ABS Mercury Sable 2008 Pioneer Navigation System Supplement
[x] Cancel search | Manufacturer: MERCURY, Model Year: 2008, Model line: Sable, Model: Mercury Sable 2008Pages: 164, PDF Size: 4.44 MB
Page 11 of 164

VOICE RECOGNITION (IF EQUIPPED)
Your navigation system may be equipped with a voice activated feature
that allows you to “speak” certain commands to the system. For further
information, refer toVoice recognitionin theNavigationchapter.
MENU TAB ARRANGEMENT
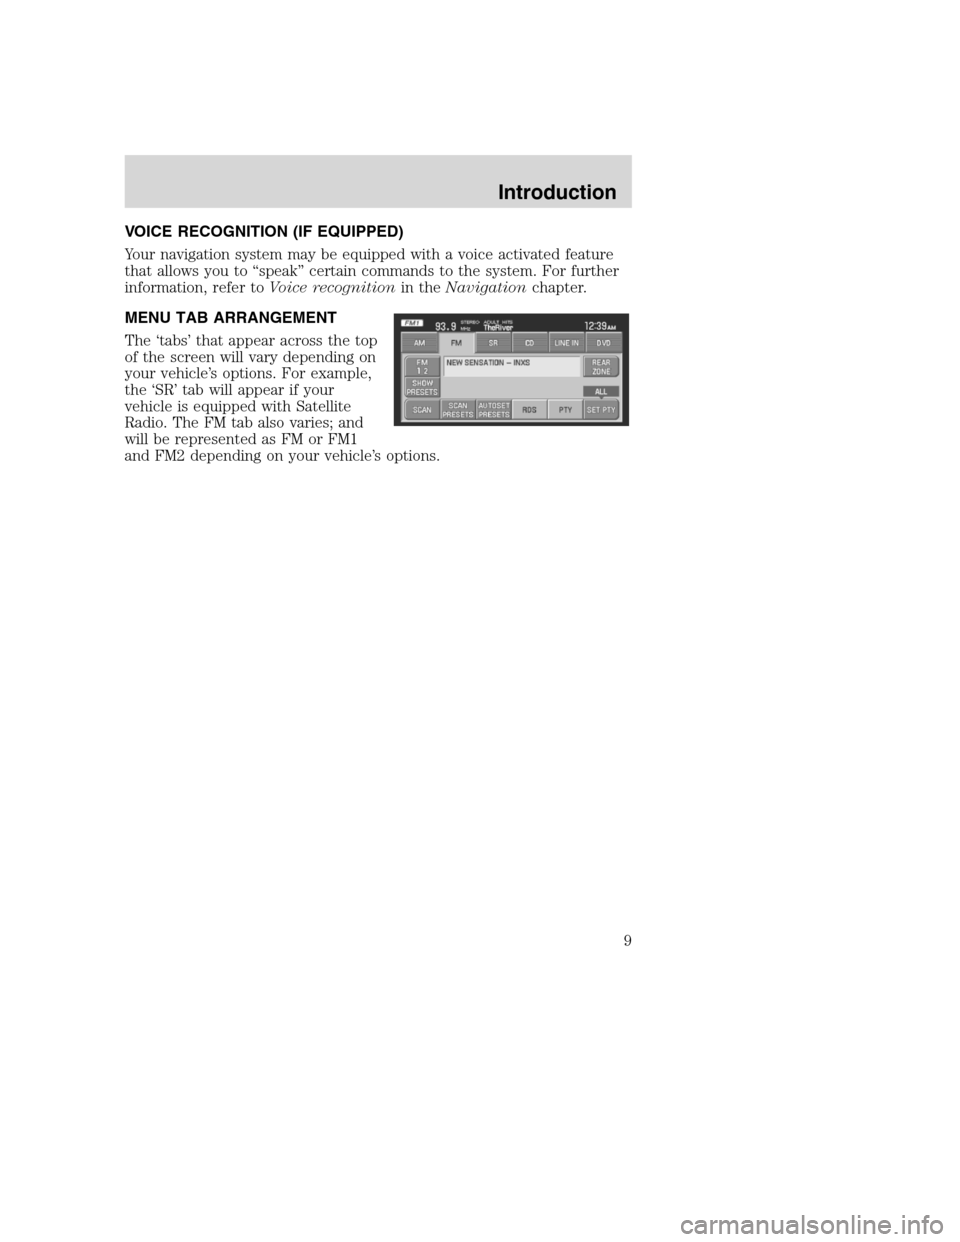
The ‘tabs’ that appear across the top
of the screen will vary depending on
your vehicle’s options. For example,
the ‘SR’ tab will appear if your
vehicle is equipped with Satellite
Radio. The FM tab also varies; and
will be represented as FM or FM1
and FM2 depending on your vehicle’s options.
2008(nv1)
Supplement
USA(fus)
Introduction
9
Page 13 of 164

Refer to the System Overview
graphics on the previous page.
1.Memory presets:To save a
station (AM/FM1/FM2) in radio mode, tune to the selection. Press and
hold the desired memory preset button (1–6). Press the memory preset
buttons (1-6) to access your preset stations. In CD mode, press the
memory preset buttons (1-6) to play the disc in the corresponding slot
location.
2.CD slot:To load a CD: Press LOAD and a specific memory preset to
load a CD to a specific slot. Once LOAD CD# appears in the display, the
CD door will open. Insert the CD label side up.
3.
(Eject):Press the eject
button to eject a single disc. Press
and hold the button to eject all discs
present in the system. To eject a specific disc, press the eject control
and then press the corresponding memory preset button. If you do not
select a specific disc, the system will automatically eject the disc that is
currently playing.
4.LOAD:Press the load button to
load a single disc. Press and hold
the button to load discs in all empty
slot locations.
5.MAP:Press to access the
navigation map. Press while the map
display is active to re-center the
map on the current vehicle position. Press while the map display is
active and a route is active to step through the different map guidance
views.
6.DEST (Destination):Press to
access the navigation destination
entry menu. Press while in the
navigation destination entry menu to show additional destination entry
techniques.
7.NAV (Navigation):Press to
access the navigation menu. Press
while in the navigation menu to step
through the navigation menu tabs.
2008(nv1)
Supplement
USA(fus)
Navigation system overview
11
Page 14 of 164

8.REPEAT:Press the repeat button
while navigation guidance is active
to repeat the last spoken navigation
guidance prompt.
9.TUNE:In radio mode, press
TUNEto manually advance
down or up the frequency band. In
MP3 mode, press
TUNEto
advance to the previous/next folder.
Note:This feature requires a disc containing MP3 files organized in
multiple folders.
10.SEEK:In radio mode, press
SEEK
/to seek to the
next/previous available station. In
CDX6 / DVD mode (if equipped),
press SEEK
/to advance to the next/previous track.
11.MENU:Press to access the
system menu. Press while the
system menu is active to step
through the system menu tabs.
12.PHONE:Your vehicle may be
equipped with SYNC, a hands-free
communications and entertainment
system with special phone and
media features. For more information, please refer to theSYNC phone
featureschapter.
13.SOUND:Press to access the
Sound menu. Press while in the
sound menu to step through the
sound menu tabs.
14.MEDIA:Press to access the
media menu. Press while in the
media menu to step through the
media menu tabs consisting of various sources.
2008(nv1)
Supplement
USA(fus)
Navigation system overview
12
Page 69 of 164

•PHONE NUMBER:Select to edit phone number for the specified entry.
•ICON:Select from a list of available icons. All icons, except for the
Home icon, can be used more than once.
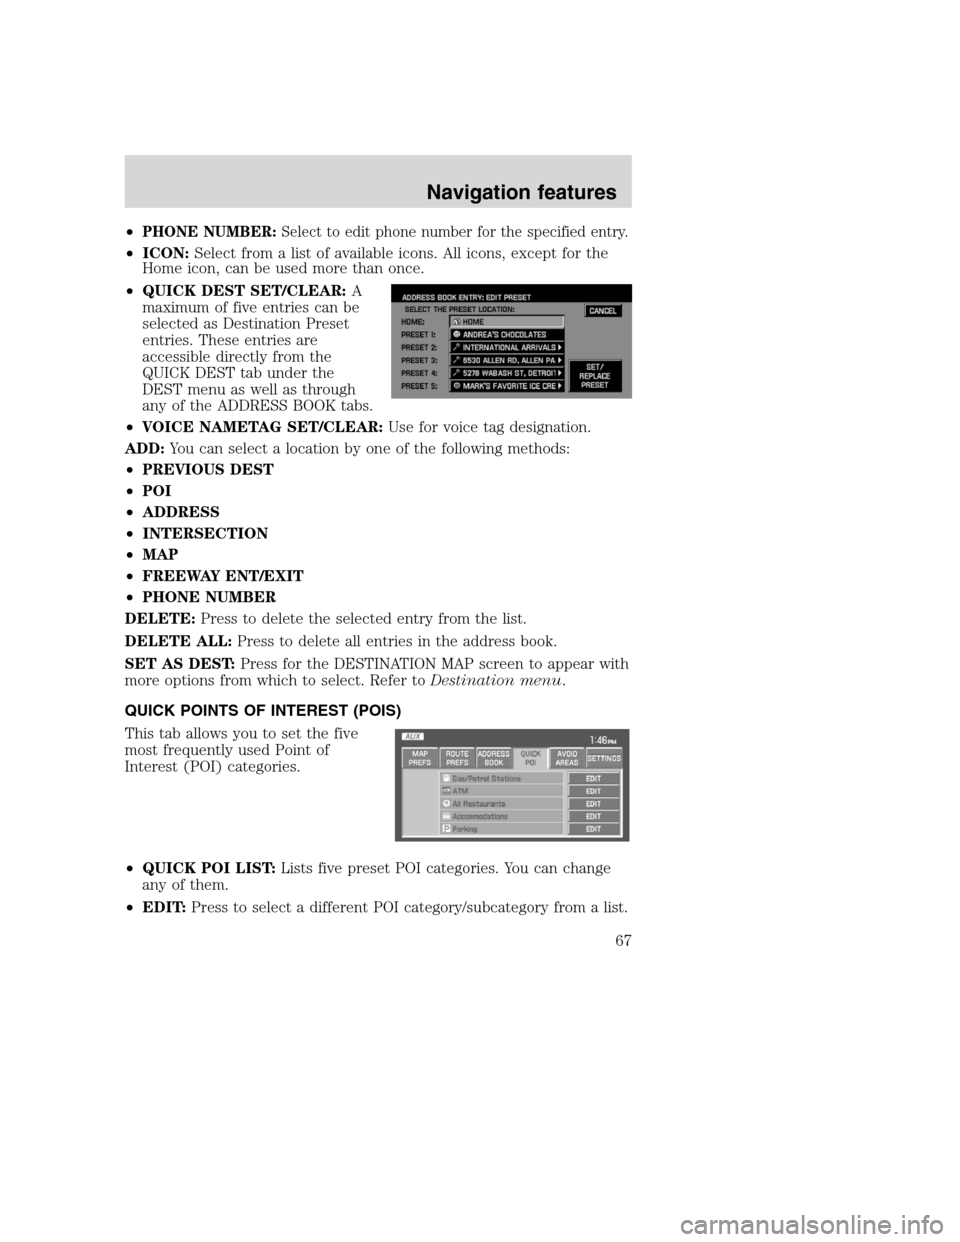
•QUICK DEST SET/CLEAR:A
maximum of five entries can be
selected as Destination Preset
entries. These entries are
accessible directly from the
QUICK DEST tab under the
DEST menu as well as through
any of the ADDRESS BOOK tabs.
•VOICE NAMETAG SET/CLEAR:Use for voice tag designation.
ADD:You can select a location by one of the following methods:
•PREVIOUS DEST
•POI
•ADDRESS
•INTERSECTION
•MAP
•FREEWAY ENT/EXIT
•PHONE NUMBER
DELETE:Press to delete the selected entry from the list.
DELETE ALL:Press to delete all entries in the address book.
SET AS DEST:Press for the DESTINATION MAP screen to appear with
more options from which to select. Refer toDestination menu.
QUICK POINTS OF INTEREST (POIS)
This tab allows you to set the five
most frequently used Point of
Interest (POI) categories.
•QUICK POI LIST:Lists five preset POI categories. You can change
any of them.
•EDIT:Press to select a different POI category/subcategory from a list.
2008(nv1)
Supplement
USA(fus)
Navigation features
67