climate control Mercury Villager 1999 s User Guide
[x] Cancel search | Manufacturer: MERCURY, Model Year: 1999, Model line: Villager, Model: Mercury Villager 1999Pages: 264, PDF Size: 2.19 MB
Page 36 of 264

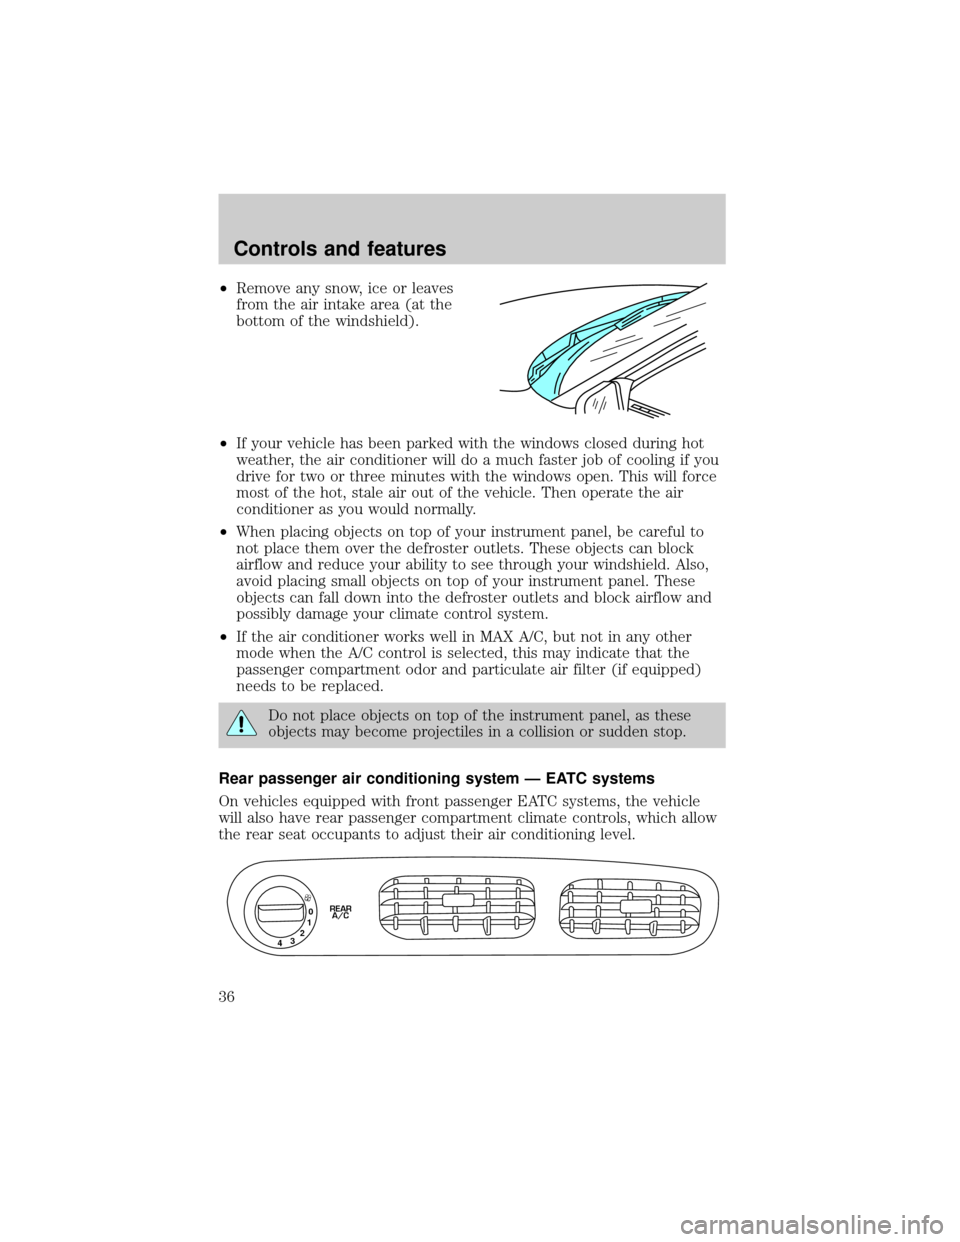
²Remove any snow, ice or leaves
from the air intake area (at the
bottom of the windshield).
²If your vehicle has been parked with the windows closed during hot
weather, the air conditioner will do a much faster job of cooling if you
drive for two or three minutes with the windows open. This will force
most of the hot, stale air out of the vehicle. Then operate the air
conditioner as you would normally.
²When placing objects on top of your instrument panel, be careful to
not place them over the defroster outlets. These objects can block
airflow and reduce your ability to see through your windshield. Also,
avoid placing small objects on top of your instrument panel. These
objects can fall down into the defroster outlets and block airflow and
possibly damage your climate control system.
²If the air conditioner works well in MAX A/C, but not in any other
mode when the A/C control is selected, this may indicate that the
passenger compartment odor and particulate air filter (if equipped)
needs to be replaced.
Do not place objects on top of the instrument panel, as these
objects may become projectiles in a collision or sudden stop.
Rear passenger air conditioning system Ð EATC systems
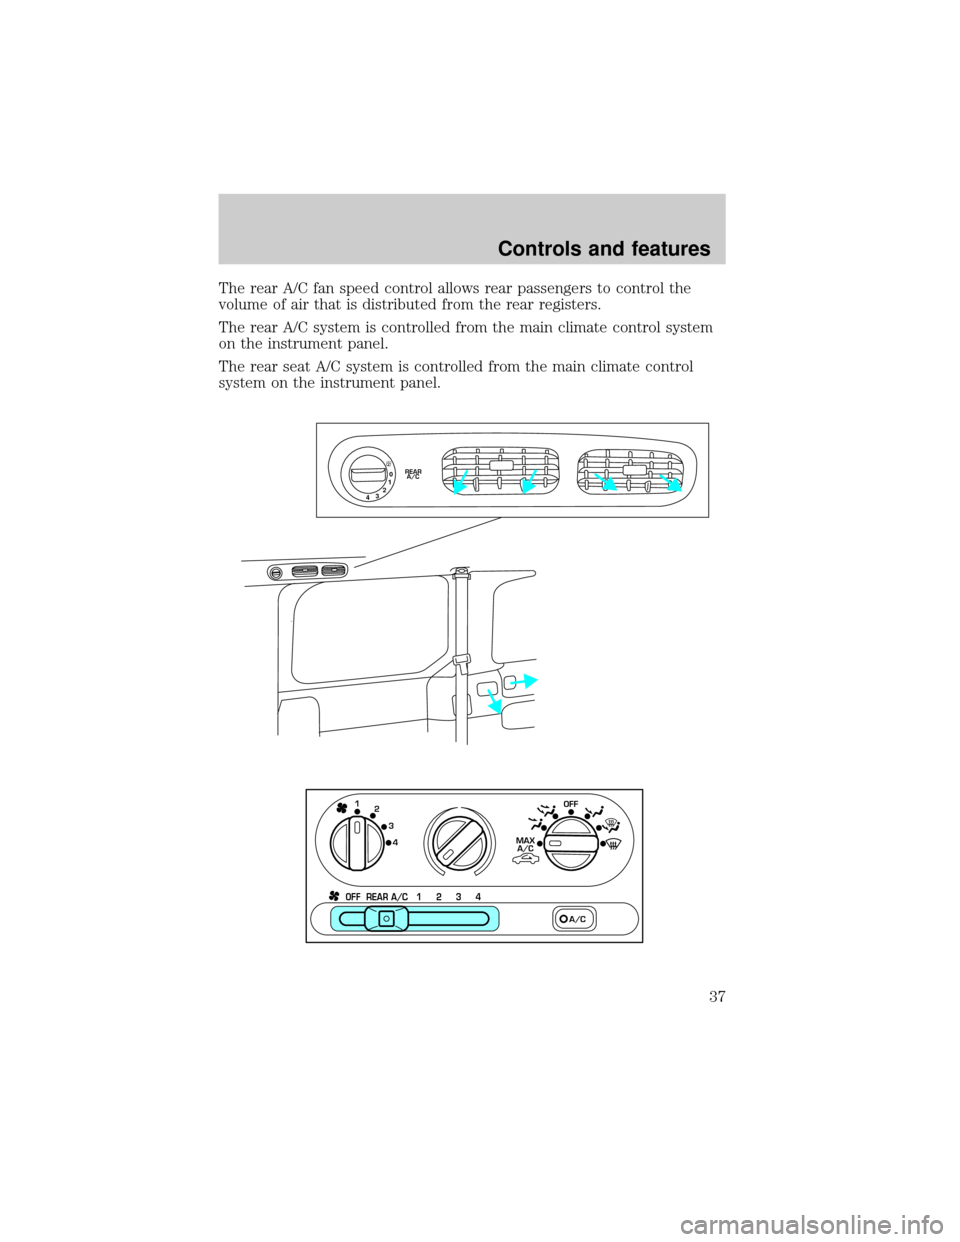
On vehicles equipped with front passenger EATC systems, the vehicle
will also have rear passenger compartment climate controls, which allow
the rear seat occupants to adjust their air conditioning level.
0
1
2
3
4REAR
A/C
Controls and features
36
Page 37 of 264

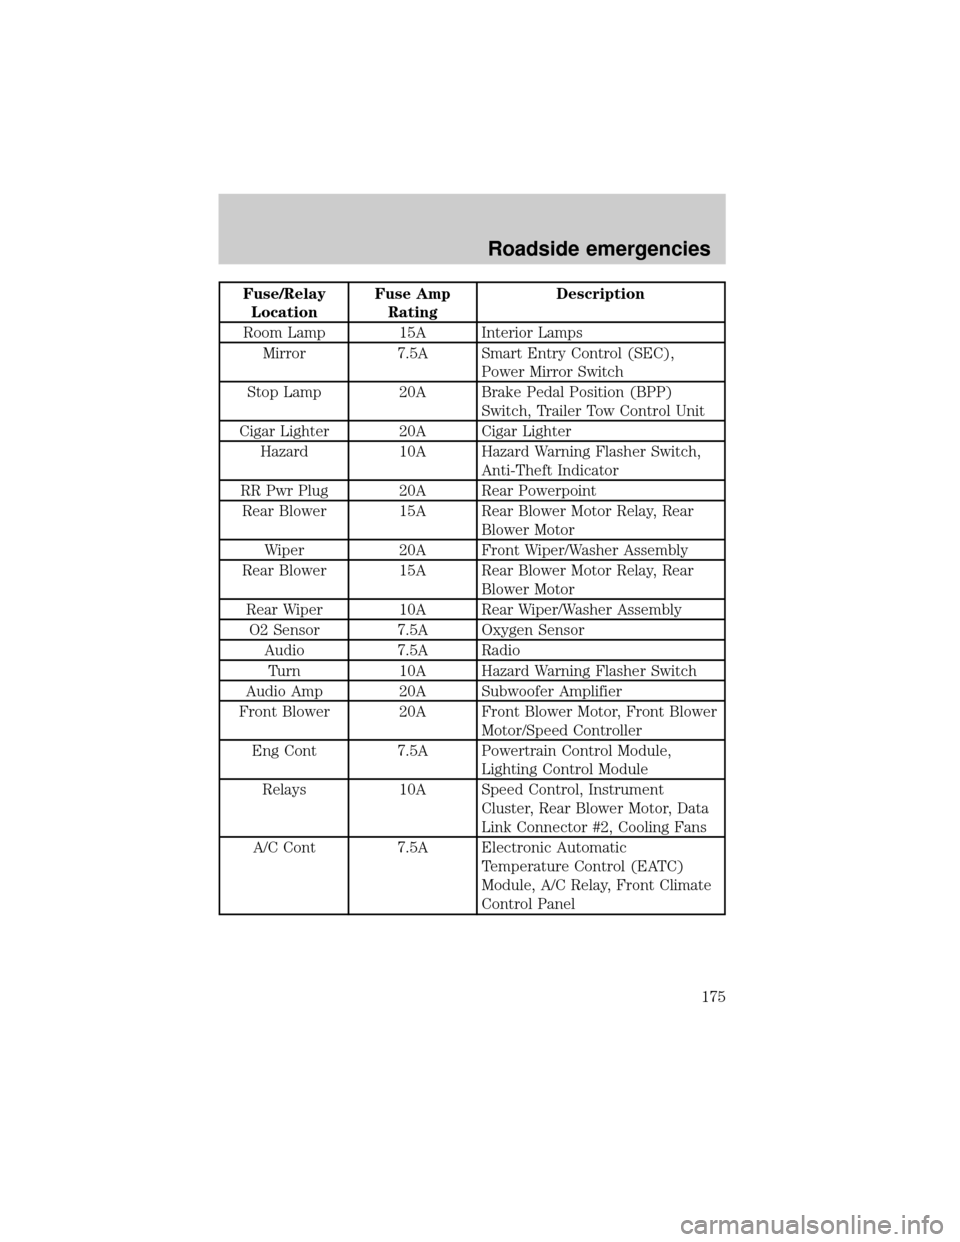
The rear A/C fan speed control allows rear passengers to control the
volume of air that is distributed from the rear registers.
The rear A/C system is controlled from the main climate control system
on the instrument panel.
The rear seat A/C system is controlled from the main climate control
system on the instrument panel.
0
1
2
3
4REAR
A/C
OFF REAR A/C 1 2 3 4
1
MAX
A/COFF2
3
4
A/C
Controls and features
37
Page 38 of 264

Turning the Rear A/C on
1. Set the main climate control rear fan control to Rear A/C, set the
mode selector in any position (other than OFF), and depress the A/C
control.
2. Set the fan speed on the Rear A/C fan control to a number between
1±4.
Front seat air flow regulation of the rear fan
Set the main climate control rear fan control to a number between 1±4.
This numerical settingwill take control of the airflow from the rear A/C
fan control.
Turning the Rear A/C off:
To turn the Rear A/C off, turn the Rear Fan Control on the main climate
control system to OFF, or
1
2
3
4REAR
A/C
OFF REAR A/C 1 2 3 4
A/C
Controls and features
38
Page 39 of 264

turn the Rear Fan Control on the main climate control system to Rear
A/C and turn the Rear A/C Fan Control to 0.
For maximum cooling for the front seat passengers, set the rear fan
switch to the OFF (0) position.
Please note that the rear passenger air conditioning system is
designed for air conditioning purposes only, and does not heat the
rear compartment. Rear compartment heating is provided by the
underseat ducts. Refer to Rear Seat Heating.
REAR WINDOW DEFROSTER
The rear defroster control is located
on the instrument panel.
Press the rear defroster control to
clear the rear window of thin ice
and fog.
²The small LED will illuminate
when the rear defroster is
activated.
OFF REAR A/C 1 2 3 4
A/C
0
1
2
3
4REAR
A/C
SECURITYHAZARD
RR DEFOGRR WIPER
RR WASH
Controls and features
39
Page 175 of 264

Fuse/Relay
LocationFuse Amp
RatingDescription
Room Lamp 15A Interior Lamps
Mirror 7.5A Smart Entry Control (SEC),
Power Mirror Switch
Stop Lamp 20A Brake Pedal Position (BPP)
Switch, Trailer Tow Control Unit
Cigar Lighter 20A Cigar Lighter
Hazard 10A Hazard Warning Flasher Switch,
Anti-Theft Indicator
RR Pwr Plug 20A Rear Powerpoint
Rear Blower 15A Rear Blower Motor Relay, Rear
Blower Motor
Wiper 20A Front Wiper/Washer Assembly
Rear Blower 15A Rear Blower Motor Relay, Rear
Blower Motor
Rear Wiper 10A Rear Wiper/Washer Assembly
O2 Sensor 7.5A Oxygen Sensor
Audio 7.5A Radio
Turn 10A Hazard Warning Flasher Switch
Audio Amp 20A Subwoofer Amplifier
Front Blower 20A Front Blower Motor, Front Blower
Motor/Speed Controller
Eng Cont 7.5A Powertrain Control Module,
Lighting Control Module
Relays 10A Speed Control, Instrument
Cluster, Rear Blower Motor, Data
Link Connector #2, Cooling Fans
A/C Cont 7.5A Electronic Automatic
Temperature Control (EATC)
Module, A/C Relay, Front Climate
Control Panel
Roadside emergencies
175
Page 208 of 264

The odor and particulate air filtration system is designed to reduce the
concentration of objectionable exterior odors as well as airborne particles
such as dust, spores and pollen in the air being supplied to the interior
of the vehicle. The extent of EXTERIOR odor reduction depends on the
odor itself and the perceptional threshold of the individual. The odor and
particulate filtration system gives the following benefits to customers:
²Improves the customer's driving comfort by reducing odor and particle
concentration
²Improves the interior compartment cleanliness
²Protects the climate control components from particle deposits
The filter is located just in front of the windshield under the cowl grille
on the passenger side of the vehicle.
To replace the filter, perform the following procedure:
1. Remove both windshield wiper
arms.
²Lift the wiper arm away from the
windshield surface until the wiper
arm is perpendicular to the
windshield surface.
²Rotate the small retaining clip at
the base of the wiper arm
counterclockwise while holding
the wiper arm.
²Lift and remove the wiper arm
while holding the retaining clip
outward. Note the LH and RH
wiper arms.
Maintenance and care
208
Page 212 of 264

INFORMATION ABOUT TIRE QUALITY GRADES
New vehicles are fitted with tires
that have their Tire Quality Grade
(described below) molded into the
tire's sidewall. These Tire Quality
Grades are determined by standards
that the United States Department
of Transportation has set.
Tire Quality Grades apply to new
pneumatic tires for use on
passenger cars. They do not apply
to deep tread, winter-type snow
tires, space-saver or temporary use spare tires, tires with nominal rim
diameters of 10 to 12 inches or limited production tires as defined in
Title 49 Code of Federal Regulations Part 575.104(c)(2).
U.S. Department of Transportation-Tire quality grades:The U.S.
Department of Transportation requires Ford to give you the following
information about tire grades exactly as the government has written it.
Treadwear
The treadwear grade is a comparative rating based on the wear rate of
the tire when tested under controlled conditions on a specified
government test course. For example, a tire graded 150 would wear one
and one-half (1 1/2) times as well on the government course as a tire
graded 100. The relative performance of tires depends upon the actual
conditions of their use, however, and may depart significantly from the
norm due to variations in driving habits, service practices, and
differences in road characteristics and climate.
Traction AA A B C
The traction grades, from highest to lowest are AA, A, B, and C. Those
grades represent the tire's ability to stop on wet pavement as measured
under controlled conditions on specified government test surfaces of
asphalt and concrete. A tire marked C may have poor traction
performance.
The traction grade assigned to this tire is based on
straight-ahead braking traction tests, and does not include
acceleration, cornering, hydroplaning or peak traction characteristics.
Maintenance and care
212
Page 215 of 264

Failure to follow these precautions may adversely affect the
handling of the vehicle and make it easier for the driver to lose
control and roll over.
Tires that are larger or smaller than your vehicle's original tires may also
affect the accuracy of your speedometer.
SNOW TIRES AND CHAINS
Snow tires must be the same size and grade as the tires you
currently have on your vehicle.
The tires on your vehicle have all weather treads to provide traction in
rain and snow. However, in some climates, you may need to use snow
tires and chains. If you need to use chains, it is recommended that steel
wheels (of the same size and specifications) be used as chains may chip
aluminum wheels.
Follow these guidelines when using snow tires and chains:
²Use only SAE Class S chains.
²Install chains securely, verifying that the chains do not touch any
wiring, brake lines or fuel lines.
²Drive cautiously. If you hear the chains rub or bang against your
vehicle, stop and re-tighten the chains. If this does not work, remove
the chains to prevent damage to your vehicle.
²If possible, avoid fully loading your vehicle.
²Remove the tire chains when they are no longer needed. Do not use
tire chains on dry roads.
²The suspension insulation and bumpers will help prevent vehicle
damage. Do not remove these components from your vehicle when
using snow tires and chains.
WHAT YOU SHOULD KNOW ABOUT AUTOMOTIVE FUELS
Important safety precautions
Do not overfill the fuel tank. The pressure in an overfilled tank
may cause leakage and lead to fuel spray and fire.
Maintenance and care
215
Page 258 of 264

Overdrive ..............................87,164
Panic alarm feature, remote
entry system ..............................101
Parking brake ............................158
Parts (see Motorcraft parts) ....235
Power distribution box
(see Fuses) ...............................176
Power door locks ........................90
Power steering ..........................159
fluid, checking and adding ....202
fluid, refill capacity ................235
fluid, specifications ..........236,237
Radio ............................................40
Relays .................................172,179
Remote entry system ........100,101
illuminated entry ....................102
locking/unlocking doors .........101
panic alarm .............................101
replacement/additional
transmitters .............................103
replacing the batteries ...........102
Roof rack ...................................170
Safety belts (see Safety
restraints) ......124,125,126,127,128
Safety Compliance
Certification Label ....................239
Safety defects, reporting ..........254
Safety
restraints .......124,125,126,127,128
cleaning the safety belts .130,234
extension assembly ................129
for adults ...................125,126,127
for children ......................135,136
lap belt ....................................128
warning light and
chime ........................7,10,129,130
Safety seats for children ..........137
Seat belts (see Safety
restraints) ..................................124
Seats ..........................................110
child safety seats ....................137
cleaning ...................................234memory seat ...........................113
Servicing your vehicle ..............191
Spark plugs,
specifications ...............235,237,238
Specification chart,
lubricants ............................236,237
Speed control ..............................81
Speedometer ...............................12
Starting your vehicle .........152,154
jump starting ..........................185
Steering wheel
controls ......................................85
tilting .........................................88
Tachometer .................................11
Temperature control
(see Climate control) .................21
Tilt steering wheel ......................88
Tires .............................179,212,213
changing ....................179,180,182
checking the pressure ............213
replacing ..................................214
rotating ....................................213
snow tires and chains ............215
tire grades ...............................213
treadwear ................................212
Towing ................................166,213
trailer towing ..........................166
wrecker ....................................190
Transaxle
automatic operation ...............160
fluid, refill capacities ..............235
lubricant specifications ..........237
Transmission
fluid, checking and adding
(automatic) .............................202
Trip odometer .............................13
Turn signal ...............................8,86
Vehicle dimensions ...................238
Vehicle Identification Number
(VIN) ..........................................240
Vehicle loading ..........................165
Ventilating your vehicle ...........156
Index
258