air filter Mercury Villager 1999 Owner's Manuals
[x] Cancel search | Manufacturer: MERCURY, Model Year: 1999, Model line: Villager, Model: Mercury Villager 1999Pages: 264, PDF Size: 2.19 MB
Page 25 of 264
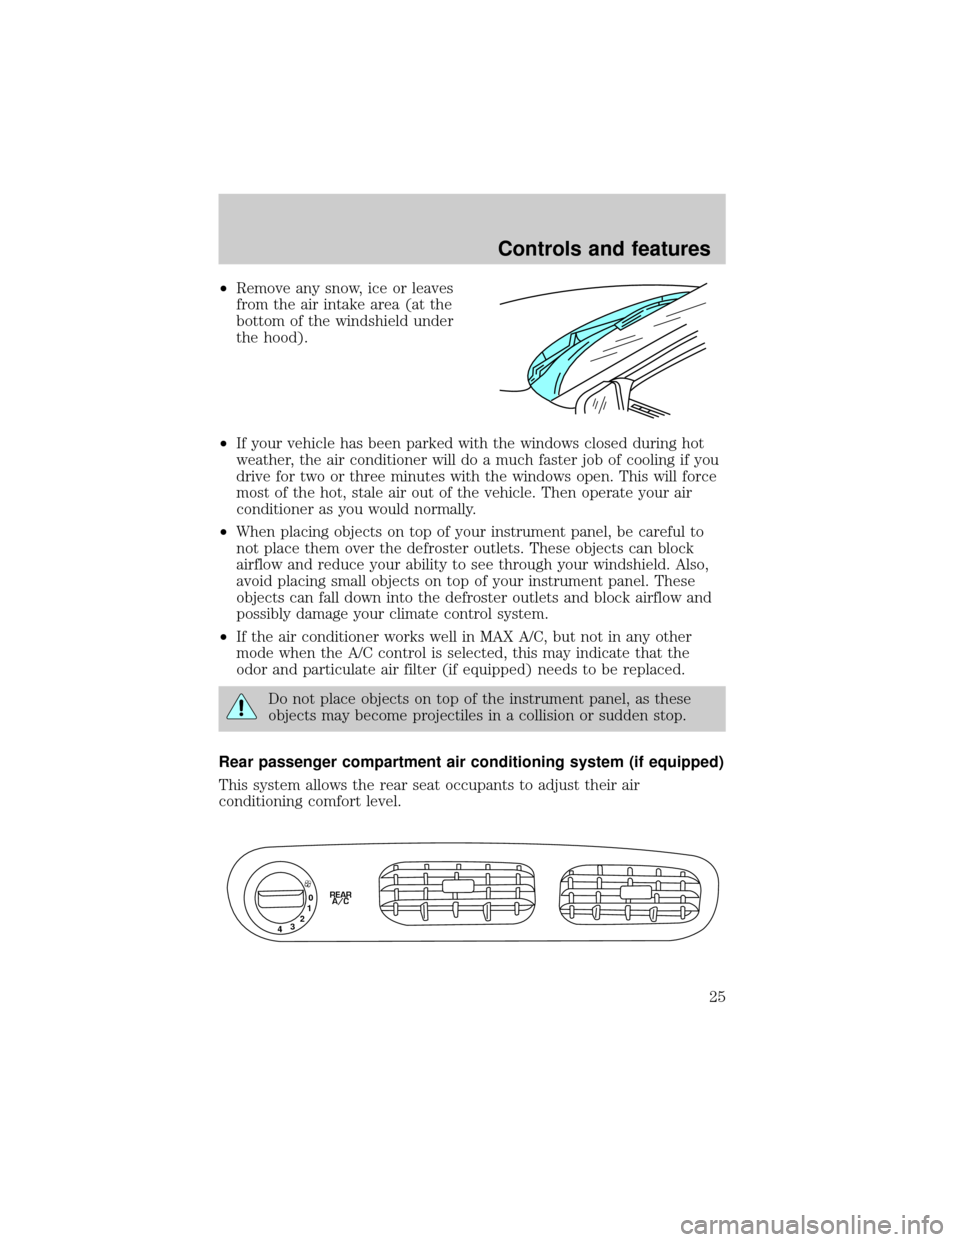
²Remove any snow, ice or leaves
from the air intake area (at the
bottom of the windshield under
the hood).
²If your vehicle has been parked with the windows closed during hot
weather, the air conditioner will do a much faster job of cooling if you
drive for two or three minutes with the windows open. This will force
most of the hot, stale air out of the vehicle. Then operate your air
conditioner as you would normally.
²When placing objects on top of your instrument panel, be careful to
not place them over the defroster outlets. These objects can block
airflow and reduce your ability to see through your windshield. Also,
avoid placing small objects on top of your instrument panel. These
objects can fall down into the defroster outlets and block airflow and
possibly damage your climate control system.
²If the air conditioner works well in MAX A/C, but not in any other
mode when the A/C control is selected, this may indicate that the
odor and particulate air filter (if equipped) needs to be replaced.
Do not place objects on top of the instrument panel, as these
objects may become projectiles in a collision or sudden stop.
Rear passenger compartment air conditioning system (if equipped)
This system allows the rear seat occupants to adjust their air
conditioning comfort level.
0
1
2
3
4REAR
A/C
Controls and features
25
Page 36 of 264
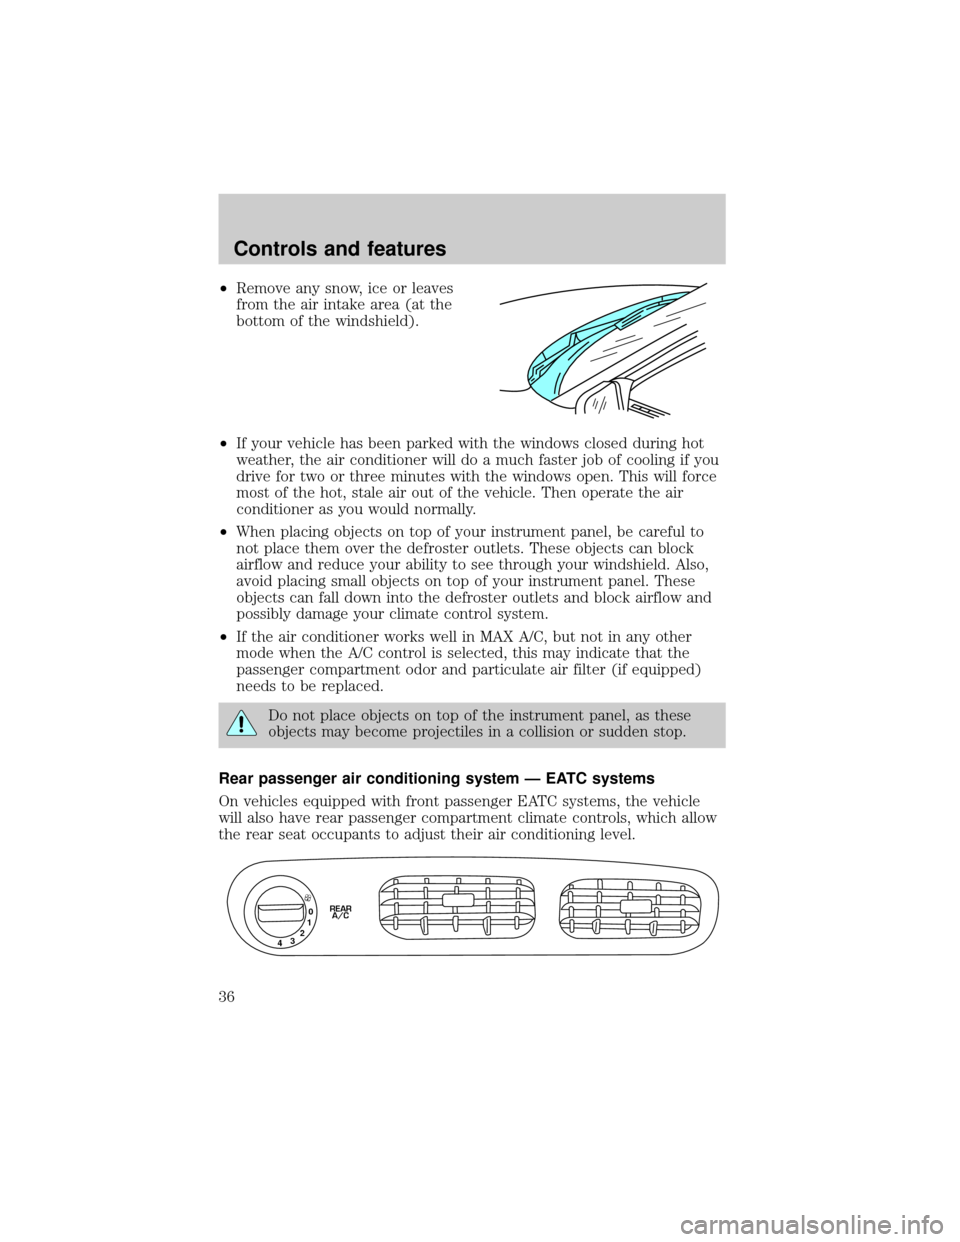
²Remove any snow, ice or leaves
from the air intake area (at the
bottom of the windshield).
²If your vehicle has been parked with the windows closed during hot
weather, the air conditioner will do a much faster job of cooling if you
drive for two or three minutes with the windows open. This will force
most of the hot, stale air out of the vehicle. Then operate the air
conditioner as you would normally.
²When placing objects on top of your instrument panel, be careful to
not place them over the defroster outlets. These objects can block
airflow and reduce your ability to see through your windshield. Also,
avoid placing small objects on top of your instrument panel. These
objects can fall down into the defroster outlets and block airflow and
possibly damage your climate control system.
²If the air conditioner works well in MAX A/C, but not in any other
mode when the A/C control is selected, this may indicate that the
passenger compartment odor and particulate air filter (if equipped)
needs to be replaced.
Do not place objects on top of the instrument panel, as these
objects may become projectiles in a collision or sudden stop.
Rear passenger air conditioning system Ð EATC systems
On vehicles equipped with front passenger EATC systems, the vehicle
will also have rear passenger compartment climate controls, which allow
the rear seat occupants to adjust their air conditioning level.
0
1
2
3
4REAR
A/C
Controls and features
36
Page 193 of 264
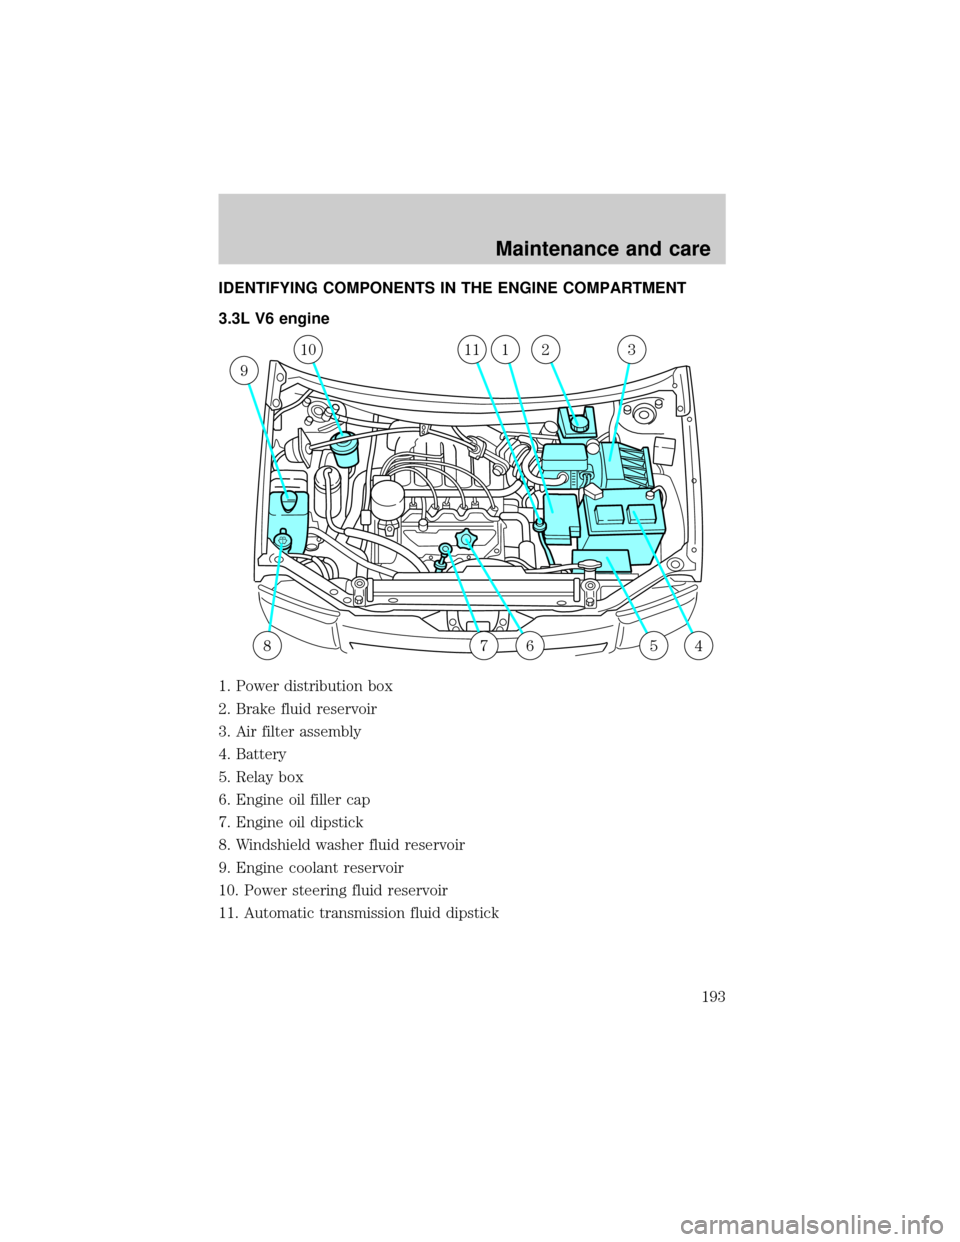
IDENTIFYING COMPONENTS IN THE ENGINE COMPARTMENT
3.3L V6 engine
1. Power distribution box
2. Brake fluid reservoir
3. Air filter assembly
4. Battery
5. Relay box
6. Engine oil filler cap
7. Engine oil dipstick
8. Windshield washer fluid reservoir
9. Engine coolant reservoir
10. Power steering fluid reservoir
11. Automatic transmission fluid dipstick
9
45678
1011123
Maintenance and care
193
Page 204 of 264
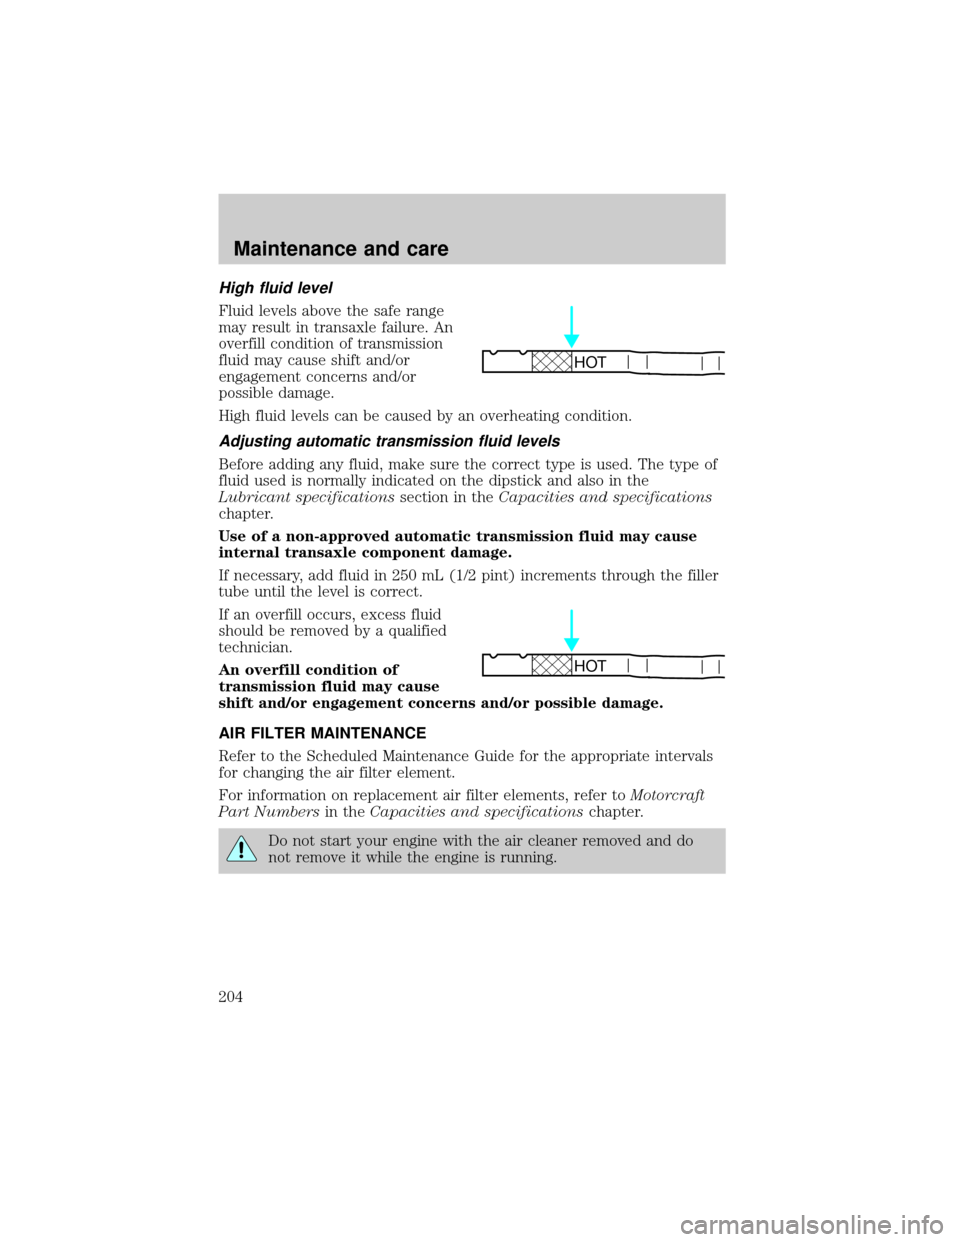
High fluid level
Fluid levels above the safe range
may result in transaxle failure. An
overfill condition of transmission
fluid may cause shift and/or
engagement concerns and/or
possible damage.
High fluid levels can be caused by an overheating condition.
Adjusting automatic transmission fluid levels
Before adding any fluid, make sure the correct type is used. The type of
fluid used is normally indicated on the dipstick and also in the
Lubricant specificationssection in theCapacities and specifications
chapter.
Use of a non-approved automatic transmission fluid may cause
internal transaxle component damage.
If necessary, add fluid in 250 mL (1/2 pint) increments through the filler
tube until the level is correct.
If an overfill occurs, excess fluid
should be removed by a qualified
technician.
An overfill condition of
transmission fluid may cause
shift and/or engagement concerns and/or possible damage.
AIR FILTER MAINTENANCE
Refer to the Scheduled Maintenance Guide for the appropriate intervals
for changing the air filter element.
For information on replacement air filter elements, refer toMotorcraft
Part Numbersin theCapacities and specificationschapter.
Do not start your engine with the air cleaner removed and do
not remove it while the engine is running.
HOT
HOT
Maintenance and care
204
Page 205 of 264
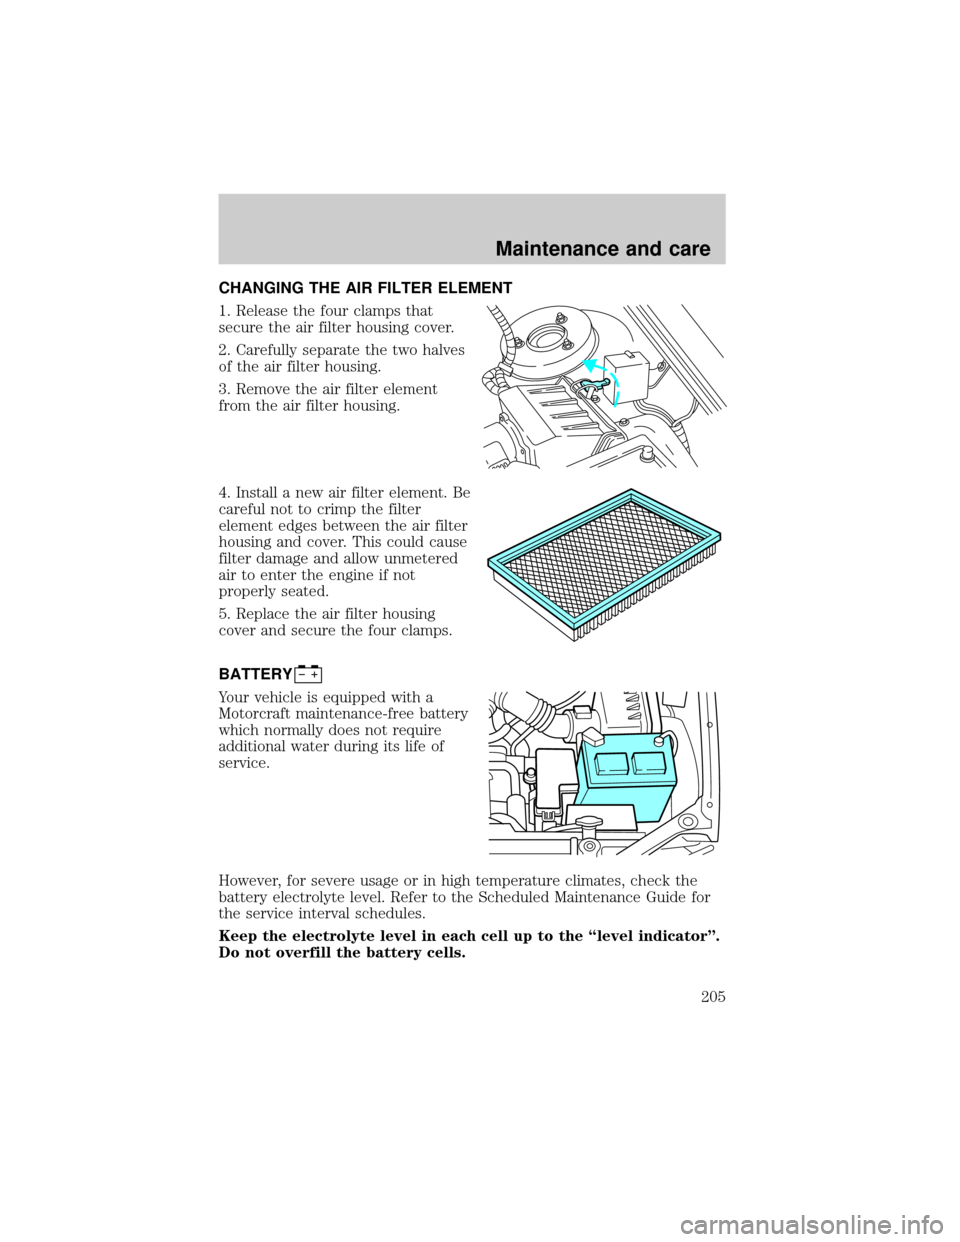
CHANGING THE AIR FILTER ELEMENT
1. Release the four clamps that
secure the air filter housing cover.
2. Carefully separate the two halves
of the air filter housing.
3. Remove the air filter element
from the air filter housing.
4. Install a new air filter element. Be
careful not to crimp the filter
element edges between the air filter
housing and cover. This could cause
filter damage and allow unmetered
air to enter the engine if not
properly seated.
5. Replace the air filter housing
cover and secure the four clamps.
BATTERY
Your vehicle is equipped with a
Motorcraft maintenance-free battery
which normally does not require
additional water during its life of
service.
However, for severe usage or in high temperature climates, check the
battery electrolyte level. Refer to the Scheduled Maintenance Guide for
the service interval schedules.
Keep the electrolyte level in each cell up to the ªlevel indicatorº.
Do not overfill the battery cells.
Maintenance and care
205
Page 208 of 264

The odor and particulate air filtration system is designed to reduce the
concentration of objectionable exterior odors as well as airborne particles
such as dust, spores and pollen in the air being supplied to the interior
of the vehicle. The extent of EXTERIOR odor reduction depends on the
odor itself and the perceptional threshold of the individual. The odor and
particulate filtration system gives the following benefits to customers:
²Improves the customer's driving comfort by reducing odor and particle
concentration
²Improves the interior compartment cleanliness
²Protects the climate control components from particle deposits
The filter is located just in front of the windshield under the cowl grille
on the passenger side of the vehicle.
To replace the filter, perform the following procedure:
1. Remove both windshield wiper
arms.
²Lift the wiper arm away from the
windshield surface until the wiper
arm is perpendicular to the
windshield surface.
²Rotate the small retaining clip at
the base of the wiper arm
counterclockwise while holding
the wiper arm.
²Lift and remove the wiper arm
while holding the retaining clip
outward. Note the LH and RH
wiper arms.
Maintenance and care
208
Page 209 of 264

2. Remove the six (6) screws (B) from the cowl grille (A) at the base of
the windshield.
3. Open the hood.
4. Remove the four (4) plastic screws (C) from the forward edge of the
cowl leaf screen under the hood.
²Remove the four (4) screw anchors by pushing upward on the screw
anchor.
5. Disconnect the windshield washer
hose at the Y connector at the rear
corner of the engine compartment.
6. Lift the cowl grille from the vehicle.
7. Locate the cabin air filter on the passenger side of the vehicle.
A
B
C
Maintenance and care
209
Page 210 of 264

8. Remove four (4) screws from the top surface of the cabin air filter top
cover.
9. Remove the cover.
10. Remove the filter element by
pulling forward on the top surface of
the filter and lifting.
11. Install the new filter (A)
element into the filter retaining
frame (B). Ensure that you insert
the three retaining tabs in the
bottom of the filter frame.
12. Reinstall the filter top cover and
the four (4) screws.
13. Reconnect the washer hose.
A
B
Maintenance and care
210
Page 235 of 264
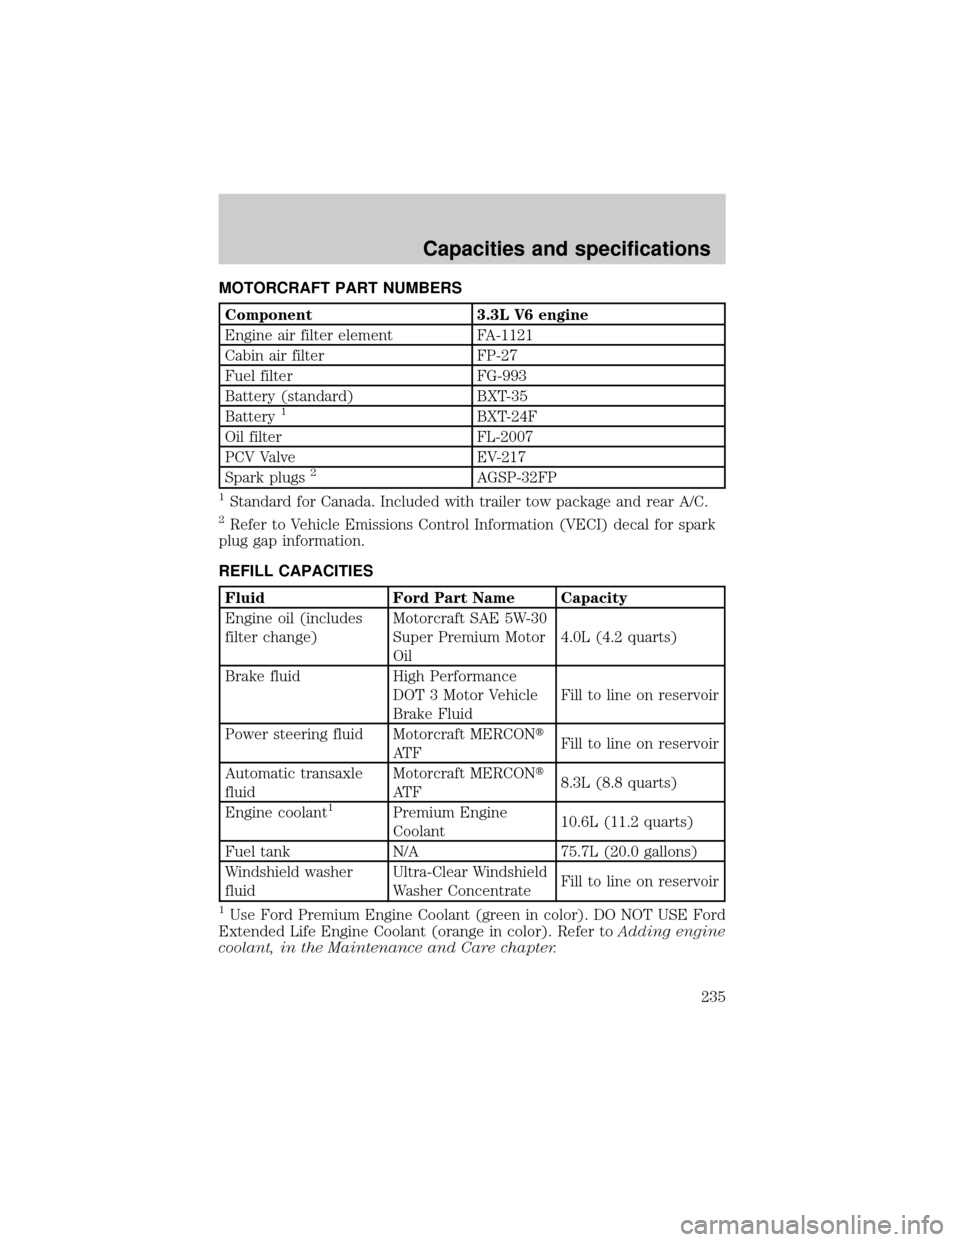
MOTORCRAFT PART NUMBERS
Component 3.3L V6 engine
Engine air filter element FA-1121
Cabin air filter FP-27
Fuel filter FG-993
Battery (standard) BXT-35
Battery
1BXT-24F
Oil filter FL-2007
PCV Valve EV-217
Spark plugs
2AGSP-32FP
1Standard for Canada. Included with trailer tow package and rear A/C.
2Refer to Vehicle Emissions Control Information (VECI) decal for spark
plug gap information.
REFILL CAPACITIES
Fluid Ford Part Name Capacity
Engine oil (includes
filter change)Motorcraft SAE 5W-30
Super Premium Motor
Oil4.0L (4.2 quarts)
Brake fluid High Performance
DOT 3 Motor Vehicle
Brake FluidFill to line on reservoir
Power steering fluid Motorcraft MERCONt
AT FFill to line on reservoir
Automatic transaxle
fluidMotorcraft MERCONt
AT F8.3L (8.8 quarts)
Engine coolant
1Premium Engine
Coolant10.6L (11.2 quarts)
Fuel tank N/A 75.7L (20.0 gallons)
Windshield washer
fluidUltra-Clear Windshield
Washer ConcentrateFill to line on reservoir
1Use Ford Premium Engine Coolant (green in color). DO NOT USE Ford
Extended Life Engine Coolant (orange in color). Refer toAdding engine
coolant, in the Maintenance and Care chapter.
Capacities and specifications
235
Page 255 of 264

Accessory delay ..........................90
Air bag supplemental restraint
system ........................................131
and child safety seats ............133
description ..............................131
disposal ....................................135
driver air bag ..........................133
indicator light ......................6,135
operation .................................133
passenger air bag ...................133
Air cleaner filter .........204,205,235
Air conditioning ..........................21
automatic temperature
control system ..........................29
Air filter, cabin ..........................207
Anti-theft system ......................104
arming the system ..................104
disarming a triggered
system .....................................105
disarming an untriggered
system .....................................105
Automatic transaxle .................160
driving with .............................161
fluid, refill capacities ..............235
fluid, specification ..................237
Battery .......................................205
acid, treating emergencies .....205
charging system warning
light ..............................................6
jumping a disabled battery ....185
maintenance-free ....................205
replacement, specifications ...235
servicing ..................................205
Brakes ........................................157
anti-lock ............................157,158
anti-lock brake system (ABS)
warning light ........................8,158
brake warning light ....................7
fluid, checking and adding ....197
fluid, refill capacities ..............235
fluid, specifications ..........236,237
lubricant specifications ...236,237parking ....................................158
shift interlock ..........................160
Break-in period .............................2
Capacities for refilling fluids ....235
Cargo cover ...............................108
Cargo net ............................107,108
CD changer .................................76
Child safety restraints ..............136
child safety belts ....................136
child safety seats ....................137
Child safety seats ......................137
attaching with tether straps ..141
built-in child seat ...................137
in front seat ............................138
in rear seat .......................138,141
tether anchorage hardware ...143
Cleaning your vehicle ...............230
built-in child seat .....148,151,234
engine compartment ..............232
exterior .............................231,233
exterior lamps .........................233
instrument panel ....................233
interior ..............................233,234
mirrors .....................................234
plastic parts ............................232
safety belts ..............................234
washing ....................................230
waxing .....................................231
wheels ......................................231
windows ..................................234
wiper blades ............................233
Clock ..................................47,59,71
Console
overhead ...............................97,98
Controls ........................93,94,95,96
power seat ...............................111
steering column ........................85
Coolant ...............................198,201
checking and adding ..............199
refill capacities .................201,235
specifications ...................236,237
Customer Assistance ................241
Index
255