cooling Mercury Villager 1999 Owner's Manuals
[x] Cancel search | Manufacturer: MERCURY, Model Year: 1999, Model line: Villager, Model: Mercury Villager 1999Pages: 264, PDF Size: 2.19 MB
Page 23 of 264

and air conditioning capabilities are provided in this mode. For added
customer comfort, when the temperature control knob is anywhere in
between the full hot and full cold positions, the air distributed through
the front and rear floor ducts will be slightly warmer than the air sent
to the windshield defroster ducts. If the outside temperature is about
4ÉC (40ÉF) or higher, the air conditioner will automatically dehumidify
the air to reduce fogging.
²
(Defrost)-Distributes outside air through the windshield
defroster ducts. It can be used to clear ice or fog from the windshield.
If the outside temperature is about 4ÉC (40ÉF) or higher, the air
conditioner will automatically dehumidify the air to reduce fogging.
However, the indicator will not light unless the A/C control is selected.
Cooling your vehicle with outside air
Cooling your vehicle with air conditioned outside air is quieter but less
economical than using air conditioned recirculated air. It also has less
cooling capacity and is not recommended for high outside temperatures.
In order to cool your vehicle using outside air:
1. Turn the mode selector to
(panel),(panel and floor) or
(floor).
2. Press the
A/C(A/C) selector. The indicator light on the A/C selector
will illuminate.
3. Turn the temperature control knob counterclockwise to COOL.
4. Turn the fan speed control to the position of your choice.
During periods of high humidity, vapor may be emitted from the air
outlets when using the A/C system with outside air. This can be
corrected by using MAX A/C to cool the vehicle.
Controls and features
23
Page 25 of 264
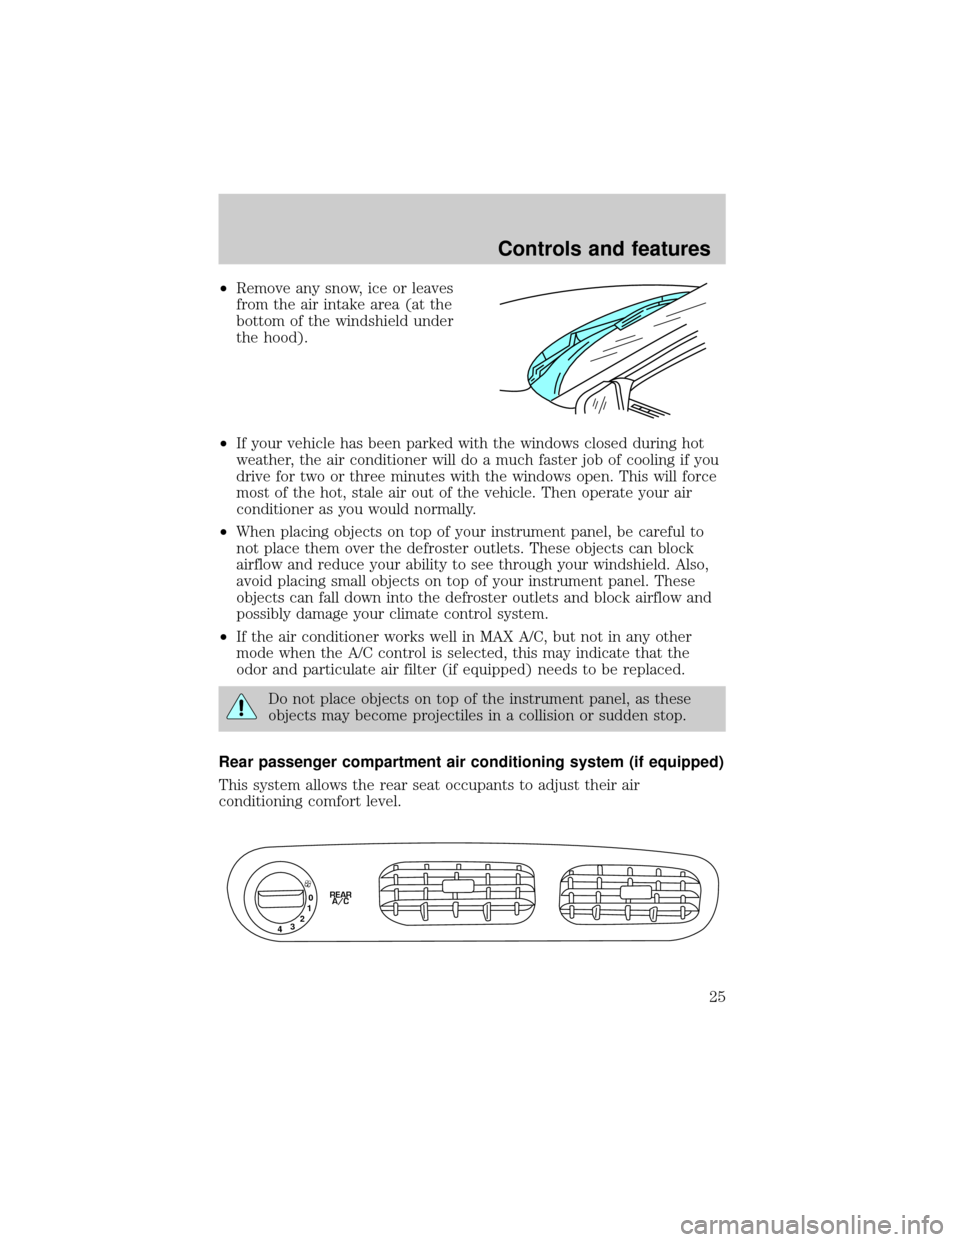
²Remove any snow, ice or leaves
from the air intake area (at the
bottom of the windshield under
the hood).
²If your vehicle has been parked with the windows closed during hot
weather, the air conditioner will do a much faster job of cooling if you
drive for two or three minutes with the windows open. This will force
most of the hot, stale air out of the vehicle. Then operate your air
conditioner as you would normally.
²When placing objects on top of your instrument panel, be careful to
not place them over the defroster outlets. These objects can block
airflow and reduce your ability to see through your windshield. Also,
avoid placing small objects on top of your instrument panel. These
objects can fall down into the defroster outlets and block airflow and
possibly damage your climate control system.
²If the air conditioner works well in MAX A/C, but not in any other
mode when the A/C control is selected, this may indicate that the
odor and particulate air filter (if equipped) needs to be replaced.
Do not place objects on top of the instrument panel, as these
objects may become projectiles in a collision or sudden stop.
Rear passenger compartment air conditioning system (if equipped)
This system allows the rear seat occupants to adjust their air
conditioning comfort level.
0
1
2
3
4REAR
A/C
Controls and features
25
Page 28 of 264
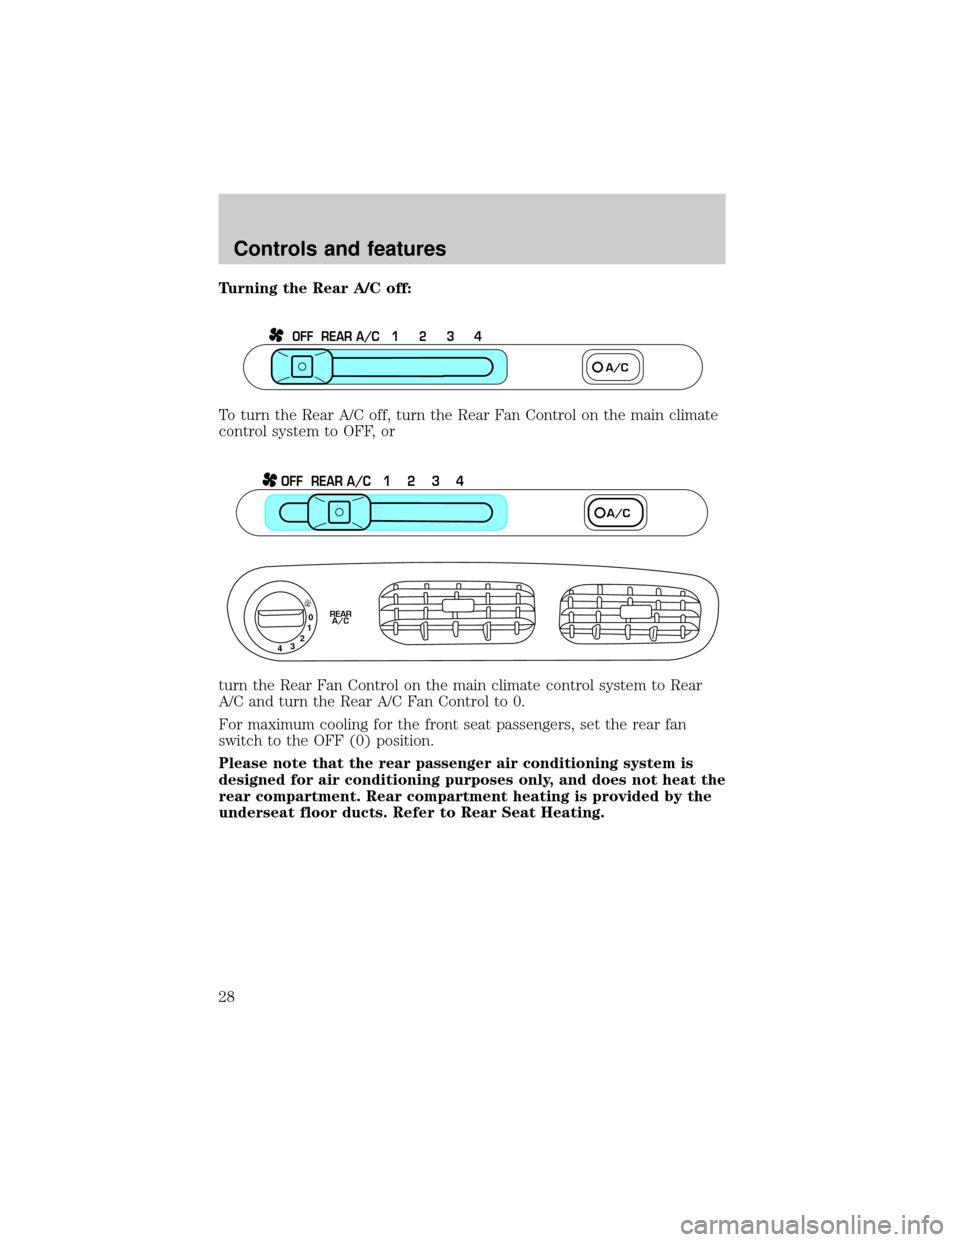
Turning the Rear A/C off:
To turn the Rear A/C off, turn the Rear Fan Control on the main climate
control system to OFF, or
turn the Rear Fan Control on the main climate control system to Rear
A/C and turn the Rear A/C Fan Control to 0.
For maximum cooling for the front seat passengers, set the rear fan
switch to the OFF (0) position.
Please note that the rear passenger air conditioning system is
designed for air conditioning purposes only, and does not heat the
rear compartment. Rear compartment heating is provided by the
underseat floor ducts. Refer to Rear Seat Heating.
OFF REAR A/C 1 2 3 4
A/C
OFF REAR A/C 1 2 3 4
A/C
0
1
2
3
4REAR
A/C
Controls and features
28
Page 31 of 264

To control the temperature, select
any temperature between 15ÉC
(60ÉF) and 32ÉC (90ÉF) by pressing
the temperature controls.
For continuous maximum cooling, push the temperature control until
15ÉC (60ÉF) is shown in the display window. The EATC will continue
maximum cooling (disregarding the displayed temperature) until a
warmer temperature is selected by pressing the temperature controls.
For continuous maximum heating, push the temperature controls until
32ÉC (90ÉF) is shown in the display window. The EATC will continue
maximum heating (disregarding the displayed temperature) until a
cooler temperature is selected by pressing the temperature control.
Temperature conversion
Press theA/C(A/C) and(DEF) simultaneously for one second while
rotating the fan speed dial upward until it stops moving, to switch
between Fahrenheit and Celsius.
TEMP
AUTOMATICOFF REAR 1
OFF
A/C
TEMP
AUTOMATICOFF REAR 1 2 3 4
OFFA/C
A/CMAXHI
LO
Controls and features
31
Page 34 of 264

²MAX A/C-Uses recirculated air to cool the vehicle. MAX A/C is noisier
thanA/CA/C but more economical and will cool the inside of the
vehicle faster. After pressing the MAX control, both the MAX and
A/CA/C indicators will light and the airflow will be from the
instrument panel registers. In this mode, the air conditioning will
automatically engage if the outside temperature is about 4ÉC (40ÉF) or
higher.
Cooling your vehicle with outside air using override controls
Cooling your vehicle with air conditioned outside air using just the A/C
override control is quieter but less economical than using both the A/C
and the MAX control. It also has less cooling capacity and is not
recommended for high outside temperatures.
In order to cool your vehicle with outside air using the override controls:
1. Select the override control
(panel),(panel and floor) or
(floor).
2. Press the
A/C(A/C) control. The indicator light on theA/C(A/C)
control will illuminate.
3. Select the desired temperature for your comfort level.
4. Adjust the fan speed override knob to the position of your choice.
During periods of high humidity, vapor may be emitted from the air
outlets when using the A/C system with outside air. This can be
corrected by using MAX A/C to cool the vehicle.
Controls and features
34
Page 36 of 264
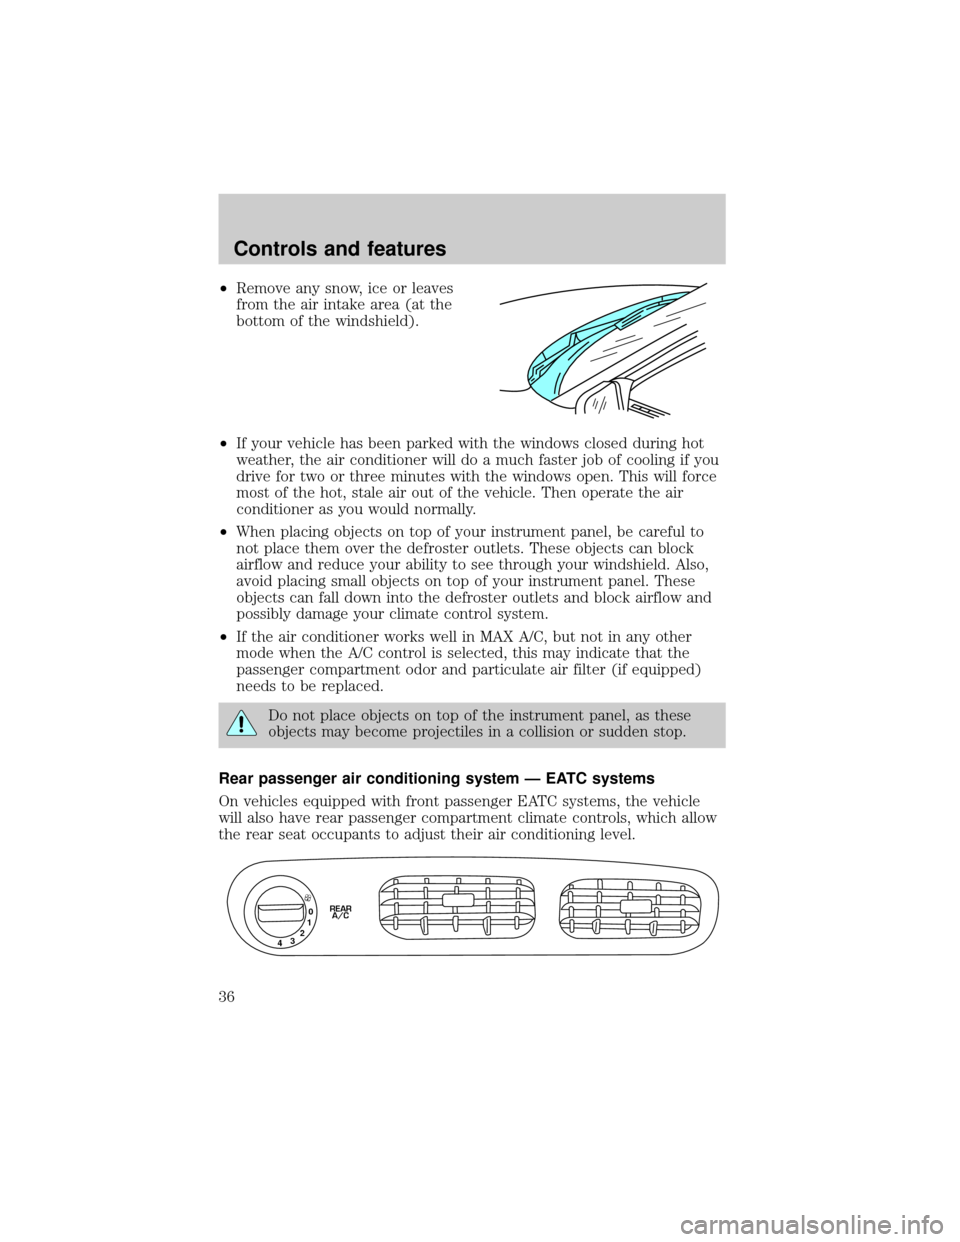
²Remove any snow, ice or leaves
from the air intake area (at the
bottom of the windshield).
²If your vehicle has been parked with the windows closed during hot
weather, the air conditioner will do a much faster job of cooling if you
drive for two or three minutes with the windows open. This will force
most of the hot, stale air out of the vehicle. Then operate the air
conditioner as you would normally.
²When placing objects on top of your instrument panel, be careful to
not place them over the defroster outlets. These objects can block
airflow and reduce your ability to see through your windshield. Also,
avoid placing small objects on top of your instrument panel. These
objects can fall down into the defroster outlets and block airflow and
possibly damage your climate control system.
²If the air conditioner works well in MAX A/C, but not in any other
mode when the A/C control is selected, this may indicate that the
passenger compartment odor and particulate air filter (if equipped)
needs to be replaced.
Do not place objects on top of the instrument panel, as these
objects may become projectiles in a collision or sudden stop.
Rear passenger air conditioning system Ð EATC systems
On vehicles equipped with front passenger EATC systems, the vehicle
will also have rear passenger compartment climate controls, which allow
the rear seat occupants to adjust their air conditioning level.
0
1
2
3
4REAR
A/C
Controls and features
36
Page 39 of 264

turn the Rear Fan Control on the main climate control system to Rear
A/C and turn the Rear A/C Fan Control to 0.
For maximum cooling for the front seat passengers, set the rear fan
switch to the OFF (0) position.
Please note that the rear passenger air conditioning system is
designed for air conditioning purposes only, and does not heat the
rear compartment. Rear compartment heating is provided by the
underseat ducts. Refer to Rear Seat Heating.
REAR WINDOW DEFROSTER
The rear defroster control is located
on the instrument panel.
Press the rear defroster control to
clear the rear window of thin ice
and fog.
²The small LED will illuminate
when the rear defroster is
activated.
OFF REAR A/C 1 2 3 4
A/C
0
1
2
3
4REAR
A/C
SECURITYHAZARD
RR DEFOGRR WIPER
RR WASH
Controls and features
39
Page 169 of 264

Trailer lamps
Trailer lamps are required on most towed vehicles. Make sure your
trailer lamps conform to local and Federal regulations. See your dealer or
trailer rental agency for proper instructions and equipment for hooking
up trailer lamps.
Driving while you tow
Do not drive faster than 88 km/h (55 mph) when towing a trailer.
Speed control may shut off if you are towing on long, steep grades.
When towing a trailer:
²Use a lower gear when towing up or down steep hills. This will
eliminate excessive downshifting and upshifting for optimum fuel
economy and transaxle cooling.
²Anticipate stops and brake gradually.
Exceeding the GCWR rating may cause internal transaxle damage
and void your warranty coverage.
Servicing after towing
If you tow a trailer for long distances, your vehicle will require more
frequent service intervals. Refer to your Scheduled Maintenance Guide
for more information.
Trailer towing tips
²Practice turning, stopping and backing up in an area before starting on
a trip to get the feel of the vehicle trailer combination. When turning,
make wider turns so the trailer wheels will clear curbs and other
obstacles.
²Allow more distance for stopping with a trailer attached.
²The trailer tongue weight should be 10% of the loaded trailer weight.
²After you have traveled 80 km (50 miles), thoroughly check your
hitch, electrical connections and trailer wheel lug nuts.
²When stopped in traffic for long periods of time in hot weather, place
the gearshift in P (Park) and increase idle speed. This aids engine
cooling and air conditioner efficiency.
²Vehicles with trailers should not be parked on a grade. If you must
park on a grade, place wheel chocks under the trailer's wheels.
Driving
169
Page 175 of 264
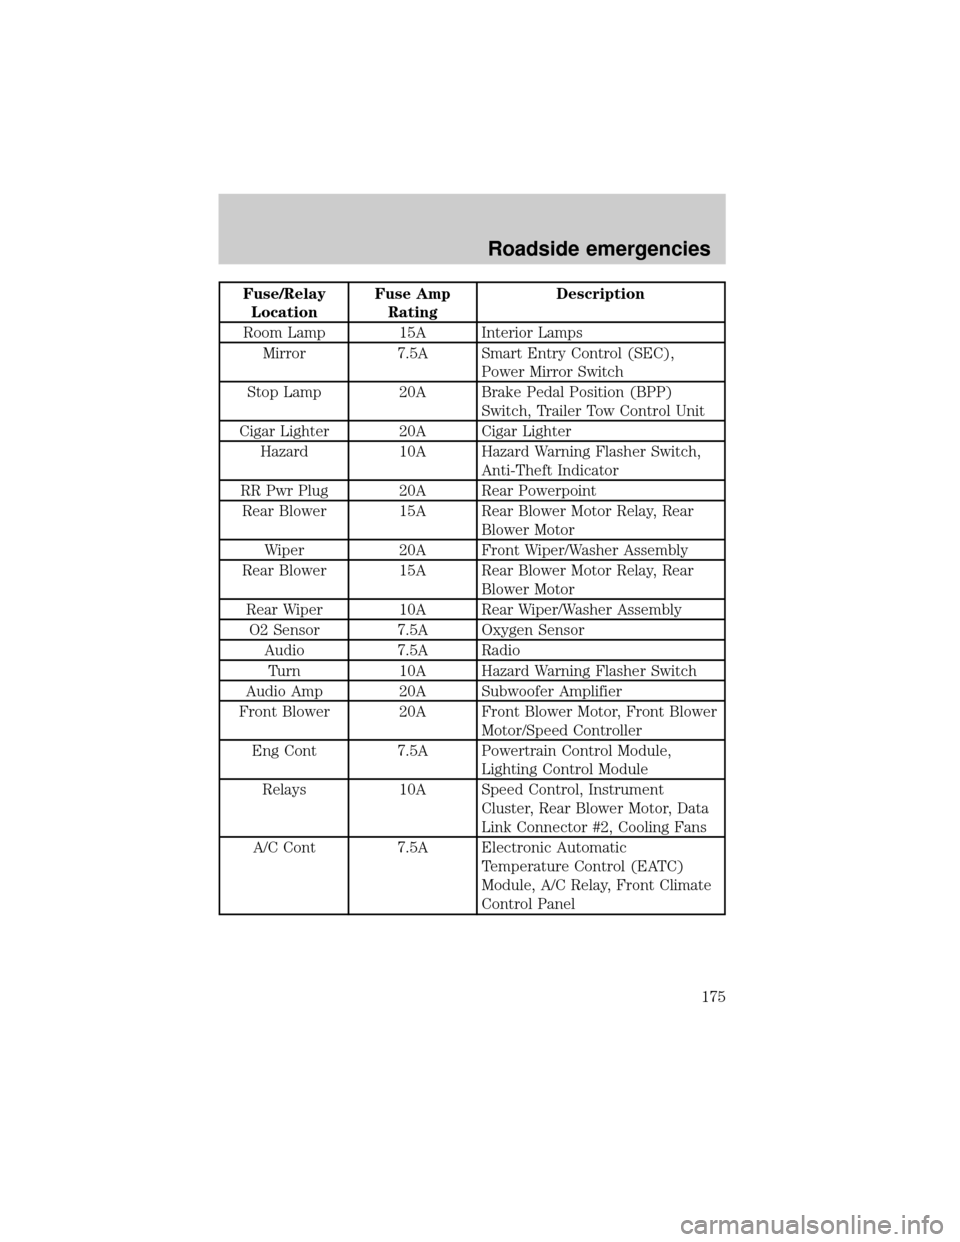
Fuse/Relay
LocationFuse Amp
RatingDescription
Room Lamp 15A Interior Lamps
Mirror 7.5A Smart Entry Control (SEC),
Power Mirror Switch
Stop Lamp 20A Brake Pedal Position (BPP)
Switch, Trailer Tow Control Unit
Cigar Lighter 20A Cigar Lighter
Hazard 10A Hazard Warning Flasher Switch,
Anti-Theft Indicator
RR Pwr Plug 20A Rear Powerpoint
Rear Blower 15A Rear Blower Motor Relay, Rear
Blower Motor
Wiper 20A Front Wiper/Washer Assembly
Rear Blower 15A Rear Blower Motor Relay, Rear
Blower Motor
Rear Wiper 10A Rear Wiper/Washer Assembly
O2 Sensor 7.5A Oxygen Sensor
Audio 7.5A Radio
Turn 10A Hazard Warning Flasher Switch
Audio Amp 20A Subwoofer Amplifier
Front Blower 20A Front Blower Motor, Front Blower
Motor/Speed Controller
Eng Cont 7.5A Powertrain Control Module,
Lighting Control Module
Relays 10A Speed Control, Instrument
Cluster, Rear Blower Motor, Data
Link Connector #2, Cooling Fans
A/C Cont 7.5A Electronic Automatic
Temperature Control (EATC)
Module, A/C Relay, Front Climate
Control Panel
Roadside emergencies
175
Page 185 of 264
JUMP STARTING YOUR VEHICLE
The gases around the battery can explode if exposed to flames,
sparks, or lit cigarettes. An explosion could result in injury or
vehicle damage.
Do not push start your vehicle. You could damage the catalytic
converter.
Batteries contain sulfuric acid which can burn skin, eyes, and
clothing, if contacted.
Do not attempt to push start your vehicle. Automatic
transmissions do not have push-start capability.
Preparing your vehicle
1.Use only a 12±volt supply to start your vehicle.
2. Do not disconnect the battery of the disabled vehicle as this could
damage the vehicle's electrical system.
3. Park the booster vehicle close to the hood of the disabled vehicle
making sure the two vehiclesdo nottouch. Set the parking brake on
both vehicles and stay clear of the engine cooling fan and other moving
parts.
4. Check all battery terminals and remove any excessive corrosion before
you attach the battery cables. Ensure that vent caps are tight and level.
5. Turn the heater fan on in both vehicles to protect any electrical
surges. Turn all other accessories off.
Roadside emergencies
185