Security Mercury Villager 2000 Owner's Manuals
[x] Cancel search | Manufacturer: MERCURY, Model Year: 2000, Model line: Villager, Model: Mercury Villager 2000Pages: 256, PDF Size: 2.21 MB
Page 7 of 256
OFF REAR 1 2 3 4
1
MAX
A/C
A/C OFF2
3
4
OVERDRIVE
OFF/ON
FFREWSIDE1 - 2
BASS TREB BAL FADE
TAPE
AMSAM
FMCDCLKVOL - PUSH ON
SHUFFLE COMP CD
EJ
CDSCAN
DISCS
TUNESEEK
3 2 1456
DC
12V
SECURITYHAZARD
RR DEFOGRR WIPER
RR WASH
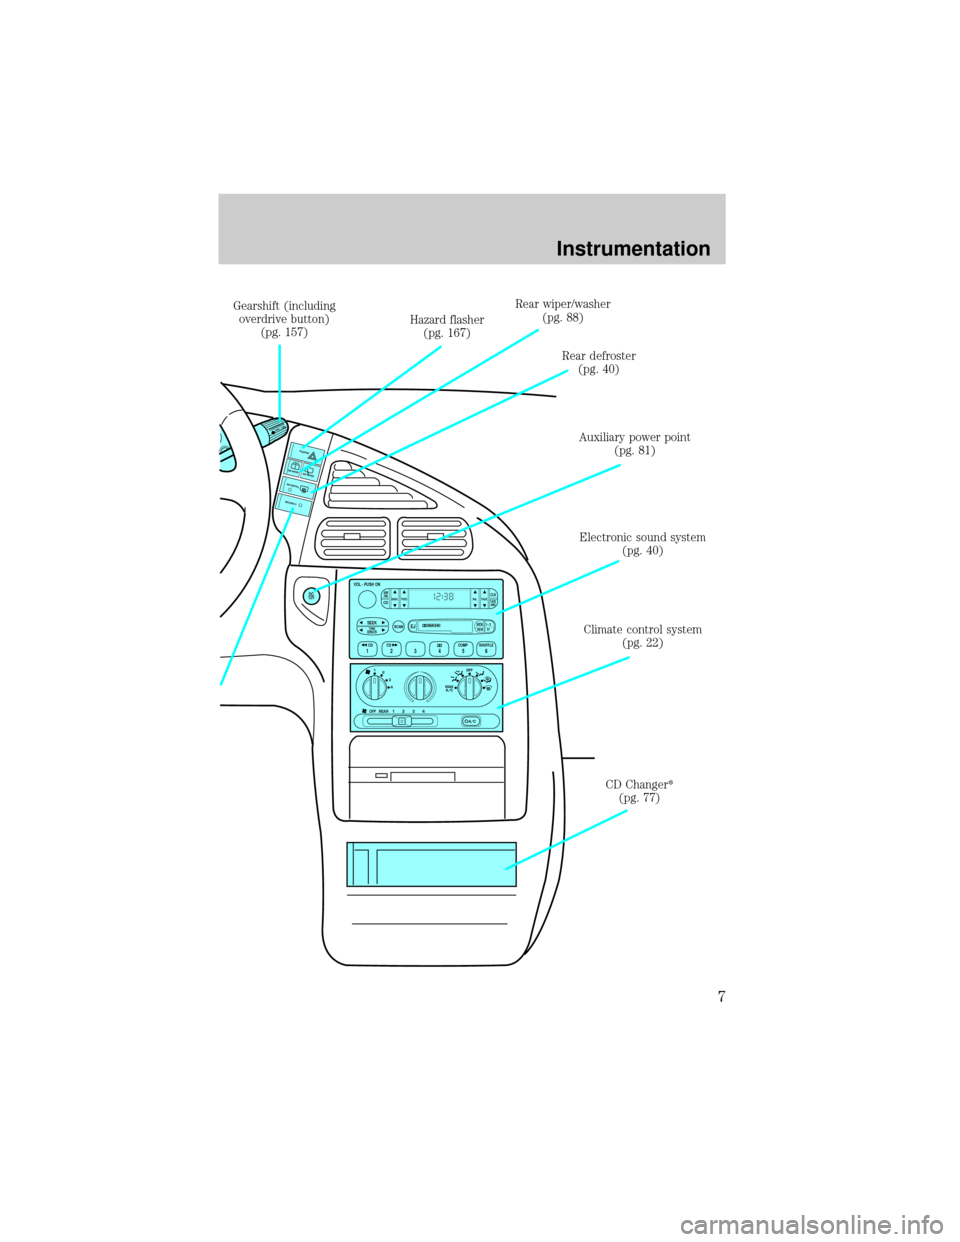
Gearshift (including
overdrive button)
(pg. 157)Hazard flasher
(pg. 167)Rear wiper/washer
(pg. 88)
Rear defroster
(pg. 40)
Auxiliary power point
(pg. 81)
Climate control system
(pg. 22) Electronic sound system
(pg. 40)
CD Changer*
(pg. 77)
Instrumentation
7
Page 40 of 256
REAR WINDOW DEFROSTER
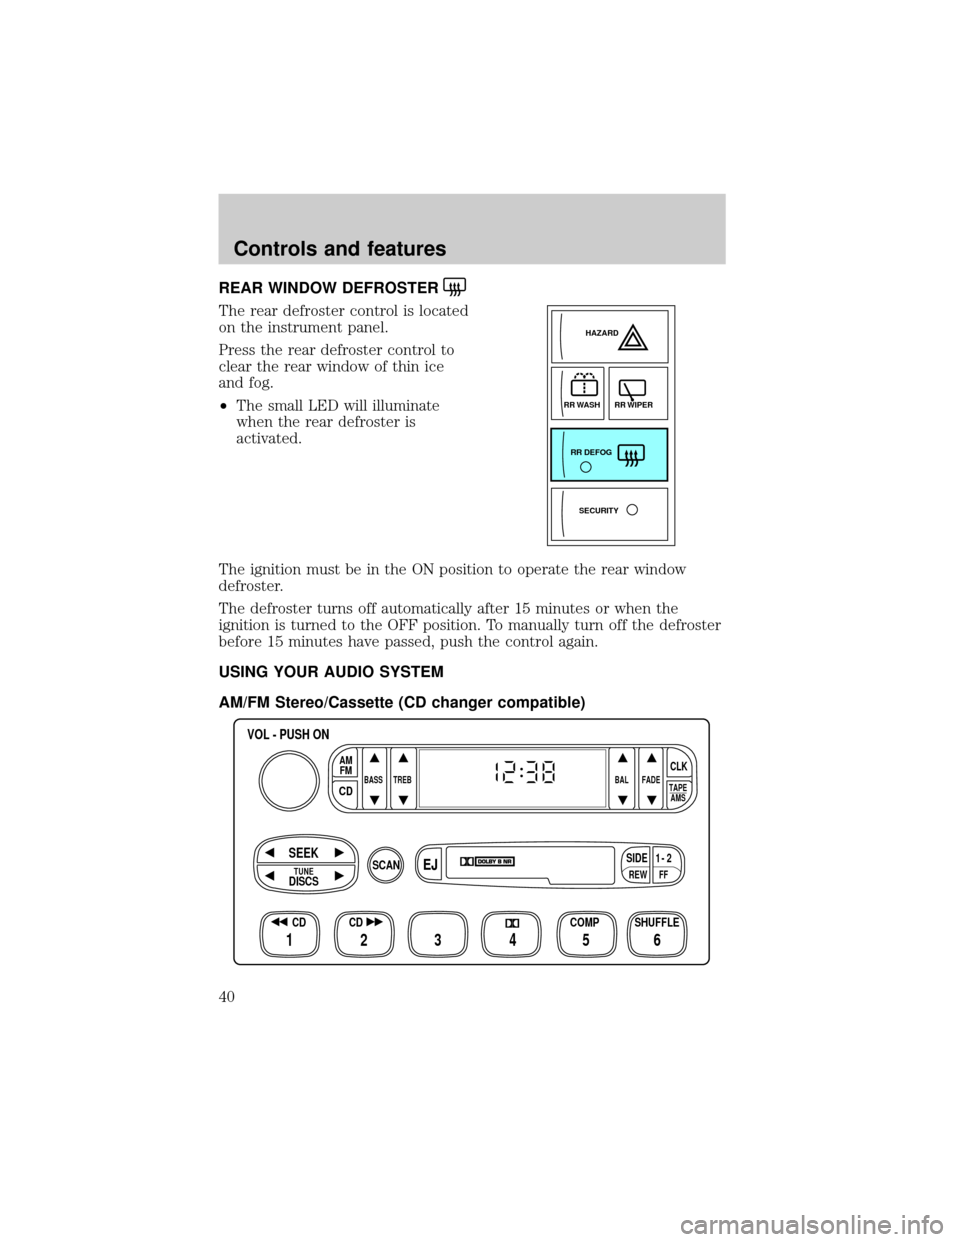
The rear defroster control is located
on the instrument panel.
Press the rear defroster control to
clear the rear window of thin ice
and fog.
²The small LED will illuminate
when the rear defroster is
activated.
The ignition must be in the ON position to operate the rear window
defroster.
The defroster turns off automatically after 15 minutes or when the
ignition is turned to the OFF position. To manually turn off the defroster
before 15 minutes have passed, push the control again.
USING YOUR AUDIO SYSTEM
AM/FM Stereo/Cassette (CD changer compatible)
SECURITYHAZARD
RR DEFOGRR WIPER
RR WASH
FFREW
SIDE1 - 2
BASS TREB BAL FADE
TAPE
AMS
AM
FM
CD
CLK
VOL - PUSH ON
SHUFFLE COMP CD
EJ
CDSCAN
DISCS
TUNE
SEEK
3 2 1456
Controls and features
40
Page 88 of 256
Rear window wiper and washer
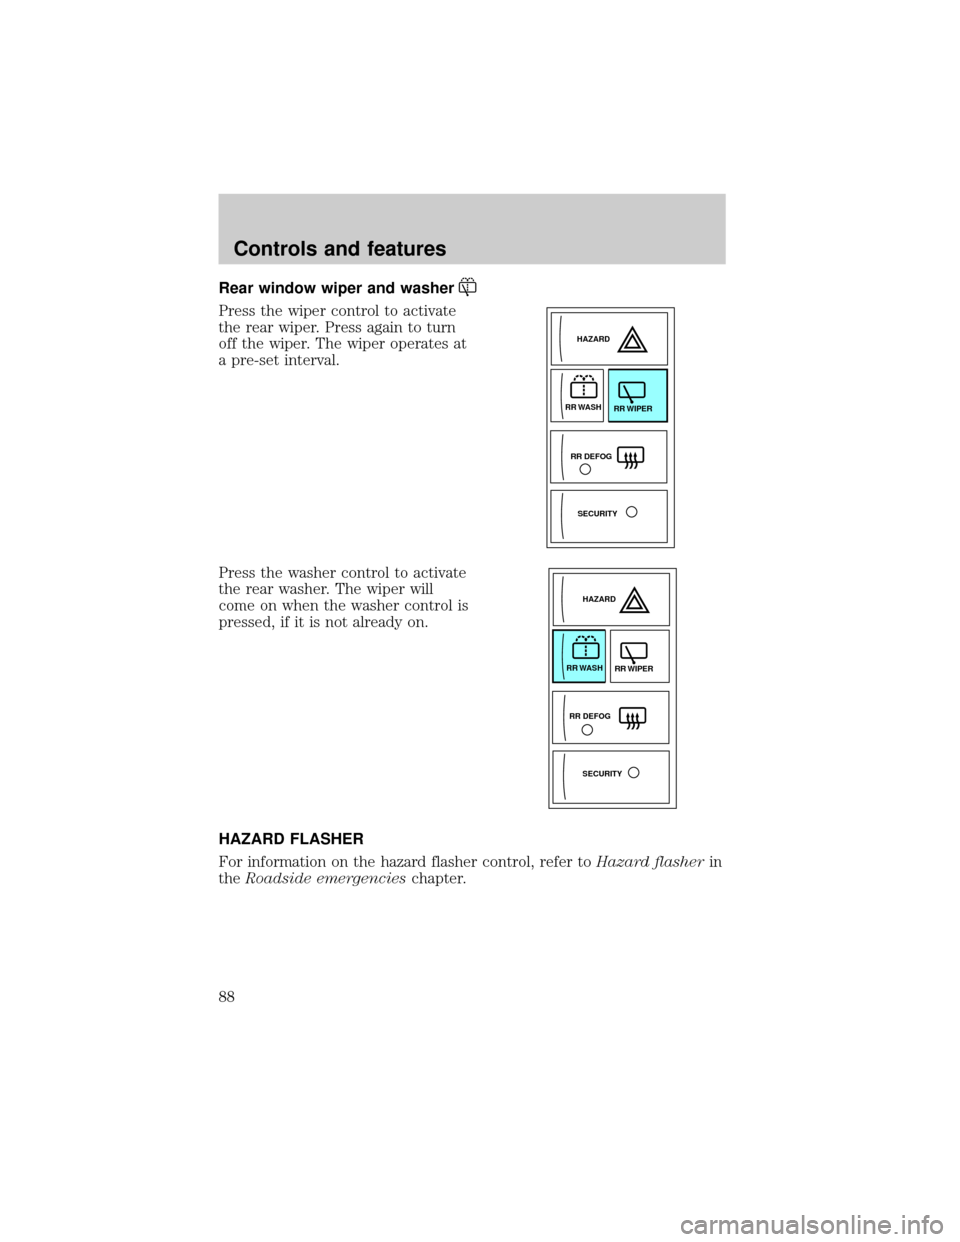
Press the wiper control to activate
the rear wiper. Press again to turn
off the wiper. The wiper operates at
a pre-set interval.
Press the washer control to activate
the rear washer. The wiper will
come on when the washer control is
pressed, if it is not already on.
HAZARD FLASHER
For information on the hazard flasher control, refer toHazard flasherin
theRoadside emergencieschapter.
SECURITY HAZARD
RR DEFOGRR WIPER RR WASH
SECURITYHAZARD
RR DEFOGRR WIPER RR WASH
Controls and features
88
Page 94 of 256
with a single built-in device. This feature will learn the radio frequency
codes of most current transmitters to operate garage doors, entry gates,
security systems, entry door locks, and home or office lighting.
When programming your HomeLinktUniversal Transceiver, to a
garage door or gate be sure that people and objects are out of
the way to prevent potential harm or damage.
Do not use the HomeLinktUniversal Transceiver with any garage door
opener that lacks safety stop and reverse features as required by U.S.
federal safety standards (this includes any garage door opener model
manufactured before April 1, 1982). A garage door which cannot detect
an object, signaling the door to stop and reverse, does not meet current
U.S. federal safety standards. For more information on this matter, call
toll-free: 1±800±355±3515 or on the Internet atHomeLink.jci.com.
Programming
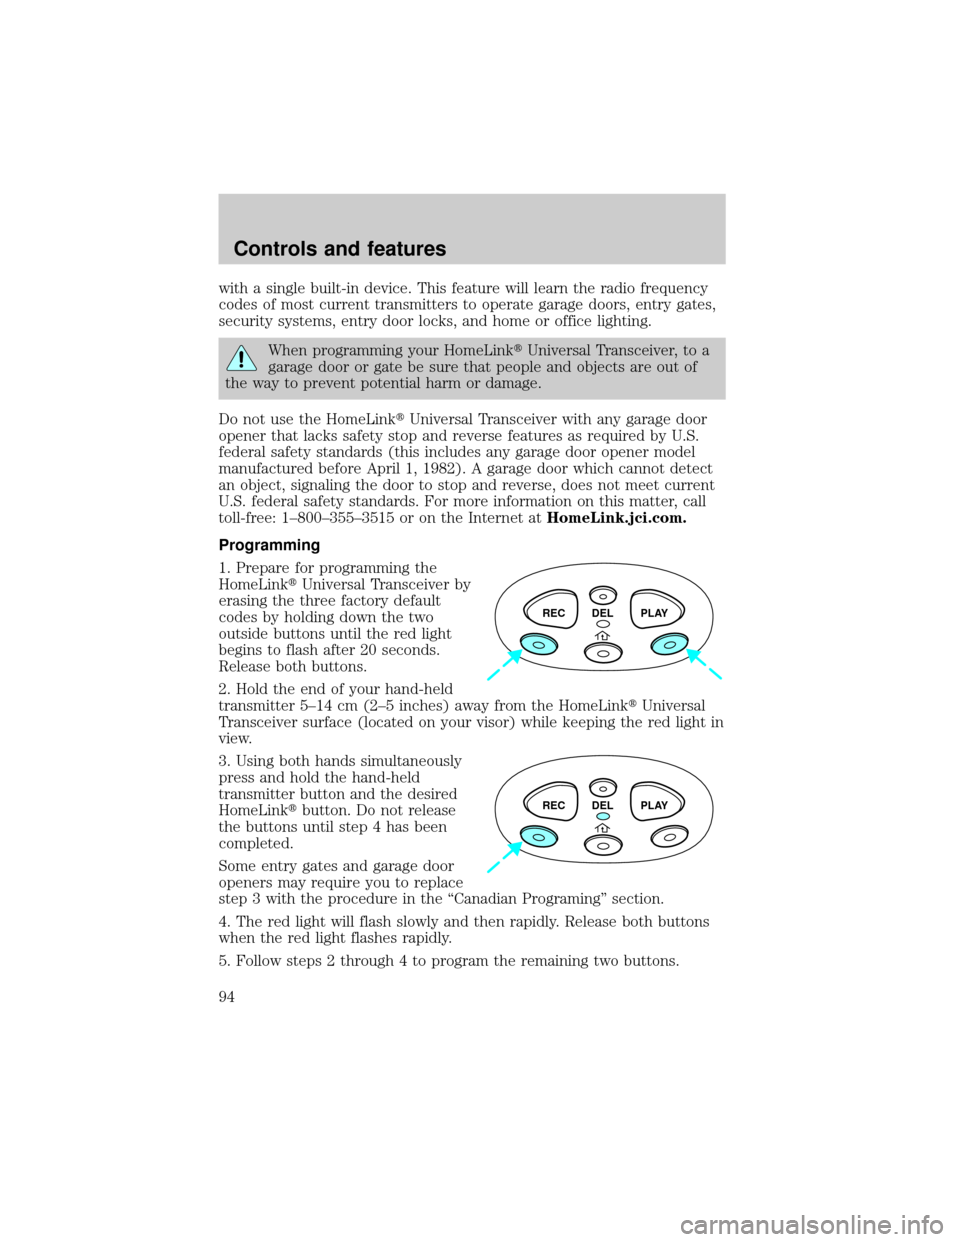
1. Prepare for programming the
HomeLinktUniversal Transceiver by
erasing the three factory default
codes by holding down the two
outside buttons until the red light
begins to flash after 20 seconds.
Release both buttons.
2. Hold the end of your hand-held
transmitter 5±14 cm (2±5 inches) away from the HomeLinktUniversal
Transceiver surface (located on your visor) while keeping the red light in
view.
3. Using both hands simultaneously
press and hold the hand-held
transmitter button and the desired
HomeLinktbutton. Do not release
the buttons until step 4 has been
completed.
Some entry gates and garage door
openers may require you to replace
step 3 with the procedure in the ªCanadian Programingº section.
4. The red light will flash slowly and then rapidly. Release both buttons
when the red light flashes rapidly.
5. Follow steps 2 through 4 to program the remaining two buttons.
REC DEL PLAY
REC DEL PLAY
Controls and features
94
Page 105 of 256
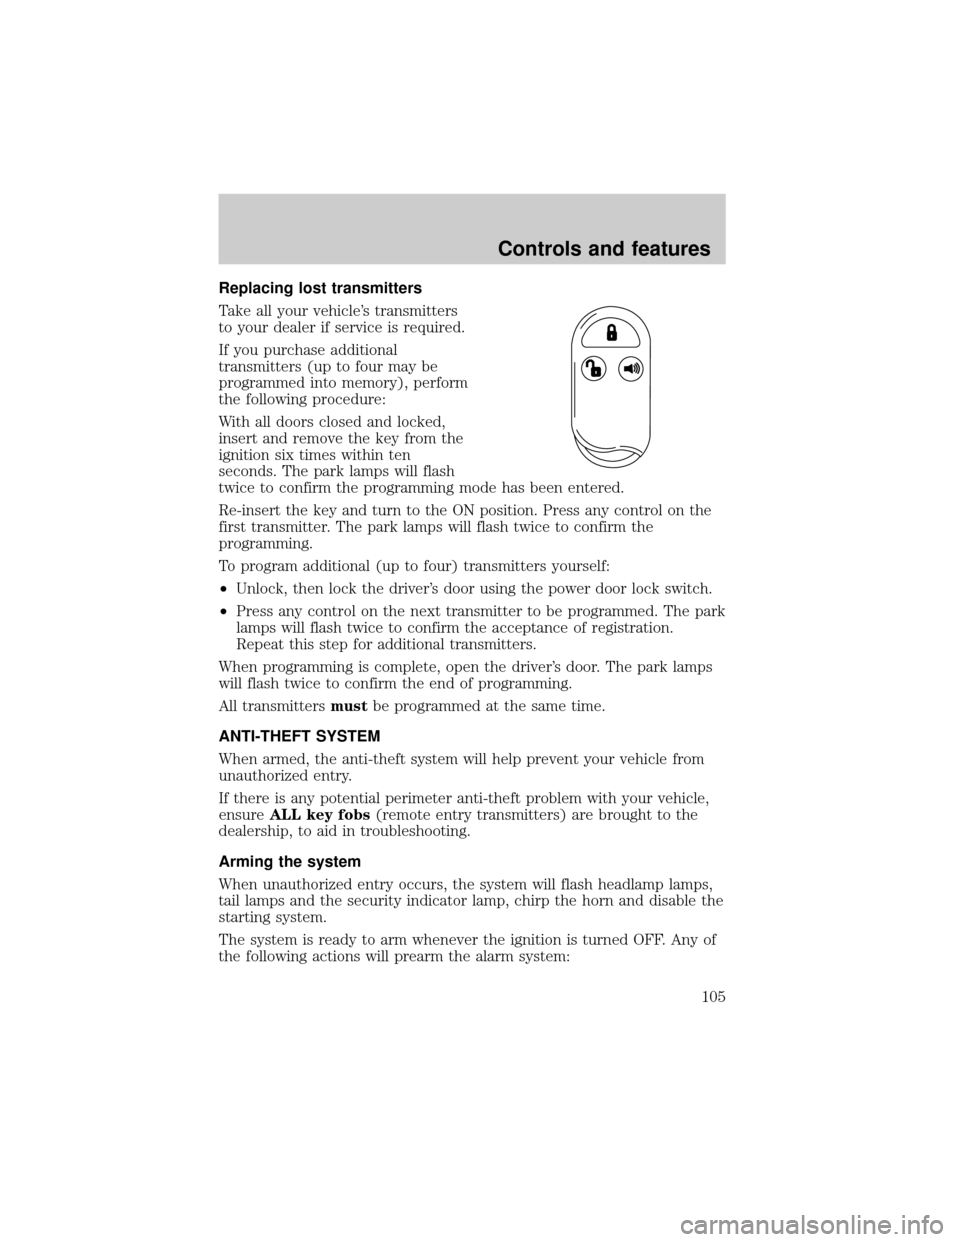
Replacing lost transmitters
Take all your vehicle's transmitters
to your dealer if service is required.
If you purchase additional
transmitters (up to four may be
programmed into memory), perform
the following procedure:
With all doors closed and locked,
insert and remove the key from the
ignition six times within ten
seconds. The park lamps will flash
twice to confirm the programming mode has been entered.
Re-insert the key and turn to the ON position. Press any control on the
first transmitter. The park lamps will flash twice to confirm the
programming.
To program additional (up to four) transmitters yourself:
²Unlock, then lock the driver's door using the power door lock switch.
²Press any control on the next transmitter to be programmed. The park
lamps will flash twice to confirm the acceptance of registration.
Repeat this step for additional transmitters.
When programming is complete, open the driver's door. The park lamps
will flash twice to confirm the end of programming.
All transmittersmustbe programmed at the same time.
ANTI-THEFT SYSTEM
When armed, the anti-theft system will help prevent your vehicle from
unauthorized entry.
If there is any potential perimeter anti-theft problem with your vehicle,
ensureALL key fobs(remote entry transmitters) are brought to the
dealership, to aid in troubleshooting.
Arming the system
When unauthorized entry occurs, the system will flash headlamp lamps,
tail lamps and the security indicator lamp, chirp the horn and disable the
starting system.
The system is ready to arm whenever the ignition is turned OFF. Any of
the following actions will prearm the alarm system:
Controls and features
105
Page 106 of 256
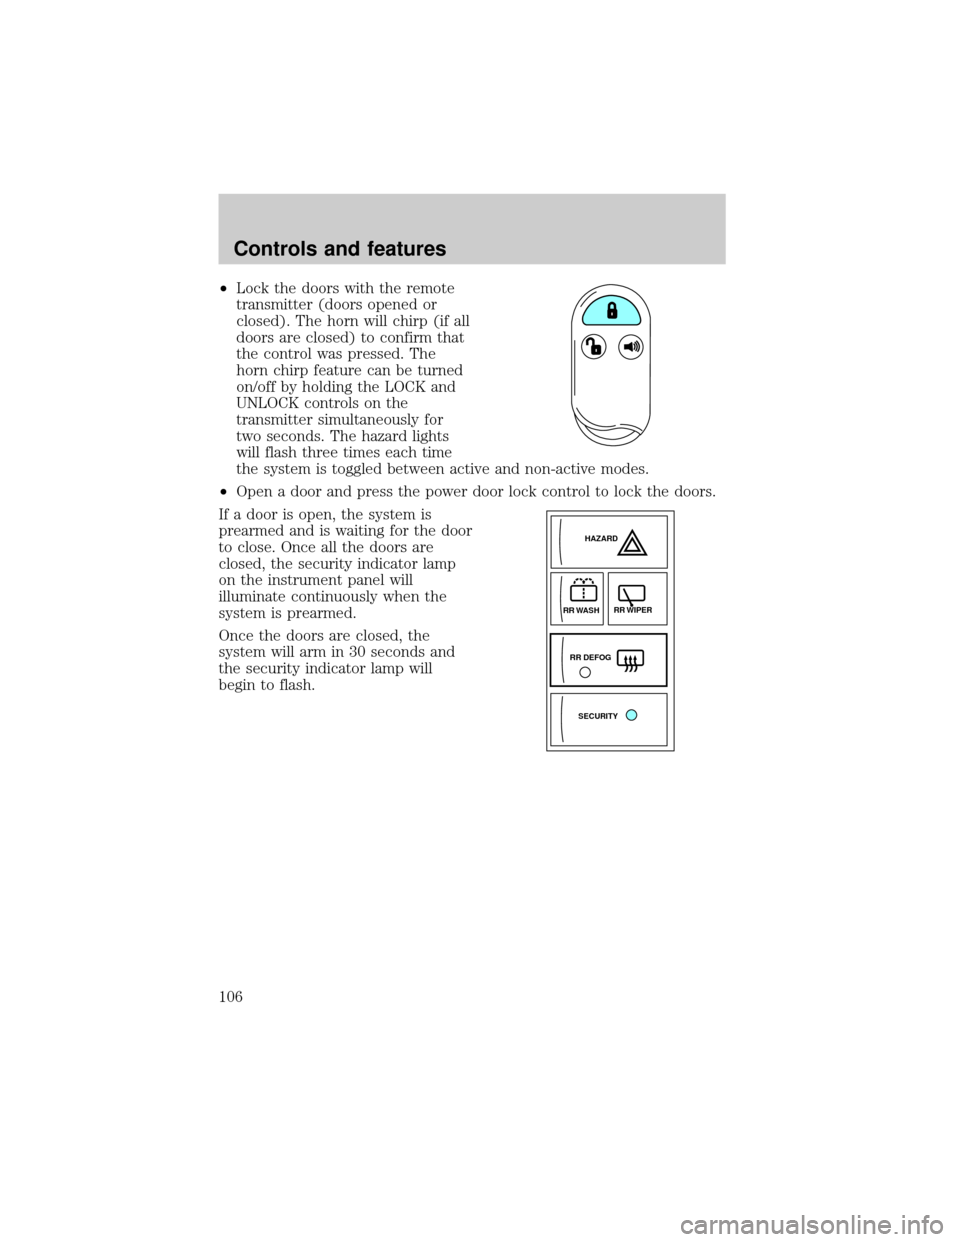
²Lock the doors with the remote
transmitter (doors opened or
closed). The horn will chirp (if all
doors are closed) to confirm that
the control was pressed. The
horn chirp feature can be turned
on/off by holding the LOCK and
UNLOCK controls on the
transmitter simultaneously for
two seconds. The hazard lights
will flash three times each time
the system is toggled between active and non-active modes.
²Open a door and press the power door lock control to lock the doors.
If a door is open, the system is
prearmed and is waiting for the door
to close. Once all the doors are
closed, the security indicator lamp
on the instrument panel will
illuminate continuously when the
system is prearmed.
Once the doors are closed, the
system will arm in 30 seconds and
the security indicator lamp will
begin to flash.
SECURITYHAZARD
RR DEFOGRR WIPER
RR WASH
Controls and features
106
Page 132 of 256
Safety belt maintenance
Inspect the safety belt systems periodically to make sure they work
properly and are not damaged. Inspect the safety belts to make sure
there are no nicks, wears or cuts, replacing if necessary. All safety belt
assemblies, including retractors, buckles, front seat belt buckle
assemblies, buckle support assemblies (slide bar-if equipped), shoulder
belt height adjusters (if equipped), shoulder belt guide on seatback (if
equipped), child safety seat tether bracket assemblies (if equipped), and
attaching hardware, should be inspected after a collision. Ford
recommends that all safety belt assemblies used in vehicles involved in a
collision be replaced. However, if the collision was minor and a qualified
technician finds that the belts do not show damage and continue to
operate properly, they do not need to be replaced. Safety belt assemblies
not in use during a collision should also be inspected and replaced if
either damage or improper operation is noted.
Failure to inspect and if necessary replace the safety belt
assembly under the above conditions could result in severe
personal injuries in the event of a collision.
Refer toCleaning and maintaining the safety beltsin the
Maintenance and caresection.
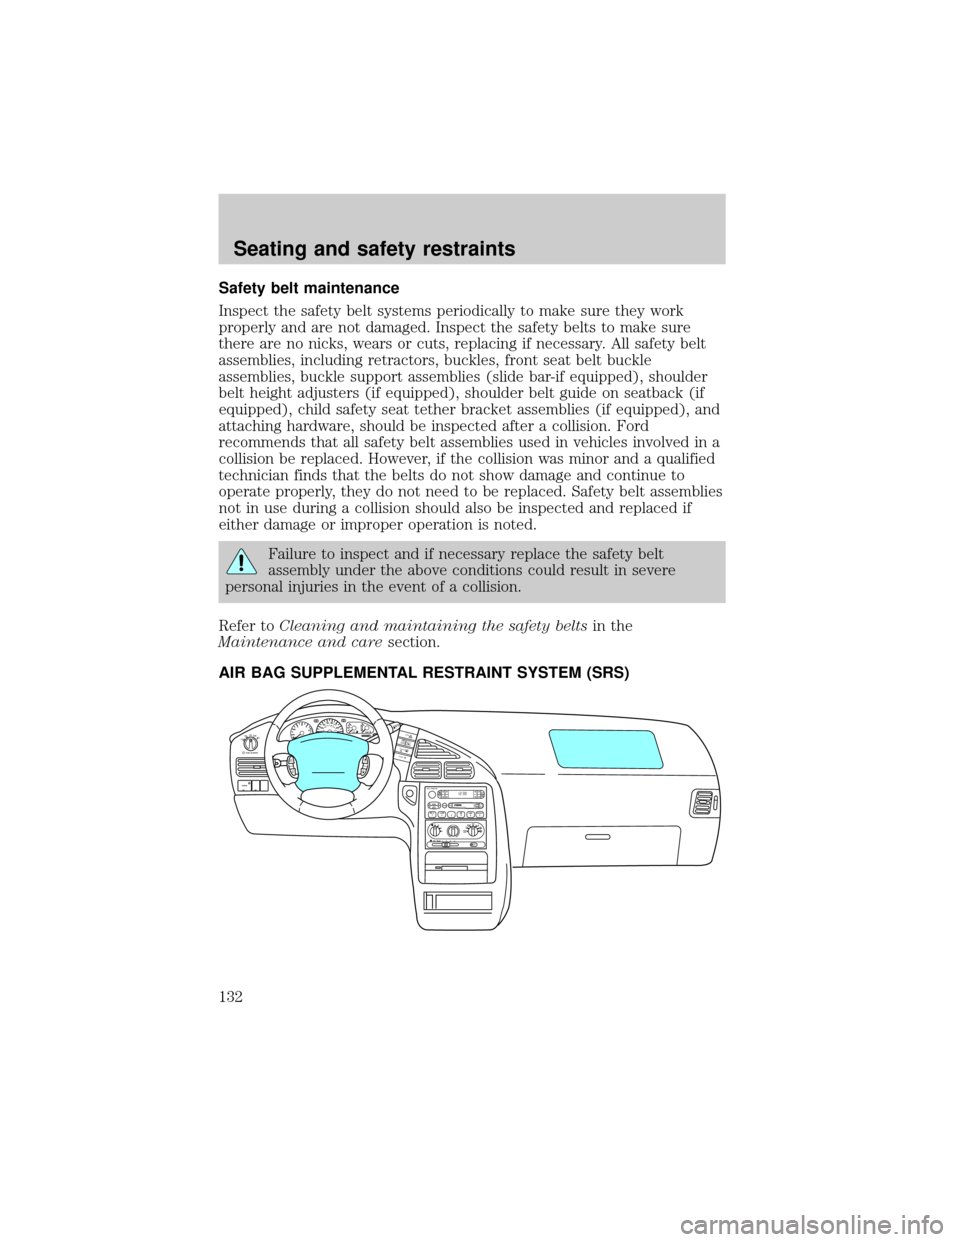
AIR BAG SUPPLEMENTAL RESTRAINT SYSTEM (SRS)
OFF REAR 1 2 3 4
1
MAX
A/C
A/C OFF2
3
4
OFFAUTO
1
AUTO
2
PUSH INTERIOR
CEF
H1/2FUEL OVERDRIVE
OFF/ONTEMPNORMAL000020304050
60
70
80
90406080100120
1400 234
5
6
71
FFREWSIDE1 - 2BASS TREB BAL FADE
TAPE
AMSAM
FMCDCLKVOL - PUSH ON
SHUFFLE COMP CDEJCDSCAN
DISCSTUNESEEK3 2 1456
SECURITYHAZARD
RR DEFOGRR W
IPER
RR W
ASH
CRUISE
ON OFF
C
A
N
C
E
L R
E
S
A
C
C
E
L
C
O
A
S
T
S
E
TVOL
NEXTVOL
Seating and safety restraints
132
Page 167 of 256
Roadside coverage beyond basic warranty
In the United States, you may purchase additional roadside assistance
coverage beyond this period through the Ford Auto Club by contacting
your Ford or Lincoln Mercury dealer.
Similarly in Canada, you may purchase additional coverage beyond the
basic coverage period by consulting the Ford Roadside Assistance Club
brochure or by calling 1±877±294±CLUB (1±877±894±2582).
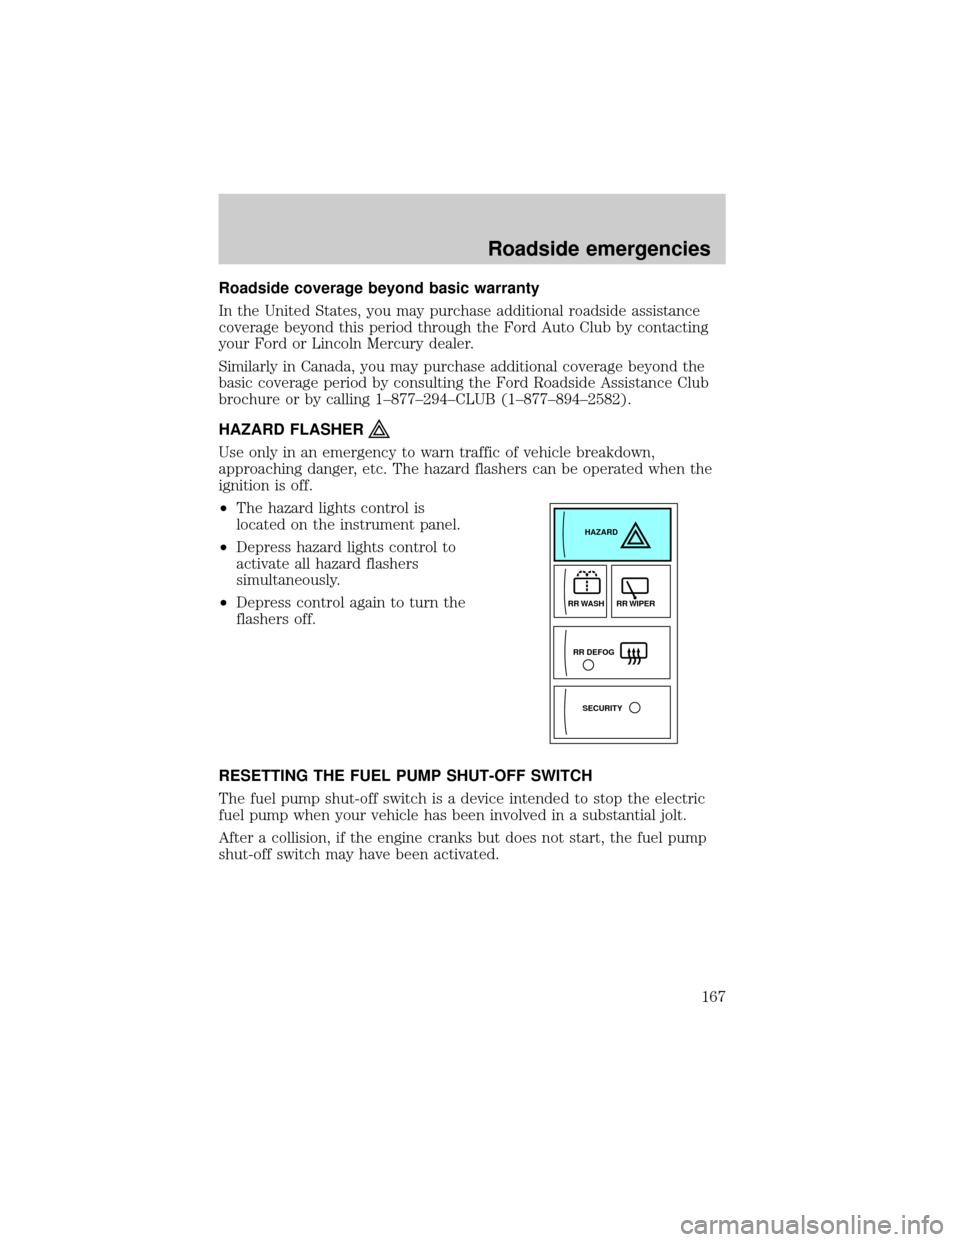
HAZARD FLASHER
Use only in an emergency to warn traffic of vehicle breakdown,
approaching danger, etc. The hazard flashers can be operated when the
ignition is off.
²The hazard lights control is
located on the instrument panel.
²Depress hazard lights control to
activate all hazard flashers
simultaneously.
²Depress control again to turn the
flashers off.
RESETTING THE FUEL PUMP SHUT-OFF SWITCH
The fuel pump shut-off switch is a device intended to stop the electric
fuel pump when your vehicle has been involved in a substantial jolt.
After a collision, if the engine cranks but does not start, the fuel pump
shut-off switch may have been activated.
SECURITYHAZARD
RR DEFOGRR WIPER RR WASH
Roadside emergencies
167
Page 246 of 256

Ford Deluxe Leather and Vinyl Cleaner (not available in Canada)
Motorcraft Vinyl Cleaner (Canada only)
Ford Extra Strength Tar and Road Oil Remover* (not available in
Canada)
Ford Extra Strength Upholstery Cleaner (Canada only)
Ford Extra Strength Upholstery Cleaner (not available in Canada)
Ford Metal Surface Cleaner
Ford Multi-Purpose Cleaner*
Motorcraft Car Wash Concentrate
Motorcraft Carlite Glass Cleaner
Ford Spot and Stain Remover*
Ford Super Premium Tire and Trim Dressing
Ford Triple Clean
Ford Ultra-Clear Spray Glass Cleaner (not available in Canada)
* May be sold with the Motorcraft name
FORD ACCESSORIES FOR YOUR VEHICLE
A wide selection of Ford accessories are available for your vehicle
through your local authorized Ford, Lincoln Mercury or Ford of Canada
dealer. These quality accessories have been specifically engineered to
fulfill your automotive needs; they are custom designed to complement
the style and aerodynamic appearance of your vehicle. In addition, each
accessory is made from high quality materials and meets or exceeds
Ford's rigid engineering and safety specifications. Ford accessories are
warranted for up to 12 months or 20 000 km (12 000 miles) on all cars
and light trucks and 12 months with unlimited distance on medium/heavy
duty trucks unless the accessory is installed on a new vehicle, then the
warranty becomes the balance of the new vehicle's warranty or the
accessories warranty, whichever is greater. See your dealer for complete
warranty information and availability.
Not all accessories are available for all models.
Vehicle Security
Styled wheel protector locks
Vehicle security systems
Customer assistance
246