headlamp Mercury Villager 2000 Owner's Manuals
[x] Cancel search | Manufacturer: MERCURY, Model Year: 2000, Model line: Villager, Model: Mercury Villager 2000Pages: 256, PDF Size: 2.21 MB
Page 6 of 256
OFFAUTO
1
AUTO
2
PUSH INTERIOR
CEF
H1/2FUELTEMP
NORMAL000020304050
60
70
80
90406080100120
140
0 234
5
6
71
CRUISE
OFF
CANCELRES
ACCEL
COAST
SETVOL
NEXT
VOL
DIM
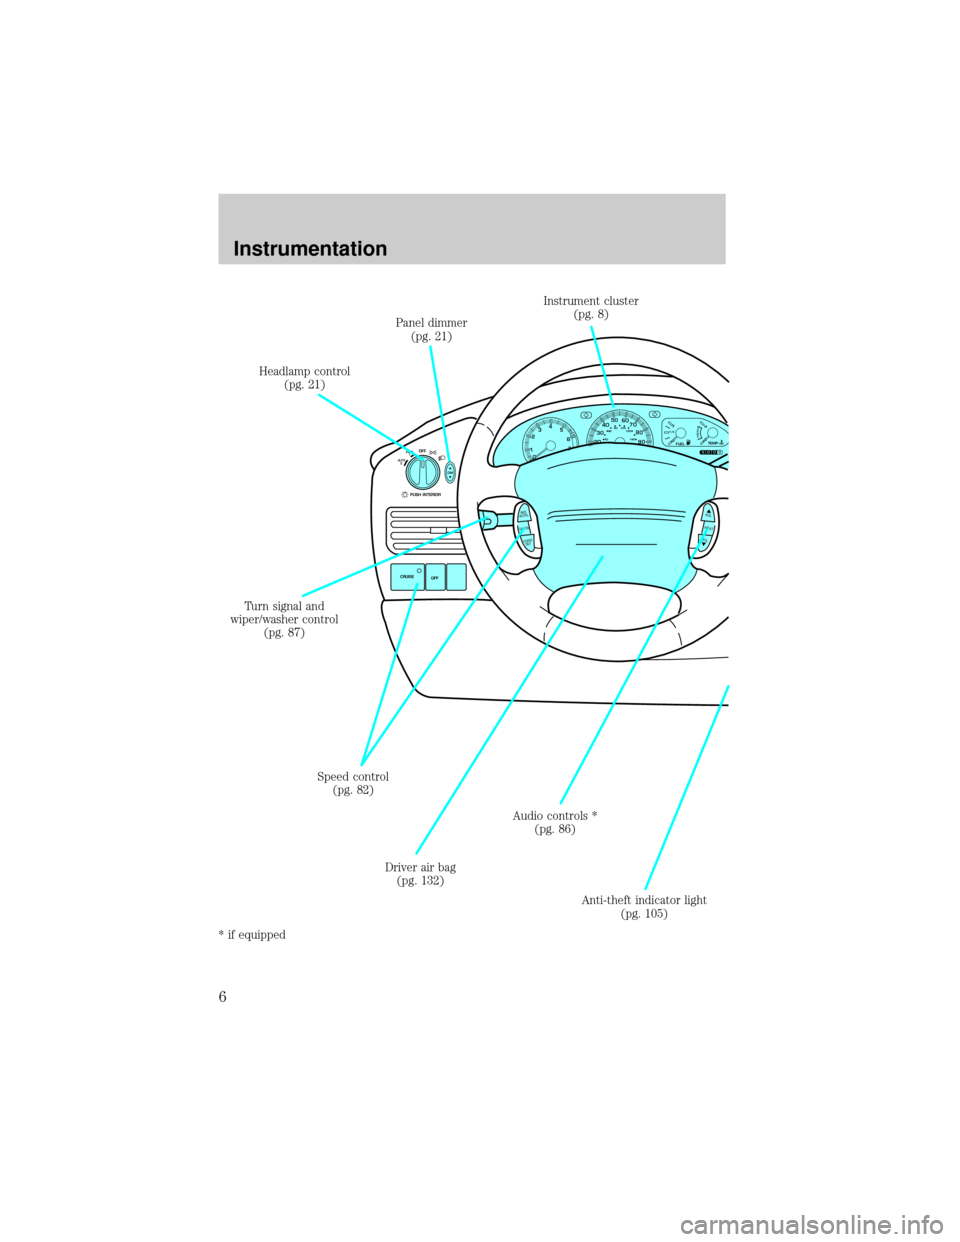
Panel dimmer
(pg. 21)
Headlamp control
(pg. 21)
Speed control
(pg. 82)
Driver air bag
(pg. 132) Turn signal and
wiper/washer control
(pg. 87)Instrument cluster
(pg. 8)
Audio controls *
(pg. 86)
Anti-theft indicator light
(pg. 105)
* if equipped
Instrumentation
6
Page 9 of 256
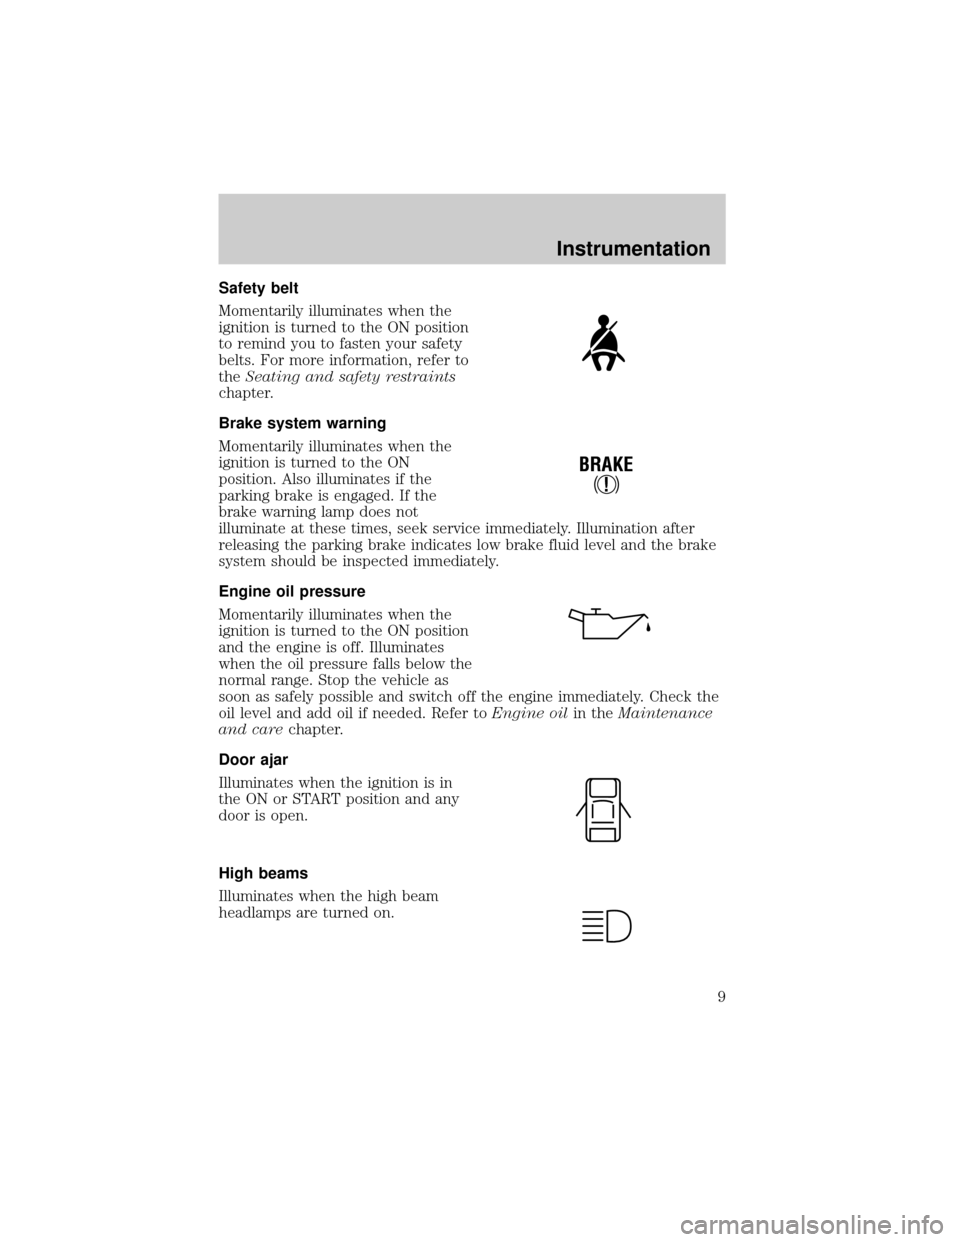
Safety belt
Momentarily illuminates when the
ignition is turned to the ON position
to remind you to fasten your safety
belts. For more information, refer to
theSeating and safety restraints
chapter.
Brake system warning
Momentarily illuminates when the
ignition is turned to the ON
position. Also illuminates if the
parking brake is engaged. If the
brake warning lamp does not
illuminate at these times, seek service immediately. Illumination after
releasing the parking brake indicates low brake fluid level and the brake
system should be inspected immediately.
Engine oil pressure
Momentarily illuminates when the
ignition is turned to the ON position
and the engine is off. Illuminates
when the oil pressure falls below the
normal range. Stop the vehicle as
soon as safely possible and switch off the engine immediately. Check the
oil level and add oil if needed. Refer toEngine oilin theMaintenance
and carechapter.
Door ajar
Illuminates when the ignition is in
the ON or START position and any
door is open.
High beams
Illuminates when the high beam
headlamps are turned on.
!
BRAKE
Instrumentation
9
Page 13 of 256
Headlamps on warning chime
Sounds when the headlamps or parking lamps are on, the ignition is off
(and the key is not in the ignition) and the driver's door is opened.
GAUGES
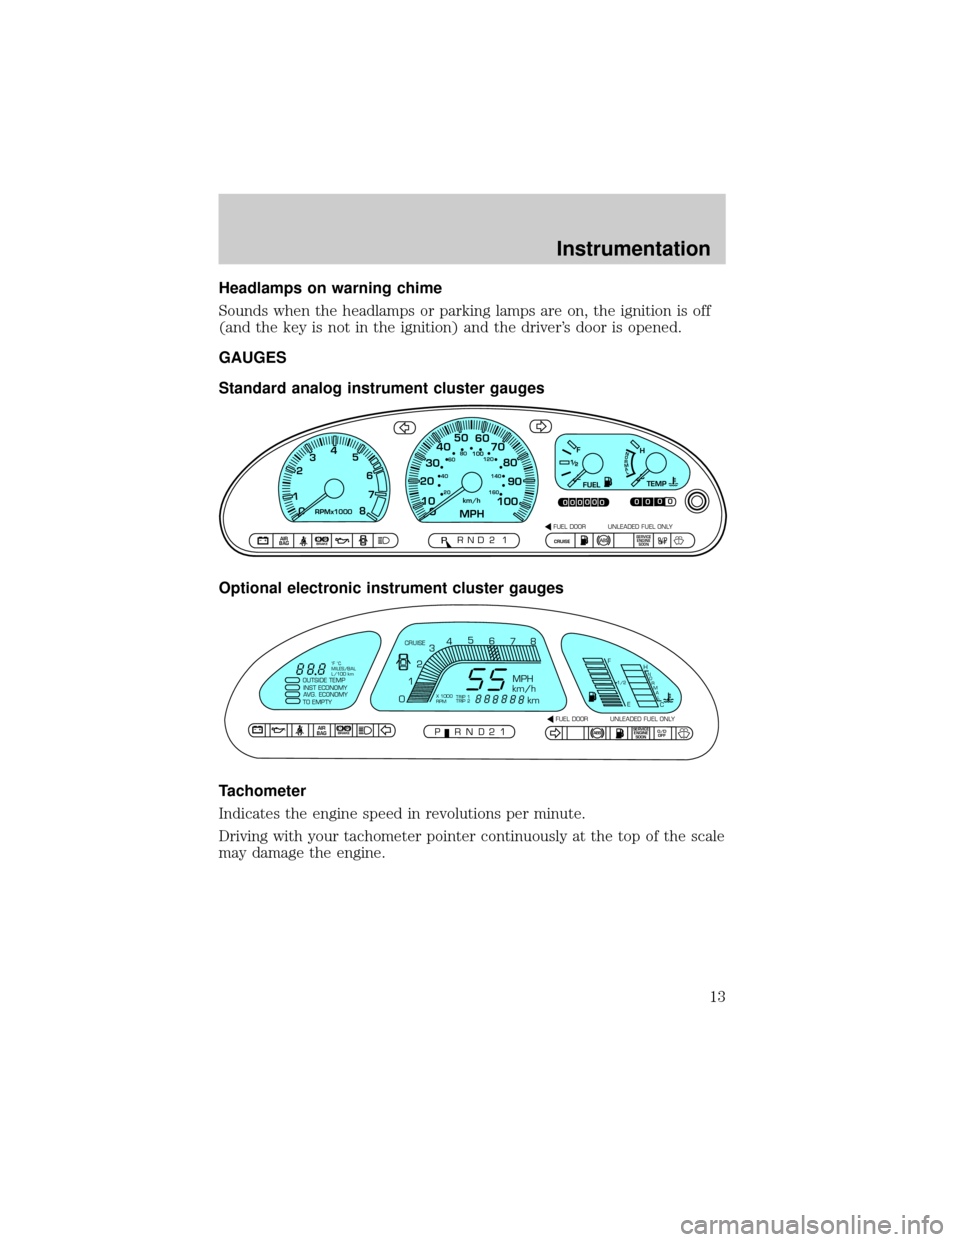
Standard analog instrument cluster gauges
Optional electronic instrument cluster gauges
Tachometer
Indicates the engine speed in revolutions per minute.
Driving with your tachometer pointer continuously at the top of the scale
may damage the engine.
CE
F
H
FUELTEMPNORMAL
0
PRND2P1P!
BRAKEAIR
BAGSERVICE
ENGINE
SOONCRUISEO/D
OFF
00000
00000MPHkm/h10 20304050
60
70
80
90
10020 406080
100120
140
160
0 234
5
6
7
8RPMx10001
FUEL DOOR UNLEADED FUEL ONLY
ABSAIR
BAGSERVICE
ENGINE
SOONABSO/D
OFF
OUTSIDE TEMP
INST ECONOMY
AVG. ECONOMY
TO EMPTY
PRND21FUEL DOOR UNLEADED FUEL ONLY CRUISE
MPH
km/h
km
F
EH
C
1/2N
O
R
M
A
L
012345
6
78
P!BRAKE
X 1000
RPMTRIP 1
TRIP 2 ˚F ˚C
MILES/BAL
L/100 km
Instrumentation
13
Page 21 of 256
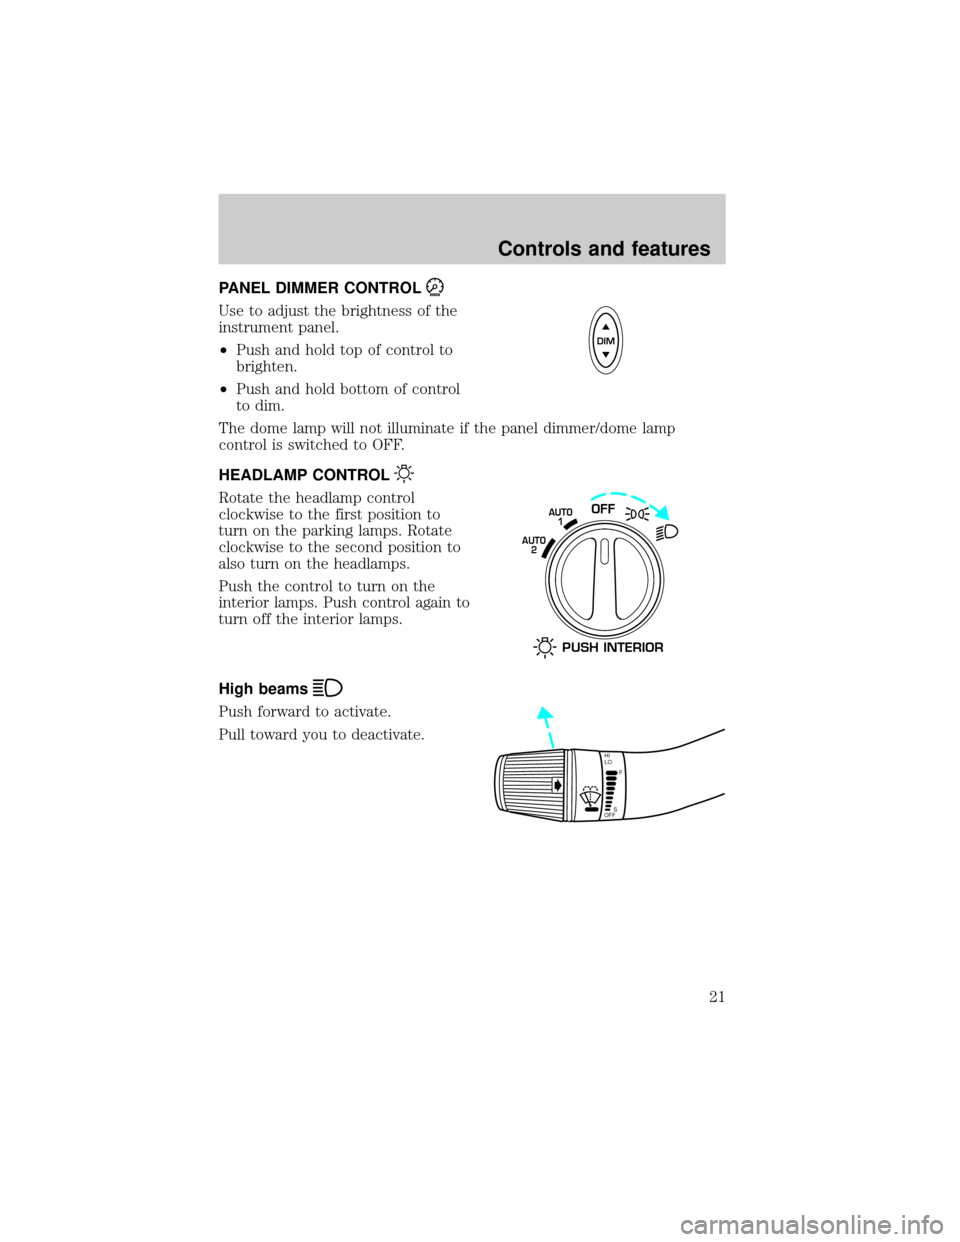
PANEL DIMMER CONTROL
Use to adjust the brightness of the
instrument panel.
²Push and hold top of control to
brighten.
²Push and hold bottom of control
to dim.
The dome lamp will not illuminate if the panel dimmer/dome lamp
control is switched to OFF.
HEADLAMP CONTROL
Rotate the headlamp control
clockwise to the first position to
turn on the parking lamps. Rotate
clockwise to the second position to
also turn on the headlamps.
Push the control to turn on the
interior lamps. Push control again to
turn off the interior lamps.
High beams
Push forward to activate.
Pull toward you to deactivate.
DIM
OFFAUTO
1
AUTO
2
PUSH INTERIOR
HI
LO
F
S
OFF
Controls and features
21
Page 22 of 256
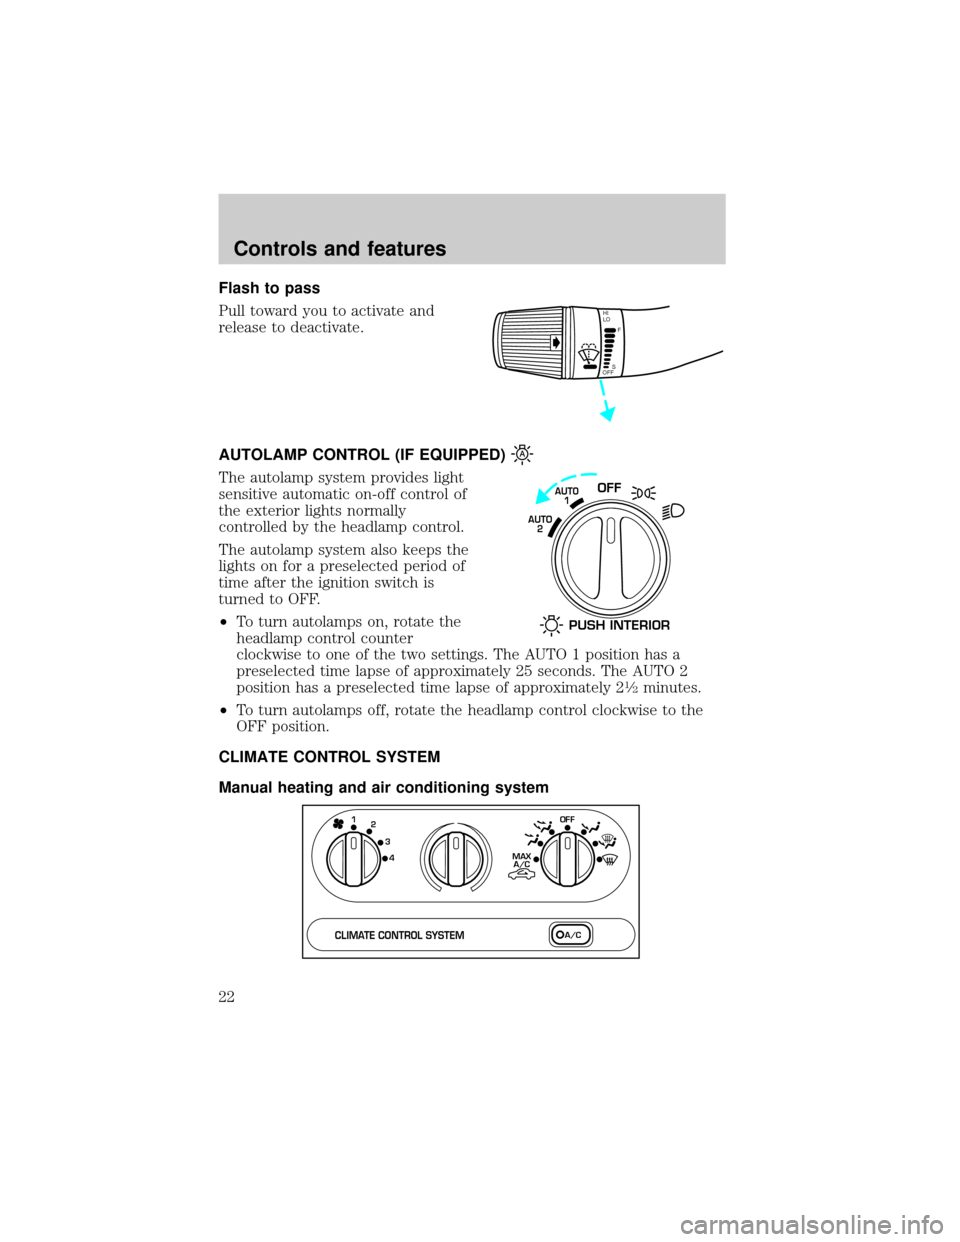
Flash to pass
Pull toward you to activate and
release to deactivate.
AUTOLAMP CONTROL (IF EQUIPPED)
The autolamp system provides light
sensitive automatic on-off control of
the exterior lights normally
controlled by the headlamp control.
The autolamp system also keeps the
lights on for a preselected period of
time after the ignition switch is
turned to OFF.
²To turn autolamps on, rotate the
headlamp control counter
clockwise to one of the two settings. The AUTO 1 position has a
preselected time lapse of approximately 25 seconds. The AUTO 2
position has a preselected time lapse of approximately 2
1¤2minutes.
²To turn autolamps off, rotate the headlamp control clockwise to the
OFF position.
CLIMATE CONTROL SYSTEM
Manual heating and air conditioning system
HI
LO
F
S
OFF
OFFAUTO
1
AUTO
2
PUSH INTERIOR
1
MAX
A/C
A/C OFF2
3
4
CLIMATE CONTROL SYSTEM
Controls and features
22
Page 52 of 256

Your audio system is equipped with selective lighting, a unique lighting
strategy. This lighting feature is operable when the headlamps are
illuminated. During the operation of any selected mode, lighting for the
individual function controls will either illuminate or turn off. Those
controls which have a function for the specific mode of operation
selected will be lit, while the controls which have no function for that
mode will be turned off.
Volume/power control
Press the control to turn the audio
system on or off.
Turn the control to raise or lower
volume.
If the volume is set above a certain level and the ignition is turned off,
the volume will come back on at a ªnominalº listening level when the
ignition switch is turned back on.
AM/FM select
The AM/FM select control works in
radio, tape and CD changer modes
(if equipped).
AM/FM select in radio mode
This control allows you to select AM or FM frequency bands. Press the
control to switch between AM, FM1 or FM2 memory preset stations.
AM/FM select in CD or CD changer mode (if equipped)
Press this control to stop CD play and begin radio play.
VOL
PUSH ON
VOL
PUSH ON
AM
FM
Controls and features
52
Page 63 of 256

Super Sound AM/FM Stereo/Cassette/Single CD Player
(CD Changer Compatible)
Your audio system is equipped with selective lighting, a unique lighting
strategy. This lighting feature is operable when the headlamps are
illuminated. During the operation of any selected mode, lighting for the
individual function controls will either illuminate or turn off. Those
controls which have a function for the specific mode of operation
selected will be lit, while the controls which have no function for that
mode will be turned off.
Volume/power control
Press the control to turn the audio
system on or off.
FM1ST
REW FFSCAN
BASS TREB SEL BALTAPE DISC
EJ CD
FADEAUTO
RDS
CLK
SIDE 1-2 COMP SHUFFLEEJ
MUTE
VOL - PUSH ON
SEEK
TUNE AM FM
12 3456
DOLBY B NR
VOL - PUSH ON
Controls and features
63
Page 103 of 256

Locking the doors
Press this control to lock all doors.
To confirm all doors are closed and
locked, the horn will chirp and the
lamps will flash. The horn chirp
feature can be turned on/off by
holding the LOCK and UNLOCK
controls on the transmitter
simultaneously for two seconds. The
hazard lights will flash three times
each time the system is toggled
between active and non-active
modes.
If any of the doors are ajar, the horn will not chirp and the lights will not
flash.
Sounding a panic alarm
To activate the alarm, press and
hold the PANIC control for longer
than 1.5 seconds. The horn will
sound and the headlamps and tail
lights will flash for thirty (30)
seconds.
To deactivate the alarm, press the
LOCK or UNLOCK or hold the
PANIC control down for longer than
1.5 seconds.
This device complies with part 15 of the FCC rules and with RS-210 of
Industry Canada. Operation is subject to the following two conditions:
(1) This device may not cause harmful interference, and (2) This device
must accept any interference received, including interference that may
cause undesired operation.
Changes or modifications not expressly approved by the party
responsible for compliance could void the user's authority to
operate the equipment.
Illuminated entry
The interior lamps illuminate when the remote entry system is used to
unlock the door(s) or sound the panic alarm.
Controls and features
103
Page 104 of 256
The system automatically turns off after 15 seconds or when the ignition
is turned to the RUN position.
The inside lights will not turn off if:
²they have been turned on with the headlamp control or
²any door is open.
The battery saver will shut off the interior lamps after 30 minutes if the
front door is left open or after 60 minutes if the liftgate is left open.
Replacing the battery
The transmitter is powered by one coin type three-volt lithium battery.
Typical operating range will allow you to be up to 10 meters (33 feet)
away from your vehicle. A decrease in operating range can be caused by:
²weather conditions
²nearby radio towers
²structures around the vehicle
²other vehicles parked next to the vehicle
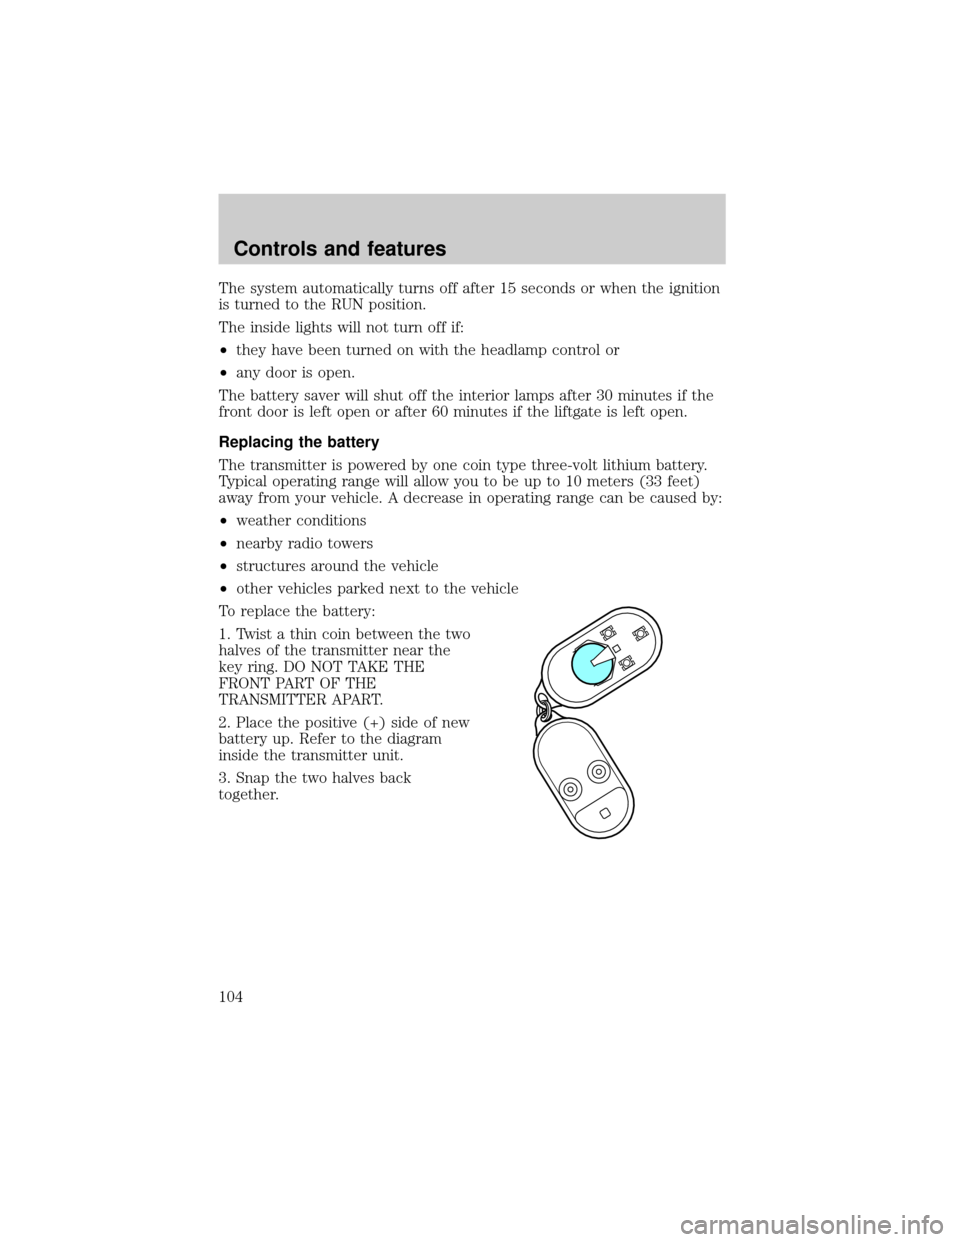
To replace the battery:
1. Twist a thin coin between the two
halves of the transmitter near the
key ring. DO NOT TAKE THE
FRONT PART OF THE
TRANSMITTER APART.
2. Place the positive (+) side of new
battery up. Refer to the diagram
inside the transmitter unit.
3. Snap the two halves back
together.
Controls and features
104
Page 105 of 256
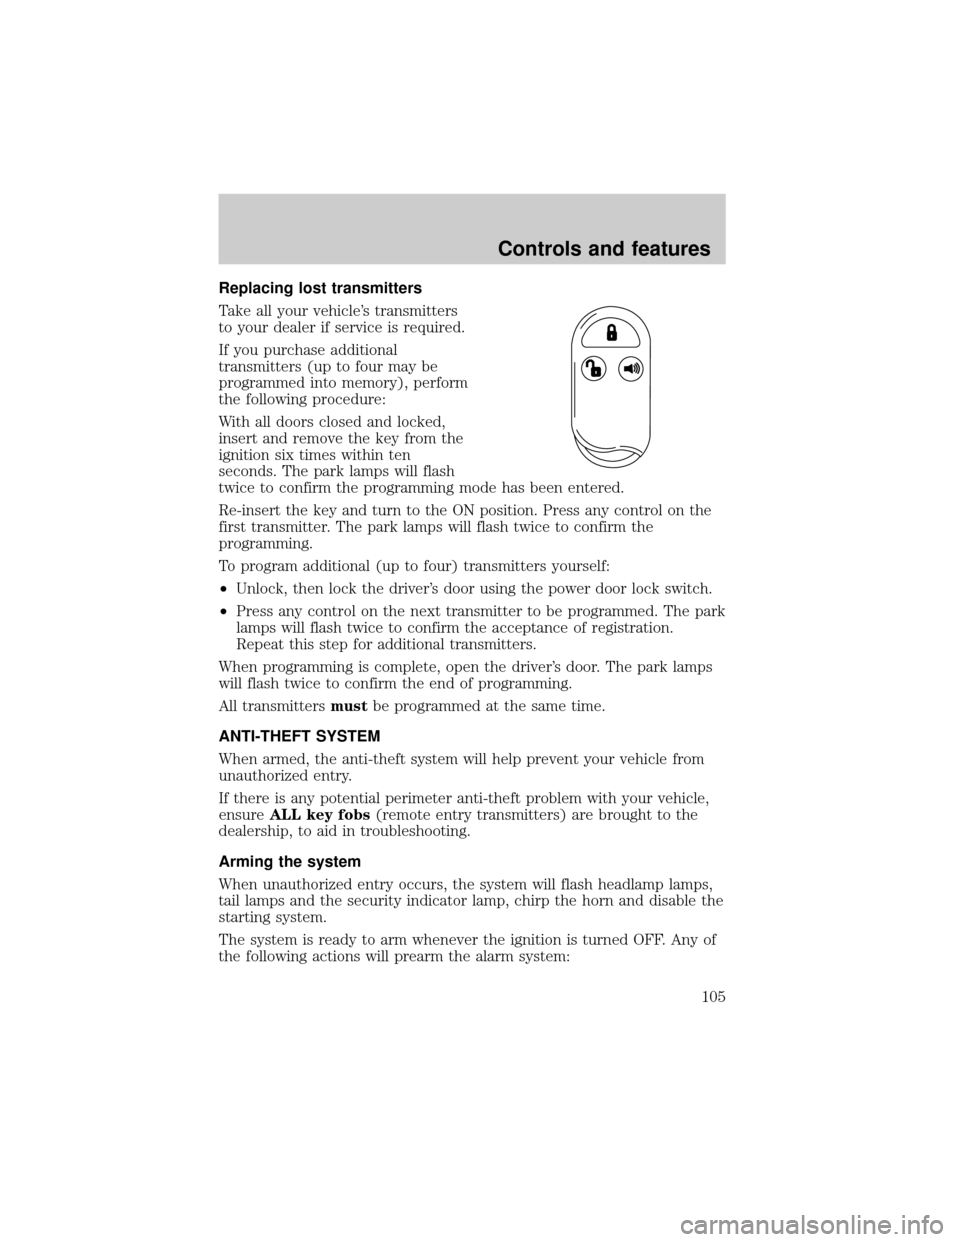
Replacing lost transmitters
Take all your vehicle's transmitters
to your dealer if service is required.
If you purchase additional
transmitters (up to four may be
programmed into memory), perform
the following procedure:
With all doors closed and locked,
insert and remove the key from the
ignition six times within ten
seconds. The park lamps will flash
twice to confirm the programming mode has been entered.
Re-insert the key and turn to the ON position. Press any control on the
first transmitter. The park lamps will flash twice to confirm the
programming.
To program additional (up to four) transmitters yourself:
²Unlock, then lock the driver's door using the power door lock switch.
²Press any control on the next transmitter to be programmed. The park
lamps will flash twice to confirm the acceptance of registration.
Repeat this step for additional transmitters.
When programming is complete, open the driver's door. The park lamps
will flash twice to confirm the end of programming.
All transmittersmustbe programmed at the same time.
ANTI-THEFT SYSTEM
When armed, the anti-theft system will help prevent your vehicle from
unauthorized entry.
If there is any potential perimeter anti-theft problem with your vehicle,
ensureALL key fobs(remote entry transmitters) are brought to the
dealership, to aid in troubleshooting.
Arming the system
When unauthorized entry occurs, the system will flash headlamp lamps,
tail lamps and the security indicator lamp, chirp the horn and disable the
starting system.
The system is ready to arm whenever the ignition is turned OFF. Any of
the following actions will prearm the alarm system:
Controls and features
105