length Mercury Villager 2000 Owner's Manuals
[x] Cancel search | Manufacturer: MERCURY, Model Year: 2000, Model line: Villager, Model: Mercury Villager 2000Pages: 256, PDF Size: 2.21 MB
Page 87 of 256

In any mode:
²Press VOL up or down to adjust
the volume.
TURN SIGNAL CONTROL
²Push down to activate the left
turn signal.
²Push up to activate the right turn
signal.
WINDSHIELD WIPER/WASHER CONTROLS
Rotate the windshield wiper control
to the desired interval, low or high
speed position.
The bars of varying length are for
intermittent wipers. When in this
position rotate the control upward
for fast intervals and downward for
slow intervals.
Push the control on the end of the
stalk to activate washer. Push and
hold for a longer wash cycle. The
washer will automatically shut off
after ten seconds of continuous use.
VOL
NEXT
VOL
HI
LO
F
S
OFF
HI
LO
F
S
OFF
HI
LO
F
S
OFF
Controls and features
87
Page 97 of 256

3. Press and hold the hand-held transmitter button.
4. The HomeLinktindicator light will flash, first slowly and then rapidly.
When the indicator light begins to flash rapidly, release both buttons.
The previous device has now been erased and the new device can be
activated by pushing the HomeLinktbutton that has just been
programmed.
Operating TravelNoteT
TravelNotetrecords and stores messages for up to three minutes in total
length with simple controls. When you get an idea or remember
something important while you're driving, you don't have to try to
scribble it down or pull off the side of the road. All you have to do is
push a button and begin speaking.
To record a message:
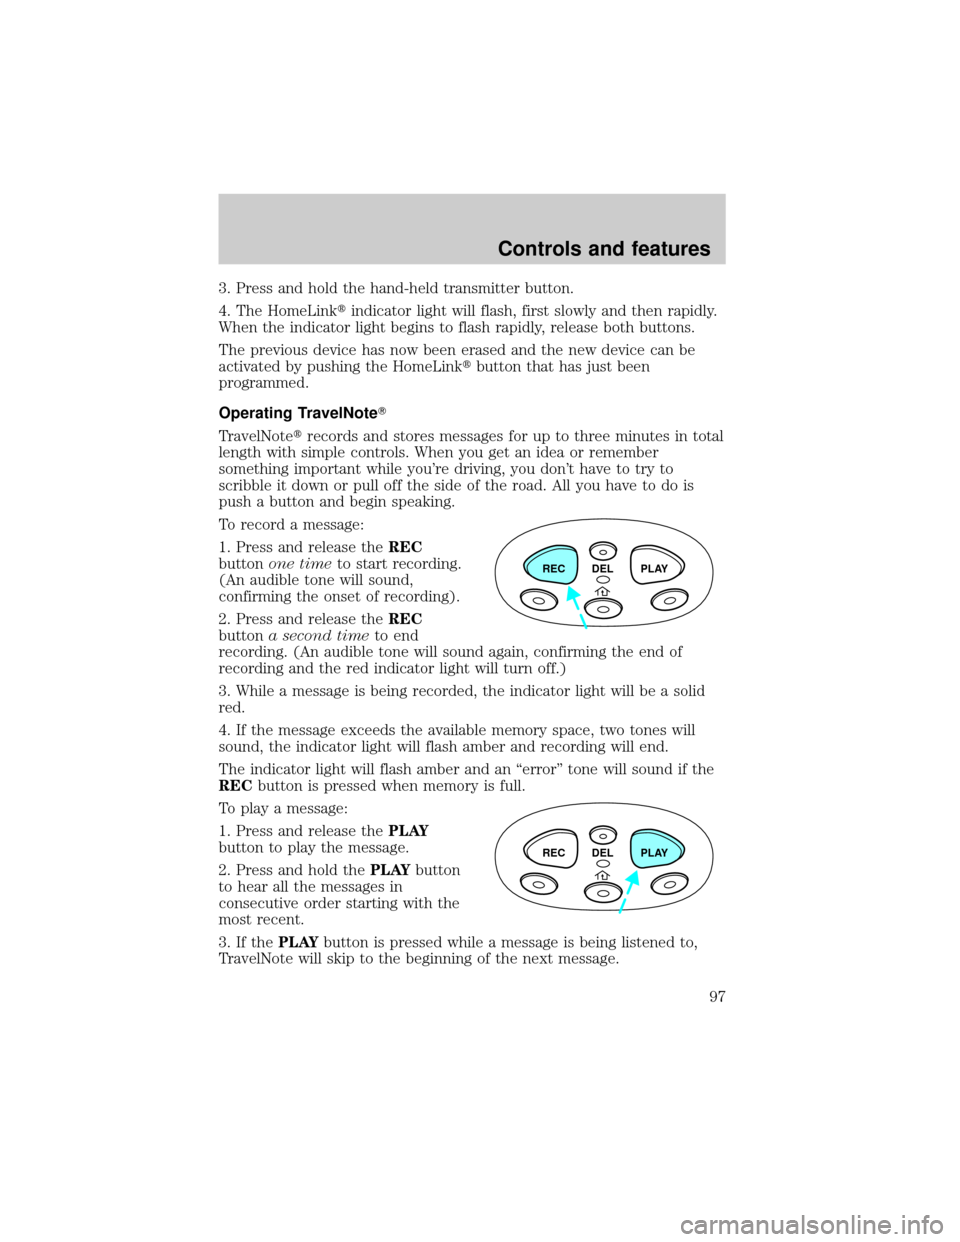
1. Press and release theREC
buttonone timeto start recording.
(An audible tone will sound,
confirming the onset of recording).
2. Press and release theREC
buttona second timeto end
recording. (An audible tone will sound again, confirming the end of
recording and the red indicator light will turn off.)
3. While a message is being recorded, the indicator light will be a solid
red.
4. If the message exceeds the available memory space, two tones will
sound, the indicator light will flash amber and recording will end.
The indicator light will flash amber and an ªerrorº tone will sound if the
RECbutton is pressed when memory is full.
To play a message:
1. Press and release thePLAY
button to play the message.
2. Press and hold thePLAYbutton
to hear all the messages in
consecutive order starting with the
most recent.
3. If thePLAYbutton is pressed while a message is being listened to,
TravelNote will skip to the beginning of the next message.
REC DEL PLAY
REC DEL PLAY
Controls and features
97
Page 128 of 256

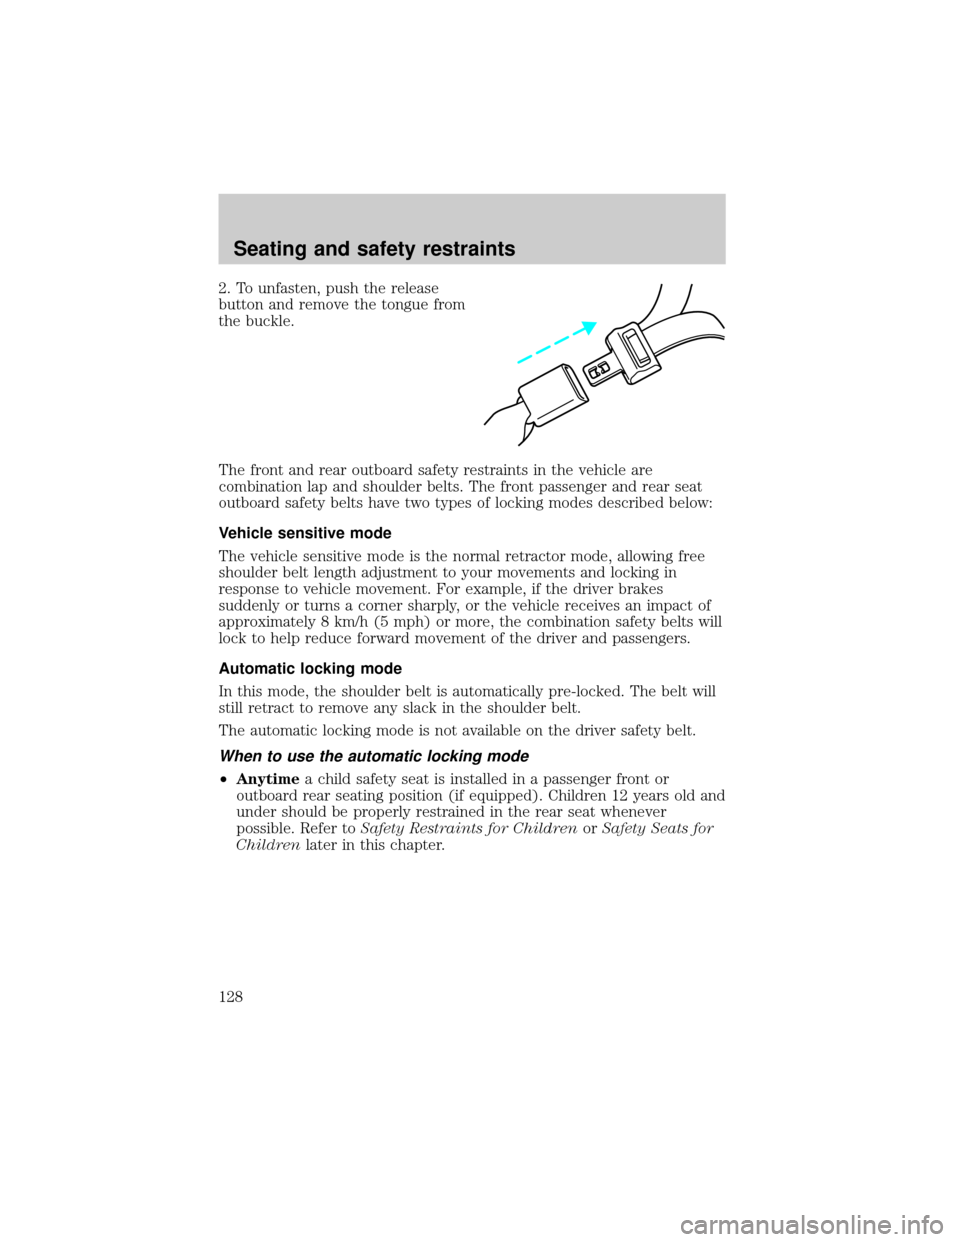
2. To unfasten, push the release
button and remove the tongue from
the buckle.
The front and rear outboard safety restraints in the vehicle are
combination lap and shoulder belts. The front passenger and rear seat
outboard safety belts have two types of locking modes described below:
Vehicle sensitive mode
The vehicle sensitive mode is the normal retractor mode, allowing free
shoulder belt length adjustment to your movements and locking in
response to vehicle movement. For example, if the driver brakes
suddenly or turns a corner sharply, or the vehicle receives an impact of
approximately 8 km/h (5 mph) or more, the combination safety belts will
lock to help reduce forward movement of the driver and passengers.
Automatic locking mode
In this mode, the shoulder belt is automatically pre-locked. The belt will
still retract to remove any slack in the shoulder belt.
The automatic locking mode is not available on the driver safety belt.
When to use the automatic locking mode
²Anytimea child safety seat is installed in a passenger front or
outboard rear seating position (if equipped). Children 12 years old and
under should be properly restrained in the rear seat whenever
possible. Refer toSafety Restraints for ChildrenorSafety Seats for
Childrenlater in this chapter.
Seating and safety restraints
128
Page 130 of 256

Front safety belt height adjustment
Your vehicle has safety belt height
adjustments for the driver and front
passenger. Adjust the height of the
shoulder belt so the belt rests
across the middle of your shoulder.
To lower the shoulder belt height,
push the button and slide the height
adjuster down. To raise the height
of the shoulder belt, slide the height
adjuster up. Pull down on the height
adjuster to make sure it is locked in place.
Position the shoulder belt height adjusters so that the belt rests
across the middle of your shoulder. Failure to adjust the safety
belt properly could reduce the effectiveness of the seat belt and
increase the risk of injury in a collision.
Lap belts
Adjusting the lap belt
The lap belt does not adjust automatically.
The lap belts should fit snugly and as low as possible around the
hips, not around the waist.
Insert the tongue into the correct
buckle (the buckle closest to the
direction the tongue is coming
from). To lengthen the belt, turn the
tongue at a right angle to the belt
and pull across your lap until it
reaches the buckle. To tighten the
belt, pull the loose end of the belt
through the tongue until it fits
snugly across the hips.
Seating and safety restraints
130
Page 142 of 256

7. Pull the lap belt portion across
the child seat toward the buckle and
pull up on the shoulder belt while
pushing down with your knee on the
child seat.
8. Allow the safety belt to retract to
remove any slack in the belt.
9. Before placing the child in the
seat, forcibly tilt the seat forward
and back to make sure the seat is
securely held in place.
10. Try to pull the belt out of the retractor to make sure the retractor is
in the automatic locking mode (you should not be able to pull more belt
out). If the retractor is not locked, unbuckle the belt and repeat steps
two through nine.
Check to make sure the child seat is properly secured before each use.
Installing child safety seats in the lap belt seating positions
1. Lengthen the lap belt. To lengthen the belt, hold the tongue so that its
bottom is perpendicular to the direction of webbing while sliding the
tongue up the webbing.
2. Place the child safety seat in the center seating position.
3. Route the tongue and webbing through the child seat according to the
child seat manufacturer's instructions.
4. Insert the belt tongue into the proper buckle for the center seating
position until you hear a snap and feel it latch. Make sure the tongue is
securely fastened to the buckle by pulling on tongue.
5. Push down on the child seat while pulling on the loose end of the lap
belt webbing to tighten the belt.
Seating and safety restraints
142
Page 157 of 256

Overdrive Ð column mounted gearshift with O/D off switch
The Overdrive position with the O/D
OFF switchnotdepressed is the
normal driving position for this
automatic overdrive transaxle. When your vehicle cruises at a constant
speed for any length of time, this fourth gear will increase your fuel
economy.
Overdrive may not be appropriate
for certain terrains. If the transaxle
shifts back and forth between third
and fourth gears while you are
driving hilly roads or if your vehicle
requires additional power for climbing hills, press the O/D OFF switch.
Each time the vehicle is started, the transaxle will automatically return
to normal overdrive mode.
If your vehicle is on an extremely slippery surface, the Transaxle Control
Module may receive a signal indicating a rapid increase or decrease in
wheel speed. When the module detects this condition, it will limit the
transaxle operation to Third and Reverse gears. This reduces tire
slippage and protects the transaxle. The transaxle will operate normally
in Reverse, but will lack power during acceleration in Drive.
If this happens;
1. Stop your vehicle as soon as possible.
2. Turn the ignition off for three seconds.
3. Restart the vehicle.
If the condition still exists, contact your dealer as soon as possible.
If the O/D OFF indicator light is flashing on and off repeatedly when the
vehicle is started or does not come on when the O/D OFF control is
pressed, there may be a transaxle electronic system malfunction. You
should contact your dealer as soon as possible or damage to the
transaxle could occur.
P RND21
OVERDRIVE
OFF/ON
Driving
157
Page 235 of 256

Item Ford part
nameFord part
numberFord
specification
Disc brake
caliper railsSilicone Brake
Caliper Grease
and Dielectric
CompoundD7AZ-19A331-A
(Motorcraft
WA-10)ESE-M1C171-A
Constant
velocity jointsCV Joint Grease
(High Temp.)E43Z-19590-A ESP-M1C207-A
Windshield
washer fluidUltra-clear
Windshield
Washer
ConcentrateC9AZ-19550-AC ESR-M17P5-A
ENGINE DATA
Engine 3.3L V6 engine
Cubic inches 200
Required fuel 87 octane
Firing order 1-2-3-4-5-6
Spark plug gap 1.0-1.1 mm (0.039-0.043 inch)
Ignition system
1Distributor ignition system
Compression ratio 8.9:1
1This ignition system meets all Canadian Interference-Causing
Equipment standard requirements regulating the impulse electrical field
strength of radio noise.
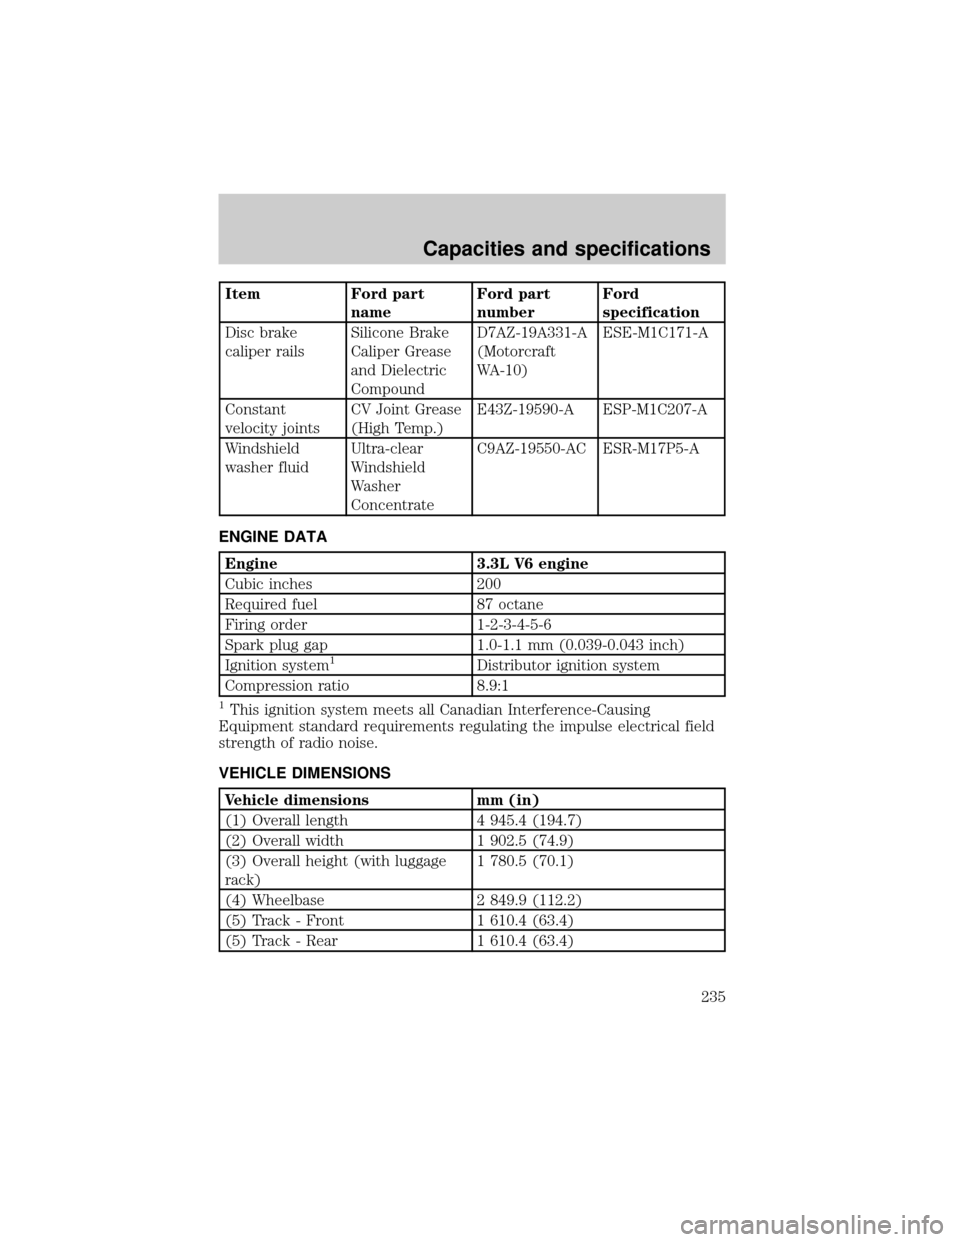
VEHICLE DIMENSIONS
Vehicle dimensions mm (in)
(1) Overall length 4 945.4 (194.7)
(2) Overall width 1 902.5 (74.9)
(3) Overall height (with luggage
rack)1 780.5 (70.1)
(4) Wheelbase 2 849.9 (112.2)
(5) Track - Front 1 610.4 (63.4)
(5) Track - Rear 1 610.4 (63.4)
Capacities and specifications
235
Page 244 of 256

You may also contact the North American Customer Assistance Center at
1-800-392-3673 (Ford), TDD for the hearing impaired: 1-800-232-5952 or
by writing to the Center at the following address:
Ford Motor Company
Customer Assistance Center
16800 Executive Plaza Drive
P.O. Box 6248
Dearborn, Michigan 48121
UTILIZING THE MEDIATION/ARBITRATION PROGRAM
(CANADA ONLY)
In those cases where you continue to feel that the efforts by Ford and
the dealer to resolve a factory-related vehicle service concern have been
unsatisfactory, Ford of Canada participates in an impartial third party
mediation/arbitration program administered by the Canadian Motor
Vehicle Arbitration Plan (CAMVAP).
The CAMVAP program is a straight-forward and relatively speedy
alternative to resolve a disagreement when all other efforts to produce a
settlement have failed. This procedure is without cost to you and is
designed to eliminate the need for lengthy and expensive legal
proceedings.
In the CAMVAP program, impartial third-party arbitrators conduct
hearings at mutually convenient times and places in an informal
environment. These impartial arbitrators review the positions of the
parties, make decisions and, when appropriate, render awards to resolve
disputes. CAMVAP decisions are fast, fair, and final; the arbitrator's
award is binding both to you and Ford of Canada.
CAMVAP services are available in all territories and provinces, except
Quebec. For more information, without charge or obligation, call your
CAMVAP Provincial Administrator directly at 1-800-207-0685.
GETTING ASSISTANCE OUTSIDE THE U.S. AND CANADA
Before exporting your vehicle to a foreign country, contact the
appropriate foreign embassy or consulate. These officials can inform you
of local vehicle registration regulations and where to find unleaded fuel.
If you cannot find unleaded fuel or can only get fuel with an anti-knock
index lower than is recommended for your vehicle, contact a district or
owner relations/customer assistance office.
Customer assistance
244