remove seats Mercury Villager 2000 Owner's Manuals
[x] Cancel search | Manufacturer: MERCURY, Model Year: 2000, Model line: Villager, Model: Mercury Villager 2000Pages: 256, PDF Size: 2.21 MB
Page 110 of 256

Front Cargo net (if equipped)
The front cargo net can be used to
hold small items between the front
seats. To install the net, secure the
hooks into the retainers located on
the inboard base of the front seats.
Parcel Shelf (if equipped)
Your vehicle may be equipped with a
14 kg (30 lbs.) maximum capacity
parcel shelf located behind the rear
seat of your vehicle which can be
positioned to three different heights.
To remove the shelf:
1. Open the liftgate.
2. Disconnect the net loop from the
retainer underneath the shelf to
access the lock knob.
3. Turn the lock knob
counterclockwise and slide the knob
to the UNLATCH position.
4. Remove the shelf from the
vehicle.
To install the shelf:
1. Position and slide the shelf into
the right mounting bracket; then
align the shelf into the left mounting bracket.
2. Slide the lock knob to the LATCH position and tighten the lock knob
clockwise.
3. Connect the net loop to the retainer underneath the shelf and close
the liftgate.
LOCK
Controls and features
110
Page 116 of 256

2. Press and hold the desired memory position button. Within ten
seconds, press the unlock button on the transmitter while the memory
button is pressed.
3. When the transmitter has been programmed, the indicator will flash
five times. The indicator light will remain illuminated until the memory
button is pressed again or ten seconds lapse.
To remove a programmed seat position:
1. Press and hold both memory seat buttons 1 and 2 and then press the
unlock button on the remote entry transmitter.
REAR SEATS
Removable floor mats
Whenever the floor mats are removed to adjust or move any of the rear
seats, always reinstall the mats before passengers ride in the vehicle. The
floor mats are specifically designed to keep objects out of the seat
tracks.
The cargo mat (A.) can be reversed (top to bottom) to retain soils and
liquids.
²7 passenger vehicle
A. Cargo mat
B. Narrow mats
C. Sliding door mats, LH/RH
ACB
Seating and safety restraints
116
Page 117 of 256

²4 passenger vehicle (with third row seat in storage position)
A. Cargo mat
B. Narrow mats
C. Sliding door mats, LH/RH
²5 passenger vehicle (second row seats removed)
A. Cargo mat
B. Narrow mats
C. Sliding door mats, LH/RH
ABCB
BAB
C
Seating and safety restraints
117
Page 118 of 256

²5 passenger vehicle (second row seats removed and third row bench
seat moved forward to limousine seating position)
A. Cargo mat
B. Narrow mats
²Two passenger vehicle (second row seats removed and third row seat
stored in full forward position Ð if equipped with Rear Seat
Entertainment System, the third row seat cannot be put into this
position.)
A. Cargo mat
B. Narrow mats
AB
AB
Seating and safety restraints
118
Page 123 of 256

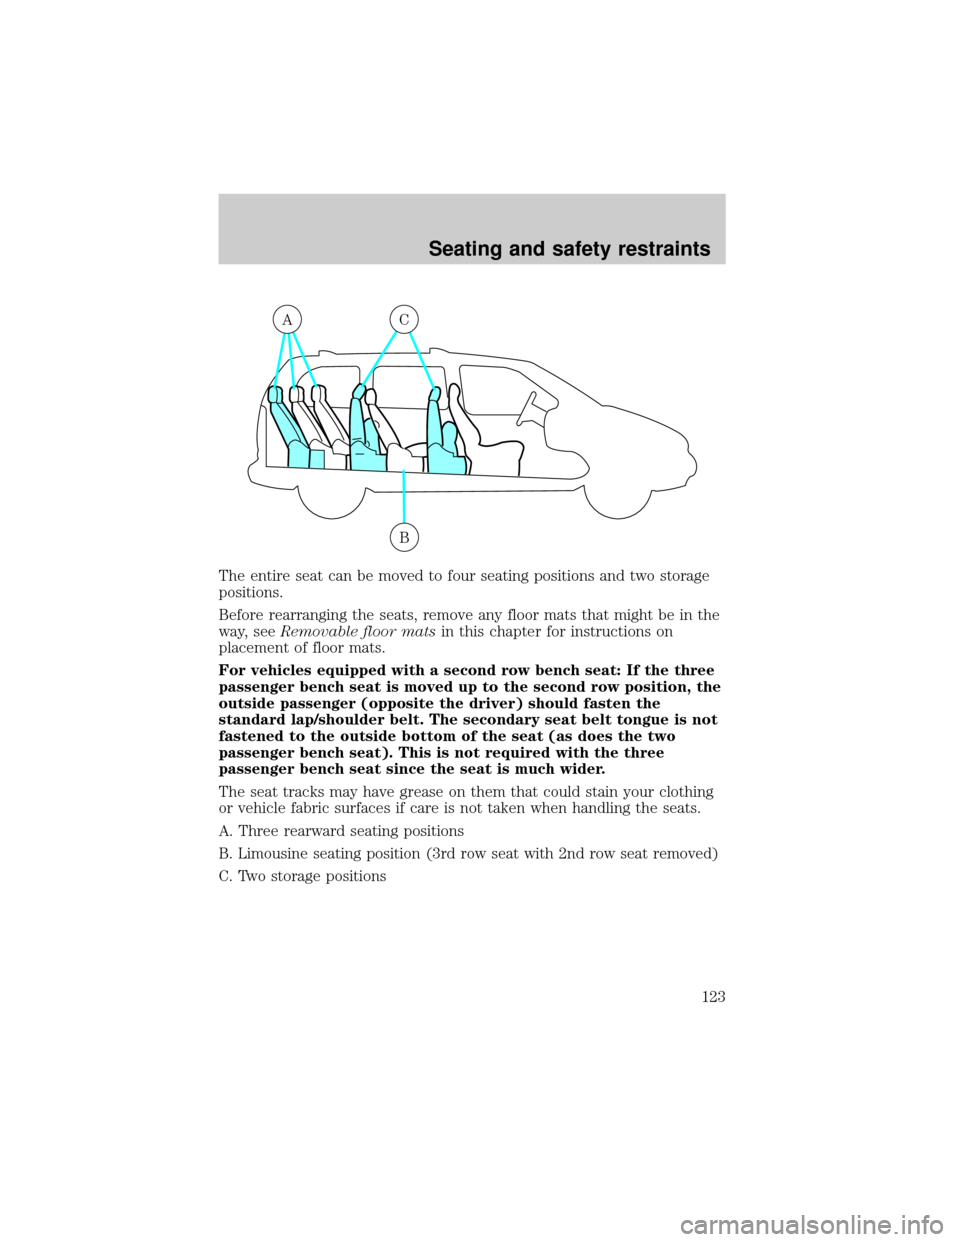
The entire seat can be moved to four seating positions and two storage
positions.
Before rearranging the seats, remove any floor mats that might be in the
way, seeRemovable floor matsin this chapter for instructions on
placement of floor mats.
For vehicles equipped with a second row bench seat: If the three
passenger bench seat is moved up to the second row position, the
outside passenger (opposite the driver) should fasten the
standard lap/shoulder belt. The secondary seat belt tongue is not
fastened to the outside bottom of the seat (as does the two
passenger bench seat). This is not required with the three
passenger bench seat since the seat is much wider.
The seat tracks may have grease on them that could stain your clothing
or vehicle fabric surfaces if care is not taken when handling the seats.
A. Three rearward seating positions
B. Limousine seating position (3rd row seat with 2nd row seat removed)
C. Two storage positions
AC
B
Seating and safety restraints
123
Page 125 of 256

After sliding the seat, check to ensure that both sides of the seat are
locked in position. This must be done before the vehicle is put into
motion in order to prevent unintended movement of the seat.
Every time you adjust any seat, check to be sure that it is
properly latched in the lock position of both seat tracks. If the
seat is not properly latched, it could come loose and increase the risk
of severe injury or death in an accident.
The 3rd row bench seat is not removable.
To remove the 2nd row seat(s):
Use the following instructions for
both bench and bucket seats.
The seat tracks may have grease on
them that could stain your clothing
or vehicle fabric surfaces if care is
not taken when handling the seats.
Fold the seatback flat before
removing each seat. Refer to the
Adjusting 2nd row seatsportion of
this section.
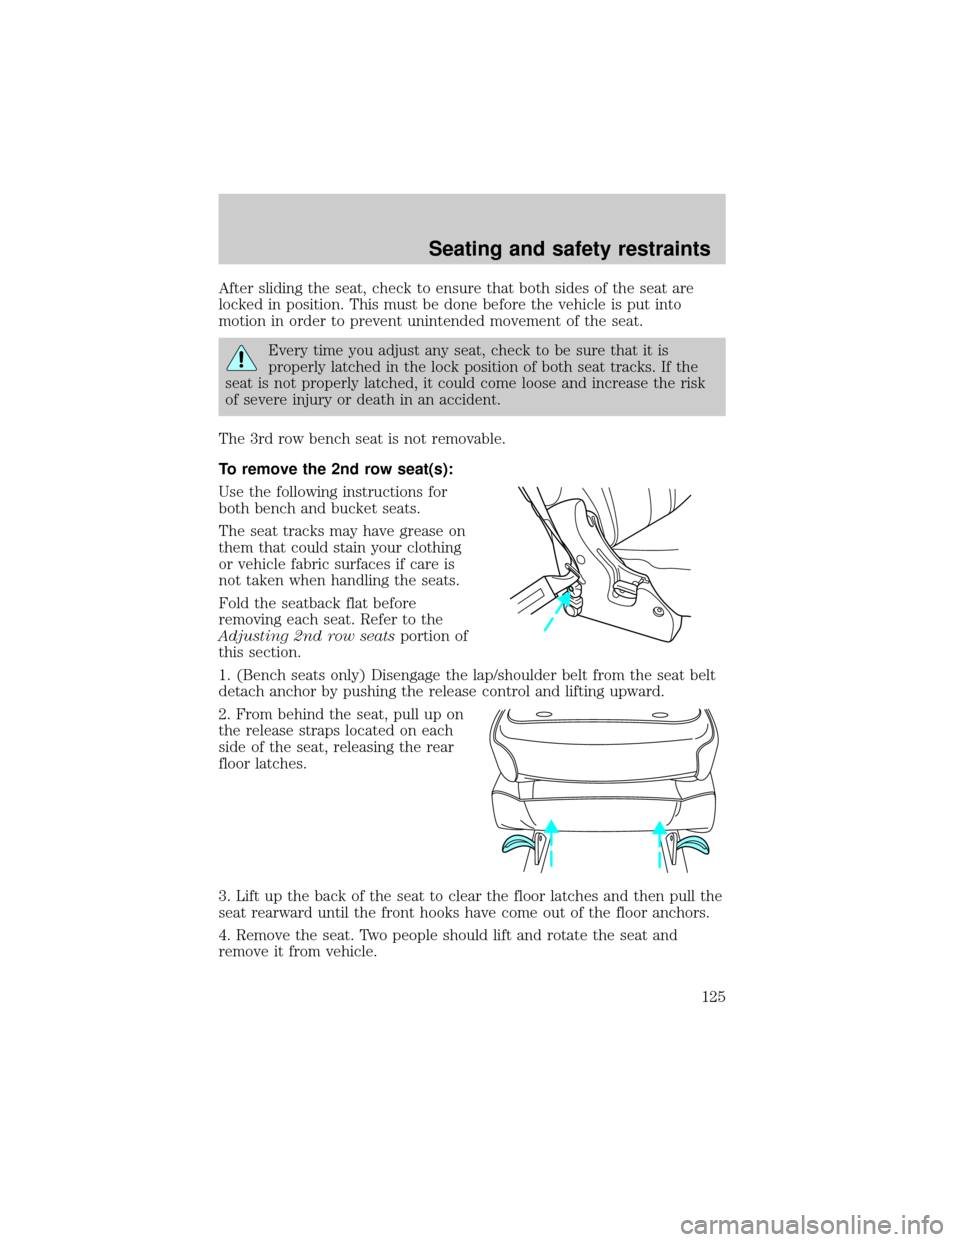
1. (Bench seats only) Disengage the lap/shoulder belt from the seat belt
detach anchor by pushing the release control and lifting upward.
2. From behind the seat, pull up on
the release straps located on each
side of the seat, releasing the rear
floor latches.
3. Lift up the back of the seat to clear the floor latches and then pull the
seat rearward until the front hooks have come out of the floor anchors.
4. Remove the seat. Two people should lift and rotate the seat and
remove it from vehicle.
Seating and safety restraints
125
Page 128 of 256

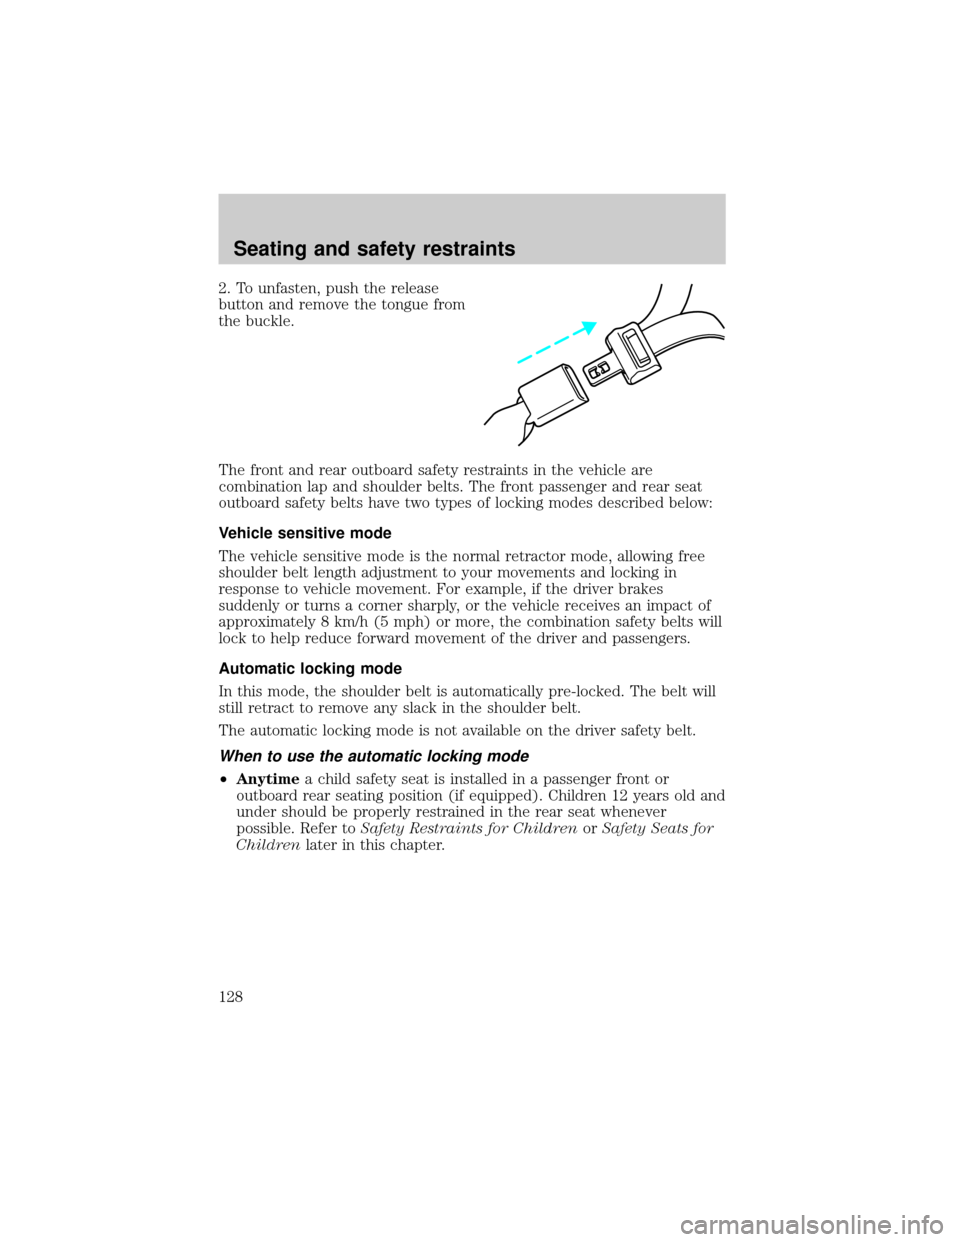
2. To unfasten, push the release
button and remove the tongue from
the buckle.
The front and rear outboard safety restraints in the vehicle are
combination lap and shoulder belts. The front passenger and rear seat
outboard safety belts have two types of locking modes described below:
Vehicle sensitive mode
The vehicle sensitive mode is the normal retractor mode, allowing free
shoulder belt length adjustment to your movements and locking in
response to vehicle movement. For example, if the driver brakes
suddenly or turns a corner sharply, or the vehicle receives an impact of
approximately 8 km/h (5 mph) or more, the combination safety belts will
lock to help reduce forward movement of the driver and passengers.
Automatic locking mode
In this mode, the shoulder belt is automatically pre-locked. The belt will
still retract to remove any slack in the shoulder belt.
The automatic locking mode is not available on the driver safety belt.
When to use the automatic locking mode
²Anytimea child safety seat is installed in a passenger front or
outboard rear seating position (if equipped). Children 12 years old and
under should be properly restrained in the rear seat whenever
possible. Refer toSafety Restraints for ChildrenorSafety Seats for
Childrenlater in this chapter.
Seating and safety restraints
128
Page 139 of 256

When installing a child safety seat:
²Review and follow the information
presented in theAir Bag
Supplemental Restraint System
section in this chapter.
²Use the correct safety belt buckle
for that seating position.
²Insert the belt tongue into the
proper buckle until you hear a
snap and feel it latch. Make sure
the tongue is securely fastened in
the buckle.
²Keep the buckle release button pointing up and away from the safety
seat, with the tongue between the child seat and the release button,
to prevent accidental unbuckling.
²Place seat back in upright position.
²Put the safety belt in the automatic locking mode. Refer toAutomatic
locking mode(passenger side front and outboard rear seating
positions).
Ford recommends the use of a child safety seat having a top tether
strap. Install the child safety seat in a seating position which is capable
of providing a tether anchorage. For more information on top tether
straps, refer toAttaching safety seats with tether straps.
Carefully follow all of the manufacturer's instructions included
with the safety seat you put in your vehicle. If you do not install
and use the safety seat properly, the child may be injured in a sudden
stop or collision.
To properly use child safety tethers in the 3rd row seat position,
remove the parcel shelf and tether child safety seat to the tether
anchor located on the floor behind the 3rd row seat.
Seating and safety restraints
139
Page 142 of 256

7. Pull the lap belt portion across
the child seat toward the buckle and
pull up on the shoulder belt while
pushing down with your knee on the
child seat.
8. Allow the safety belt to retract to
remove any slack in the belt.
9. Before placing the child in the
seat, forcibly tilt the seat forward
and back to make sure the seat is
securely held in place.
10. Try to pull the belt out of the retractor to make sure the retractor is
in the automatic locking mode (you should not be able to pull more belt
out). If the retractor is not locked, unbuckle the belt and repeat steps
two through nine.
Check to make sure the child seat is properly secured before each use.
Installing child safety seats in the lap belt seating positions
1. Lengthen the lap belt. To lengthen the belt, hold the tongue so that its
bottom is perpendicular to the direction of webbing while sliding the
tongue up the webbing.
2. Place the child safety seat in the center seating position.
3. Route the tongue and webbing through the child seat according to the
child seat manufacturer's instructions.
4. Insert the belt tongue into the proper buckle for the center seating
position until you hear a snap and feel it latch. Make sure the tongue is
securely fastened to the buckle by pulling on tongue.
5. Push down on the child seat while pulling on the loose end of the lap
belt webbing to tighten the belt.
Seating and safety restraints
142
Page 231 of 256

Cleaning the instrument panel
Clean with a damp cloth, then dry with a dry cloth.
Avoid cleaner or polish that increases the gloss of the upper portion of
the instrument panel. The dull finish in this area helps protect the driver
from undesirable windshield reflection.
Do not use chemical solvents or strong detergents when cleaning
the steering wheel or instrument panel to avoid contamination of
the air bag system.
Cleaning the instrument cluster lens
Clean with a damp cloth, then dry with a dry cloth.
Do not use household or glass cleaners as these may damage the lens.
Cleaning seats equipped with side air bags
Remove dust and loose dirt with a whisk broom or a vacuum cleaner.
Remove fresh spots immediately. Follow the directions that come with
the cleaner. Do not saturate the seat cover with upholstery cleaner.
Do not use chemical solvents or strong detergents when cleaning
the seat mounted side air bag. Such products could contaminate
the side air bag system and affect performance of the side air bag in a
collision.
Woodtone trim
Wipe stains with a soft cloth and a multi-purpose cleaning solution.
Cleaning the overhead console
Clean with a damp cloth, then wipe dry with a dry cloth.
Avoid cleaner or polish that increases the gloss of the console. The dull
finish in this area helps protect the driver from undesirable windshield
reflection.
Inside windows
Use Ultra-Clear Spray Glass Cleaner (E4AZ-19C507±AA) for the inside
windows if they become fogged.
Maintenance and care
231