ECU Mercury Villager 2001 Owner's Manuals
[x] Cancel search | Manufacturer: MERCURY, Model Year: 2001, Model line: Villager, Model: Mercury Villager 2001Pages: 256, PDF Size: 2.35 MB
Page 7 of 256

OFF REAR 1 2 3 4
1
MAX
A/C
A/C OFF2
3
4
OVERDRIVE
OFF/ON
FFREWSIDE1 - 2
BASS TREB BAL FADE
TAPE
AMSAM
FMCDCLKVOL - PUSH ON
SHUFFLE COMP CD
EJ
CDSCAN
DISCS
TUNESEEK
3 2 1456
DC
12V
SECURITYHAZARD
RR DEFOGRR WIPER
RR WASH
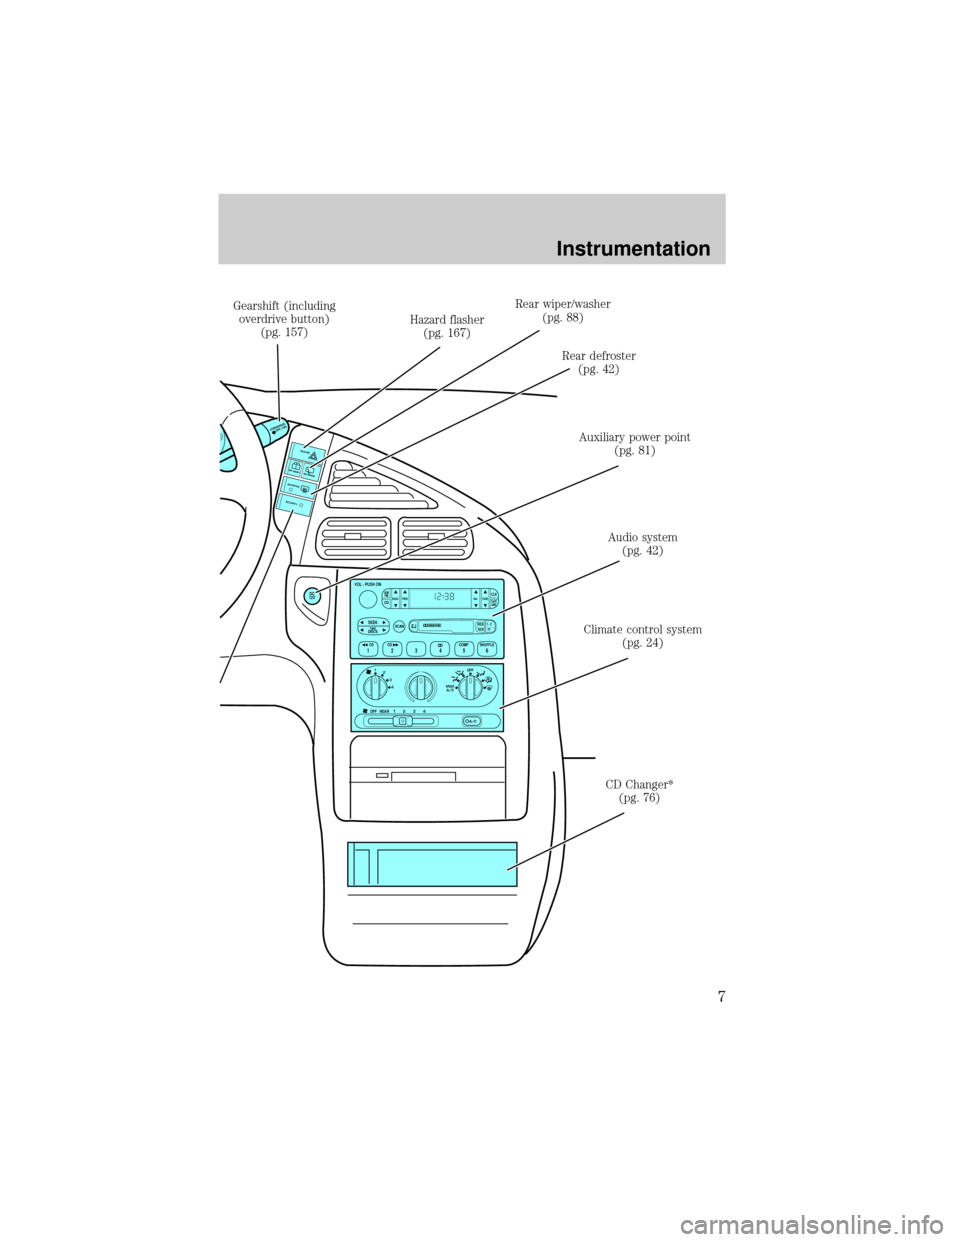
Gearshift (including
overdrive button)
(pg. 157)Hazard flasher
(pg. 167)Rear wiper/washer
(pg. 88)
Rear defroster
(pg. 42)
Auxiliary power point
(pg. 81)
Audio system
(pg. 42)
Climate control system
(pg. 24)
CD Changer*
(pg. 76)
Instrumentation
7
Page 12 of 256

TheService Engine Soonindicator light illuminates when the ignition is
first turned to the ON position to check the bulb. If it comes on after the
engine is started, one of the engine's emission control systems may be
malfunctioning. The light may illuminate without a driveability concern
being noted. The vehicle will usually be drivable and will not require
towing.
What you should do if the Service Engine Soon light illuminates
Light turns on solid:
This means that the OBD II system has detected a malfunction.
Temporary malfunctions may cause yourService Engine Soonlight to
illuminate. Examples are:
1. The vehicle has run out of fuel. (The engine may misfire or run
poorly.)
2. Poor fuel quality or water in the fuel.
3. The fuel cap may not have been properly installed and securely
tightened.
These temporary malfunctions can be corrected by filling the fuel tank
with high quality fuel of the recommended octane and/or properly
installing and securely tightening the gas cap. After three driving cycles
without these or any other temporary malfunctions present, theService
Engine Soonlight should turn off. (A driving cycle consists of a cold
engine startup followed by mixed city/highway driving.) No additional
vehicle service is required.
If theService Engine Soonlight remains on, have your vehicle serviced
at the first available opportunity.
Light is blinking:
Engine misfire is occurring which could damage your catalytic converter.
You should drive in a moderate fashion (avoid heavy acceleration and
deceleration) and have your vehicle serviced at the first available
opportunity.
Under engine misfire conditions, excessive exhaust temperatures
could damage the catalytic converter, the fuel system, interior
floor coverings or other vehicle components, possibly causing a fire.
Instrumentation
12
Page 42 of 256

REAR WINDOW DEFROSTER
The rear defroster control is located
on the instrument panel.
Press the rear defroster control to
clear the rear window of thin ice
and fog.
²The small LED will illuminate
when the rear defroster is
activated.
The ignition must be in the ON position to operate the rear window
defroster.
The defroster turns off automatically after 15 minutes or when the
ignition is turned to the OFF position. To manually turn off the defroster
before 15 minutes have passed, push the control again.
USING YOUR AUDIO SYSTEM
AM/FM Stereo/Cassette (CD changer compatible)
SECURITYHAZARD
RR DEFOGRR WIPER
RR WASH
FFREW
SIDE1 - 2
BASS TREB BAL FADE
TAPE
AMS
AM
FM
CD
CLK
VOL - PUSH ON
SHUFFLE COMP CD
EJ
CDSCAN
DISCS
TUNE
SEEK
3 2 1456
Controls and features
42
Page 78 of 256

5. Line up the CD with the groove
of the disc holder. Ensure that the
label on the CD faces downwards.
6. Press in on the disc holder until it
locks securely into the magazine. If
the disc holders are not fully locked
into the magazine, the unit will not
operate.
Ensure that the disc holder is
evenly inserted and at the same
level as the magazine (A). The unit
will not operate if the disc holder is
not inserted at the same level (B).
Radio power must be turned on to play the CDs in the changer. The
magazine may be stored in the glove box when not being used.
The CD magazine may be inserted or ejected with the radio power on or
off.
ONLY use the magazine type supplied with the CD changer, other types
will damage the unit.
Keep the CD changer door closed. Coins and foreign objects will damage
the CD player and void your audio system warranty.
Do not insert any promotional (odd shaped or sized) discs, or
discs with removable labels into the CD player as jamming may
occur.
Troubleshooting the CD changer (if equipped)
The laser beam used in the compact disc player is harmful to the
eyes. Do not attempt to disassemble the case.
If sound skips:
²You may be traveling on a rough road, playing badly scratched discs or
the disc may be dirty. Skipping will not scratch the discs or damage
the player.
A
B
Controls and features
78
Page 88 of 256

WINDSHIELD WIPER/WASHER CONTROLS
Rotate the windshield wiper control
to the desired interval, low or high
speed position.
The bars of varying length are for
intermittent wipers. When in this
position rotate the control upward
for fast intervals and downward for
slow intervals.
Push the control on the end of the
stalk to activate washer. Push and
hold for a longer wash cycle. The
washer will automatically shut off
after ten seconds of continuous use.
Rear window wiper and washer
Press the wiper control to activate
the rear wiper. Press again to turn
off the wiper. The wiper operates at
a pre-set interval.
HI
LO
F
S
OFF
HI
LO
F
S
OFF
SECURITY HAZARD
RR DEFOGRR WIPER RR WASH
Controls and features
88
Page 89 of 256

Press the washer control to activate
the rear washer. The wiper will
come on when the washer control is
pressed, if it is not already on.
HAZARD FLASHER
For information on the hazard flasher control, refer toHazard flasherin
theRoadside emergencieschapter.
OVERDRIVE CONTROL
Activating overdrive
D (Overdrive) is the normal drive position for the best fuel economy.
The overdrive function allows automatic upshifts from third to fourth
gear.
Deactivating overdrive
Press the Transmission Control
Switch (TCS) located on the end of
the gearshift lever. The O/D OFF
indicator light will illuminate.
The transaxle will operate in all
gears except overdrive. To return to normal overdrive mode, press the
Transmission Control Switch again. The O/D OFF indicator light will no
longer be illuminated.
When you shut off and re-start your vehicle, the transaxle will
automatically return to normal D (Overdrive) mode.
SECURITYHAZARD
RR DEFOGRR WIPER RR WASH
OVERDRIVE
OFF/ON
Controls and features
89
Page 94 of 256

2. Move the control in the direction
you wish to tilt the mirror.
3. Return to the center position to lock mirrors in place.
Heated outside mirrors (if equipped)
Both mirrors are heated
automatically to remove ice, mist
and fog when the rear window
defrost is activated.
Do not remove ice from the mirrors
with a scraper or attempt to readjust
the mirror glass if it is frozen in
place. These actions could cause
damage to the glass and mirrors.
HOMELINKTUNIVERSAL TRANSCEIVER (IF EQUIPPED)
The HomeLinktUniversal Transceiver, located on the driver's visor,
provides a convenient way to replace up to three hand-held transmitters
with a single built-in device. This feature will learn the radio frequency
codes of most current transmitters to operate garage doors, entry gates,
security systems, entry door locks, and home or office lighting.
When programming your HomeLinktUniversal Transceiver, to a
garage door or gate be sure that people and objects are out of
the way to prevent potential harm or damage.
Do not use the HomeLinktUniversal Transceiver with any garage door
opener that lacks safety stop and reverse features as required by U.S.
federal safety standards (this includes any garage door opener model
manufactured before April 1, 1982). A garage door which cannot detect
an object, signaling the door to stop and reverse, does not meet current
U.S. federal safety standards. For more information on this matter, call
toll-free: 1±800±355±3515 or on the Internet atHomeLink.jci.com.
MIRRORS
L R
Controls and features
94
Page 104 of 256

Re-insert the key and turn to the ON position. Press any control on the
first transmitter. The park lamps will flash twice to confirm the
programming.
To program additional (up to four) transmitters yourself:
²Unlock, then lock the driver's door using the power door lock switch.
²Press any control on the next transmitter to be programmed. The park
lamps will flash twice to confirm the acceptance of registration.
Repeat this step for additional transmitters.
When programming is complete, open the driver's door. The park lamps
will flash twice to confirm the end of programming.
All transmittersmustbe programmed at the same time.
ANTI-THEFT SYSTEM
When armed, the anti-theft system will help prevent your vehicle from
unauthorized entry.
If there is any potential perimeter anti-theft problem with your vehicle,
ensureALL key fobs(remote entry transmitters) are brought to the
dealership, to aid in troubleshooting.
Arming the system
When unauthorized entry occurs, the system will flash headlamp lamps,
tail lamps and the security indicator lamp, chirp the horn and disable the
starting system.
The system is ready to arm whenever the key is removed from the
ignition. Any of the following actions will prearm the alarm system:
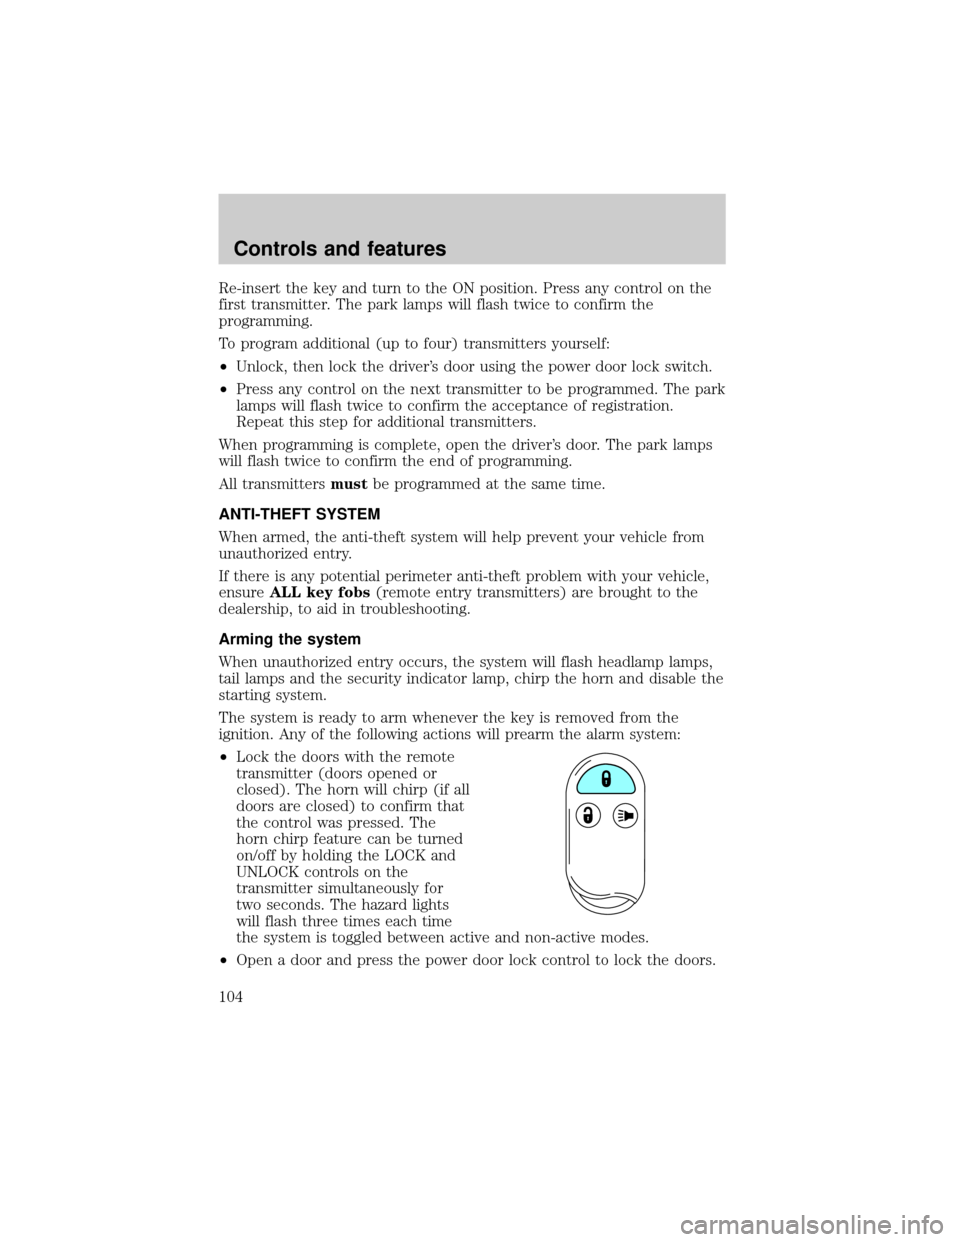
²Lock the doors with the remote
transmitter (doors opened or
closed). The horn will chirp (if all
doors are closed) to confirm that
the control was pressed. The
horn chirp feature can be turned
on/off by holding the LOCK and
UNLOCK controls on the
transmitter simultaneously for
two seconds. The hazard lights
will flash three times each time
the system is toggled between active and non-active modes.
²Open a door and press the power door lock control to lock the doors.
Controls and features
104
Page 105 of 256

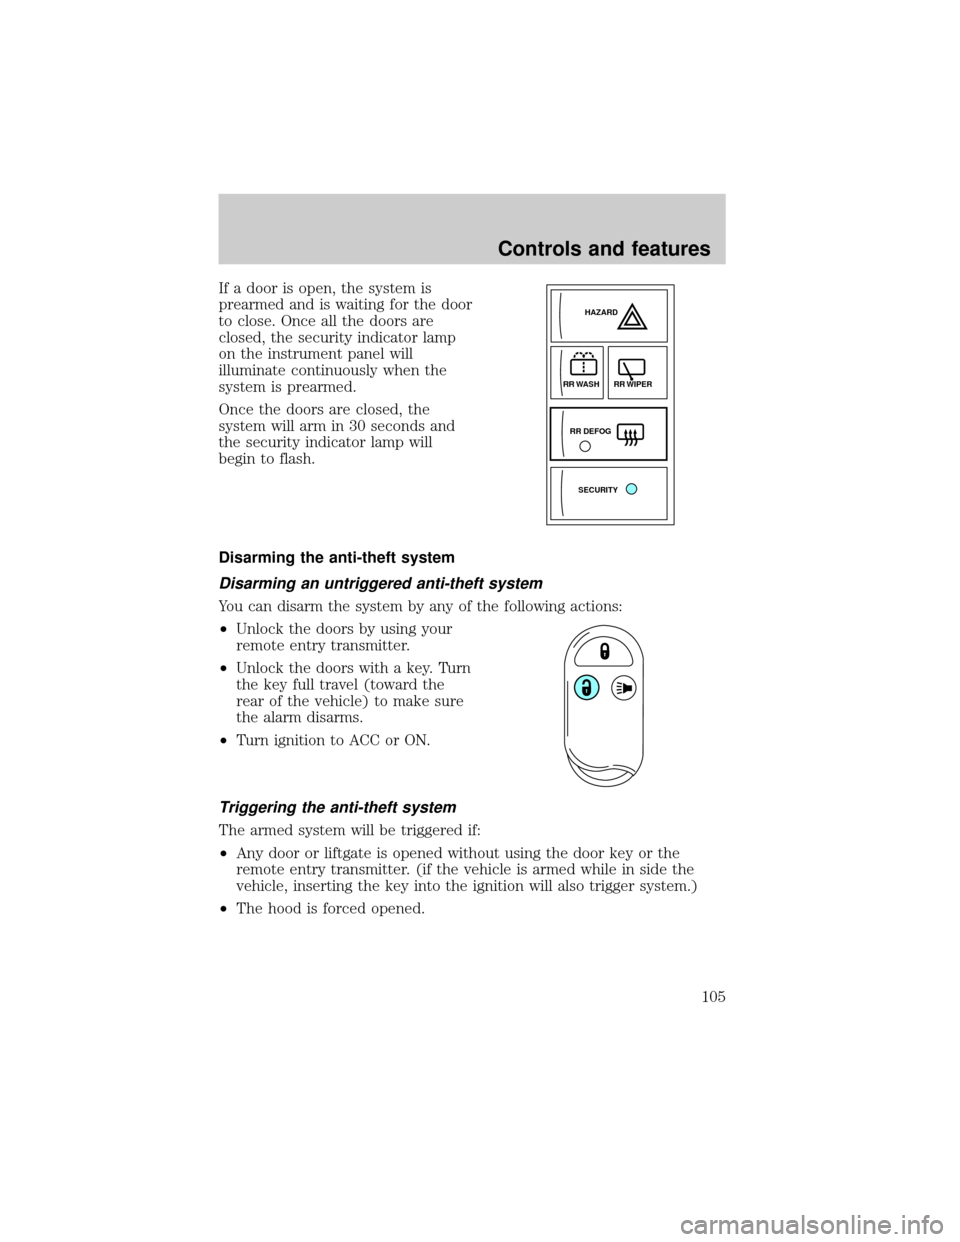
If a door is open, the system is
prearmed and is waiting for the door
to close. Once all the doors are
closed, the security indicator lamp
on the instrument panel will
illuminate continuously when the
system is prearmed.
Once the doors are closed, the
system will arm in 30 seconds and
the security indicator lamp will
begin to flash.
Disarming the anti-theft system
Disarming an untriggered anti-theft system
You can disarm the system by any of the following actions:
²Unlock the doors by using your
remote entry transmitter.
²Unlock the doors with a key. Turn
the key full travel (toward the
rear of the vehicle) to make sure
the alarm disarms.
²Turn ignition to ACC or ON.
Triggering the anti-theft system
The armed system will be triggered if:
²Any door or liftgate is opened without using the door key or the
remote entry transmitter. (if the vehicle is armed while in side the
vehicle, inserting the key into the ignition will also trigger system.)
²The hood is forced opened.
SECURITYHAZARD
RR DEFOGRR WIPER
RR WASH
Controls and features
105
Page 107 of 256

Cargo Area Features
Rear Cargo net
The cargo net helps stabilize lightweight objects in the cargo area.
Attach the net to the anchors provided. The cargo restrained in the net
must not exceed 22 kg (50 lbs.) or the net may not stay secured.
The cargo net is not designed to restrain objects during a
collision or heavy braking.
Front Cargo net (if equipped)
The front cargo net can be used to
hold small items between the front
seats. To install the net, secure the
hooks into the retainers located on
the inboard base of the front seats.
Controls and features
107