buttons MINI 3 door 2013 User Guide
[x] Cancel search | Manufacturer: MINI, Model Year: 2013, Model line: 3 door, Model: MINI 3 door 2013Pages: 233, PDF Size: 17.19 MB
Page 114 of 233
Interior equipmentVehicle equipmentAll standard, country-specific and optional
equipment that is offered in the model series is
described in this chapter. Therefore, equipment
is also described that is not available in a vehi‐
cle, e. g., because of the selected optional
equipment or country variant. This also applies
for safety-related functions and systems.
Universal garage dooropener
The concept
The universal garage door opener can operate
up to 3 functions of remote-controlled systems
such as garage door drives or lighting systems.
The universal garage door opener replaces up
to 3 different hand-held transmitters. To oper‐
ate the remote control, the buttons on the inte‐
rior rearview mirror must be programmed with
the desired functions. The hand-held transmit‐
ter for the particular system is required in order
to program the remote control.
During programming
During programming and before activat‐
ing a device using the integrated universal re‐
mote control, ensure that there are no people,
animals, or objects in the range of movement
of the remote-controlled device; otherwise,
there is a risk of injury or damage.
Also follow the safety instructions of the hand-
held transmitter. ◀
Before selling the vehicle, delete the stored
functions for the sake of security.Compatibility
If this symbol is printed on the packag‐
ing or in the instructions of the system
to be controlled, the system is generally
compatible with the universal garage door
opener.
If you have any questions, please contact:▷Your service center.▷www.homelink.com on the Internet.
HomeLink is a registered trademark of Johnson
Controls, Inc.
At a glance
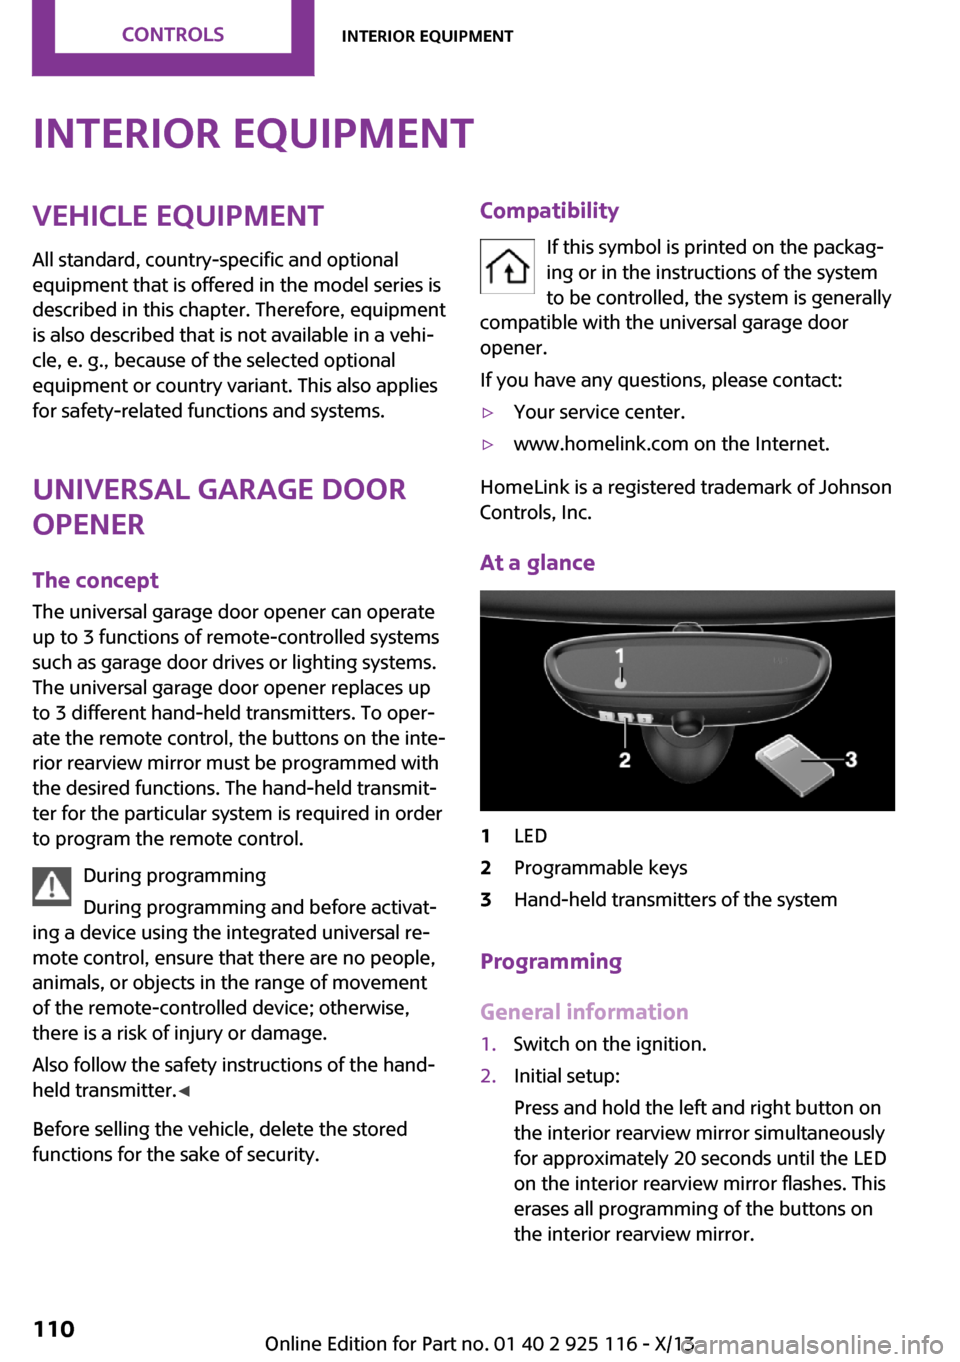
1LED2Programmable keys3Hand-held transmitters of the system
Programming
General information
1.Switch on the ignition.2.Initial setup:
Press and hold the left and right button on
the interior rearview mirror simultaneously
for approximately 20 seconds until the LED
on the interior rearview mirror flashes. This
erases all programming of the buttons on
the interior rearview mirror.Seite 110ControlsInterior equipment110
Online Edition for Part no. 01 40 2 925 116 - X/13
Page 115 of 233
3.Hold the hand-held transmitter for the sys‐
tem to be controlled approx. 1 to 3 in/2.5
to 8 cm away from the buttons on the inte‐
rior rearview mirror. The required distance
depends on the manual transmitter.4.Simultaneously press and hold the button
of the desired function on the hand-held
transmitter and the button to be program‐
med on the interior rearview mirror. The
LED on the interior rearview mirror will be‐
gin flashing slowly.5.Release both buttons as soon as the LED
flashes more rapidly. When the LED is flash‐
ing faster, this indicates that the button on
the interior rearview mirror has been pro‐
grammed.
If the LED does not flash faster after at least
60 seconds, change the distance between
the interior rearview mirror and the hand-
held transmitter and repeat the step. Sev‐
eral more attempts at different distances
may be necessary. Wait at least 15 seconds
between attempts.
Canada: if programming with the hand-
held transmitter was interrupted, hold
down the interior rearview mirror button
and repeatedly press and release the hand-
held transmitter button for 2 seconds.6.To program other functions on other but‐
tons, repeat steps 3 to 5.
The systems can be controlled using the interior
rearview mirror buttons.
Special feature of the alternating-code
wireless system
If you are unable to operate the system after
repeated programming, please check if the sys‐
tem to be controlled features an alternating-
code system.
Read the system's operating manual, or press
the programmed button on the interior rear‐
view mirror longer. If the LED on the interior
rearview mirror starts flashing rapidly and then
stays lit constantly for 2 seconds, the system
features an alternating-code system. Flashing
and continuous illumination of the LED will re‐
peat for approximately 20 seconds.
For systems with an alternating-code system,
the universal garage door opener and the sys‐
tem also have to be synchronized.
Please read the operating manual of the sys‐
tem being set up for information on how to
synchronize the system.
Synchronizing is easier with the aid of a second
person.
To synchronize:1.Park the vehicle within range of the re‐
mote-controlled system.2.Program the relevant button on the interior
rearview mirror as described.3.Locate and press the synchronizing button
on the system being programmed. You
have approx. 30 seconds for the next step.4.Hold down the programmed button on the
interior rearview mirror for approximately
3 seconds and then release it. If necessary,
repeat this work step up to three times in
order to finish synchronization. Once syn‐
chronization is complete, the programmed
function will be carried out.
Reprogramming individual buttons
1.Switch on the ignition.2.Press and hold the interior rearview mirror
button to be programmed.3.As soon as the interior rearview mirror LED
starts flashing slowly, hold the hand-held
transmitter for the system to be controlled
approx. 1 to 3 in/2.5 to 8 cm away from the
buttons on the interior rearview mirror. The
required distance depends on the manual
transmitter.Seite 111Interior equipmentControls111
Online Edition for Part no. 01 40 2 925 116 - X/13
Page 116 of 233
4.Likewise, press and hold the button of the
desired function on the hand-held trans‐
mitter.5.Release both buttons as soon as the interior
rearview mirror LED flashes more rapidly.
When the LED is flashing faster, this indi‐
cates that the button on the interior rear‐
view mirror has been programmed. The
system can then be controlled by the but‐
ton on the interior rearview mirror.
If the LED does not flash faster after at least
60 seconds, change the distance and re‐
peat the step. Several more attempts at dif‐
ferent distances may be necessary. Wait at
least 15 seconds between attempts.
Canada: if programming with the hand-
held transmitter was interrupted, hold
down the interior rearview mirror button
and repeatedly press and release the hand-
held transmitter button for 2 seconds.
Controls
Before operation
Before operating a system using the
integrated universal remote control, ensure
that there are no people, animals, or objects
within the range of movement of the remote-
controlled system; otherwise, there is a risk of
injury or damage.
Also follow the safety instructions of the hand- held transmitter. ◀
The system, such as the garage door, can be
operated using the button on the interior rear‐
view mirror while the engine is running or
when the ignition is started. To do this, hold down the button within receiving range of the
system until the function is activated. The inte‐
rior rearview mirror LED stays lit while the wire‐
less signal is being transmitted.
Deleting stored functions
Press and hold the left and right button on the
interior rearview mirror simultaneously for ap‐
proximately 20 seconds until the LED flashes
rapidly. All stored functions are deleted. The
functions cannot be deleted individually.
Digital compass
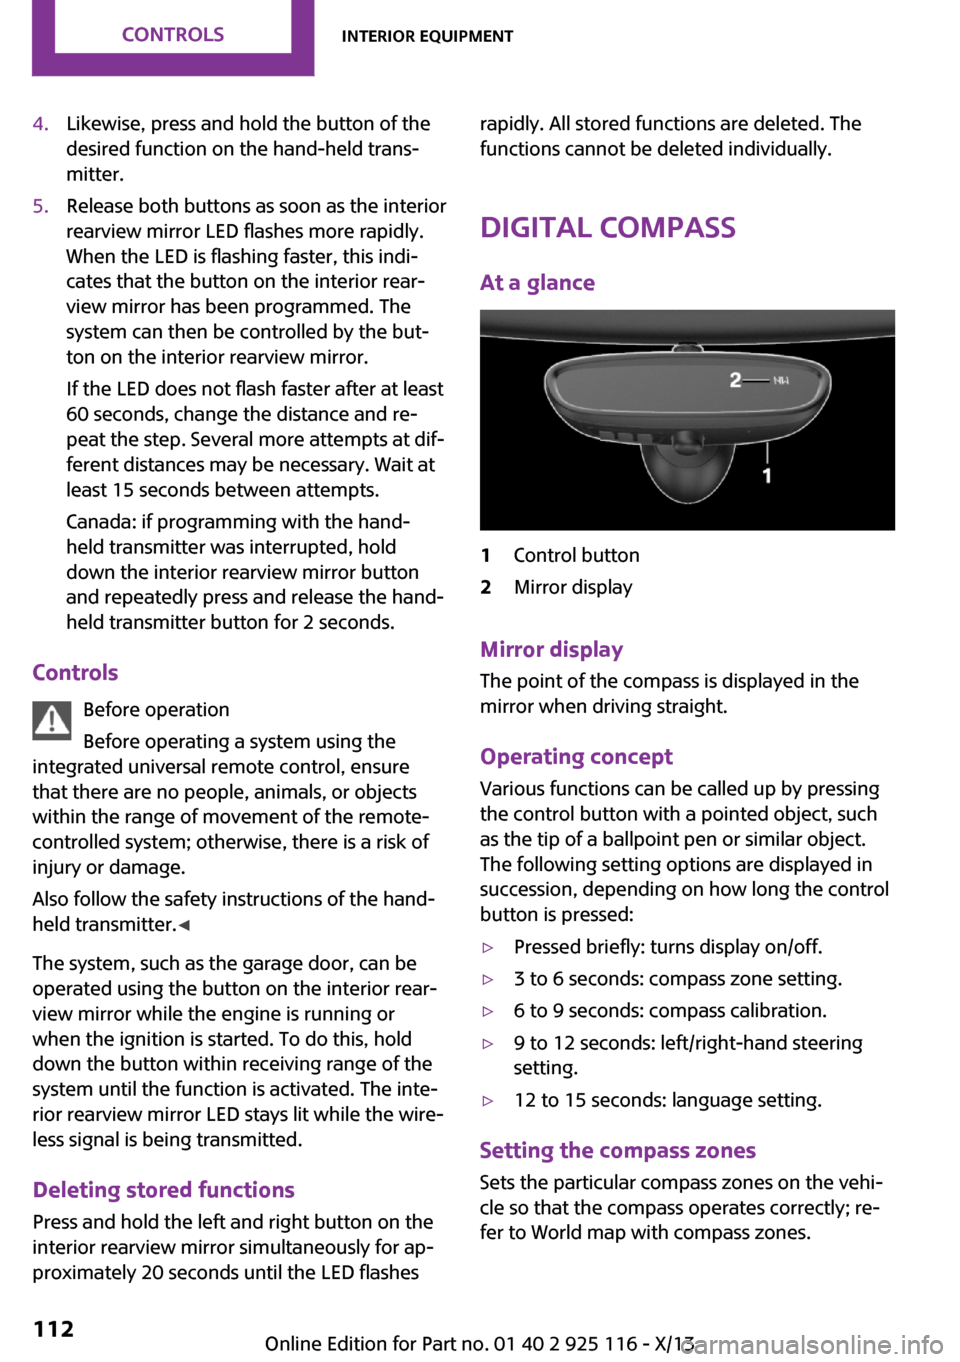
At a glance1Control button2Mirror display
Mirror display The point of the compass is displayed in the
mirror when driving straight.
Operating concept Various functions can be called up by pressing
the control button with a pointed object, such
as the tip of a ballpoint pen or similar object.
The following setting options are displayed in
succession, depending on how long the control
button is pressed:
▷Pressed briefly: turns display on/off.▷3 to 6 seconds: compass zone setting.▷6 to 9 seconds: compass calibration.▷9 to 12 seconds: left/right-hand steering
setting.▷12 to 15 seconds: language setting.
Setting the compass zones
Sets the particular compass zones on the vehi‐
cle so that the compass operates correctly; re‐
fer to World map with compass zones.
Seite 112ControlsInterior equipment112
Online Edition for Part no. 01 40 2 925 116 - X/13
Page 143 of 233
RadioVehicle equipment
All standard, country-specific and optional
equipment that is offered in the model series is
described in this chapter. Therefore, equipment
is also described that is not available in a vehi‐
cle, e. g., because of the selected optional
equipment or country variant. This also applies
for safety-related functions and systems.
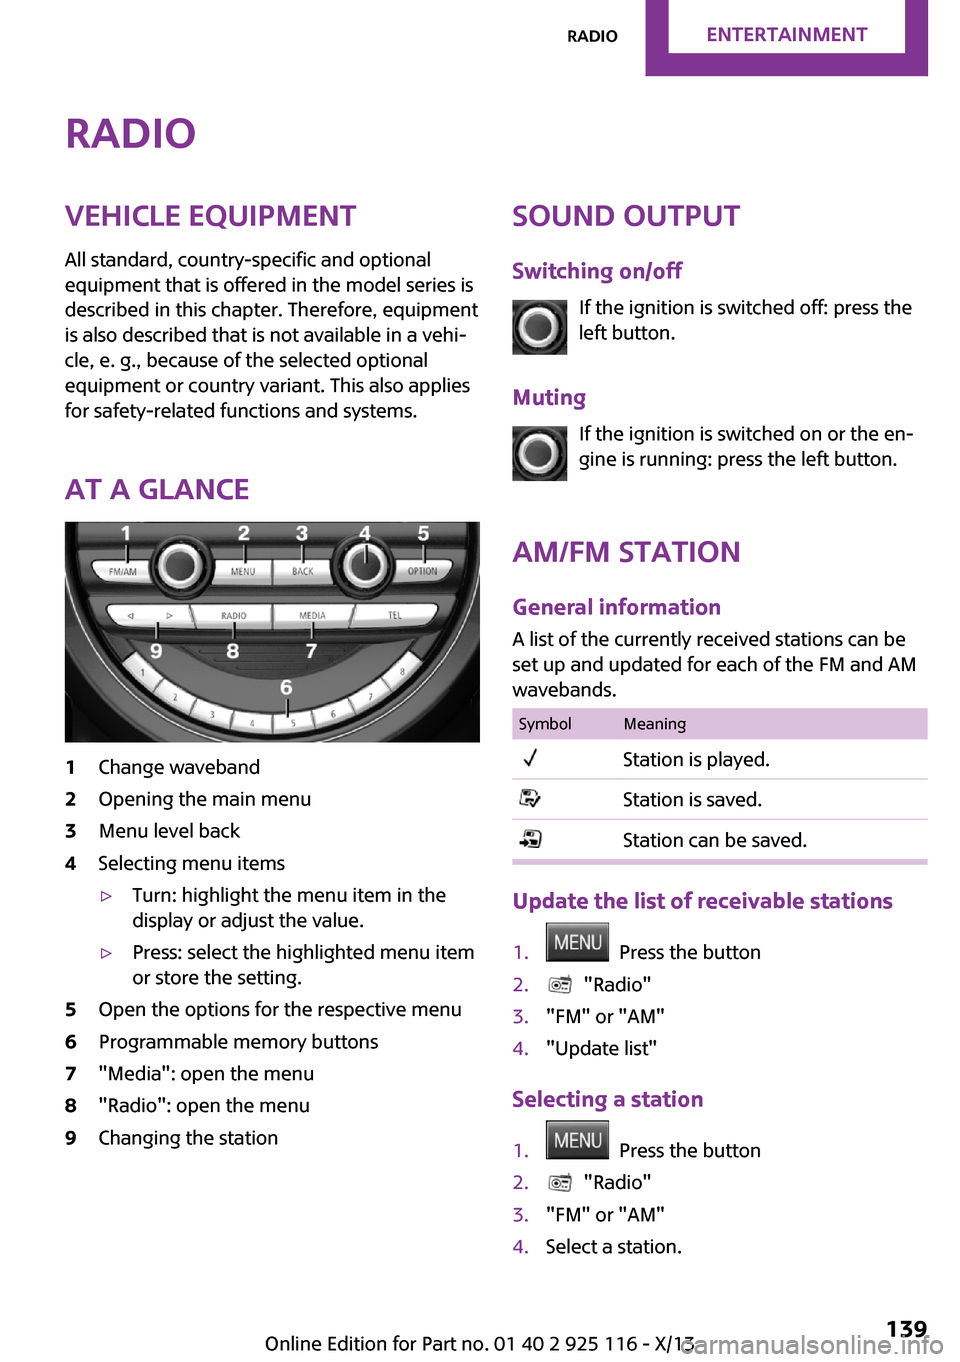
At a glance1Change waveband2Opening the main menu3Menu level back4Selecting menu items▷Turn: highlight the menu item in the
display or adjust the value.▷Press: select the highlighted menu item
or store the setting.5Open the options for the respective menu6Programmable memory buttons7"Media": open the menu8"Radio": open the menu9Changing the stationSound output
Switching on/off If the ignition is switched off: press the
left button.
Muting If the ignition is switched on or the en‐
gine is running: press the left button.
AM/FM station General information
A list of the currently received stations can be
set up and updated for each of the FM and AM
wavebands.SymbolMeaningStation is played.Station is saved.Station can be saved.
Update the list of receivable stations
1. Press the button2. "Radio"3."FM" or "AM"4."Update list"
Selecting a station
1. Press the button2. "Radio"3."FM" or "AM"4.Select a station.Seite 139RadioEntertainment139
Online Edition for Part no. 01 40 2 925 116 - X/13
Page 144 of 233
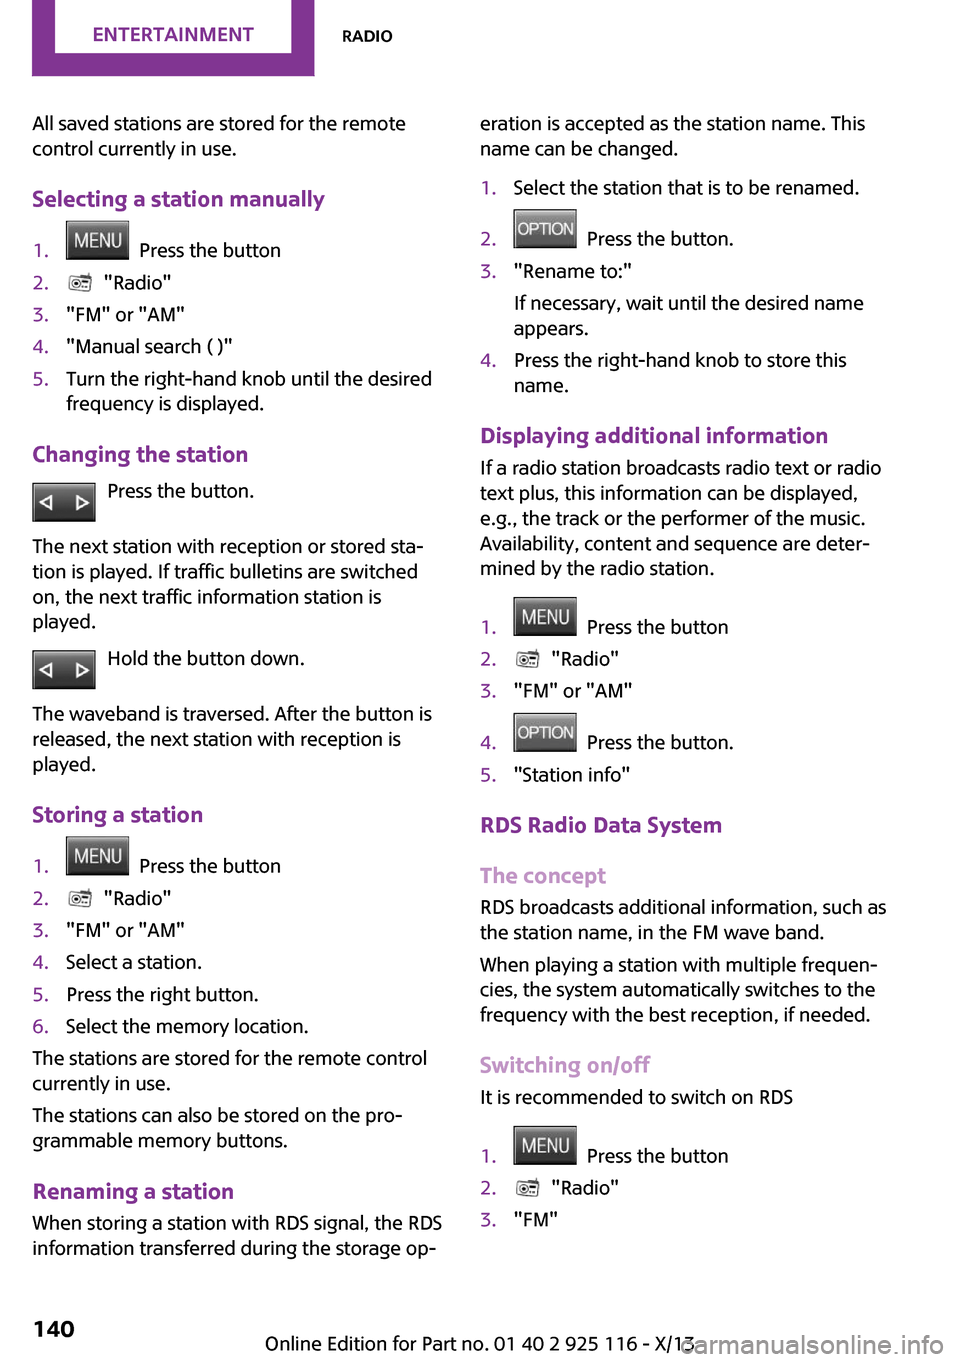
All saved stations are stored for the remote
control currently in use.
Selecting a station manually1. Press the button2. "Radio"3."FM" or "AM"4."Manual search ( )"5.Turn the right-hand knob until the desired
frequency is displayed.
Changing the station
Press the button.
The next station with reception or stored sta‐
tion is played. If traffic bulletins are switched
on, the next traffic information station is
played.
Hold the button down.
The waveband is traversed. After the button is
released, the next station with reception is
played.
Storing a station
1. Press the button2. "Radio"3."FM" or "AM"4.Select a station.5.Press the right button.6.Select the memory location.
The stations are stored for the remote control
currently in use.
The stations can also be stored on the pro‐
grammable memory buttons.
Renaming a station
When storing a station with RDS signal, the RDS
information transferred during the storage op‐
eration is accepted as the station name. This
name can be changed.1.Select the station that is to be renamed.2. Press the button.3."Rename to:"
If necessary, wait until the desired name
appears.4.Press the right-hand knob to store this
name.
Displaying additional information
If a radio station broadcasts radio text or radio
text plus, this information can be displayed,
e.g., the track or the performer of the music.
Availability, content and sequence are deter‐
mined by the radio station.
1. Press the button2. "Radio"3."FM" or "AM"4. Press the button.5."Station info"
RDS Radio Data System
The concept
RDS broadcasts additional information, such as
the station name, in the FM wave band.
When playing a station with multiple frequen‐
cies, the system automatically switches to the
frequency with the best reception, if needed.
Switching on/off It is recommended to switch on RDS
1. Press the button2. "Radio"3."FM"Seite 140EntertainmentRadio140
Online Edition for Part no. 01 40 2 925 116 - X/13
Page 146 of 233
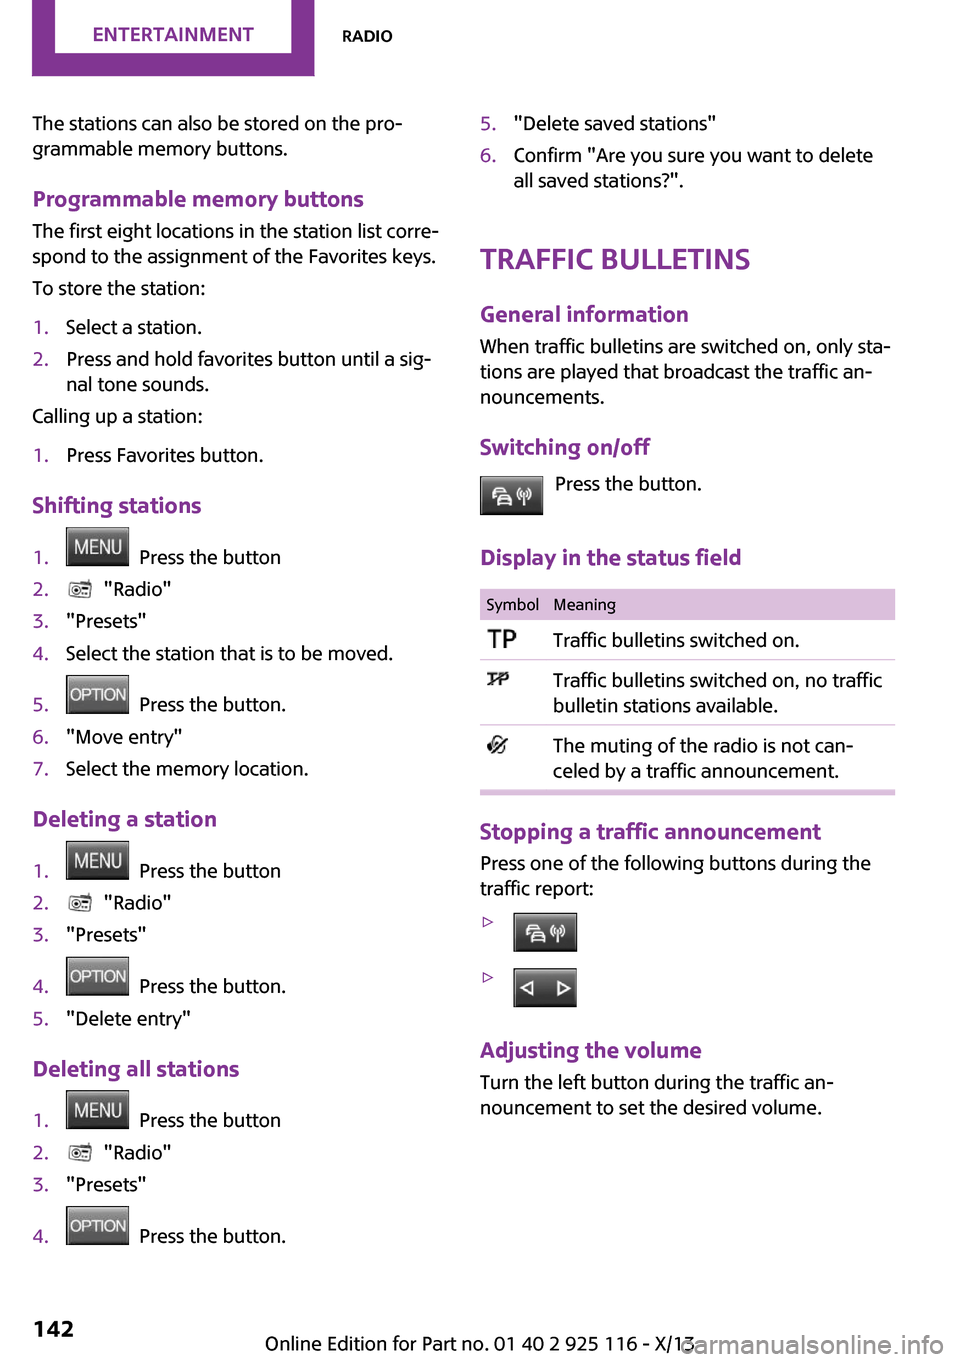
The stations can also be stored on the pro‐
grammable memory buttons.
Programmable memory buttons
The first eight locations in the station list corre‐
spond to the assignment of the Favorites keys.
To store the station:1.Select a station.2.Press and hold favorites button until a sig‐
nal tone sounds.
Calling up a station:
1.Press Favorites button.
Shifting stations
1. Press the button2. "Radio"3."Presets"4.Select the station that is to be moved.5. Press the button.6."Move entry"7.Select the memory location.
Deleting a station
1. Press the button2. "Radio"3."Presets"4. Press the button.5."Delete entry"
Deleting all stations
1. Press the button2. "Radio"3."Presets"4. Press the button.5."Delete saved stations"6.Confirm "Are you sure you want to delete
all saved stations?".
Traffic bulletins
General information When traffic bulletins are switched on, only sta‐
tions are played that broadcast the traffic an‐
nouncements.
Switching on/off Press the button.
Display in the status field
SymbolMeaningTraffic bulletins switched on.Traffic bulletins switched on, no traffic
bulletin stations available.The muting of the radio is not can‐
celed by a traffic announcement.
Stopping a traffic announcement
Press one of the following buttons during the
traffic report:
▷▷
Adjusting the volume
Turn the left button during the traffic an‐
nouncement to set the desired volume.
Seite 142EntertainmentRadio142
Online Edition for Part no. 01 40 2 925 116 - X/13
Page 147 of 233
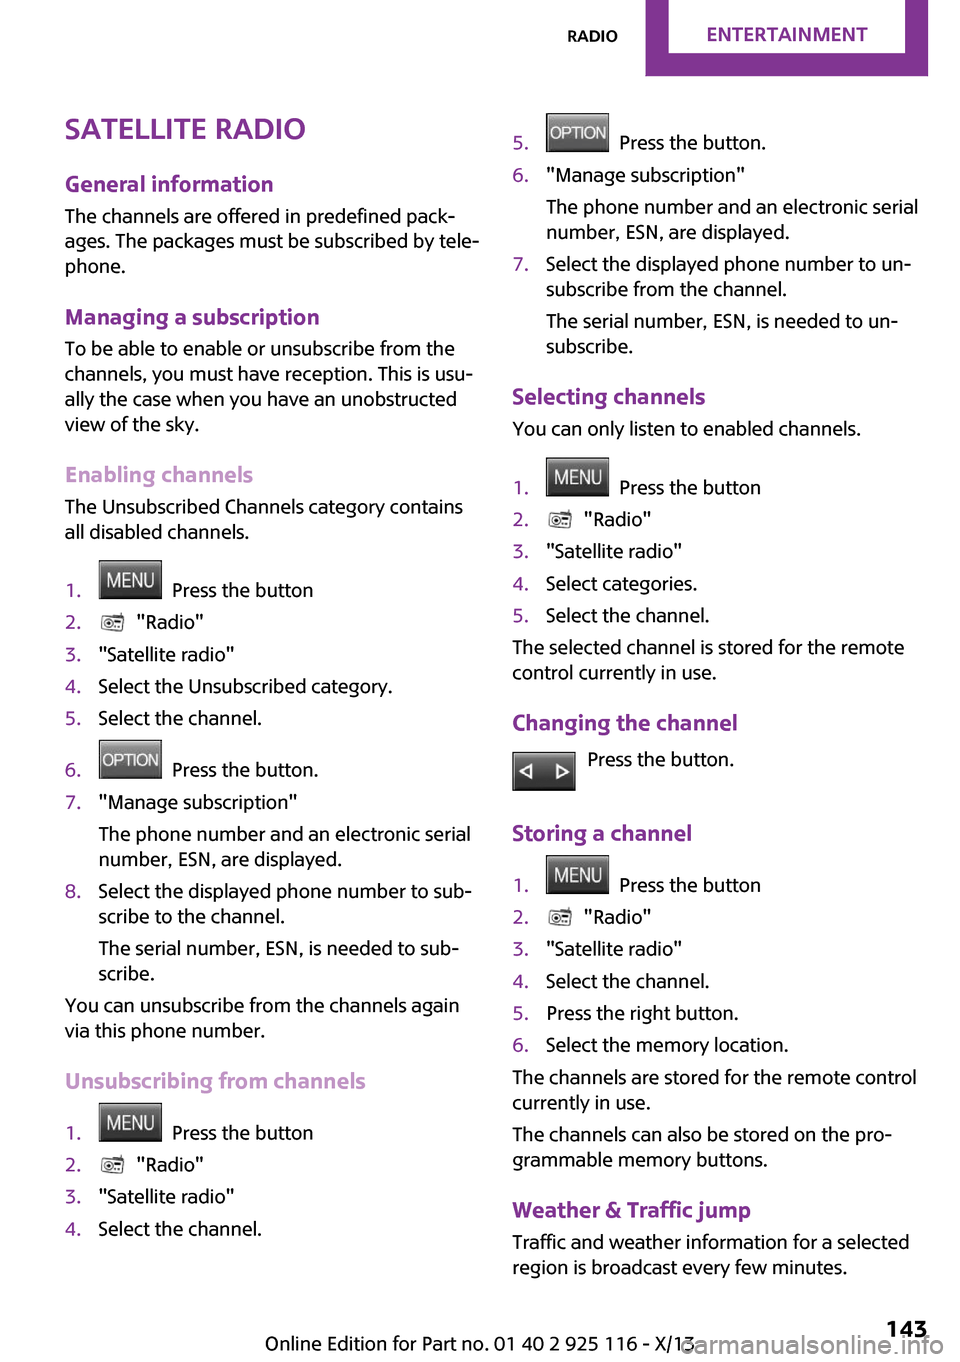
Satellite radioGeneral information
The channels are offered in predefined pack‐
ages. The packages must be subscribed by tele‐
phone.
Managing a subscription
To be able to enable or unsubscribe from the
channels, you must have reception. This is usu‐
ally the case when you have an unobstructed
view of the sky.
Enabling channels
The Unsubscribed Channels category contains
all disabled channels.1. Press the button2. "Radio"3."Satellite radio"4.Select the Unsubscribed category.5.Select the channel.6. Press the button.7."Manage subscription"
The phone number and an electronic serial
number, ESN, are displayed.8.Select the displayed phone number to sub‐
scribe to the channel.
The serial number, ESN, is needed to sub‐
scribe.
You can unsubscribe from the channels again
via this phone number.
Unsubscribing from channels
1. Press the button2. "Radio"3."Satellite radio"4.Select the channel.5. Press the button.6."Manage subscription"
The phone number and an electronic serial
number, ESN, are displayed.7.Select the displayed phone number to un‐
subscribe from the channel.
The serial number, ESN, is needed to un‐
subscribe.
Selecting channels
You can only listen to enabled channels.
1. Press the button2. "Radio"3."Satellite radio"4.Select categories.5.Select the channel.
The selected channel is stored for the remote
control currently in use.
Changing the channel Press the button.
Storing a channel
1. Press the button2. "Radio"3."Satellite radio"4.Select the channel.5.Press the right button.6.Select the memory location.
The channels are stored for the remote control
currently in use.
The channels can also be stored on the pro‐
grammable memory buttons.
Weather & Traffic jump Traffic and weather information for a selected
region is broadcast every few minutes.
Seite 143RadioEntertainment143
Online Edition for Part no. 01 40 2 925 116 - X/13
Page 149 of 233
MultimediaExternal devices
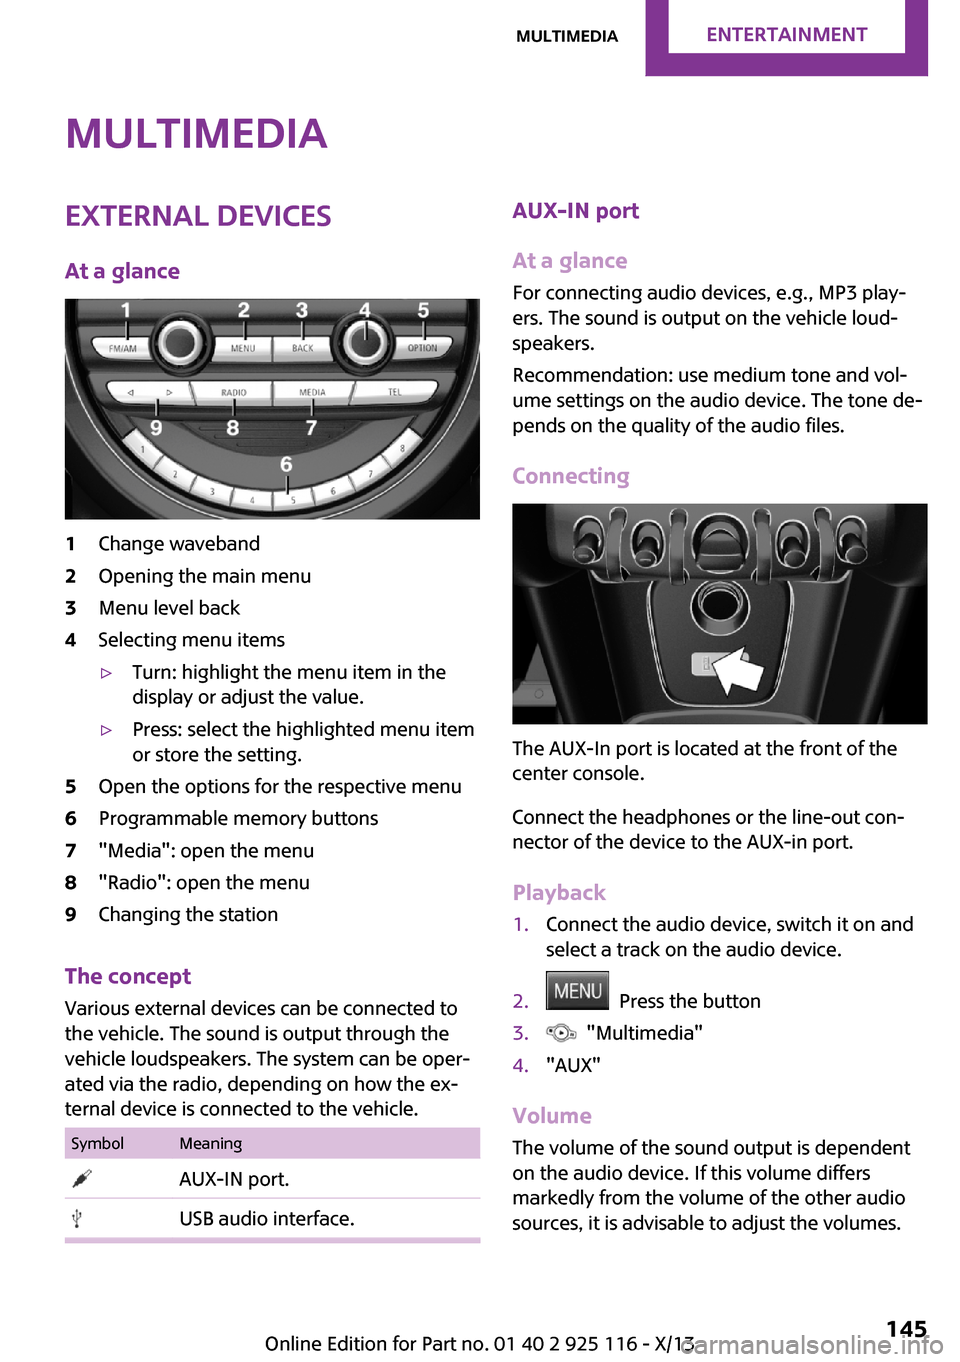
At a glance1Change waveband2Opening the main menu3Menu level back4Selecting menu items▷Turn: highlight the menu item in the
display or adjust the value.▷Press: select the highlighted menu item
or store the setting.5Open the options for the respective menu6Programmable memory buttons7"Media": open the menu8"Radio": open the menu9Changing the station
The concept
Various external devices can be connected to
the vehicle. The sound is output through the
vehicle loudspeakers. The system can be oper‐
ated via the radio, depending on how the ex‐
ternal device is connected to the vehicle.
SymbolMeaning AUX-IN port. USB audio interface.AUX-IN port
At a glance
For connecting audio devices, e.g., MP3 play‐
ers. The sound is output on the vehicle loud‐
speakers.
Recommendation: use medium tone and vol‐
ume settings on the audio device. The tone de‐
pends on the quality of the audio files.
Connecting
The AUX-In port is located at the front of the
center console.
Connect the headphones or the line-out con‐
nector of the device to the AUX-in port.
Playback
1.Connect the audio device, switch it on and
select a track on the audio device.2. Press the button3. "Multimedia"4."AUX"
Volume
The volume of the sound output is dependent
on the audio device. If this volume differs
markedly from the volume of the other audio
sources, it is advisable to adjust the volumes.
Seite 145MultimediaEntertainment145
Online Edition for Part no. 01 40 2 925 116 - X/13
Page 156 of 233
Bluetooth hands-free systemVehicle equipmentAll standard, country-specific and optional
equipment that is offered in the model series is
described in this chapter. Therefore, equipment
is also described that is not available in a vehi‐
cle, e. g., because of the selected optional
equipment or country variant. This also applies
for safety-related functions and systems.
The concept Mobile phones can be connected to the vehicle
via Bluetooth. After the mobile phones are
paired once, they are recognized automatically
when the ignition is switched on. As soon as
they are inside the vehicle they can be oper‐
ated via the radio and via the buttons on the
steering wheel.
Hints Using the mobile phone while driving
Make entries only when traffic and road
conditions allow. Do not hold the mobile phone
in your hand while you are driving; use the
hands-free system instead. If you do not ob‐
serve this precaution, you can endanger the ve‐
hicle occupants and other road users. ◀
Certain functions may need to be enabled by
the mobile phone provider or service provider.
At high temperatures, the charge functions of
the mobile phone can be limited under certain
circumstances, and functions are no longer
executed.
When the mobile phone is used via the vehicle,
refer to the operating manual of the mobile
phone.Approved mobile phones
Accurate information about which mobile
phones are supported with a Bluetooth inter‐
face is available at www.mini.com/connectivity.
Displaying the vehicle identification
number and software part number
The vehicle identification number and the soft‐
ware part number are needed to determine
which mobile phones are supported by the mo‐
bile phone preparation package. The software
version of the mobile phone may also be re‐
quired.1. "Telephone"2. Press the button.3."Bluetooth® info"4."System information"
These approved mobile phones, with a certain
software version, support the vehicle functions
described below.
Malfunctions may occur with other mobile
phones or software versions.
Do not operate a mobile phone that is con‐
nected to the vehicle on the mobile phone key‐
pad, as this may lead to a malfunction.
Pairing/unpairing the
mobile phone
Requirements
▷The mobile phone is suitable.▷The mobile phone is ready for operation.▷The ignition is switched on.▷Bluetooth connection on the vehicle and on
the mobile phone activated.Seite 152CommunicationBluetooth hands-free system152
Online Edition for Part no. 01 40 2 925 116 - X/13
Page 228 of 233
K
Key/remote control 20
Keyless Go, refer to Comfort
Access 25
Key Memory, refer to Personal
Profile 21
Kickdown, automatic trans‐
mission 53
Knee airbag 71
L
Lamp replacement 187
Lamp replacement, front 188
Lamp replacement, rear 190
Lamp replacement, side 193
Lamps and bulbs 187
Language, setting 65
Lashing eyes, securing
cargo 128
LATCH child restraint fixing
system 41
Launch Control 55
Leather, care 204
LED bug light 188
LED headlamps 188
LED ring, central instrument
cluster 65
LEDs, light-emitting di‐
odes 187
Left-hand traffic, lamp set‐
ting 69
License Texts and Certifica‐
tions
Light 66
Light-alloy wheels, care 205
Light-emitting diodes,
LEDs 187
Lighter 115
Lighting 66
Lighting via remote con‐
trol 22
Light switch 66
Load 127
Loading 127
Lock, door 23
Locking/unlocking via door
lock 23
Locking/unlocking with re‐
mote control 22
Locking, automatic 27
Locking, settings 26
Low beams 66
Low beams, automatic, refer
to High-beam Assistant 68
Lower back support, mechani‐
cal 33
Low-Sulfur Diesel 165
Lug bolt lock 196
Luggage rack, refer to Roof-
mounted luggage rack 128
Lumbar support, mechani‐
cal 33
M
Maintenance 184
Maintenance require‐
ments 184
Maintenance, service require‐
ments 60
Maintenance system,
MINI 184
Malfunction displays, refer to
Check Control 57
Manual air distribu‐
tion 105, 107
Manual air flow 105, 107
Manual mode, transmis‐
sion 53
Manual operation, door
lock 23
Manual operation, exterior
mirrors 37
Manual operation, fuel filler
flap 162
Manual operation, Park Dis‐
tance Control PDC 99
Manual transmission 52
Manufacturer of the MINI 6
Marking on approved
tires 172
Marking, run-flat tires 173
Master key, refer to Remote
control 20
Maximum cooling 107
Maximum speed, display 61
Maximum speed, winter
tires 172
Medical kit 198
Menu in instrument cluster 63
Microfilter 106, 109
MID - program, driving dy‐
namics 88
MINI maintenance sys‐
tem 184
Minimum tread, tires 170
Mirrors 37
Mobile communication devi‐
ces in the vehicle 125
Mobile phone 152
Mobility System 173
Mode, GREEN Mode 131
Modifications, technical, refer
to Safety 6
Moisture in headlamp 187
Mounting of child restraint fix‐
ing systems 40
Multifunction steering wheel,
buttons 12
N
Neck restraints, front, refer to
Head restraints 35
Neck restraints, rear, refer to
Head restraints 36
New wheels and tires 171
No Passing Information 61
Nylon rope for tow-starting/
towing 201
O
OBD Onboard Diagnos‐
tics 184
Seite 224ReferenceEverything from A to Z224
Online Edition for Part no. 01 40 2 925 116 - X/13
216