Stop MINI 3 door 2015 User Guide
[x] Cancel search | Manufacturer: MINI, Model Year: 2015, Model line: 3 door, Model: MINI 3 door 2015Pages: 248, PDF Size: 5.43 MB
Page 62 of 248
DrivingVehicle features and op‐
tions
This chapter describes all standard, country-
specific and optional features offered with the
series. It also describes features that are not
necessarily available in your car, e. g., due to
the selected options or country versions. This
also applies to safety-related functions and sys‐
tems. The respectively applicable country provi‐
sions must be observed when using the respec‐
tive features and systems.
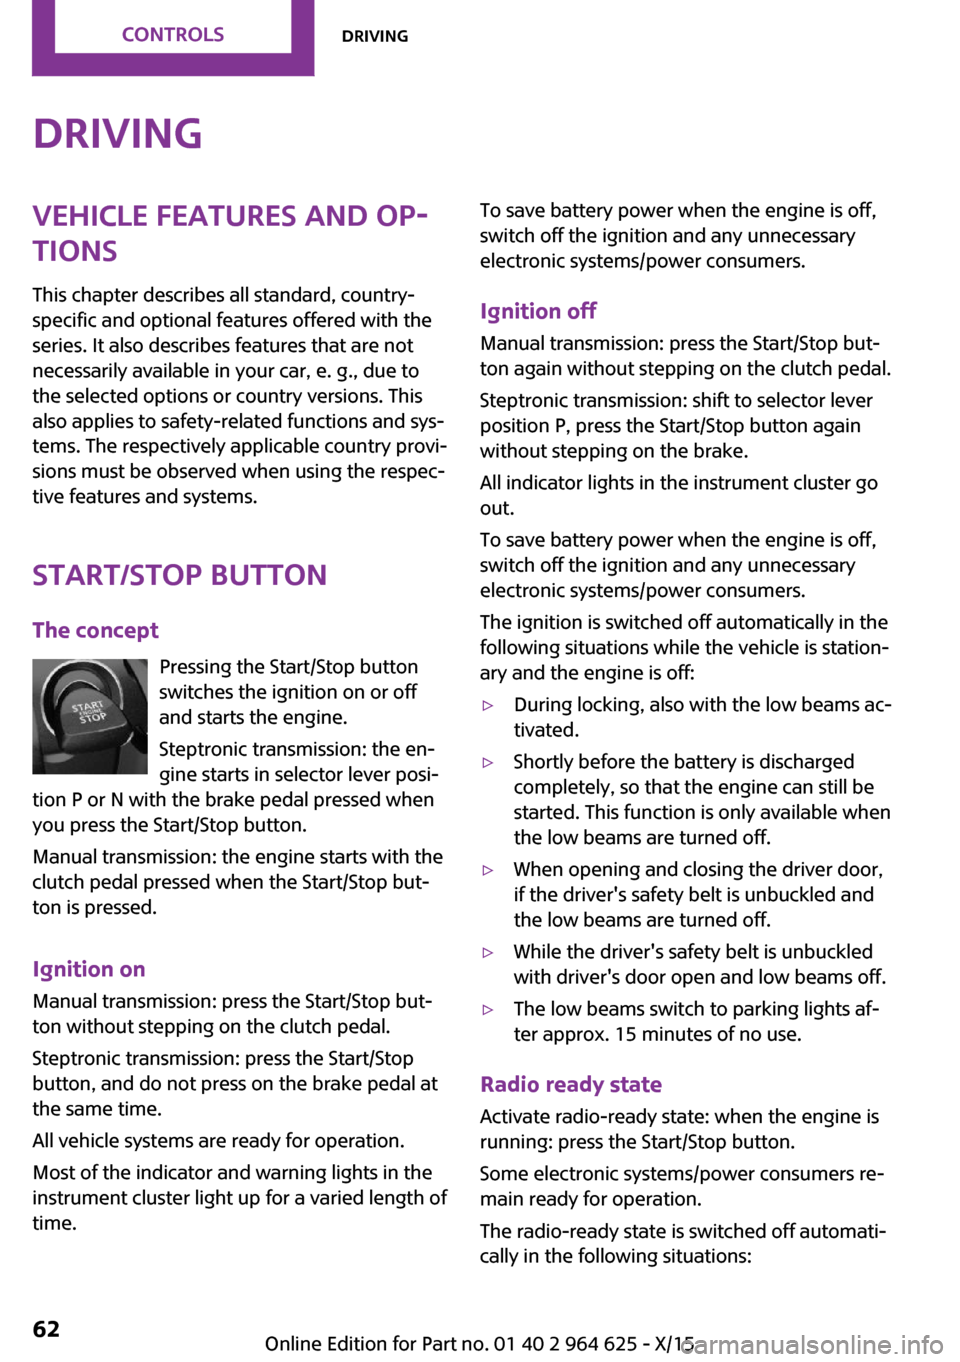
Start/Stop button The concept Pressing the Start/Stop button
switches the ignition on or off
and starts the engine.
Steptronic transmission: the en‐
gine starts in selector lever posi‐
tion P or N with the brake pedal pressed when
you press the Start/Stop button.
Manual transmission: the engine starts with the
clutch pedal pressed when the Start/Stop but‐
ton is pressed.
Ignition on Manual transmission: press the Start/Stop but‐
ton without stepping on the clutch pedal.
Steptronic transmission: press the Start/Stop
button, and do not press on the brake pedal at
the same time.
All vehicle systems are ready for operation.
Most of the indicator and warning lights in the
instrument cluster light up for a varied length of
time.To save battery power when the engine is off,
switch off the ignition and any unnecessary
electronic systems/power consumers.
Ignition off
Manual transmission: press the Start/Stop but‐
ton again without stepping on the clutch pedal.
Steptronic transmission: shift to selector lever
position P, press the Start/Stop button again
without stepping on the brake.
All indicator lights in the instrument cluster go
out.
To save battery power when the engine is off,
switch off the ignition and any unnecessary electronic systems/power consumers.
The ignition is switched off automatically in the
following situations while the vehicle is station‐
ary and the engine is off:▷During locking, also with the low beams ac‐
tivated.▷Shortly before the battery is discharged
completely, so that the engine can still be
started. This function is only available when
the low beams are turned off.▷When opening and closing the driver door,
if the driver's safety belt is unbuckled and
the low beams are turned off.▷While the driver's safety belt is unbuckled
with driver's door open and low beams off.▷The low beams switch to parking lights af‐
ter approx. 15 minutes of no use.
Radio ready state
Activate radio-ready state: when the engine is
running: press the Start/Stop button.
Some electronic systems/power consumers re‐
main ready for operation.
The radio-ready state is switched off automati‐
cally in the following situations:
Seite 62CONTROLSDriving62
Online Edition for Part no. 01 40 2 964 625 - X/15
Page 63 of 248
▷After approx. 8 minutes.▷When the vehicle is locked using the central
locking system.▷Shortly before the battery is discharged
completely, so that the engine can still be
started.
The radio-ready state remains active if, for ex‐
ample, the ignition is automatically switched off
for the following reasons:
▷Opening or closing the driver's door.▷Unfastening of the driver's safety belt.▷When automatically switching from low
beams to parking lights.
If the engine is switched off and the ignition is
switched on, the system automatically switches
to the radio-ready state if the lights are turned
off or, if correspondingly equipped, the day‐
time running lights are activated.
Starting the engine
Information DANGER
If the exhaust pipe is blocked or ventila‐
tion is insufficient, harmful exhaust gases can
enter into the vehicle. The exhaust gases con‐
tain carbon monoxide, an odorless and color‐
less but highly toxic gas. In enclosed areas, ex‐
haust gases can also accumulate outside of the
vehicle. There is danger to life. Keep the ex‐
haust pipe free and ensure sufficient ventila‐
tion. ◀
WARNING
An unsecured vehicle can put itself into
motion and roll away. There is risk of an acci‐
dent. Before exiting, secure the vehicle against
rolling.
In order to ensure that the vehicle is secured
against rolling away, observe the following:
▷Set the parking brake.▷On uphill grades or on a slope, turn the
front wheels in the direction of the curb.▷On uphill grades or on a slope, also secure
the vehicle, for example with a wheel
chock. ◀
CAUTION
In the case of repeated starting attempts
or repeated starting in quick succession, the
fuel is not burned or is inadequately burned.
The catalytic converter can overheat. There is
risk of property damage. Avoid repeated start‐
ing in quick succession. ◀
Steptronic transmission
Starting the engine
1.Depress the brake pedal.2.Engage selector lever position P or N.3.Press the Start/Stop button.
The ignition is activated automatically for a cer‐
tain time and is stopped as soon as the engine
starts.
Manual transmission
Starting the engine
1.Depress the brake pedal.2.Press on the clutch pedal and shift to neu‐
tral.3.Press the Start/Stop button.
The ignition is activated automatically for a cer‐
tain time and is stopped as soon as the engine
starts.
Engine stop
Information WARNING
Unattended children or animals can move
the vehicle and endanger themselves and traf‐
fic, for example with the following actions:
Seite 63DrivingCONTROLS63
Online Edition for Part no. 01 40 2 964 625 - X/15
Page 64 of 248
▷Pressing the Start/Stop button.▷Releasing the parking brake.▷Opening and closing of doors or windows.▷Engaging selector lever position N.▷Using vehicle equipment.
There is risk of accidents or injuries. Do not
leave children or animals unattended in the ve‐
hicle. Carry remote control along when exiting
and lock the vehicle. ◀
WARNING
An unsecured vehicle can put itself into
motion and roll away. There is risk of an acci‐
dent. Before exiting, secure the vehicle against
rolling.
In order to ensure that the vehicle is secured
against rolling away, observe the following:
▷Set the parking brake.▷On uphill grades or on a slope, turn the
front wheels in the direction of the curb.▷On uphill grades or on a slope, also secure
the vehicle, for example with a wheel
chock. ◀
Before driving into a car wash
So that the vehicle can roll into a car wash ob‐
serve instructions for going into an automatic
car wash, refer to page 221.
Steptronic transmission
Switching off the engine
1.Engage selector lever position P with the
vehicle stopped.2.Press the Start/Stop button.
The engine is switched off.
The radio-ready state is switched on.3.Set the parking brake.Manual transmission
Switching off the engine1.With the vehicle at a standstill, press the
Start/Stop button.
The engine is switched off.
The radio-ready state is switched on.2.Shift into first gear or reverse.3.Set the parking brake.
Auto Start/Stop function
The concept
The Auto Start/Stop function helps save fuel.
The system switches off the engine during a
stop, for example, in traffic congestion or at
traffic lights. The ignition remains switched on.
The engine starts again automatically for driv‐
ing off.
Information After every start of the engine using the Start/
Stop button, the Auto Start/Stop function is in
the last selected state, refer to page 66. When
the Auto Start/Stop function is active, it is avail‐
able when the vehicle is traveling faster than
about 3 mph, approx. 5 km/h.
Depending on the selected driving mode, refer
to page 118, the system is automatically acti‐
vated or deactivated.
Engine stop
The engine is switched off automatically during
a stop under the following conditions:
Manual transmission:
▷Neutral is engaged and the clutch pedal is
not pressed.▷The driver's safety belt is buckled or the
driver's door is closed.
Steptronic transmission:
Seite 64CONTROLSDriving64
Online Edition for Part no. 01 40 2 964 625 - X/15
Page 65 of 248
▷The selector lever is in selector lever posi‐
tion D.▷Brake pedal remains depressed while the
vehicle is stopped.▷The driver's safety belt is buckled or the
driver's door is closed.
In order to be able to release the brake pedal,
engage lever in position P. The engine remains
off.
To continue driving depress the brake pedal.
When a gear is engaged, the engine starts au‐
tomatically.
The air flow from the air conditioner is reduced
when the engine is switched off.
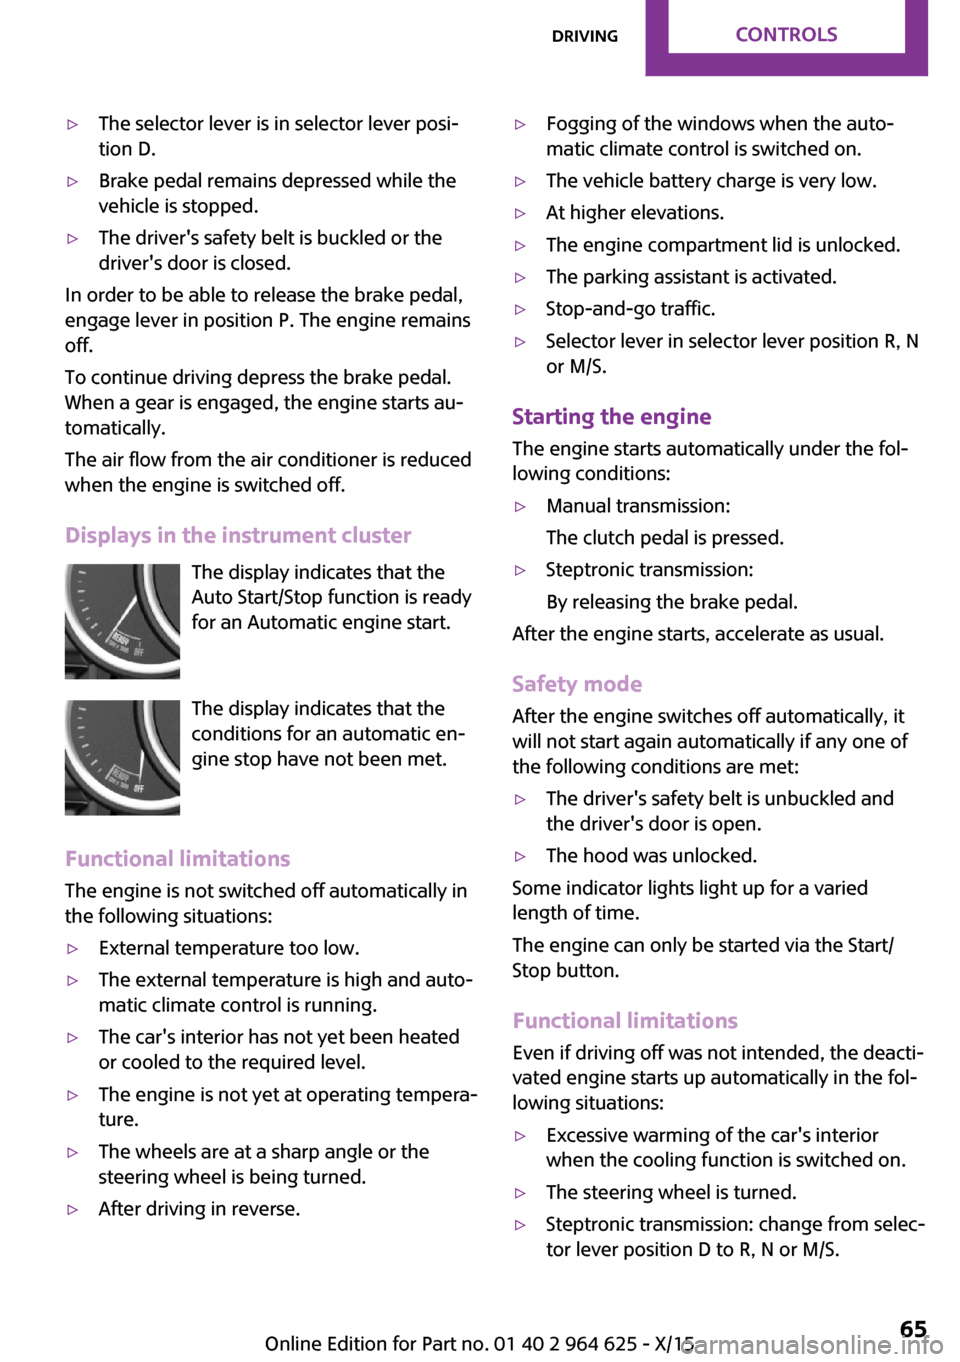
Displays in the instrument cluster The display indicates that theAuto Start/Stop function is ready
for an Automatic engine start.
The display indicates that the
conditions for an automatic en‐
gine stop have not been met.
Functional limitations The engine is not switched off automatically in
the following situations:
▷External temperature too low.▷The external temperature is high and auto‐
matic climate control is running.▷The car's interior has not yet been heated
or cooled to the required level.▷The engine is not yet at operating tempera‐
ture.▷The wheels are at a sharp angle or the
steering wheel is being turned.▷After driving in reverse.▷Fogging of the windows when the auto‐
matic climate control is switched on.▷The vehicle battery charge is very low.▷At higher elevations.▷The engine compartment lid is unlocked.▷The parking assistant is activated.▷Stop-and-go traffic.▷Selector lever in selector lever position R, N
or M/S.
Starting the engine
The engine starts automatically under the fol‐
lowing conditions:
▷Manual transmission:
The clutch pedal is pressed.▷Steptronic transmission:
By releasing the brake pedal.
After the engine starts, accelerate as usual.
Safety mode
After the engine switches off automatically, it
will not start again automatically if any one of
the following conditions are met:
▷The driver's safety belt is unbuckled and
the driver's door is open.▷The hood was unlocked.
Some indicator lights light up for a varied
length of time.
The engine can only be started via the Start/
Stop button.
Functional limitations
Even if driving off was not intended, the deacti‐
vated engine starts up automatically in the fol‐
lowing situations:
▷Excessive warming of the car's interior
when the cooling function is switched on.▷The steering wheel is turned.▷Steptronic transmission: change from selec‐
tor lever position D to R, N or M/S.Seite 65DrivingCONTROLS65
Online Edition for Part no. 01 40 2 964 625 - X/15
Page 66 of 248
▷Steptronic transmission: change from selec‐
tor lever position P to R, N, D or M/S.▷The vehicle begins rolling.▷Fogging of the windows when the auto‐
matic climate control is switched on.▷The vehicle battery charge is very low.▷Excessive cooling of the car's interior when
the heating is switched on.▷Manual transmission: low brake vacuum
pressure; this can occur, for example, if the
brake pedal is depressed a number of times
in succession.
Switching the system on/off
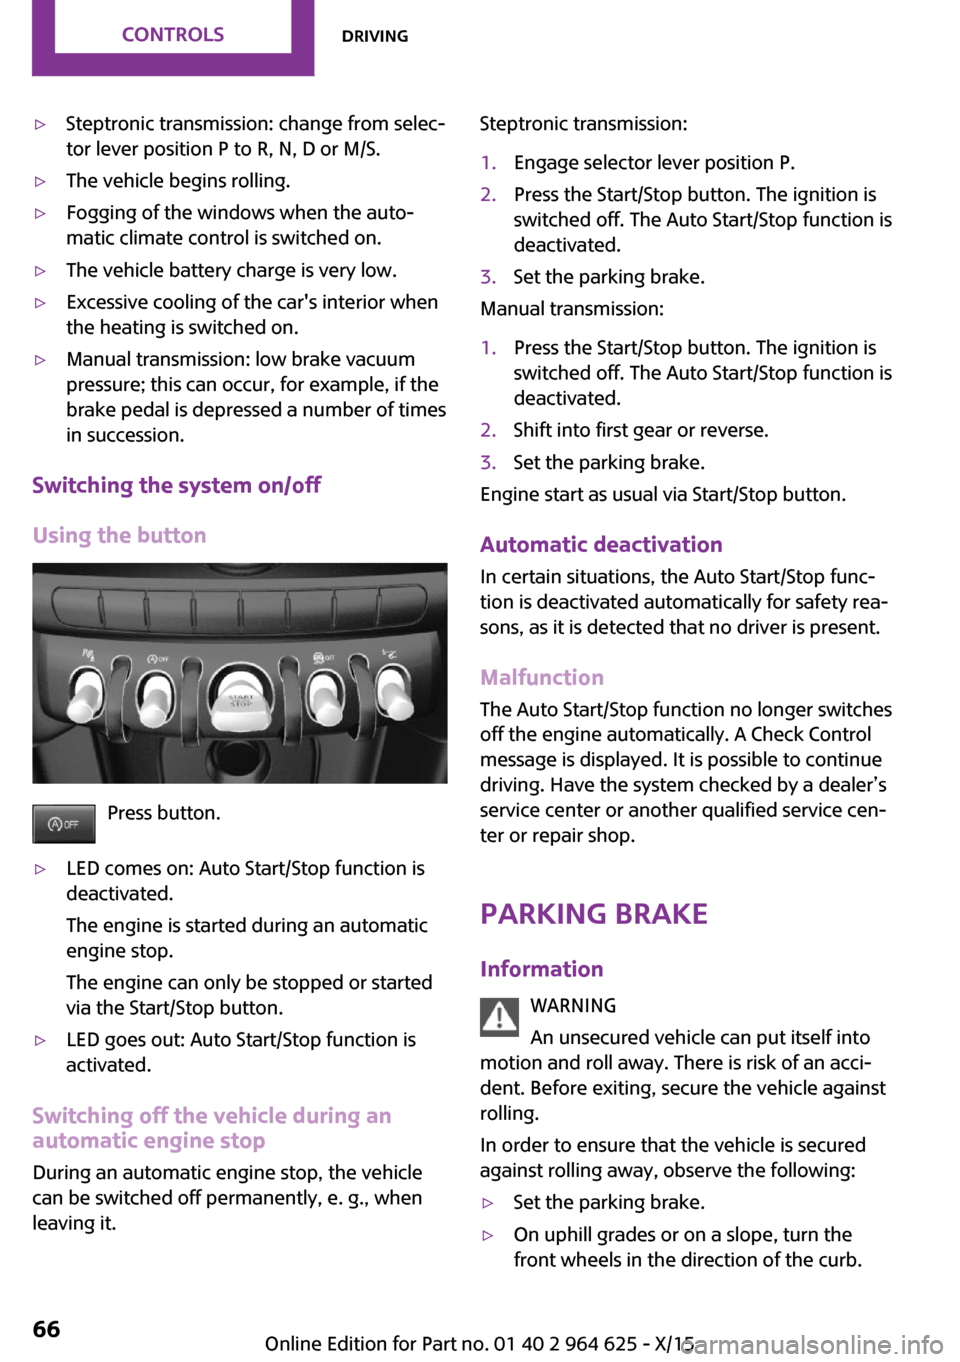
Using the button
Press button.
▷LED comes on: Auto Start/Stop function is
deactivated.
The engine is started during an automatic
engine stop.
The engine can only be stopped or started
via the Start/Stop button.▷LED goes out: Auto Start/Stop function is
activated.
Switching off the vehicle during an automatic engine stop
During an automatic engine stop, the vehicle
can be switched off permanently, e. g., when
leaving it.
Steptronic transmission:1.Engage selector lever position P.2.Press the Start/Stop button. The ignition is
switched off. The Auto Start/Stop function is
deactivated.3.Set the parking brake.
Manual transmission:
1.Press the Start/Stop button. The ignition is
switched off. The Auto Start/Stop function is
deactivated.2.Shift into first gear or reverse.3.Set the parking brake.
Engine start as usual via Start/Stop button.
Automatic deactivation
In certain situations, the Auto Start/Stop func‐
tion is deactivated automatically for safety rea‐
sons, as it is detected that no driver is present.
Malfunction The Auto Start/Stop function no longer switches
off the engine automatically. A Check Control
message is displayed. It is possible to continue
driving. Have the system checked by a dealer’s
service center or another qualified service cen‐
ter or repair shop.
Parking brake Information WARNING
An unsecured vehicle can put itself into
motion and roll away. There is risk of an acci‐
dent. Before exiting, secure the vehicle against
rolling.
In order to ensure that the vehicle is secured
against rolling away, observe the following:
▷Set the parking brake.▷On uphill grades or on a slope, turn the
front wheels in the direction of the curb.Seite 66CONTROLSDriving66
Online Edition for Part no. 01 40 2 964 625 - X/15
Page 78 of 248
be activated if objects are placed on the front
passenger seat.
Make sure that the safety belts are positioned
correctly.
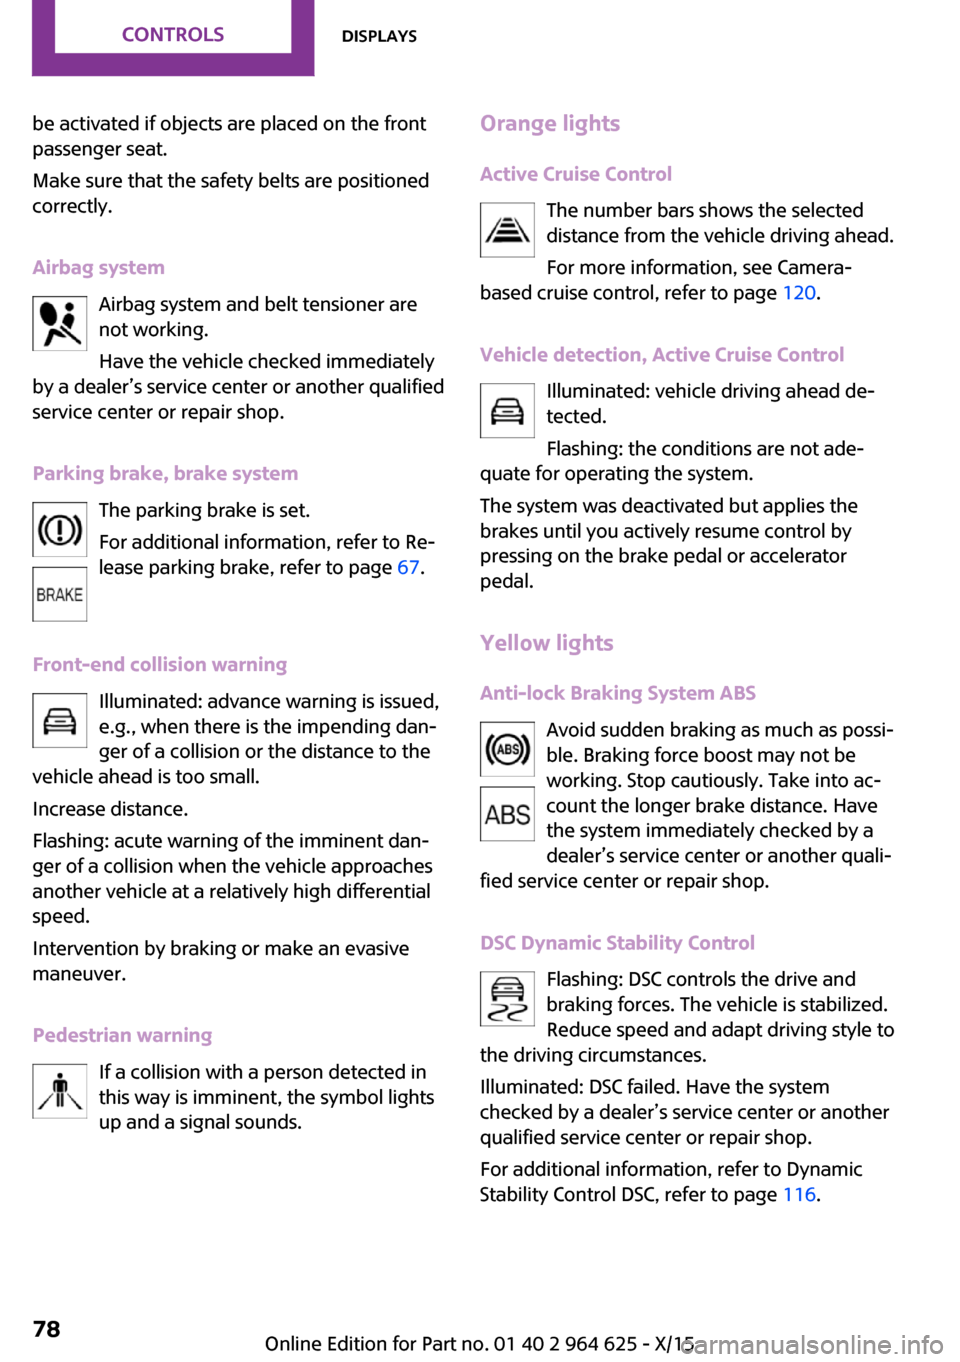
Airbag system Airbag system and belt tensioner are
not working.
Have the vehicle checked immediately
by a dealer’s service center or another qualified
service center or repair shop.
Parking brake, brake system The parking brake is set.
For additional information, refer to Re‐
lease parking brake, refer to page 67.
Front-end collision warning Illuminated: advance warning is issued,
e.g., when there is the impending dan‐
ger of a collision or the distance to the
vehicle ahead is too small.
Increase distance.
Flashing: acute warning of the imminent dan‐
ger of a collision when the vehicle approaches
another vehicle at a relatively high differential
speed.
Intervention by braking or make an evasive
maneuver.
Pedestrian warning If a collision with a person detected in
this way is imminent, the symbol lights
up and a signal sounds.Orange lights
Active Cruise Control The number bars shows the selected
distance from the vehicle driving ahead.
For more information, see Camera-
based cruise control, refer to page 120.
Vehicle detection, Active Cruise Control Illuminated: vehicle driving ahead de‐
tected.
Flashing: the conditions are not ade‐
quate for operating the system.
The system was deactivated but applies the
brakes until you actively resume control by
pressing on the brake pedal or accelerator
pedal.
Yellow lights Anti-lock Braking System ABS Avoid sudden braking as much as possi‐
ble. Braking force boost may not be
working. Stop cautiously. Take into ac‐
count the longer brake distance. Have
the system immediately checked by a
dealer’s service center or another quali‐
fied service center or repair shop.
DSC Dynamic Stability Control Flashing: DSC controls the drive and
braking forces. The vehicle is stabilized.
Reduce speed and adapt driving style to
the driving circumstances.
Illuminated: DSC failed. Have the system
checked by a dealer’s service center or another
qualified service center or repair shop.
For additional information, refer to Dynamic
Stability Control DSC, refer to page 116.Seite 78CONTROLSDisplays78
Online Edition for Part no. 01 40 2 964 625 - X/15
Page 79 of 248
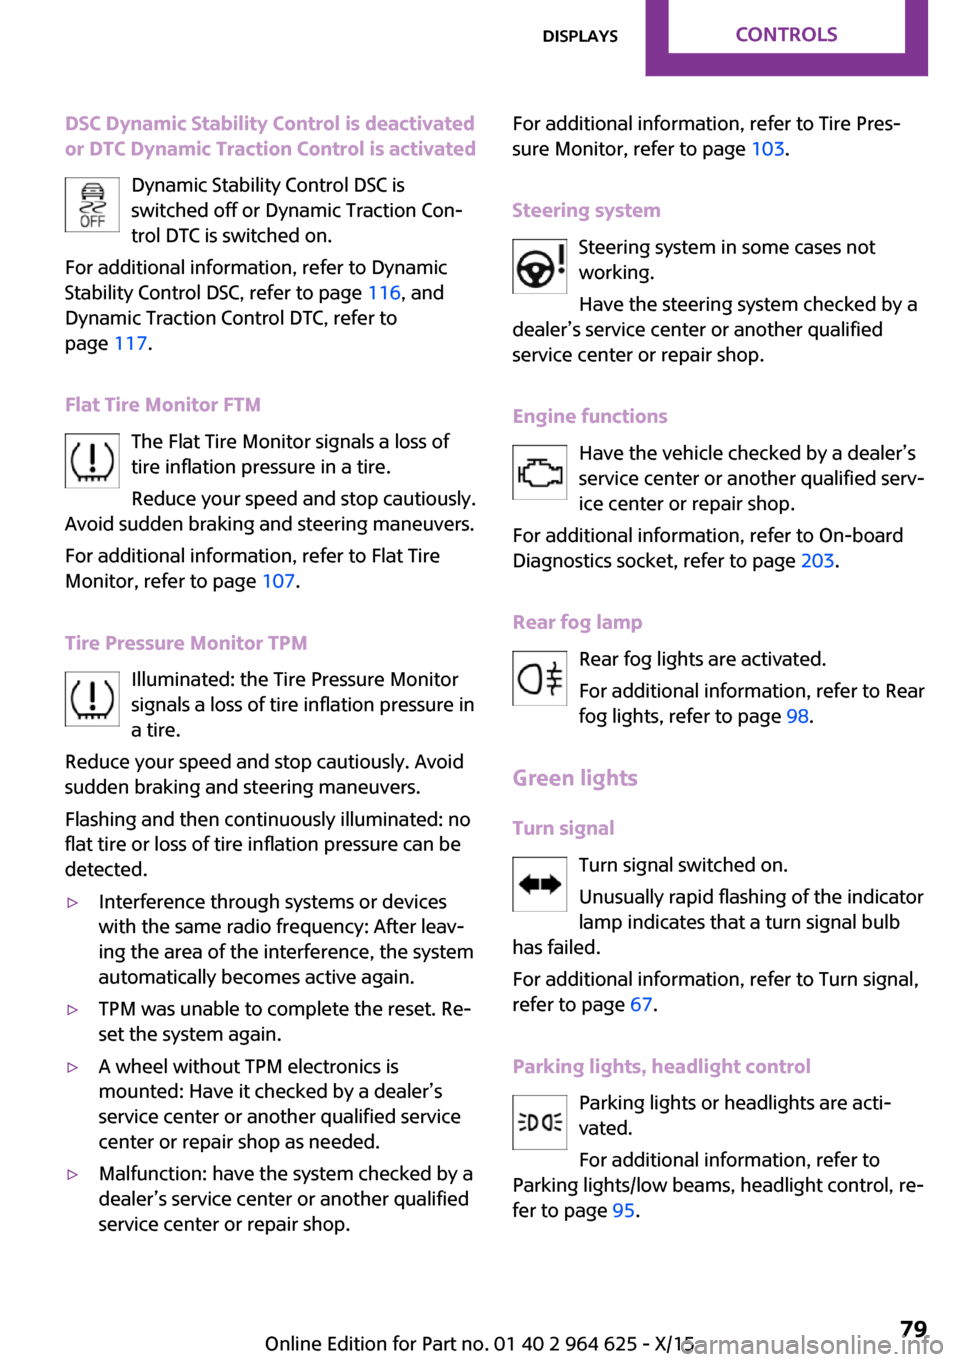
DSC Dynamic Stability Control is deactivated
or DTC Dynamic Traction Control is activated
Dynamic Stability Control DSC is
switched off or Dynamic Traction Con‐
trol DTC is switched on.
For additional information, refer to Dynamic
Stability Control DSC, refer to page 116, and
Dynamic Traction Control DTC, refer to
page 117.
Flat Tire Monitor FTM The Flat Tire Monitor signals a loss of
tire inflation pressure in a tire.
Reduce your speed and stop cautiously.
Avoid sudden braking and steering maneuvers.
For additional information, refer to Flat Tire
Monitor, refer to page 107.
Tire Pressure Monitor TPM Illuminated: the Tire Pressure Monitor
signals a loss of tire inflation pressure in
a tire.
Reduce your speed and stop cautiously. Avoid
sudden braking and steering maneuvers.
Flashing and then continuously illuminated: no
flat tire or loss of tire inflation pressure can be
detected.▷Interference through systems or devices
with the same radio frequency: After leav‐
ing the area of the interference, the system
automatically becomes active again.▷TPM was unable to complete the reset. Re‐
set the system again.▷A wheel without TPM electronics is
mounted: Have it checked by a dealer’s
service center or another qualified service
center or repair shop as needed.▷Malfunction: have the system checked by a
dealer’s service center or another qualified
service center or repair shop.For additional information, refer to Tire Pres‐
sure Monitor, refer to page 103.
Steering system Steering system in some cases not
working.
Have the steering system checked by a
dealer’s service center or another qualified
service center or repair shop.
Engine functions Have the vehicle checked by a dealer’s
service center or another qualified serv‐
ice center or repair shop.
For additional information, refer to On-board
Diagnostics socket, refer to page 203.
Rear fog lamp Rear fog lights are activated.
For additional information, refer to Rear
fog lights, refer to page 98.
Green lights Turn signal Turn signal switched on.
Unusually rapid flashing of the indicator
lamp indicates that a turn signal bulb
has failed.
For additional information, refer to Turn signal,
refer to page 67.
Parking lights, headlight control Parking lights or headlights are acti‐
vated.
For additional information, refer to
Parking lights/low beams, headlight control, re‐
fer to page 95.Seite 79DisplaysCONTROLS79
Online Edition for Part no. 01 40 2 964 625 - X/15
Page 86 of 248
When destination guidance is activated in
the navigation system.▷Speed limit detection.▷Speed.
Selecting information
You can select what information from the on‐
board computer is to be displayed on the CID
(central information display) of the instrument
cluster.
On the Control Display:
1. "Settings"2."Instrument cluster"3.Select the desired information.
Settings are stored for the profile currently
used.
Information in detail
Range Displays the estimated cruising range available
with the remaining fuel.
It is calculated based on your driving style over
the last 20 miles/30 km.
GREEN info Description of GREEN info, refer to page 169.
Average fuel consumption This is calculated for the period while the en‐
gine is running.
The average fuel consumption is calculated for
the distance traveled since the last reset by the
onboard computer.
Average speed Periods in which the vehicle is parked with the
engine manually stopped are not included in
the calculation of the average speed.
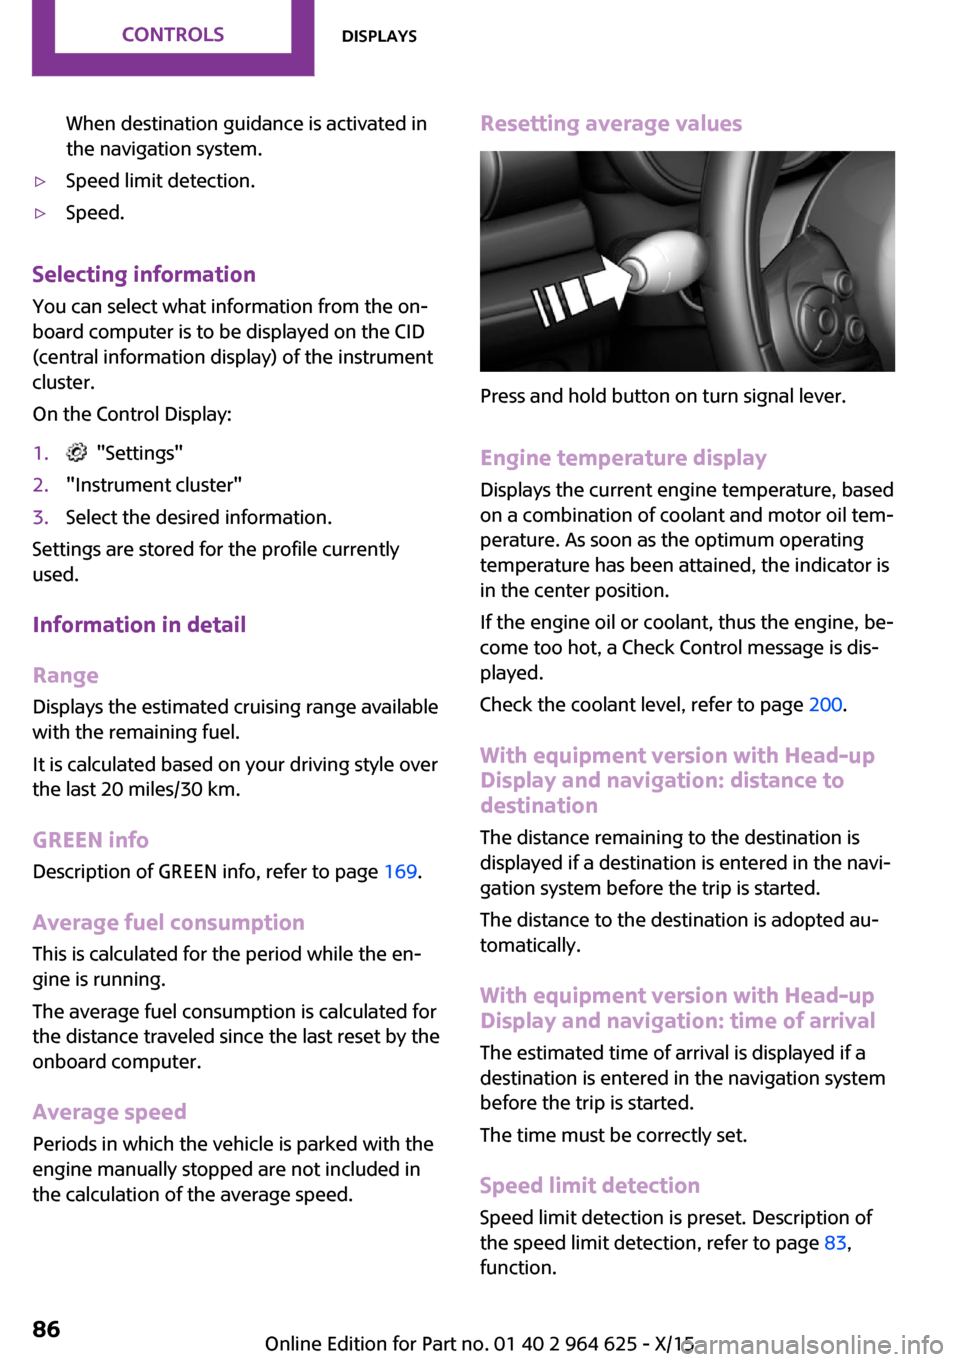
Resetting average values
Press and hold button on turn signal lever.
Engine temperature display
Displays the current engine temperature, based
on a combination of coolant and motor oil tem‐
perature. As soon as the optimum operating
temperature has been attained, the indicator is
in the center position.
If the engine oil or coolant, thus the engine, be‐
come too hot, a Check Control message is dis‐
played.
Check the coolant level, refer to page 200.
With equipment version with Head-up
Display and navigation: distance to
destination
The distance remaining to the destination is
displayed if a destination is entered in the navi‐
gation system before the trip is started.
The distance to the destination is adopted au‐
tomatically.
With equipment version with Head-up
Display and navigation: time of arrival
The estimated time of arrival is displayed if a
destination is entered in the navigation system
before the trip is started.
The time must be correctly set.
Speed limit detection
Speed limit detection is preset. Description of
the speed limit detection, refer to page 83,
function.
Seite 86CONTROLSDisplays86
Online Edition for Part no. 01 40 2 964 625 - X/15
Page 93 of 248
Chrono package in the
cockpit
The concept
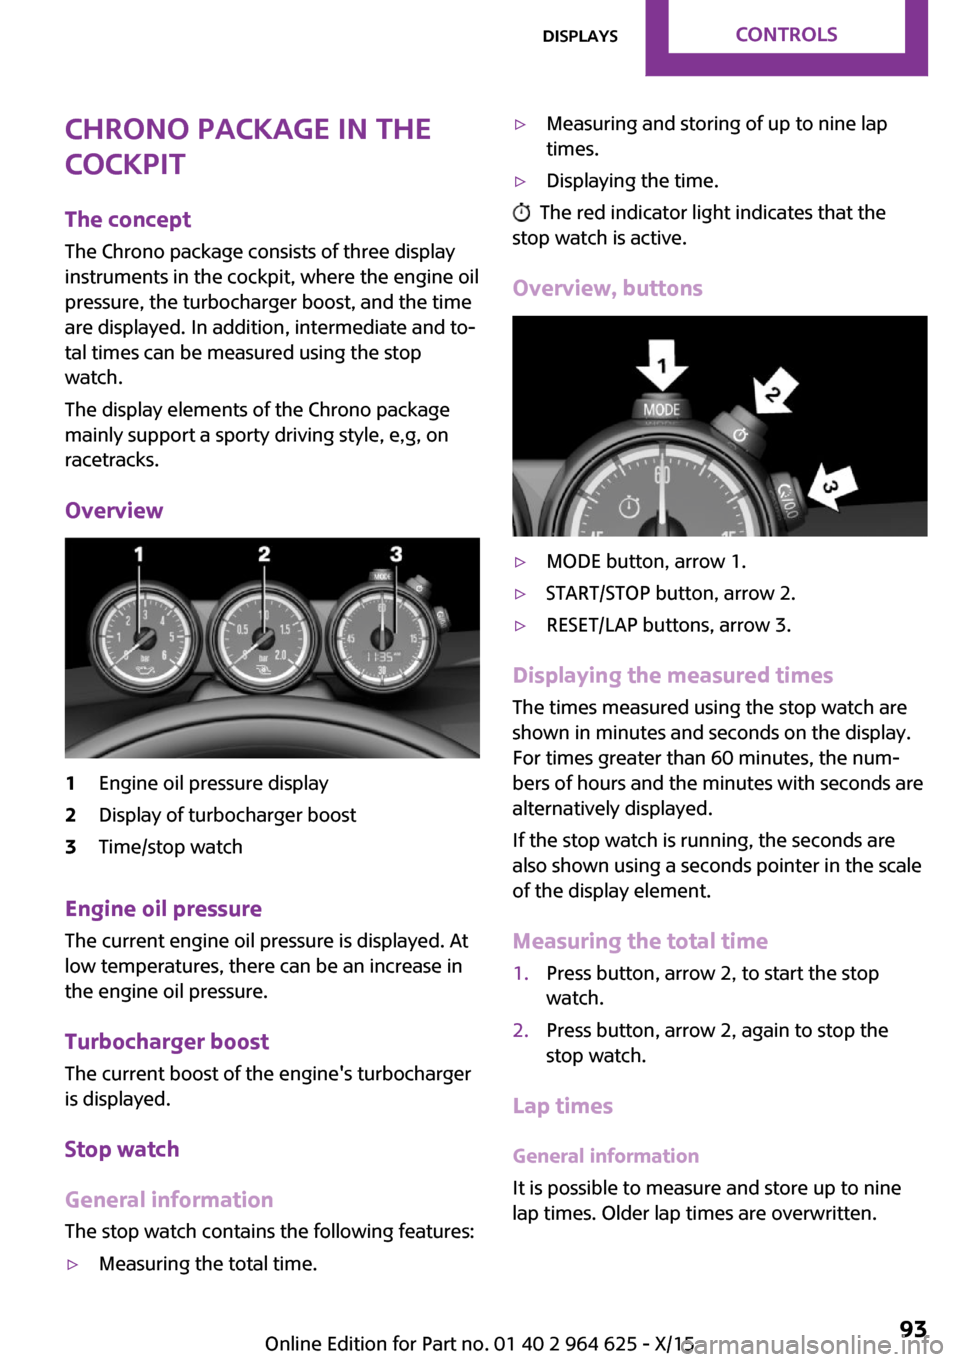
The Chrono package consists of three display
instruments in the cockpit, where the engine oil
pressure, the turbocharger boost, and the time
are displayed. In addition, intermediate and to‐
tal times can be measured using the stop
watch.
The display elements of the Chrono package
mainly support a sporty driving style, e,g, on
racetracks.
Overview1Engine oil pressure display2Display of turbocharger boost3Time/stop watch
Engine oil pressure
The current engine oil pressure is displayed. At
low temperatures, there can be an increase in
the engine oil pressure.
Turbocharger boostThe current boost of the engine's turbocharger
is displayed.
Stop watch
General information The stop watch contains the following features:
▷Measuring the total time.▷Measuring and storing of up to nine lap
times.▷Displaying the time.
The red indicator light indicates that the
stop watch is active.
Overview, buttons
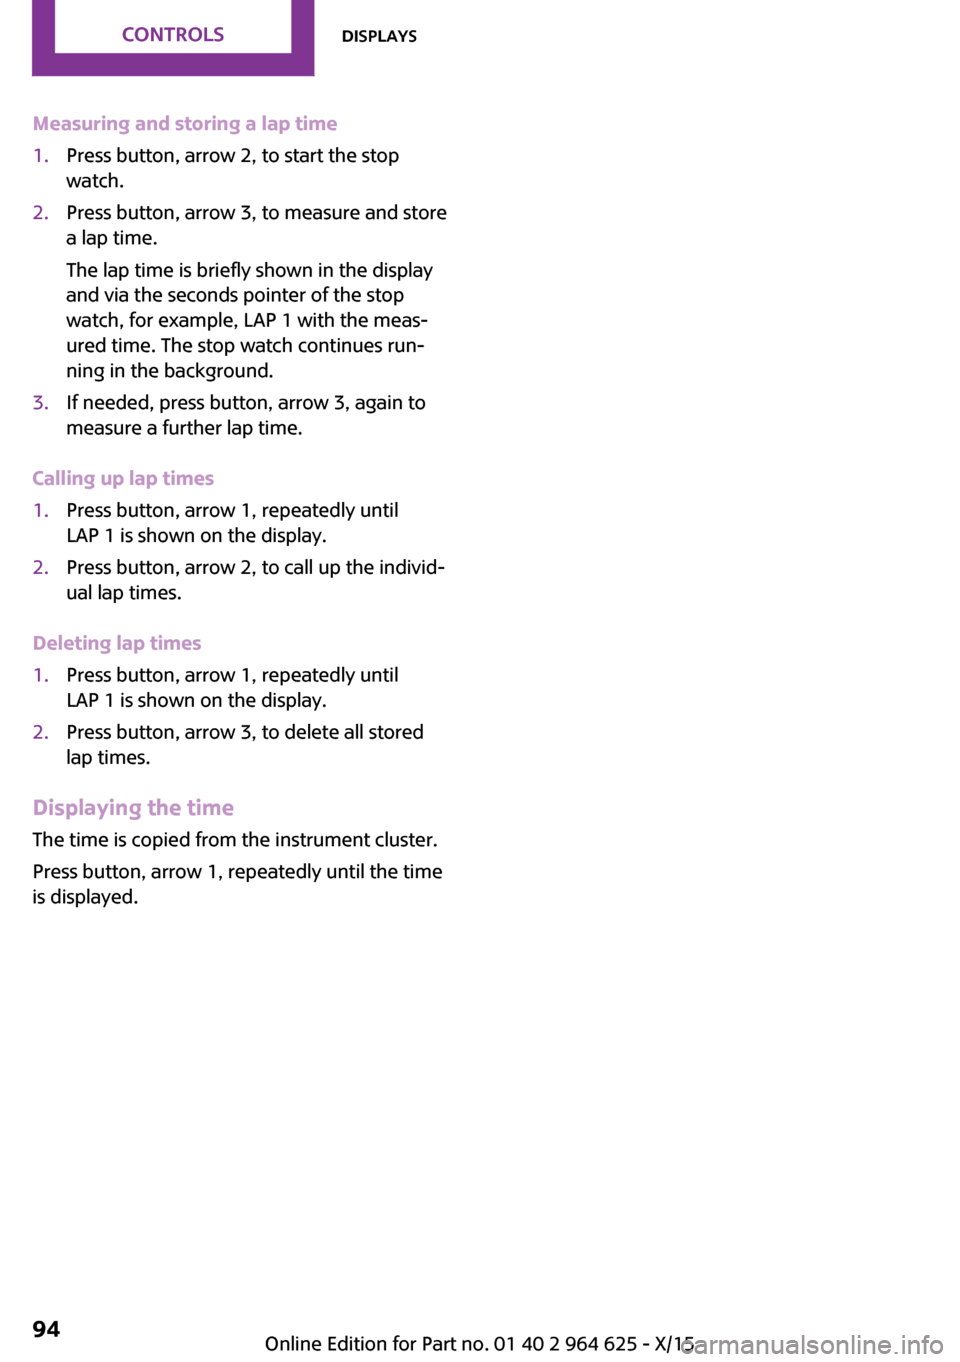
▷MODE button, arrow 1.▷START/STOP button, arrow 2.▷RESET/LAP buttons, arrow 3.
Displaying the measured times
The times measured using the stop watch are
shown in minutes and seconds on the display.
For times greater than 60 minutes, the num‐ bers of hours and the minutes with seconds are
alternatively displayed.
If the stop watch is running, the seconds are
also shown using a seconds pointer in the scale
of the display element.
Measuring the total time
1.Press button, arrow 2, to start the stop
watch.2.Press button, arrow 2, again to stop the
stop watch.
Lap times
General information
It is possible to measure and store up to nine
lap times. Older lap times are overwritten.
Seite 93DisplaysCONTROLS93
Online Edition for Part no. 01 40 2 964 625 - X/15
Page 94 of 248
Measuring and storing a lap time1.Press button, arrow 2, to start the stop
watch.2.Press button, arrow 3, to measure and store
a lap time.
The lap time is briefly shown in the display
and via the seconds pointer of the stop
watch, for example, LAP 1 with the meas‐
ured time. The stop watch continues run‐
ning in the background.3.If needed, press button, arrow 3, again to
measure a further lap time.
Calling up lap times
1.Press button, arrow 1, repeatedly until
LAP 1 is shown on the display.2.Press button, arrow 2, to call up the individ‐
ual lap times.
Deleting lap times
1.Press button, arrow 1, repeatedly until
LAP 1 is shown on the display.2.Press button, arrow 3, to delete all stored
lap times.
Displaying the time
The time is copied from the instrument cluster.
Press button, arrow 1, repeatedly until the time
is displayed.
Seite 94CONTROLSDisplays94
Online Edition for Part no. 01 40 2 964 625 - X/15