ESP MINI 3 door 2015 Repair Manual
[x] Cancel search | Manufacturer: MINI, Model Year: 2015, Model line: 3 door, Model: MINI 3 door 2015Pages: 248, PDF Size: 5.43 MB
Page 149 of 248
Settings are stored automatically after approxi‐
mately 10 seconds.
Sun visor
Glare shield
Fold the sun visor down or up.
Vanity mirror
A vanity mirror is located in the sun visor be‐
hind a cover.
When the cover is opened, the mirror lighting
switches on.
Ashtray/cigarette
lighter
Overview
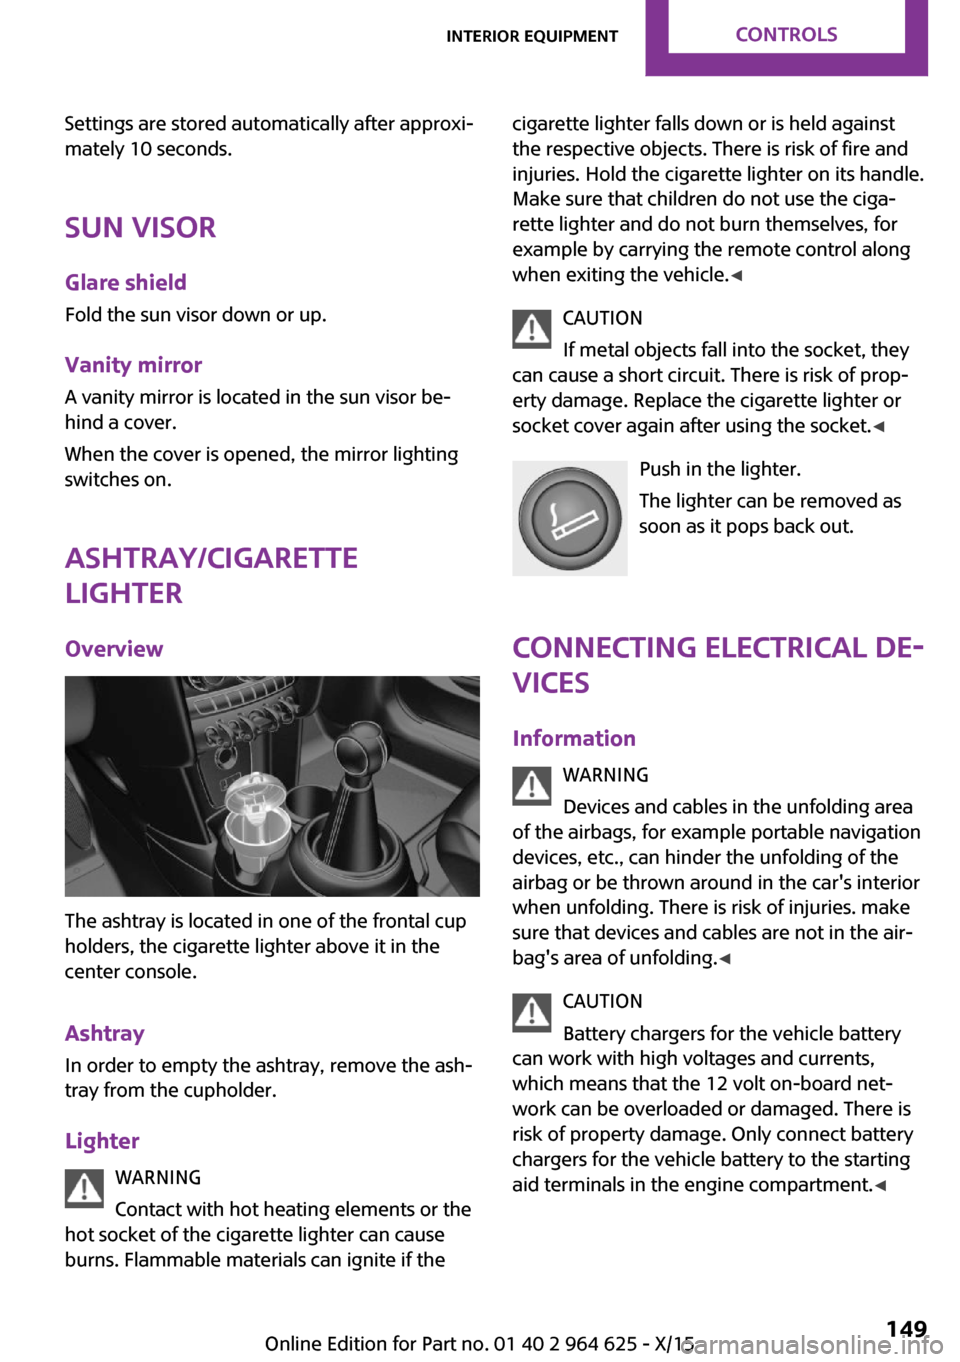
The ashtray is located in one of the frontal cup
holders, the cigarette lighter above it in the
center console.
Ashtray In order to empty the ashtray, remove the ash‐
tray from the cupholder.
Lighter WARNING
Contact with hot heating elements or the
hot socket of the cigarette lighter can cause
burns. Flammable materials can ignite if the
cigarette lighter falls down or is held against
the respective objects. There is risk of fire and
injuries. Hold the cigarette lighter on its handle.
Make sure that children do not use the ciga‐
rette lighter and do not burn themselves, for
example by carrying the remote control along
when exiting the vehicle. ◀
CAUTION
If metal objects fall into the socket, they
can cause a short circuit. There is risk of prop‐
erty damage. Replace the cigarette lighter or
socket cover again after using the socket. ◀
Push in the lighter.
The lighter can be removed as
soon as it pops back out.
Connecting electrical de‐
vices
Information WARNING
Devices and cables in the unfolding area
of the airbags, for example portable navigation
devices, etc., can hinder the unfolding of the
airbag or be thrown around in the car's interior
when unfolding. There is risk of injuries. make
sure that devices and cables are not in the air‐
bag's area of unfolding. ◀
CAUTION
Battery chargers for the vehicle battery
can work with high voltages and currents,
which means that the 12 volt on-board net‐
work can be overloaded or damaged. There is
risk of property damage. Only connect battery
chargers for the vehicle battery to the starting
aid terminals in the engine compartment. ◀Seite 149Interior equipmentCONTROLS149
Online Edition for Part no. 01 40 2 964 625 - X/15
Page 152 of 248
WARNING
Body parts can be jammed when moving
the head restraint. There is risk of injuries.
Make sure that the area of movement is clear
when moving the head restraint. ◀
Folding down rear seat backrests
The rear seat backrest can be folded down
from the front or from the trunk.
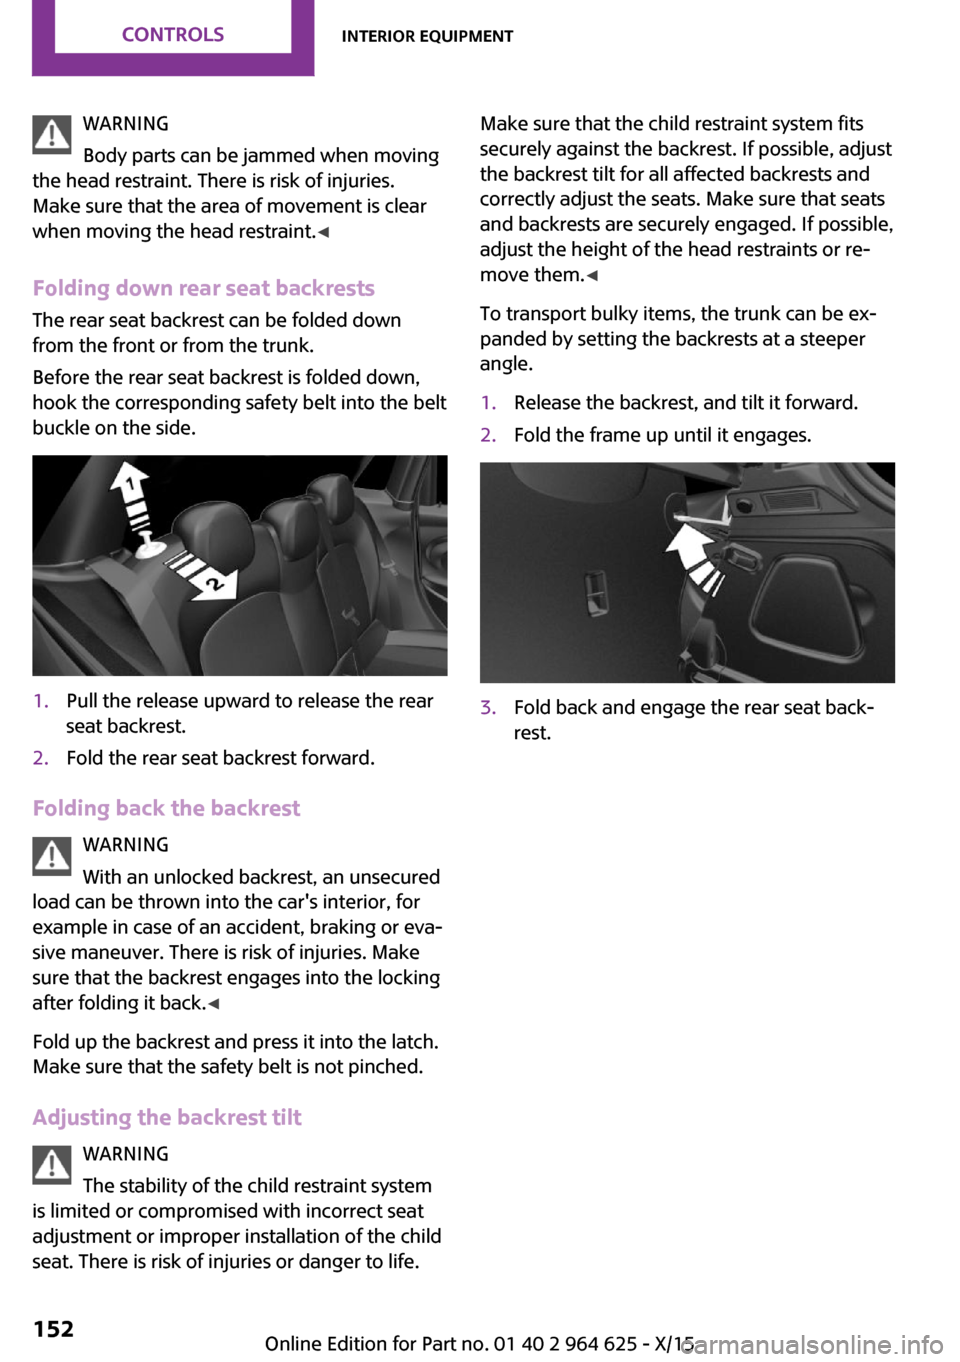
Before the rear seat backrest is folded down,
hook the corresponding safety belt into the belt
buckle on the side.1.Pull the release upward to release the rear
seat backrest.2.Fold the rear seat backrest forward.
Folding back the backrest
WARNING
With an unlocked backrest, an unsecured
load can be thrown into the car's interior, for
example in case of an accident, braking or eva‐
sive maneuver. There is risk of injuries. Make
sure that the backrest engages into the locking
after folding it back. ◀
Fold up the backrest and press it into the latch.
Make sure that the safety belt is not pinched.
Adjusting the backrest tilt WARNING
The stability of the child restraint system
is limited or compromised with incorrect seat
adjustment or improper installation of the child
seat. There is risk of injuries or danger to life.
Make sure that the child restraint system fits
securely against the backrest. If possible, adjust
the backrest tilt for all affected backrests and
correctly adjust the seats. Make sure that seats
and backrests are securely engaged. If possible,
adjust the height of the head restraints or re‐
move them. ◀
To transport bulky items, the trunk can be ex‐
panded by setting the backrests at a steeper
angle.1.Release the backrest, and tilt it forward.2.Fold the frame up until it engages.3.Fold back and engage the rear seat back‐
rest.Seite 152CONTROLSInterior equipment152
Online Edition for Part no. 01 40 2 964 625 - X/15
Page 153 of 248
Storage compartmentsVehicle features and op‐
tions
This chapter describes all standard, country-
specific and optional features offered with the
series. It also describes features that are not necessarily available in your car, e. g., due to
the selected options or country versions. This
also applies to safety-related functions and sys‐
tems. The respectively applicable country provi‐
sions must be observed when using the respec‐
tive features and systems.
Information WARNING
Loose objects or devices with a cable
connection to the vehicle, for example mobile
phones, can be thrown into the car's interior
while driving, for example in the event of an
accident or during braking and evasive maneu‐
vers. There is risk of injuries. Secure loose ob‐ jects or devices with a cable connection to the
vehicle in the car's interior. ◀
CAUTION
Anti-slip pads such as anti-slip mats can
damage the dashboard. There is risk of prop‐
erty damage. Do not use anti-slip pads. ◀
Overview
The following storage compartments are avail‐
able in the vehicle interior:▷Storage compartment in front of the cu‐
pholders.▷Storage tray in the center console.▷Glove compartment on the front passenger
side.▷Storage compartment in the center arm‐
rest.▷Compartments in the doors.▷Pockets on the backrests of the front seats.
Glove compartment
Information WARNING
Folded open, the glove compartment
protrudes in the car's interior. Objects in the
glove compartment can be thrown into the
car's interior while driving, for example in the
event of an accident or during braking and eva‐
sive maneuvers. There is risk of injuries. Always
close the glove compartment immediately after
using it. ◀
Opening
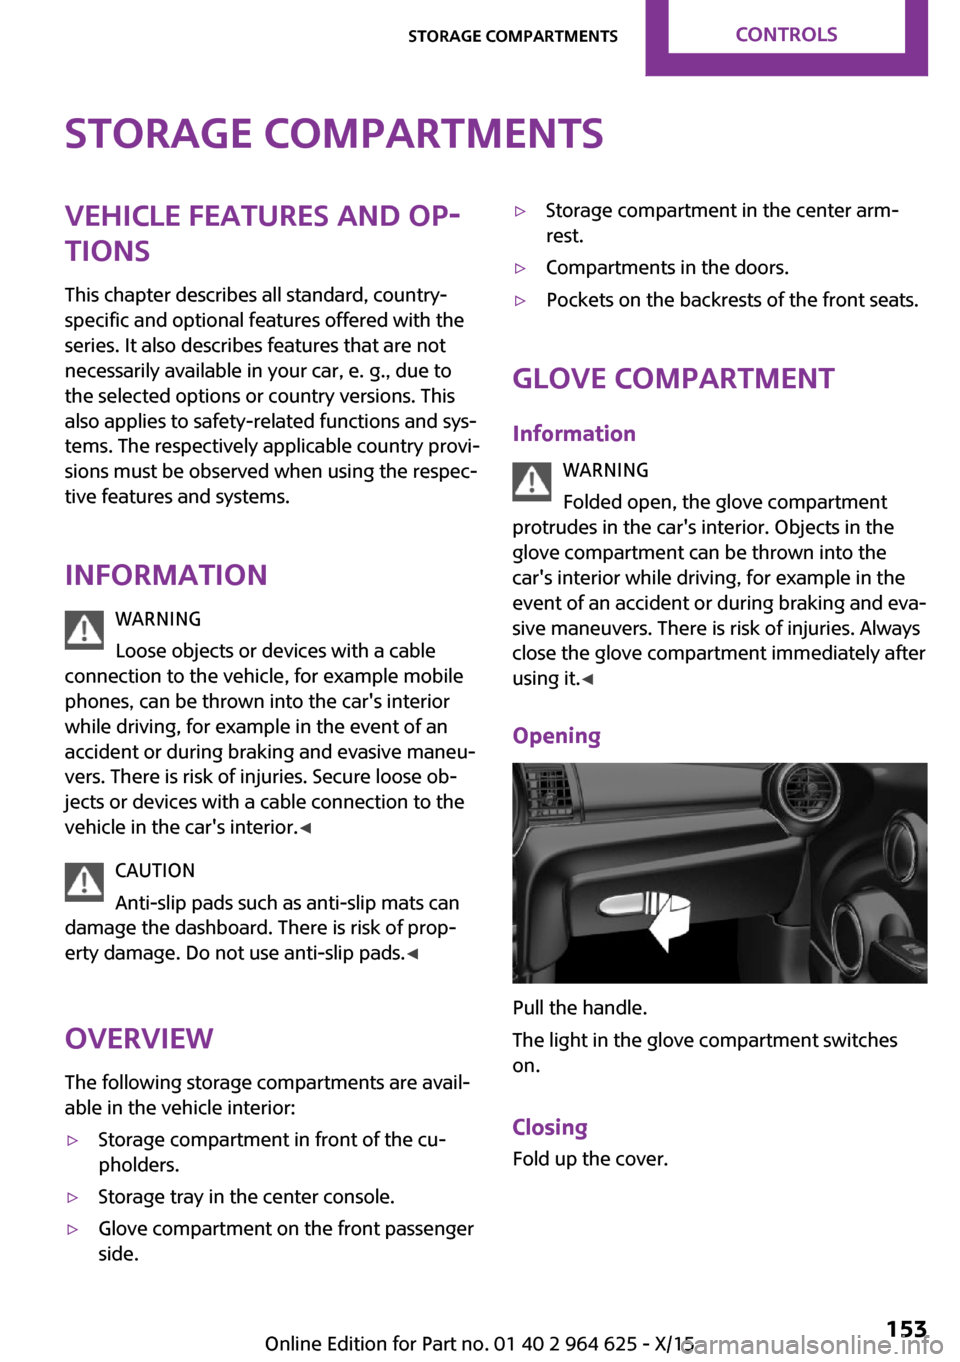
Pull the handle.
The light in the glove compartment switches
on.
Closing Fold up the cover.
Seite 153Storage compartmentsCONTROLS153
Online Edition for Part no. 01 40 2 964 625 - X/15
Page 155 of 248
For 5-door models: in front of the rear seats.Clothes hooks WARNING
Clothing articles on the clothes hooks can
obstruct the view while driving. There is risk of
an accident. When suspending clothing articles
from the hooks, ensure that they will not ob‐
struct the driver's view. ◀
WARNING
Improper use of the clothes hooks can
lead to a danger of objects flying about during
braking and evasive maneuvers. There is risk of
injuries and risk of property damage. Only hang
lightweight objects, for example clothing arti‐
cles, from the clothes hooks. ◀
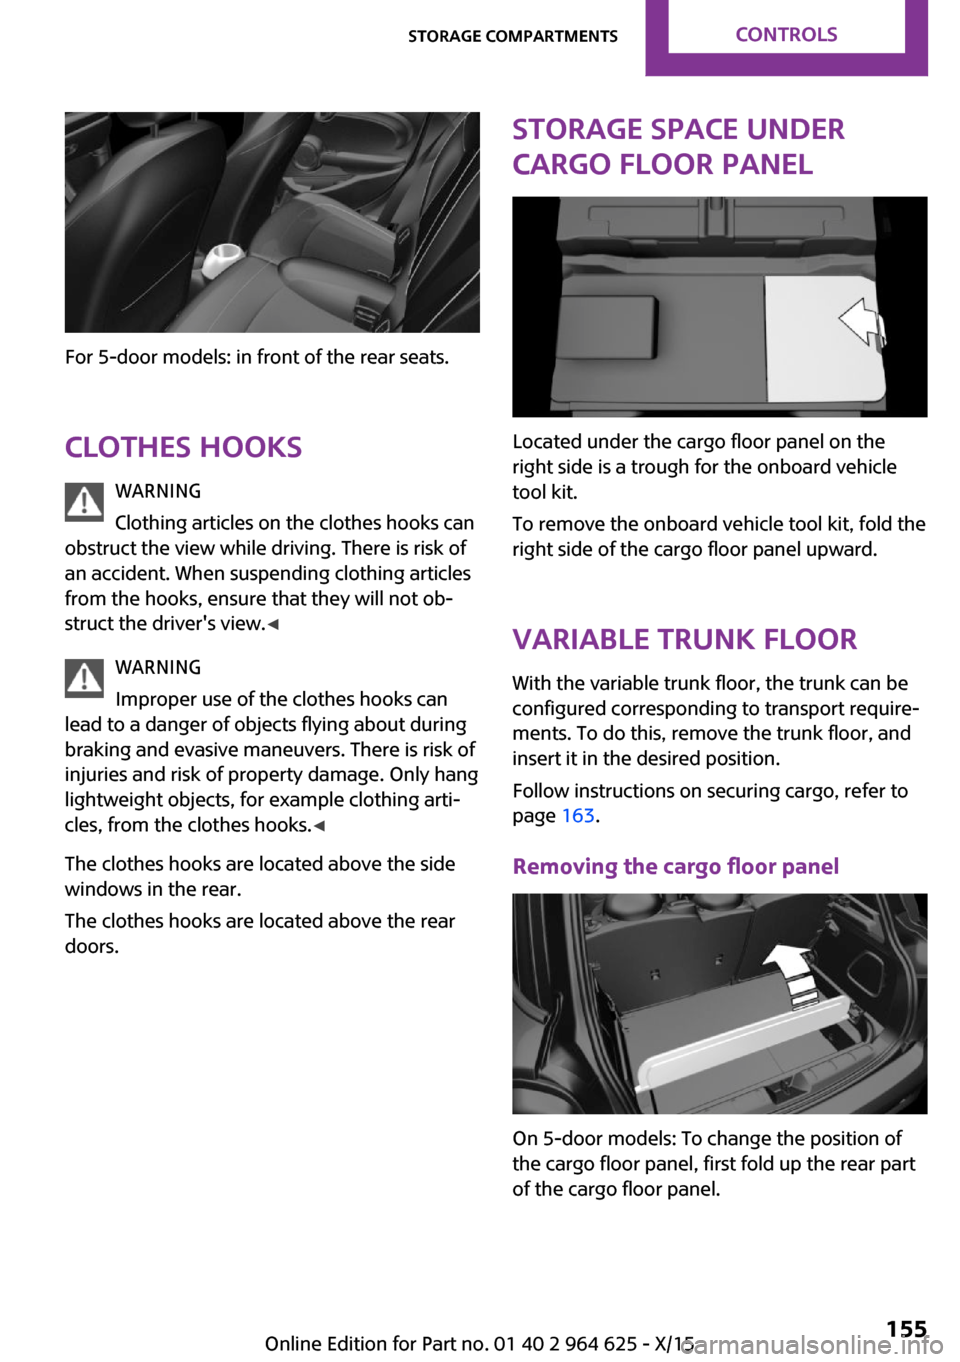
The clothes hooks are located above the side
windows in the rear.
The clothes hooks are located above the rear
doors.
Storage space under
cargo floor panel
Located under the cargo floor panel on the
right side is a trough for the onboard vehicle
tool kit.
To remove the onboard vehicle tool kit, fold the
right side of the cargo floor panel upward.
Variable trunk floor
With the variable trunk floor, the trunk can be
configured corresponding to transport require‐
ments. To do this, remove the trunk floor, and
insert it in the desired position.
Follow instructions on securing cargo, refer to
page 163.
Removing the cargo floor panel
On 5-door models: To change the position of
the cargo floor panel, first fold up the rear part
of the cargo floor panel.
Seite 155Storage compartmentsCONTROLS155
Online Edition for Part no. 01 40 2 964 625 - X/15
Page 160 of 248
Things to remember when drivingVehicle features and op‐tions
This chapter describes all standard, country-
specific and optional features offered with the
series. It also describes features that are not
necessarily available in your car, e. g., due to
the selected options or country versions. This
also applies to safety-related functions and sys‐
tems. The respectively applicable country provi‐
sions must be observed when using the respec‐
tive features and systems.
Breaking-in period General information Moving parts need time to adjust to one an‐
other (break-in time).
The following instructions will help accomplish
a long vehicle life and good efficiency.
During break-in, do not use the Launch Control,
refer to page 74.
Information WARNING
Due to new parts and components, safety
and driver assistance systems can react with a
delay. There is risk of an accident. After instal‐
ling new parts or with a new vehicle, drive con‐
servatively and interfere early if necessary. Ob‐
serve the break-in procedures of the respective
parts and components. ◀
Engine, transmission, and axle drive
Up to 1,200 miles/2,000 km Do not exceed the maximum engine and road
speed:▷For gasoline engine 4,500 rpm and
100 mph/160 km/h.
Avoid full load or kickdown under all circum‐
stances.
From 1,200 miles/2,000 km
The engine and vehicle speed can gradually be
increased.
Tires Tire traction is not optimal due to manufactur‐
ing circumstances when tires are brand-new;
they achieve their full traction potential after a
break-in time.
Drive conservatively for the first
200 miles/300 km.
Brake system Brakes require an initial break-in period of ap‐
prox. 300 miles/500 km to achieve optimal per‐
formance between brake discs and brake pads.
Drive moderately during this break-in period.
Clutch
The function of the clutch reaches its optimal
level only after a distance driven of approx.
300 miles/500 km. During this break-in period,
engage the clutch gently.
Following part replacement
The same break-in procedures should be ob‐
served if any of the components above-men‐
tioned have to be renewed in the course of the
vehicle's operating life.
Seite 160DRIVING TIPSThings to remember when driving160
Online Edition for Part no. 01 40 2 964 625 - X/15
Page 161 of 248
General driving notes
Closing the tailgate WARNING
An open tailgate protrudes from the vehi‐
cle and can endanger occupants and other traf‐
fic participants or damage the vehicle in the
event of an accident, braking or evasive ma‐
neuvers. In addition, exhaust fumes may enter
the vehicle interior. There is risk of injuries or
risk of property damage. Do not drive with the
tailgate open. ◀
If driving with the tailgate open cannot be
avoided:▷Close all windows and the glass sunroof.▷Greatly increase the air flow from the vents.▷Drive moderately.
Hot exhaust system
WARNING
During driving operation, high tempera‐
tures can occur underneath the body, for ex‐
ample caused by the exhaust gas system. If
combustible materials, such as leaves or grass,
come in contact with hot parts of the exhaust
gas system, these materials can ignite. There is
risk of injuries or risk of property damage.
Do not remove the heat shields installed and
never apply undercoating to them. Make sure
that no combustible materials can come in con‐
tact with hot vehicle parts in driving operation,
idle or during parking. Do not touch the hot ex‐
haust system. ◀
Mobile communication devices in the vehicle
WARNING
Vehicle electronics and mobile phones
can influence one another. There is radiation
due to the send operations of mobile phones.
There is risk of injuries or risk of property dam‐
age. If possible, in the car's interior use only
mobile phones with direct connections to an
exterior antenna in order to exclude mutual
disturbance and deflect the radiation from the
car's interior. ◀
Hydroplaning On wet or slushy roads, a wedge of water can
form between the tires and road surface.
This phenomenon is referred to as hydroplan‐
ing. It is characterized by a partial or complete
loss of contact between the tires and the road
surface, ultimately undermining your ability to
steer and brake the vehicle.
Driving through water CAUTION
When driving too quickly through too
deep water, water can enter into the engine compartment, the electrical system or the
transmission. There is risk of property damage.
When driving through water, do not exceed the
maximum indicated water level and the maxi‐
mum speed for driving through water. ◀
When driving through water, observe the fol‐
lowing:▷Drive through calm water only.▷Drive through water only if it is not deeper
than maximum 9.8 inches/25 cm.▷Drive through water no faster than walking
speed, up to 3 mph/5 km/h.
Braking safely
Your vehicle is equipped with ABS as a standard
feature.
Perform an emergency stop in situations that require such.
Steering is still responsive. You can still avoid
any obstacles with a minimum of steering ef‐
fort.
Pulsation of the brake pedal and sounds from
the hydraulic circuits indicate that ABS is in its
active mode.
Seite 161Things to remember when drivingDRIVING TIPS161
Online Edition for Part no. 01 40 2 964 625 - X/15
Page 163 of 248
LoadingVehicle features and op‐tions
This chapter describes all standard, country-
specific and optional features offered with the
series. It also describes features that are not
necessarily available in your car, e. g., due to
the selected options or country versions. This
also applies to safety-related functions and sys‐
tems. The respectively applicable country provi‐
sions must be observed when using the respec‐
tive features and systems.
Information WARNING
High gross weight can overheat the tires,
damage them, and cause a sudden drop in tire
inflation pressure. There is risk of an accident.
Pay attention to the permitted load capacity of
the tires and never exceed the permitted gross
weight. ◀
WARNING
Loose objects or devices with a cable
connection to the vehicle, for example mobile
phones, can be thrown into the car's interior
while driving, for example in the event of an
accident or during braking and evasive maneu‐
vers. There is risk of injuries. Secure loose ob‐
jects or devices with a cable connection to the
vehicle in the car's interior. ◀
CAUTION
Fluids in the cargo area can cause dam‐
age. There is risk of property damage. Make
sure that no fluids leak in the cargo area. ◀Determining the load
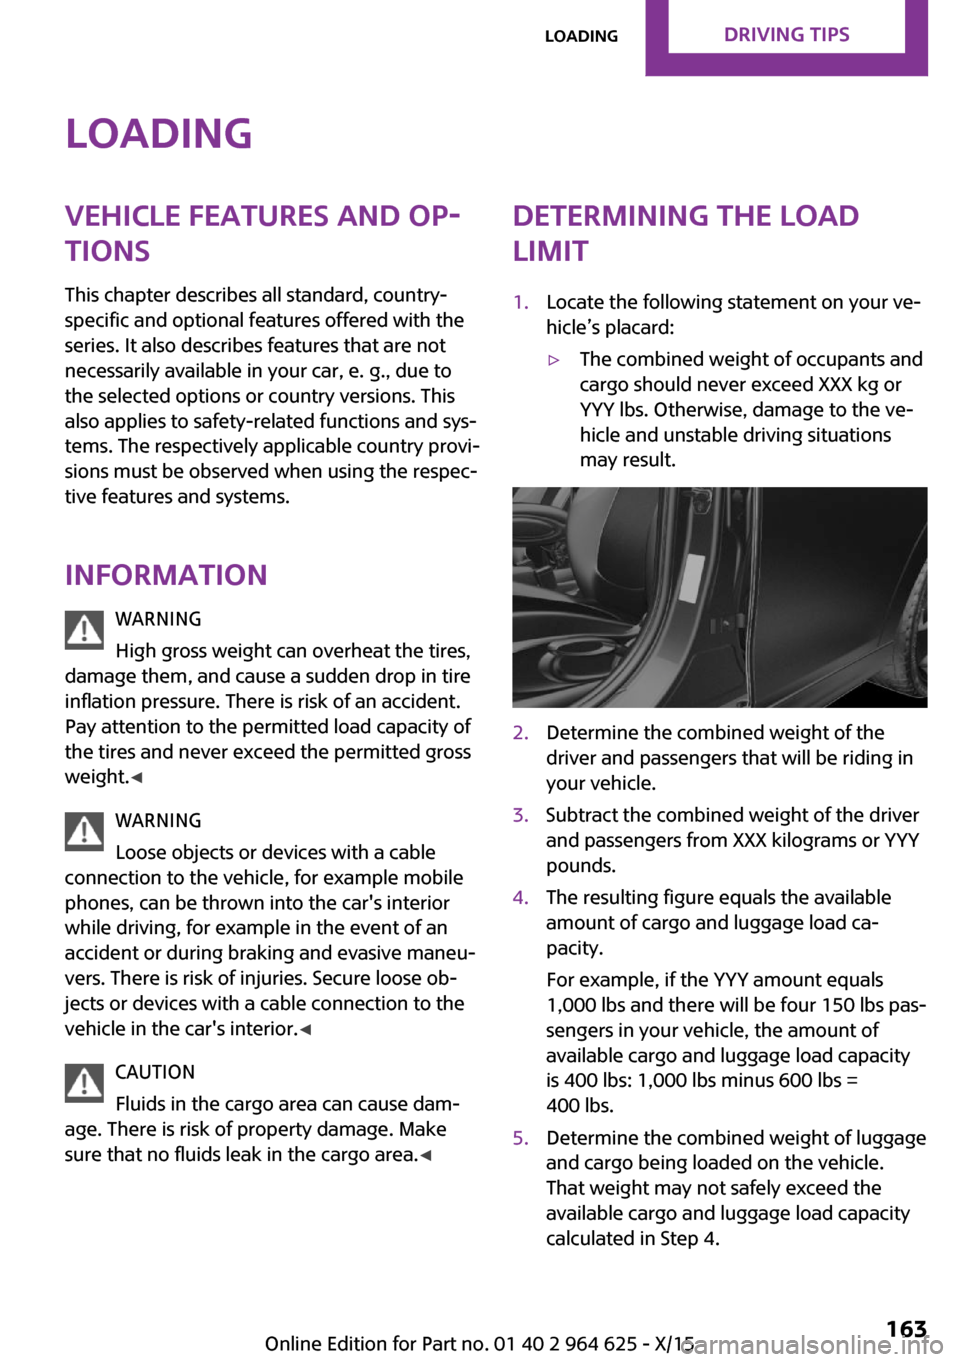
limit1.Locate the following statement on your ve‐
hicle’s placard:▷The combined weight of occupants and
cargo should never exceed XXX kg or
YYY lbs. Otherwise, damage to the ve‐
hicle and unstable driving situations
may result.2.Determine the combined weight of the
driver and passengers that will be riding in
your vehicle.3.Subtract the combined weight of the driver
and passengers from XXX kilograms or YYY
pounds.4.The resulting figure equals the available
amount of cargo and luggage load ca‐
pacity.
For example, if the YYY amount equals
1,000 lbs and there will be four 150 lbs pas‐
sengers in your vehicle, the amount of
available cargo and luggage load capacity
is 400 lbs: 1,000 lbs minus 600 lbs =
400 lbs.5.Determine the combined weight of luggage
and cargo being loaded on the vehicle.
That weight may not safely exceed the
available cargo and luggage load capacity
calculated in Step 4.Seite 163LoadingDRIVING TIPS163
Online Edition for Part no. 01 40 2 964 625 - X/15
Page 165 of 248
Roof racks are available as special accessories.Securing
Follow the installation instructions of the roof
rack.
Loading
Because roof racks raise the vehicle's center of
gravity when loaded, they have a major effect
on vehicle handling and steering response.
Therefore, note the following when loading and
driving:▷Do not exceed the approved roof/axle
loads and the approved gross vehicle
weight.▷Be sure that adequate clearance is main‐
tained for tilting and opening the glass sun‐
roof.▷Distribute the roof load uniformly.▷The roof load should not extend past the
loading area.▷Always place the heaviest pieces on the
bottom.▷Secure the roof luggage firmly, e.g., tie with
ratchet straps.▷Do not let objects project into the opening
path of the tailgate.▷Drive cautiously and avoid sudden acceler‐
ation and braking maneuvers. Take corners
gently.
Rear luggage rack
General information Installation only possible with rear luggage rack
preparation.
Rear racks are available as special accessories.
Information Follow the installation instructions of the rear
luggage rack.
Drive cautiously and avoid sudden acceleration
and braking maneuvers. Take corners gently.
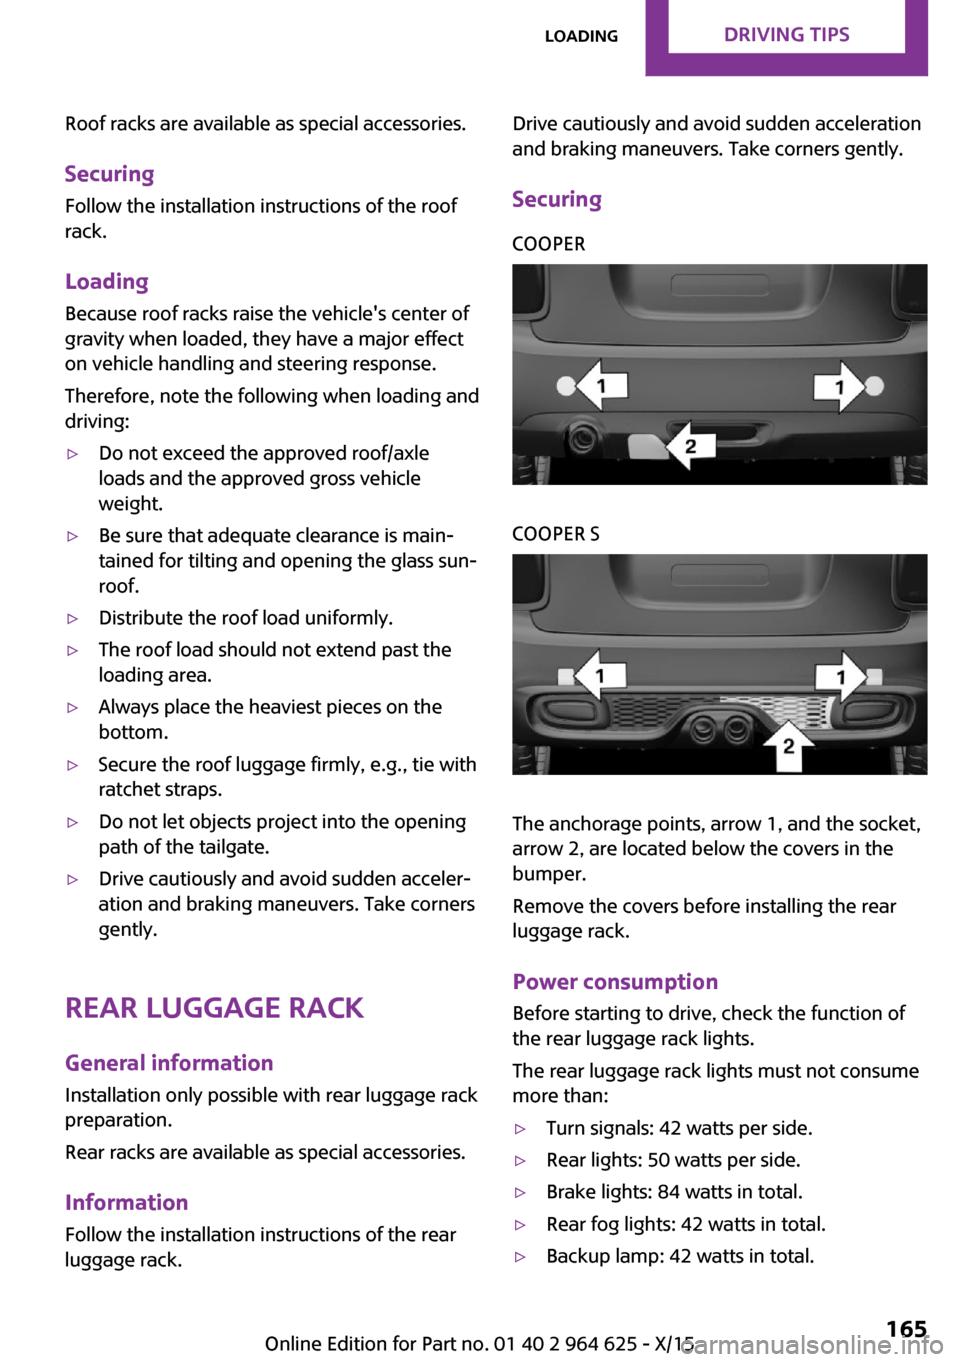
SecuringCOOPERCOOPER S
The anchorage points, arrow 1, and the socket,
arrow 2, are located below the covers in the
bumper.
Remove the covers before installing the rear
luggage rack.
Power consumption
Before starting to drive, check the function of
the rear luggage rack lights.
The rear luggage rack lights must not consume
more than:
▷Turn signals: 42 watts per side.▷Rear lights: 50 watts per side.▷Brake lights: 84 watts in total.▷Rear fog lights: 42 watts in total.▷Backup lamp: 42 watts in total.Seite 165LoadingDRIVING TIPS165
Online Edition for Part no. 01 40 2 964 625 - X/15
Page 166 of 248
Saving fuelVehicle features and op‐tions
This chapter describes all standard, country-
specific and optional features offered with the
series. It also describes features that are not necessarily available in your car, e. g., due to
the selected options or country versions. This
also applies to safety-related functions and sys‐
tems. The respectively applicable country provi‐
sions must be observed when using the respec‐
tive features and systems.
General information Your vehicle contains advanced technology for
the reduction of fuel consumption and emis‐
sions.
Fuel consumption depends on a number of dif‐
ferent factors.
The implementation of certain measures, driv‐
ing style and regular maintenance can influ‐
ence fuel consumption and environmental im‐
pact.
Remove unnecessary
cargo
Additional weight increases fuel consumption.
Remove attached parts
following use
Remove roof-mounted or rear luggage racks
which are no longer required following use.
Attached parts on the vehicle impair the aero‐
dynamics and increase the fuel consumption.Close the windows and
glass sunroof
Driving with the glass sunroof and windows
open results in increased air resistance and
raises fuel consumption.
Tires
General information Tires can affect fuel consumption in various
ways, for example, tire size may influence fuel
consumption.
Check the tire inflation pressure
regularly
Check and, if needed, correct the tire inflation
pressure at least twice a month and before
starting on a long trip.
Low tire inflation pressure increases rolling re‐
sistance and thus raises fuel consumption and
tire wear.
Drive away without de‐lay
Do not wait for the engine to warm-up while
the vehicle remains stationary. Start driving
right away, but at moderate engine speeds.
This is the fastest way for the cold engine to
reach its operating temperature.
Look well ahead when
driving
Avoid unnecessary acceleration and braking.Seite 166DRIVING TIPSSaving fuel166
Online Edition for Part no. 01 40 2 964 625 - X/15
Page 167 of 248
By maintaining a suitable distance to the vehi‐
cle driving ahead of you.
Driving smoothly and proactively reduces fuel
consumption.
Avoid high engine speeds
As a rule: driving at low engine speeds lowers
fuel consumption and reduces wear.
Use 1st gear to get the vehicle moving. Starting
with the 2nd gear, accelerate rapidly. When ac‐
celerating, shift up before reaching high engine
speeds.
When you reach the desired speed, shift into
the highest applicable gear and drive with the
engine speed as low as possible and at a con‐
stant speed.
The gear shift indicator, refer to page 83, of
your vehicle indicates the most fuel efficient gear.
Use coasting conditions When approaching a red light, take your foot
off the accelerator and let the vehicle coast to a
halt.
For going downhill take your foot off the accel‐
erator and let the vehicle roll.
The flow of fuel is interrupted while coasting.
Switch off the engine
during longer stops
Switch off the engine during longer stops, for
example, at traffic lights, railroad crossings or in
traffic congestion.
Auto Start/Stop function
The Auto Start/Stop function of your vehicle au‐
tomatically switches off the engine during a
stop.If the engine is switched off and then restarted
rather than leaving the engine running con‐
stantly, fuel consumption and emissions are re‐
duced. Savings can begin within a few seconds
of switching off the engine.
In addition, fuel consumption is also deter‐
mined by other factors, such as driving style,
road conditions, maintenance or environmental
factors.
Switch off any functions
that are not currently
needed
Functions such as seat heating and the rear
window defroster require a lot of energy and
consume additional fuel, especially in city and
stop-and-go traffic.
Therefore, switch off these functions if they are
not actually needed.
Have maintenance car‐
ried out
Have vehicles maintained regularly to achieve
optimal vehicle efficiency and service life. MINI
recommends that maintenance work be per‐
formed by a MINI service center.
Also note the MINI maintenance systems, refer
to page 202.
GREEN Mode
The concept The GREEN Mode supports a driving style that
saves on fuel consumption. For this purpose,
the engine control and comfort features, e. g.
the climate control output, are adjusted.
For Steptronic transmission:Seite 167Saving fuelDRIVING TIPS167
Online Edition for Part no. 01 40 2 964 625 - X/15