tyre pressure MINI 5 door 2015 Owner's Manua
[x] Cancel search | Manufacturer: MINI, Model Year: 2015, Model line: 5 door, Model: MINI 5 door 2015Pages: 248, PDF Size: 5.43 MB
Page 212 of 248

Changing wheels/tiresInformationWhen using run-flat tires or tire sealants, a tire
does not need to be changed immediately in
the event of pressure loss due to a flat tire.
Which is why no spare tire is available.
The tools for changing wheels are available as
accessories from your dealer’s service center or
another qualified service center or repair shop.
Jacking points for the vehicle jack
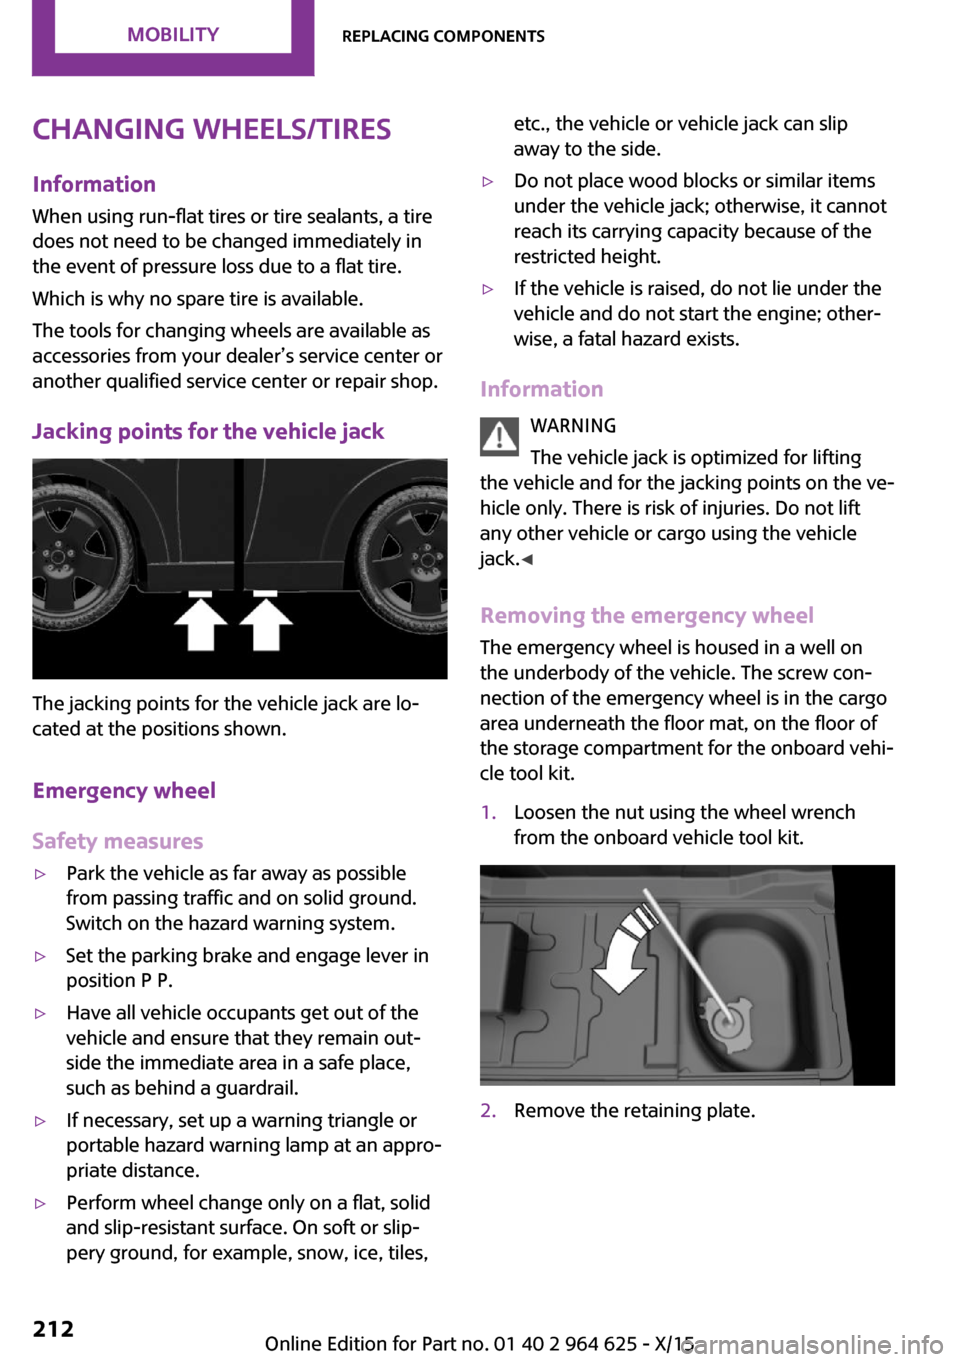
The jacking points for the vehicle jack are lo‐
cated at the positions shown.
Emergency wheel
Safety measures
▷Park the vehicle as far away as possible
from passing traffic and on solid ground.
Switch on the hazard warning system.▷Set the parking brake and engage lever in
position P P.▷Have all vehicle occupants get out of the
vehicle and ensure that they remain out‐
side the immediate area in a safe place,
such as behind a guardrail.▷If necessary, set up a warning triangle or
portable hazard warning lamp at an appro‐
priate distance.▷Perform wheel change only on a flat, solid
and slip-resistant surface. On soft or slip‐
pery ground, for example, snow, ice, tiles,etc., the vehicle or vehicle jack can slip
away to the side.▷Do not place wood blocks or similar items
under the vehicle jack; otherwise, it cannot
reach its carrying capacity because of the
restricted height.▷If the vehicle is raised, do not lie under the
vehicle and do not start the engine; other‐
wise, a fatal hazard exists.
Information
WARNING
The vehicle jack is optimized for lifting
the vehicle and for the jacking points on the ve‐
hicle only. There is risk of injuries. Do not lift
any other vehicle or cargo using the vehicle
jack. ◀
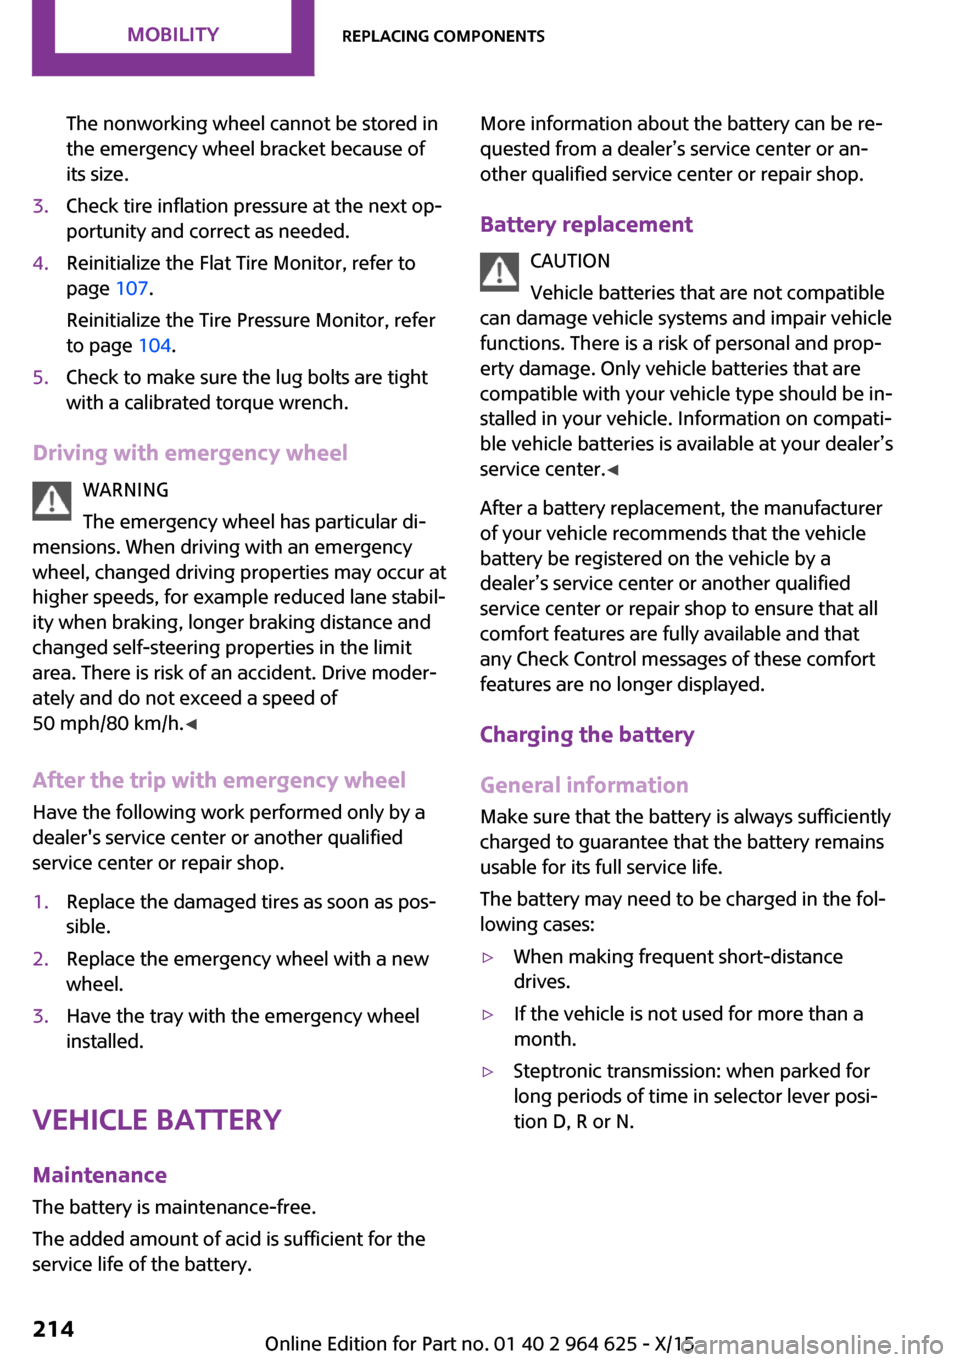
Removing the emergency wheel The emergency wheel is housed in a well on
the underbody of the vehicle. The screw con‐
nection of the emergency wheel is in the cargo
area underneath the floor mat, on the floor of
the storage compartment for the onboard vehi‐
cle tool kit.
1.Loosen the nut using the wheel wrench
from the onboard vehicle tool kit.2.Remove the retaining plate.Seite 212MOBILITYReplacing components212
Online Edition for Part no. 01 40 2 964 625 - X/15
Page 214 of 248

The nonworking wheel cannot be stored in
the emergency wheel bracket because of
its size.3.Check tire inflation pressure at the next op‐
portunity and correct as needed.4.Reinitialize the Flat Tire Monitor, refer to
page 107.
Reinitialize the Tire Pressure Monitor, refer
to page 104.5.Check to make sure the lug bolts are tight
with a calibrated torque wrench.
Driving with emergency wheel
WARNING
The emergency wheel has particular di‐
mensions. When driving with an emergency wheel, changed driving properties may occur at
higher speeds, for example reduced lane stabil‐
ity when braking, longer braking distance and
changed self-steering properties in the limit
area. There is risk of an accident. Drive moder‐
ately and do not exceed a speed of
50 mph/80 km/h. ◀
After the trip with emergency wheel Have the following work performed only by a
dealer's service center or another qualified
service center or repair shop.
1.Replace the damaged tires as soon as pos‐
sible.2.Replace the emergency wheel with a new
wheel.3.Have the tray with the emergency wheel
installed.
Vehicle battery
Maintenance
The battery is maintenance-free.
The added amount of acid is sufficient for the
service life of the battery.
More information about the battery can be re‐
quested from a dealer’s service center or an‐
other qualified service center or repair shop.
Battery replacement CAUTION
Vehicle batteries that are not compatible
can damage vehicle systems and impair vehicle
functions. There is a risk of personal and prop‐
erty damage. Only vehicle batteries that are
compatible with your vehicle type should be in‐
stalled in your vehicle. Information on compati‐
ble vehicle batteries is available at your dealer’s
service center. ◀
After a battery replacement, the manufacturer
of your vehicle recommends that the vehicle
battery be registered on the vehicle by a
dealer’s service center or another qualified
service center or repair shop to ensure that all
comfort features are fully available and that
any Check Control messages of these comfort
features are no longer displayed.
Charging the battery
General information
Make sure that the battery is always sufficiently
charged to guarantee that the battery remains
usable for its full service life.
The battery may need to be charged in the fol‐
lowing cases:▷When making frequent short-distance
drives.▷If the vehicle is not used for more than a
month.▷Steptronic transmission: when parked for
long periods of time in selector lever posi‐
tion D, R or N.Seite 214MOBILITYReplacing components214
Online Edition for Part no. 01 40 2 964 625 - X/15