navigation system MINI Clubman 2009 (Mini Connected) Service Manual
[x] Cancel search | Manufacturer: MINI, Model Year: 2009, Model line: Clubman, Model: MINI Clubman 2009Pages: 218, PDF Size: 3.69 MB
Page 131 of 218
MOBILITYAT A GLANCE CONTROLS DRIVING TIPS ENTERTAINMENT
129
NAVIGATION REFERENCE
What to do if …
What to do if …
>a navigation DVD is inserted, but an instruc-
tion to insert the DVD appears on the Control
Display?
The navigation DVD may not be the correct
DVD for the navigation system. This infor-
mation is indicated on the DVD label.
>you request the current position of your
vehicle, but do not receive a precise display?
The system is unable to receive enough GPS
signals at your current position due to
obstructions, your current position is not yet
available on your navigation DVD, or the sys-
tem is in the process of calculating your cur-
rent position. As a rule, reception is guaran-
teed when you are in the open.
>the destination guidance does not accept a
destination?
The data of the destination is not stored on
the navigation DVD that is loaded. Choose a
destination as close as possible to the origi-
nal one.
>the destination guidance does not accept an
address without the street name?
On the navigation DVD, no downtown area
can be determined for the city or town
entered. Enter any street, or a destination
such as the railway station in the selected
town, and then start the destination guid-
ance.
>you want to enter a destination for the des-
tination guidance, but it is not possible to
select the letters for your desired entry?
The data of the destination is not stored on
the navigation DVD that is loaded. In this
case, the system will not offer you any letters
to choose from. Choose a destination as
close as possible to the original one.
>the system stops furnishing directions on
which way to turn as you approach inter-
sections?
You are driving in an area that has not yet
been completely recorded on the navigation
DVD. Instead of an arrow indicating a turn, you will see an arrow which indicates the
general direction of your planned route. Or
you have left the recommended route and
the system requires a few seconds to calcu-
late a new recommended route.
>the navigation system does not react to
entries?
If the battery was disconnected, it takes
about 10 minutes before the system is once
again operational.
Page 137 of 218
MOBILITYAT A GLANCE CONTROLS DRIVING TIPS ENTERTAINMENT
135
NAVIGATION REFERENCE
Radio
Your radio provides reception of the FM and AM
wavebands.
Listening to the radio
Press the button if the sound output is switch-
ed off.
Onboard monitor, for operating principle refer
to page16.
1.Press the button.
This opens the start menu.
2.Move the MINI joystick to highlight "Enter-
tainment" and press the MINI joystick.
3.If necessary, move the highlight marker to
the uppermost field. Select "FM" or "AM".
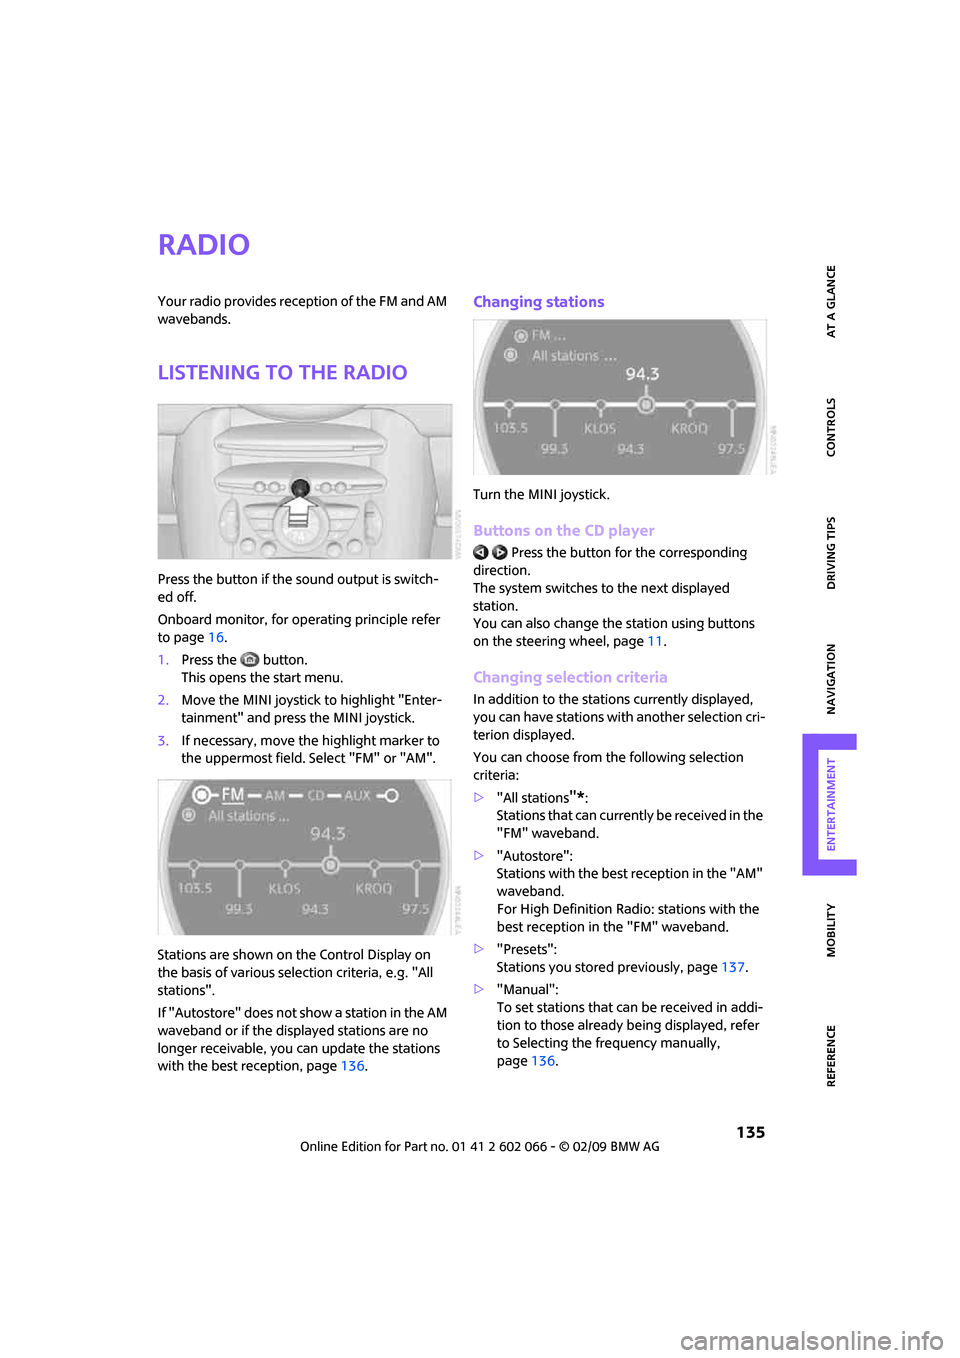
Stations are shown on the Control Display on
the basis of various selection criteria, e.g. "All
stations".
If "Autostore" does not show a station in the AM
waveband or if the displayed stations are no
longer receivable, you can update the stations
with the best reception, page136.
Changing stations
Turn the MINI joystick.
Buttons on the CD player
Press the button for the corresponding
direction.
The system switches to the next displayed
station.
You can also change the station using buttons
on the steering wheel, page11.
Changing selection criteria
In addition to the stations currently displayed,
you can have stations with another selection cri-
terion displayed.
You can choose from the following selection
criteria:
>"All stations
"*:
Stations that can currently be received in the
"FM" waveband.
>"Autostore":
Stations with the best reception in the "AM"
waveband.
For High Definition Radio: stations with the
best reception in the "FM" waveband.
>"Presets":
Stations you stored previously, page137.
>"Manual":
To set stations that can be received in addi-
tion to those already being displayed, refer
to Selecting the frequency manually,
page136.
Page 151 of 218
MOBILITYAT A GLANCE CONTROLS DRIVING TIPS ENTERTAINMENT
149
NAVIGATION REFERENCE
AUX-In port
You can connect an external audio device, for
instance an MP3 player, and play audio tracks
over the car's loudspeaker system. You can
adjust the tone on the onboard monitor.
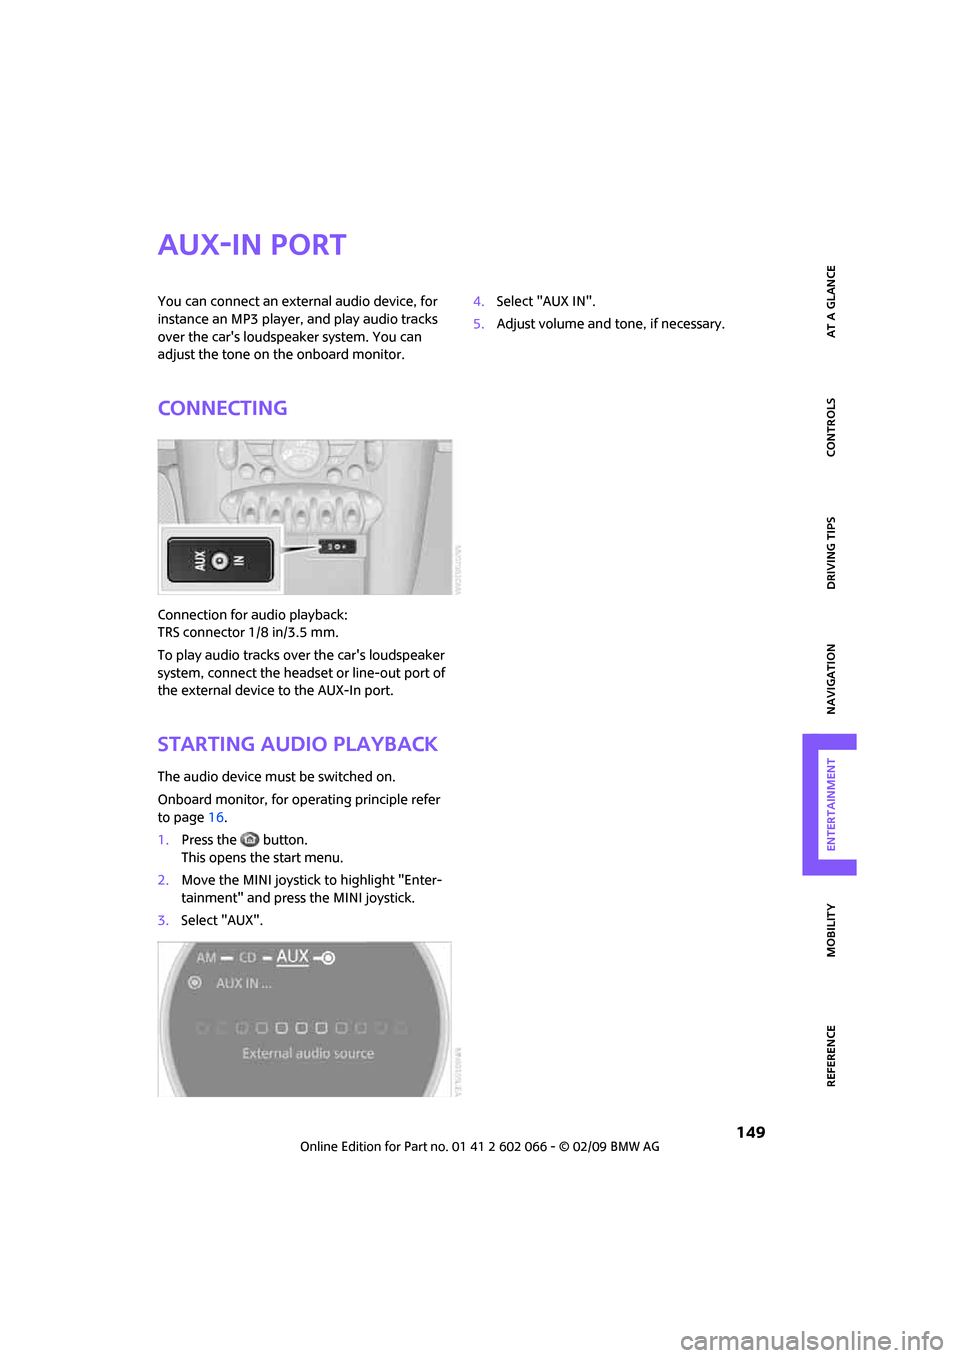
Connecting
Connection for audio playback:
TRS connector 1/8 in/3.5 mm.
To play audio tracks over the car's loudspeaker
system, connect the headset or line-out port of
the external device to the AUX-In port.
Starting audio playback
The audio device must be switched on.
Onboard monitor, for operating principle refer
to page16.
1.Press the button.
This opens the start menu.
2.Move the MINI joystick to highlight "Enter-
tainment" and press the MINI joystick.
3.Select "AUX".4.Select "AUX IN".
5.Adjust volume and tone, if necessary.
Page 159 of 218
MOBILITYAT A GLANCE CONTROLS DRIVING TIPS ENTERTAINMENT
157
NAVIGATION REFERENCE
Fuel specifications
Do not use leaded gasoline, otherwise
permanent damage to the catalytic con-
verter will result.
Do not fill the tank with E85, i.e. fuel containing
85% ethanol, nor with FlexFuel. Otherwise,
the engine and fuel supply system will be
damaged.<
Required fuel
Super Premium gasoline/AKI 91
This gasoline is highly recommended.
However, you may also use gasoline with less
AKI. The minimum AKI Rating is:
>Cooper S, John Cooper Works: 89
>Cooper: 87
If you use gasoline with this minimum AKI Rat-
ing, the engine may produce knocking sounds
when starting at high outside temperatures. This
has no effect on the engine life.
Do not use any gasoline below the speci-
fied minimum fuel grade. Otherwise the
engine could be damaged.<
Use high-quality brands
Field experience has indicated significant differ-
ences in fuel quality: volatility, composition,
additives, etc., among gasolines offered for sale
in the United States and Canada. Fuels contain-
ing up to and including 10 % ethanol or other
oxygenates with up to 2.8 % oxygen by weight,
that is, 15 % MTBE or 3 % methanol plus an
equivalent amount of co-solvent, will not void
the applicable warranties with respect to defects
in materials or workmanship.
The use of poor-quality fuels may result in
drivability, starting and stalling problems
especially under certain environmental condi-
tions such as high ambient temperature and
high altitude.
Should you encounter drivability problems
which you suspect could be related to the fuel
you are using, we recommend that you respond
by switching to a recognized high-quality brand
such as gasoline that is advertised as Top Tier Detergent Gasoline.
Failure to comply with these recommendations
may also result in unscheduled maintenance.<
Page 169 of 218
MOBILITYAT A GLANCE CONTROLS DRIVING TIPS ENTERTAINMENT
167
NAVIGATION REFERENCE
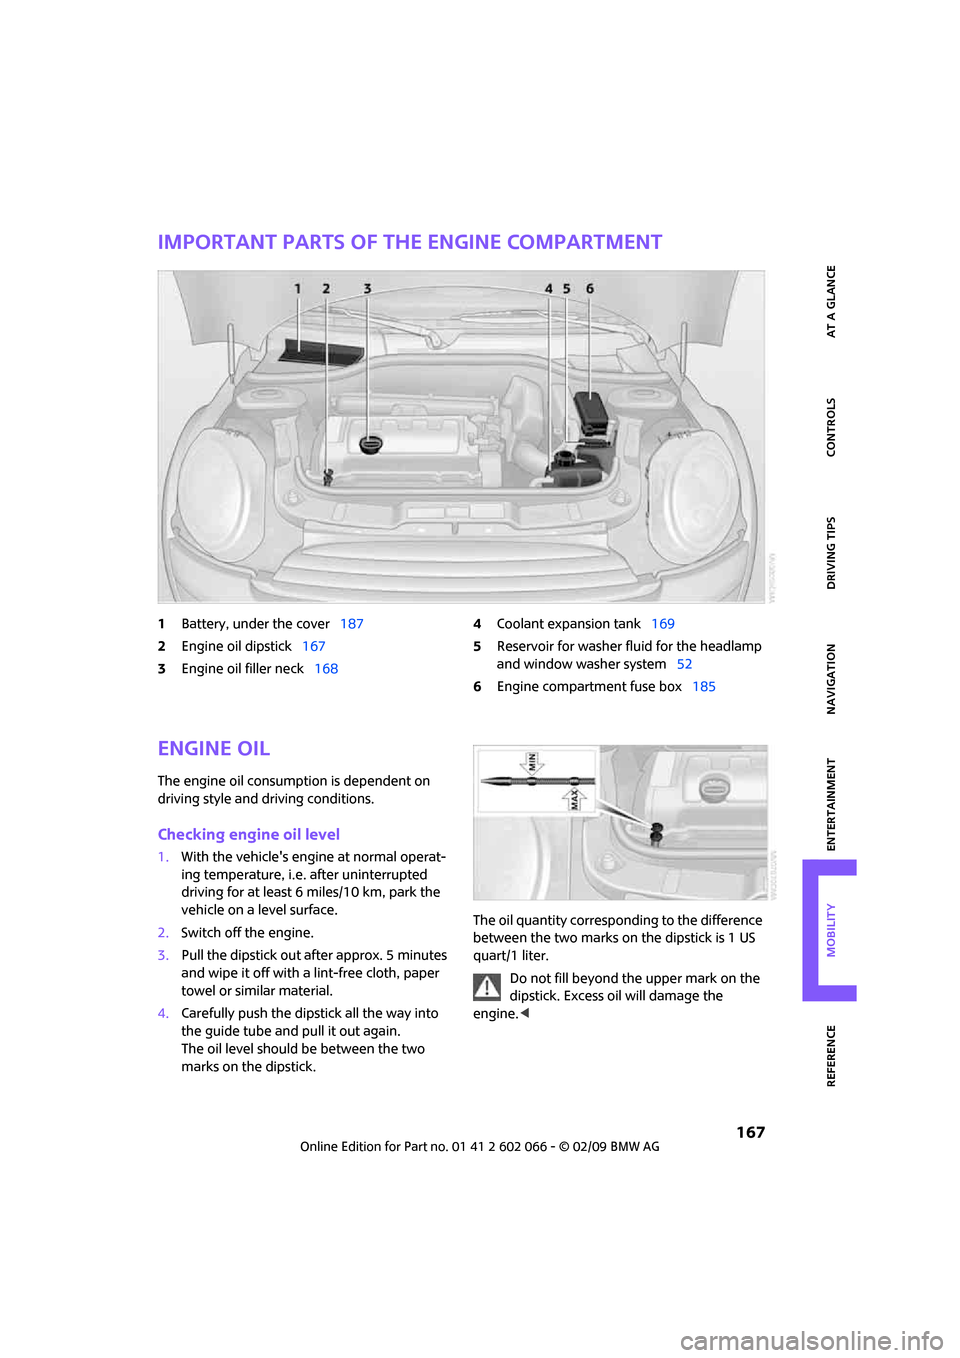
Important parts of the engine compartment
1Battery, under the cover187
2Engine oil dipstick167
3Engine oil filler neck1684Coolant expansion tank169
5Reservoir for washer fluid for the headlamp
and window washer system52
6Engine compartment fuse box185
Engine oil
The engine oil consumption is dependent on
driving style and driving conditions.
Checking engine oil level
1.With the vehicle's engine at normal operat-
ing temperature, i.e. after uninterrupted
driving for at least 6 miles/10 km, park the
vehicle on a level surface.
2.Switch off the engine.
3.Pull the dipstick out after approx. 5 minutes
and wipe it off with a lint-free cloth, paper
towel or similar material.
4.Carefully push the dipstick all the way into
the guide tube and pull it out again.
The oil level should be between the two
marks on the dipstick.The oil quantity corresponding to the difference
between the two marks on the dipstick is 1 US
quart/1 liter.
Do not fill beyond the upper mark on the
dipstick. Excess oil will damage the
engine.<
Page 171 of 218
MOBILITYAT A GLANCE CONTROLS DRIVING TIPS ENTERTAINMENT
169
NAVIGATION REFERENCE
Coolant
Do not add coolant to the cooling system
when the engine is hot. Escaping coolant
can cause burns.<
Coolant consists of half water and half additive.
Not all commercially available additives are suit-
able for your MINI. Your MINI Dealer knows
which additives are suitable and will be glad to
advise you.
Only use suitable additives, otherwise
engine damage may result. Because addi-
tives are harmful to your health, it is important
to follow the instructions on the containers.<
Comply with the appropriate environmen-
tal protection regulations when disposing
of coolant additives.<
Checking coolant level
1.Do not open the hood until the engine has
cooled down.
2.Turn the cap of the expansion tank a little
counterclockwise to allow any accumulated
pressure to escape, then continue turning
to open.
3.The coolant level is correct if it is between
the Min and Max markings.
4.If the coolant is low, slowly add coolant up to
the specified level; do not overfill.
5.Turn the cap until there is an audible click.
6.Have the reason for the coolant loss elimi-
nated as soon as possible.
Page 173 of 218
MOBILITYAT A GLANCE CONTROLS DRIVING TIPS ENTERTAINMENT
171
NAVIGATION REFERENCE
Exhaust emission values
The warning lamps come on. The
exhaust emission values have turned
poor and there is a danger of engine
damage. You can continue your jour-
ney, but moderate your speed and exercise
due caution. Have the car checked as soon as
possible.
Under certain circumstances, one of the lamps
will flash or light up continuously. This indicates
excessive misfiring or a malfunction in the
engine. If this happens, reduce your speed and
visit the nearest MINI Dealer as soon as possible.
Severe misfiring can quickly lead to serious dam-
age of emissions-related components, espe-
cially the catalytic converter. In addition,
mechanical engine components can become
damaged.
If the fuel filler cap is not properly tightened, the
OBD system may conclude that fuel vapors are
escaping, causing an indicator to light up. If the
filler cap is then tightened, the indicator should
go out within a few days.
Event data recorders
Your vehicle may be equipped with one or sev-
eral measuring or diagnostic modules or a
device for recording or sending certain vehicle
data or information.
Page 175 of 218
MOBILITYAT A GLANCE CONTROLS DRIVING TIPS ENTERTAINMENT
173
NAVIGATION REFERENCE
maximum temperature of 1407/606.
If the distance is too close, the pressure too high,
or the temperature too high, parts of the vehicle
can be damaged, or water can penetrate.
Observe the operating instructions for high-
pressure washers.<
Do not spray sensors such as Park Dis-
tance Control with high-pressure washers
for a long time or at a distance of less than
1 ft/30 cm.<
Manual washing
Use a great deal of water and, if necessary, car
shampoo when washing your car by hand. Clean
the vehicle with a sponge or a washing brush
applying a slight amount of pressure.
Before cleaning the windshield, deacti-
vate the rain sensor or turn off the ignition
to prevent unintentional wiping.<
Observe local regulations regarding wash-
ing vehicles by hand.<
Headlamps
Do not wipe dry and do not use abrasive or cor-
rosive cleaning agents. Remove dirt and con-
tamination, such as insects, by soaking with
shampoo and then washing with plenty of
water.
Do not remove accumulated ice and snow with
an ice scraper; use window de-icers instead.
Windows
Clean the outside and inside of the windows and
mirrors with a window cleaner.
Do not clean the mirrors with cleaners
containing quartz.<
Wiper blades
Clean with soapy water and change regularly to
prevent the formation of streaks
Wax, preservatives and dirt on the win-
dows cause streaks when the windshield
wipers are on, and can cause premature wear o
f the wiper blades and interfere with the rain
sensor.<
Paintwork, care
Regular care helps your vehicle retain its value
and protects the paint from the long-term
effects of aggressive substances.
In some regions, environmental factors can
affect the vehicle paintwork and damage it. It is
therefore important to adjust the frequency and
extent of vehicle care correspondingly.
Immediately remove aggressive materials such
as spilled fuel, oil, grease, brake fluid, tree sap
or bird droppings to prevent damage to the
paintwork.
Removing paintwork damage
Depending on the severity of the damage,
immediately repair stone damage or
scratches to prevent rusting.<
The manufacturer of the MINI recommends
repairing paint damage professionally according
to factory specifications with original MINI
paints.
Preservation
Preservation is necessary when water no longer
beads on the clean paint surface. To preserve
the paint, only use preservatives that contain
carnauba or synthetic waxes.
Rubber seals
Only treat with water or rubber care products.
Do not use silicon sprays or other silicon-
containing care products on rubber seals,
otherwise noise and damage could occur.<
Chrome parts*
Carefully clean vehicle parts such as the radiator
grill and door handles with copious quantities of
water and, if necessary, a shampoo additive,
especially when contaminated with road salt.
For additional treatment, use chrome polish.
Light-alloy wheels*
The system produces brake dust that collects on
the light alloy wheels. Clean them regularly with
acid-free wheel cleaner.
Page 179 of 218
MOBILITYAT A GLANCE CONTROLS DRIVING TIPS ENTERTAINMENT
177
NAVIGATION REFERENCE
sumer in question, otherwise short circuits could
result. To avoid possible injury or equipment
damage when replacing bulbs, observe any
instructions provided by the bulb manufac-
turer.<
Caring for headlamps, refer to page173.
For any bulb replacement not described
below, contact a MINI Dealer or a work-
shop that has specially trained personnel work-
ing in accordance with the specifications of the
MINI manufacturer.<
For checking and adjusting headlamp aim,
please contact your MINI Dealer.<
Light-emitting diodes LEDs
Light-emitting diodes installed behind translu-
cent lenses serve as the light sources for many of
the controls and displays in your vehicle. These
light-emitting diodes are related to conven-
tional laser diodes, and legislation defines them
as Class 1 light-emitting diodes.
Do not remove the covers or expose the
eyes directly to the unfiltered light source
for several hours, otherwise this could cause irri-
tation to the retina.<
Bi-Xenon lamps*
The service life of these bulbs is very long and
the probability of failure very low, provided that
they are not switched on and off an excessive
number of times. If a xenon lamp fails neverthe-
less, switch on the fog lamps and continue the
journey with great care, provided that local leg-
islation does not prohibit this.
Have any work on the xenon lamp system,
including bulb replacement, carried out
only by a MINI Dealer or a workshop that has
specially trained personnel working in accor-
dance with the specifications of the MINI manu-
facturer. Due to high voltage, there is a risk of
fatal injury if work on the xenon lamps is carried
out improperly.<
Halogen low beams and high beams
H13 bulb, 60/55 wattsThe H13 bulb is pressurized. Therefore,
wear safety glasses and protective gloves.
Otherwise there is a risk of injury if the bulb is
damaged.<
Be careful when installing the cover, oth-
erwise leaks could occur and cause dam-
age to the headlamp system.<
Accessing the lamp from the engine
compartment
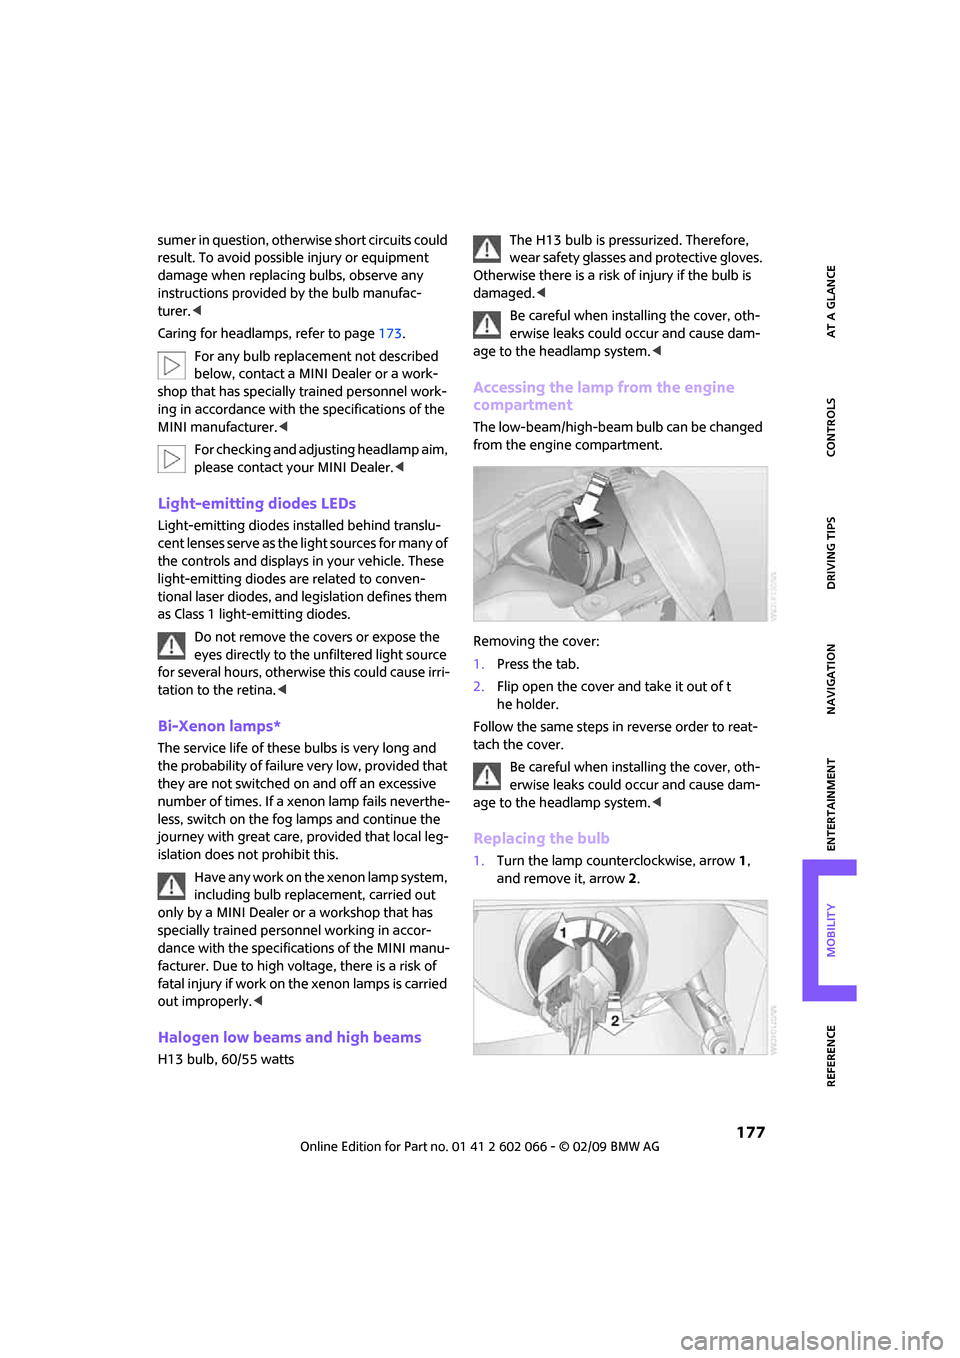
The low-beam/high-beam bulb can be changed
from the engine compartment.
Removing the cover:
1.Press the tab.
2.Flip open the cover and take it out of t
he holder.
Follow the same steps in reverse order to reat-
tach the cover.
Be careful when installing the cover, oth-
erwise leaks could occur and cause dam-
age to the headlamp system.<
Replacing the bulb
1.Turn the lamp counterclockwise, arrow1,
and remove it, arrow2.
Page 183 of 218
MOBILITYAT A GLANCE CONTROLS DRIVING TIPS ENTERTAINMENT
181
NAVIGATION REFERENCE
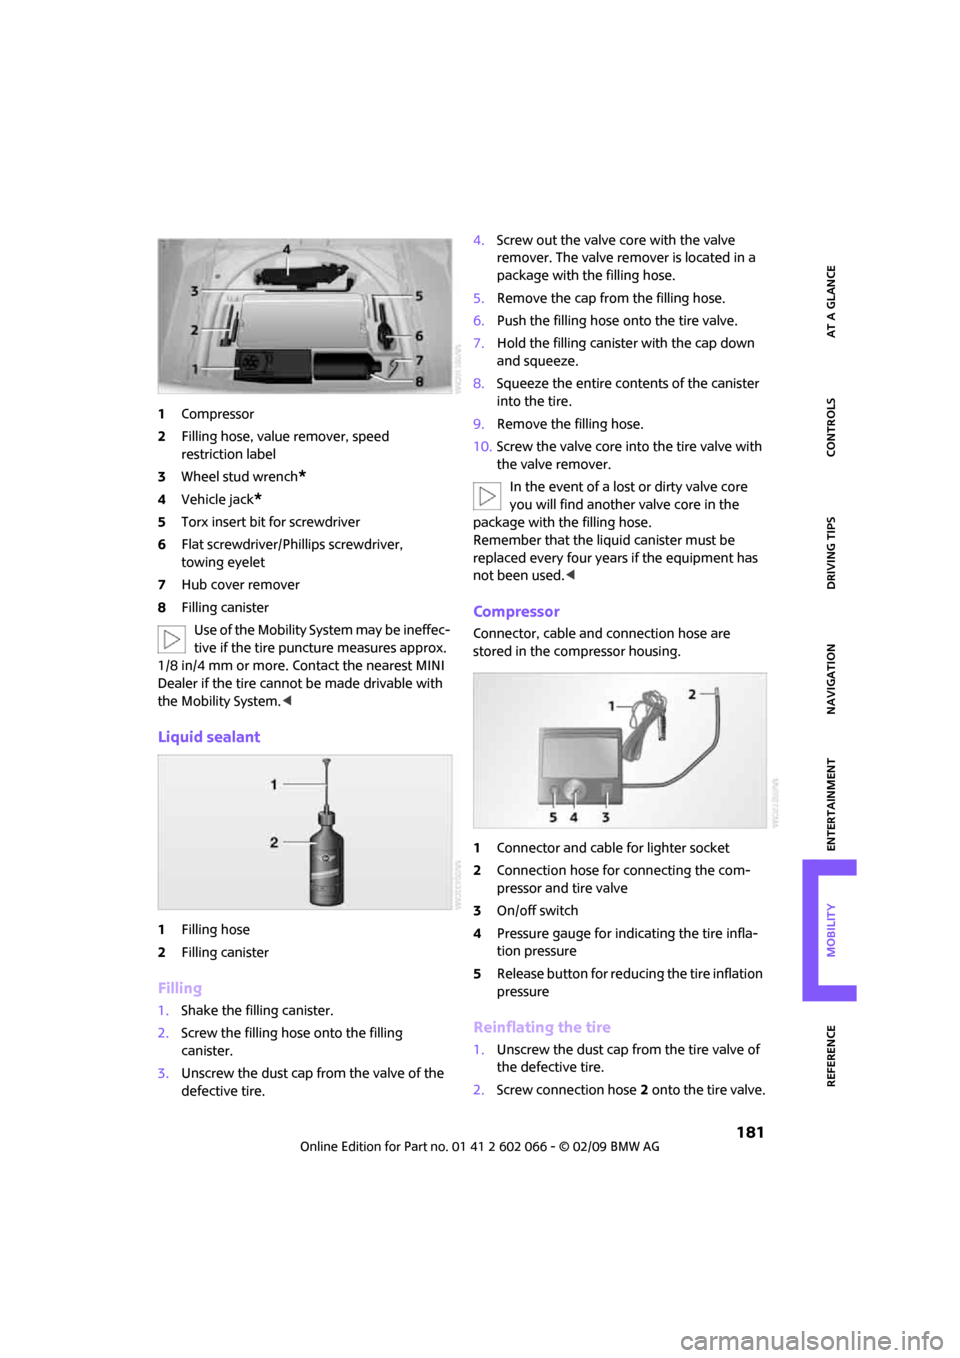
1Compressor
2Filling hose, value remover, speed
restriction label
3Wheel stud wrench
*
4Vehicle jack*
5Torx insert bit for screwdriver
6Flat screwdriver/Phillips screwdriver,
towing eyelet
7Hub cover remover
8Filling canister
Use of the Mobility System may be ineffec-
tive if the tire puncture measures approx.
1/8 in/4 mm or more. Contact the nearest MINI
Dealer if the tire cannot be made drivable with
the Mobility System.<
Liquid sealant
1Filling hose
2Filling canister
Filling
1.Shake the filling canister.
2.Screw the filling hose onto the filling
canister.
3.Unscrew the dust cap from the valve of the
defective tire.4.Screw out the valve core with the valve
remover. The valve remover is located in a
package with the filling hose.
5.Remove the cap from the filling hose.
6.Push the filling hose onto the tire valve.
7.Hold the filling canister with the cap down
and squeeze.
8.Squeeze the entire contents of the canister
into the tire.
9.Remove the filling hose.
10.Screw the valve core into the tire valve with
the valve remover.
In the event of a lost or dirty valve core
you will find another valve core in the
package with the filling hose.
Remember that the liquid canister must be
replaced every four years if the equipment has
not been used.<
Compressor
Connector, cable and connection hose are
stored in the compressor housing.
1Connector and cable for lighter socket
2Connection hose for connecting the com-
pressor and tire valve
3On/off switch
4Pressure gauge for indicating the tire infla-
tion pressure
5Release button for reducing the tire inflation
pressure
Reinflating the tire
1.Unscrew the dust cap from the tire valve of
the defective tire.
2.Screw connection hose2 onto the tire valve.