navigation update MINI Clubman 2009 Owner's Manual (Mini Connected)
[x] Cancel search | Manufacturer: MINI, Model Year: 2009, Model line: Clubman, Model: MINI Clubman 2009Pages: 218, PDF Size: 3.69 MB
Page 126 of 218
Destination guidance
124
This volume is independent of the volume of the
audio sources.
The setting is stored for the remote control cur-
rently in use.
Changing a route
Taking detours
During destination guidance, you can revise the
navigation system's route recommendations to
avoid particular stretches of road. Enter the
number of miles/kilometers that you want to
travel before returning to the original route.
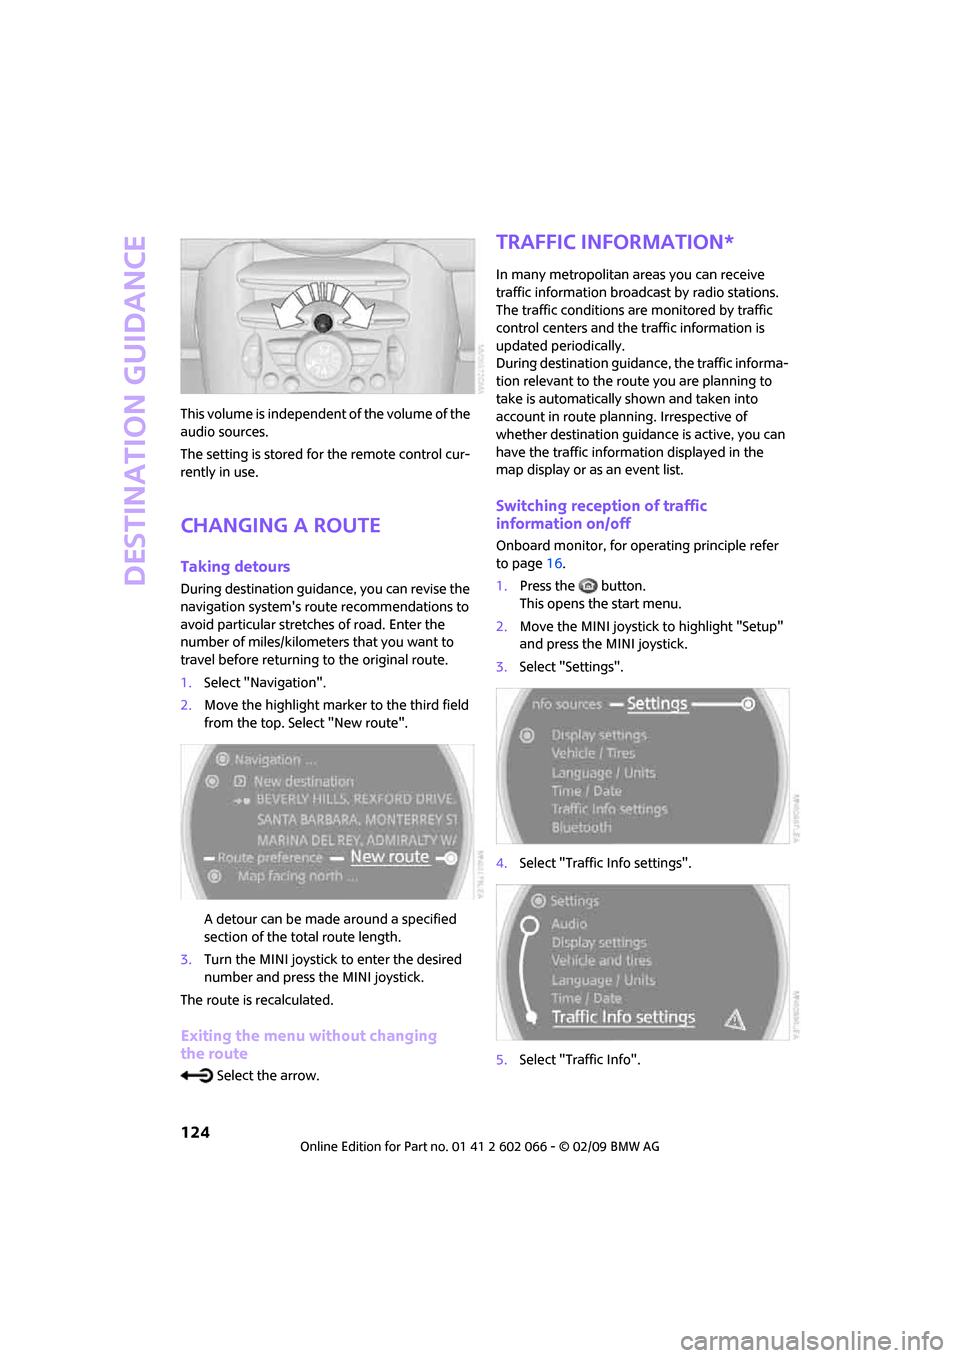
1.Select "Navigation".
2.Move the highlight marker to the third field
from the top. Select "New route".
A detour can be made around a specified
section of the total route length.
3.Turn the MINI joystick to enter the desired
number and press the MINI joystick.
The route is recalculated.
Exiting the menu without changing
the route
Select the arrow.
Traffic information*
In many metropolitan areas you can receive
traffic information broadcast by radio stations.
The traffic conditions are monitored by traffic
control centers and the traffic information is
updated periodically.
During destination guidance, the traffic informa-
tion relevant to the route you are planning to
take is automatically shown and taken into
account in route planning. Irrespective of
whether destination guidance is active, you can
have the traffic information displayed in the
map display or as an event list.
Switching reception of traffic
information on/off
Onboard monitor, for operating principle refer
to page16.
1.Press the button.
This opens the start menu.
2.Move the MINI joystick to highlight "Setup"
and press the MINI joystick.
3.Select "Settings".
4.Select "Traffic Info settings".
5.Select "Traffic Info".
Page 137 of 218
MOBILITYAT A GLANCE CONTROLS DRIVING TIPS ENTERTAINMENT
135
NAVIGATION REFERENCE
Radio
Your radio provides reception of the FM and AM
wavebands.
Listening to the radio
Press the button if the sound output is switch-
ed off.
Onboard monitor, for operating principle refer
to page16.
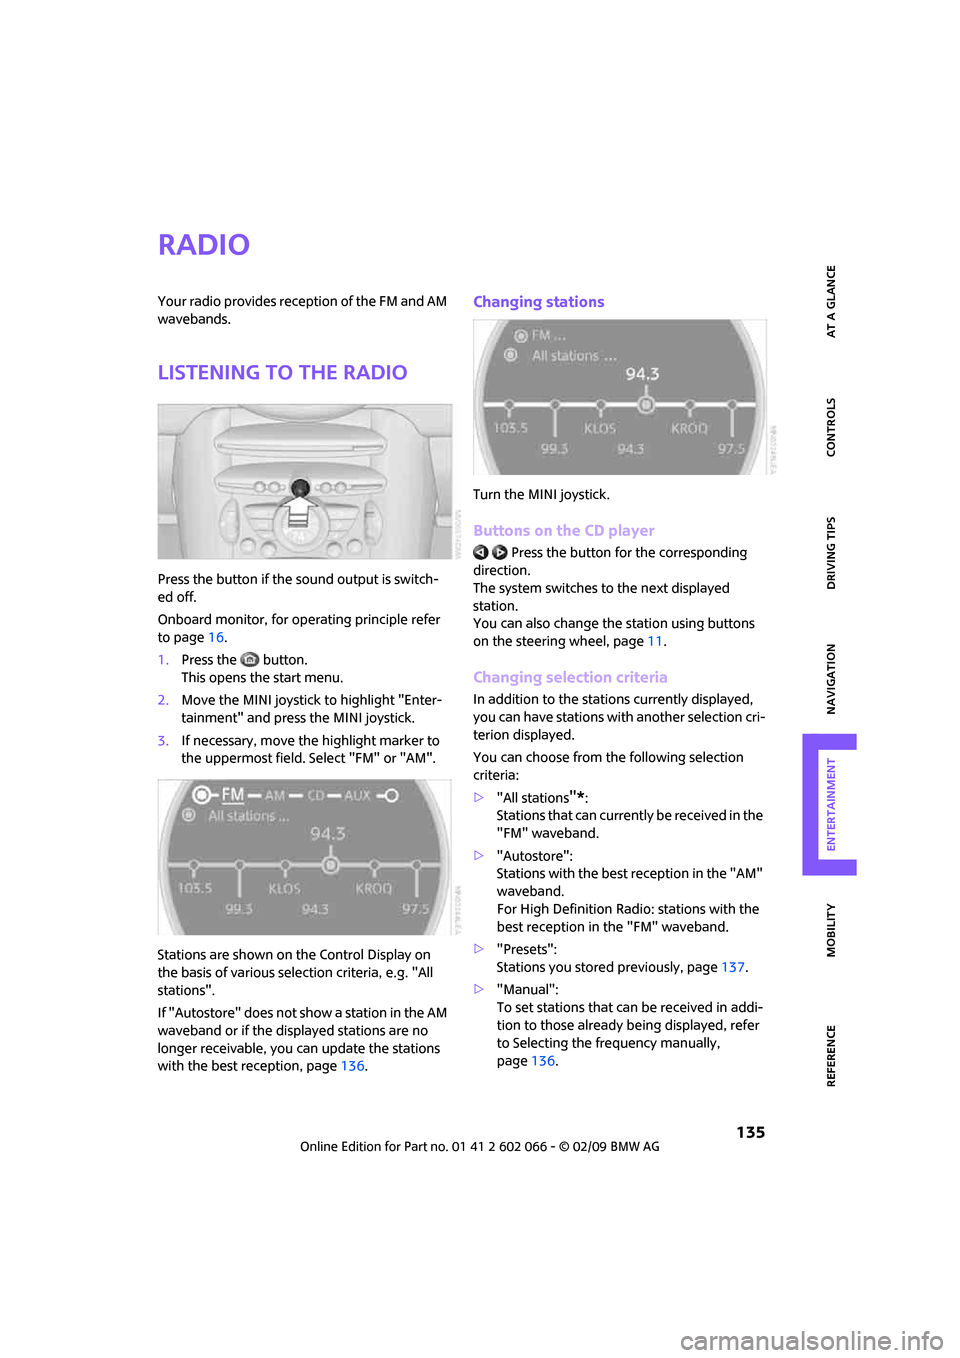
1.Press the button.
This opens the start menu.
2.Move the MINI joystick to highlight "Enter-
tainment" and press the MINI joystick.
3.If necessary, move the highlight marker to
the uppermost field. Select "FM" or "AM".
Stations are shown on the Control Display on
the basis of various selection criteria, e.g. "All
stations".
If "Autostore" does not show a station in the AM
waveband or if the displayed stations are no
longer receivable, you can update the stations
with the best reception, page136.
Changing stations
Turn the MINI joystick.
Buttons on the CD player
Press the button for the corresponding
direction.
The system switches to the next displayed
station.
You can also change the station using buttons
on the steering wheel, page11.
Changing selection criteria
In addition to the stations currently displayed,
you can have stations with another selection cri-
terion displayed.
You can choose from the following selection
criteria:
>"All stations
"*:
Stations that can currently be received in the
"FM" waveband.
>"Autostore":
Stations with the best reception in the "AM"
waveband.
For High Definition Radio: stations with the
best reception in the "FM" waveband.
>"Presets":
Stations you stored previously, page137.
>"Manual":
To set stations that can be received in addi-
tion to those already being displayed, refer
to Selecting the frequency manually,
page136.
Page 139 of 218
MOBILITYAT A GLANCE CONTROLS DRIVING TIPS ENTERTAINMENT
137
NAVIGATION REFERENCE
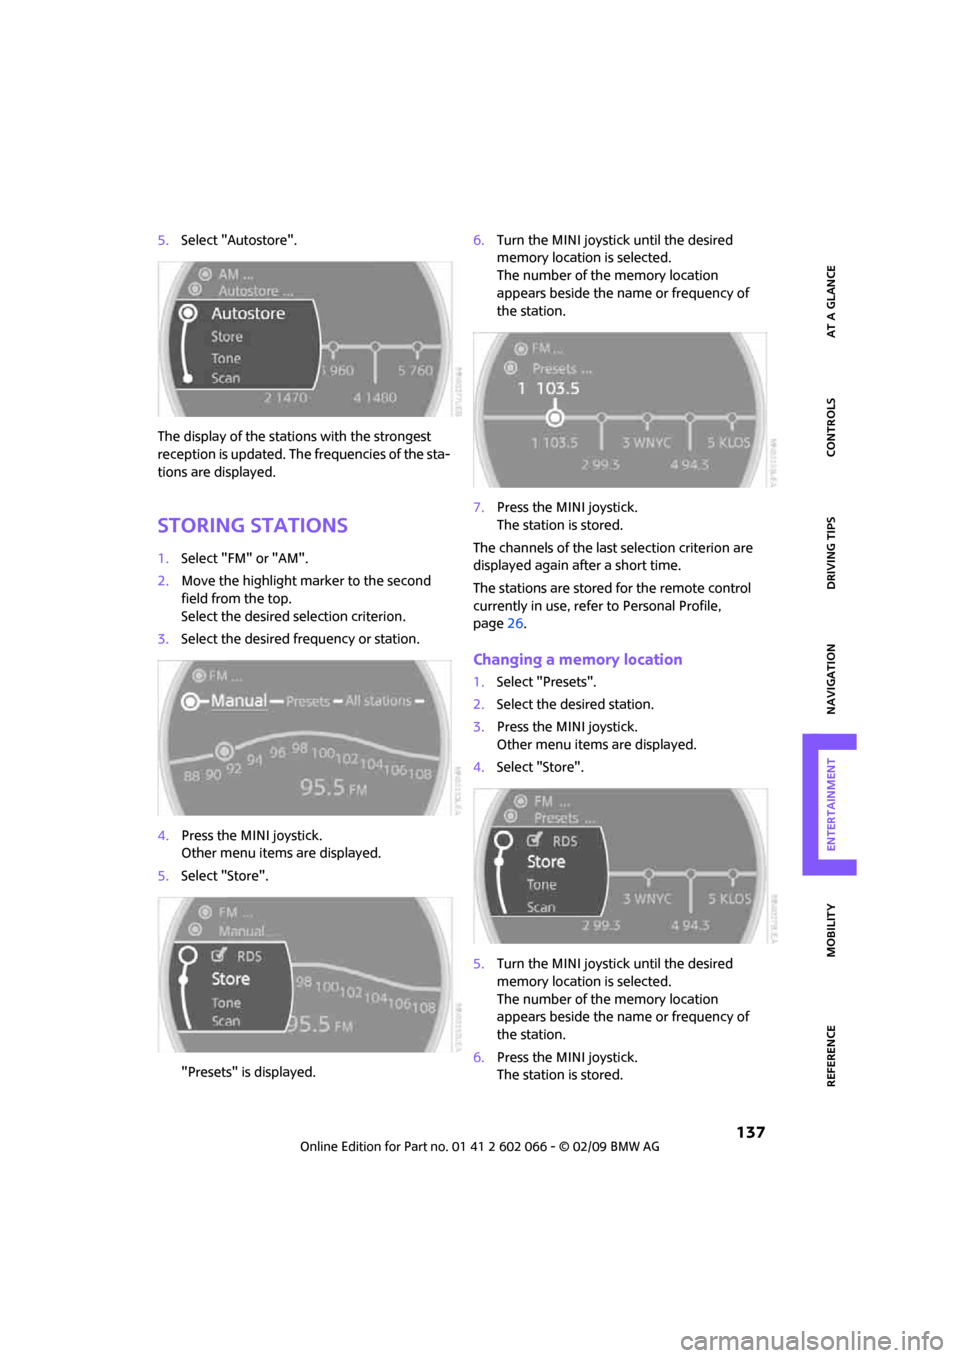
5.Select "Autostore".
The display of the stations with the strongest
reception is updated. The frequencies of the sta-
tions are displayed.
Storing stations
1.Select "FM" or "AM".
2.Move the highlight marker to the second
field from the top.
Select the desired selection criterion.
3.Select the desired frequency or station.
4.Press the MINI joystick.
Other menu items are displayed.
5.Select "Store".
"Presets" is displayed.6.Turn the MINI joystick until the desired
memory location is selected.
The number of the memory location
appears beside the name or frequency of
the station.
7.Press the MINI joystick.
The station is stored.
The channels of the last selection criterion are
displayed again after a short time.
The stations are stored for the remote control
currently in use, refer to Personal Profile,
page26.
Changing a memory location
1.Select "Presets".
2.Select the desired station.
3.Press the MINI joystick.
Other menu items are displayed.
4.Select "Store".
5.Turn the MINI joystick until the desired
memory location is selected.
The number of the memory location
appears beside the name or frequency of
the station.
6.Press the MINI joystick.
The station is stored.
Page 141 of 218
MOBILITYAT A GLANCE CONTROLS DRIVING TIPS ENTERTAINMENT
139
NAVIGATION REFERENCE
will alternate between analog and digital. This
can cause repetitions or interruptions. In this
case it may be preferable to switch off digital
reception.
Selecting programs of a digital station*
Some stations broadcast several programs on
a single frequency. To select one of these pro-
grams:
1.Select "FM" or "AM".
2.Select "Manual".
3.Select a station that can be received ’
digitally.
This symbol is displayed in the status line
when a station is received digitally.
4. Change to the next program of the
digital station using the buttons on the radio
or steering wheel.
Updating digitally receivable stations
If on a longer journey you move out of the
reception range of the stations originally
received, you can update the list of stations
received with the strongest signals.
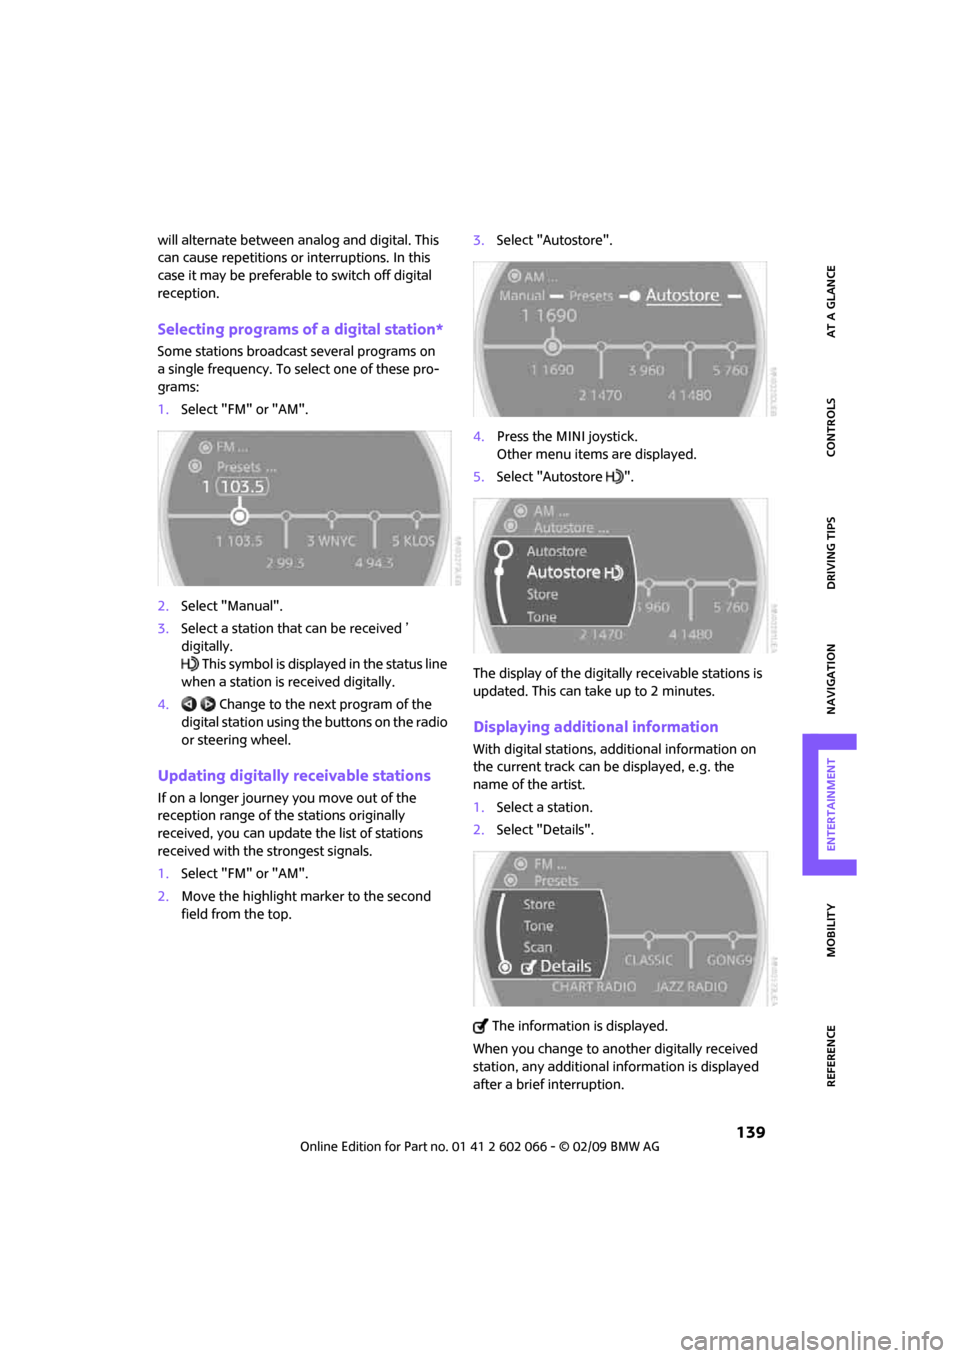
1.Select "FM" or "AM".
2.Move the highlight marker to the second
field from the top.3.Select "Autostore".
4.Press the MINI joystick.
Other menu items are displayed.
5.Select "Autostore ".
The display of the digitally receivable stations is
updated. This can take up to 2 minutes.
Displaying additional information
With digital stations, additional information on
the current track can be displayed, e.g. the
name of the artist.
1.Select a station.
2.Select "Details".
The information is displayed.
When you change to another digitally received
station, any additional information is displayed
after a brief interruption.
Page 186 of 218
Replacing components
184
of any kind. To do so could cause accidents and
personal injury.<
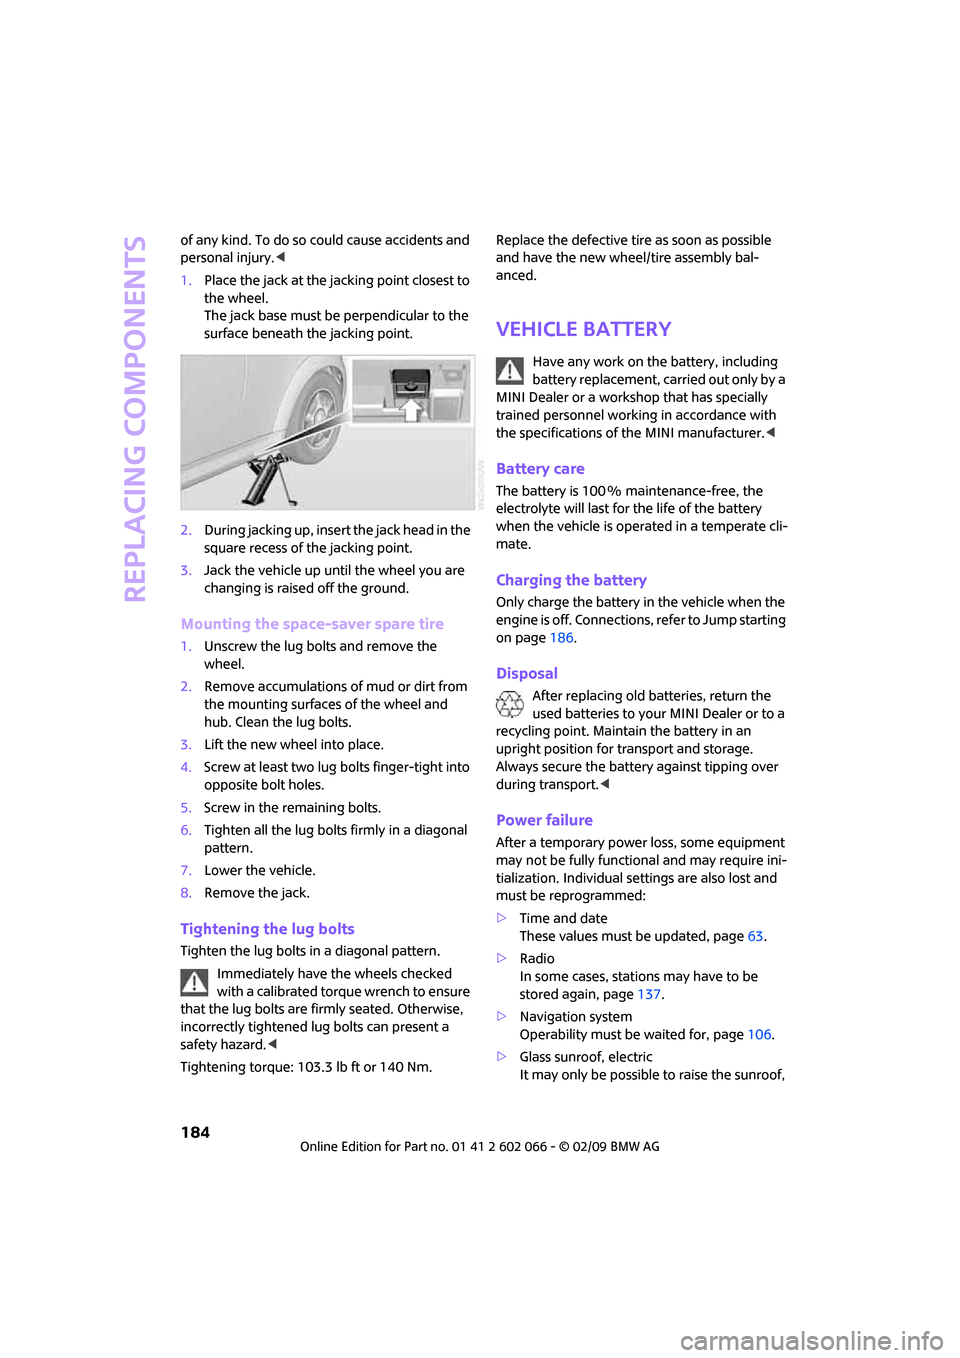
1.Place the jack at the jacking point closest to
the wheel.
The jack base must be perpendicular to the
surface beneath the jacking point.
2.During jacking up, insert the jack head in the
square recess of the jacking point.
3.Jack the vehicle up until the wheel you are
changing is raised off the ground.
Mounting the space-saver spare tire
1.Unscrew the lug bolts and remove the
wheel.
2.Remove accumulations of mud or dirt from
the mounting surfaces of the wheel and
hub. Clean the lug bolts.
3.Lift the new wheel into place.
4.Screw at least two lug bolts finger-tight into
opposite bolt holes.
5.Screw in the remaining bolts.
6.Tighten all the lug bolts firmly in a diagonal
pattern.
7.Lower the vehicle.
8.Remove the jack.
Tightening the lug bolts
Tighten the lug bolts in a diagonal pattern.
Immediately have the wheels checked
with a calibrated torque wrench to ensure
that the lug bolts are firmly seated. Otherwise,
incorrectly tightened lug bolts can present a
safety hazard.<
Tightening torque: 103.3 lb ft or 140 Nm.Replace the defective tire as soon as possible
and have the new wheel/tire assembly bal-
anced.
Vehicle battery
Have any work on the battery, including
battery replacement, carried out only by a
MINI Dealer or a workshop that has specially
trained personnel working in accordance with
the specifications of the MINI manufacturer.<
Battery care
The battery is 100 % maintenance-free, the
electrolyte will last for the life of the battery
when the vehicle is operated in a temperate cli-
mate.
Charging the battery
Only charge the battery in the vehicle when the
engine is off. Connections, refer to Jump starting
on page186.
Disposal
After replacing old batteries, return the
used batteries to your MINI Dealer or to a
recycling point. Maintain the battery in an
upright position for transport and storage.
Always secure the battery against tipping over
during transport.<
Power failure
After a temporary power loss, some equipment
may not be fully functional and may require ini-
tialization. Individual settings are also lost and
must be reprogrammed:
>Time and date
These values must be updated, page63.
>Radio
In some cases, stations may have to be
stored again, page137.
>Navigation system
Operability must be waited for, page106.
>Glass sunroof, electric
It may only be possible to raise the sunroof,