fold seats MINI Clubman 2009 Owner's Manual
[x] Cancel search | Manufacturer: MINI, Model Year: 2009, Model line: Clubman, Model: MINI Clubman 2009Pages: 158, PDF Size: 2.51 MB
Page 33 of 158
REFERENCEAT A GLANCE CONTROLS DRIVING TIPS MOBILITY
31
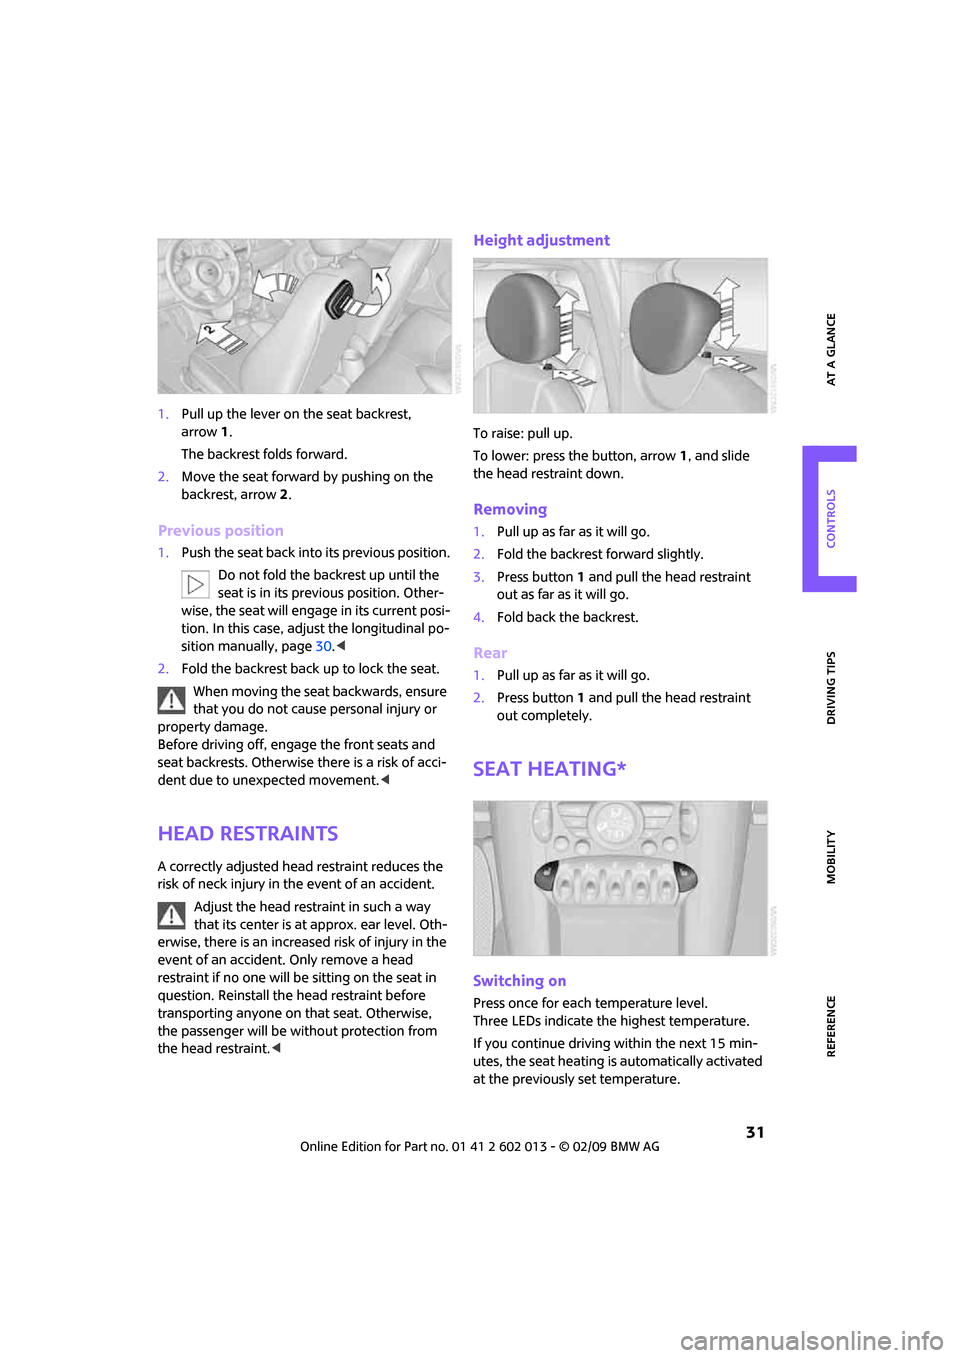
1.Pull up the lever on the seat backrest,
arrow1.
The backrest folds forward.
2.Move the seat forward by pushing on the
backrest, arrow2.
Previous position
1.Push the seat back into its previous position.
Do not fold the backrest up until the
seat is in its previous position. Other-
wise, the seat will engage in its current posi-
tion. In this case, adjust the longitudinal po-
sition manually, page30.<
2.Fold the backrest back up to lock the seat.
When moving the seat backwards, ensure
that you do not cause personal injury or
property damage.
Before driving off, engage the front seats and
seat backrests. Otherwise there is a risk of acci-
dent due to unexpected movement.<
Head restraints
A correctly adjusted head restraint reduces the
risk of neck injury in the event of an accident.
Adjust the head restraint in such a way
that its center is at approx. ear level. Oth-
erwise, there is an increased risk of injury in the
event of an accident. Only remove a head
restraint if no one will be sitting on the seat in
question. Reinstall the head restraint before
transporting anyone on that seat. Otherwise,
the passenger will be without protection from
the head restraint.<
Height adjustment
To raise: pull up.
To lower: press the button, arrow1, and slide
the head restraint down.
Removing
1.Pull up as far as it will go.
2.Fold the backrest forward slightly.
3.Press button1 and pull the head restraint
out as far as it will go.
4.Fold back the backrest.
Rear
1.Pull up as far as it will go.
2.Press button 1 and pull the head restraint
out completely.
Seat heating*
Switching on
Press once for each temperature level.
Three LEDs indicate the highest temperature.
If you continue driving within the next 15 min-
utes, the seat heating is automatically activated
at the previously set temperature.
Page 34 of 158
Adjustments
32
The temperature is lowered or the heating is
switched off entirely to save on battery power.
The LEDs stay lit.
Switching off
Press button longer.
Safety belts
Observe the instructions on page29 to
ensure the best possible personal pro-
tection.<
Before every drive, make sure that all occupants
wear their safety belts. Airbags complement the
safety belt as an additional safety device, but
they do not represent a substitute.
Front and rear seats
Closing
Make sure you hear the lock engage in the belt
buckle.
The upper belt anchor is suitable for adults of
any stature as long as the seat is adjusted prop-
erly, page29.
Opening
1.Grasp the belt firmly.
2.Press the red button in the buckle.
3.Guide the belt into its reel.
Seat belt reminder
Front seats
The indicator lamps come on and an
acoustic signal sounds. Check whether
the safety belt has been fastened cor-
rectly. The 'Fasten safety belts'
reminder is issued when the driver's safety belt
has not been fastened. The 'Fasten safety belts'
reminder is also activated at road speeds above
approx. 5 mph or 8 km/h if the front passenger's
safety belt has not been fastened, if objects are
placed on the front passenger seat, or if driver or
front passenger unfasten their safety belts.
Damage to safety belts
If the safety belts are damaged or stressed
in an accident: have the safety belt system
and its seat-belt tensioners replaced and the
belt anchors checked. Have this work carried out
only by a MINI Dealer or by a workshop that has
specially trained personnel working in accor-
dance with the specifications of the MINI manu-
facturer, otherwise correct operation of these
safety systems is not ensured.<
Mirrors
Exterior mirrors
The front passenger's mirror is more con-
vex than the driver's mirror. The objects
seen in the mirror are closer than they appear. Do
not gauge your distance from traffic behind you
on the basis of what you see in the mirror; other-
wise there is an increased risk of an accident.
<
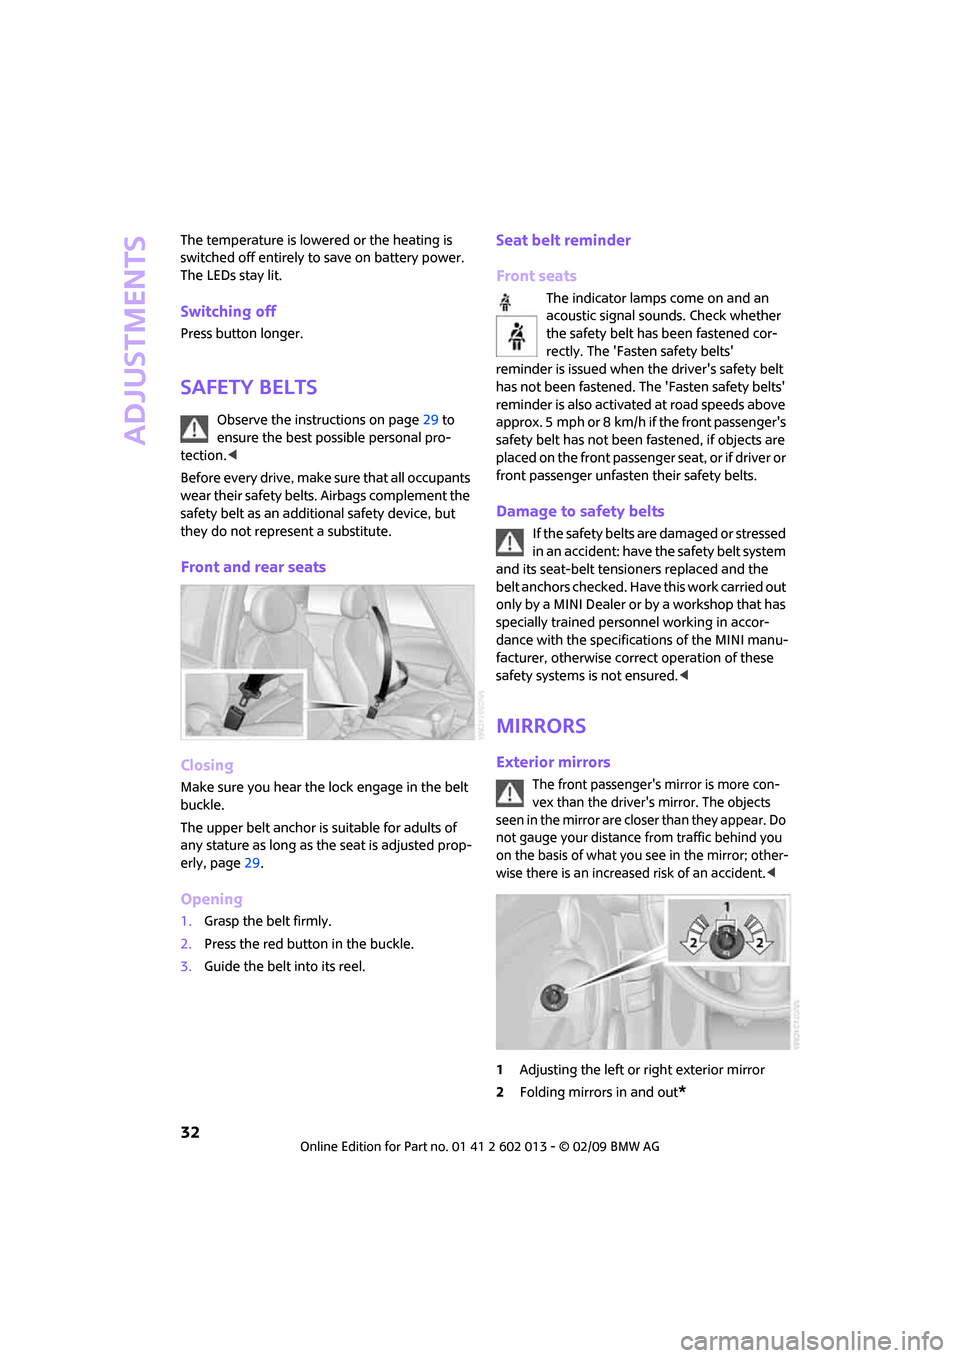
1Adjusting the left or right exterior mirror
2Folding mirrors in and out
*
Page 36 of 158
Transporting children safely
34
Transporting children safely
The right place
for children
Do not leave children unattended in the
vehicle, otherwise they could endanger
themselves and/or other persons by opening the
doors, for example.<
Children should always sit in the rear
Accident research has shown that the safest
place for children is on the rear seat.
Only transport children under the age of
13 or smaller than 5 ft/150 cm in the rear
in a child-restraint system suitable for their age,
weight and size. Otherwise there is an increased
risk of injury in the event of an accident.<
Children 13 years of age or older must be buck-
led in with a safety belt as soon as there no
longer is any child-restraint system that is
appropriate for their age, size and weight.
Only install child seats in the rear when the
rear seat backrest is folded all the way
back and engaged. Otherwise there will be
an increased risk of injury in the event of an
accident.<
Exception for front passenger seat
Front passenger airbags
Should it be necessary to use a child-
restraint system on the front passenger
seat, the front and side airbags must be deacti-
vated. Otherwise, there is an increased risk of
injury to the child if the airbags deploy, even if
the child is seated in a child-restraint system.<
For more information on automatic deactivation
of the front passenger airbags, refer to page63.
Child-restraint systems,
installation
Observe the child-restraint system manu-
facturer's instructions when selecting,
installing and using child-restraint systems. Oth-
erwise the protective effect may be dimin-
ished.<
On the front passenger seat
After installing a child-restraint system on
the front passenger seat, make sure that
the front and side airbags for the front passen-
ger are deactivated, otherwise there is an
increased risk of injury if the airbags deploy.<
Seat position
Before installing a child-restraint system, move
the front passenger seat as far back and up
*
as possible to obtain the best possible position
for the belt. Do not change the seat position
after this.
Child seat security
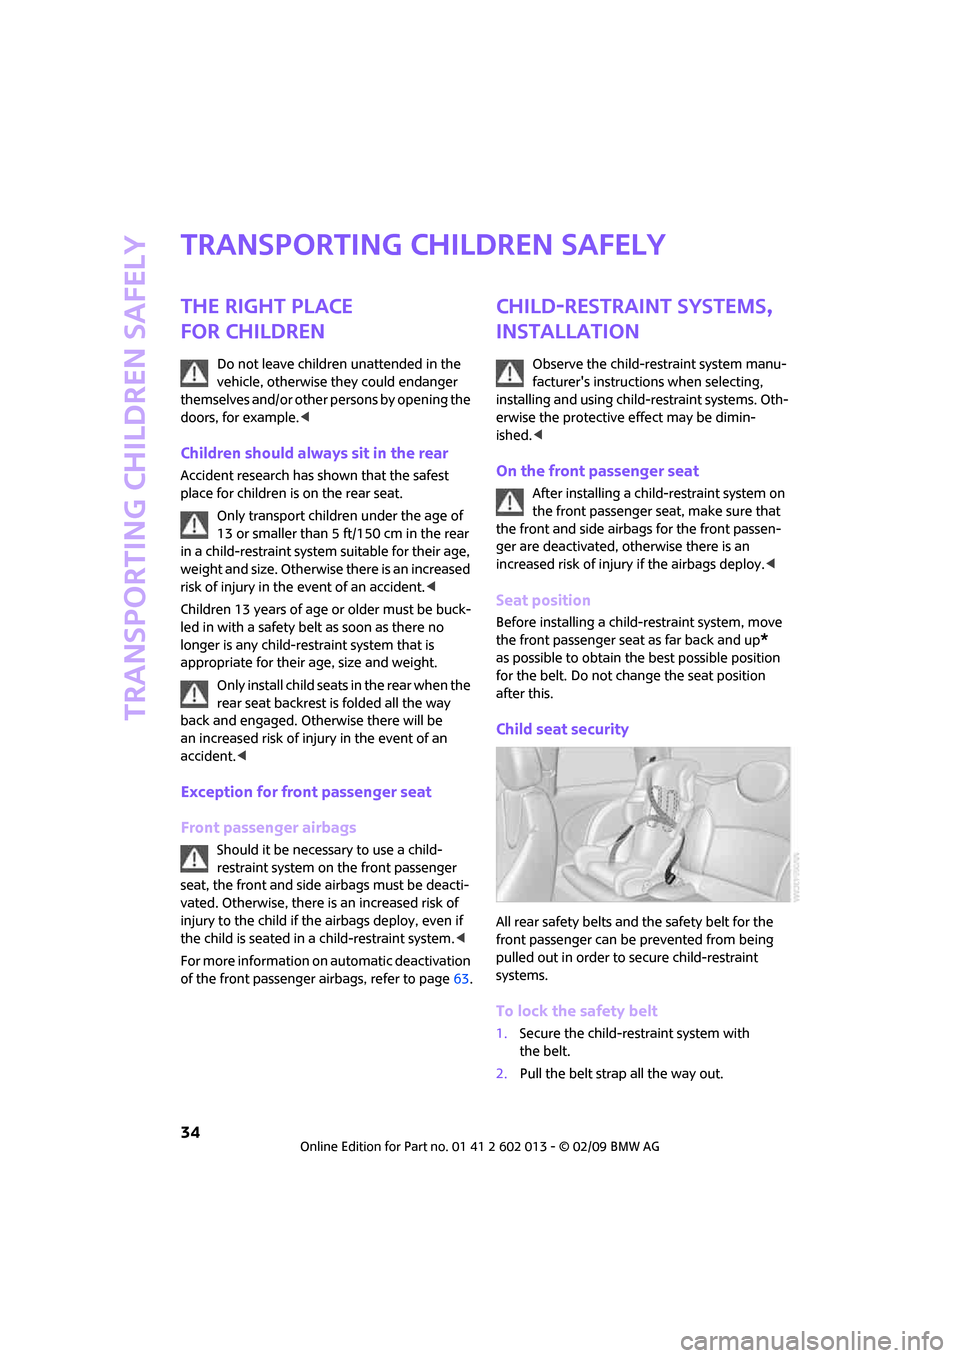
All rear safety belts and the safety belt for the
front passenger can be prevented from being
pulled out in order to secure child-restraint
systems.
To lock the safety belt
1.Secure the child-restraint system with
the belt.
2.Pull the belt strap all the way out.
Page 79 of 158
REFERENCEAT A GLANCE CONTROLS DRIVING TIPS MOBILITY
77
Closing
Fold cover up.
To prevent injury in the event of an acci-
dent, close the glove compartment after
use while the vehicle is being driven.<
Ventilation*
Depending on your vehicle's equipment, it may
be possible to ventilate the glove compartment.
Opening
Rotate the switch in the direction of the arrow.
Closing
Rotate the switch in the opposite direction of the
arrow until it is in the vertical position.
Depending on the temperature setting of the air
conditioning or the automatic climate control,
high temperatures may result in the glove com-
partment.
Center armrest*
Storage compartment
The center armrest between the front seats con-
tains either a compartment or the cover for the
mobile phone base plate
* or the snap-in
adapter
*.
Opening
The cover slides along guide rails and can be
opened fully by pushing it back and lifting it.
Closing
Push the cover forwards.
Connection for external
audio device
>iPods/iPhones or USB devices such as MP3
players and USB memory sticks: Connect via
the USB-audio interface.
>iPhone/mobile phone music players: Con-
nect via the snap-in adapter
*, refer to the
separate Owner's Manual. Playback is only
possible if there is no device connected to
the USB-audio interface.
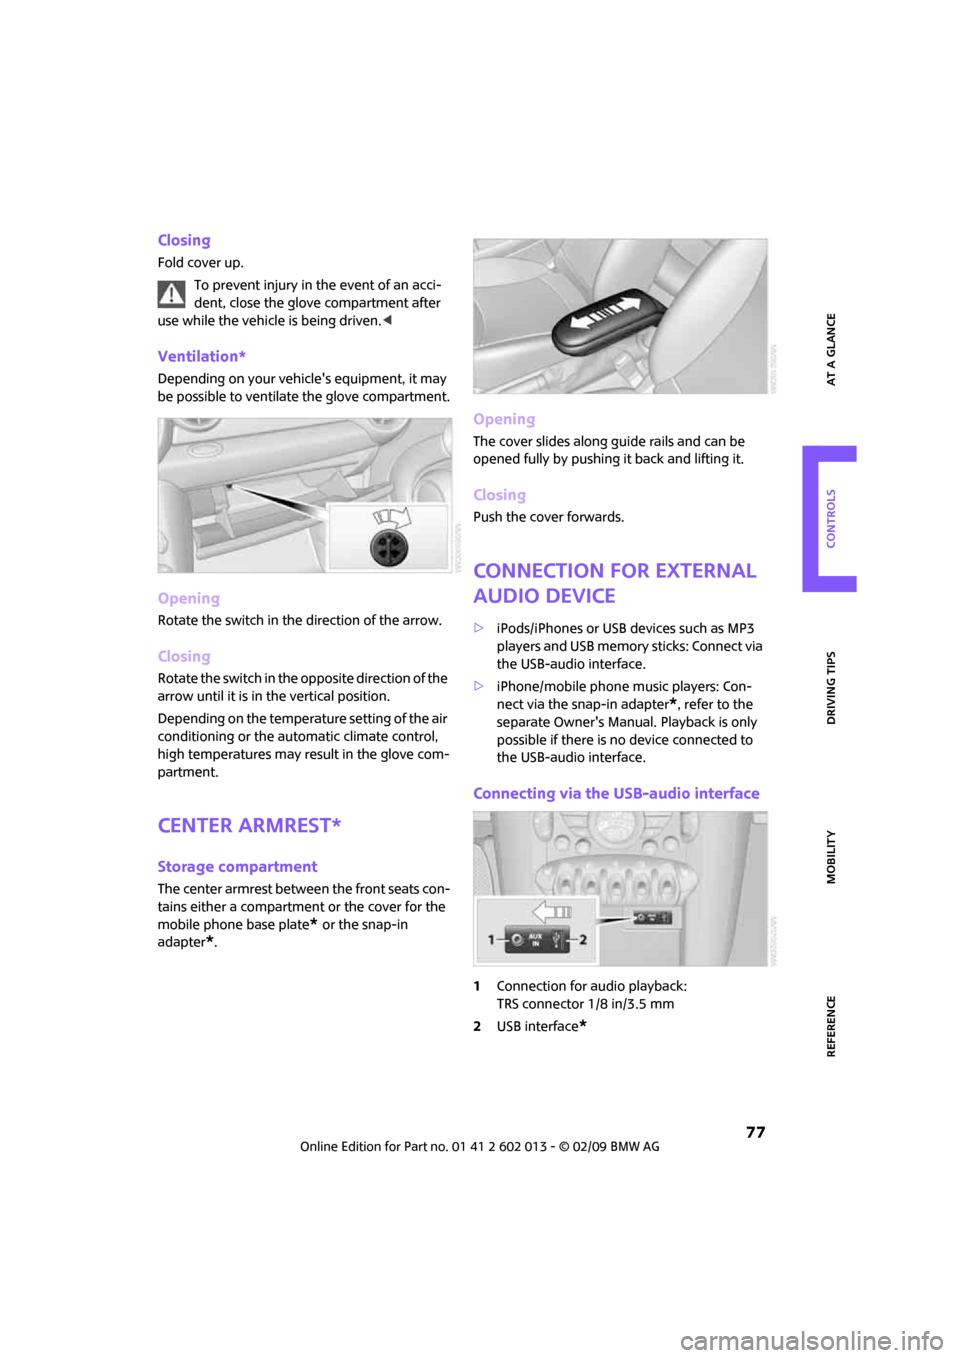
Connecting via the USB-audio interface
1Connection for audio playback:
TRS connector 1/8 in/3.5 mm
2USB interface
*
Page 87 of 158
REFERENCEAT A GLANCE CONTROLS DRIVING TIPS MOBILITY
85
If the rear seat backrests are positioned at
a steeper angle, do not install child-
restraint systems in the rear of the vehicle as
their protective features may be ineffective.<
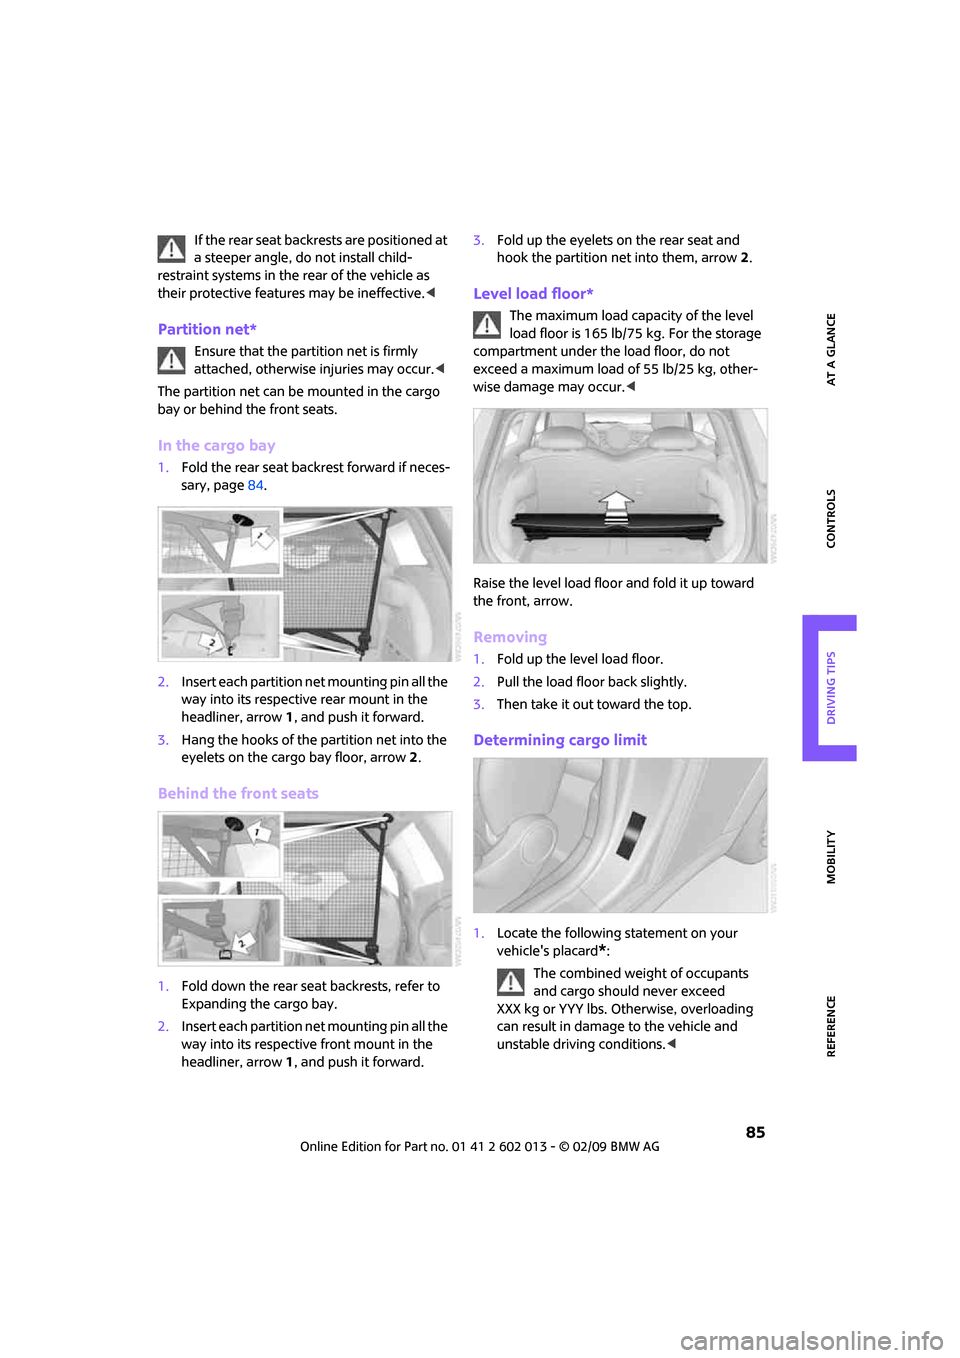
Partition net*
Ensure that the partition net is firmly
attached, otherwise injuries may occur.<
The partition net can be mounted in the cargo
bay or behind the front seats.
In the cargo bay
1.Fold the rear seat backrest forward if neces-
sary, page84.
2.Insert each partition net mounting pin all the
way into its respective rear mount in the
headliner, arrow 1, and push it forward.
3.Hang the hooks of the partition net into the
eyelets on the cargo bay floor, arrow2.
Behind the front seats
1.Fold down the rear seat backrests, refer to
Expanding the cargo bay.
2.Insert each partition net mounting pin all the
way into its respective front mount in the
headliner, arrow1, and push it forward.3.Fold up the eyelets on the rear seat and
hook the partition net into them, arrow2.
Level load floor*
The maximum load capacity of the level
load floor is 165 lb/75 kg. For the storage
compartment under the load floor, do not
exceed a maximum load of 55 lb/25 kg, other-
wise damage may occur.<
Raise the level load floor and fold it up toward
the front, arrow.
Removing
1.Fold up the level load floor.
2.Pull the load floor back slightly.
3.Then take it out toward the top.
Determining cargo limit
1.Locate the following statement on your
vehicle's placard
*:
The combined weight of occupants
and cargo should never exceed
XXX kg or YYY lbs. Otherwise, overloading
can result in damage to the vehicle and
unstable driving conditions.<
Page 152 of 158
From A to Z
150
Output, refer to Engine
data140
Outside temperature
display46
– changing unit of measure49
– on onboard computer49
Outside-air mode
– automatic climate control73
Overheated engine, refer to
Coolant temperature46
P
Paintwork, care109
Park Distance Control PDC55
Parking
– vehicle38
Parking aid, refer to Park
Distance Control PDC55
Parking brake38
Parking lamps, replacing
bulb114
Parking lamps/low beams65
Partition net85
Parts and accessories, refer to
Your individual vehicle4
Pathway lighting65
Personal Profile18
Pinch protection system
– windows28
Plastic parts, care110
Pollen
– refer to Microfilter for air
conditioner72
– refer to Microfilter/activated-
charcoal filter for automatic
climate control74
Power failure120
Power windows28
Power windows, refer to
Windows28
Pressure monitoring of tires,
refer to Tire Pressure Monitor
TPM60
Pressure monitoring, tires58
– Flat Tire Monitor58
Pressure, tires94Protective function, refer to
Pinch protection system
– windows28
Puncture
– Flat Tire Monitor58
R
Radio key, refer to Integrated
key/remote control18
Radio position, refer to Radio
readiness37
Radio readiness37
– switched off37
– switched on37
Rain sensor42
Range, refer to Cruising
range47
Reading lamps69
Rear door, refer to
Clubdoor23
Rear doors, refer to
Splitdoor23
Rear double doors, refer to
Splitdoor23
Rear fog lamp68
– indicator lamp126
– replacing bulb116
Rear lamps
– bulb replacement115
Rear lamps, refer to Tail
lamps115
Rear seat backrest, folding84
Rear seats
– folding the backrests84
Rear window heating71,73
Rearview mirror, refer to
Mirrors32
Recirculated-air mode71,73
Recirculation of air, refer to
Recirculated-air
mode71,73
Reclining seat, refer to
Backrest30
Refueling92
Releasing
– bonnet102Remote control18
– battery renewal27
– convenient access25
– garage door opener75
– malfunctions21,26
– service data106
– splitdoor21
Replacement remote
control18
Replacing bulbs, refer to
Lamps and bulbs112
Replacing tires, refer to New
wheels and tires100
Reporting safety defects6
Reserve warning, refer to Fuel
gauge47
Reservoir for washer
systems44
Restraint systems
– for children34
– refer to Safety belts32
Reverse gear
– automatic transmission with
Steptronic40
– manual transmission39
Roadside Assistance122
Roadside parking lamps67
– replacing bulb114
Roadworthiness test, refer to
Service requirements51
Roof load capacity142
Roof-mounted luggage
rack87
Rope, refer to Tow-starting,
towing away124
RSC Runflat System
Component, refer to Run-
Flat Tires100
Rubber parts, care109
Runflat System Component
RSC, refer to Run-Flat
Tires100
Run-Flat Tires100
– flat tire59
– new tires100
– tire inflation pressure94
– winter tires101
Runflat Tyres, refer to Run-Flat
Tires100