MINI Clubman 2010 Owner's Manual (Mini Connected)
Manufacturer: MINI, Model Year: 2010, Model line: Clubman, Model: MINI Clubman 2010Pages: 218, PDF Size: 3.97 MB
Page 151 of 218
MOBILITYAT A GLANCE CONTROLS DRIVING TIPS ENTERTAINMENT
149
NAVIGATION REFERENCE
AUX-IN port
You can connect an external audio device, for
instance an MP3 player, and play audio tracks
over the car's speaker system. You can adjust
the tone on the onboard monitor.
Connecting
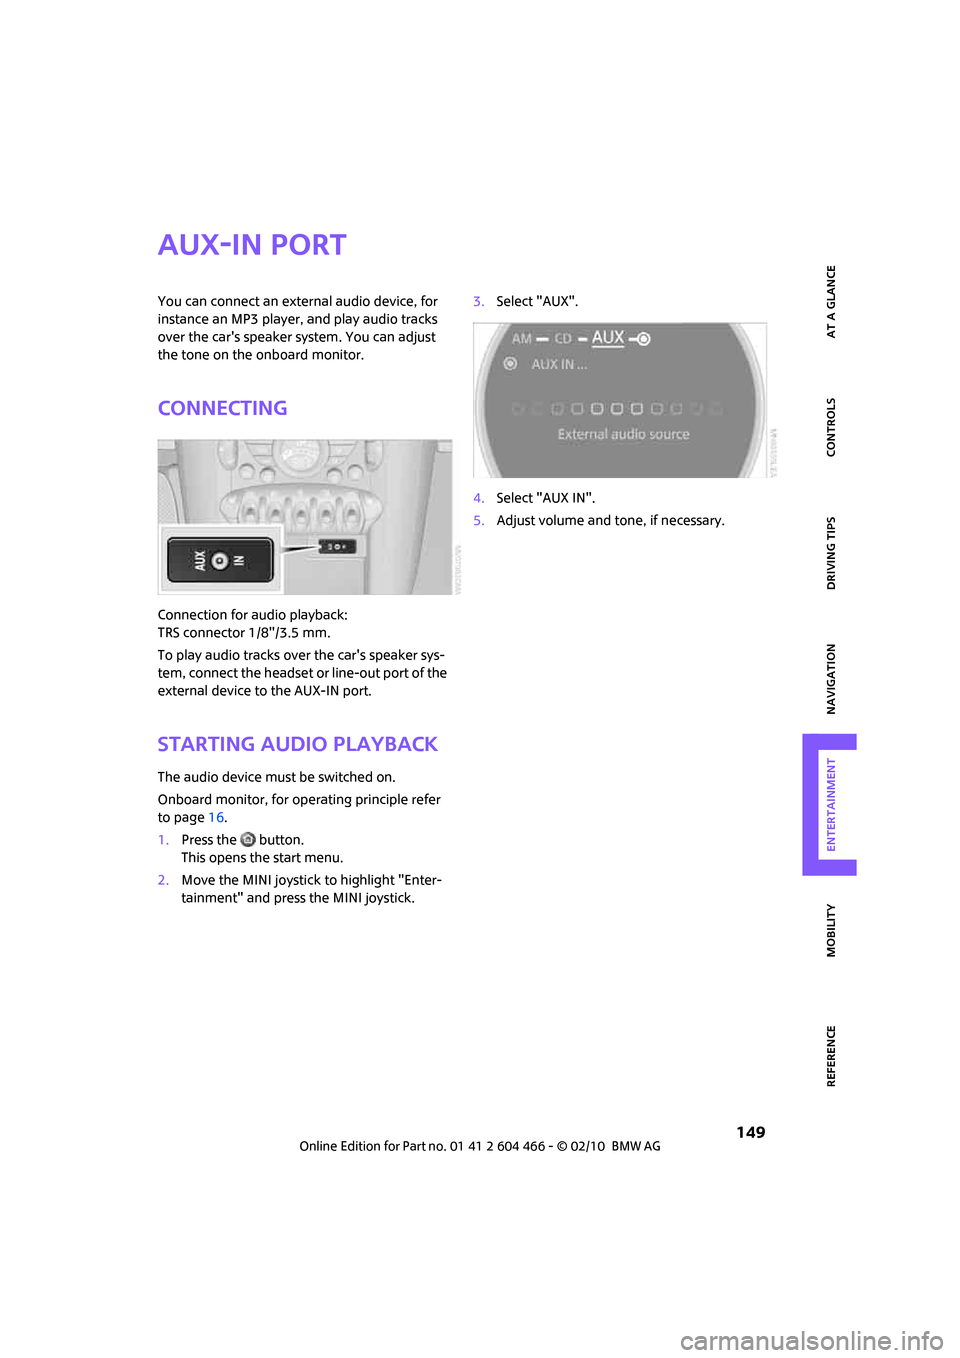
Connection for audio playback:
TRS connector 1/8"/3.5 mm.
To play audio tracks over the car's speaker sys-
tem, connect the headset or line-out port of the
external device to the AUX-IN port.
Starting audio playback
The audio device must be switched on.
Onboard monitor, for operating principle refer
to page16.
1.Press the button.
This opens the start menu.
2.Move the MINI joystick to highlight "Enter-
tainment" and press the MINI joystick.3.Select "AUX".
4.Select "AUX IN".
5.Adjust volume and tone, if necessary.
Page 152 of 218
USB audio interface
150
USB audio interface
Connections for external
devices
An external audio device or USB device can be
connected to the USB audio interface, for exam-
ple:
>MP3 player
>USB memory stick
>iPod/iPhone
>Suitable mobile phone
If they are supported by the USB audio interface,
these devices can be controlled using the
onboard monitor.
If the mobile phone has a music player connec-
tion, connect the mobile phone using the snap-
in adapter, refer to the separate Owner's Man-
ual. Audio playback is only possible if there is no
device connected to the USB audio interface.
The standard audio formats, e.g. MP3, WMA,
WAV (PCM) and AAC, and playlists in the M3U
format can be played.
Due the variety of audio devices and iPods on
the market, it cannot be guaranteed that every
device will be operable on the vehicle.
Ask your MINI Service which audio devices,
mobile phones or USB devices are suitable.
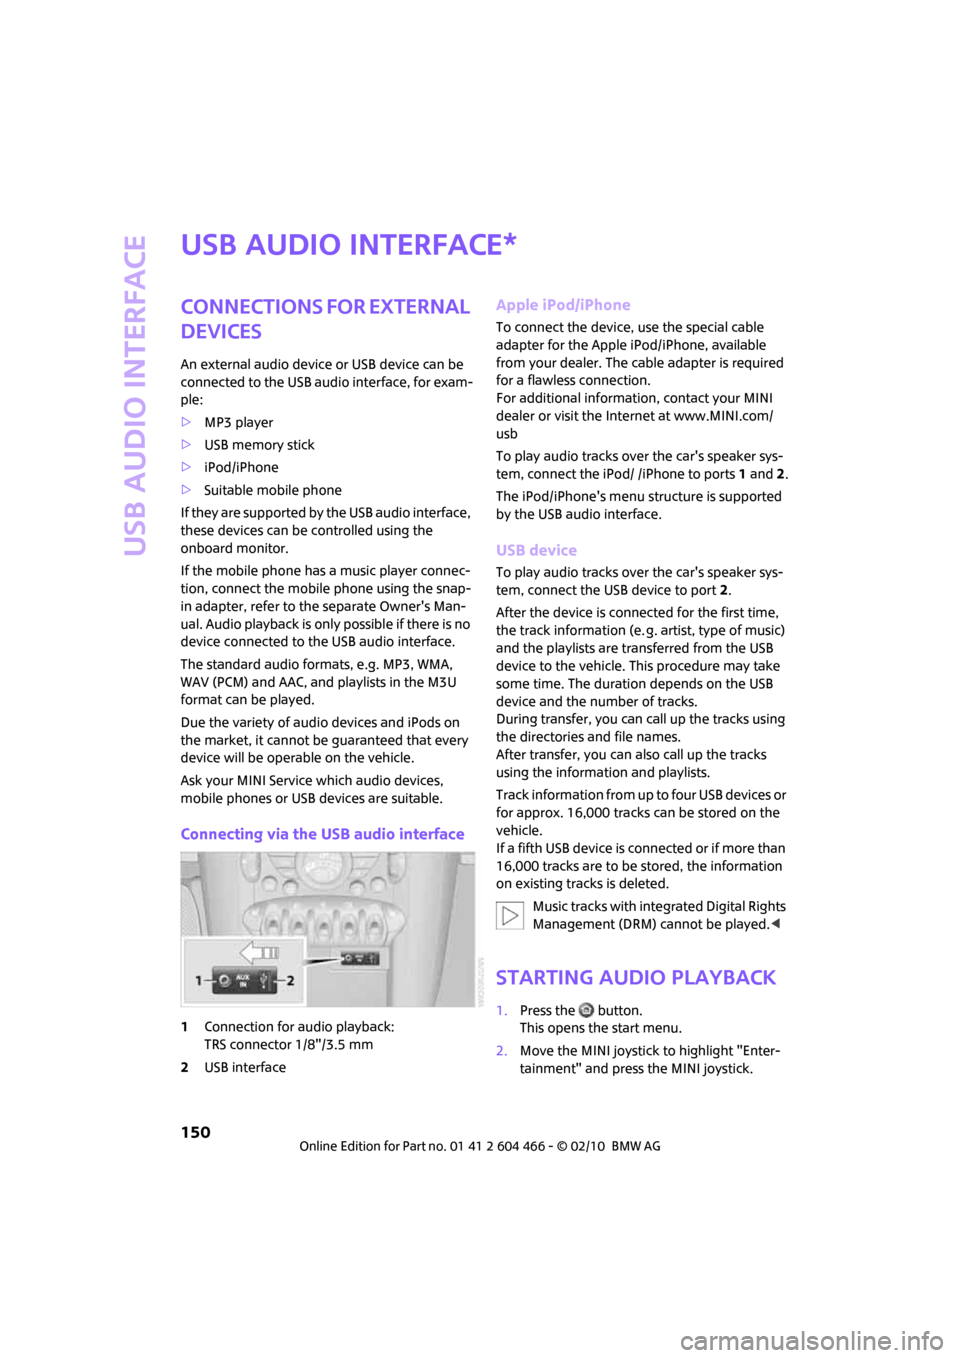
Connecting via the USB audio interface
1Connection for audio playback:
TRS connector 1/8"/3.5 mm
2USB interface
Apple iPod/iPhone
To connect the device, use the special cable
adapter for the Apple iPod/iPhone, available
from your dealer. The cable adapter is required
for a flawless connection.
For additional information, contact your MINI
dealer or visit the Internet at www.MINI.com/
usb
To play audio tracks over the car's speaker sys-
tem, connect the iPod/ /iPhone to ports 1 and 2.
The iPod/iPhone's menu structure is supported
by the USB audio interface.
USB device
To play audio tracks over the car's speaker sys-
tem, connect the USB device to port2.
After the device is connected for the first time,
the track information (e. g. artist, type of music)
and the playlists are transferred from the USB
device to the vehicle. This procedure may take
some time. The duration depends on the USB
device and the number of tracks.
During transfer, you can call up the tracks using
the directories and file names.
After transfer, you can also call up the tracks
using the information and playlists.
Track information from up to four USB devices or
for approx. 16,000 tracks can be stored on the
vehicle.
If a fifth USB device is connected or if more than
16,000 tracks are to be stored, the information
on existing tracks is deleted.
Music tracks with integrated Digital Rights
Management (DRM) cannot be played.<
Starting audio playback
1.Press the button.
This opens the start menu.
2.Move the MINI joystick to highlight "Enter-
tainment" and press the MINI joystick.
*
Page 153 of 218
MOBILITYAT A GLANCE CONTROLS DRIVING TIPS ENTERTAINMENT
151
NAVIGATION REFERENCE
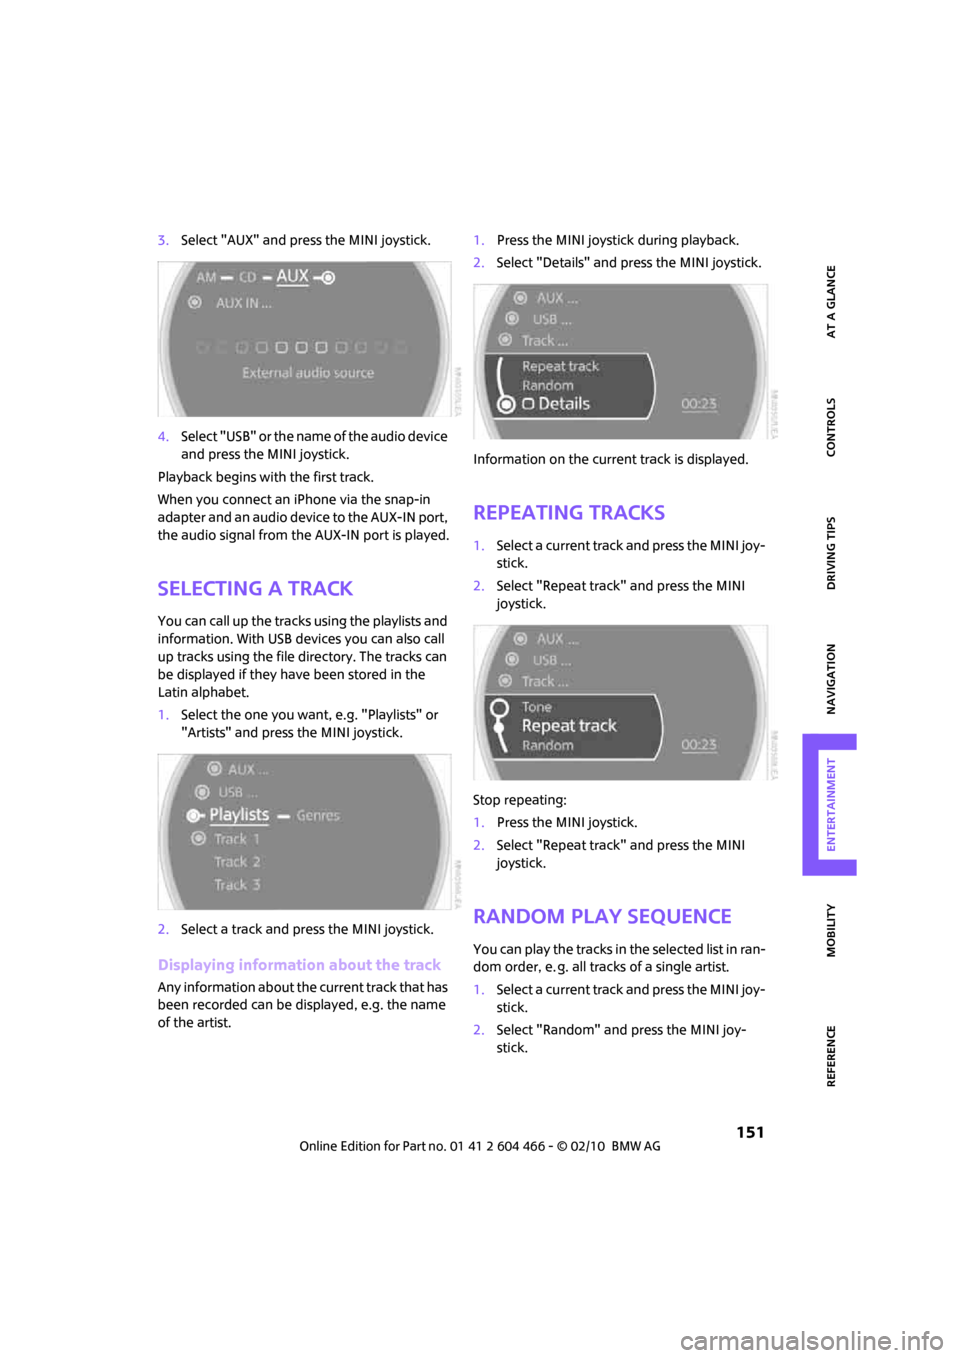
3.Select "AUX" and press the MINI joystick.
4.Select "USB" or the name of the audio device
and press the MINI joystick.
Playback begins with the first track.
When you connect an iPhone via the snap-in
adapter and an audio device to the AUX-IN port,
the audio signal from the AUX-IN port is played.
Selecting a track
You can call up the tracks using the playlists and
information. With USB devices you can also call
up tracks using the file directory. The tracks can
be displayed if they have been stored in the
Latin alphabet.
1.Select the one you want, e.g. "Playlists" or
"Artists" and press the MINI joystick.
2.Select a track and press the MINI joystick.
Displaying information about the track
Any information about the current track that has
been recorded can be displayed, e.g. the name
of the artist.1.Press the MINI joystick during playback.
2.Select "Details" and press the MINI joystick.
Information on the current track is displayed.
Repeating tracks
1.Select a current track and press the MINI joy-
stick.
2.Select "Repeat track" and press the MINI
joystick.
Stop repeating:
1.Press the MINI joystick.
2.Select "Repeat track" and press the MINI
joystick.
Random play sequence
You can play the tracks in the selected list in ran-
dom order, e. g. all tracks of a single artist.
1.Select a current track and press the MINI joy-
stick.
2.Select "Random" and press the MINI joy-
stick.
Page 154 of 218
USB audio interface
152
Stop random play:
1.Press the MINI joystick.
2.Select "Random" and press the MINI joy-
stick.
Fast forward/reverse
Buttons on the steering wheel or CD player:
Press and hold the button for the corre-
sponding direction.
Notes
Do not expose the audio device to
extreme environmental conditions, e. g.
very high temperatures, refer to the Owner's
Manual of the audio device. Otherwise, the
audio device may become damaged, which
could compromise safety while driving.<
Depending on the configuration of the audio
files, e. g. bit rates greater than 256 kbit/s, the
files may not play back correctly in every case.
Notes on connecting
>The USB audio interface supplies the con-
nected audio devices with power, provided
that this is supported by the audio device.
Therefore, do not connect the USB audio
device to the power socket in the vehicle
during operation.
>Do not forcibly connect the plug to the USB
interface.
>Do not connect devices such as fans or
lamps to the USB audio interface.
>Do not connect USB hard disks.
>Do not use the USB audio interface to charge
external devices.
Page 155 of 218
MOBILITYAT A GLANCE CONTROLS DRIVING TIPS ENTERTAINMENT
153
NAVIGATION REFERENCE
Page 156 of 218

Page 157 of 218
MOBILITY
CONTROLS
DRIVING TIPS
NAVIGATION
ENTERTAINMENT
REFERENCE AT A GLANCE
MOBILITY
Page 158 of 218
Refueling
156
Refueling
Switch off the engine before refueling;
otherwise, fuel cannot be added to the
tank and a message will be displayed.<
Take all precautionary measures and
observe all applicable regulations when
handling fuel. Do not carry any spare fuel con-
tainers in your vehicle. They can develop a leak
and cause an explosion or cause a fire in the
event of an accident.<
Fuel filler flap
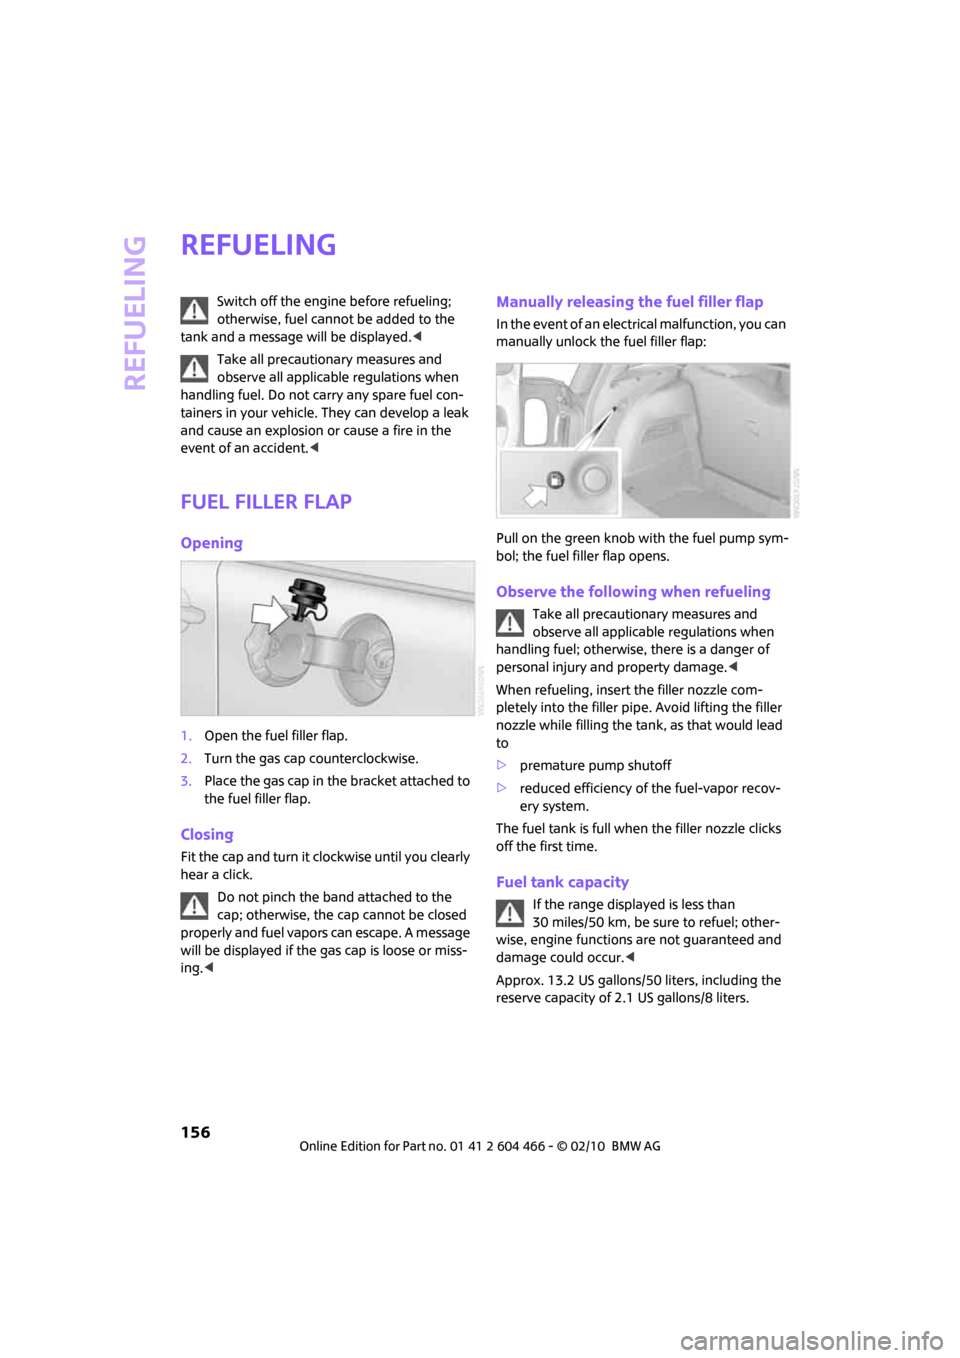
Opening
1.Open the fuel filler flap.
2.Turn the gas cap counterclockwise.
3.Place the gas cap in the bracket attached to
the fuel filler flap.
Closing
Fit the cap and turn it clockwise until you clearly
hear a click.
Do not pinch the band attached to the
cap; otherwise, the cap cannot be closed
properly and fuel vapors can escape. A message
will be displayed if the gas cap is loose or miss-
ing.<
Manually releasing the fuel filler flap
In the event of an electrical malfunction, you can
manually unlock the fuel filler flap:
Pull on the green knob with the fuel pump sym-
bol; the fuel filler flap opens.
Observe the following when refueling
Take all precautionary measures and
observe all applicable regulations when
handling fuel; otherwise, there is a danger of
personal injury and property damage.<
When refueling, insert the filler nozzle com-
pletely into the filler pipe. Avoid lifting the filler
nozzle while filling the tank, as that would lead
to
>premature pump shutoff
>reduced efficiency of the fuel-vapor recov-
ery system.
The fuel tank is full when the filler nozzle clicks
off the first time.
Fuel tank capacity
If the range displayed is less than
30 miles/50 km, be sure to refuel; other-
wise, engine functions are not guaranteed and
damage could occur.<
Approx. 13.2 US gallons/50 liters, including the
reserve capacity of 2.1 US gallons/8 liters.
Page 159 of 218
MOBILITYAT A GLANCE CONTROLS DRIVING TIPS ENTERTAINMENT
157
NAVIGATION REFERENCE
Fuel specifications
Do not use leaded gasoline; otherwise,
permanent damage to the catalytic con-
verter will result.
Do not fill the tank with E85, i.e. fuel containing
85% ethanol, nor with FlexFuel. Otherwise, the
engine and fuel supply system will be dam-
aged.<
Required fuel
Super Premium gasoline/AKI 91
This gasoline is highly recommended.
However, you may also use gasoline with less
AKI. The minimum AKI Rating is:
>Cooper S, John Cooper Works: 89
>Cooper: 87
If you use gasoline with this minimum AKI Rat-
ing, the engine may produce knocking sounds
when starting at high outside temperatures. This
has no effect on the engine life.
Do not use any gasoline below the speci-
fied minimum fuel grade. Otherwise, the
engine could be damaged.<
Use high-quality brands
Field experience has indicated significant differ-
ences in fuel quality: volatility, composition,
additives, etc., among gasolines offered for sale
in the United States and Canada. Fuels contain-
ing up to and including 10 % ethanol or other
oxygenates with up to 2.8 % oxygen by weight,
that is, 15 % MTBE or 3 % methanol plus an
equivalent amount of co-solvent, will not void
the applicable warranties with respect to defects
in materials or workmanship.
The use of poor-quality fuels may result in
drivability, starting and stalling problems
especially under certain environmental condi-
tions such as high ambient temperature and
high altitude.
Should you encounter drivability problems
which you suspect could be related to the fuel
you are using, we recommend that you respond
by switching to a recognized high-quality brand such as gasoline that is advertised as Top Tier
Detergent Gasoline.
Failure to comply with these recommendations
may also result in unscheduled maintenance.<
Page 160 of 218
Wheels and tires
158
Wheels and tires
Tire inflation pressures
Information for your safety
It is not merely the tires' service life, but also
driving comfort and, to a great extent, driving
safety that depend on the condition of the tires
and the maintenance of the specified tire pres-
sure.
Checking pressure
Check the tire inflation pressure regularly
and correct it, if necessary: at least twice a
month and before starting long trips. If you fail
to observe this precaution you may be driving
on tires with incorrect tire pressures, a condition
that can not only compromise your vehicle's
driving stability, but also lead to tire damage and
the risk of an accident. Do not drive with
deflated, i.e. flat tires, except when using run-
flat tires. A flat tire will seriously impair your
vehicle's handling and braking response.
Attempts to drive on a flat tire can lead to loss of
control over the vehicle.<
Check the tire inflation pressures only on cold
tires. This means after a maximum of 1.25 miles/
2 km driving or when the vehicle has been
parked for at least 2 hours. When tires are warm,
the tire inflation pressure is higher.
After adjusting the tire inflation pressure,
reinitialize the flat tire monitor, page74,
or reset the Tire Pressure Monitor, page76.<
Checking the tire inflation pressure of
the compact tire*
To check the inflation pressure, fold up the level
load floor. Remove the onboard vehicle tool kit
and the space-saver spare tire, refer to
page183.
Inflation pressure specifications
The tables below provide all the correct inflation
pressures for the specified tire sizes at ambient
temperature.The tire inflation pressures apply to the
tire sizes approved and the tire brands
recommended by the manufacturer of your
MINI. Your MINI dealer will be glad to advise
you.<
For correct identification of the right tire infla-
tion pressures, observe the following:
>Tire sizes for your vehicle
>Load conditions
>Maximum allowable driving speed
Tire inflation pressures for driving up to
100 mph or 160 km/h
For normal driving up to 100 mph or 160 km/h
and to achieve optimum driving comfort, adjust
pressures to the respective tire inflation pres-
sures listed on the following pages in the col-
umns for traveling speeds up to a maximum of
100 mph or 160 km/h.
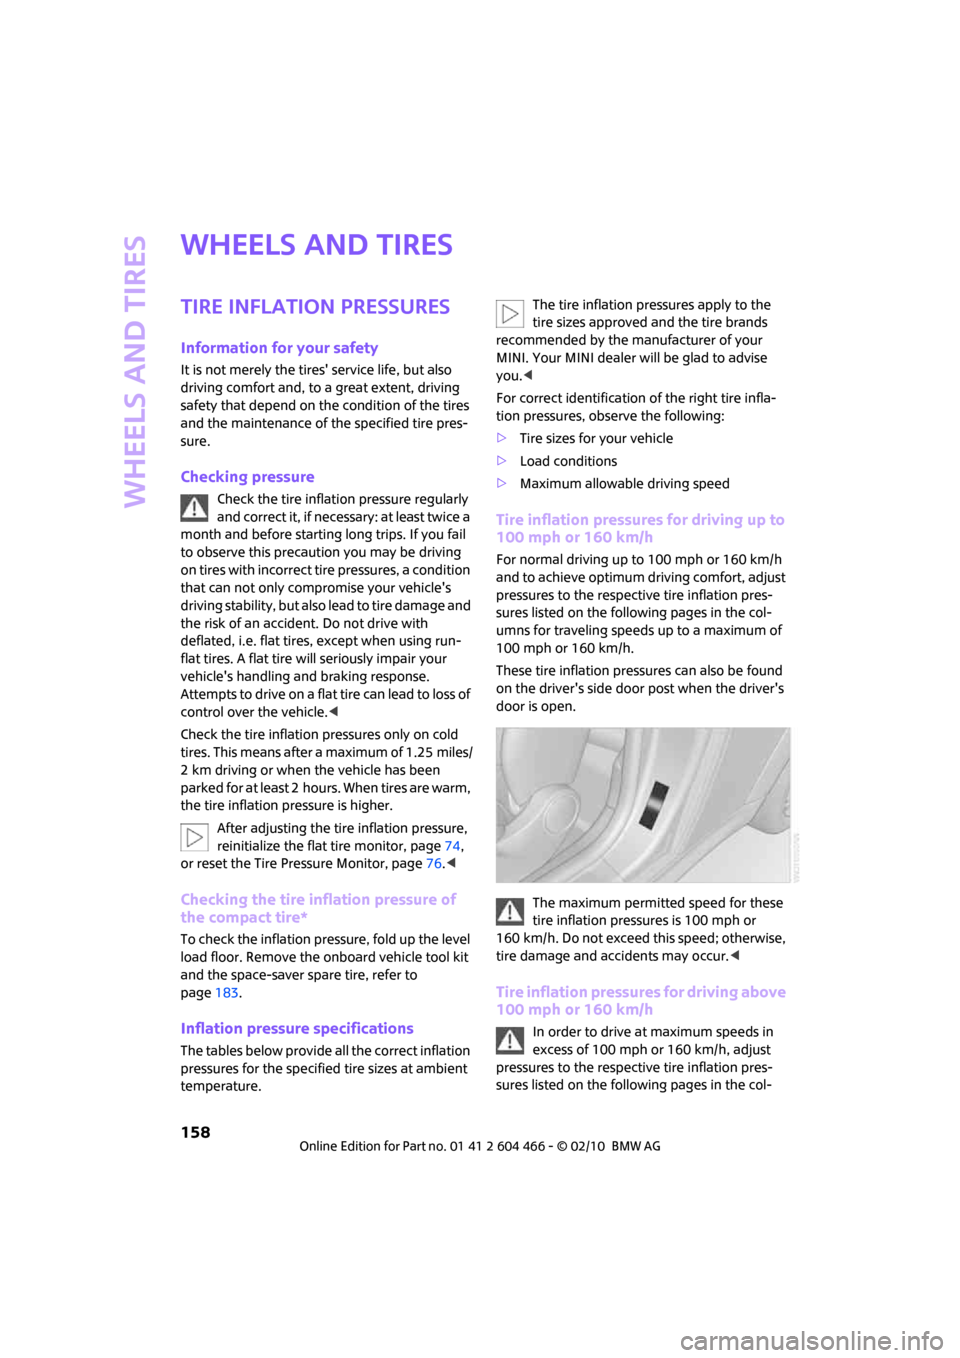
These tire inflation pressures can also be found
on the driver's side door post when the driver's
door is open.
The maximum permitted speed for these
tire inflation pressures is 100 mph or
160 km/h. Do not exceed this speed; otherwise,
tire damage and accidents may occur.<
Tire inflation pressures for driving above
100 mph or 160 km/h
In order to drive at maximum speeds in
excess of 100 mph or 160 km/h, adjust
pressures to the respective tire inflation pres-
sures listed on the following pages in the col-