buttons MINI Clubman 2010 (Mini Connected) User Guide
[x] Cancel search | Manufacturer: MINI, Model Year: 2010, Model line: Clubman, Model: MINI Clubman 2010Pages: 218, PDF Size: 3.97 MB
Page 141 of 218
MOBILITYAT A GLANCE CONTROLS DRIVING TIPS ENTERTAINMENT
139
NAVIGATION REFERENCE
Some stations do not transmit the digital and
analog signals simultaneously. If you are in an
area in which digital reception of the selected
station is not possible continuously, reception
will alternate between analog and digital. This
can cause repetitions or interruptions. In this
case it may be preferable to switch off digital
reception.
Selecting programs of a digital station*
Some stations broadcast several programs on a
single frequency. To select one of these pro-
grams:
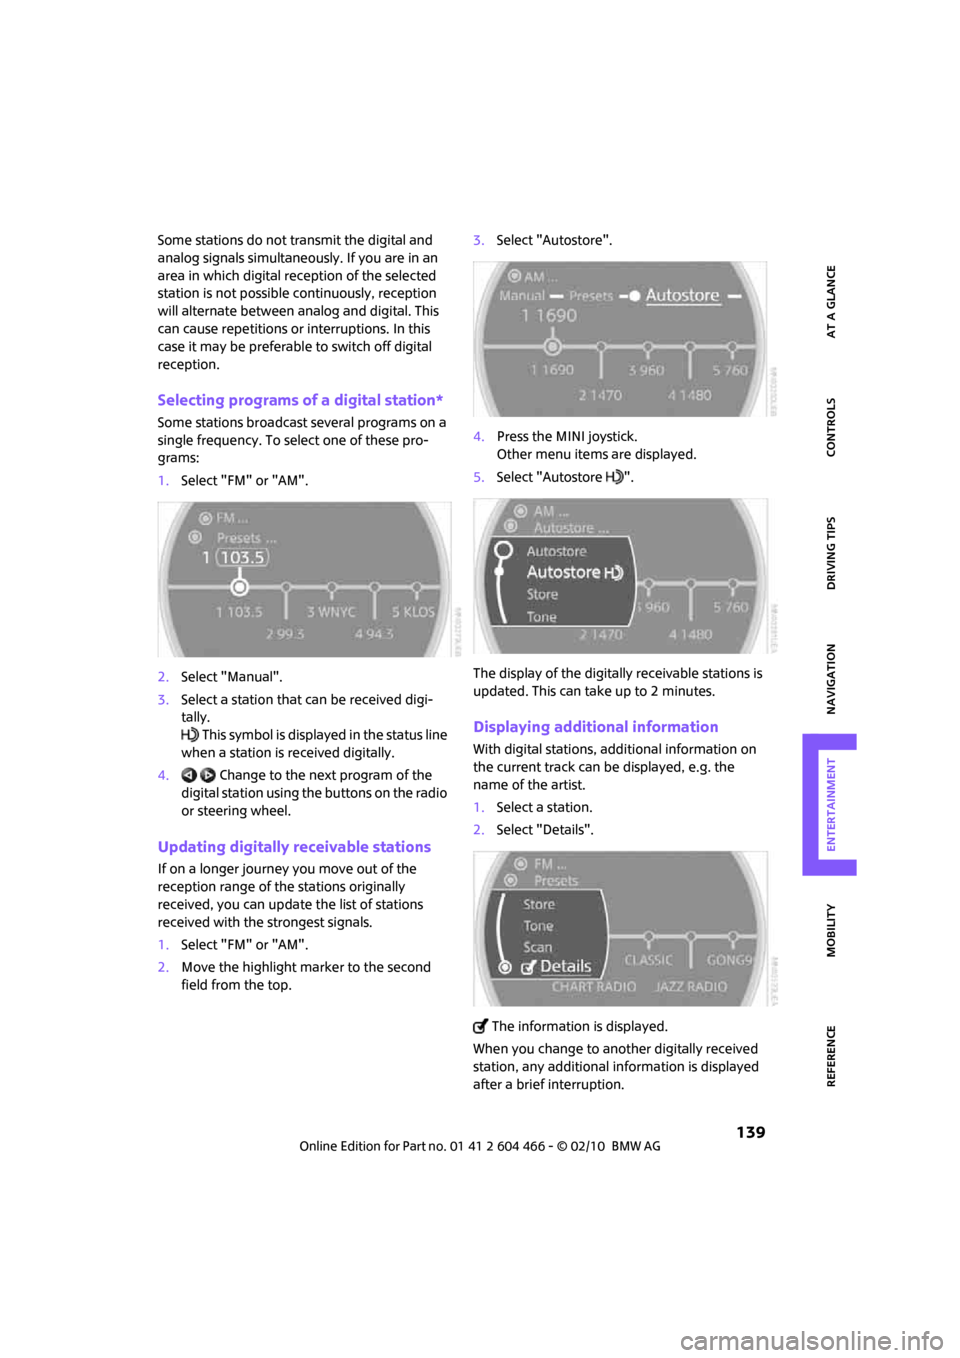
1.Select "FM" or "AM".
2.Select "Manual".
3.Select a station that can be received digi-
tally.
This symbol is displayed in the status line
when a station is received digitally.
4. Change to the next program of the
digital station using the buttons on the radio
or steering wheel.
Updating digitally receivable stations
If on a longer journey you move out of the
reception range of the stations originally
received, you can update the list of stations
received with the strongest signals.
1.Select "FM" or "AM".
2.Move the highlight marker to the second
field from the top.3.Select "Autostore".
4.Press the MINI joystick.
Other menu items are displayed.
5.Select "Autostore ".
The display of the digitally receivable stations is
updated. This can take up to 2 minutes.
Displaying additional information
With digital stations, additional information on
the current track can be displayed, e.g. the
name of the artist.
1.Select a station.
2.Select "Details".
The information is displayed.
When you change to another digitally received
station, any additional information is displayed
after a brief interruption.
Page 144 of 218
Radio
142
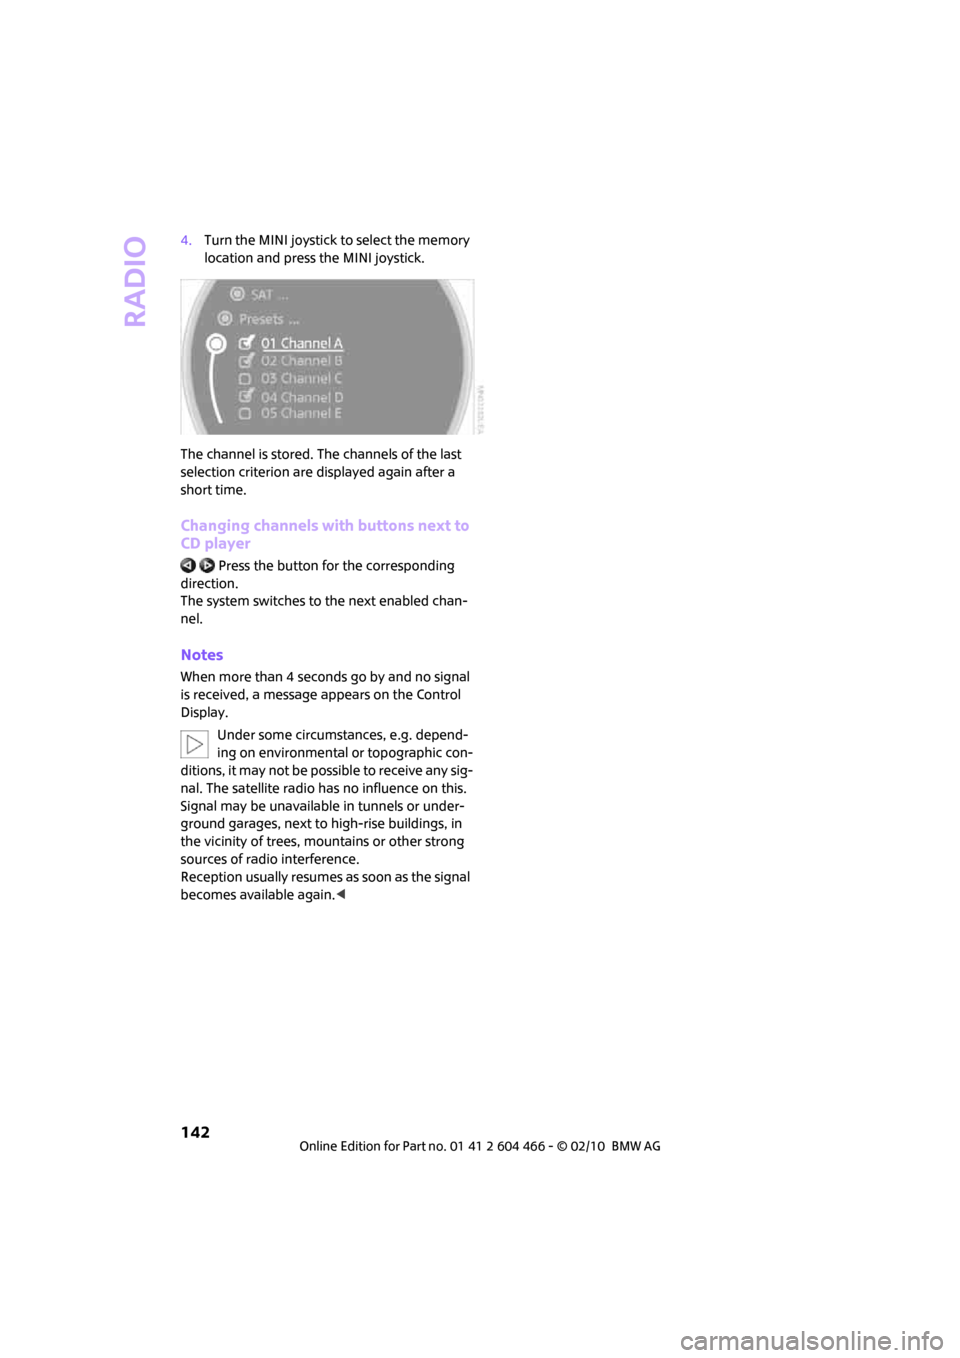
4.Turn the MINI joystick to select the memory
location and press the MINI joystick.
The channel is stored. The channels of the last
selection criterion are displayed again after a
short time.
Changing channels with buttons next to
CD player
Press the button for the corresponding
direction.
The system switches to the next enabled chan-
nel.
Notes
When more than 4 seconds go by and no signal
is received, a message appears on the Control
Display.
Under some circumstances, e.g. depend-
ing on environmental or topographic con-
ditions, it may not be possible to receive any sig-
nal. The satellite radio has no influence on this.
Signal may be unavailable in tunnels or under-
ground garages, next to high-rise buildings, in
the vicinity of trees, mountains or other strong
sources of radio interference.
Reception usually resumes as soon as the signal
becomes available again.<
Page 146 of 218
CD player and CD changer
144
Selecting a track
Buttons on the CD player
Press the button for the desired direction
repeatedly until the desired track on the current
CD is reached.
Playback of the CD starts at the beginning of the
track. The track is displayed on the Control Dis-
play.
You can also change the track using the buttons
on the steering wheel, page11.
Using the onboard monitor
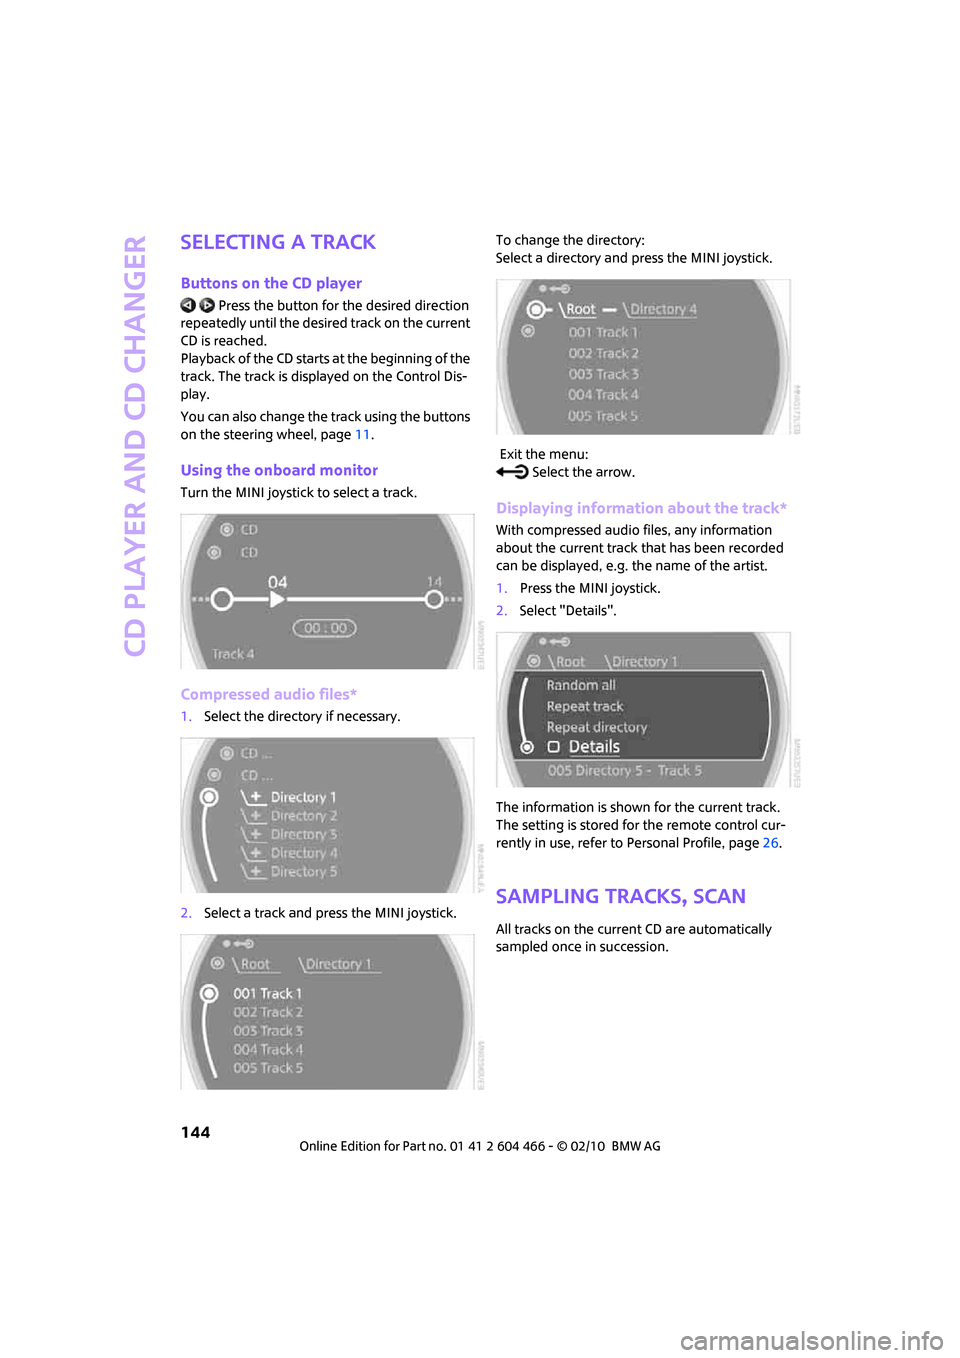
Turn the MINI joystick to select a track.
Compressed audio files*
1.Select the directory if necessary.
2.Select a track and press the MINI joystick.To change the directory:
Select a directory and press the MINI joystick.
Exit the menu:
Select the arrow.
Displaying information about the track*
With compressed audio files, any information
about the current track that has been recorded
can be displayed, e.g. the name of the artist.
1.Press the MINI joystick.
2.Select "Details".
The information is shown for the current track.
The setting is stored for the remote control cur-
rently in use, refer to Personal Profile, page26.
Sampling tracks, Scan
All tracks on the current CD are automatically
sampled once in succession.
Page 148 of 218
CD player and CD changer
146
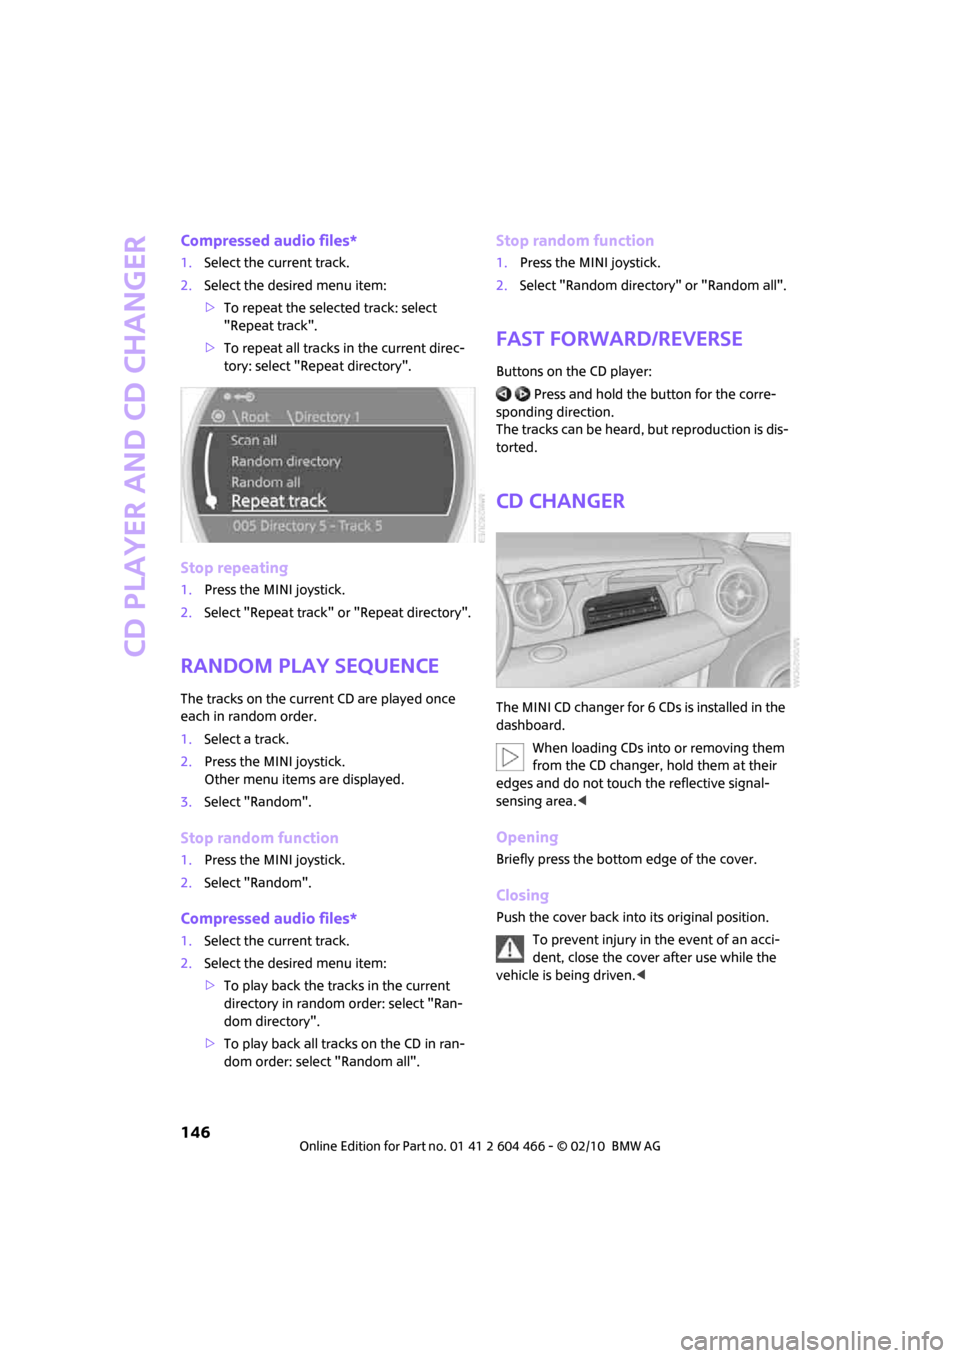
Compressed audio files*
1.Select the current track.
2.Select the desired menu item:
>To repeat the selected track: select
"Repeat track".
>To repeat all tracks in the current direc-
tory: select "Repeat directory".
Stop repeating
1.Press the MINI joystick.
2.Select "Repeat track" or "Repeat directory".
Random play sequence
The tracks on the current CD are played once
each in random order.
1.Select a track.
2.Press the MINI joystick.
Other menu items are displayed.
3.Select "Random".
Stop random function
1.Press the MINI joystick.
2.Select "Random".
Compressed audio files*
1.Select the current track.
2.Select the desired menu item:
>To play back the tracks in the current
directory in random order: select "Ran-
dom directory".
>To play back all tracks on the CD in ran-
dom order: select "Random all".
Stop random function
1.Press the MINI joystick.
2.Select "Random directory" or "Random all".
Fast forward/reverse
Buttons on the CD player:
Press and hold the button for the corre-
sponding direction.
The tracks can be heard, but reproduction is dis-
torted.
CD changer
The MINI CD changer for 6 CDs is installed in the
dashboard.
When loading CDs into or removing them
from the CD changer, hold them at their
edges and do not touch the reflective signal-
sensing area.<
Opening
Briefly press the bottom edge of the cover.
Closing
Push the cover back into its original position.
To prevent injury in the event of an acci-
dent, close the cover after use while the
vehicle is being driven.<
Page 149 of 218
MOBILITYAT A GLANCE CONTROLS DRIVING TIPS ENTERTAINMENT
147
NAVIGATION REFERENCE
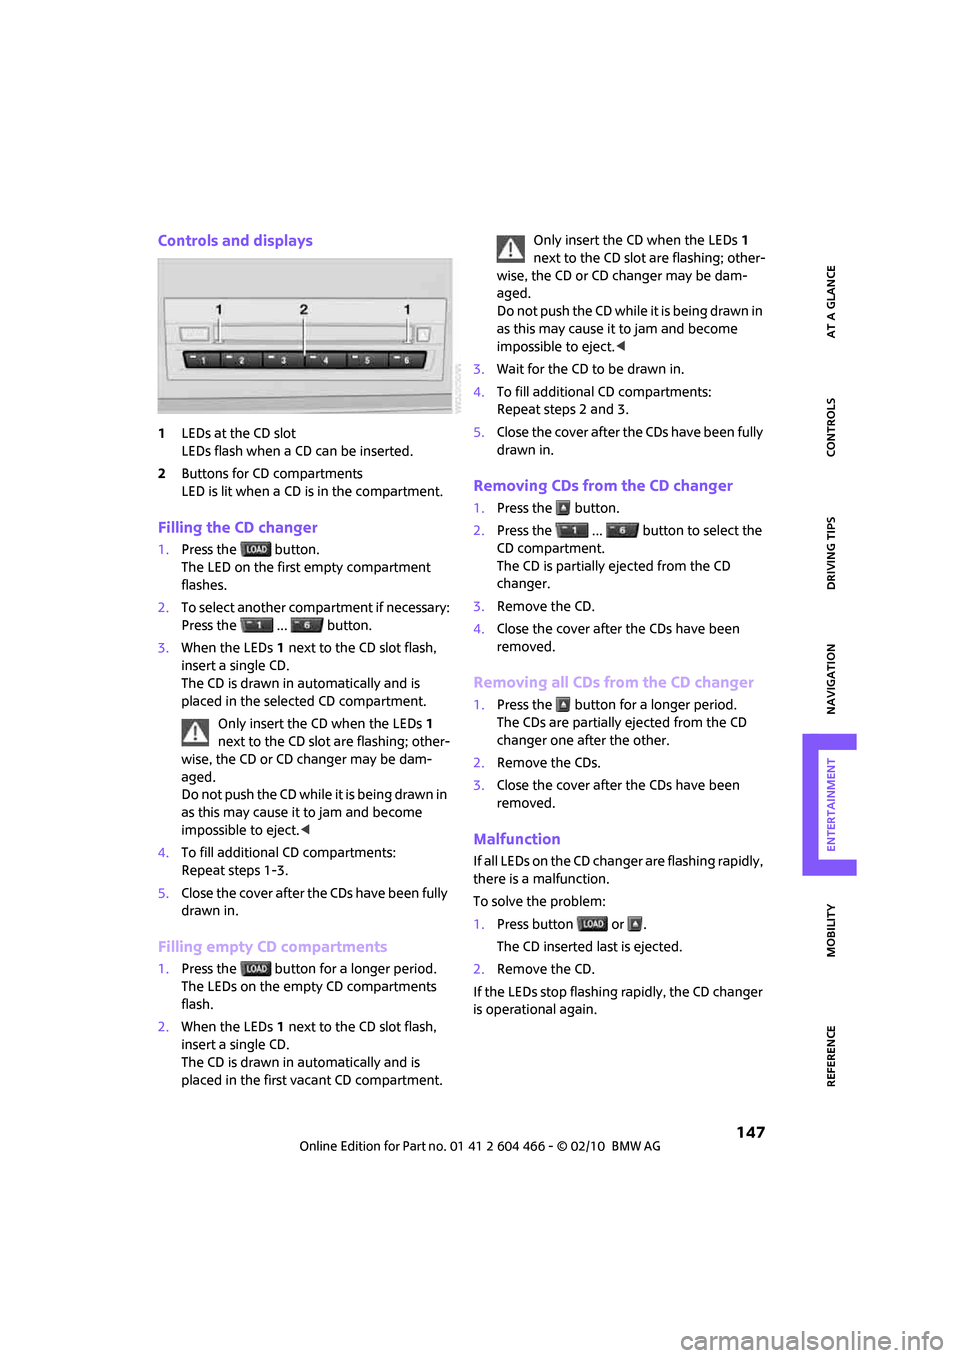
Controls and displays
1LEDs at the CD slot
LEDs flash when a CD can be inserted.
2Buttons for CD compartments
LED is lit when a CD is in the compartment.
Filling the CD changer
1.Press the button.
The LED on the first empty compartment
flashes.
2.To select another compartment if necessary:
Press the ... button.
3.When the LEDs 1 next to the CD slot flash,
insert a single CD.
The CD is drawn in automatically and is
placed in the selected CD compartment.
Only insert the CD when the LEDs1
next to the CD slot are flashing; other-
wise, the CD or CD changer may be dam-
aged.
Do not push the CD while it is being drawn in
as this may cause it to jam and become
impossible to eject.<
4.To fill additional CD compartments:
Repeat steps 1-3.
5.Close the cover after the CDs have been fully
drawn in.
Filling empty CD compartments
1.Press the button for a longer period.
The LEDs on the empty CD compartments
flash.
2.When the LEDs 1 next to the CD slot flash,
insert a single CD.
The CD is drawn in automatically and is
placed in the first vacant CD compartment.Only insert the CD when the LEDs1
next to the CD slot are flashing; other-
wise, the CD or CD changer may be dam-
aged.
Do not push the CD while it is being drawn in
as this may cause it to jam and become
impossible to eject.<
3.Wait for the CD to be drawn in.
4.To fill additional CD compartments:
Repeat steps 2 and 3.
5.Close the cover after the CDs have been fully
drawn in.
Removing CDs from the CD changer
1.Press the button.
2.Press the ... button to select the
CD compartment.
The CD is partially ejected from the CD
changer.
3.Remove the CD.
4.Close the cover after the CDs have been
removed.
Removing all CDs from the CD changer
1.Press the button for a longer period.
The CDs are partially ejected from the CD
changer one after the other.
2.Remove the CDs.
3.Close the cover after the CDs have been
removed.
Malfunction
If all LEDs on the CD changer are flashing rapidly,
there is a malfunction.
To solve the problem:
1.Press button or .
The CD inserted last is ejected.
2.Remove the CD.
If the LEDs stop flashing rapidly, the CD changer
is operational again.
Page 154 of 218
USB audio interface
152
Stop random play:
1.Press the MINI joystick.
2.Select "Random" and press the MINI joy-
stick.
Fast forward/reverse
Buttons on the steering wheel or CD player:
Press and hold the button for the corre-
sponding direction.
Notes
Do not expose the audio device to
extreme environmental conditions, e. g.
very high temperatures, refer to the Owner's
Manual of the audio device. Otherwise, the
audio device may become damaged, which
could compromise safety while driving.<
Depending on the configuration of the audio
files, e. g. bit rates greater than 256 kbit/s, the
files may not play back correctly in every case.
Notes on connecting
>The USB audio interface supplies the con-
nected audio devices with power, provided
that this is supported by the audio device.
Therefore, do not connect the USB audio
device to the power socket in the vehicle
during operation.
>Do not forcibly connect the plug to the USB
interface.
>Do not connect devices such as fans or
lamps to the USB audio interface.
>Do not connect USB hard disks.
>Do not use the USB audio interface to charge
external devices.
Page 203 of 218
REFERENCEAT A GLANCE CONTROLS DRIVING TIPS MOBILITY
201
Avoid highways in
navigation118
"Avoid tollroads" in
Navigation118
Axle loads, refer to
Weights194
B
Background lighting, refer to
Ambient lighting84
Backrests, refer to Seats37
Backup lamps
– replacing bulb179
Balance, tone control133
Band-aids, refer to First aid
pouch186
Bar, refer to Tow-starting,
towing away188
Bass sounds, refer to Tone
control133
Bass sounds, refer to Treble
and bass133
Bass, tone control133
Battery185
– charging185
– disposal34,185
– jump-starting186
– temporary power failure185
Battery renewal
– remote control34
Being towed188
Belt tensioner, refer to Safety
belts40
Belts, refer to Safety belts40
Beverage holders, refer to
Cupholders91
Black ice, refer to Outside
temperature warning55
Blower, refer to Air flow rate86
Bottle holders, refer to
Cupholders91
Brake Assist71
Brake fluid, refer to Service
requirements60Brake lamps
– replacing bulbs179
Brake pads, breaking in96
Brake rotors97
– brakes96
– breaking in96
Brake system96
– breaking in96
– disc brakes97
– MINI Maintenance
System170
Brakes
– ABS71
– breaking in96
– MINI Maintenance
System170
– parking brake47
– service requirements60
Brakes, refer to Braking
safely97
Breakdown service, refer to
Roadside Assistance186
Break-in period
96
Breaking in the clutch96
"Brightness" on the Control
Display69
Bulb changing, refer to Lamps
and bulbs176
Button for starting the
engine46
Buttons on the steering
wheel11
C
California Proposition 65
warning5
Can holders, refer to
Cupholders91
Capacities194
Car battery, refer to Vehicle
battery185
Car care172
"Car Data"57
Car key, refer to Keys/remote
controls26Car phone
– installation location, refer to
Center armrest90
– refer to separate Owner's
Manual
Car radio, refer to Radio135
Car wash, care172
Car washes172
Care172
– car washes172
– car-care products172
– CD/DVD drives175
– external172
– high-pressure washers172
– internal174
– leather174
– manual washing173
– upholstery and fabrics174
– windows173
– wiper blades173
Cargo area
– capacity194
Cargo bay98
– Comfort Access33
– doors, refer to Splitdoor31
– lamp83
– opening from outside31
– trunk lid, refer to Splitdoor31
Cargo bay doors, refer to
Splitdoor31
Cargo bay, expanding98
Cargo bay lamp83
Cargo bay partition net, refer
to Partition net99
Cargo loading99
– securing cargo100
– stowing cargo100
– vehicle98
Cargo, securing100
Carpets, care174
Catalytic converter, refer to
Hot exhaust system96
"Categories"141
"CD"132,143
Page 205 of 218
REFERENCEAT A GLANCE CONTROLS DRIVING TIPS MOBILITY
203
Date
– setting64
– setting format65
"Date format"65
"Daytime running lamps"82
Daytime running lights82
DBC Dynamic Brake Control,
refer to Brake Assist71
Deactivating front passenger
airbags79
Deadlocking, refer to
Locking28
Defect
– door lock30
– fuel filler flap156
Defogging windows87
Defrost position, refer to
Defrosting windows87
Defrosting windows87
Defrosting windows and
removing condensation
– automatic climate control87
Defrosting windshield, refer to
Defrosting windows87
Destination address
– deleting117
– entering108,111
Destination for navigation
– destination list115
– entry108
– home address117
– manual entry108,111
– selecting from address
book116
– selecting using
information114
– selecting via map113
– storing116
Destination guidance120
– changing specified route118
– displaying route121
– distance and arrival120
– interrupting120
– starting120
– taking detours124
– terminating/continuing120
– voice instructions123
– volume for voice
instructions123Destination list for navigation
system115
Destinations recently driven
to115
Detour, refer to Driving around
a traffic congestion127
Differential, breaking in96
Digital clock55
Digital radio, refer to HD
Radio138
Dimensions193
Dipstick, engine oil168
Direction instructions, refer to
Voice instructions123
Directional indicators, refer to
Turn signals50
Directory for navigation, refer
to Address book115
Displacement, refer to Engine
data192
Display lighting, refer to
Instrument lighting83
"Display off"20
Display, refer to Onboard
monitor controls16
Displays12
– instrument combination12
– on the Control Display16
Displays and controls10
Displays, care174
Disposal
– of coolant169
– remote control battery34
– vehicle battery185
"Dist. to dest."58
Distance remaining to service,
refer to Service
requirements60
Distance warning, refer to Park
Distance Control PDC70
Door
– rear, refer to Clubdoor31
Door key, refer to Integrated
key/remote control26
Door lock29
Door lock, confirmation
signals28
"Door locks"28,30
Doors, manual operation30DOT Quality Grades163
Double doors, refer to
Splitdoor31
Drinks holders, refer to
Cupholders91
Drive-off assistant, refer to Hill
Assist73
Driving around a traffic
congestion127
Driving dynamics control, refer
to Sport button73
Driving lamps, refer to Parking
lamps/low beams81
Driving notes96
Driving off on inclines, refer to
Hill Assist73
Driving route, refer to
Displaying route121
Driving stability control
systems71
Driving through water
97
Driving tips, refer to Driving
notes96
Dry air, refer to Cooling
function87
DTC Dynamic Traction Control
DTC72
DVD for navigation106
Dynamic Brake Control DBC,
refer to Brake Assist71
Dynamic Stability Control
DSC71
Dynamic Traction Control72
E
Eject button, refer to Buttons
on the CD player132
Electrical malfunction
– door lock30
– fuel filler flap156
Electronic brake-force
distribution71
Electronic Stability Program
ESP, refer to Dynamic
Stability Control DSC71
Page 208 of 218
Everything from A to Z
206
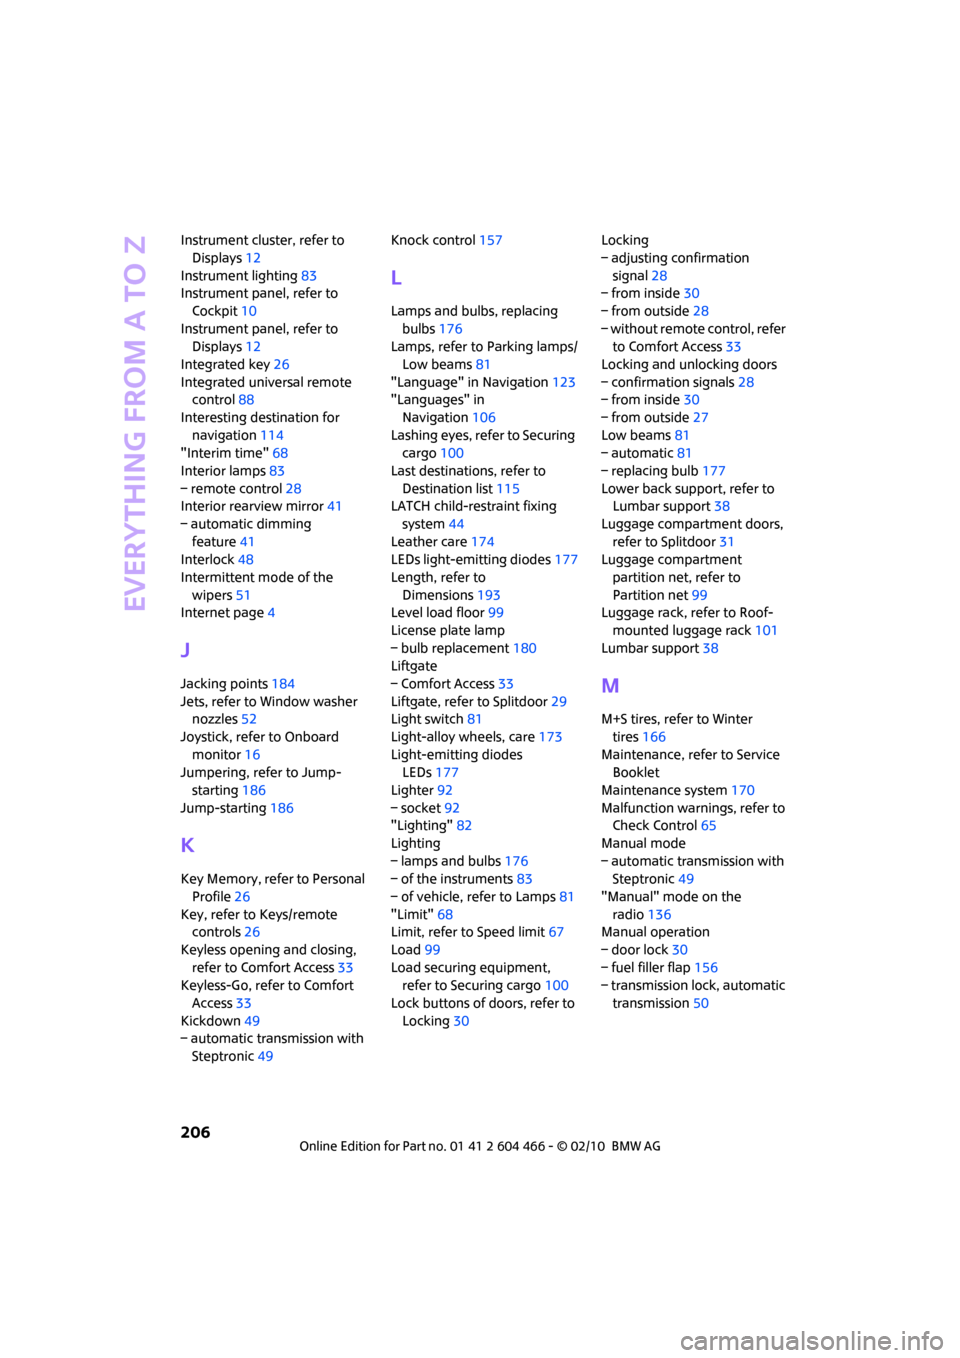
Instrument cluster, refer to
Displays12
Instrument lighting83
Instrument panel, refer to
Cockpit10
Instrument panel, refer to
Displays12
Integrated key26
Integrated universal remote
control88
Interesting destination for
navigation114
"Interim time"68
Interior lamps83
– remote control28
Interior rearview mirror41
– automatic dimming
feature41
Interlock48
Intermittent mode of the
wipers51
Internet page4
J
Jacking points184
Jets, refer to Window washer
nozzles52
Joystick, refer to Onboard
monitor16
Jumpering, refer to Jump-
starting186
Jump-starting186
K
Key Memory, refer to Personal
Profile26
Key, refer to Keys/remote
controls26
Keyless opening and closing,
refer to Comfort Access33
Keyless-Go, refer to Comfort
Access33
Kickdown49
– automatic transmission with
Steptronic49Knock control157
L
Lamps and bulbs, replacing
bulbs176
Lamps, refer to Parking lamps/
Low beams81
"Language" in Navigation123
"Languages" in
Navigation106
Lashing eyes, refer to Securing
cargo100
Last destinations, refer to
Destination list115
LATCH child-restraint fixing
system44
Leather care174
LEDs light-emitting diodes177
Length, refer to
Dimensions193
Level load floor99
License plate lamp
– bulb replacement180
Liftgate
– Comfort Access33
Liftgate, refer to Splitdoor29
Light switch81
Light-alloy wheels, care173
Light-emitting diodes
LEDs177
Lighter92
– socket92
"Lighting"82
Lighting
– lamps and bulbs176
– of the instruments83
– of vehicle, refer to Lamps81
"Limit"68
Limit, refer to Speed limit67
Load99
Load securing equipment,
refer to Securing cargo100
Lock buttons of doors, refer to
Locking30Locking
– adjusting confirmation
signal28
– from inside30
– from outside28
– without remote control, refer
to Comfort Access33
Locking and unlocking doors
– confirmation signals28
– from inside30
– from outside27
Low beams81
– automatic81
– replacing bulb177
Lower back support, refer to
Lumbar support38
Luggage compartment doors,
refer to Splitdoor31
Luggage compartment
partition net, refer to
Partition net99
Luggage rack, refer to Roof-
mounted luggage rack
101
Lumbar support38
M
M+S tires, refer to Winter
tires166
Maintenance, refer to Service
Booklet
Maintenance system170
Malfunction warnings, refer to
Check Control65
Manual mode
– automatic transmission with
Steptronic49
"Manual" mode on the
radio136
Manual operation
– door lock30
– fuel filler flap156
– transmission lock, automatic
transmission50
Page 209 of 218
REFERENCEAT A GLANCE CONTROLS DRIVING TIPS MOBILITY
207
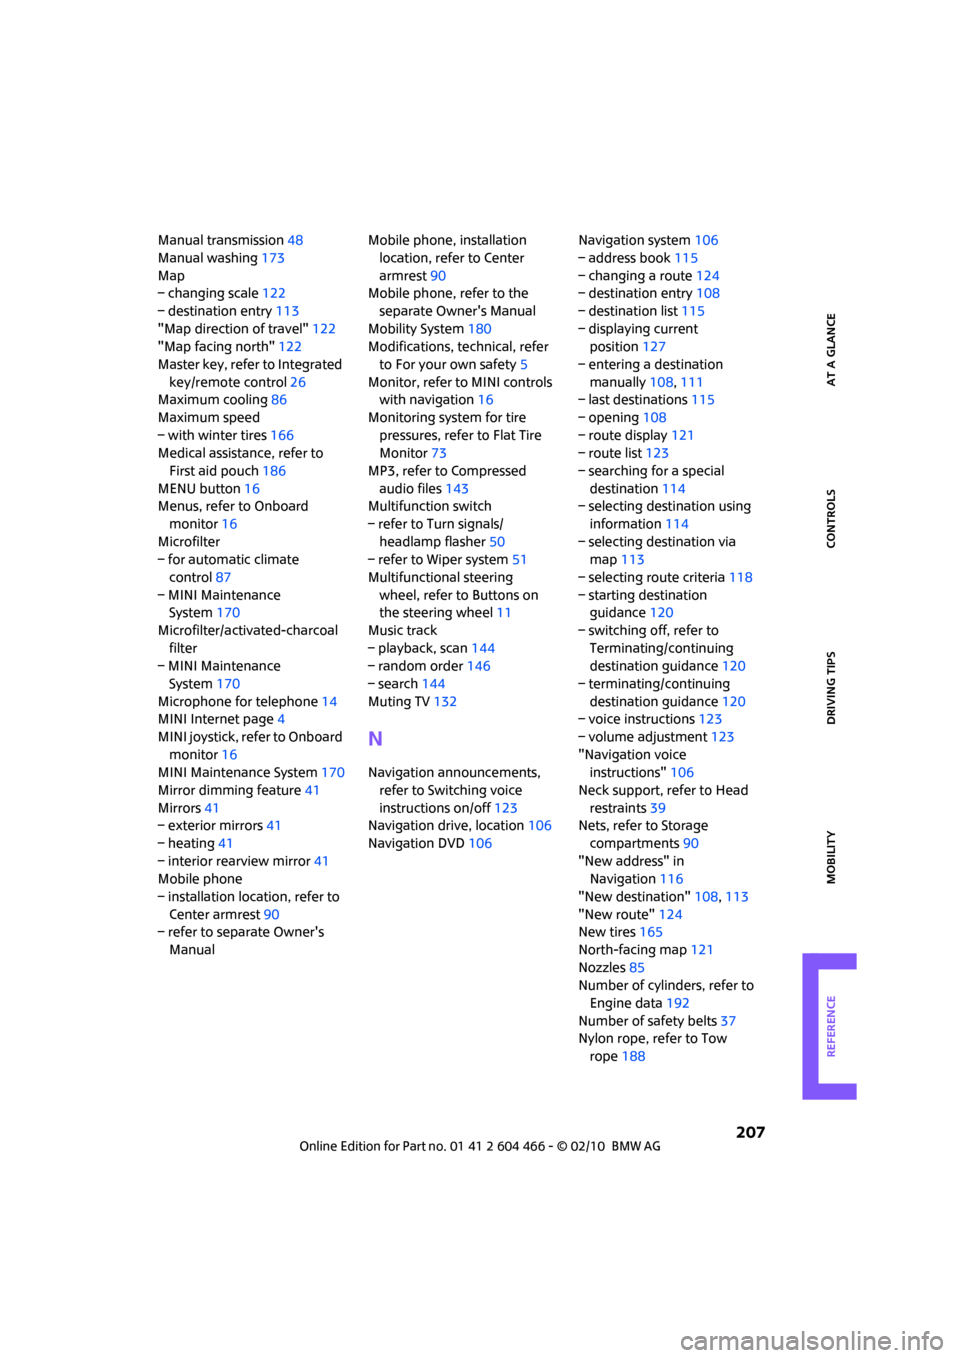
Manual transmission48
Manual washing173
Map
– changing scale122
– destination entry113
"Map direction of travel"122
"Map facing north"122
Master key, refer to Integrated
key/remote control26
Maximum cooling86
Maximum speed
– with winter tires166
Medical assistance, refer to
First aid pouch186
MENU button16
Menus, refer to Onboard
monitor16
Microfilter
– for automatic climate
control87
– MINI Maintenance
System170
Microfilter/activated-charcoal
filter
– MINI Maintenance
System170
Microphone for telephone14
MINI Internet page4
MINI joystick, refer to Onboard
monitor16
MINI Maintenance System170
Mirror dimming feature41
Mirrors41
– exterior mirrors41
– heating41
– interior rearview mirror41
Mobile phone
– installation location, refer to
Center armrest90
– refer to separate Owner's
ManualMobile phone, installation
location, refer to Center
armrest90
Mobile phone, refer to the
separate Owner's Manual
Mobility System180
Modifications, technical, refer
to For your own safety5
Monitor, refer to MINI controls
with navigation16
Monitoring system for tire
pressures, refer to Flat Tire
Monitor73
MP3, refer to Compressed
audio files143
Multifunction switch
– refer to Turn signals/
headlamp flasher50
– refer to Wiper system51
Multifunctional steering
wheel, refer to Buttons on
the steering wheel11
Music track
– playback, scan144
– random order146
– search144
Muting TV132
N
Navigation announcements,
refer to Switching voice
instructions on/off123
Navigation drive, location106
Navigation DVD106Navigation system106
– address book115
– changing a route124
– destination entry108
– destination list115
– displaying current
position127
– entering a destination
manually108,111
– last destinations115
– opening108
– route display121
– route list123
– searching for a special
destination114
– selecting destination using
information114
– selecting destination via
map113
– selecting route criteria118
– starting destination
guidance120
– switching off, refer to
Terminating/continuing
destination guidance120
– terminating/continuing
destination guidance120
– voice instructions123
– volume adjustment123
"Navigation voice
instructions"106
Neck support, refer to Head
restraints39
Nets, refer to Storage
compartments90
"New address" in
Navigation116
"New destination"108,113
"New route"124
New tires165
North-facing map121
Nozzles85
Number of cylinders, refer to
Engine data192
Number of safety belts37
Nylon rope, refer to Tow
rope188