tow MINI Clubman 2010 (Mini Connected) User Guide
[x] Cancel search | Manufacturer: MINI, Model Year: 2010, Model line: Clubman, Model: MINI Clubman 2010Pages: 218, PDF Size: 3.97 MB
Page 102 of 218
Things to remember when driving
100
2.Determine the combined weight of the
driver and passengers that will be riding in
your vehicle.
3.Subtract the combined weight of the driver
and passengers from XXX kilograms or YYY
pounds.
4.The resulting figure equals the available
amount of cargo and luggage load capacity.
For example, if the XXX amount equals
1,400 lbs and there will be four 150 lbs pas-
sengers in your vehicle, the amount of avail-
able cargo and luggage load capacity is
650 lbs:
1,400 lbs minus 750 lbs = 650 lbs.
5.Determine the combined weight of luggage
and cargo being loaded on the vehicle. That
weight may not safely exceed the available
cargo and luggage load capacity calculated
in step 4.
6.I f y o u r v e h icl e w i ll be t o w i n g a t r a il e r , pa r t o f
the load from your trailer will be transferred
to your vehicle. Consult the manual for
transporting a trailer to determine how this
may reduce the available cargo and luggage
load capacity of your vehicle.
Load
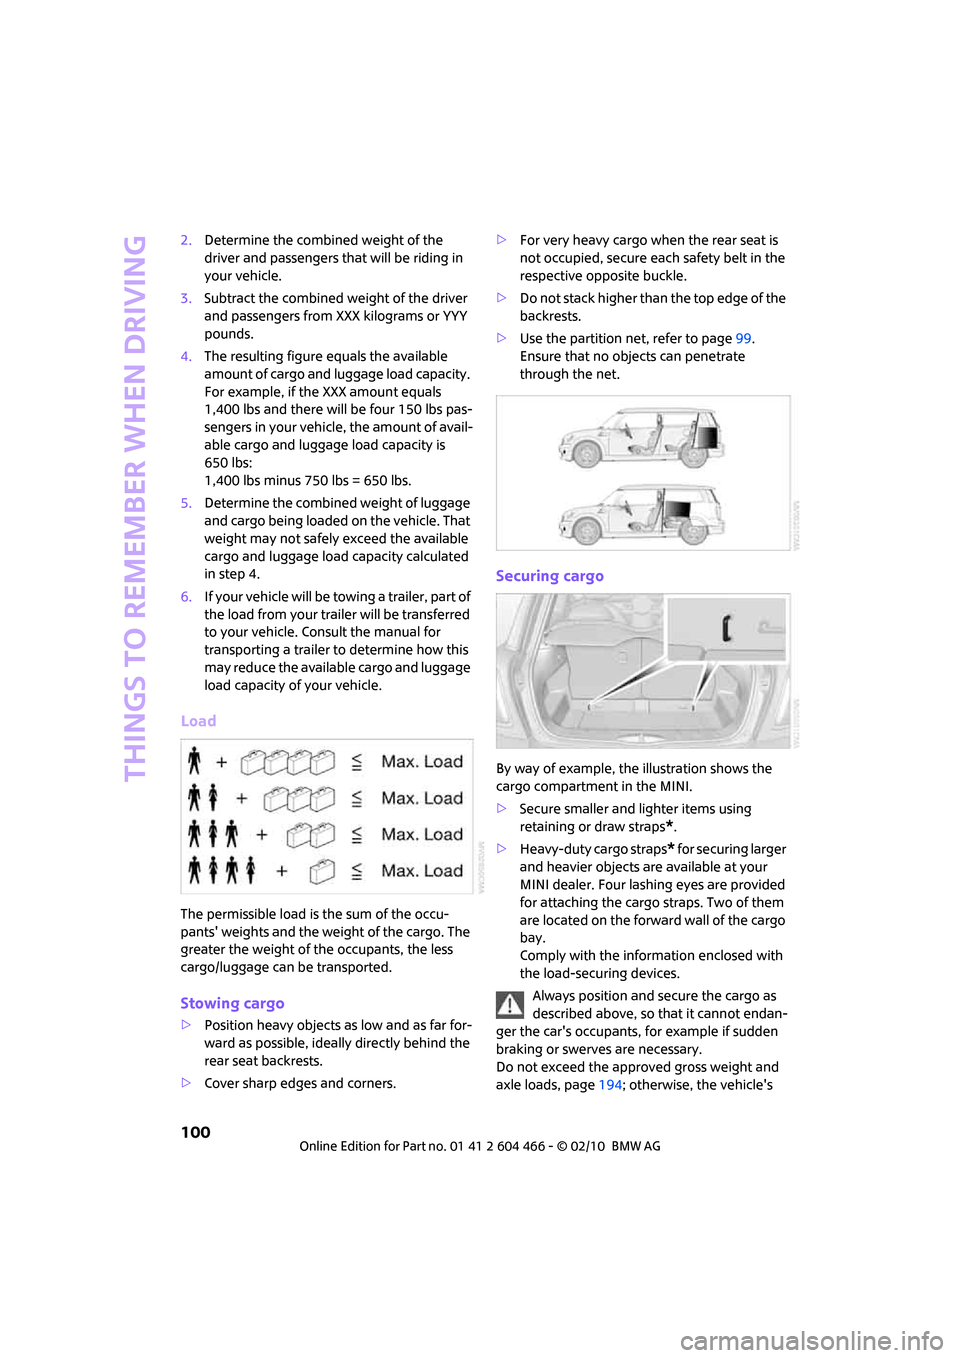
The permissible load is the sum of the occu-
pants' weights and the weight of the cargo. The
greater the weight of the occupants, the less
cargo/luggage can be transported.
Stowing cargo
>Position heavy objects as low and as far for-
ward as possible, ideally directly behind the
rear seat backrests.
>Cover sharp edges and corners.>For very heavy cargo when the rear seat is
not occupied, secure each safety belt in the
respective opposite buckle.
>Do not stack higher than the top edge of the
backrests.
>Use the partition net, refer to page99.
Ensure that no objects can penetrate
through the net.
Securing cargo
By way of example, the illustration shows the
cargo compartment in the MINI.
>Secure smaller and lighter items using
retaining or draw straps
*.
>Heavy-duty cargo straps
* for securing larger
and heavier objects are available at your
MINI dealer. Four lashing eyes are provided
for attaching the cargo straps. Two of them
are located on the forward wall of the cargo
bay.
Comply with the information enclosed with
the load-securing devices.
Always position and secure the cargo as
described above, so that it cannot endan-
ger the car's occupants, for example if sudden
braking or swerves are necessary.
Do not exceed the approved gross weight and
axle loads, page194; otherwise, the vehicle's
Page 110 of 218

Destination entry
108
Destination entry
In entering your destination you can select from
the following options:
>Entering a destination manually, see below
>Entering a destination by voice commands*,
page111
>Selecting destination using information,
page114
>Selecting destination from a list, Destination
list, page115
>Selecting destination from address book,
page115
>Storing home address, page117
After selecting your destination you can proceed
to start the destination guidance, page120.
Enter data only when the vehicle is sta-
tionary, and always give priority to the
applicable traffic regulations in the event of any
contradiction between traffic and road condi-
tions and the instructions issued by the naviga-
tion system. If you do not observe this precau-
tion, you may be in violation of the law, and can
endanger vehicle occupants and other road
users.<
Opening navigation
Onboard monitor, for operating principle refer
to page16.
1.Press the button.
This opens the start menu.
2.Move the MINI joystick to highlight "Naviga-
tion" and press the MINI joystick.3.Select "Navigation".
The following information is displayed on the
onboard monitor:
>During destination guidance: the arrow or
map view
>When destination guidance is switch off: the
destination list
Entering a destination
manually
The system's word-matching principle makes it
easier to enter the names of streets or towns,
page119. This allows you to enter different
spellings and completes your entry automati-
cally so that stored names can be called up
quickly.
1.If necessary, move the highlight marker to
the uppermost field.
2.Select "Navigation".
"New destination" is highlighted.
3.Press the MINI joystick.
Page 111 of 218

MOBILITYAT A GLANCE CONTROLS DRIVING TIPS ENTERTAINMENT
109
NAVIGATION REFERENCE
4.Select "Enter address".
The system also supports you with the following
features:
>If you do not enter a street, the system will
guide you to the downtown area of a town
or city.
>You can skip the entry of country and local-
ity if the current entries should be retained
for your new destination.
Selecting country
1.Select "State / Province" or displayed coun-
try.
The list of available countries appears on the
display.
2.Select the country of destination.
At least the town/city of the destination or its zip
code must be entered in order to start the desti-
nation guidance.
Entering destination by town/city name
1.Select "Town / City" or displayed city.
2.Select the first letter.
A list of all towns/cities starting with this let-
ter appears on the Control Display.3.Delete letters if necessary:
>To delete individual numbers or letters:
Move the MINI joystick to the right to
highlight and press the MINI joystick.
>To delete all numbers or letters:
Move the MINI joystick to the right to
highlight and press the MINI joystick
for an extended period.
4.If necessary, enter more letters.
The list gradually grows smaller each time
you enter a new letter.
>To enter spaces, if necessary:
Select the symbol.
5.If necessary, change to the list of towns and
cities and select a name.
Page 112 of 218

Destination entry
110
Entering destination by zip code
1.Select "City / Zip code".
2.Enter the zip code:
Select the digits individually.
>To enter spaces, if necessary:
Select the symbol.
>To delete individual numbers or letters:
Move the MINI joystick to the right to
highlight and press the MINI joystick.
>To delete all numbers or letters:
Move the MINI joystick to the right to
highlight and press the MINI joystick
for an extended period.
3.Select the zip code.
The corresponding destination is displayed.
4.Move the highlight marker to the third field
from the top. Select the town/city.
Entering street, house number and
intersection
After the street you can also enter the intersec-
tion or the house number.
Entering street and intersection
1.Select "Street" or displayed street.
2.Enter the street.
The street is entered in the same manner as
the town or city.
The intersection is entered in the same way as
the street.
Entering a street without entering a
town/city
You can also enter a street without specifying a
town/city. In this case, all streets in the desig-
nated country are offered. The corresponding
town/city is displayed after the street name.
1.Turn the MINI joystick until "State / Prov-
ince" or the displayed country is selected.
The list of available countries appears on the
display.
2.Select the country of destination.
3.Turn the MINI joystick until the "Street" is
selected.
4.Select the first letter.
A list of all streets starting with this letter and
of the associated towns/cities appears on
the Control Display.
Page 113 of 218
MOBILITYAT A GLANCE CONTROLS DRIVING TIPS ENTERTAINMENT
111
NAVIGATION REFERENCE
5.If necessary, enter more letters.
The list gradually grows smaller each time
you enter a new letter.
6.Change to the list of street names and select
the street name in the corresponding town/
city.
Entering a house number
You can enter all house numbers that are stored
for the street on the navigation DVD.
1.Select "House number".
2.To enter the house number:
Select the digits individually.
3.Move the highlight marker to the third field
from the top. Select the house number.
You can only enter house numbers that are
stored for the street on the navigation DVD.
Starting destination guidance with
manual destination entry
>Select "Start guidance".
Destination guidance starts immediately.
>If you do not want to start destination guid-
ance right away:
Select "Add to destination list".
The destination is stored in the destination
list, page115.
Entering a destination by
voice commands*
You can enter a desired destination via the voice
activation system. During the destination input,
you can switch between voice entry and entry
via the onboard monitor at any time. To do so,
reactivate the voice activation system if neces-
sary.
You can have the possible commands
read aloud via {Options}.<
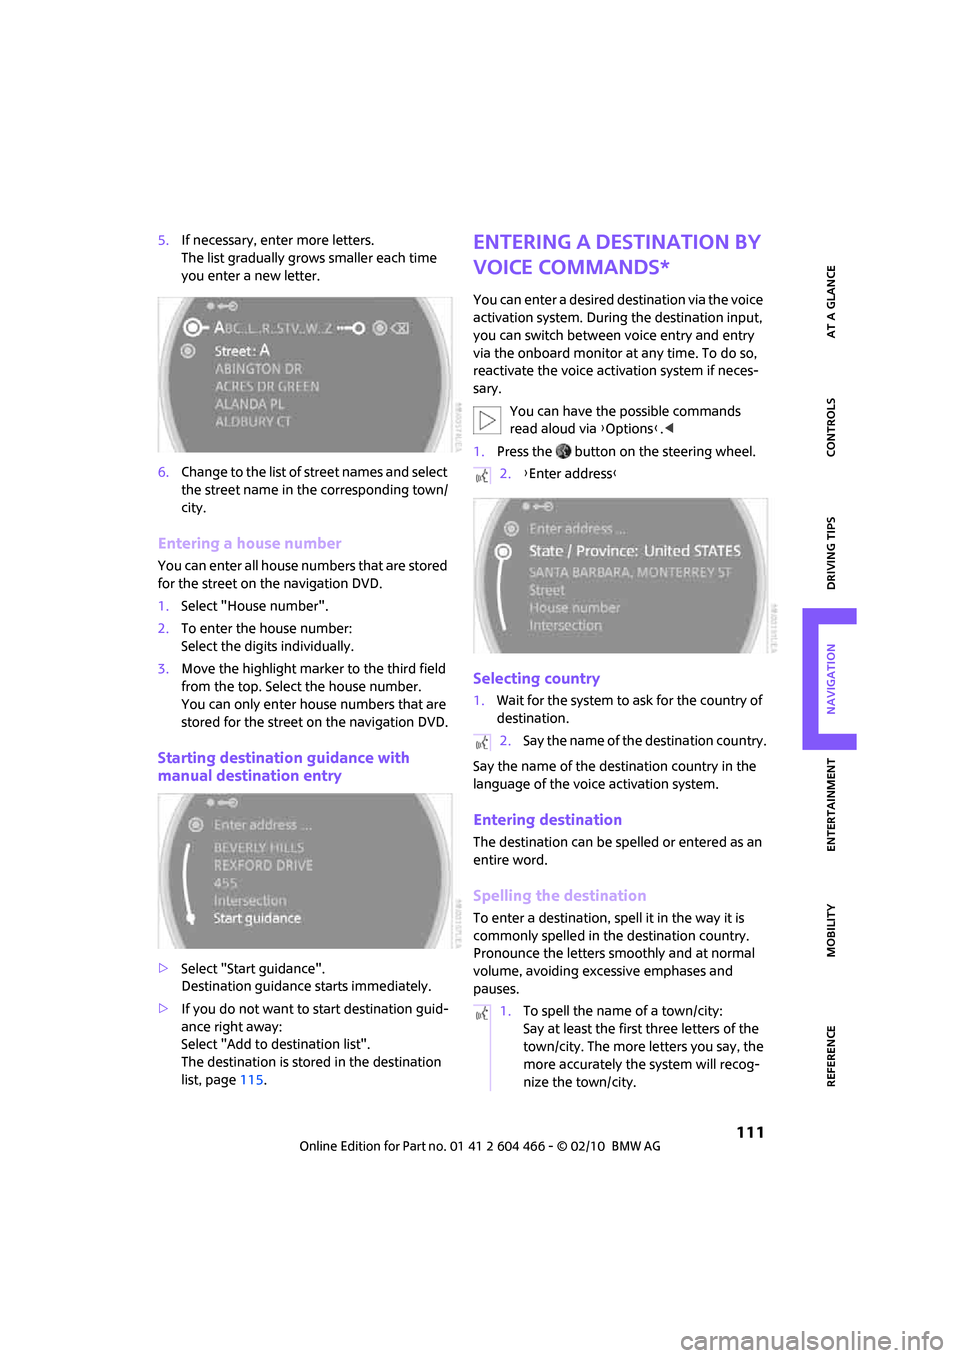
1.Press the button on the steering wheel.
Selecting country
1.Wait for the system to ask for the country of
destination.
Say the name of the destination country in the
language of the voice activation system.
Entering destination
The destination can be spelled or entered as an
entire word.
Spelling the destination
To enter a destination, spell it in the way it is
commonly spelled in the destination country.
Pronounce the letters smoothly and at normal
volume, avoiding excessive emphases and
pauses.
2.{Enter address}
2.Say the name of the destination country.
1.To spell the name of a town/city:
Say at least the first three letters of the
town/city. The more letters you say, the
more accurately the system will recog-
nize the town/city.
Page 114 of 218
Destination entry
112
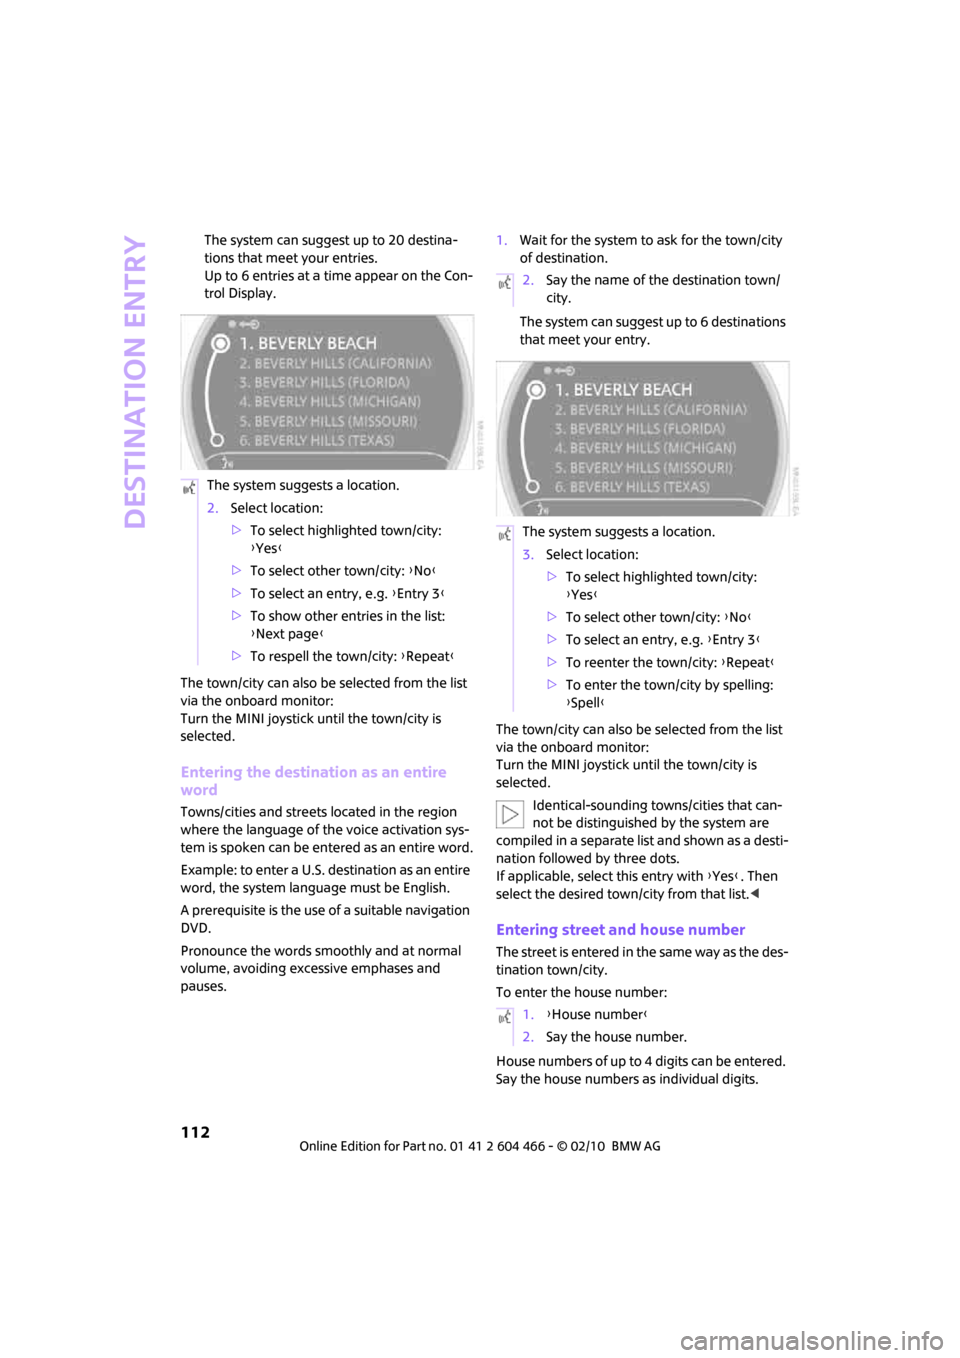
The system can suggest up to 20 destina-
tions that meet your entries.
Up to 6 entries at a time appear on the Con-
trol Display.
The town/city can also be selected from the list
via the onboard monitor:
Turn the MINI joystick until the town/city is
selected.
Entering the destination as an entire
word
Towns/cities and streets located in the region
where the language of the voice activation sys-
tem is spoken can be entered as an entire word.
Example: to enter a U.S. destination as an entire
word, the system language must be English.
A prerequisite is the use of a suitable navigation
DVD.
Pronounce the words smoothly and at normal
volume, avoiding excessive emphases and
pauses.1.Wait for the system to ask for the town/city
of destination.
The system can suggest up to 6 destinations
that meet your entry.
The town/city can also be selected from the list
via the onboard monitor:
Turn the MINI joystick until the town/city is
selected.
Identical-sounding towns/cities that can-
not be distinguished by the system are
compiled in a separate list and shown as a desti-
nation followed by three dots.
If applicable, select this entry with {Yes}. Then
select the desired town/city from that list.<
Entering street and house number
The street is entered in the same way as the des-
tination town/city.
To enter the house number:
House numbers of up to 4 digits can be entered.
Say the house numbers as individual digits. The system suggests a location.
2.Select location:
>To select highlighted town/city:
{Yes}
>To select other town/city: {No}
>To select an entry, e.g. {Entry 3}
>To show other entries in the list:
{Next page}
>To respell the town/city: {Repeat}
2.Say the name of the destination town/
city.
The system suggests a location.
3.Select location:
>To select highlighted town/city:
{Yes}
>To select other town/city: {No}
>To select an entry, e.g. {Entry 3}
>To reenter the town/city: {Repeat}
>To enter the town/city by spelling:
{Spell}
1.{House number}
2.Say the house number.
Page 115 of 218
MOBILITYAT A GLANCE CONTROLS DRIVING TIPS ENTERTAINMENT
113
NAVIGATION REFERENCE
Starting destination guidance
Destination guidance starts immediately.
Storing destinations
Destinations are added to the destination list or
can be stored in the address book.
Map-guided destination
selection
If you only know the location of the town or
street of destination, you can enter the destina-
tion using a map. Select the destination on the
map using cross-hairs and then transfer it for
destination guidance.
1.Select "Navigation".
"New destination" is highlighted.
2.Press the MINI joystick.
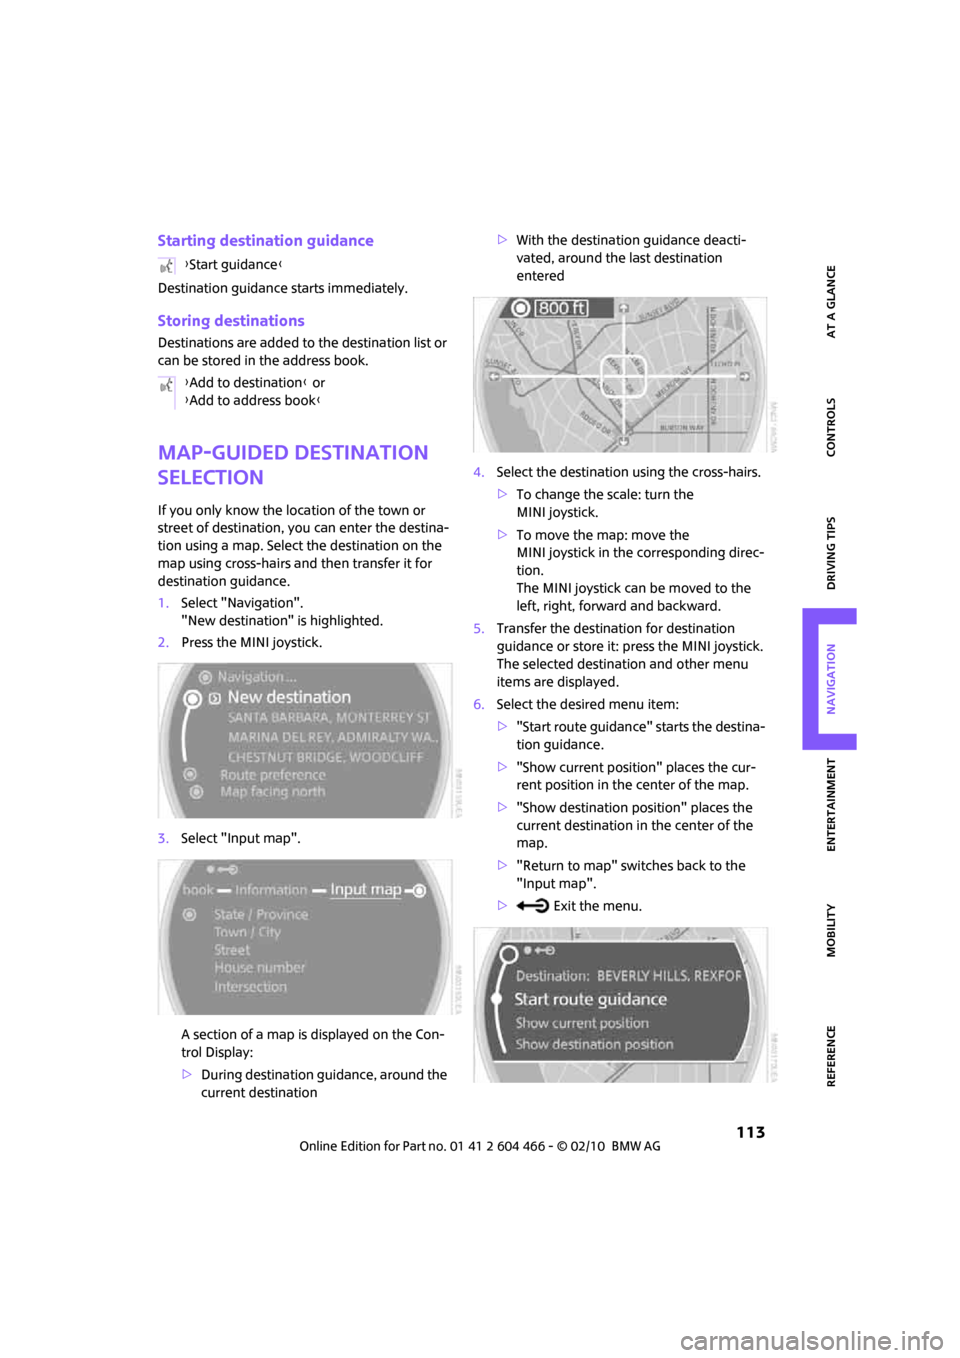
3.Select "Input map".
A section of a map is displayed on the Con-
trol Display:
>During destination guidance, around the
current destination>With the destination guidance deacti-
vated, around the last destination
entered
4.Select the destination using the cross-hairs.
>To change the scale: turn the
MINI joystick.
>To move the map: move the
MINI joystick in the corresponding direc-
tion.
The MINI joystick can be moved to the
left, right, forward and backward.
5.Transfer the destination for destination
guidance or store it: press the MINI joystick.
The selected destination and other menu
items are displayed.
6.Select the desired menu item:
>"Start route guidance" starts the destina-
tion guidance.
>"Show current position" places the cur-
rent position in the center of the map.
>"Show destination position" places the
current destination in the center of the
map.
>"Return to map" switches back to the
"Input map".
> Exit the menu. {Start guidance}
{Add to destination} or
{Add to address book}
Page 117 of 218
MOBILITYAT A GLANCE CONTROLS DRIVING TIPS ENTERTAINMENT
115
NAVIGATION REFERENCE
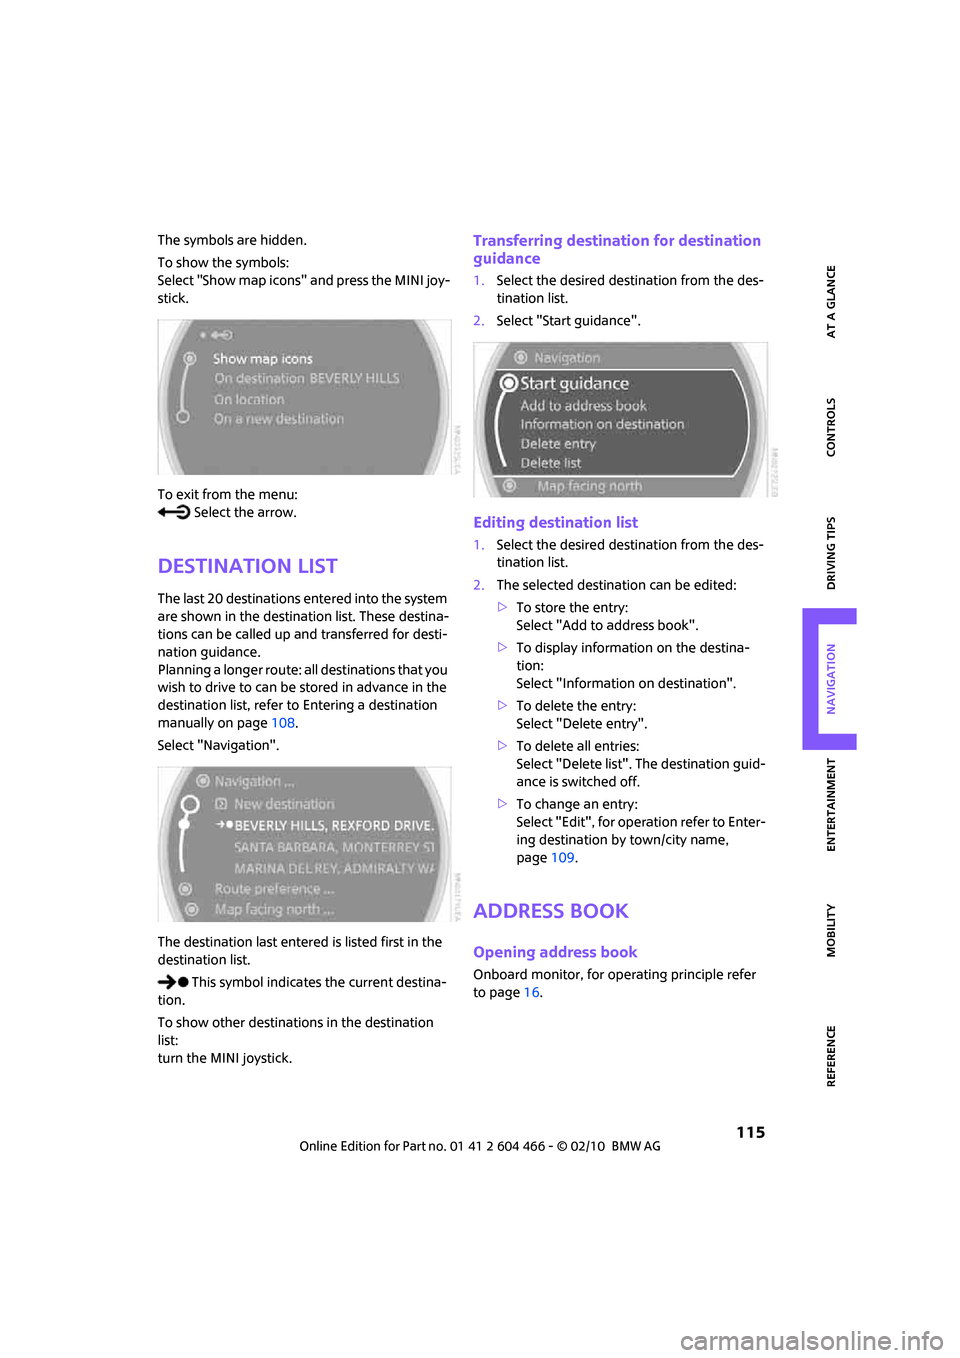
The symbols are hidden.
To show the symbols:
Select "Show map icons" and press the MINI joy-
stick.
To exit from the menu:
Select the arrow.
Destination list
The last 20 destinations entered into the system
are shown in the destination list. These destina-
tions can be called up and transferred for desti-
nation guidance.
Planning a longer route: all destinations that you
wish to drive to can be stored in advance in the
destination list, refer to Entering a destination
manually on page108.
Select "Navigation".
The destination last entered is listed first in the
destination list.
This symbol indicates the current destina-
tion.
To show other destinations in the destination
list:
turn the MINI joystick.
Transferring destination for destination
guidance
1.Select the desired destination from the des-
tination list.
2.Select "Start guidance".
Editing destination list
1.Select the desired destination from the des-
tination list.
2.The selected destination can be edited:
>To store the entry:
Select "Add to address book".
>To display information on the destina-
tion:
Select "Information on destination".
>To delete the entry:
Select "Delete entry".
>To delete all entries:
Select "Delete list". The destination guid-
ance is switched off.
>To change an entry:
Select "Edit", for operation refer to Enter-
ing destination by town/city name,
page109.
Address book
Opening address book
Onboard monitor, for operating principle refer
to page16.
Page 121 of 218
MOBILITYAT A GLANCE CONTROLS DRIVING TIPS ENTERTAINMENT
119
NAVIGATION REFERENCE
Exiting the menu
Select the arrow.
Word-matching principle
The system's word-matching principle makes it
easier to enter the names of towns or streets.
The system runs ongoing checks, comparing
your destination entries with the data stored on
the navigation DVD as the basis for instant
response. The benefits for you include:
>Names of towns entered may differ from the
official versions if you are using a spelling
that is customary in another country.
Example:
Instead of "München", you can also enter
the English spelling "Munich" or the Italian
spelling "Monaco".
>When you are entering the names of towns
and streets the system will complete them
automatically as soon as enough letters are
available to ensure unambiguous identifica-
tion.
>The system offers only those letters for
selection of name entries that are stored on
the navigation DVD. Thus, entry of errone-
ous or unregistered names is impossible.
Page 124 of 218
Destination guidance
122
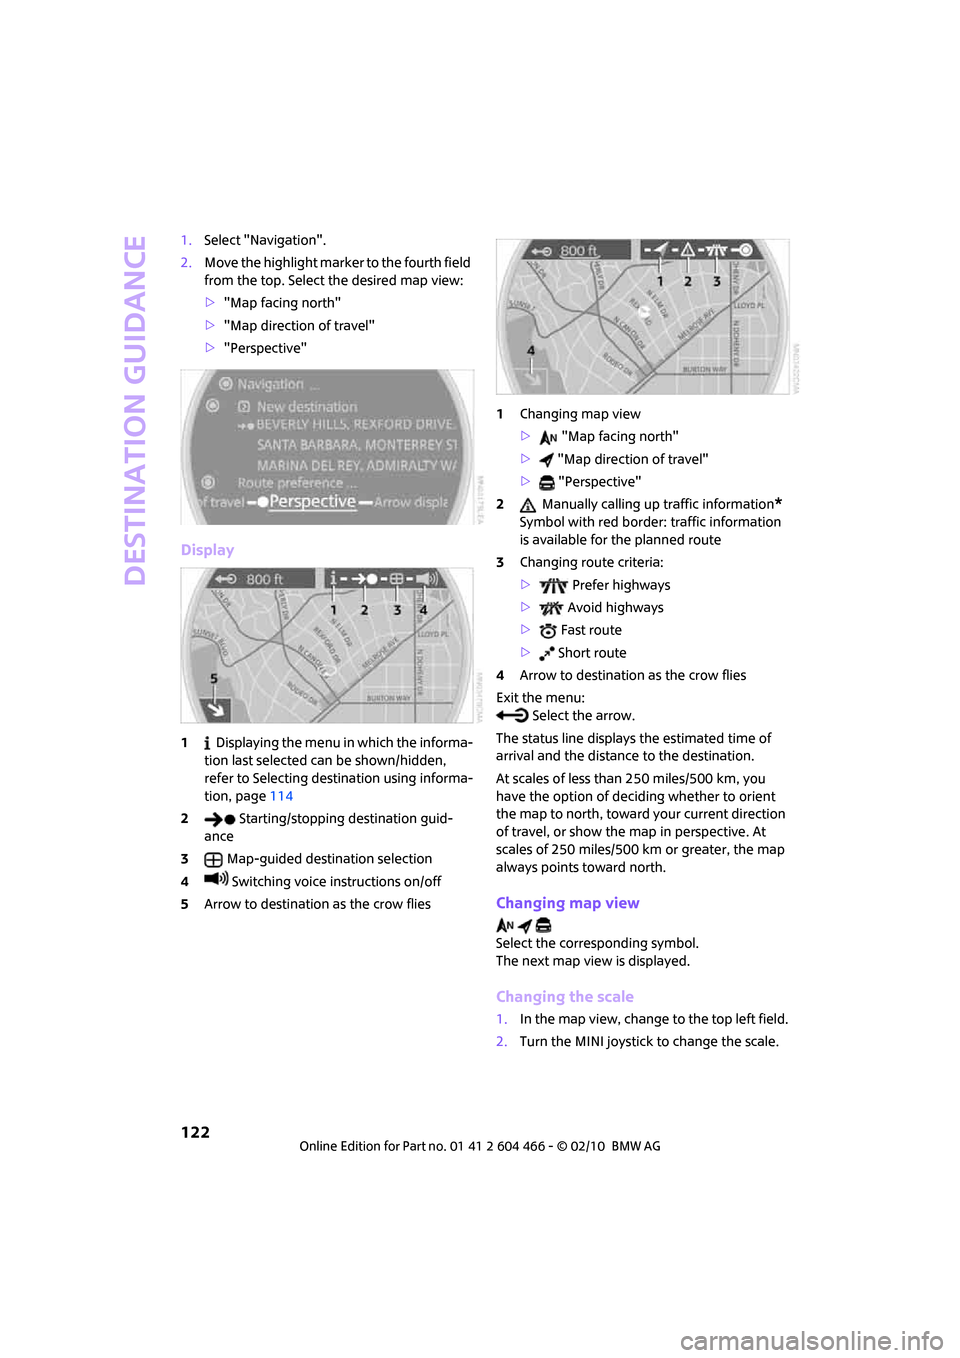
1.Select "Navigation".
2.Move the highlight marker to the fourth field
from the top. Select the desired map view:
>"Map facing north"
>"Map direction of travel"
>"Perspective"
Display
1 Displaying the menu in which the informa-
tion last selected can be shown/hidden,
refer to Selecting destination using informa-
tion, page114
2 Starting/stopping destination guid-
ance
3Map-guided destination selection
4 Switching voice instructions on/off
5Arrow to destination as the crow flies1Changing map view
> "Map facing north"
> "Map direction of travel"
> "Perspective"
2 Manually calling up traffic information
*
Symbol with red border: traffic information
is available for the planned route
3Changing route criteria:
> Prefer highways
> Avoid highways
> Fast route
> Short route
4Arrow to destination as the crow flies
Exit the menu:
Select the arrow.
The status line displays the estimated time of
arrival and the distance to the destination.
At scales of less than 250 miles/500 km, you
have the option of deciding whether to orient
the map to north, toward your current direction
of travel, or show the map in perspective. At
scales of 250 miles/500 km or greater, the map
always points toward north.
Changing map view
Select the corresponding symbol.
The next map view is displayed.
Changing the scale
1.In the map view, change to the top left field.
2.Turn the MINI joystick to change the scale.