steering MINI Clubman 2010 (Mini Connected) Owner's Guide
[x] Cancel search | Manufacturer: MINI, Model Year: 2010, Model line: Clubman, Model: MINI Clubman 2010Pages: 218, PDF Size: 3.97 MB
Page 141 of 218
MOBILITYAT A GLANCE CONTROLS DRIVING TIPS ENTERTAINMENT
139
NAVIGATION REFERENCE
Some stations do not transmit the digital and
analog signals simultaneously. If you are in an
area in which digital reception of the selected
station is not possible continuously, reception
will alternate between analog and digital. This
can cause repetitions or interruptions. In this
case it may be preferable to switch off digital
reception.
Selecting programs of a digital station*
Some stations broadcast several programs on a
single frequency. To select one of these pro-
grams:
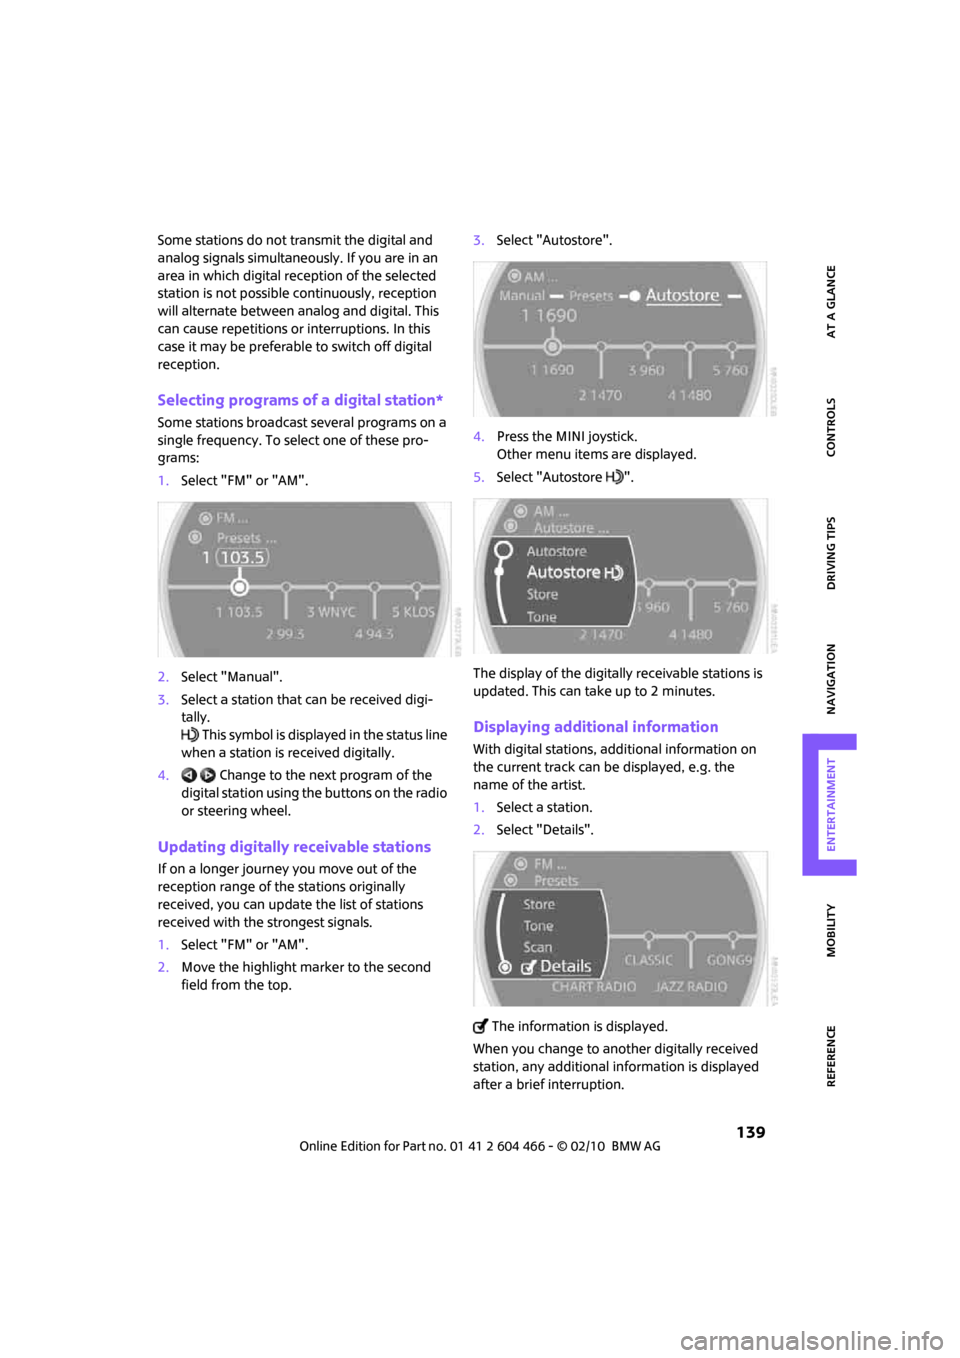
1.Select "FM" or "AM".
2.Select "Manual".
3.Select a station that can be received digi-
tally.
This symbol is displayed in the status line
when a station is received digitally.
4. Change to the next program of the
digital station using the buttons on the radio
or steering wheel.
Updating digitally receivable stations
If on a longer journey you move out of the
reception range of the stations originally
received, you can update the list of stations
received with the strongest signals.
1.Select "FM" or "AM".
2.Move the highlight marker to the second
field from the top.3.Select "Autostore".
4.Press the MINI joystick.
Other menu items are displayed.
5.Select "Autostore ".
The display of the digitally receivable stations is
updated. This can take up to 2 minutes.
Displaying additional information
With digital stations, additional information on
the current track can be displayed, e.g. the
name of the artist.
1.Select a station.
2.Select "Details".
The information is displayed.
When you change to another digitally received
station, any additional information is displayed
after a brief interruption.
Page 146 of 218
CD player and CD changer
144
Selecting a track
Buttons on the CD player
Press the button for the desired direction
repeatedly until the desired track on the current
CD is reached.
Playback of the CD starts at the beginning of the
track. The track is displayed on the Control Dis-
play.
You can also change the track using the buttons
on the steering wheel, page11.
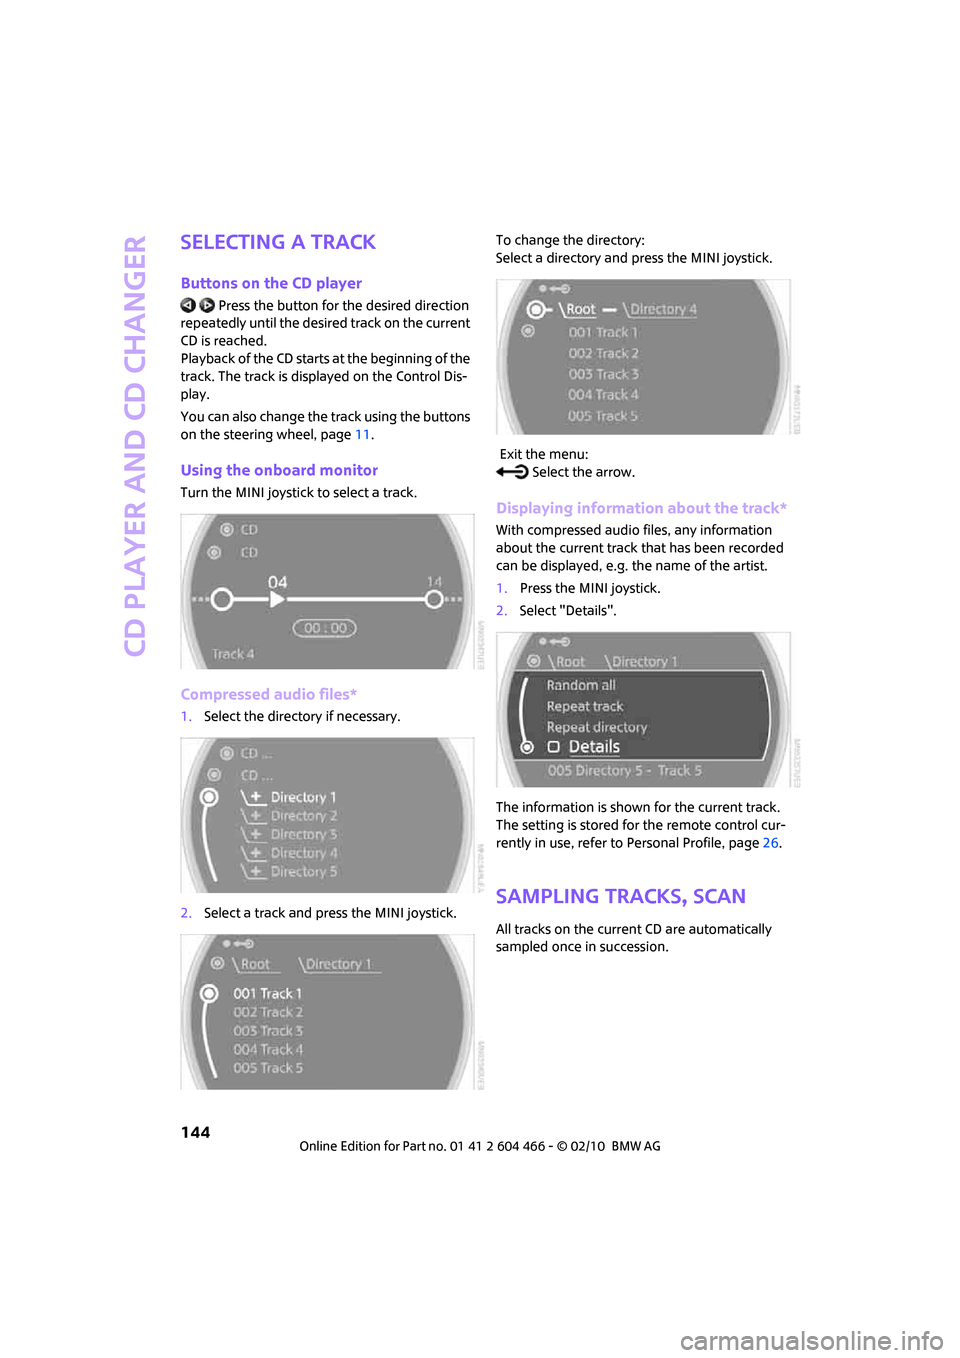
Using the onboard monitor
Turn the MINI joystick to select a track.
Compressed audio files*
1.Select the directory if necessary.
2.Select a track and press the MINI joystick.To change the directory:
Select a directory and press the MINI joystick.
Exit the menu:
Select the arrow.
Displaying information about the track*
With compressed audio files, any information
about the current track that has been recorded
can be displayed, e.g. the name of the artist.
1.Press the MINI joystick.
2.Select "Details".
The information is shown for the current track.
The setting is stored for the remote control cur-
rently in use, refer to Personal Profile, page26.
Sampling tracks, Scan
All tracks on the current CD are automatically
sampled once in succession.
Page 154 of 218
USB audio interface
152
Stop random play:
1.Press the MINI joystick.
2.Select "Random" and press the MINI joy-
stick.
Fast forward/reverse
Buttons on the steering wheel or CD player:
Press and hold the button for the corre-
sponding direction.
Notes
Do not expose the audio device to
extreme environmental conditions, e. g.
very high temperatures, refer to the Owner's
Manual of the audio device. Otherwise, the
audio device may become damaged, which
could compromise safety while driving.<
Depending on the configuration of the audio
files, e. g. bit rates greater than 256 kbit/s, the
files may not play back correctly in every case.
Notes on connecting
>The USB audio interface supplies the con-
nected audio devices with power, provided
that this is supported by the audio device.
Therefore, do not connect the USB audio
device to the power socket in the vehicle
during operation.
>Do not forcibly connect the plug to the USB
interface.
>Do not connect devices such as fans or
lamps to the USB audio interface.
>Do not connect USB hard disks.
>Do not use the USB audio interface to charge
external devices.
Page 182 of 218
Replacing components
180
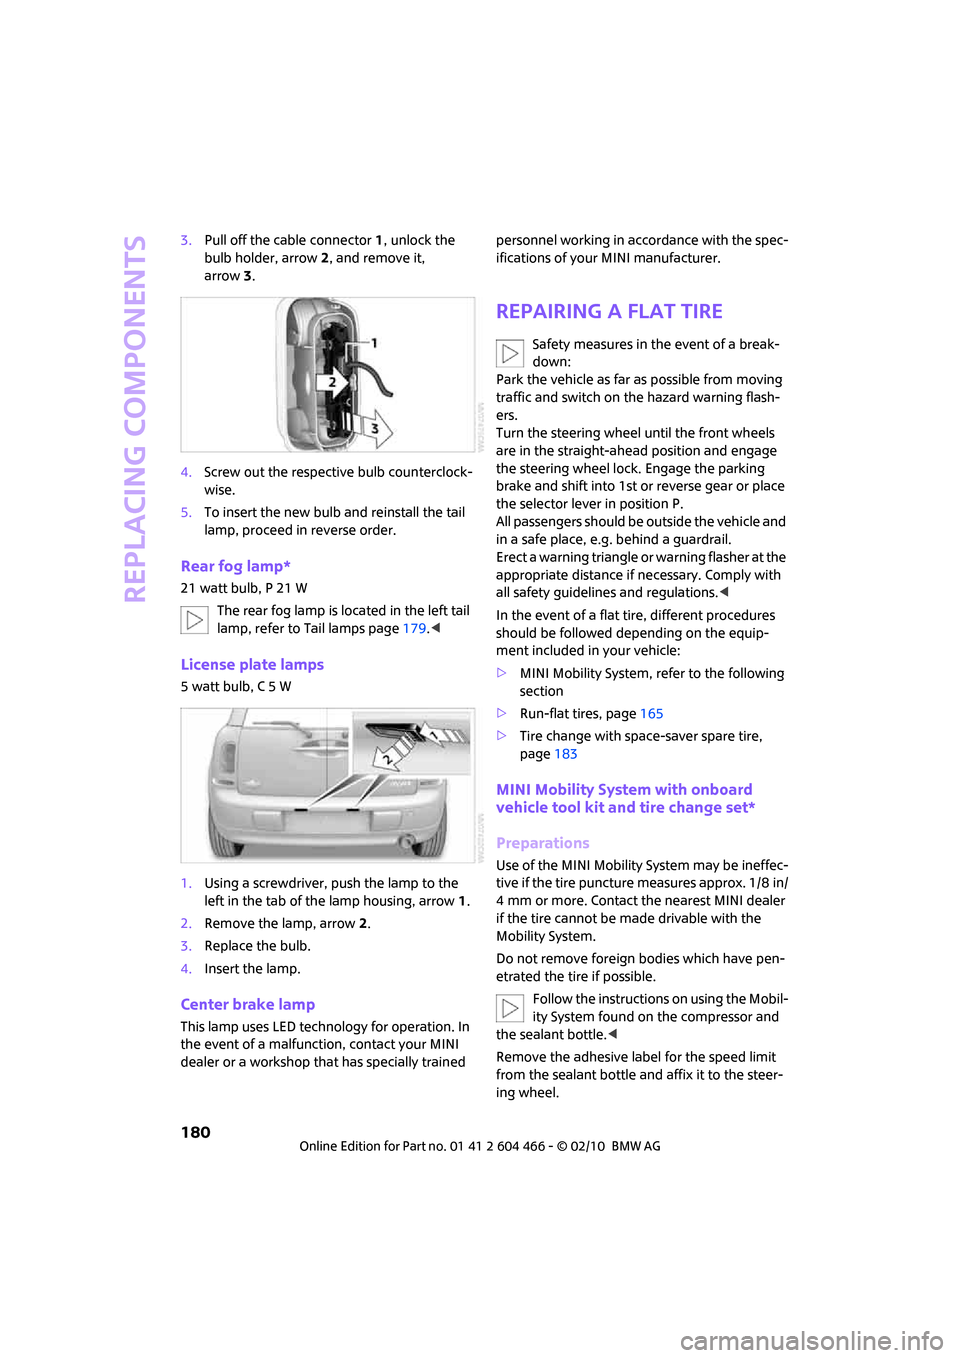
3.Pull off the cable connector 1, unlock the
bulb holder, arrow2, and remove it,
arrow3.
4.Screw out the respective bulb counterclock-
wise.
5.To insert the new bulb and reinstall the tail
lamp, proceed in reverse order.
Rear fog lamp*
21 watt bulb, P 21 W
The rear fog lamp is located in the left tail
lamp, refer to Tail lamps page179.<
License plate lamps
5 watt bulb, C 5 W
1.Using a screwdriver, push the lamp to the
left in the tab of the lamp housing, arrow1.
2.Remove the lamp, arrow 2.
3.Replace the bulb.
4.Insert the lamp.
Center brake lamp
This lamp uses LED technology for operation. In
the event of a malfunction, contact your MINI
dealer or a workshop that has specially trained personnel working in accordance with the spec-
ifications of your MINI manufacturer.
Repairing a flat tire
Safety measures in the event of a break-
down:
Park the vehicle as far as possible from moving
traffic and switch on the hazard warning flash-
ers.
Turn the steering wheel until the front wheels
are in the straight-ahead position and engage
the steering wheel lock. Engage the parking
brake and shift into 1st or reverse gear or place
the selector lever in position P.
All passengers should be outside the vehicle and
in a safe place, e.g. behind a guardrail.
Erect a warning triangle or warning flasher at the
appropriate distance if necessary. Comply with
all safety guidelines and regulations.<
In the event of a flat tire, different procedures
should be followed depending on the equip-
ment included in your vehicle:
>MINI Mobility System, refer to the following
section
>Run-flat tires, page165
>Tire change with space-saver spare tire,
page183
MINI Mobility System with onboard
vehicle tool kit and tire change set*
Preparations
Use of the MINI Mobility System may be ineffec-
tive if the tire puncture measures approx. 1/8 in/
4 mm or more. Contact the nearest MINI dealer
if the tire cannot be made drivable with the
Mobility System.
Do not remove foreign bodies which have pen-
etrated the tire if possible.
Follow the instructions on using the Mobil-
ity System found on the compressor and
the sealant bottle.<
Remove the adhesive label for the speed limit
from the sealant bottle and affix it to the steer-
ing wheel.
Page 185 of 218
MOBILITYAT A GLANCE CONTROLS DRIVING TIPS ENTERTAINMENT
183
NAVIGATION REFERENCE
If an inflation pressure of 26 psi/180 kPa still
cannot be reached, the tire is too heavily dam-
aged. Contact the nearest MINI dealer.<
Driving on
Do not exceed the permitted maximum
speed of 50 mph/80 km/h; doing so may
result in an accident.<
Replace the defective tire as soon as possible
and have the new wheel/tire assembly bal-
anced.
Have the Mobility System refilled.
Changing wheels
Space-saver spare tire*
To change a space-saver spare tire, proceed as
follows:
>Remove the space-saver spare tire,
page183
>Prepare for tire change, page184
>Jack up vehicle, page184
>Mount space-saver spare tire, page184
>Tighten lug bolts, page184
>Drive with space-saver spare tire, page183
Tire change set for a space-saver spare
tire*
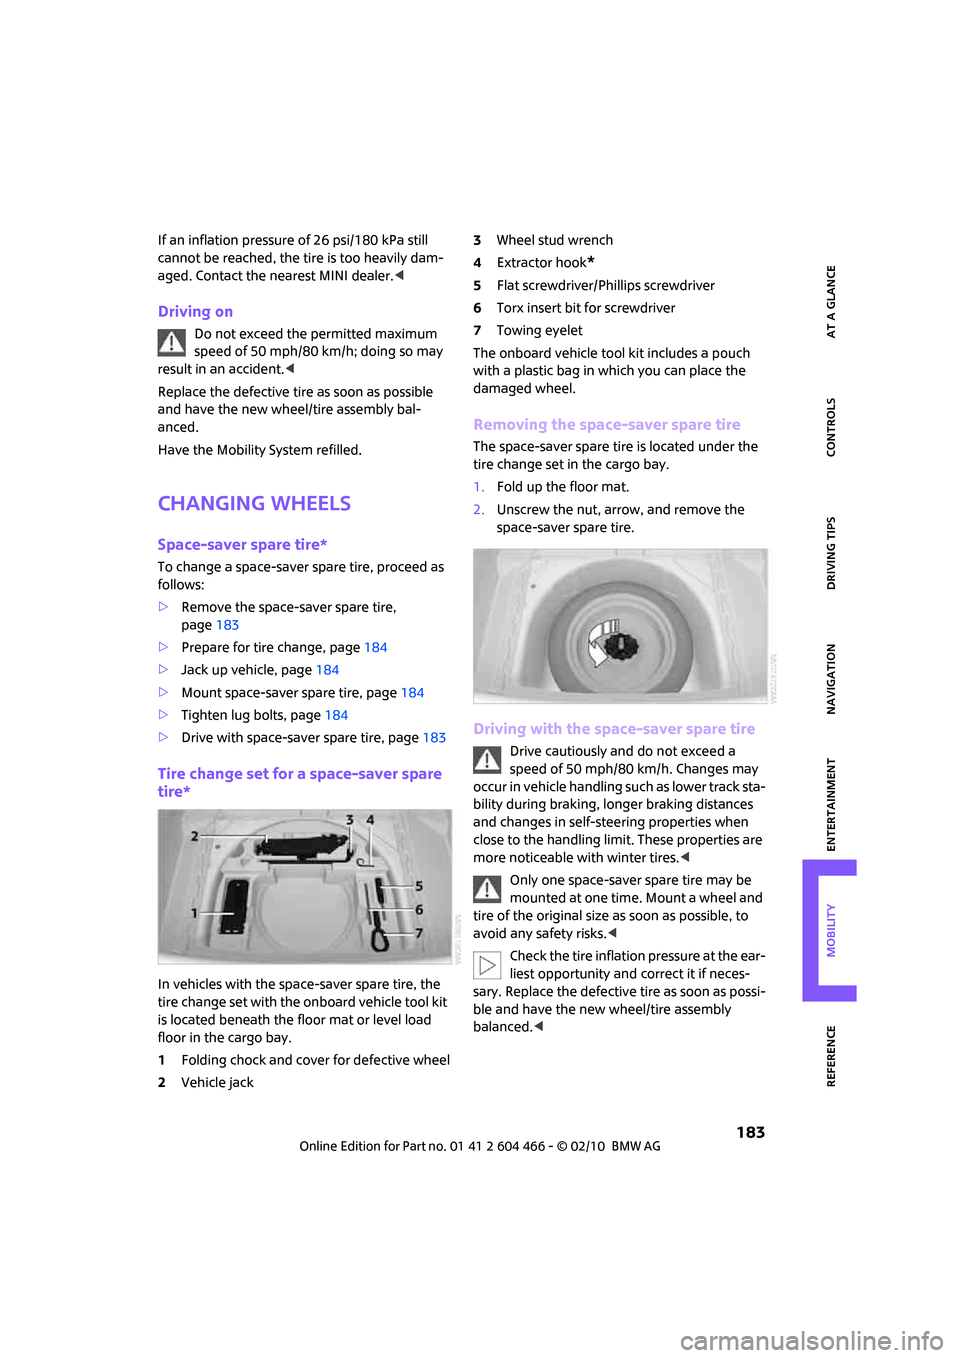
In vehicles with the space-saver spare tire, the
tire change set with the onboard vehicle tool kit
is located beneath the floor mat or level load
floor in the cargo bay.
1Folding chock and cover for defective wheel
2Vehicle jack3Wheel stud wrench
4Extractor hook
*
5Flat screwdriver/Phillips screwdriver
6Torx insert bit for screwdriver
7Towing eyelet
The onboard vehicle tool kit includes a pouch
with a plastic bag in which you can place the
damaged wheel.
Removing the space-saver spare tire
The space-saver spare tire is located under the
tire change set in the cargo bay.
1.Fold up the floor mat.
2.Unscrew the nut, arrow, and remove the
space-saver spare tire.
Driving with the space-saver spare tire
Drive cautiously and do not exceed a
speed of 50 mph/80 km/h. Changes may
occur in vehicle handling such as lower track sta-
bility during braking, longer braking distances
and changes in self-steering properties when
close to the handling limit. These properties are
more noticeable with winter tires.<
Only one space-saver spare tire may be
mounted at one time. Mount a wheel and
tire of the original size as soon as possible, to
avoid any safety risks.<
Check the tire inflation pressure at the ear-
liest opportunity and correct it if neces-
sary. Replace the defective tire as soon as possi-
ble and have the new wheel/tire assembly
balanced.<
Page 190 of 218
Giving and receiving assistance
188
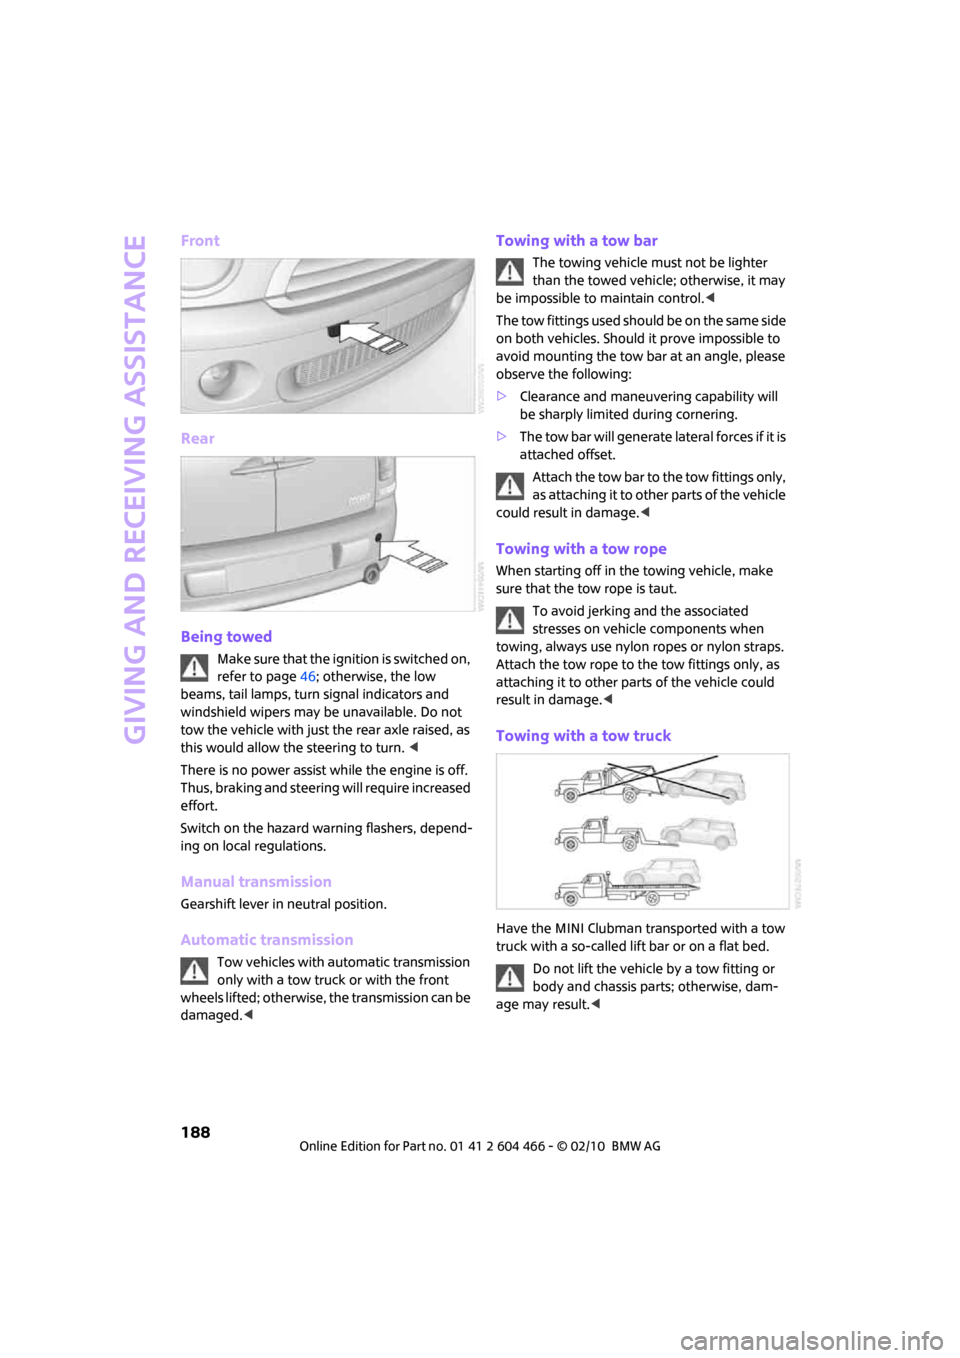
Front
Rear
Being towed
Make sure that the ignition is switched on,
refer to page46; otherwise, the low
beams, tail lamps, turn signal indicators and
windshield wipers may be unavailable. Do not
tow the vehicle with just the rear axle raised, as
this would allow the steering to turn. <
There is no power assist while the engine is off.
Thus, braking and steering will require increased
effort.
Switch on the hazard warning flashers, depend-
ing on local regulations.
Manual transmission
Gearshift lever in neutral position.
Automatic transmission
Tow vehicles with automatic transmission
only with a tow truck or with the front
wheels lifted; otherwise, the transmission can be
damaged.<
Towing with a tow bar
The towing vehicle must not be lighter
than the towed vehicle; otherwise, it may
be impossible to maintain control.<
The tow fittings used should be on the same side
on both vehicles. Should it prove impossible to
avoid mounting the tow bar at an angle, please
observe the following:
>Clearance and maneuvering capability will
be sharply limited during cornering.
>The tow bar will generate lateral forces if it is
attached offset.
Attach the tow bar to the tow fittings only,
as attaching it to other parts of the vehicle
could result in damage.<
Towing with a tow rope
When starting off in the towing vehicle, make
sure that the tow rope is taut.
To avoid jerking and the associated
stresses on vehicle components when
towing, always use nylon ropes or nylon straps.
Attach the tow rope to the tow fittings only, as
attaching it to other parts of the vehicle could
result in damage.<
Towing with a tow truck
Have the MINI Clubman transported with a tow
truck with a so-called lift bar or on a flat bed.
Do not lift the vehicle by a tow fitting or
body and chassis parts; otherwise, dam-
age may result.<
Page 203 of 218
REFERENCEAT A GLANCE CONTROLS DRIVING TIPS MOBILITY
201
Avoid highways in
navigation118
"Avoid tollroads" in
Navigation118
Axle loads, refer to
Weights194
B
Background lighting, refer to
Ambient lighting84
Backrests, refer to Seats37
Backup lamps
– replacing bulb179
Balance, tone control133
Band-aids, refer to First aid
pouch186
Bar, refer to Tow-starting,
towing away188
Bass sounds, refer to Tone
control133
Bass sounds, refer to Treble
and bass133
Bass, tone control133
Battery185
– charging185
– disposal34,185
– jump-starting186
– temporary power failure185
Battery renewal
– remote control34
Being towed188
Belt tensioner, refer to Safety
belts40
Belts, refer to Safety belts40
Beverage holders, refer to
Cupholders91
Black ice, refer to Outside
temperature warning55
Blower, refer to Air flow rate86
Bottle holders, refer to
Cupholders91
Brake Assist71
Brake fluid, refer to Service
requirements60Brake lamps
– replacing bulbs179
Brake pads, breaking in96
Brake rotors97
– brakes96
– breaking in96
Brake system96
– breaking in96
– disc brakes97
– MINI Maintenance
System170
Brakes
– ABS71
– breaking in96
– MINI Maintenance
System170
– parking brake47
– service requirements60
Brakes, refer to Braking
safely97
Breakdown service, refer to
Roadside Assistance186
Break-in period
96
Breaking in the clutch96
"Brightness" on the Control
Display69
Bulb changing, refer to Lamps
and bulbs176
Button for starting the
engine46
Buttons on the steering
wheel11
C
California Proposition 65
warning5
Can holders, refer to
Cupholders91
Capacities194
Car battery, refer to Vehicle
battery185
Car care172
"Car Data"57
Car key, refer to Keys/remote
controls26Car phone
– installation location, refer to
Center armrest90
– refer to separate Owner's
Manual
Car radio, refer to Radio135
Car wash, care172
Car washes172
Care172
– car washes172
– car-care products172
– CD/DVD drives175
– external172
– high-pressure washers172
– internal174
– leather174
– manual washing173
– upholstery and fabrics174
– windows173
– wiper blades173
Cargo area
– capacity194
Cargo bay98
– Comfort Access33
– doors, refer to Splitdoor31
– lamp83
– opening from outside31
– trunk lid, refer to Splitdoor31
Cargo bay doors, refer to
Splitdoor31
Cargo bay, expanding98
Cargo bay lamp83
Cargo bay partition net, refer
to Partition net99
Cargo loading99
– securing cargo100
– stowing cargo100
– vehicle98
Cargo, securing100
Carpets, care174
Catalytic converter, refer to
Hot exhaust system96
"Categories"141
"CD"132,143
Page 207 of 218
REFERENCEAT A GLANCE CONTROLS DRIVING TIPS MOBILITY
205
G
Garage door opener, refer to
Integrated universal remote
control88
Gasoline
– refer to Average fuel
consumption56
Gasoline display, refer to Fuel
gauge56
Gasoline, refer to Required
fuel157
Gear indicator
– automatic transmission with
Steptronic48
Gear shifting
– automatic transmission48
– manual transmission48
Gearshift lever
– automatic transmission with
Steptronic48
– manual transmission48
General driving notes96
Glass sunroof, electric34
– convenient operation28,29
– opening, closing35
– raising35
– remote control28
Glove compartment89
GPS navigation, refer to
Navigation system106
Grills85
Gross vehicle weight, refer to
Weights194
H
Halogen lamps
– replacing bulb177
Handbrake, refer to Parking
brake47
Hands-free system14
Hazard warning flashers14
"HD radio"138
HD radio, refer to High
Definition Radio138
Head airbags79
Head restraints39
– sitting safely37Headlamp control,
automatic81
Headlamp flasher50
– indicator lamp11,13
Headlamps
– replacing bulb177
Headlamps, care173
Headlight glass lens177
Heated
– mirrors41
– rear window87
– seats40
Heating
– mirrors41
– rear window87
– seats40
Heavy loads, refer to Stowing
cargo100
Height adjustment
– seats38
– steering wheel41
Height, refer to
Dimensions193
High beams82
– headlamp flasher82
– indicator lamp13
– replacing bulb177
High Definition Radio, refer to
HD Radio138
High water, refer to Driving
through water97
Highways, refer to Route
criteria118
Hill Assist73
Hills97
Holders for cups91
Home address117
"Home address" in
Navigation118
Homepage4
Hood167
Horn10
Hot exhaust system96
"Hour memo"64
"House number" in
destination input
111
Hydroplaning96
I
IBOC, refer to HD Radio138
Ice warning55
ID3 tag, refer to Information
about the track144
Ignition46
– switched off46
– switched on46
Ignition key position 1, refer to
Radio readiness46
Ignition key position 2, refer to
Ignition on46
Ignition key, refer to
Integrated key/remote
control26
Ignition lock46
Imprint2
Indicator and warning
lamps13
– Tire Pressure Monitor TPM77
Indicator lighting, refer to
Instrument lighting83
Individual settings, refer to
Personal Profile26
Inflation pressure monitoring,
refer to Tire Pressure Monitor
TPM75
Information
– on another location114
– on country114
– on current position114
– on destination location114
"Information" in
Navigation114
"Information on
destination"115
Initializing
– Flat Tire Monitor FTM74
– glass sunroof, electric35
Installation location
– drive for navigation DVD and
audio CD106
Instructions for navigation
system, refer to Voice
instructions123
Page 209 of 218
REFERENCEAT A GLANCE CONTROLS DRIVING TIPS MOBILITY
207
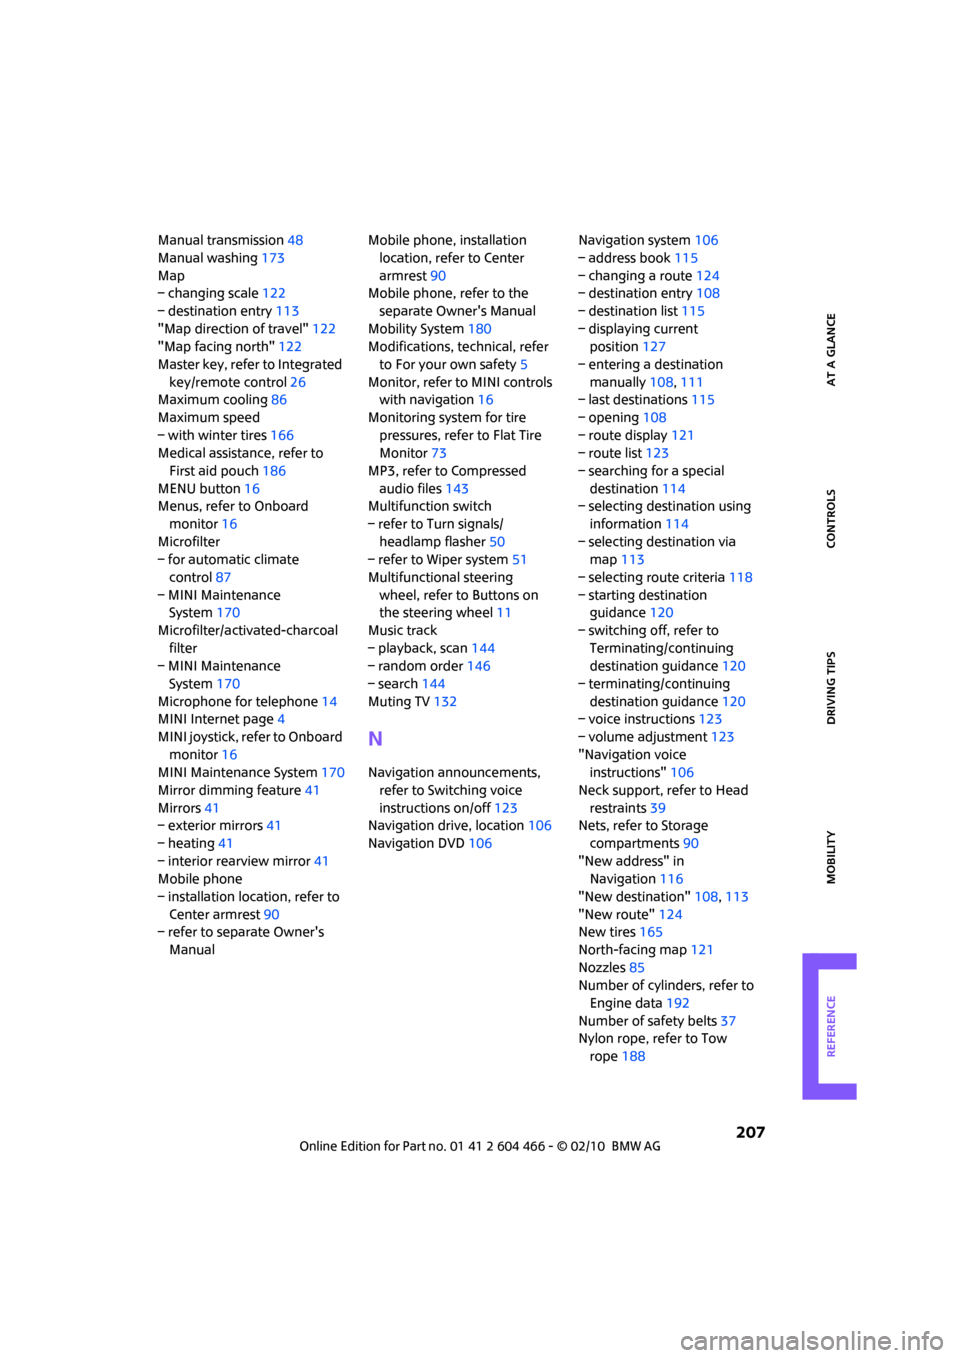
Manual transmission48
Manual washing173
Map
– changing scale122
– destination entry113
"Map direction of travel"122
"Map facing north"122
Master key, refer to Integrated
key/remote control26
Maximum cooling86
Maximum speed
– with winter tires166
Medical assistance, refer to
First aid pouch186
MENU button16
Menus, refer to Onboard
monitor16
Microfilter
– for automatic climate
control87
– MINI Maintenance
System170
Microfilter/activated-charcoal
filter
– MINI Maintenance
System170
Microphone for telephone14
MINI Internet page4
MINI joystick, refer to Onboard
monitor16
MINI Maintenance System170
Mirror dimming feature41
Mirrors41
– exterior mirrors41
– heating41
– interior rearview mirror41
Mobile phone
– installation location, refer to
Center armrest90
– refer to separate Owner's
ManualMobile phone, installation
location, refer to Center
armrest90
Mobile phone, refer to the
separate Owner's Manual
Mobility System180
Modifications, technical, refer
to For your own safety5
Monitor, refer to MINI controls
with navigation16
Monitoring system for tire
pressures, refer to Flat Tire
Monitor73
MP3, refer to Compressed
audio files143
Multifunction switch
– refer to Turn signals/
headlamp flasher50
– refer to Wiper system51
Multifunctional steering
wheel, refer to Buttons on
the steering wheel11
Music track
– playback, scan144
– random order146
– search144
Muting TV132
N
Navigation announcements,
refer to Switching voice
instructions on/off123
Navigation drive, location106
Navigation DVD106Navigation system106
– address book115
– changing a route124
– destination entry108
– destination list115
– displaying current
position127
– entering a destination
manually108,111
– last destinations115
– opening108
– route display121
– route list123
– searching for a special
destination114
– selecting destination using
information114
– selecting destination via
map113
– selecting route criteria118
– starting destination
guidance120
– switching off, refer to
Terminating/continuing
destination guidance120
– terminating/continuing
destination guidance120
– voice instructions123
– volume adjustment123
"Navigation voice
instructions"106
Neck support, refer to Head
restraints39
Nets, refer to Storage
compartments90
"New address" in
Navigation116
"New destination"108,113
"New route"124
New tires165
North-facing map121
Nozzles85
Number of cylinders, refer to
Engine data192
Number of safety belts37
Nylon rope, refer to Tow
rope188
Page 213 of 218
REFERENCEAT A GLANCE CONTROLS DRIVING TIPS MOBILITY
211
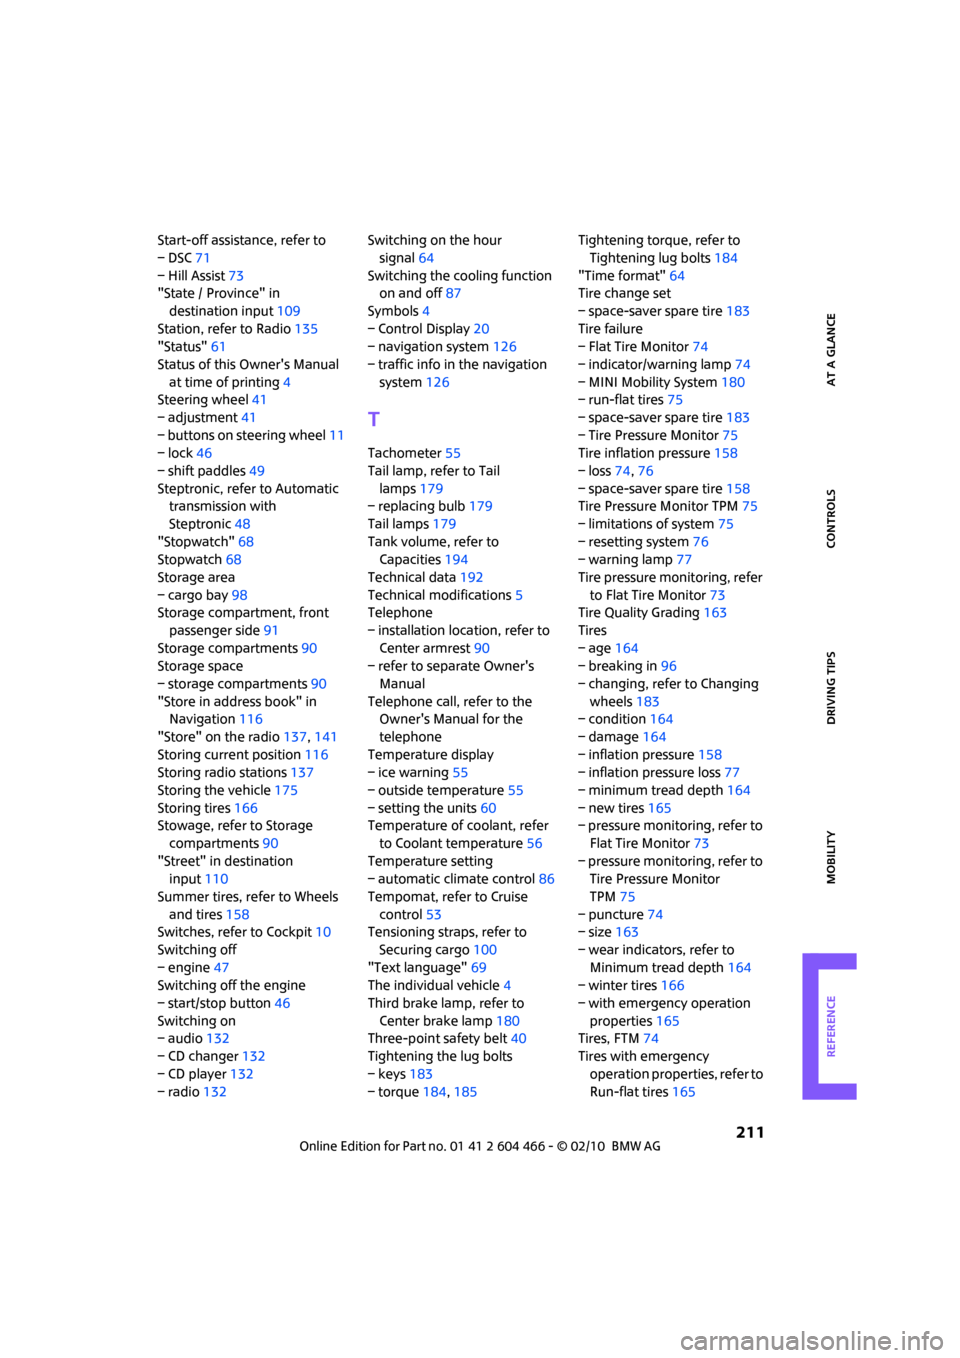
Start-off assistance, refer to
– DSC71
– Hill Assist73
"State / Province" in
destination input109
Station, refer to Radio135
"Status"61
Status of this Owner's Manual
at time of printing4
Steering wheel41
– adjustment41
– buttons on steering wheel11
– lock46
– shift paddles49
Steptronic, refer to Automatic
transmission with
Steptronic48
"Stopwatch"68
Stopwatch68
Storage area
– cargo bay98
Storage compartment, front
passenger side91
Storage compartments90
Storage space
– storage compartments90
"Store in address book" in
Navigation116
"Store" on the radio137,141
Storing current position116
Storing radio stations137
Storing the vehicle175
Storing tires166
Stowage, refer to Storage
compartments90
"Street" in destination
input110
Summer tires, refer to Wheels
and tires158
Switches, refer to Cockpit10
Switching off
– engine47
Switching off the engine
– start/stop button46
Switching on
– audio132
– CD changer132
– CD player132
– radio132Switching on the hour
signal64
Switching the cooling function
on and off87
Symbols4
– Control Display20
– navigation system126
– traffic info in the navigation
system126
T
Tachometer55
Tail lamp, refer to Tail
lamps179
– replacing bulb179
Tail lamps179
Tank volume, refer to
Capacities194
Technical data192
Technical modifications5
Telephone
– installation location, refer to
Center armrest90
– refer to separate Owner's
Manual
Telephone call, refer to the
Owner's Manual for the
telephone
Temperature display
– ice warning55
– outside temperature55
– setting the units60
Temperature of coolant, refer
to Coolant temperature56
Temperature setting
– automatic climate control86
Tempomat, refer to Cruise
control53
Tensioning straps, refer to
Securing cargo100
"Text language"69
The individual vehicle4
Third brake lamp, refer to
Center brake lamp180
Three-point safety belt40
Tightening the lug bolts
– keys183
– torque184,185Tightening torque, refer to
Tightening lug bolts184
"Time format"64
Tire change set
– space-saver spare tire183
Tire failure
– Flat Tire Monitor74
– indicator/warning lamp74
– MINI Mobility System180
– run-flat tires75
– space-saver spare tire183
– Tire Pressure Monitor75
Tire inflation pressure158
– loss74,76
– space-saver spare tire158
Tire Pressure Monitor TPM75
– limitations of system75
– resetting system76
– warning lamp77
Tire pressure monitoring, refer
to Flat Tire Monitor73
Tire Quality Grading163
Tires
– age164
– breaking in96
– changing, refer to Changing
wheels183
– condition164
– damage164
– inflation pressure158
– inflation pressure loss77
– minimum tread depth164
– new tires165
– pressure monitoring, refer to
Flat Tire Monitor73
– pressure monitoring, refer to
Tire Pressure Monitor
TPM75
– puncture74
– size163
– wear indicators, refer to
Minimum tread depth164
– winter tires166
– with emergency operation
properties165
Tires, FTM74
Tires with emergency
operation properties, refer to
Run-flat tires165