open hood MINI Clubman 2010 Owner's Manual (Mini Connected)
[x] Cancel search | Manufacturer: MINI, Model Year: 2010, Model line: Clubman, Model: MINI Clubman 2010Pages: 218, PDF Size: 3.97 MB
Page 5 of 218
MOBILITYAT A GLANCE CONTROLS DRIVING TIPS ENTERTAINMENT
3
NAVIGATION REFERENCE
CONTENTS
The fastest way to find information on a particu-
lar topic or item is by using the index, refer to
page200.
Using this Owner's Manual
4Notes
6Reporting safety defects
AT A GLANCE
10Cockpit
16Onboard monitor
21Voice activation system
CONTROLS
26Opening and closing
37Adjustments
43Transporting children safely
46Driving
55Controls overview
70Technology for driving comfort and safety
81Lamps
85Climate
88Practical interior accessories
DRIVING TIPS
96Things to remember when driving
NAVIGATION
106Starting the navigation system
108Destination entry
120Destination guidance
128What to do if …
ENTERTAINMENT
132On/off and settings
135Radio
143CD player and CD changer
149AUX-IN port
150USB audio interface
MOBILITY
156Refueling
158Wheels and tires
167Under the hood
170Maintenance
172Care
176Replacing components
186Giving and receiving assistance
REFERENCE
192Technical data
195Short commands for the voice activation
system
200Everything from A to Z
Page 34 of 218
Opening and closing
32
Arming and disarming
Whenever the car is locked or unlocked, the
alarm system is armed or disarmed.
Even when the alarm system is armed, you can
open the liftgate by means of the button
on the remote control.
When you subsequently close the liftgate it is
again locked and monitored.
In certain market-specific versions,
unlocking via the door lock triggers the
alarm.<
Panic mode*
You can activate the alarm system if you find
yourself in a dangerous situation.
Press the button for at least two seconds.
Switching off the alarm:
Press any button.
Switching off an alarm
>Unlock the car with the remote control.
>Insert the key fully into the ignition lock.
>In cars with Comfort Access
*, press the but-
ton on the door lock.
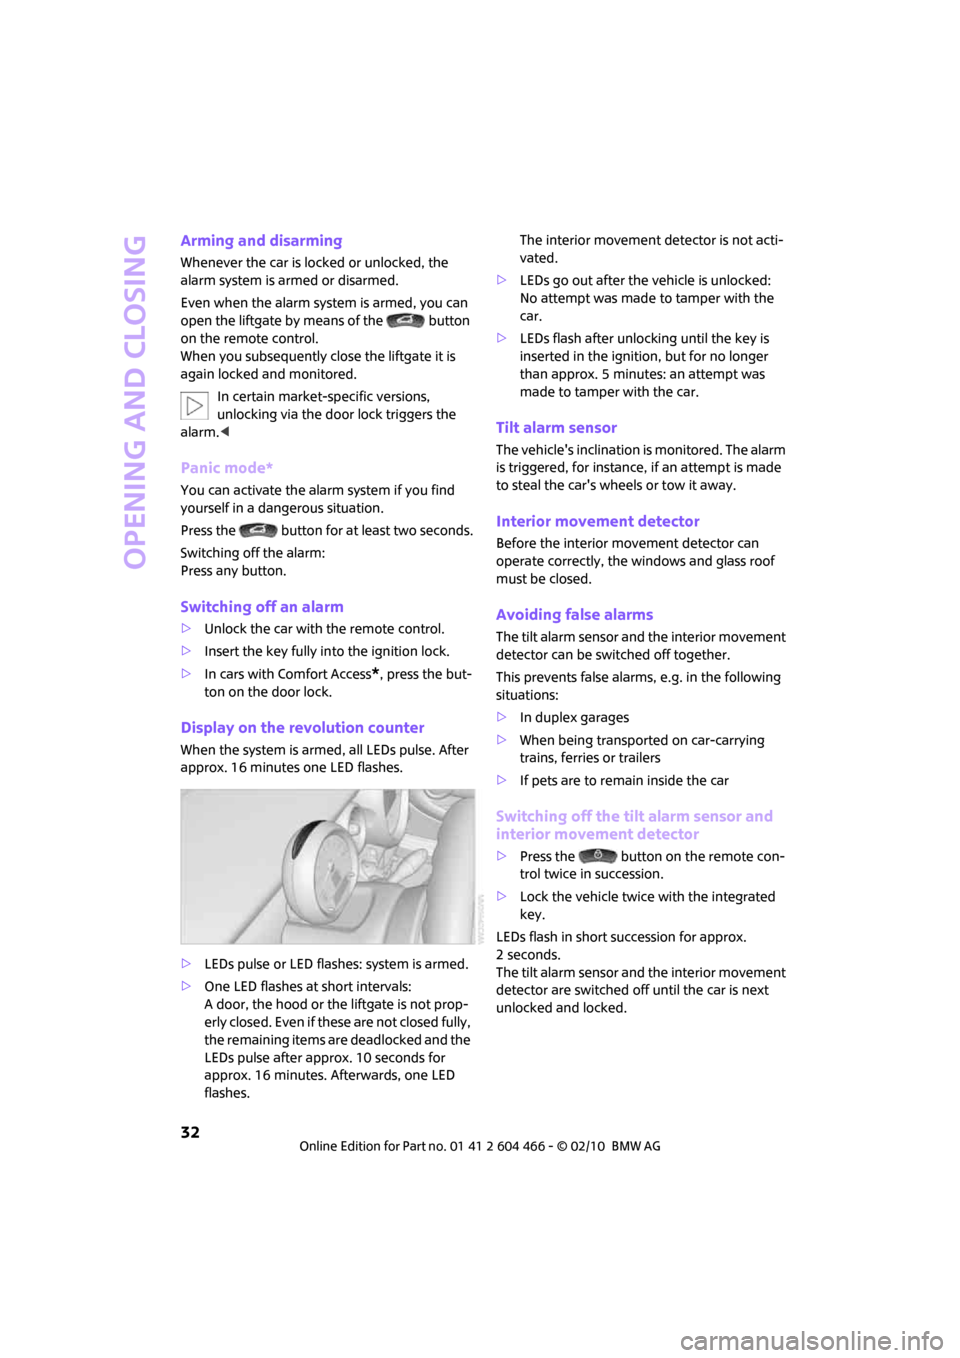
Display on the revolution counter
When the system is armed, all LEDs pulse. After
approx. 16 minutes one LED flashes.
>LEDs pulse or LED flashes: system is armed.
>One LED flashes at short intervals:
A door, the hood or the liftgate is not prop-
erly closed. Even if these are not closed fully,
the remaining items are deadlocked and the
LEDs pulse after approx. 10 seconds for
approx. 16 minutes. Afterwards, one LED
flashes.The interior movement detector is not acti-
vated.
>LEDs go out after the vehicle is unlocked:
No attempt was made to tamper with the
car.
>LEDs flash after unlocking until the key is
inserted in the ignition, but for no longer
than approx. 5 minutes: an attempt was
made to tamper with the car.
Tilt alarm sensor
The vehicle's inclination is monitored. The alarm
is triggered, for instance, if an attempt is made
to steal the car's wheels or tow it away.
Interior movement detector
Before the interior movement detector can
operate correctly, the windows and glass roof
must be closed.
Avoiding false alarms
The tilt alarm sensor and the interior movement
detector can be switched off together.
This prevents false alarms, e.g. in the following
situations:
>In duplex garages
>When being transported on car-carrying
trains, ferries or trailers
>If pets are to remain inside the car
Switching off the tilt alarm sensor and
interior movement detector
>Press the button on the remote con-
trol twice in succession.
>Lock the vehicle twice with the integrated
key.
LEDs flash in short succession for approx.
2seconds.
The tilt alarm sensor and the interior movement
detector are switched off until the car is next
unlocked and locked.
Page 54 of 218
Driving
52
5.Press and hold the button until the display
changes.
6.Press the button to select the desired sensi-
tivity.
7.Wait, or press and hold the button until the
display changes.
The settings are stored.
Deactivating intermittent wipe or rain
sensor
Press the button again, arrow3.
Brief wipe
Press the lever downward once, arrow2.
Cleaning windshield and headlamps*
Pull the lever, arrow 4.
Washer fluid is sprayed onto the windshield and
the wipers are operated briefly.
When the vehicle lighting system is switched on,
the headlamps are cleaned at regular and
appropriate intervals.
In cars equipped with an alarm system, the
headlamps cannot be cleaned when the hood is
open.
Do not use the washers when the washer
fluid reservoir is empty; otherwise, you will
damage the washer pump.
Only use the washers if the hood has been com-
pletely closed; otherwise, the headlamp washer
system
* may be damaged. Do not use the
washers if there is any danger that the fluid will
freeze on the windshield. If you do, your vision
could be obscured. For this reason, use anti-
freeze.<
Window washer nozzles
The window washer nozzles are heated auto-
matically
* while the engine is running or the
ignition is switched on.
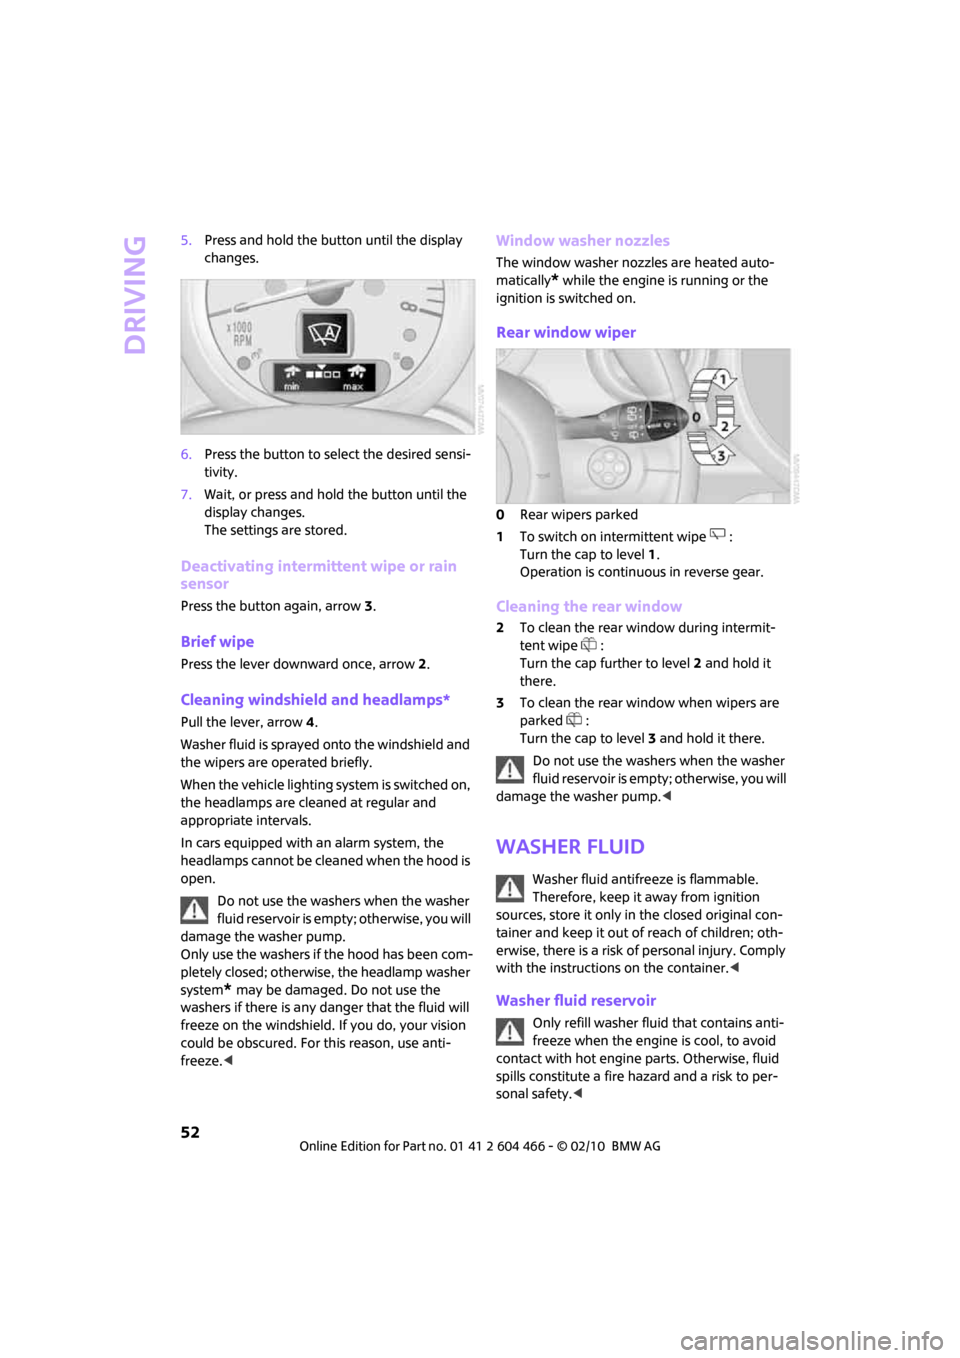
Rear window wiper
0Rear wipers parked
1To switch on intermittent wipe :
Turn the cap to level1.
Operation is continuous in reverse gear.
Cleaning the rear window
2To clean the rear window during intermit-
tent wipe :
Turn the cap further to level2 and hold it
there.
3To clean the rear window when wipers are
parked :
Turn the cap to level3 and hold it there.
Do not use the washers when the washer
fluid reservoir is empty; otherwise, you will
damage the washer pump.<
Washer fluid
Washer fluid antifreeze is flammable.
Therefore, keep it away from ignition
sources, store it only in the closed original con-
tainer and keep it out of reach of children; oth-
erwise, there is a risk of personal injury. Comply
with the instructions on the container.<
Washer fluid reservoir
Only refill washer fluid that contains anti-
freeze when the engine is cool, to avoid
contact with hot engine parts. Otherwise, fluid
spills constitute a fire hazard and a risk to per-
sonal safety.<
Page 169 of 218

MOBILITYAT A GLANCE CONTROLS DRIVING TIPS ENTERTAINMENT
167
NAVIGATION REFERENCE
Under the hood
Do not work on the car unless you possess
the necessary technical knowledge. If you
are not familiar with the regulations to be
observed, have the necessary work on your
vehicle carried out only by a MINI dealer or a
workshop that has specially trained personnel
working in accordance with the specifications of
the MINI manufacturer. If this work is not carried
out properly, there is a danger of subsequent
damage and related safety hazards.<
Hood
Releasing
Pull the lever.
Do not clean the windshield and head-
lamps if the hood is unlocked as this may
damage the headlamp washer system
*.<
Opening
To avoid damage, make sure that the
wiper arms are against the windshield
before you open the hood.<
Press the release handle and open the hood.
Closing
Close the hood from a height of approx. 16 in/
40 cm with momentum. It must be clearly heard
to engage.
If you notice any signs while driving your
vehicle that the hood is not completely
closed, stop at once and close it securely.
Make sure that the closing path of the hood is
clear; otherwise, injuries may result.<
Page 171 of 218
MOBILITYAT A GLANCE CONTROLS DRIVING TIPS ENTERTAINMENT
169
NAVIGATION REFERENCE
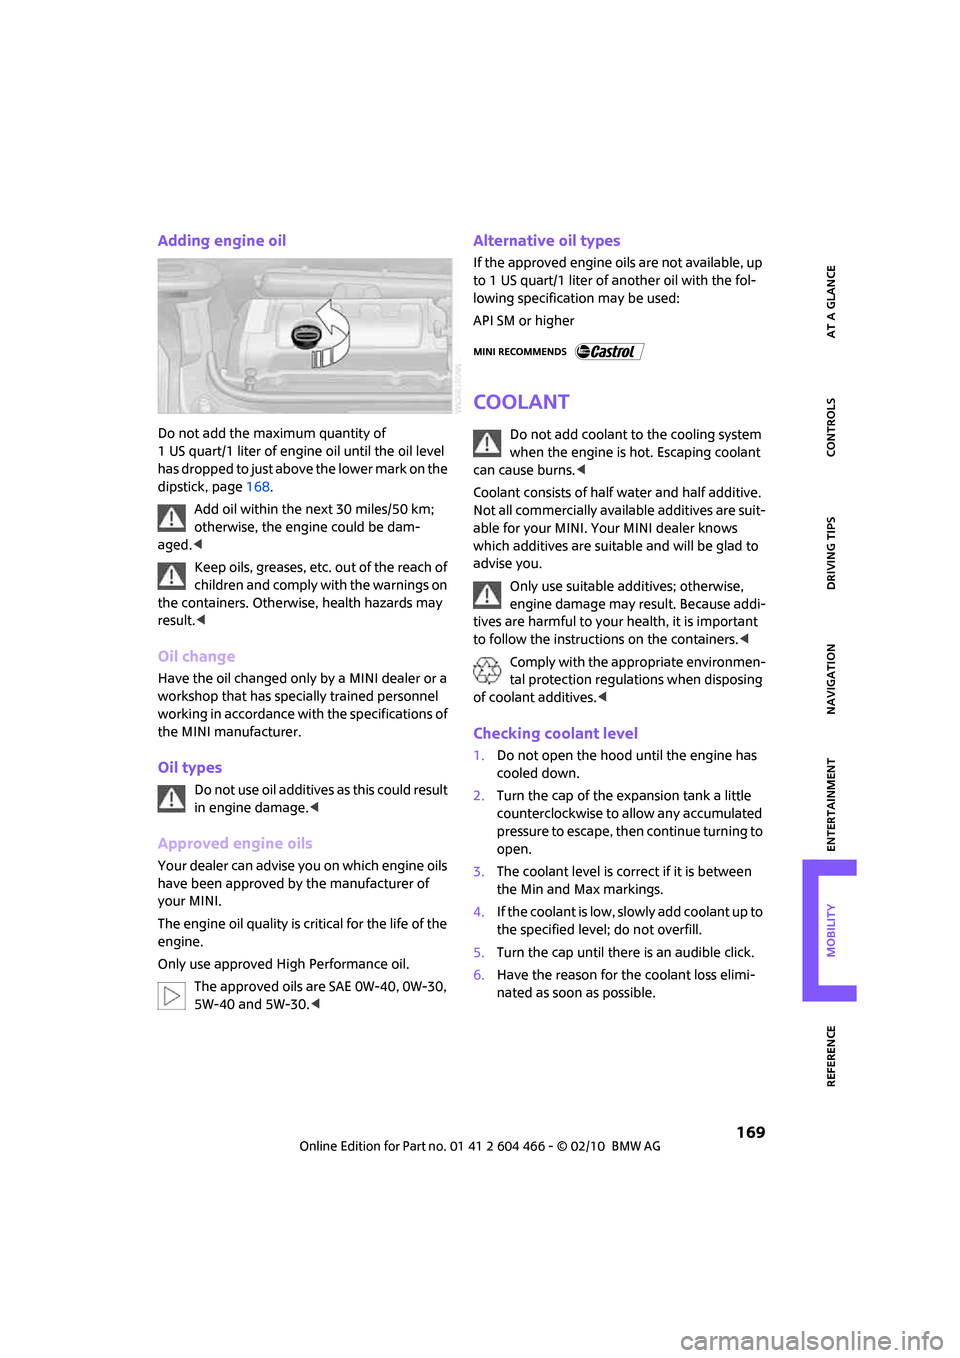
Adding engine oil
Do not add the maximum quantity of
1 US quart/1 liter of engine oil until the oil level
has dropped to just above the lower mark on the
dipstick, page168.
Add oil within the next 30 miles/50 km;
otherwise, the engine could be dam-
aged.<
Keep oils, greases, etc. out of the reach of
children and comply with the warnings on
the containers. Otherwise, health hazards may
result.<
Oil change
Have the oil changed only by a MINI dealer or a
workshop that has specially trained personnel
working in accordance with the specifications of
the MINI manufacturer.
Oil types
Do not use oil additives as this could result
in engine damage.<
Approved engine oils
Your dealer can advise you on which engine oils
have been approved by the manufacturer of
your MINI.
The engine oil quality is critical for the life of the
engine.
Only use approved High Performance oil.
The approved oils are SAE 0W-40, 0W-30,
5W-40 and 5W-30.<
Alternative oil types
If the approved engine oils are not available, up
to 1 US quart/1 liter of another oil with the fol-
lowing specification may be used:
API SM or higher
Coolant
Do not add coolant to the cooling system
when the engine is hot. Escaping coolant
can cause burns.<
Coolant consists of half water and half additive.
Not all commercially available additives are suit-
able for your MINI. Your MINI dealer knows
which additives are suitable and will be glad to
advise you.
Only use suitable additives; otherwise,
engine damage may result. Because addi-
tives are harmful to your health, it is important
to follow the instructions on the containers.<
Comply with the appropriate environmen-
tal protection regulations when disposing
of coolant additives.<
Checking coolant level
1.Do not open the hood until the engine has
cooled down.
2.Turn the cap of the expansion tank a little
counterclockwise to allow any accumulated
pressure to escape, then continue turning to
open.
3.The coolant level is correct if it is between
the Min and Max markings.
4.If the coolant is low, slowly add coolant up to
the specified level; do not overfill.
5.Turn the cap until there is an audible click.
6.Have the reason for the coolant loss elimi-
nated as soon as possible.
Page 178 of 218
Replacing components
176
Replacing components
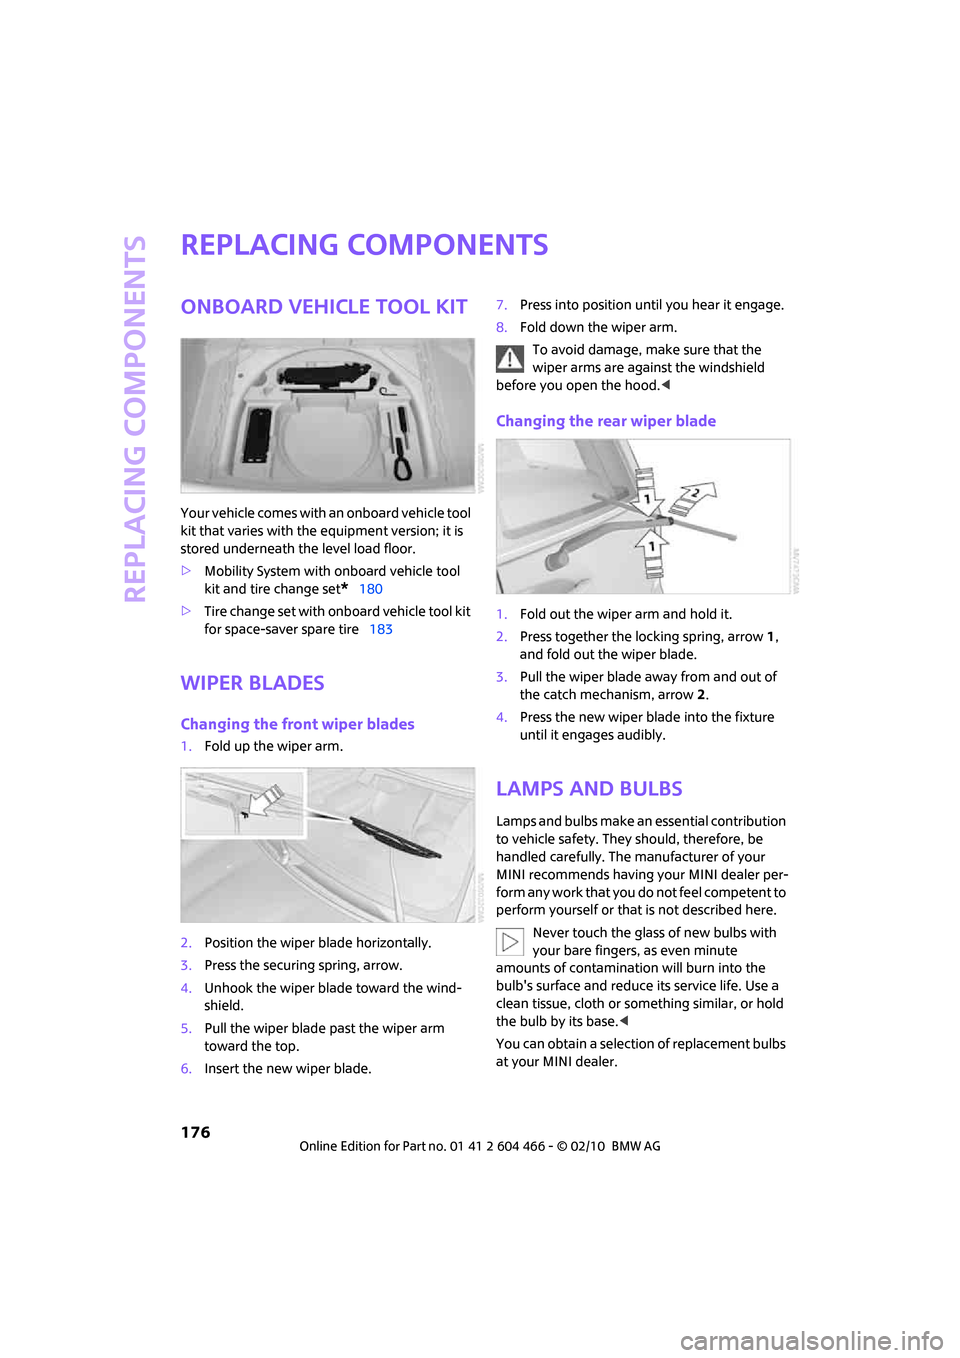
Onboard vehicle tool kit
Your vehicle comes with an onboard vehicle tool
kit that varies with the equipment version; it is
stored underneath the level load floor.
>Mobility System with onboard vehicle tool
kit and tire change set
*180
>Tire change set with onboard vehicle tool kit
for space-saver spare tire183
Wiper blades
Changing the front wiper blades
1.Fold up the wiper arm.
2.Position the wiper blade horizontally.
3.Press the securing spring, arrow.
4.Unhook the wiper blade toward the wind-
shield.
5.Pull the wiper blade past the wiper arm
toward the top.
6.Insert the new wiper blade.7.Press into position until you hear it engage.
8.Fold down the wiper arm.
To avoid damage, make sure that the
wiper arms are against the windshield
before you open the hood.<
Changing the rear wiper blade
1.Fold out the wiper arm and hold it.
2.Press together the locking spring, arrow 1,
and fold out the wiper blade.
3.Pull the wiper blade away from and out of
the catch mechanism, arrow 2.
4.Press the new wiper blade into the fixture
until it engages audibly.
Lamps and bulbs
Lamps and bulbs make an essential contribution
to vehicle safety. They should, therefore, be
handled carefully. The manufacturer of your
MINI recommends having your MINI dealer per-
form any work that you do not feel competent to
perform yourself or that is not described here.
Never touch the glass of new bulbs with
your bare fingers, as even minute
amounts of contamination will burn into the
bulb's surface and reduce its service life. Use a
clean tissue, cloth or something similar, or hold
the bulb by its base.<
You can obtain a selection of replacement bulbs
at your MINI dealer.
Page 207 of 218
REFERENCEAT A GLANCE CONTROLS DRIVING TIPS MOBILITY
205
G
Garage door opener, refer to
Integrated universal remote
control88
Gasoline
– refer to Average fuel
consumption56
Gasoline display, refer to Fuel
gauge56
Gasoline, refer to Required
fuel157
Gear indicator
– automatic transmission with
Steptronic48
Gear shifting
– automatic transmission48
– manual transmission48
Gearshift lever
– automatic transmission with
Steptronic48
– manual transmission48
General driving notes96
Glass sunroof, electric34
– convenient operation28,29
– opening, closing35
– raising35
– remote control28
Glove compartment89
GPS navigation, refer to
Navigation system106
Grills85
Gross vehicle weight, refer to
Weights194
H
Halogen lamps
– replacing bulb177
Handbrake, refer to Parking
brake47
Hands-free system14
Hazard warning flashers14
"HD radio"138
HD radio, refer to High
Definition Radio138
Head airbags79
Head restraints39
– sitting safely37Headlamp control,
automatic81
Headlamp flasher50
– indicator lamp11,13
Headlamps
– replacing bulb177
Headlamps, care173
Headlight glass lens177
Heated
– mirrors41
– rear window87
– seats40
Heating
– mirrors41
– rear window87
– seats40
Heavy loads, refer to Stowing
cargo100
Height adjustment
– seats38
– steering wheel41
Height, refer to
Dimensions193
High beams82
– headlamp flasher82
– indicator lamp13
– replacing bulb177
High Definition Radio, refer to
HD Radio138
High water, refer to Driving
through water97
Highways, refer to Route
criteria118
Hill Assist73
Hills97
Holders for cups91
Home address117
"Home address" in
Navigation118
Homepage4
Hood167
Horn10
Hot exhaust system96
"Hour memo"64
"House number" in
destination input
111
Hydroplaning96
I
IBOC, refer to HD Radio138
Ice warning55
ID3 tag, refer to Information
about the track144
Ignition46
– switched off46
– switched on46
Ignition key position 1, refer to
Radio readiness46
Ignition key position 2, refer to
Ignition on46
Ignition key, refer to
Integrated key/remote
control26
Ignition lock46
Imprint2
Indicator and warning
lamps13
– Tire Pressure Monitor TPM77
Indicator lighting, refer to
Instrument lighting83
Individual settings, refer to
Personal Profile26
Inflation pressure monitoring,
refer to Tire Pressure Monitor
TPM75
Information
– on another location114
– on country114
– on current position114
– on destination location114
"Information" in
Navigation114
"Information on
destination"115
Initializing
– Flat Tire Monitor FTM74
– glass sunroof, electric35
Installation location
– drive for navigation DVD and
audio CD106
Instructions for navigation
system, refer to Voice
instructions123
Page 211 of 218
REFERENCEAT A GLANCE CONTROLS DRIVING TIPS MOBILITY
209
Rear fog lamp83
– indicator lamp13
– replacing bulb180
Rear lamps
– bulb replacement179
Rear lamps, refer to Tail
lamps179
Rear seat backrest, folding98
Rear seats
– folding the backrests98
Rear window defroster87
Rearview mirror, refer to
Mirrors41
Receiving level of mobile
phone, refer to Status
information20
Reception
– radio station138
Recirculated-air mode86
Recirculation of air, refer to
Recirculated-air mode86
Reclining seat, refer to
Backrest38
Recording times, refer to
Stopwatch68
Refueling156
Releasing
– hood167
Remote control26
– battery renewal34
– Comfort Access33
– garage door opener88
– malfunctions29,34
– service data170
– splitdoor29
"Repeat directory" during
audio playback146
"Repeat track" during audio
playback146
Replacement remote
control26
Replacing bulbs, refer to
Lamps and bulbs176
Replacing tires, refer to New
wheels and tires165
Reporting safety defects6
Reserve warning, refer to Fuel
gauge56Reservoir for washer
systems52
"Reset"74
"Reset" of tone settings134
Reset, refer to Resetting tone
settings134
"Reset" the stopwatch68
Restraint systems
– for children43
– refer to Safety belts40
Reverse
– CD changer146
– CD player146
Reverse gear
– automatic transmission with
Steptronic49
– manual transmission48
Road map121
Roadside Assistance186
Roadside parking lamps82
– replacing bulb178
Roadworthiness test, refer to
Service requirements60
Roof load capacity194
Roof-mounted luggage
rack101
Rope, refer to Tow-starting,
towing away188
Route118
– changing118,124
– display121
– displaying arrow view121
– displaying map view121
– displaying town123
– list123
– selecting118
– selecting criteria118
– taking detours124
Route selection118
RSC Run-flat System
Component, refer to Run-flat
tires165
Rubber parts, care173
Run-flat System Component
RSC, refer to Run-flat
tires165Run-flat tires165
– flat tire74
– tire inflation pressure158
– tire replacement165
– winter tires166
S
Safety belt
– number37
Safety Belt Reminder40
Safety belts40
– damage40
– indicator lamp40
– reminder40
– sitting safely37
Safety belts, care174
Safety systems
– airbags79
– Antilock Brake System
ABS71
– Dynamic Stability Control
DSC71
– safety belts40
Safety tires, refer to Run-flat
tires165
"SAT" on the radio132,140
Satellite radio140
– enabling channel140
– selecting channel140
– storing channel140
Scale for navigation,
changing122
"Scan"
– Briefly play stations on the
radio136
Scan
– CD changer144
– CD player144
– radio136
"Scan all" during audio
playback145
"Scan directory" during audio
playback145
Screen, refer to Onboard
monitor controls16
Screw thread for tow
fitting187