start stop button MINI Clubman 2010 Owner's Manual (Mini Connected)
[x] Cancel search | Manufacturer: MINI, Model Year: 2010, Model line: Clubman, Model: MINI Clubman 2010Pages: 218, PDF Size: 3.97 MB
Page 13 of 218
MOBILITYAT A GLANCE CONTROLS DRIVING TIPS ENTERTAINMENT
11
NAVIGATION REFERENCE
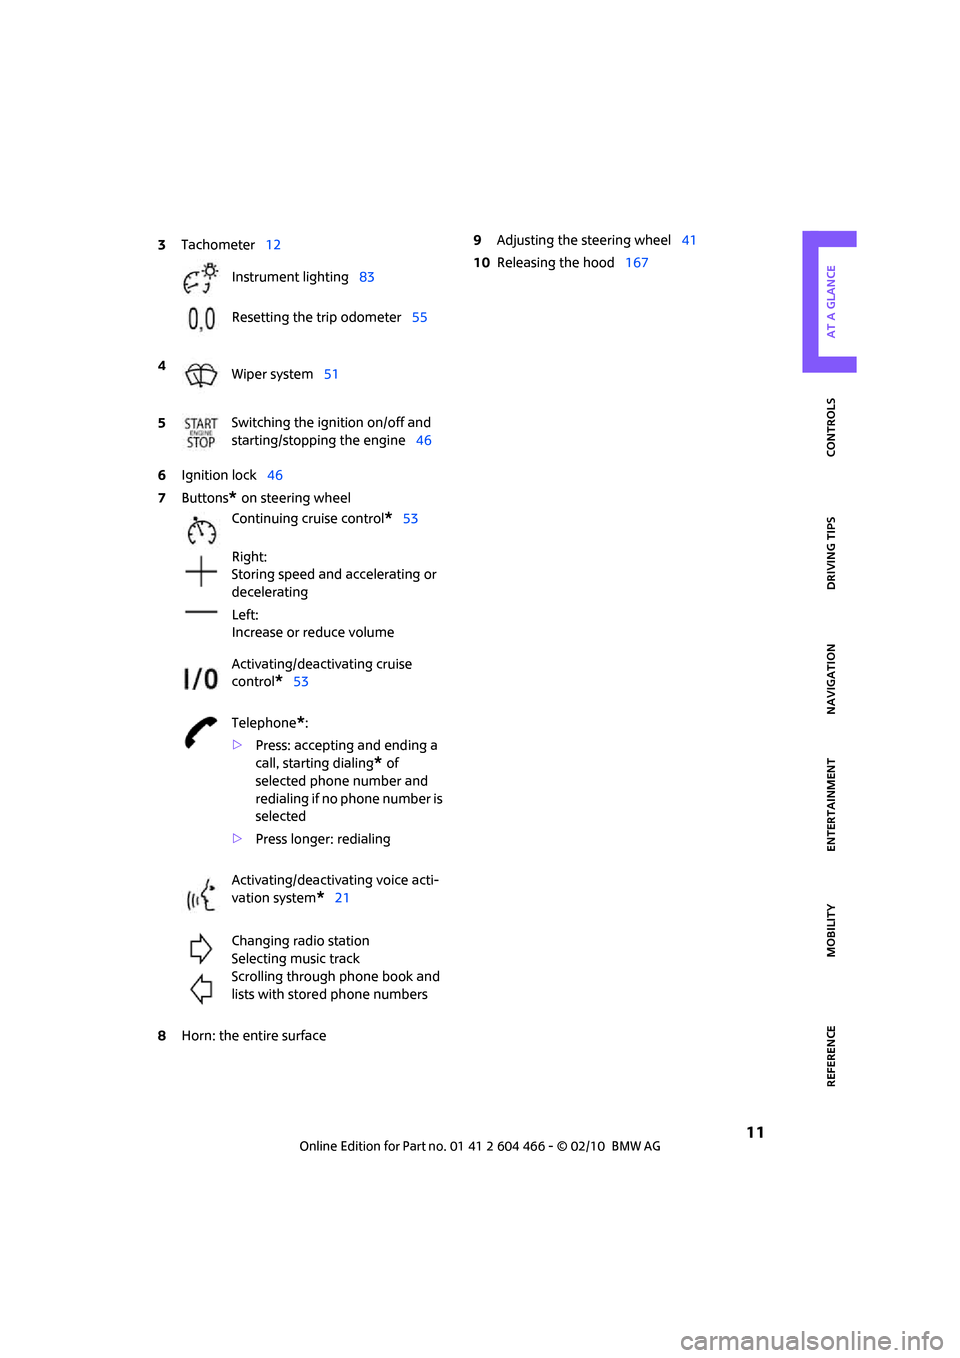
6Ignition lock46
7Buttons
* on steering wheel
8Horn: the entire surface9Adjusting the steering wheel41
10Releasing the hood167 3Tachometer12
Instrument lighting83
Resetting the trip odometer55
4
Wiper system51
5Switching the ignition on/off and
starting/stopping the engine46
Continuing cruise control
*53
Right:
Storing speed and accelerating or
decelerating
Left:
Increase or reduce volume
Activating/deactivating cruise
control
*53
Telephone
*:
>Press: accepting and ending a
call, starting dialing
* of
selected phone number and
redialing if no phone number is
selected
>Press longer: redialing
Activating/deactivating voice acti-
vation system
*21
Changing radio station
Selecting music track
Scrolling through phone book and
lists with stored phone numbers
Page 36 of 218
Opening and closing
34
Switching on radio readiness
Switch on radio readiness by briefly pressing the
start/stop button, page46.
Do not depress the brake or the clutch;
otherwise, the engine will start.<
Starting the engine
The engine can be started or the ignition can be
switched on when a remote control is inside the
vehicle. It is not necessary to insert a remote
control into the ignition lock, page46.
Switching off the engine in cars with
automatic transmission
The engine can only be switched off when the
selector lever is in position P, page47.
To switch the engine off when the selector lever
is in position N, the remote control must be in
the ignition lock.
Before driving a vehicle with automatic
transmission into a car wash
1.Insert remote control into ignition lock.
2.Depress the brake.
3.Move the selector lever to position N.
4.Switch off the engine.
The vehicle can roll.
Malfunction
Comfort Access may malfunction due to local
radio waves.
If this happens, open or close the vehicle via the
buttons on the remote control or using the inte-
grated key.
Insert the remote control into the ignition lock
and start the engine.
Warning lamps
The warning lamp comes on when an
attempt is made to start the engine: the
engine cannot be started. The remote
control is not inside the vehicle or is malfunc-
tioning. Take the remote control with you inside
the vehicle or have it checked. If necessary, insert another remote control into the ignition
lock.
The warning lamp comes on when the
engine is running: the remote control is
no longer inside the vehicle. After the
engine is switched off, the engine can only be
restarted within approx. 10 seconds.
The indicator lamp comes on and a mes-
sage appears on the Control Display:
Replace the battery in the remote con-
trol.
Replacing the battery
The remote control for Comfort Access contains
a battery that will need to be replaced from time
to time.
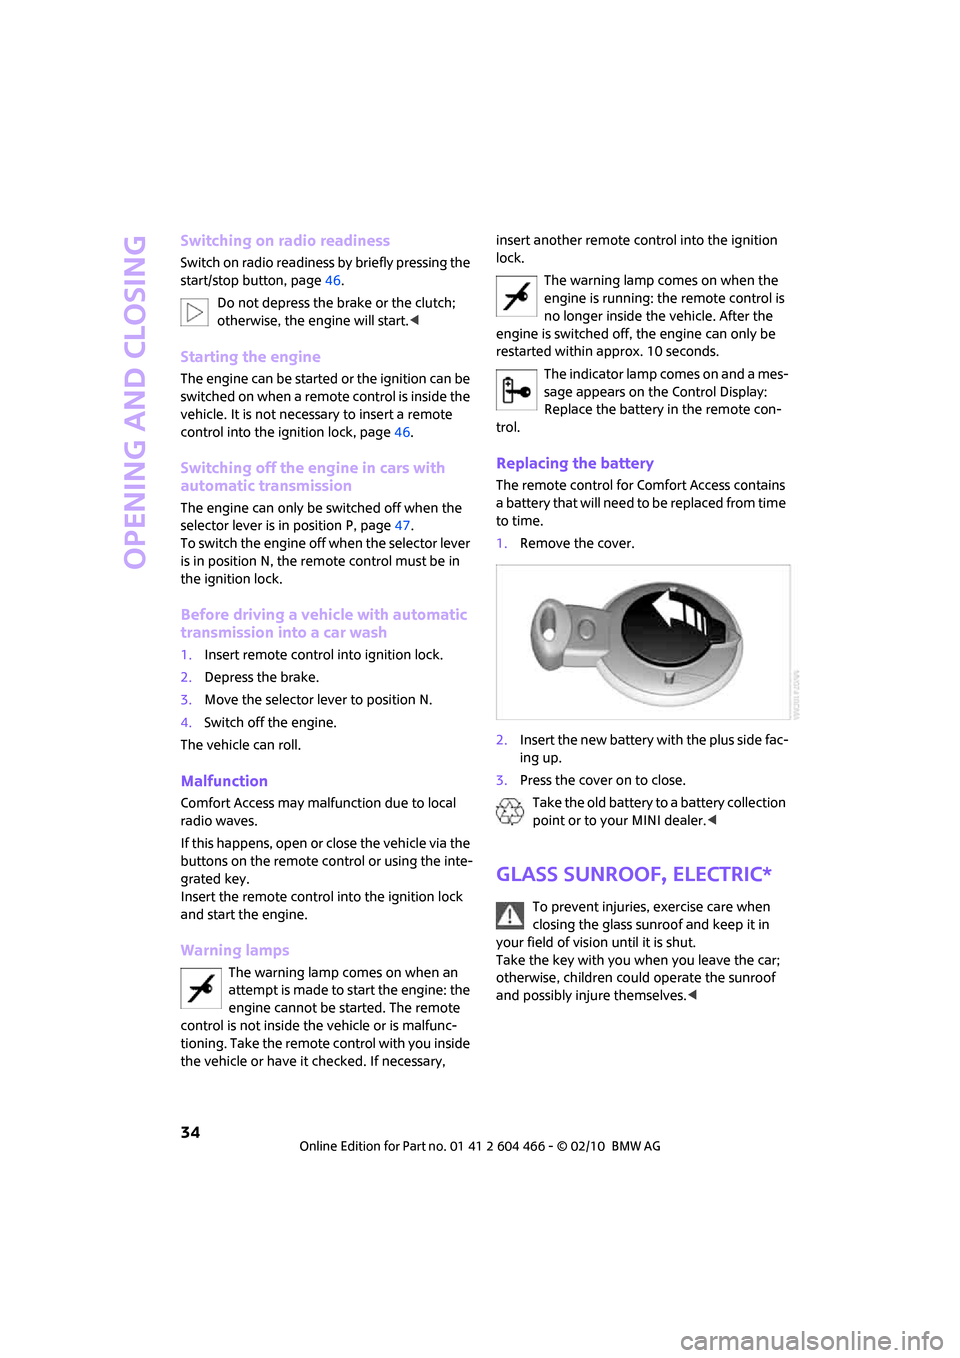
1.Remove the cover.
2.Insert the new battery with the plus side fac-
ing up.
3.Press the cover on to close.
Take the old battery to a battery collection
point or to your MINI dealer.<
Glass sunroof, electric*
To prevent injuries, exercise care when
closing the glass sunroof and keep it in
your field of vision until it is shut.
Take the key with you when you leave the car;
otherwise, children could operate the sunroof
and possibly injure themselves.<
Page 48 of 218
Driving
46
Driving
Ignition lock
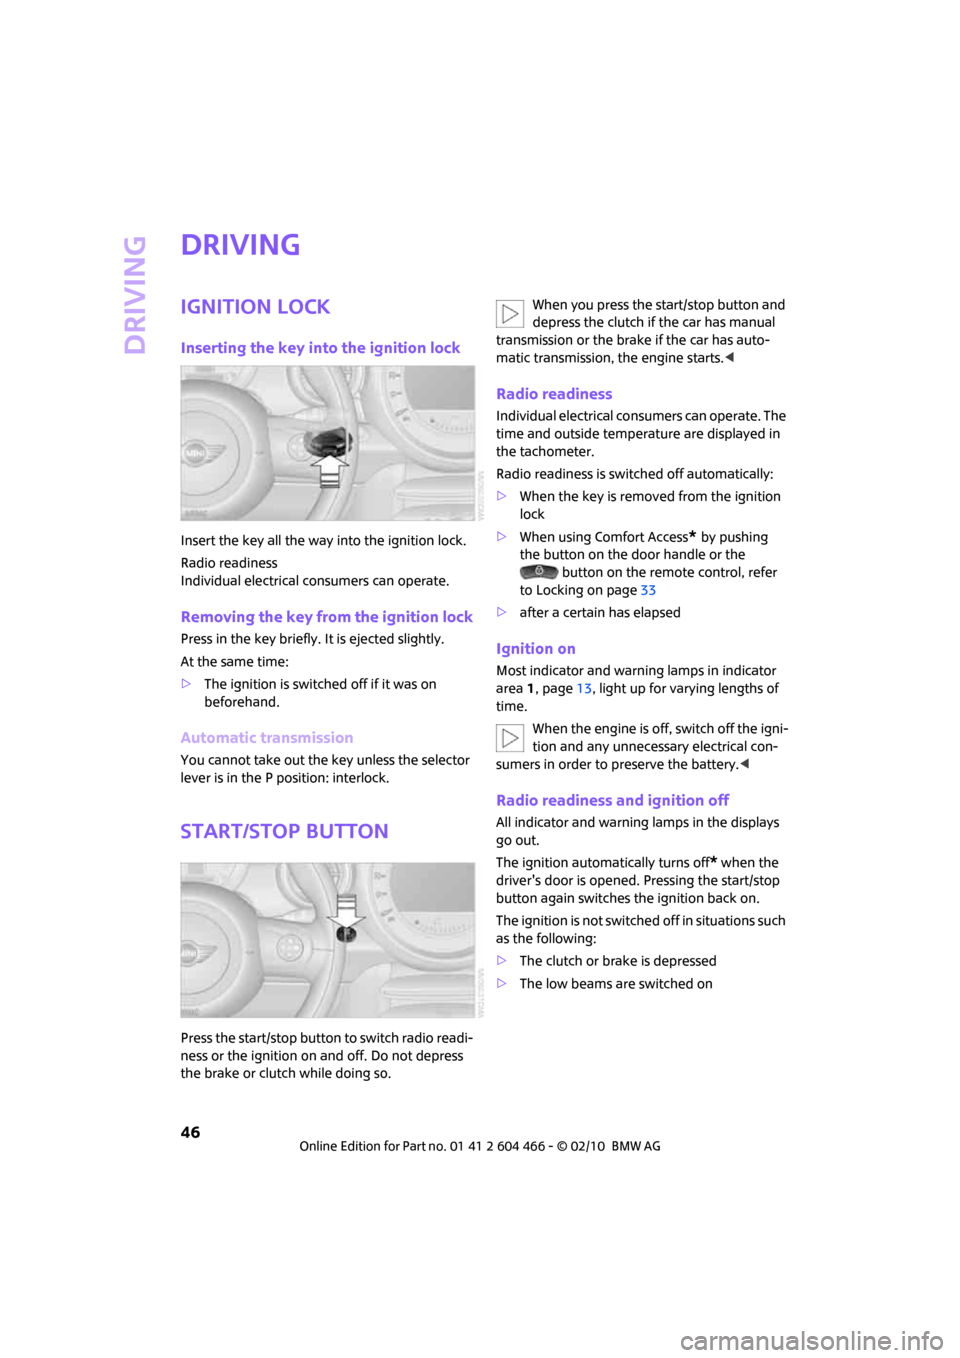
Inserting the key into the ignition lock
Insert the key all the way into the ignition lock.
Radio readiness
Individual electrical consumers can operate.
Removing the key from the ignition lock
Press in the key briefly. It is ejected slightly.
At the same time:
>The ignition is switched off if it was on
beforehand.
Automatic transmission
You cannot take out the key unless the selector
lever is in the P position: interlock.
Start/stop button
Press the start/stop button to switch radio readi-
ness or the ignition on and off. Do not depress
the brake or clutch while doing so.When you press the start/stop button and
depress the clutch if the car has manual
transmission or the brake if the car has auto-
matic transmission, the engine starts.<
Radio readiness
Individual electrical consumers can operate. The
time and outside temperature are displayed in
the tachometer.
Radio readiness is switched off automatically:
>When the key is removed from the ignition
lock
>When using Comfort Access
* by pushing
the button on the door handle or the
button on the remote control, refer
to Locking on page33
>after a certain has elapsed
Ignition on
Most indicator and warning lamps in indicator
area 1, page13, light up for varying lengths of
time.
When the engine is off, switch off the igni-
tion and any unnecessary electrical con-
sumers in order to preserve the battery.<
Radio readiness and ignition off
All indicator and warning lamps in the displays
go out.
The ignition automatically turns off
* when the
driver's door is opened. Pressing the start/stop
button again switches the ignition back on.
The ignition is not switched off in situations such
as the following:
>The clutch or brake is depressed
>The low beams are switched on
Page 49 of 218
MOBILITYAT A GLANCE CONTROLS DRIVING TIPS ENTERTAINMENT
47
NAVIGATION REFERENCE
Starting the engine
Do not allow the engine to run in enclosed
areas; otherwise, inhalation of the noxious
exhaust gases can lead to loss of consciousness
and death. Exhaust gases contain carbon mon-
oxide, an odorless and colorless, but highly toxic
gas. Never leave an unattended vehicle with the
engine running; otherwise, such a vehicle repre-
sents a potential safety hazard.
Before leaving the car while the engine is run-
ning, place the transmission in neutral or move
the selector lever to position P and forcefully
apply the parking brake to prevent the car from
moving.<
Avoid frequent starting in quick succes-
sion or repeated start attempts in which
the engine does not start. Otherwise, the fuel is
not burned or inadequately burned and there is
a danger of overheating and damaging the cat-
alytic converter.<
Do not let the engine warm up with the vehicle
at a standstill. Move off immediately at a moder-
ate engine speed.
When starting the engine, do not depress the
accelerator pedal.
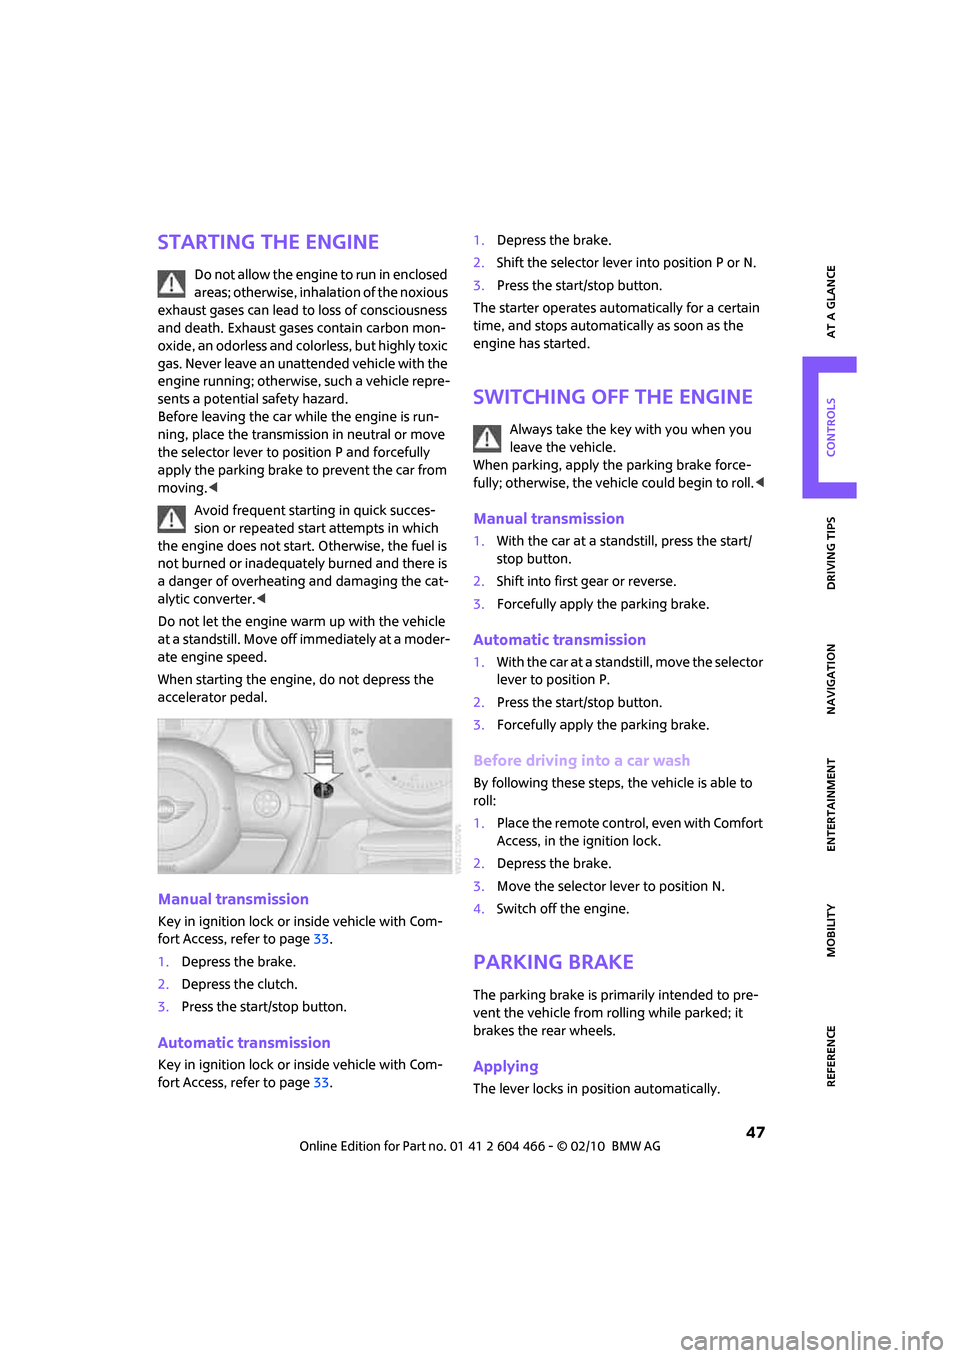
Manual transmission
Key in ignition lock or inside vehicle with Com-
fort Access, refer to page33.
1.Depress the brake.
2.Depress the clutch.
3.Press the start/stop button.
Automatic transmission
Key in ignition lock or inside vehicle with Com-
fort Access, refer to page33.1.Depress the brake.
2.Shift the selector lever into position P or N.
3.Press the start/stop button.
The starter operates automatically for a certain
time, and stops automatically as soon as the
engine has started.
Switching off the engine
Always take the key with you when you
leave the vehicle.
When parking, apply the parking brake force-
fully; otherwise, the vehicle could begin to roll.<
Manual transmission
1.With the car at a standstill, press the start/
stop button.
2.Shift into first gear or reverse.
3.Forcefully apply the parking brake.
Automatic transmission
1.With the car at a standstill, move the selector
lever to position P.
2.Press the start/stop button.
3.Forcefully apply the parking brake.
Before driving into a car wash
By following these steps, the vehicle is able to
roll:
1.Place the remote control, even with Comfort
Access, in the ignition lock.
2.Depress the brake.
3.Move the selector lever to position N.
4.Switch off the engine.
Parking brake
The parking brake is primarily intended to pre-
vent the vehicle from rolling while parked; it
brakes the rear wheels.
Applying
The lever locks in position automatically.
Page 60 of 218
Controls overview
58
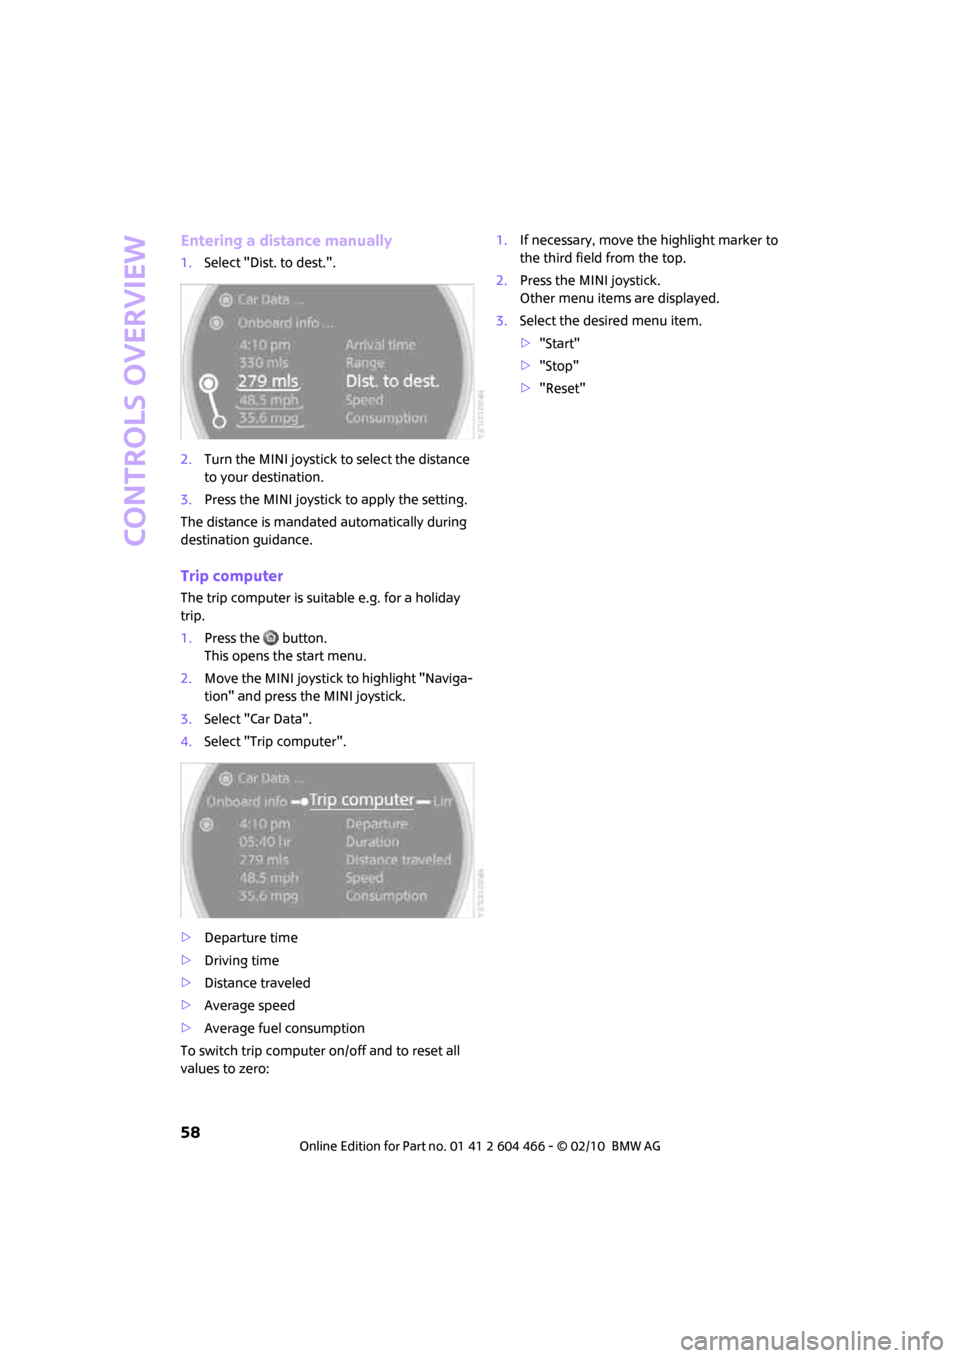
Entering a distance manually
1.Select "Dist. to dest.".
2.Turn the MINI joystick to select the distance
to your destination.
3.Press the MINI joystick to apply the setting.
The distance is mandated automatically during
destination guidance.
Trip computer
The trip computer is suitable e.g. for a holiday
trip.
1.Press the button.
This opens the start menu.
2.Move the MINI joystick to highlight "Naviga-
tion" and press the MINI joystick.
3.Select "Car Data".
4.Select "Trip computer".
>Departure time
>Driving time
>Distance traveled
>Average speed
>Average fuel consumption
To switch trip computer on/off and to reset all
values to zero:1.If necessary, move the highlight marker to
the third field from the top.
2.Press the MINI joystick.
Other menu items are displayed.
3.Select the desired menu item.
>"Start"
>"Stop"
>"Reset"
Page 70 of 218
Controls overview
68
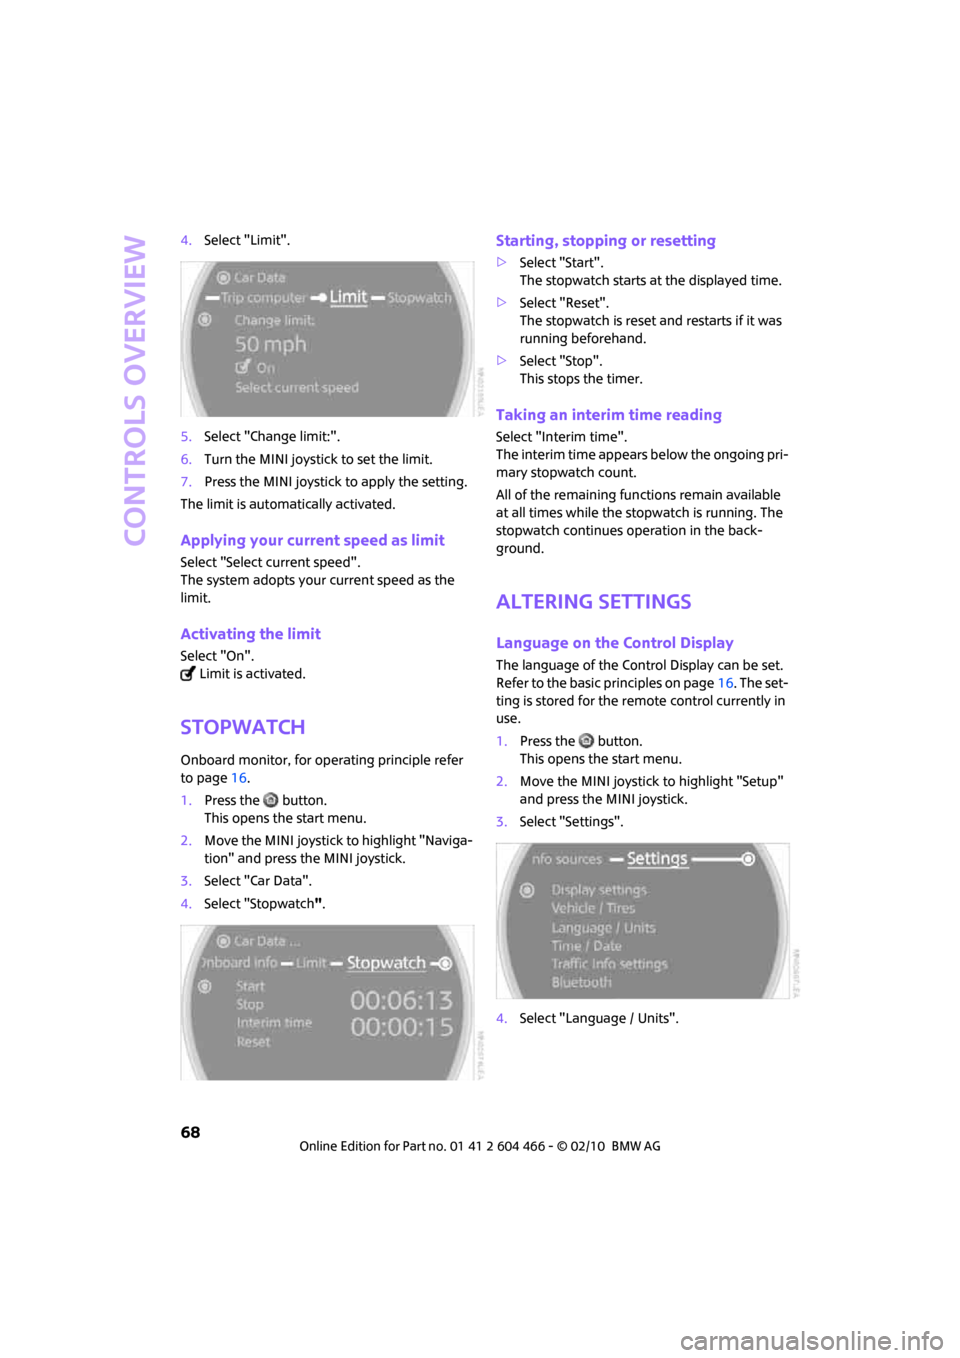
4.Select "Limit".
5.Select "Change limit:".
6.Turn the MINI joystick to set the limit.
7.Press the MINI joystick to apply the setting.
The limit is automatically activated.
Applying your current speed as limit
Select "Select current speed".
The system adopts your current speed as the
limit.
Activating the limit
Select "On".
Limit is activated.
Stopwatch
Onboard monitor, for operating principle refer
to page16.
1.Press the button.
This opens the start menu.
2.Move the MINI joystick to highlight "Naviga-
tion" and press the MINI joystick.
3.Select "Car Data".
4.Select "Stopwatch".
Starting, stopping or resetting
>Select "Start".
The stopwatch starts at the displayed time.
>Select "Reset".
The stopwatch is reset and restarts if it was
running beforehand.
>Select "Stop".
This stops the timer.
Taking an interim time reading
Select "Interim time".
The interim time appears below the ongoing pri-
mary stopwatch count.
All of the remaining functions remain available
at all times while the stopwatch is running. The
stopwatch continues operation in the back-
ground.
Altering settings
Language on the Control Display
The language of the Control Display can be set.
Refer to the basic principles on page16. The set-
ting is stored for the remote control currently in
use.
1.Press the button.
This opens the start menu.
2.Move the MINI joystick to highlight "Setup"
and press the MINI joystick.
3.Select "Settings".
4.Select "Language / Units".
Page 72 of 218
Technology for driving comfort and safety
70
Technology for driving comfort and
safety
Park Distance Control
PDC*
The concept
PDC assists you with parking backwards. Acous-
tic signals and a visual indicator
warn you of the
presence of an object behind the vehicle. To
measure the distance, there are four ultrasonic
sensors in either bumper.
These sensors have a range of approx.
6.5 ft/2 m. However, an acoustic warning
does not sound until an object is approx. 24 in/
60 cm from the rear corner sensors, or approx.
5 ft/1.50 m from the rear center sensors. PDC is
a parking aid that can indicate objects when
they are approached slowly, as is usually the
case when parking. Avoid approaching an
object at high speed; otherwise, physical cir-
cumstances may lead to the system warning
being issued too late.<
Automatic mode
With the engine running or the ignition switched
on, the system is activated automatically after
approx. 1 second when you engage reverse gear
or move the automatic transmission selector
lever to position R. Wait this short period before
driving.
Acoustic signals
As the distance between vehicle and object
decreases, the intervals between the tones
become shorter. If the distance to the nearest
object falls to below roughly 1 ft/30 cm, then a
continuous tone sounds.
If the distance remains constant, e.g. when driv-
ing parallel to a wall, the acoustic signal stops
after approx. 3 seconds.
Malfunction
Indicator lamp comes on: PDC has
failed. A message appears on the Con-
trol Display. Have the system checked.
To avoid this problem, keep the sensors clean
and free of ice or snow in order to ensure that
they will continue to operate effectively. When
using a high-pressure cleaner, do not direct the
jet toward the sensors for lengthy periods and
only spray from a distance of at least 4 in/10 cm.
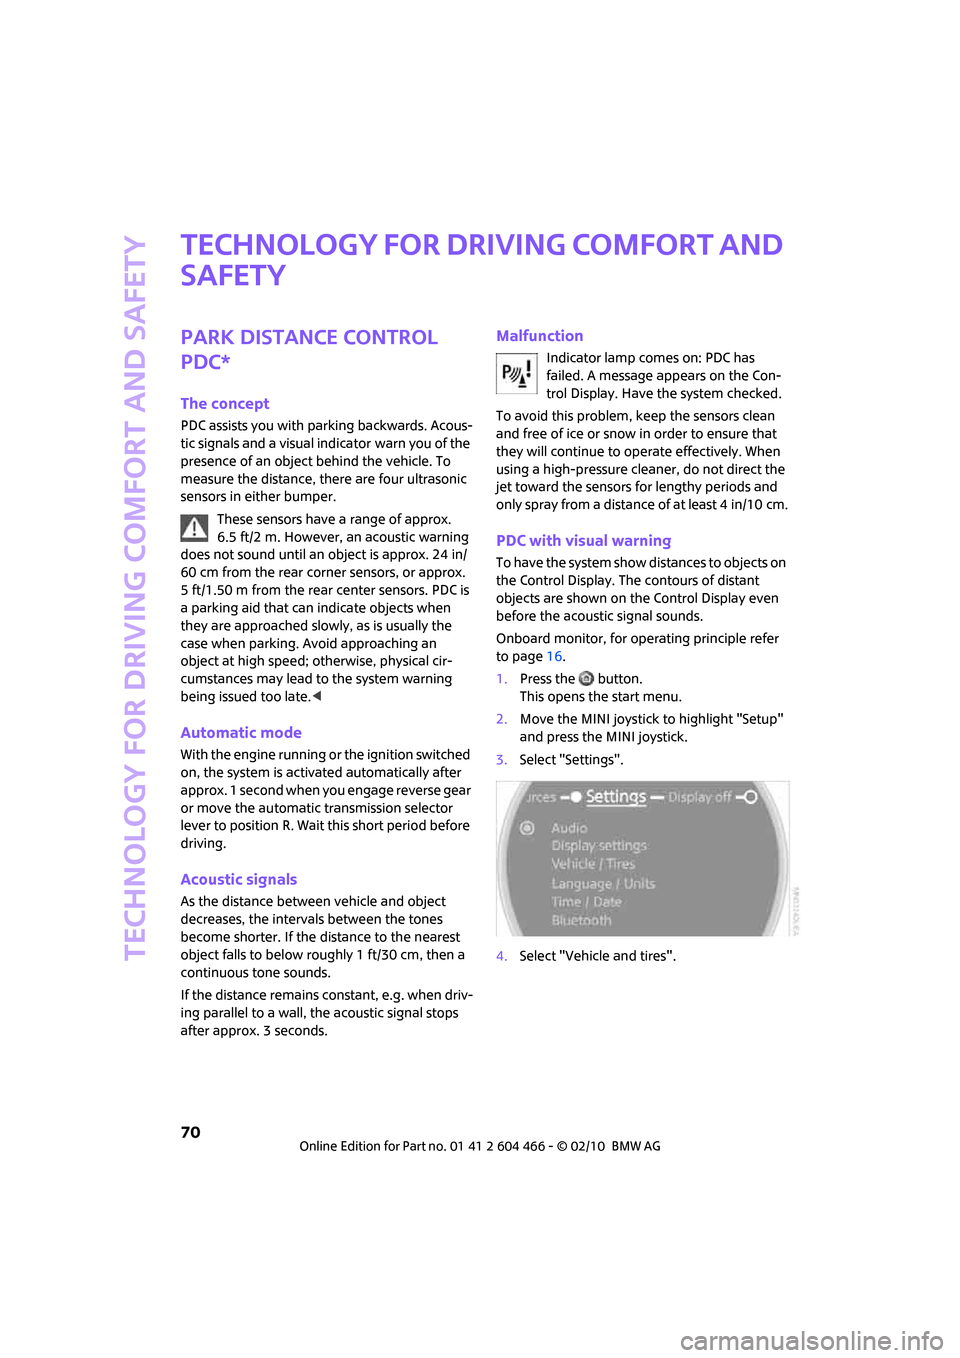
PDC with visual warning
To have the system show distances to objects on
the Control Display. The contours of distant
objects are shown on the Control Display even
before the acoustic signal sounds.
Onboard monitor, for operating principle refer
to page16.
1.Press the button.
This opens the start menu.
2.Move the MINI joystick to highlight "Setup"
and press the MINI joystick.
3.Select "Settings".
4.Select "Vehicle and tires".
Page 85 of 218
MOBILITYAT A GLANCE CONTROLS DRIVING TIPS ENTERTAINMENT
83
NAVIGATION REFERENCE
Switching off
Press the lever up or down to the pressure point.
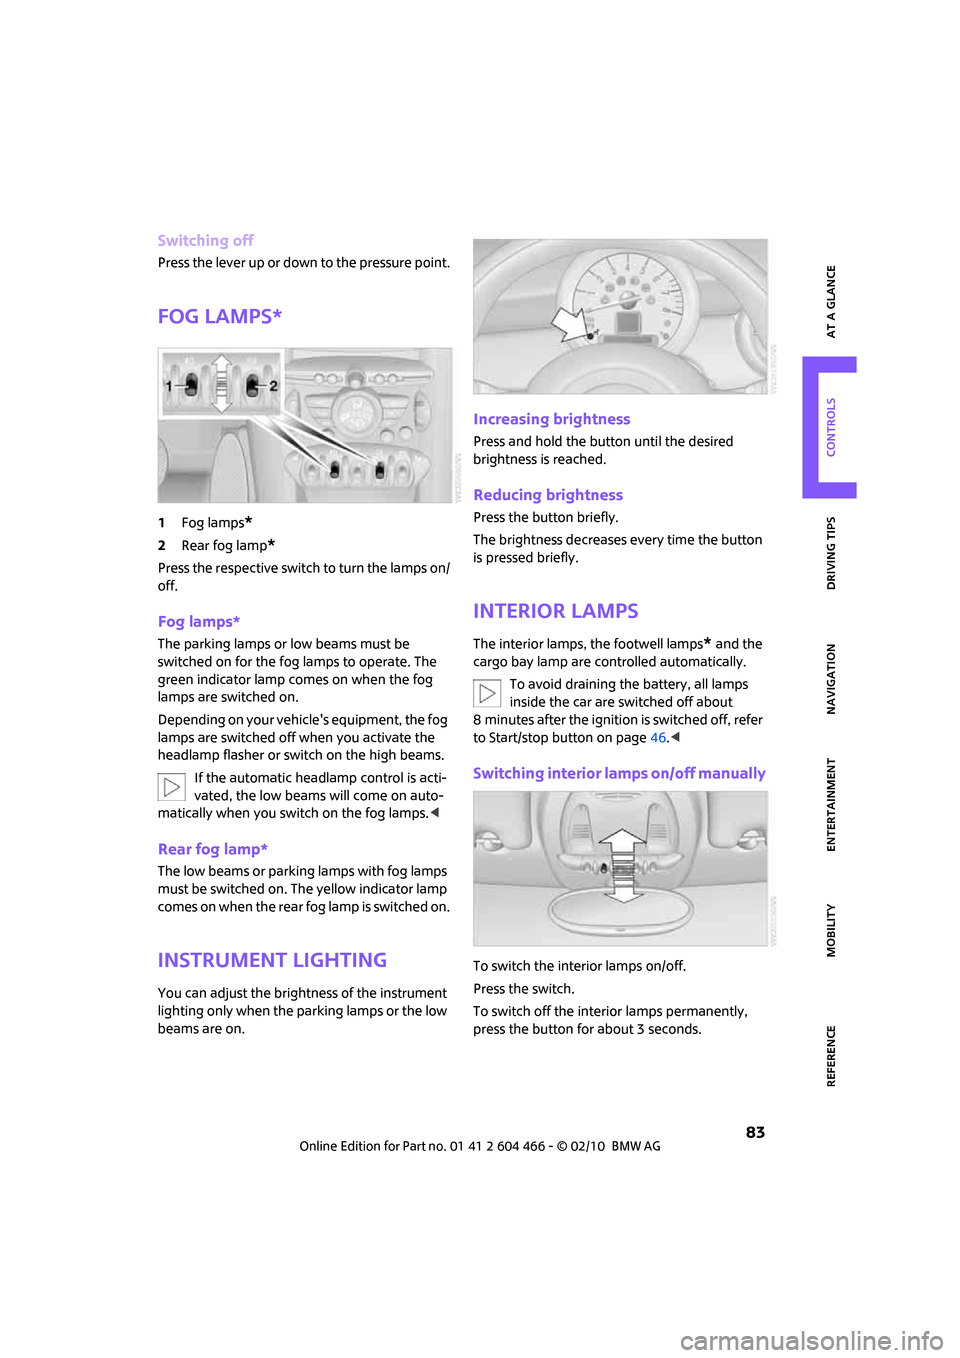
Fog lamps*
1Fog lamps*
2Rear fog lamp*
Press the respective switch to turn the lamps on/
off.
Fog lamps*
The parking lamps or low beams must be
switched on for the fog lamps to operate. The
green indicator lamp comes on when the fog
lamps are switched on.
Depending on your vehicle's equipment, the fog
lamps are switched off when you activate the
headlamp flasher or switch on the high beams.
If the automatic headlamp control is acti-
vated, the low beams will come on auto-
matically when you switch on the fog lamps.<
Rear fog lamp*
The low beams or parking lamps with fog lamps
must be switched on. The yellow indicator lamp
comes on when the rear fog lamp is switched on.
Instrument lighting
You can adjust the brightness of the instrument
lighting only when the parking lamps or the low
beams are on.
Increasing brightness
Press and hold the button until the desired
brightness is reached.
Reducing brightness
Press the button briefly.
The brightness decreases every time the button
is pressed briefly.
Interior lamps
The interior lamps, the footwell lamps* and the
cargo bay lamp are controlled automatically.
To avoid draining the battery, all lamps
inside the car are switched off about
8 minutes after the ignition is switched off, refer
to Start/stop button on page46.<
Switching interior lamps on/off manually
To switch the interior lamps on/off.
Press the switch.
To switch off the interior lamps permanently,
press the button for about 3 seconds.
Page 212 of 218
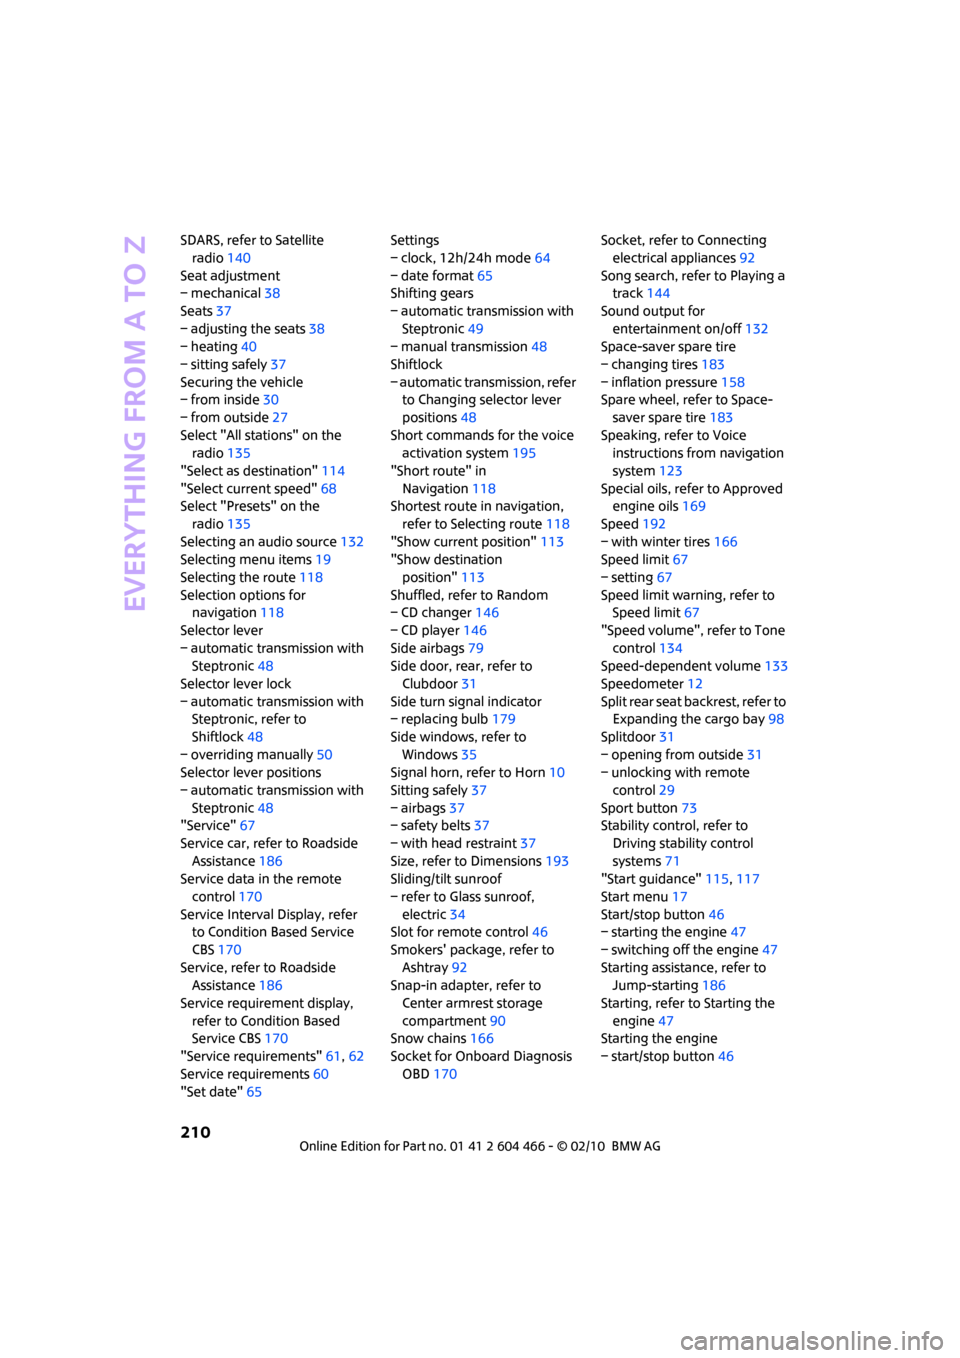
Everything from A to Z
210
SDARS, refer to Satellite
radio140
Seat adjustment
– mechanical38
Seats37
– adjusting the seats38
– heating40
– sitting safely37
Securing the vehicle
– from inside30
– from outside27
Select "All stations" on the
radio135
"Select as destination"114
"Select current speed"68
Select "Presets" on the
radio135
Selecting an audio source132
Selecting menu items19
Selecting the route118
Selection options for
navigation118
Selector lever
– automatic transmission with
Steptronic48
Selector lever lock
– automatic transmission with
Steptronic, refer to
Shiftlock48
– overriding manually50
Selector lever positions
– automatic transmission with
Steptronic48
"Service"67
Service car, refer to Roadside
Assistance186
Service data in the remote
control170
Service Interval Display, refer
to Condition Based Service
CBS170
Service, refer to Roadside
Assistance186
Service requirement display,
refer to Condition Based
Service CBS170
"Service requirements"61,62
Service requirements60
"Set date"65Settings
– clock, 12h/24h mode64
– date format65
Shifting gears
– automatic transmission with
Steptronic49
– manual transmission48
Shiftlock
– automatic transmission, refer
to Changing selector lever
positions48
Short commands for the voice
activation system195
"Short route" in
Navigation118
Shortest route in navigation,
refer to Selecting route
118
"Show current position"113
"Show destination
position"113
Shuffled, refer to Random
– CD changer146
– CD player146
Side airbags79
Side door, rear, refer to
Clubdoor31
Side turn signal indicator
– replacing bulb179
Side windows, refer to
Windows35
Signal horn, refer to Horn10
Sitting safely37
– airbags37
– safety belts37
– with head restraint37
Size, refer to Dimensions193
Sliding/tilt sunroof
– refer to Glass sunroof,
electric34
Slot for remote control46
Smokers' package, refer to
Ashtray92
Snap-in adapter, refer to
Center armrest storage
compartment90
Snow chains166
Socket for Onboard Diagnosis
OBD170Socket, refer to Connecting
electrical appliances92
Song search, refer to Playing a
track144
Sound output for
entertainment on/off132
Space-saver spare tire
– changing tires183
– inflation pressure158
Spare wheel, refer to Space-
saver spare tire183
Speaking, refer to Voice
instructions from navigation
system123
Special oils, refer to Approved
engine oils169
Speed192
– with winter tires166
Speed limit67
– setting67
Speed limit warning, refer to
Speed limit67
"Speed volume", refer to Tone
control134
Speed-dependent volume133
Speedometer12
Split rear seat backrest, refer to
Expanding the cargo bay98
Splitdoor31
– opening from outside31
– unlocking with remote
control29
Sport button73
Stability control, refer to
Driving stability control
systems71
"Start guidance"115,117
Start menu17
Start/stop button46
– starting the engine47
– switching off the engine47
Starting assistance, refer to
Jump-starting186
Starting, refer to Starting the
engine47
Starting the engine
– start/stop button46
Page 213 of 218
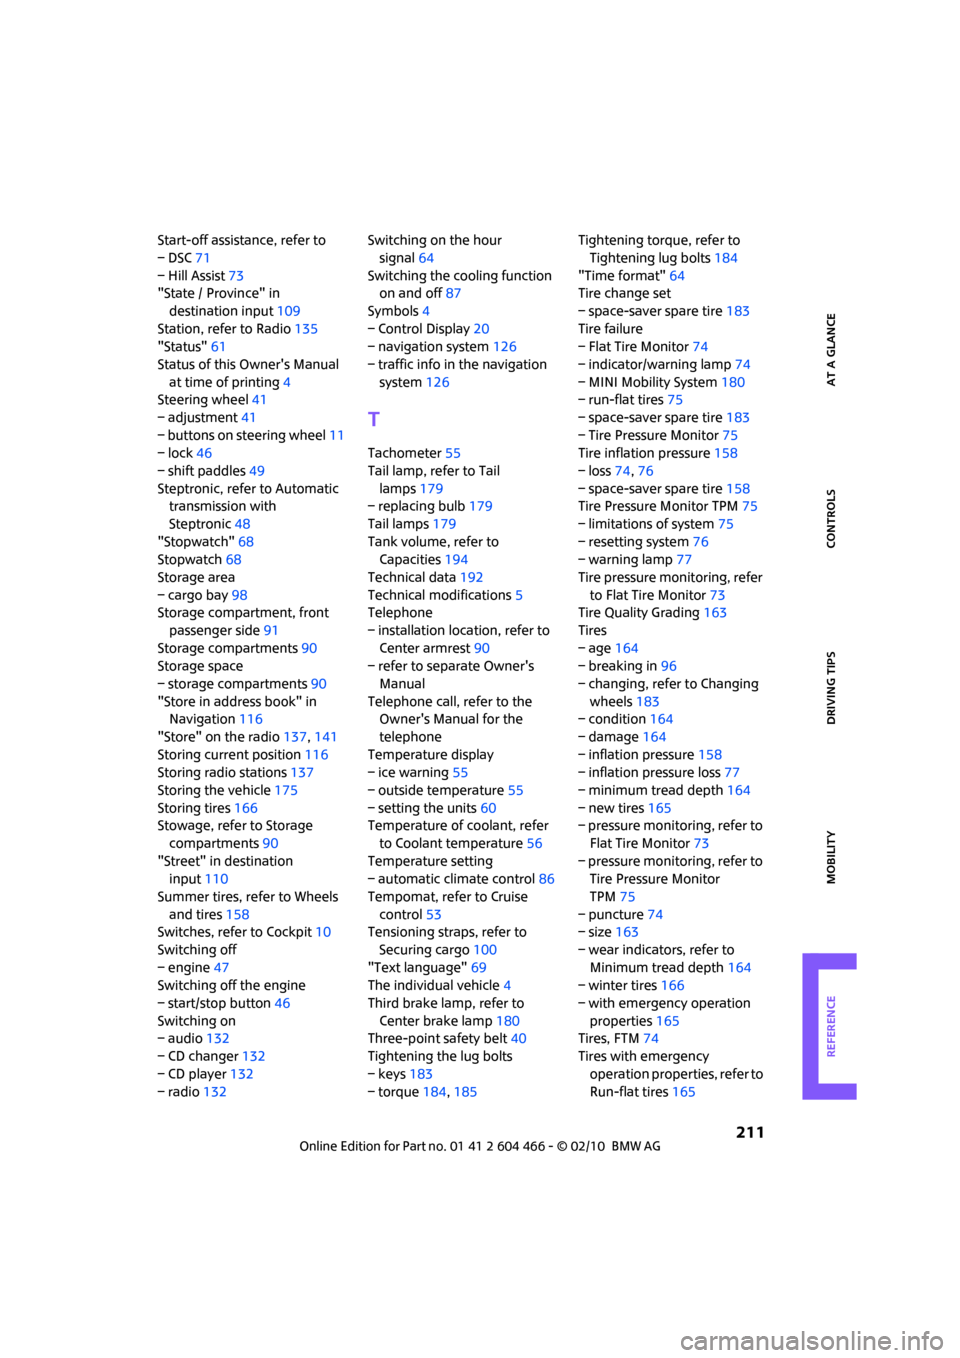
REFERENCEAT A GLANCE CONTROLS DRIVING TIPS MOBILITY
211
Start-off assistance, refer to
– DSC71
– Hill Assist73
"State / Province" in
destination input109
Station, refer to Radio135
"Status"61
Status of this Owner's Manual
at time of printing4
Steering wheel41
– adjustment41
– buttons on steering wheel11
– lock46
– shift paddles49
Steptronic, refer to Automatic
transmission with
Steptronic48
"Stopwatch"68
Stopwatch68
Storage area
– cargo bay98
Storage compartment, front
passenger side91
Storage compartments90
Storage space
– storage compartments90
"Store in address book" in
Navigation116
"Store" on the radio137,141
Storing current position116
Storing radio stations137
Storing the vehicle175
Storing tires166
Stowage, refer to Storage
compartments90
"Street" in destination
input110
Summer tires, refer to Wheels
and tires158
Switches, refer to Cockpit10
Switching off
– engine47
Switching off the engine
– start/stop button46
Switching on
– audio132
– CD changer132
– CD player132
– radio132Switching on the hour
signal64
Switching the cooling function
on and off87
Symbols4
– Control Display20
– navigation system126
– traffic info in the navigation
system126
T
Tachometer55
Tail lamp, refer to Tail
lamps179
– replacing bulb179
Tail lamps179
Tank volume, refer to
Capacities194
Technical data192
Technical modifications5
Telephone
– installation location, refer to
Center armrest90
– refer to separate Owner's
Manual
Telephone call, refer to the
Owner's Manual for the
telephone
Temperature display
– ice warning55
– outside temperature55
– setting the units60
Temperature of coolant, refer
to Coolant temperature56
Temperature setting
– automatic climate control86
Tempomat, refer to Cruise
control53
Tensioning straps, refer to
Securing cargo100
"Text language"69
The individual vehicle4
Third brake lamp, refer to
Center brake lamp180
Three-point safety belt40
Tightening the lug bolts
– keys183
– torque184,185Tightening torque, refer to
Tightening lug bolts184
"Time format"64
Tire change set
– space-saver spare tire183
Tire failure
– Flat Tire Monitor74
– indicator/warning lamp74
– MINI Mobility System180
– run-flat tires75
– space-saver spare tire183
– Tire Pressure Monitor75
Tire inflation pressure158
– loss74,76
– space-saver spare tire158
Tire Pressure Monitor TPM75
– limitations of system75
– resetting system76
– warning lamp77
Tire pressure monitoring, refer
to Flat Tire Monitor73
Tire Quality Grading163
Tires
– age164
– breaking in96
– changing, refer to Changing
wheels183
– condition164
– damage164
– inflation pressure158
– inflation pressure loss77
– minimum tread depth164
– new tires165
– pressure monitoring, refer to
Flat Tire Monitor73
– pressure monitoring, refer to
Tire Pressure Monitor
TPM75
– puncture74
– size163
– wear indicators, refer to
Minimum tread depth164
– winter tires166
– with emergency operation
properties165
Tires, FTM74
Tires with emergency
operation properties, refer to
Run-flat tires165