radio controls MINI Clubman 2010 Owner's Manual
[x] Cancel search | Manufacturer: MINI, Model Year: 2010, Model line: Clubman, Model: MINI Clubman 2010Pages: 160, PDF Size: 2.58 MB
Page 7 of 160
REFERENCEAT A GLANCE CONTROLS DRIVING TIPS MOBILITY
5
For your safety
Maintenance and repair
Advanced technology, e.g. the use of
modern materials and powerful electron-
ics, requires specially adapted maintenance and
repair methods. Therefore, have the necessary
work on your MINI only carried out by a MINI
dealer or a workshop that has specially trained
personnel working in accordance with the spec-
ifications of the MINI manufacturer. If this work
is not carried out properly, there is a danger
of subsequent damage and related safety
hazards.<
Parts and accessories
For your own safety, use genuine parts
and accessories approved by the manu-
facturer of the MINI.
When you purchase accessories tested and
approved by the manufacturer of the MINI and
Original MINI Parts, you simultaneously acquire
the assurance that they have been thoroughly
tested by the manufacturer of the MINI to
ensure optimum performance when installed on
your vehicle.
The manufacturer of the MINI warrants these
parts to be free from defects in material and
workmanship.
The manufacturer of the MINI will not accept any
liability for damage resulting from installation of
parts and accessories not approved by the man-
ufacturer of the MINI.
The manufacturer of the MINI cannot test every
product made by other manufacturers to verify
i f i t c a n b e u s e d o n a M I N I s a f e l y a n d w i t h o u t r i s k
to either the vehicle, its operation, or its occu-
pants.
Original MINI Parts, MINI Accessories and other
products approved by the manufacturer of the
MINI, together with professional advice on using
these items, are available from all MINI dealers.
Installation and operation of accessories that
have not been approved by the manufacturer of
your MINI, such as alarms, radios, amplifiers,
radar detectors, wheels, suspension compo-nents, brake dust shields, telephones, including
operation of any mobile phone from within the
vehicle without using an externally mounted
antenna, or transceiver equipment, for instance,
CBs, walkie-talkies, ham radios or similar acces-
sories, may cause extensive damage to the vehi-
cle, compromise its safety, interfere with the
vehicle's electrical system or affect the validity of
the MINI Limited Warranty. See your MINI dealer
for additional information.<
Maintenance, replacement, or repair of
the emission control devices and systems
may be performed by any automotive repair
establishment or individual using any certified
automotive part.
warning:
Engine exhaust and a wide variety of
automobile components and parts,
including components found in the interior fur-
nishings in a vehicle, contain or emit chemicals
known to the State of California to cause cancer
and birth defects and reproductive harm. In
addition, certain fluids contained in vehicles and
certain products of component wear contain or
emit chemicals known to the State of California
to cause cancer and birth defects or other repro-
ductive harm.
Battery posts, terminals and related accessories
contain lead and lead compounds. Wash your
hands after handling.
Used engine oil contains chemicals that have
caused cancer in laboratory animals. Always
protect your skin by washing thoroughly with
soap and water.<
Page 13 of 160
REFERENCE
AT A GLANCE CONTROLS DRIVING TIPS MOBILITY
11
6Ignition lock40
7Buttons
* on steering wheel
8Horn: the entire surface
9Adjusting the steering wheel36
10Releasing the bonnet105 3Tachometer12
Instrument lighting70
Resetting the trip odometer49
4
Wiper system45
5Switching the ignition on/off and
starting/stopping the engine40
Continuing cruise control
*47
Right:
Storing speed and accelerating or
decelerating
Left:
Increase or reduce volume
Activating/deactivating cruise
control
*48
Telephone
*:
Accepting and ending a call, start-
ing dialing
* of selected phone
number and redialing if no phone
number is selected
Activating/deactivating voice acti-
vation system
*
Changing radio station
Selecting music track
Scrolling through phone book and
lists with stored phone numbers
Page 25 of 160
REFERENCEAT A GLANCE CONTROLS DRIVING TIPS MOBILITY
23
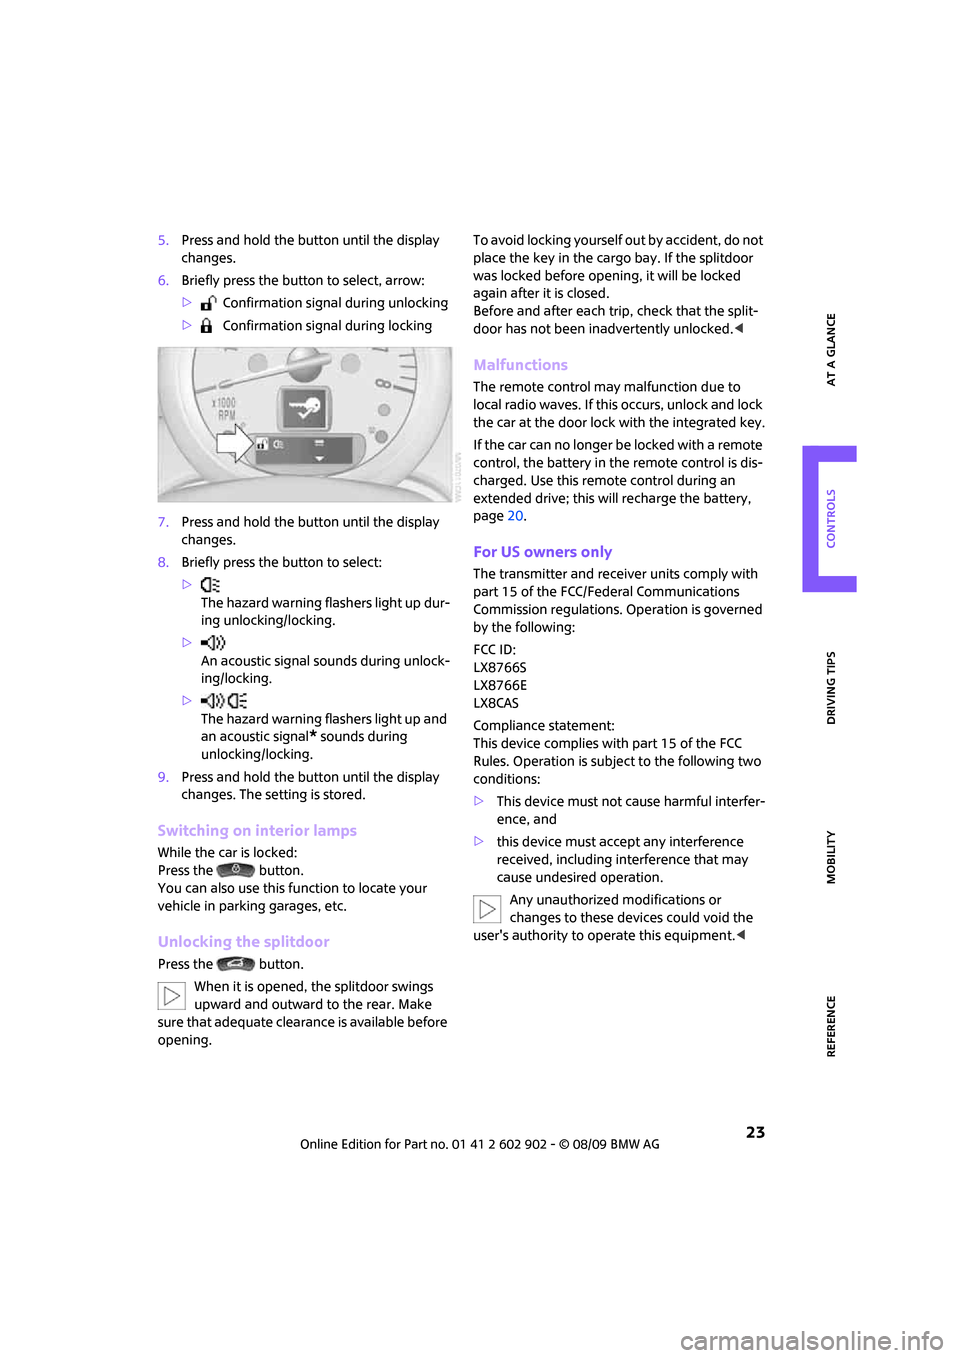
5.Press and hold the button until the display
changes.
6.Briefly press the button to select, arrow:
> Confirmation signal during unlocking
> Confirmation signal during locking
7.Press and hold the button until the display
changes.
8.Briefly press the button to select:
>
The hazard warning flashers light up dur-
ing unlocking/locking.
>
An acoustic signal sounds during unlock-
ing/locking.
>
The hazard warning flashers light up and
an acoustic signal
* sounds during
unlocking/locking.
9.Press and hold the button until the display
changes. The setting is stored.
Switching on interior lamps
While the car is locked:
Press the button.
You can also use this function to locate your
vehicle in parking garages, etc.
Unlocking the splitdoor
Press the button.
When it is opened, the splitdoor swings
upward and outward to the rear. Make
sure that adequate clearance is available before
opening.To avoid locking yourself out by accident, do not
place the key in the cargo bay. If the splitdoor
was locked before opening, it will be locked
again after it is closed.
Before and after each trip, check that the split-
door has not been inadvertently unlocked.<
Malfunctions
The remote control may malfunction due to
local radio waves. If this occurs, unlock and lock
the car at the door lock with the integrated key.
If the car can no longer be locked with a remote
control, the battery in the remote control is dis-
charged. Use this remote control during an
extended drive; this will recharge the battery,
page20.
For US owners only
The transmitter and receiver units comply with
part 15 of the FCC/Federal Communications
Commission regulations. Operation is governed
by the following:
FCC ID:
LX8766S
LX8766E
LX8CAS
Compliance statement:
This device complies with part 15 of the FCC
Rules. Operation is subject to the following two
conditions:
>This device must not cause harmful interfer-
ence, and
>this device must accept any interference
received, including interference that may
cause undesired operation.
Any unauthorized modifications or
changes to these devices could void the
user's authority to operate this equipment.<
Page 30 of 160
Opening and closing
28
Comparison to standard remote controls
In general, there is no difference between using
Comfort Access or pressing the buttons on the
remote control to carry out the functions men-
tioned above.
Instructions on opening and closing are found
starting on page20.
Special features regarding the use of Comfort
Access are described below.
If you notice a brief delay while opening or
closing the windows or glass sunroof, the
system is checking whether a remote control is
inside the vehicle. Repeat the opening or closing
procedure, if necessary.<
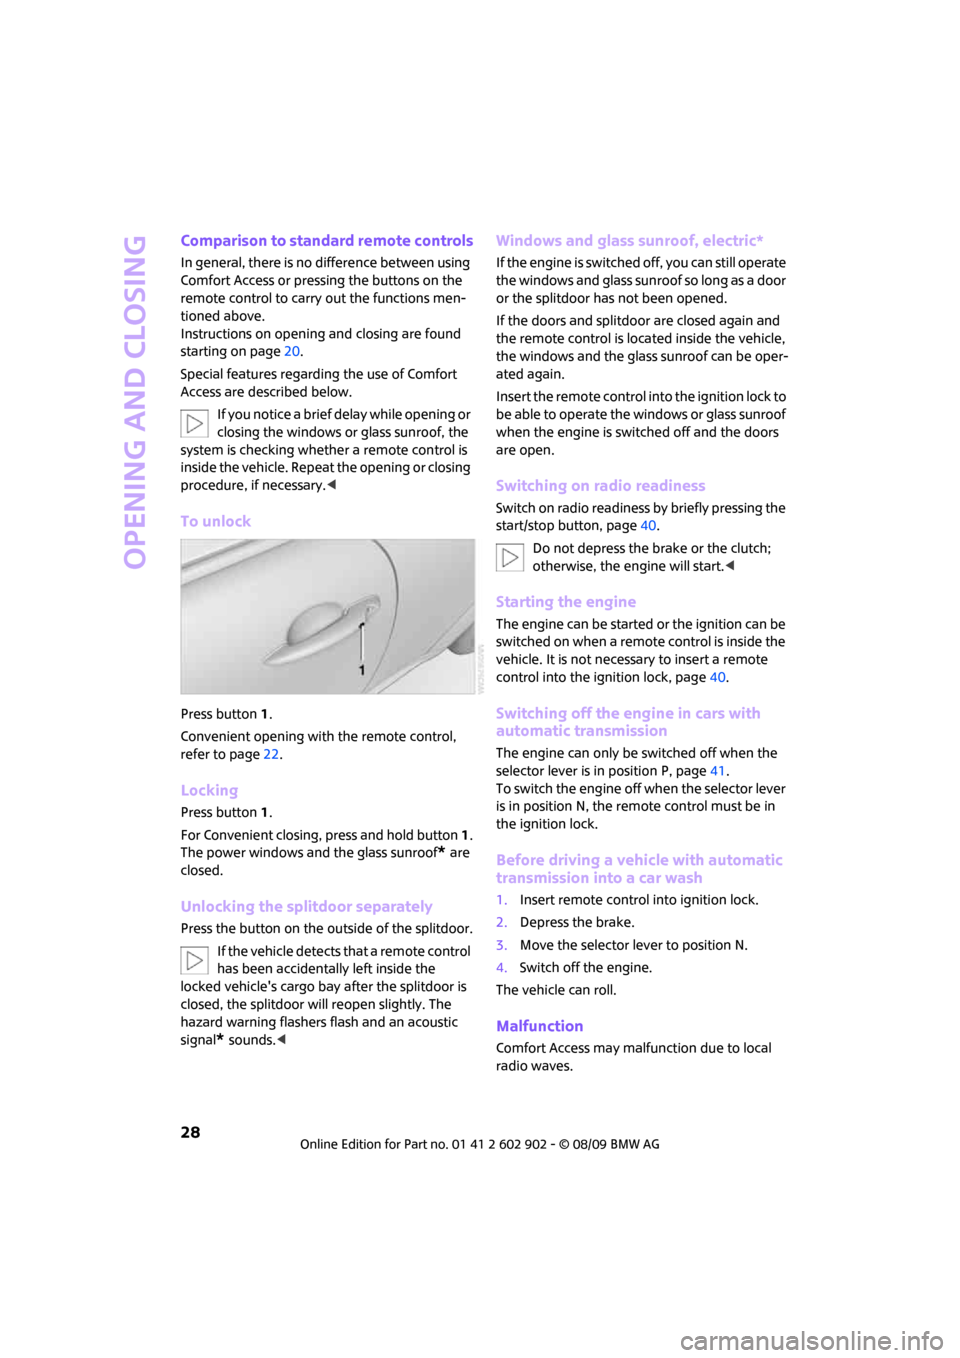
To unlock
Press button 1.
Convenient opening with the remote control,
refer to page22.
Locking
Press button 1.
For Convenient closing, press and hold button 1.
The power windows and the glass sunroof
* are
closed.
Unlocking the splitdoor separately
Press the button on the outside of the splitdoor.
If the vehicle detects that a remote control
has been accidentally left inside the
locked vehicle's cargo bay after the splitdoor is
closed, the splitdoor will reopen slightly. The
hazard warning flashers flash and an acoustic
signal
* sounds.<
Windows and glass sunroof, electric*
If the engine is switched off, you can still operate
the windows and glass sunroof so long as a door
or the splitdoor has not been opened.
If the doors and splitdoor are closed again and
the remote control is located inside the vehicle,
the windows and the glass sunroof can be oper-
ated again.
Insert the remote control into the ignition lock to
be able to operate the windows or glass sunroof
when the engine is switched off and the doors
are open.
Switching on radio readiness
Switch on radio readiness by briefly pressing the
start/stop button, page40.
Do not depress the brake or the clutch;
otherwise, the engine will start.<
Starting the engine
The engine can be started or the ignition can be
switched on when a remote control is inside the
vehicle. It is not necessary to insert a remote
control into the ignition lock, page40.
Switching off the engine in cars with
automatic transmission
The engine can only be switched off when the
selector lever is in position P, page41.
To switch the engine off when the selector lever
is in position N, the remote control must be in
the ignition lock.
Before driving a vehicle with automatic
transmission into a car wash
1.Insert remote control into ignition lock.
2.Depress the brake.
3.Move the selector lever to position N.
4.Switch off the engine.
The vehicle can roll.
Malfunction
Comfort Access may malfunction due to local
radio waves.
Page 57 of 160
REFERENCEAT A GLANCE CONTROLS DRIVING TIPS MOBILITY
55
Clock
Setting the time
To set the 12h/24h mode, refer to Formats and
units of measure on page52.
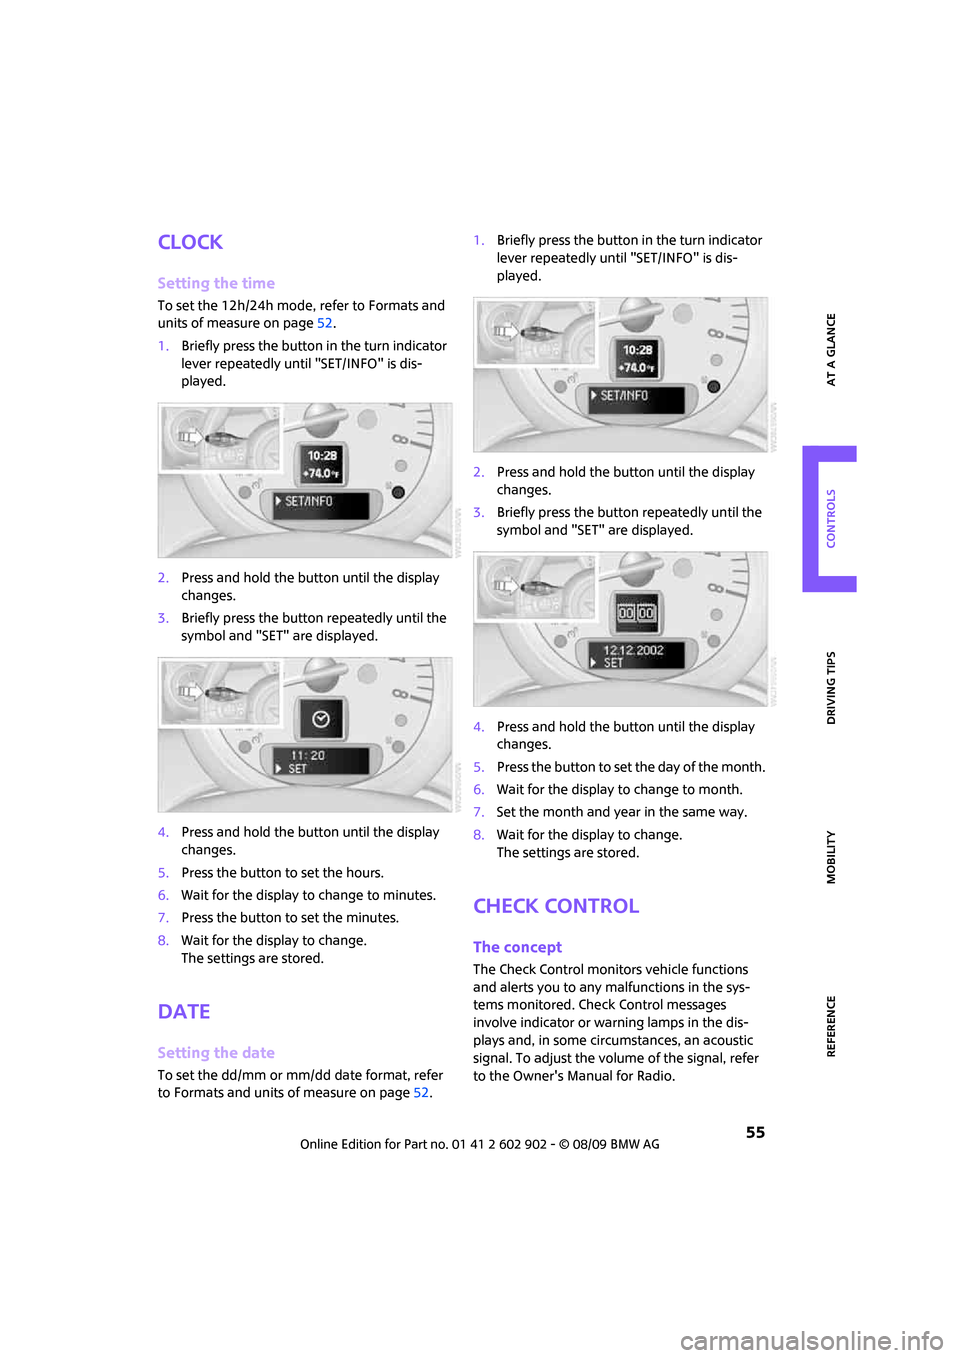
1.Briefly press the button in the turn indicator
lever repeatedly until "SET/INFO" is dis-
played.
2.Press and hold the button until the display
changes.
3.Briefly press the button repeatedly until the
symbol and "SET" are displayed.
4.Press and hold the button until the display
changes.
5.Press the button to set the hours.
6.Wait for the display to change to minutes.
7.Press the button to set the minutes.
8.Wait for the display to change.
The settings are stored.
Date
Setting the date
To set the dd/mm or mm/dd date format, refer
to Formats and units of measure on page52.1.Briefly press the button in the turn indicator
lever repeatedly until "SET/INFO" is dis-
played.
2.Press and hold the button until the display
changes.
3.Briefly press the button repeatedly until the
symbol and "SET" are displayed.
4.Press and hold the button until the display
changes.
5.Press the button to set the day of the month.
6.Wait for the display to change to month.
7.Set the month and year in the same way.
8.Wait for the display to change.
The settings are stored.
Check Control
The concept
The Check Control monitors vehicle functions
and alerts you to any malfunctions in the sys-
tems monitored. Check Control messages
involve indicator or warning lamps in the dis-
plays and, in some circumstances, an acoustic
signal. To adjust the volume of the signal, refer
to the Owner's Manual for Radio.
Page 59 of 160
REFERENCEAT A GLANCE CONTROLS DRIVING TIPS MOBILITY
57
Technology for driving comfort and
safety
Park Distance
Control PDC*
The concept
PDC assists you with parking backwards. Acous-
tic signals warn you of the presence of an object
behind the vehicle. To measure the distance,
there are four ultrasonic sensors in either
bumper.
However, an acoustic warning does not
sound until an object is approx. 24 in/
60 cm from the corner sensors, or approx. 5 ft/
1.50 m from the center sensors.PDC is a parking
aid that can indicate objects when they are
approached slowly, as is usually the case when
parking. Avoid approaching an object at high
speed; otherwise, physical circumstances
may lead to the system warning being issued
too late.<
Automatic mode
With the engine running or the ignition switched
on, the system is activated automatically after
approx. 1 second when you engage reverse gear
or move the automatic transmission selector
lever to position R. Wait this short period before
driving.
Acoustic signals
As the distance between vehicle and object
decreases, the intervals between the tones
become shorter. If the distance to the nearest
object falls to below roughly 1 ft/30 cm, then a
continuous tone sounds.
If the distance remains constant, e.g. when driv-
ing parallel to a wall, the acoustic signal stops
after approx. 3 seconds.
Adjustments
The volume of the acoustic signals can be
adjusted, refer to the Owner's Manual for Radio.
Malfunction
Indicator lamp comes on: PDC is mal-
functioning. Have the system checked.
To avoid this problem, keep the sensors
clean and free of ice or snow in order to ensure
that they will continue to operate effectively.
When using a high-pressure cleaner, do not
direct the jet toward the sensors for lengthy
periods and only spray from a distance of at least
4in/10cm.
System limitations
Even with PDC, final responsibility for esti-
mating the distance between the vehicle
and any obstructions always remains with the
driver. Sensors, too, have blind spots in which
objects cannot be detected. Moreover, ultra-
sonic detection can reach its physical limits with
objects such as trailer tow bars and couplings,
thin and wedge-shaped objects, etc. Low
objects already indicated, such as curbs, may
enter the sensors' blind spots before or after a
continuous audible signal is given. Higher, pro-
truding objects, such as wall ledges, may not be
detectable. Therefore, always drive cautiously;
otherwise, there is a risk of personal injury or
property damage. Loud sound sources outside
or inside the car can drown out the PDC signal.<
Driving stability control
systems
Your MINI has a number of systems that help to
maintain the vehicle's stability even in adverse
driving conditions.
The laws of physics cannot be repealed,
even with driving stability control systems.
An appropriate driving style always remains the
responsibility of the driver. Therefore do not
reduce the additional safety margin by engaging
Page 79 of 160
REFERENCEAT A GLANCE CONTROLS DRIVING TIPS MOBILITY
77
Practical interior accessories
Integrated universal
remote control*
The concept
The integrated universal remote control can
replace as many as three hand-held transmitters
for various remote-controlled devices, such as
garage and gate openers and lighting systems.
The integrated universal remote control regis-
ters and stores signals from the original hand-
held transmitters.
The signal of an original hand-held transmitter
can be programmed on one of the three mem-
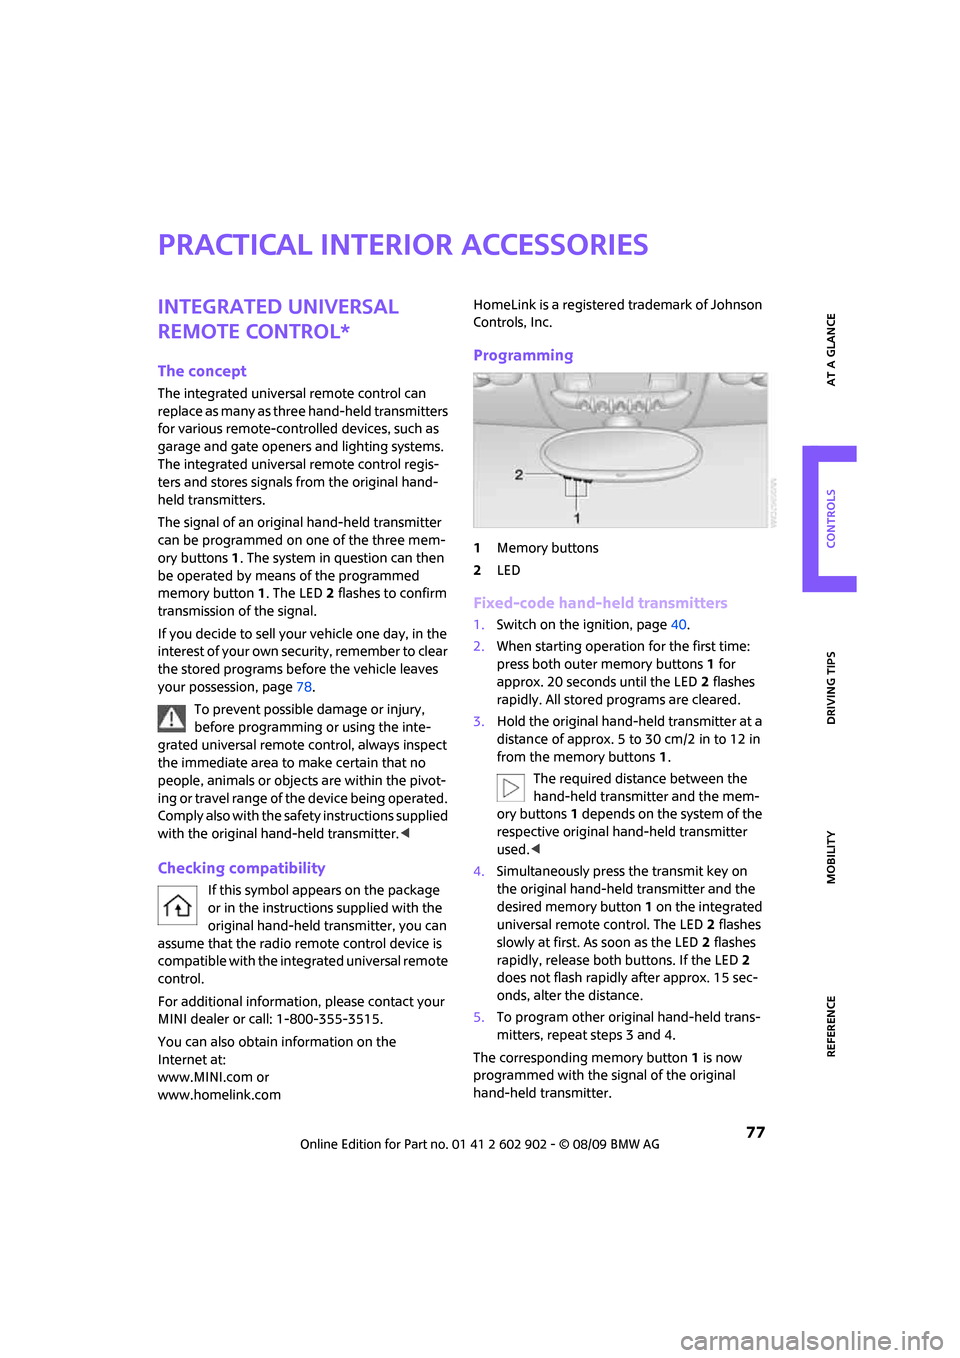
ory buttons1. The system in question can then
be operated by means of the programmed
memory button1. The LED2 flashes to confirm
transmission of the signal.
If you decide to sell your vehicle one day, in the
interest of your own security, remember to clear
the stored programs before the vehicle leaves
your possession, page78.
To prevent possible damage or injury,
before programming or using the inte-
grated universal remote control, always inspect
the immediate area to make certain that no
people, animals or objects are within the pivot-
ing or travel range of the device being operated.
Comply also with the safety instructions supplied
with the original hand-held transmitter.<
Checking compatibility
If this symbol appears on the package
or in the instructions supplied with the
original hand-held transmitter, you can
assume that the radio remote control device is
compatible with the integrated universal remote
control.
For additional information, please contact your
MINI dealer or call: 1-800-355-3515.
You can also obtain information on the
Internet at:
www.MINI.com or
www.homelink.comHomeLink is a registered trademark of Johnson
Controls, Inc.
Programming
1Memory buttons
2LED
Fixed-code hand-held transmitters
1.Switch on the ignition, page40.
2.When starting operation for the first time:
press both outer memory buttons1 for
approx. 20 seconds until the LED2 flashes
rapidly. All stored programs are cleared.
3.Hold the original hand-held transmitter at a
distance of approx. 5 to 30 cm/2 in to 12 in
from the memory buttons1.
The required distance between the
hand-held transmitter and the mem-
ory buttons1 depends on the system of the
respective original hand-held transmitter
used.<
4.Simultaneously press the transmit key on
the original hand-held transmitter and the
desired memory button 1 on the integrated
universal remote control. The LED 2 flashes
slowly at first. As soon as the LED2 flashes
rapidly, release both buttons. If the LED2
does not flash rapidly after approx. 15 sec-
onds, alter the distance.
5.To program other original hand-held trans-
mitters, repeat steps 3 and 4.
The corresponding memory button 1 is now
programmed with the signal of the original
hand-held transmitter.
Page 115 of 160
REFERENCEAT A GLANCE CONTROLS DRIVING TIPS MOBILITY
113
Displays
To clean displays such as radios or display ele-
ments, use a display cleaning cloth or a soft,
non-scratching, lint-free cloth.
Avoid pressing too hard when cleaning
the display as this can cause damage.<
Do not use chemical or abrasive house-
hold cleaning agents. Keep fluids of any
kind away from the device. Surfaces or electrical
components may otherwise become corroded
or damaged.<
CD/DVD drives
Do not use cleaning CDs as this could
damage parts of the drive.<
Vehicle storage
If you are not going to drive your car for more
than three months, please ask for advice from
your MINI dealer or a workshop that works
according to MINI manufacturer specifications.
Page 125 of 160
REFERENCEAT A GLANCE CONTROLS DRIVING TIPS MOBILITY
123
Vehicle battery
Maintenance
The battery is 100 % maintenance-free, the
electrolyte will last for the life of the battery
when the vehicle is operated in a temperate
climate.
Battery replacement
Only use vehicle batteries that have been
approved for your vehicle by the manu-
facturer; otherwise, the vehicle could be dam-
aged and systems or functions may not be fully
available.<
After a battery replacement, have the battery
registered on the vehicle by your dealer to
ensure that all comfort functions are fully
available.
Charging the battery
Only charge the battery in the vehicle when the
engine is off. Connections, refer to Jump-start-
ing on page124.
Disposal
After replacing old batteries, return the
used batteries to your MINI dealer or to a
recycling point. Maintain the battery in an
upright position for transport and storage.
Always secure the battery against tipping over
during transport.<
Power failure
After a temporary power loss, some equipment
may not be fully functional and may require ini-
tialization. Individual settings are also lost and
must be reprogrammed:
>Time and date
These values must be updated, page55.
>Radio
Stations must be stored again, refer to the
separate Owner's Manual for Radio.
>Glass sunroof
*, electric
It may only be possible to raise the sunroof,
if applicable. The system must be initialized.
Contact your nearest MINI dealer.
Fuses
Do not attempt to repair a blown fuse or
replace it with a fuse of a different color or
Ampere rating. To do this could cause a fire in
the vehicle resulting from a circuit overload.
Have the fuse changed only by a MINI dealer or
a workshop that has specially trained personnel
working in accordance with the specifications of
the MINI manufacturer.<
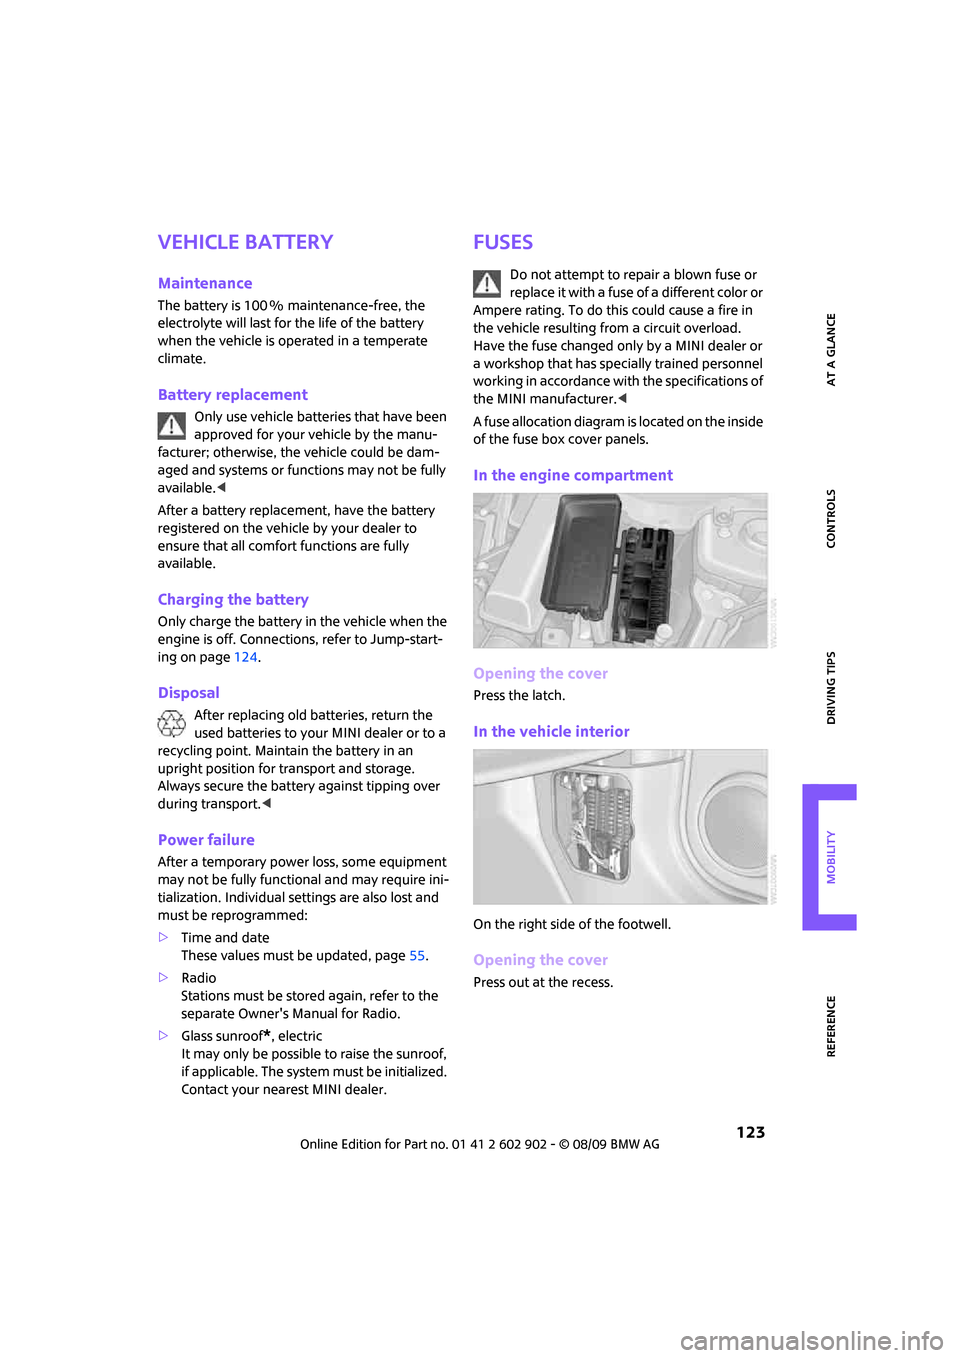
A fuse allocation diagram is located on the inside
of the fuse box cover panels.
In the engine compartment
Opening the cover
Press the latch.
In the vehicle interior
On the right side of the footwell.
Opening the cover
Press out at the recess.
Page 137 of 160
REFERENCEAT A GLANCE CONTROLS DRIVING TIPS MOBILITY
135
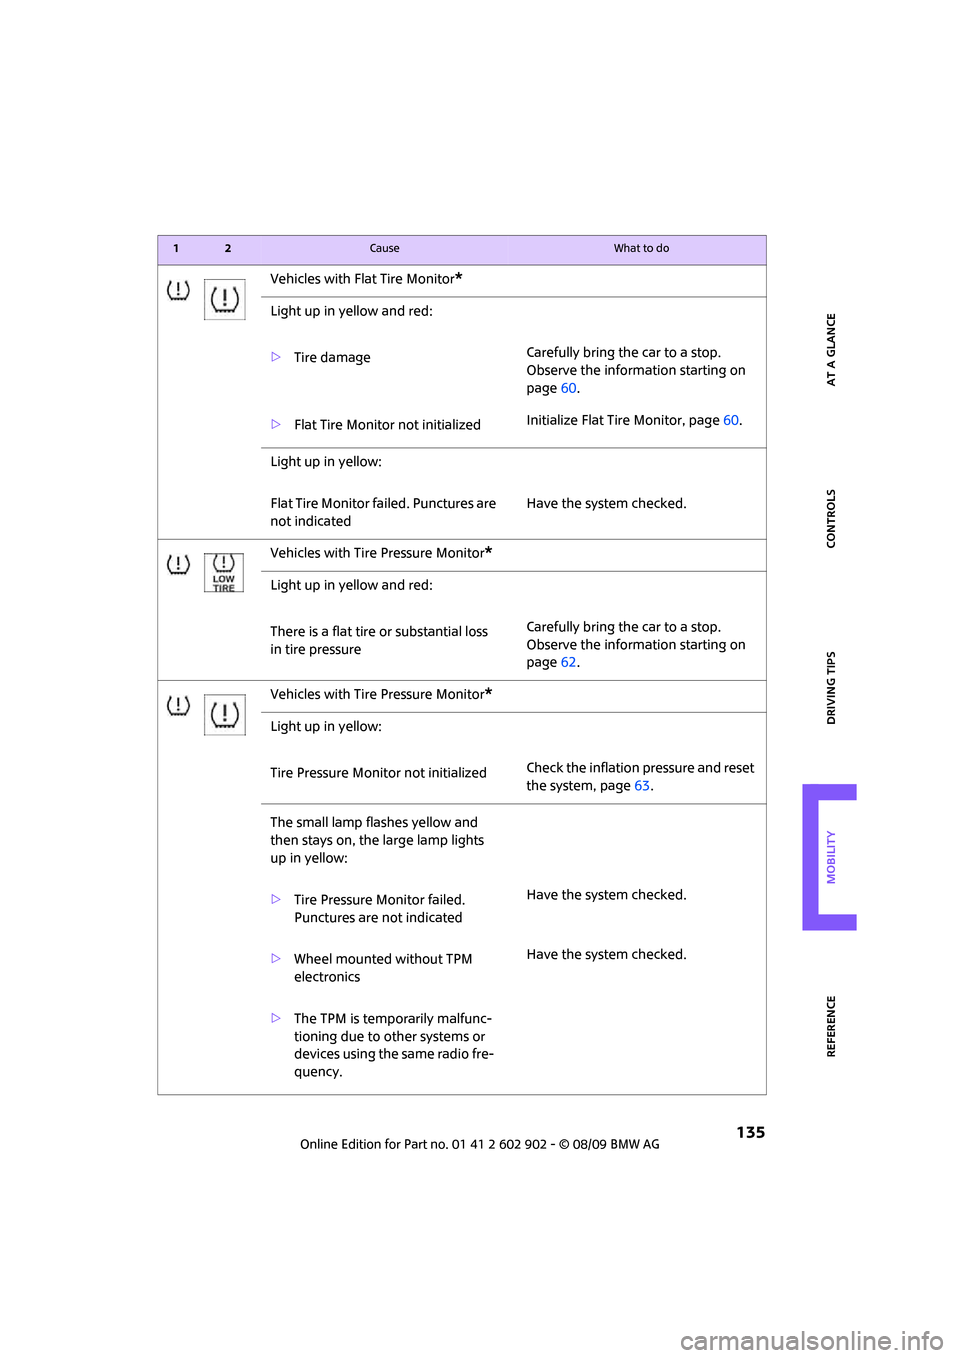
Vehicles with Flat Tire Monitor*
Light up in yellow and red:
>Tire damageCarefully bring the car to a stop.
Observe the information starting on
page60.
>Flat Tire Monitor not initializedInitialize Flat Tire Monitor, page60.
Light up in yellow:
Flat Tire Monitor failed. Punctures are
not indicatedHave the system checked.
Vehicles with Tire Pressure Monitor
*
Light up in yellow and red:
There is a flat tire or substantial loss
in tire pressureCarefully bring the car to a stop.
Observe the information starting on
page62.
Vehicles with Tire Pressure Monitor
*
Light up in yellow:
Tire Pressure Monitor not initializedCheck the inflation pressure and reset
the system, page63.
The small lamp flashes yellow and
then stays on, the large lamp lights
up in yellow:
>Tire Pressure Monitor failed.
Punctures are not indicatedHave the system checked.
>Wheel mounted without TPM
electronicsHave the system checked.
>The TPM is temporarily malfunc-
tioning due to other systems or
devices using the same radio fre-
quency.
12Cause What to do