ECU MINI Clubman 2011 Owner's Manual (Mini Connected)
[x] Cancel search | Manufacturer: MINI, Model Year: 2011, Model line: Clubman, Model: MINI Clubman 2011Pages: 256, PDF Size: 3.75 MB
Page 45 of 256

Transporting children safelyCONTROLS
43
Transporting children safely
The right place for
children
Do not leave children unattended in the
vehicle; otherwise, they could endanger
themselves and/or other persons by opening the
doors, for example.<
Children should always sit in the rear
Accident research has shown that the safest
place for children is on the rear seat.
Only transport children under the age of
13 or smaller than 5 ft/150 cm in the rear
in a child restraint system suitable for their age,
weight and size. Othe rwise, there is an
increased risk of injury in the event of an acci-
dent. <
Children 13 years of age or older must be buck-
led in with a safety belt as soon as there no
longer is any child restraint system that is appro-
priate for their age, size and weight.
Only install child seats in the rear when the
rear seat backrest is folded all the way
back and engaged. Otherwise, there is an
increased risk of injury in the event of an acci-
dent. <
Exception for front passenger seat
Front passenger airbags
Should it be necessary to use a child
restraint system on the front passenger
seat, the front and side airbags must be deacti-
vated. Otherwise, there is an increased risk of
injury to the child if th e airbags deploy, even if
the child is seated in a child restraint system. <
For more information on automatic deactivation
of the front passenger airbags, refer to page 79.
Child restraint systems,
installation
Observe the child restraint system manu-
facturer's instructions when selecting,
installing and using ch ild restraint systems.
Otherwise, the protective effect may be dimin-
ished. <
On the front passenger seat
After installing a child restraint system on
the front passenger seat, make sure that
the front and side airbags for the front passen-
ger are deactivated; otherwise, there is an
increased risk of injury if the airbags deploy. <
Seat position
Before installing a child restraint system, move
the front passenger seat as far back and up
* as
possible to obtain the be st possible position for
the belt. Do not change the seat position after
this.
Child seat security
All rear safety belts and the safety belt for the
front passenger can be prevented from being
pulled out in order to se cure child restraint sys-
tems.
Page 46 of 256

CONTROLSTransporting children safely
44
To lock the safety belt
1.Secure the child restraint system with the
belt.
2. Pull the belt strap all the way out.
3. Allow the belt strap to retract and pull it taut
against the child restraint system.
The safety belt is locked.
To unlock the safety belt
1. Open the belt buckle.
2. Remove the child restraint system.
3. Allow the safety belt strap to retract all the
way.
LATCH child restraint
fixing system
LATCH: Lower Anchors and Tethers for Children.
To install and use the LATCH child restraint
system, follow the operating and safety
instructions provided by the manufacturer of the
system; otherwise, the protective function of the
seat may be compromised. <
Anchor points for LATCH anchors
Before installing the child seat, pull the belt out
of the area for the child restraint fixing system.
The anchor points for the lower LATCH anchors
are located behind the labeled protective caps. Make sure t hat bo th l owe r LATCH ancho rs
are properly engaged and that the child
restraint system rests fi rmly against the seat
backrest; otherwise, the protective function of
the seat may be compromised. <
Child restraint system with tether strap
Use the tether strap anchors to secure
child restraint systems only; otherwise, the
anchors could be damaged. <
By way of example, the illustration shows the
cargo area in the MINI.
There are two additional anchors for child
restraint systems with tether straps, arrows.
When the vehicle is equi pped with a flat load
floor
*, the anchors are covered. Their positions
are labeled.
Placement of the tether strap
Make sure the upper retaining strap does
not run over sharp edges and is not
twisted as it passes to the top anchor. Other-
wise, the strap will not properly secure the child
restraint system in the event of an accident. <
Page 52 of 256
CONTROLSDriving
50
Sport program and manual mode M/S
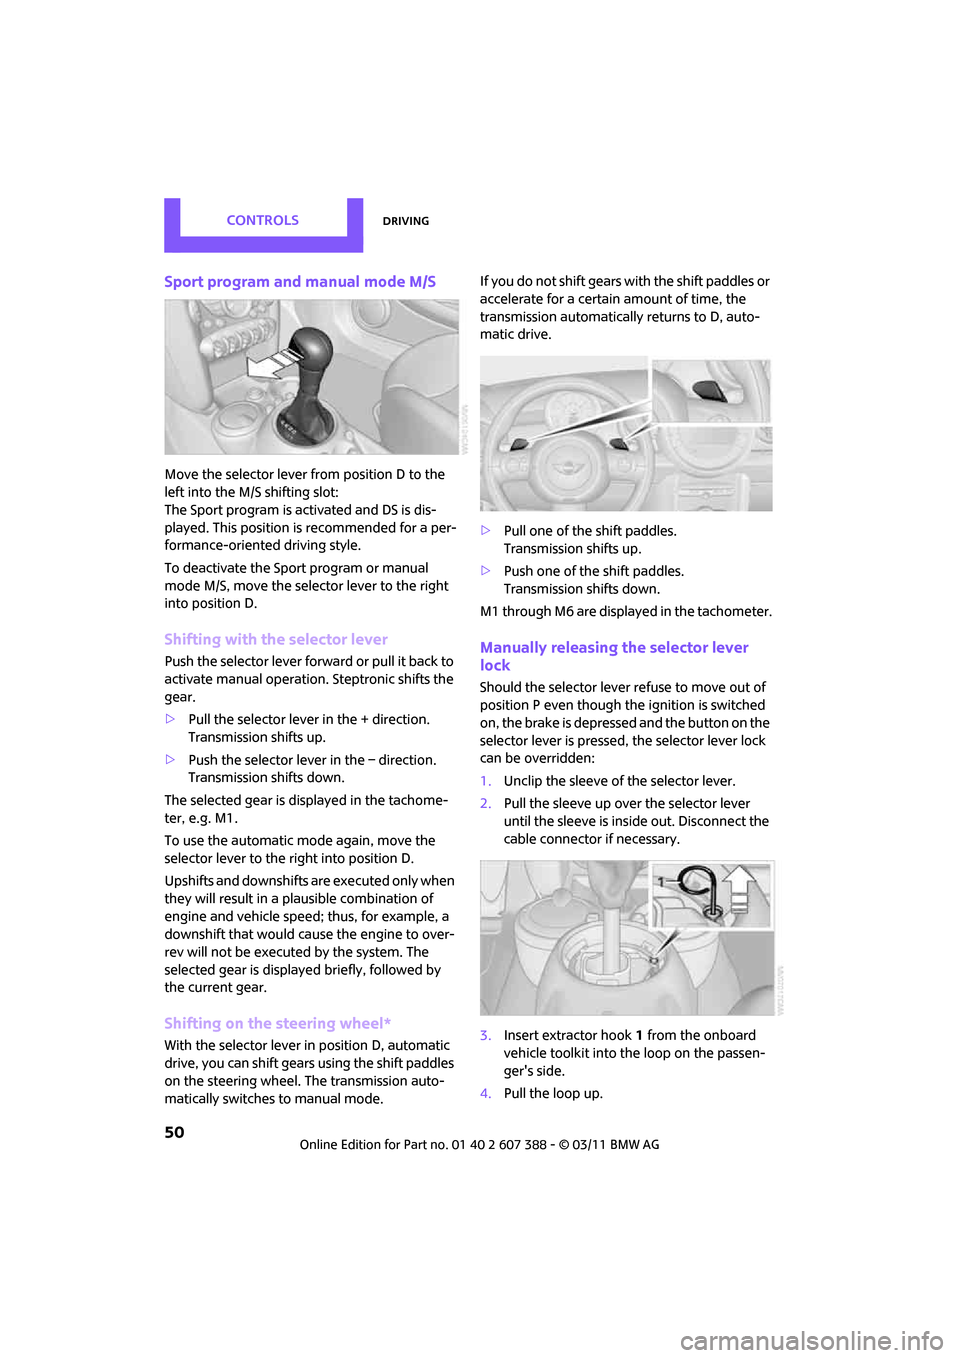
Move the selector lever from position D to the
left into the M/S shifting slot:
The Sport program is activated and DS is dis-
played. This position is recommended for a per-
formance-oriented driving style.
To deactivate the Sport program or manual
mode M/S, move the selector lever to the right
into position D.
Shifting with the selector lever
Push the selector lever forward or pull it back to
activate manual operation. Steptronic shifts the
gear.
> Pull the selector lever in the + direction.
Transmission shifts up.
> Push the selector leve r in the – direction.
Transmission shifts down.
The selected gear is displayed in the tachome-
ter, e.g. M1.
To use the automatic mode again, move the
selector lever to the right into position D.
Upshifts and downshifts are executed only when
they will result in a plausible combination of
engine and vehicle speed; thus, for example, a
downshift that would cause the engine to over-
rev will not be executed by the system. The
selected gear is displayed briefly, followed by
the current gear.
Shifting on the steering wheel*
With the selector lever in position D, automatic
drive, you can shift gears using the shift paddles
on the steering wheel. The transmission auto-
matically switches to manual mode. If you do not shift gears with the shift paddles or
accelerate for a certai
n amount of time, the
transmission automatically returns to D, auto-
matic drive.
> Pull one of the shift paddles.
Transmission shifts up.
> Push one of the shift paddles.
Transmission shifts down.
M1 through M6 are displayed in the tachometer.
Manually releasing the selector lever
lock
Should the selector lever refuse to move out of
position P even though the ignition is switched
on, the brake is depressed and the button on the
selector lever is pressed, the selector lever lock
can be overridden:
1. Unclip the sleeve of the selector lever.
2. Pull the sleeve up over the selector lever
until the sleeve is insi de out. Disconnect the
cable connector if necessary.
3. Insert extractor hook 1 from the onboard
vehicle toolkit into the loop on the passen-
ger's side.
4. Pull the loop up.
Page 71 of 256

Technology for driving comfort and safetyCONTROLS
69
Driving stability control
systems
Your MINI has a number of systems that help to
maintain the vehicle's st ability even in adverse
driving conditions.
The laws of physics cannot be repealed,
even with driving stab ility control systems.
An appropriate driving style always remains the
responsibility of the driver. Therefore do not
reduce the additional safety margin by engaging
in hazardous driving thereby running the risk of
an accident. <
Antilock Brake System ABS
ABS prevents locking of the wheels during brak-
ing. Safe steering respon se is maintained even
during full braking. Act ive safety is thus
increased.
Braking safely, refer to page 99.
ABS is operational every time you start the
engine.
Cornering Brake Control CBC
Driving stability and steering characteristics are
further enhanced while braking in turns or dur-
ing a lane change.
Electronic brake-forc e distribution EBV
The system controls the brake pressure in the
rear wheels to ensure stable braking behavior.
Brake Assist
Rapidly depressing the brake causes this system
to automatically develop maximum braking
force. Thus, the system helps keep braking dis-
tance to a minimum. At the same time, all the
benefits provided by ABS are exploited.
Do not reduce the pressure on the brake for the
duration of the full braking application.
Dynamic Stability Control DSC
The concept
DSC prevents the driving wheels from losing
traction when you pull away from rest or accel-
erate.
DSC also detects unstable driving conditions
such as when the vehicle' s rear end fishtails or
the vehicle is sliding on its front wheels. In these
cases, DSC helps the vehicle maintain a safe
course within physical limits by reducing engine
output and through brakin g actions at the indi-
vidual wheels.
Every time that the engine is started, the DSC is
ready to operate.
Deactivating DSC
Press the button until the DSC OFF indicator light
on the speedometer is on and DSC OFF is dis-
played on the tachometer. DSC is deactivated.
Stabilizing and pr opulsion promoting actions are
no longer executed.
When driving with snow chains or to 'rock free'
in snow, it can be helpfu l to switch off DSC for a
brief period.
To increase vehicle stability, activate DSC again
as soon as possible.
Activating DSC
Press the button again: the DSC indicator lamps
in the display elements go out.
Page 80 of 256
CONTROLSTechnology for driving comfort and safety
78
Airbags
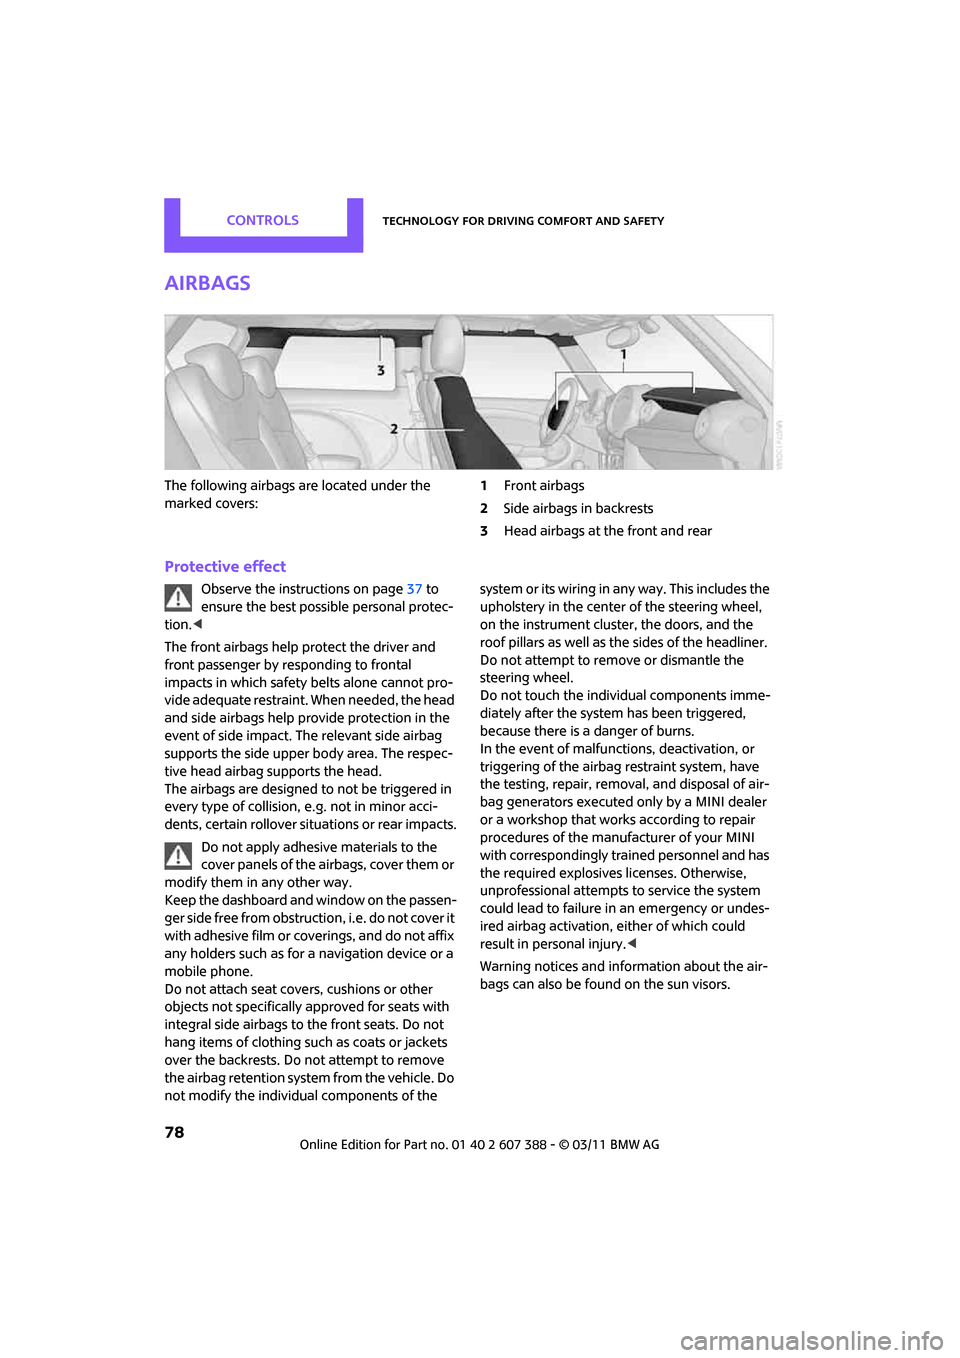
The following airbags are located under the
marked covers:1
Front airbags
2 Side airbags in backrests
3 Head airbags at the front and rear
Protective effect
Observe the instructions on page 37 to
ensure the best possible personal protec-
tion. <
The front airbags help protect the driver and
front passenger by re sponding to frontal
impacts in which safety belts alone cannot pro-
vide adequate restraint. When needed, the head
and side airbags help provide protection in the
event of side impact. The relevant side airbag
supports the side upper body area. The respec-
tive head airbag supports the head.
The airbags are designed to not be triggered in
every type of collision, e.g. not in minor acci-
dents, certain rollover situations or rear impacts.
Do not apply adhesive materials to the
cover panels of the airbags, cover them or
modify them in any other way.
Keep the dashboard and window on the passen-
g e r s i d e f r e e f r o m o b s t r u c t i o n , i . e . d o n o t c o v e r i t
with adhesive film or co verings, and do not affix
any holders such as for a navigation device or a
mobile phone.
Do not attach seat cove rs, cushions or other
objects not specifically approved for seats with
integral side airbags to the front seats. Do not
hang items of clothing su ch as coats or jackets
over the backrests. Do not attempt to remove
the airbag retention system from the vehicle. Do
not modify the individual components of the syste m o r its w iring in any way. Th is includ es the
upholstery in the center of the steering wheel,
on the instrument cluster, the doors, and the
roof pillars as well as the sides of the headliner.
Do not attempt to remove or dismantle the
steering wheel.
Do not touch the individual components imme-
diately after the system has been triggered,
because there is a danger of burns.
In the event of malfunctions, deactivation, or
triggering of the airbag
restraint system, have
the testing, repair, remova l, and disposal of air-
bag generators executed only by a MINI dealer
or a workshop that work s according to repair
procedures of the manufacturer of your MINI
with correspondingly trained personnel and has
the required explosives licenses. Otherwise,
unprofessional attempts to service the system
could lead to failure in an emergency or undes-
ired airbag activation, either of which could
result in personal injury. <
Warning notices and information about the air-
bags can also be found on the sun visors.
Page 92 of 256

CONTROLSPractical interior accessories
90
Practical interior accessories
Integrated universal
remote control*
The concept
The integrated universal remote control can
replace as many as three hand-held transmitters
for various remote-controlled devices, such as
garage and gate openers and lighting systems.
The integrated universal remote control regis-
ters and stores signals from the original hand-
held transmitters.
The signal of an original hand-held transmitter
can be programmed on one of the three mem-
ory buttons 1. The system in question can then
be operated by means of the programmed
memory button 1. The LED 2 flashes to confirm
transmission of the signal.
If you decide to sell your vehicle one day, in the
interest of your own security, remember to clear
the stored programs before the vehicle leaves
your possession, page 91.
To prevent possible damage or injury,
before programming or using the inte-
grated universal remote control, always inspect
the immediate area to make certain that no
people, animals or object s are within the travel
range of the device. Comply also with the safety
instructions supplied with the original hand-held
transmitter. <
Checking compatibility
If this symbol a ppears on the package
or in the instructions supplied with the
original hand-held transmitter, you can
assume that the radio remote control device is
compatible with the integrated universal remote
control.
For additional informatio n, please contact your
MINI dealer or call: 1-800-355-3515.
You can also obtain info rmation on the Internet
at: www.homelink.com
HomeLink is a registered trademark of Johnson
Controls, Inc.
Programming
1
Memory buttons
2 LED
Fixed-code hand-held transmitters
1.Switch on the ignition, page 46.
2. When starting operation for the first time:
press both outer memory buttons 1 for
approx. 20 seconds until the LED 2 flashes
rapidly. All stored programs are cleared.
3. Hold the original hand-held transmitter at a
distance of approx. 1in/2.5cm to 3in/8cm
from the memory buttons 1.
The required distance between the
hand-held transmitter and the mem-
ory buttons 1 depends on the system of the
respective original hand-held transmitter
used. <
4. Simultaneously press the transmit key on
the original hand-hel d transmitter and the
desired memory button 1 on the integrated
universal remote control. The LED 2 flashes
slowly at first. As soon as the LED 2 flashes
rapidly, release both buttons. If the LED 2
does not flash rapidly after approx.
60 seconds, alter the distance and repeat
this step.
Page 101 of 256
Things to remember when drivingDRIVING TIPS
99
Hydroplaning
When driving on wet or slushy roads,
reduce road speed. If you do not, a wedge
of water can form betw een tires and road sur-
face. This situation, known as hydroplaning, can
cause partial or complete loss of tire contact
with the road surface, so that the car cannot be
steered or braked properly. <
The risk of hydroplaning increases with declining
tread depth on the tires, refer also to Tread
depth on page 195.
Driving through water
Drive through water on the road only if it is
not deeper than 1 ft/30 cm, and then only
at walking speed at the most. Otherwise, the
vehicle's engine, the electrical systems and the
transmission may be damaged. <
Parking brake on inclines
On inclines, do not hold the vehicle with
the clutch; use the parking brake. Other-
wise, greater clutch wear will result. <
For information on drivin g off using Hill Assist,
refer to page 71.
Braking safely
Your MINI is equipped with ABS. If you are in a
situation which requires full braking, it is best to
brake using maximum brake pressure. Since the
vehicle maintains steeri ng responsiveness, you
can still avoid possible obstacles with a mini-
mum of steering effort.
The pulsation of the brake pedal, together with
the sound of hydraulic regulation, indicates that
ABS is functioning properly.
Objects in the move ment range of the
pedals
Keep floor mats, carpet, and other objects
out of the movement range of the pedals;
otherwise, they may inhibit the function of the
pedals during driving.
Do not place additional floor mats onto an exist-
ing one or onto other objects. Only use floor mats that
have been approved for
the vehicle and can be appropriately fastened.
Make sure that the floo r mats are securely fas-
tened again after they have been removed, e.g.
for cleaning. <
Driving in wet conditions
When roads are wet or ther e is heavy rain, briefly
exert gentle pressure on the brake pedal every
few miles. Monitor traffic conditions to ensure
that this maneuver does not endanger other
road users. The heat generated in this process
helps dry the pads and rotors to ensure that
Then full braking force will be immediately avail-
able when it is needed.
Hills
To prevent overheatin g and the resulting
reduced efficiency of the brake system,
drive long or steep downhill gradients in the
gear in which the least braking is required. Even
light but consistent brake pressure can lead to
high temperatures, brake wear and possibly
even brake failure. <
You can increase the engine's braking effect by
shifting down, all the way to first gear if neces-
sary. This strategy helps you avoid placing
excessive loads on the brake system. Downshift-
ing in manual mo de of the automatic transmis-
sion, page 50.
Never drive with the clutch held down,
with the transmission in neutral or with
the engine switched off; otherwise, engine brak-
ing action will not be present or there will be no
power assistance to th e brakes or steering.
Never allow floor mats, carpets or any other
objects to protrude into the area around the
pedals; otherwise, pedal function could be
impaired. <
Corrosion on brake rotors
When the vehicle is driven only occasionally,
during extended periods when the vehicle is not
used at all, and in operating conditions where
brake applications are less frequent, there is an
Page 105 of 256

Things to remember when drivingDRIVING TIPS
103
Stowing cargo
>Position heavy objects as low and as far for-
ward as possible, ideally directly behind the
rear seat backrests.
> Cover sharp edges and corners.
> For very heavy cargo when the rear seat is
not occupied, secure each safety belt in the
respective opposite buckle.
> Do not stack higher than the top edge of the
backrests.
> Use the cargo net, refer to page 101. Ensure
that no objects can penetrate through the
net.
Securing cargo
By way of example, the illustration shows the
cargo compartment in the MINI.
> Secure smaller and lighter items using
retaining or draw straps
*.
> Heavy-duty cargo straps
* for securing larger
and heavier objects ar e available at your
MINI dealer. Four lashing eyes are provided
for attaching the cargo straps. Two of them
are located on the forward wall of the cargo
area. Comply with the information enclosed with
the load-securing devices.
Always position and secure the cargo as
described above, so that it cannot endan-
ger the car's occupants, for example if sudden
braking or swerves are necessary.
Do not exceed the approved gross vehicle
weight and axle loads, page 228; otherwise, the
vehicle's operating safety is no longer assured
and the vehicle will not be in compliance with
the construction and use regulations.
Heavy or hard objects should not be carried
loose inside the car, since they could be thrown
around, for example as a re sult of heavy braking,
sudden swerves, etc., and endanger the occu-
pants. Do not secure ca rgo using the fastening
points for the tether strap, page 44; they may
become damaged. <
Roof-mounted luggage
rack*
A special rack system is available as an option for
your MINI. Your MINI dealer will be glad to
advise you. Comply with the installation instruc-
tions supplied with the rack system.
Mounting points
By way of example, the illustration shows the
roof of the MINI.
Remove the cover panel.
Page 106 of 256
DRIVING TIPSThings to remember when driving
104
Loading roof-mounted luggage rack
Because roof racks raise the vehicle's center of
gravity when loaded, they have a major effect
on vehicle handling and steering response.
You should therefore always remember not to
exceed the approved roof load capacity, the
approved gross vehicle weight or the axle loads
when loading the rack.
You can find the applicable data under Weights
on page 228.
The roof load must be distributed uniformly and
should not be too large in area. Heavy items
should always be placed at the bottom.
When loading, make sure that there is sufficient
space for the movement of the glass roof.
Fasten roof-mounted cargo correctly and
securely to prevent it from shifting or falling off
during the trip.
Drive smoothly. Avoid su dden acceleration and
braking maneuvers, and take corners gently.
Saving fuel
Fuel consumption depends on a number of dif-
ferent factors. The implementation of certain
measures, your driving style and regular mainte-
nance can have an influence on fuel consump-
tion and on the environmental impact.
Remove unnecessary cargo
Additional weight incr eases fuel consumption.
Remove attached parts no longer in use
Remove auxiliary mirrors, roof- or rear-mounted
luggage racks whenever you are not using
them.
Attached parts on the ve hicle affect its aero-
dynamics and increase fuel consumption.
Check tire inflation pressure regularly
Check and, if necessary, correct tire inflation
pressure at least twice a month and before start-
ing on a long trip. Low inflation pressure increases rolling resis-
tance and thus leads to greater fuel consump-
tion and tire wear.
Drive off immediately
Do not wait for the engine to warm up while the
vehicle remains stationary. Start driving right
away, but at moderate engi
ne speeds. This is the
fastest way for the cold engine to reach its oper-
ating temperature.
Think ahead while driving
Avoid unnecessary acceleration and braking by
maintaining a suitable di stance to the vehicle
driving ahead.
Driving smoothly and an ticipating impending
traffic situations reduces fuel consumption.
Avoid high engine speeds
Use first gear only for driving off. In second and
higher gears, accelerate smoothly to a suitable
engine and road speed. In doing so, avoid high
engine speeds and shift up early.
When you reach your desired traveling speed,
shift to the highest suit able gear and drive at
constant speed.
As a rule: driving at lo w engine speeds lowers
fuel consumption and reduces wear.
Coasting
When approaching a red traffic light, take your
foot off the accelerator and let the vehicle coast
to a halt in the highest suitable gear.
On a downhill gradient, take your foot off the
accelerator and let the vehicle coast in a suitable
gear.
Fuel supply is shut off automatically when the
vehicle is coasting.
Switch off the engine during lengthy
stops
Switch off the engine when stopping for lengthy
periods, e.g. at traffic li ghts, railroad crossings or
in traffic jams.
Page 157 of 256
Hands-free device BluetoothCommunications
155
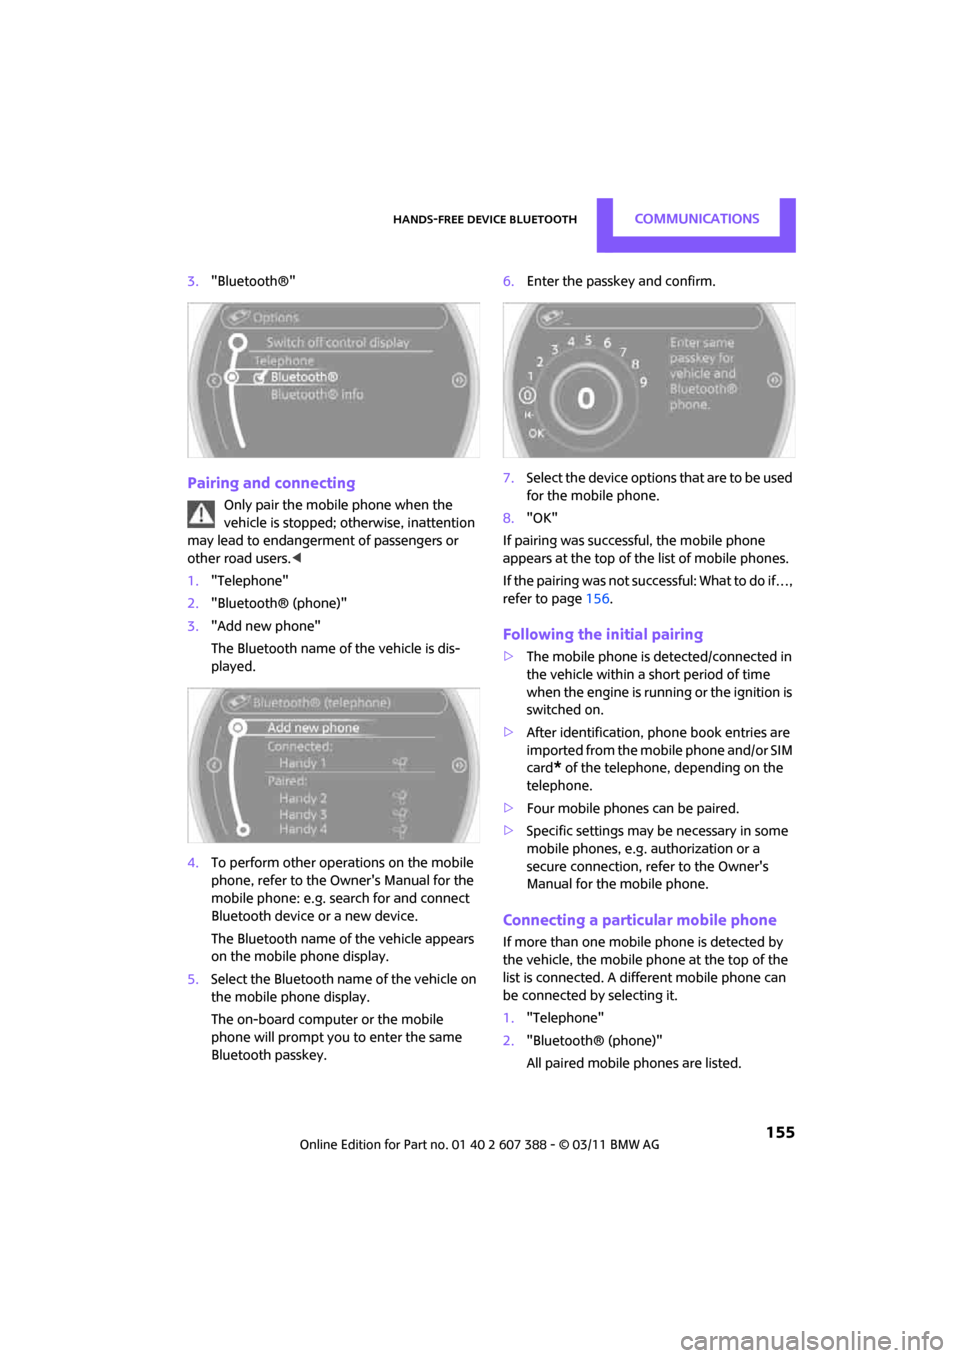
3."Bluetooth®"
Pairing and connecting
Only pair the mobile phone when the
vehicle is stopped; otherwise, inattention
may lead to endangerment of passengers or
other road users. <
1. "Telephone"
2. "Bluetooth® (phone)"
3. "Add new phone"
The Bluetooth name of the vehicle is dis-
played.
4. To perform other operations on the mobile
phone, refer to the Ow ner's Manual for the
mobile phone: e.g. se arch for and connect
Bluetooth device or a new device.
The Bluetooth name of the vehicle appears
on the mobile phone display.
5. Select the Bluetooth name of the vehicle on
the mobile phone display.
The on-board computer or the mobile
phone will prompt you to enter the same
Bluetooth passkey. 6.
Enter the passkey and confirm.
7. Select the device options that are to be used
for the mobile phone.
8. "OK"
If pairing was successful, the mobile phone
appears at the top of the list of mobile phones.
If the pairing was not successful: What to do if…,
refer to page 156.
Following the initial pairing
>The mobile phone is detected/connected in
the vehicle within a short period of time
when the engine is running or the ignition is
switched on.
> After identification, phone book entries are
imported from the mobile phone and/or SIM
card
* of the telephone, depending on the
telephone.
> Four mobile phones can be paired.
> Specific settings may be necessary in some
mobile phones, e.g. authorization or a
secure connection, re fer to the Owner's
Manual for the mobile phone.
Connecting a particular mobile phone
If more than one mobile phone is detected by
the vehicle, the mobile phone at the top of the
list is connected. A diff erent mobile phone can
be connected by selecting it.
1. "Telephone"
2. "Bluetooth® (phone)"
All paired mobile phones are listed.