engine MINI Clubman 2011 Owner's Guide
[x] Cancel search | Manufacturer: MINI, Model Year: 2011, Model line: Clubman, Model: MINI Clubman 2011Pages: 196, PDF Size: 3.08 MB
Page 86 of 196

CONTROLSPractical interior accessories
84
Canada: if the LED is not flashing rapidly
after 60 seconds, chan ge the distance and
repeat the step or, if the programming was
interrupted by the hand-held transmitter,
press and hold the memory button and
press the button on the hand-held transmit-
ter for 2 seconds and release several times.
5. To program other original hand-held trans-
mitters, repeat steps 3 and 4.
The corresponding memory button1 is now
programmed with the signal of the original
hand-held transmitter.
You can operate the system with the engine
running or with the ignition switched on.
If the system fails to function even after
repeated programming, check whether
the original hand-held transmitter uses an alter-
nating-code system. To do so, either read the
instructions for the orig inal hand-held transmit-
ter or hold down the programmed memory
button 1 of the integrated universal remote con-
trol. If the LED 2 for the integrated universal
remote control quickly flashes for a short period
of time and is then co ntinuously on, then the
original hand-held transm itter is equipped with
an alternating-code system . If it uses an alter-
nating-code system, program the memory
buttons 1 as described under Alternating-code
hand-held transmitters. <
Alternating-code hand-held
transmitters
To program the integrat ed universal remote
control, consult the oper ating instructions for
the device to be set. You will find information
there on the possibilities for synchronization or
programming of additional hand-held transmit-
ters.
When programming hand-held transmitters that
employ an alternating code, please observe the
following supplementary instructions:
Programming will be easier with the aid of
a second person. < 1.
Park your vehicle within the range of the
remote-controlled device.
Do not exceed the 164 ft/50 m range
of the remote-controlled device.
2. Program the integrated universal remote
control as described above in the section
Fixed-code hand-held transmitters.
3. Locate the button on the receiver of the
device to be set, e.g. on the drive unit.
4. Press the button on the receiver of the
device to be set. After Step 4, there remain
approx. 30 seconds for Step 5.
5. Press and hold the programmed memory
button 1 on the integrated universal remote
control for approx. 3 seconds.
If necessary, repeat the step up to three
times.
The corresponding memory button1 is now
programmed with the signal of the original
hand-held transmitter.
Clearing stored programs
Press both outer memory buttons 1 for approx.
20 seconds until the LED 2 flashes: all stored
programs are cleared.
It is not possible to clear individual programs.
Reassigning individual programs
1. Hold the original hand-held transmitter at a
distance of approx. 1in/2.5cm to 3in/8cm
from the memory buttons 1.
The required distance between the
hand-held transmitter and the mem-
ory buttons 1 depends on the system of the
respective original hand-held transmitter
used. <
2. Press the desired memory button 1 of the
integrated universal remote control.
If the LED 2 flashes slowly after approx.
20 seconds, press the transmit key of the
original hand-held transmitter and release
both buttons as soon as the LED 2 flashes
rapidly.
Page 89 of 196
Practical interior accessoriesCONTROLS
87
Cupholders and ashtray*
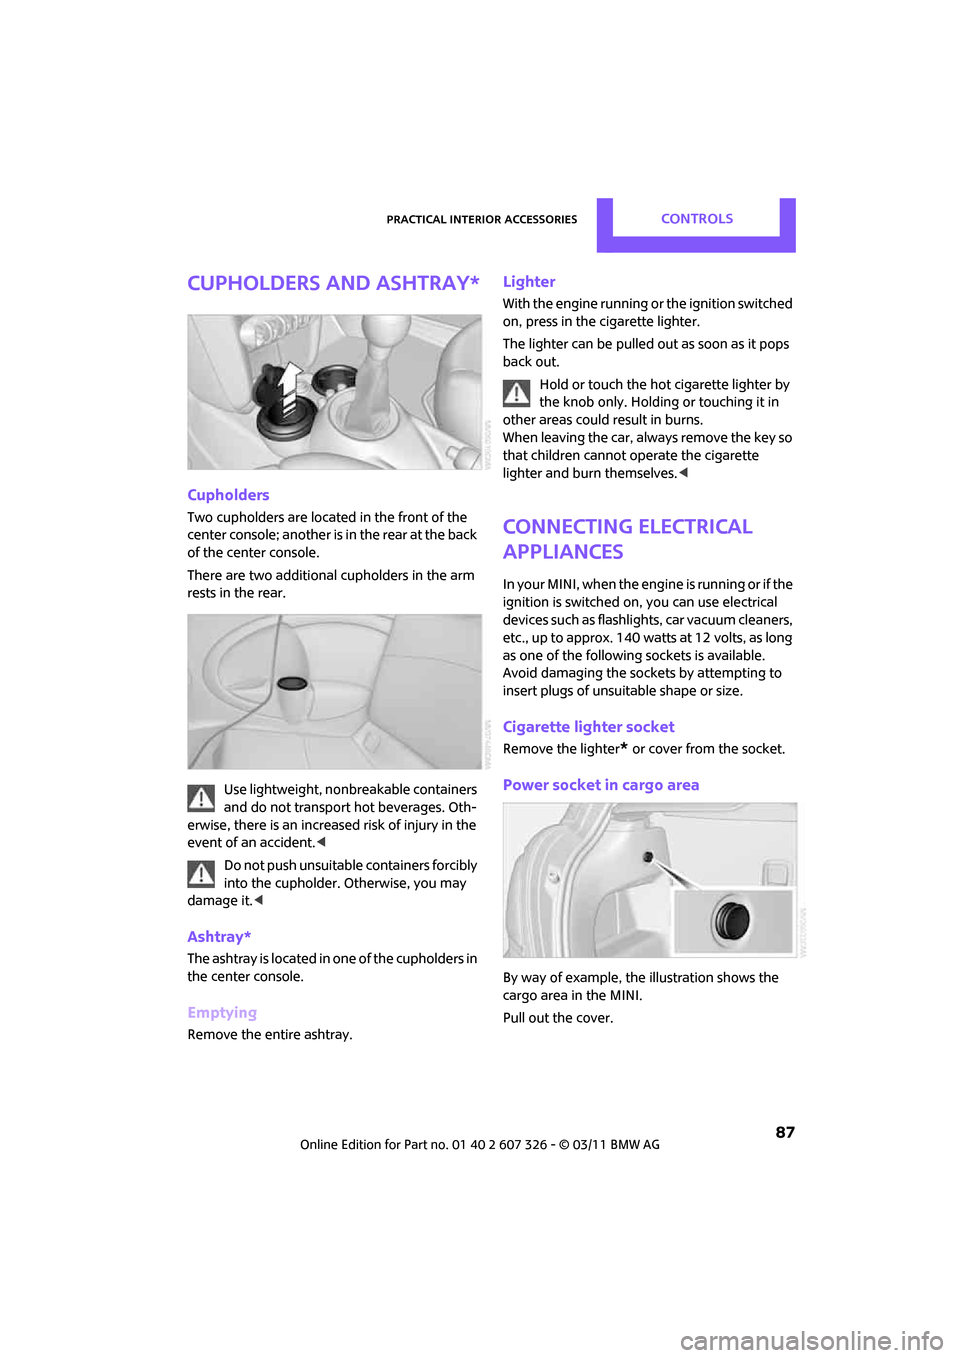
Cupholders
Two cupholders are located in the front of the
center console; another is in the rear at the back
of the center console.
There are two additional cupholders in the arm
rests in the rear.Use lightweight, nonbreakable containers
and do not transport hot beverages. Oth-
erwise, there is an increased risk of injury in the
event of an accident. <
Do not push unsuitable containers forcibly
into the cupholder. Otherwise, you may
damage it. <
Ashtray*
The ashtray is located in one of the cupholders in
the center console.
Emptying
Remove the entire ashtray.
Lighter
With the engine running or the ignition switched
on, press in the cigarette lighter.
The lighter can be pulled out as soon as it pops
back out.
Hold or touch the hot cigarette lighter by
the knob only. Holding or touching it in
other areas could re sult in burns.
When leaving the car, always remove the key so
that children cannot operate the cigarette
lighter and burn themselves. <
Connecting electrical
appliances
In your MINI, when the engine is running or if the
ignition is switched on, you can use electrical
devices such as flashlights, car vacuum cleaners,
etc., up to approx. 140 watts at 12 volts, as long
as one of the following sockets is available.
Avoid damaging the sockets by attempting to
insert plugs of unsui table shape or size.
Cigarette lighter socket
Remove the lighter* or cover from the socket.
Power socket in cargo area
By way of example, the illustration shows the
cargo area in the MINI.
Pull out the cover.
Page 92 of 196

DRIVING TIPSThings to remember when driving
90
Things to remember when driving
Break-in period
Moving parts need breaking-in time to adjust to
each other. Please follow the instructions below
in order to achieve the optimal service life and
economy of operation for your vehicle.
Engine and differential
Always obey all official speed limits.
Up to 1,200 miles/2,000 km
Drive at varying engine and road speeds, but do
not exceed the following:
> Gasoline engine
4,500 rpm or 100 mph/160 km/h
Avoid full-throttle operation and use of the
transmission's kickdown mode.
After driving 1,200 miles/2,000 km
Engine and vehicle speeds can be gradually
increased.
Tires
Due to technical factors associated with their
manufacture, tires do not achieve their full trac-
tion potential until after an initial break-in
period. Therefore, drive cautiously during the
first 200 miles/300 km.
Brake system
Brakes require an initial break-in period of
approx. 300 miles/500 km to achieve optimized
contact and wear patterns between brake pads
and rotors. Drive cautiously during this break-in
period.
Clutch
The function of the clutch reaches its optimal
level only after a distan ce driven of approx.
300 miles/500 km. During this break-in period,
engage the clutch gently.
Following part replacement
The same break-in procedures should be
observed if any of the components mentioned
above have to be renewed in the course of the
vehicle's operating life.
General driving notes
Close Split Rear Barn Doors
Only drive with the Split Rear Barn Doors
closed. Failure to do so may endanger
passengers or other road users or may damage
the vehicle in the event of an accident or a brak-
ing and evasive maneuver. In addition, exhaust
gas may flow into the passenger compart-
ment. <
If special circumstances make it absolutely nec-
essary to drive with the Split Rear Barn Doors
open:
1. Close all windows and the glass roof
*.
2. Switch off the recirculated-air mode and sig-
nificantly increase the air flow rate of the air
conditioner or automa tic climate control,
page 79 or 81.
Hot exhaust system
As in all vehicles, extremely high tempera-
tures are generated on the exhaust sys-
tem. Do not remove the heat shields installed
adjacent to various sections of the exhaust sys-
tem, and never apply undercoating to them.
Make sure that when driving, idling or when
parking, no easily flamma ble materials, such as
hay, leaves, grass, etc. come into contact with
the hot exhaust system. Such contact could lead
to a fire, with the risk of serious personal injuries
and property damage. Do not touch hot exhaust
tail pipes. Otherwise, there is a risk of burns. <
Page 93 of 196

Things to remember when drivingDRIVING TIPS
91
Hydroplaning
When driving on wet or slushy roads,
reduce road speed. If you do not, a wedge
of water can form betw een tires and road sur-
face. This situation, known as hydroplaning, can
cause partial or complete loss of tire contact
with the road surface, so that the car cannot be
steered or braked properly. <
The risk of hydroplaning increases with declining
tread depth on the tires, refer also to Tread
depth on page 133.
Driving through water
Drive through water on the road only if it is
not deeper than 1 ft/30 cm, and then only
at walking speed at the most. Otherwise, the
vehicle's engine, the electrical systems and the
transmission may be damaged. <
Parking brake on inclines
On inclines, do not hold the vehicle with
the clutch; use the parking brake. Other-
wise, greater clutch wear will result. <
For information on drivin g off using Hill Assist,
refer to page 63.
Braking safely
Your MINI is equipped with ABS. If you are in a
situation which requires full braking, it is best to
brake using maximum brake pressure. Since the
vehicle maintains steeri ng responsiveness, you
can still avoid possible obstacles with a mini-
mum of steering effort.
The pulsation of the brake pedal, together with
the sound of hydraulic regulation, indicates that
ABS is functioning properly.
Objects in the move ment range of the
pedals
Keep floor mats, carpet, and other objects
out of the movement range of the pedals;
otherwise, they may inhibit the function of the
pedals during driving.
Do not place additional floor mats onto an exist-
ing one or onto other objects. Only use floor mats that
have been approved for
the vehicle and can be appropriately fastened.
Make sure that the floo r mats are securely fas-
tened again after they have been removed, e.g.
for cleaning. <
Driving in wet conditions
When roads are wet or ther e is heavy rain, briefly
exert gentle pressure on the brake pedal every
few miles. Monitor traffic conditions to ensure
that this maneuver does not endanger other
road users. The heat generated in this process
helps dry the pads and rotors to ensure that
Then full braking force will be immediately avail-
able when it is needed.
Hills
To prevent overheatin g and the resulting
reduced efficiency of the brake system,
drive long or steep downhill gradients in the
gear in which the least braking is required. Even
light but consistent brake pressure can lead to
high temperatures, brake wear and possibly
even brake failure. <
You can increase the engine's braking effect by
shifting down, all the way to first gear if neces-
sary. This strategy helps you avoid placing
excessive loads on the brake system. Downshift-
ing in manual mo de of the automatic transmis-
sion, page 45.
Never drive with the clutch held down,
with the transmission in neutral or with
the engine switched off; otherwise, engine brak-
ing action will not be present or there will be no
power assistance to th e brakes or steering.
Never allow floor mats, carpets or any other
objects to protrude into the area around the
pedals; otherwise, pedal function could be
impaired. <
Corrosion on brake rotors
When the vehicle is driven only occasionally,
during extended periods when the vehicle is not
used at all, and in operating conditions where
brake applications are less frequent, there is an
Page 94 of 196
DRIVING TIPSThings to remember when driving
92
increased tendency for corrosion to form on
rotors, while contaminan ts accumulate on the
brake pads. This occurs because the minimum
pressure which must be exerted by the pads
during brake applications to clean the rotors is
not reached.
Should corrosion form on the brake rotors, the
brakes will tend to respond with a pulsating
effect that even extended application will fail to
cure.
When the vehicle is parked
Condensation forms while the automatic climate
control is in operation, and then exits under the
vehicle. Traces of condensed water under the
vehicle are therefore normal.
In the MINI Cooper S, the coolant pump may
continue to run for some time after the engine is
switched off. This will generate noise in the
engine compartment.
Cargo loading
To avoid loading the tires beyond their
approved carrying ca pacity, never over-
load the vehicle. Overloading can lead to over-
heating and increases the rate at which damage
develops inside the tires. The ultimate result can
assume the form of a sudden blowout. <
Avoid fluid spills in the cargo area as they
could damage the vehicle. <
Luggage compartment roller cover
Do not place heavy or hard objects on the
luggage compartment roller cover. If you
do so, they may already po se a danger to vehicle
occupants during braking or evasive maneuvers.
Do not allow the luggage compartment roll-up
cover to snap back, ot herwise it can be dam-
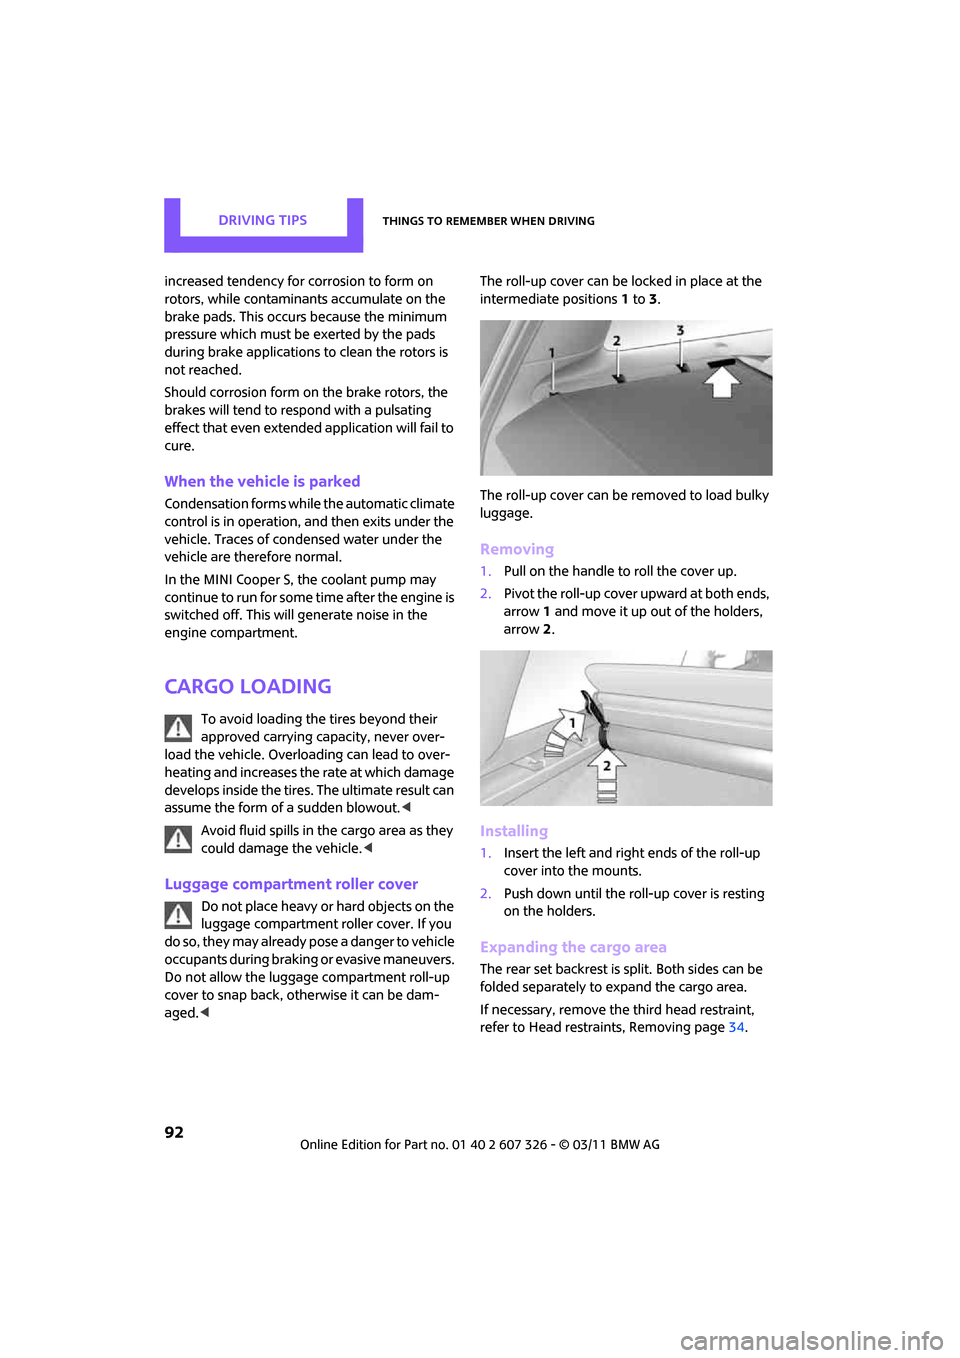
aged. < The roll-up cover can be locked in place at the
intermediate positions
1to 3.
The roll-up cover can be removed to load bulky
luggage.
Removing
1. Pull on the handle to roll the cover up.
2. Pivot the roll-up cover upward at both ends,
arrow 1 and move it up out of the holders,
arrow 2.
Installing
1. Insert the left and right ends of the roll-up
cover into the mounts.
2. Push down until the roll-up cover is resting
on the holders.
Expanding the cargo area
The rear set backrest is split. Both sides can be
folded separately to expand the cargo area.
If necessary, remove th e third head restraint,
refer to Head restraints, Removing page 34.
Page 98 of 196
DRIVING TIPSThings to remember when driving
96
Loading roof-mounted luggage rack
Because roof racks raise the vehicle's center of
gravity when loaded, they have a major effect
on vehicle handling and steering response.
You should therefore always remember not to
exceed the approved roof load capacity, the
approved gross vehicle weight or the axle loads
when loading the rack.
You can find the applicable data under Weights
on page 178.
The roof load must be distributed uniformly and
should not be too large in area. Heavy items
should always be placed at the bottom.
When loading, make sure that there is sufficient
space for the movement of the glass roof.
Fasten roof-mounted cargo correctly and
securely to prevent it from shifting or falling off
during the trip.
Drive smoothly. Avoid su dden acceleration and
braking maneuvers, and take corners gently.
Saving fuel
Fuel consumption depends on a number of dif-
ferent factors. The implementation of certain
measures, your driving style and regular mainte-
nance can have an influence on fuel consump-
tion and on the environmental impact.
Remove unnecessary cargo
Additional weight incr eases fuel consumption.
Remove attached parts no longer in use
Remove auxiliary mirrors, roof- or rear-mounted
luggage racks whenever you are not using
them.
Attached parts on the ve hicle affect its aerody-
namics and increase fuel consumption.
Check tire inflation pressure regularly
Check and, if necessary, correct tire inflation
pressure at least twice a month and before start-
ing on a long trip. Low inflation pressure increases rolling resis-
tance and thus leads to greater fuel consump-
tion and tire wear.
Drive off immediately
Do not wait for the engine to warm up while the
vehicle remains stationary. Start driving right
away, but at moderate engi
ne speeds. This is the
fastest way for the cold engine to reach its oper-
ating temperature.
Think ahead while driving
Avoid unnecessary acceleration and braking by
maintaining a suitable di stance to the vehicle
driving ahead.
Driving smoothly and an ticipating impending
traffic situations reduces fuel consumption.
Avoid high engine speeds
Use first gear only for driving off. In second and
higher gears, accelerate smoothly to a suitable
engine and road speed. In doing so, avoid high
engine speeds and shift up early.
When you reach your desired traveling speed,
shift to the highest suit able gear and drive at
constant speed.
As a rule: driving at lo w engine speeds lowers
fuel consumption and reduces wear.
Coasting
When approaching a red traffic light, take your
foot off the accelerator and let the vehicle coast
to a halt in the highest suitable gear.
On a downhill gradient, take your foot off the
accelerator and let the vehicle coast in a suitable
gear.
Fuel supply is shut off automatically when the
vehicle is coasting.
Switch off the engine during lengthy
stops
Switch off the engine when stopping for lengthy
periods, e.g. at traffic li ghts, railroad crossings or
in traffic jams.
Page 116 of 196
COMMUNICATIONSTelephone
114
10Switching displays 118
> "PHONE": telephone
> "COMP": computer
> "CONFIG": adjusting
11 Radio on/off, volume
>Press: to switch radio on/off
> Turn: adjusting volume 117
12 Ejecting CD
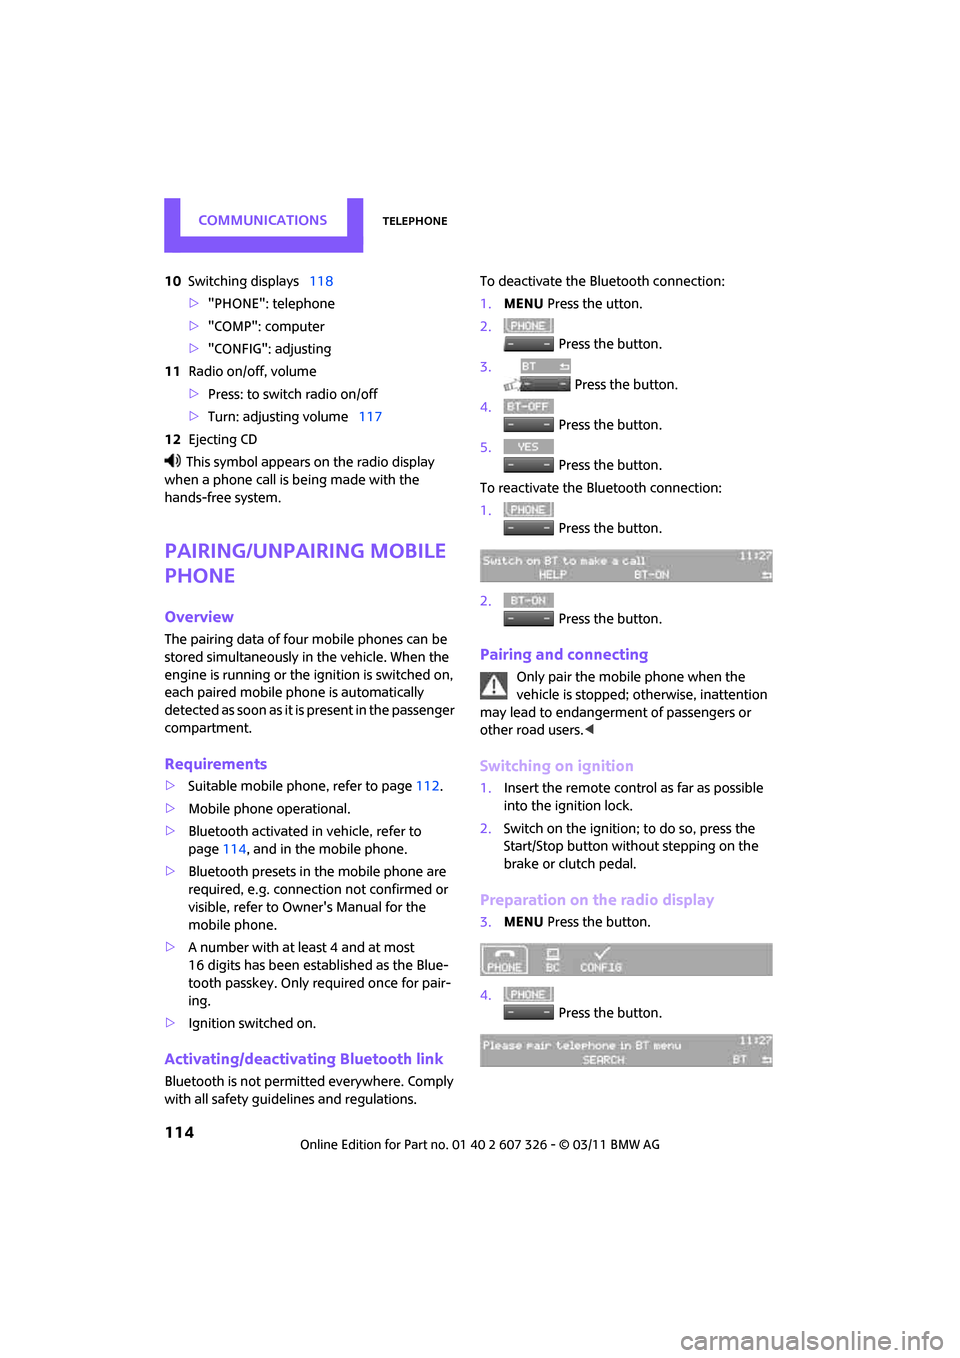
This symbol appears on the radio display
when a phone call is being made with the
hands-free system.
Pairing/unpairing mobile
phone
Overview
The pairing data of four mobile phones can be
stored simultaneously in the vehicle. When the
engine is running or the ignition is switched on,
each paired mobile phone is automatically
detected as soon as it is present in the passenger
compartment.
Requirements
> Suitable mobile ph one, refer to page112.
> Mobile phone operational.
> Bluetooth activated in vehicle, refer to
page 114, and in the mobile phone.
> Bluetooth presets in the mobile phone are
required, e.g. connection not confirmed or
visible, refer to Owner's Manual for the
mobile phone.
> A number with at least 4 and at most
16 digits has been established as the Blue-
tooth passkey. Only required once for pair-
ing.
> Ignition switched on.
Activating/deactivating Bluetooth link
Bluetooth is not permitted everywhere. Comply
with all safety guidel ines and regulations. To deactivate the Bluetooth connection:
1.
MENU Press the utton.
2. Press the button.
3. Press the button.
4. Press the button.
5. Press the button.
To reactivate the Bluetooth connection:
1. Press the button.
2. Press the button.
Pairing and connecting
Only pair the mobile phone when the
vehicle is stopped; otherwise, inattention
may lead to endangerment of passengers or
other road users. <
Switching on ignition
1.Insert the remote control as far as possible
into the ignition lock.
2. Switch on the ignition; to do so, press the
Start/Stop button without stepping on the
brake or clutch pedal.
Preparation on the radio display
3.MENU Press the button.
4. Press the button.
Page 118 of 196
COMMUNICATIONSTelephone
116
Turn the right button to show the phone number
for the Hotline and the required information for
the pairing procedure on the display.
Following the initial pairing
> The mobile phone is detected/connected in
the vehicle within a short period of time
when the engine is running or radio readi-
ness is switched on.
> After identification, phone book entries are
imported from the mobile phone and/or SIM
card
* of the telephone, depending on the
telephone.
> Specific settings may be necessary in some
mobile phones, e.g. authorization or a
secure connection, re fer to the Owner's
Manual for the mobile phone.
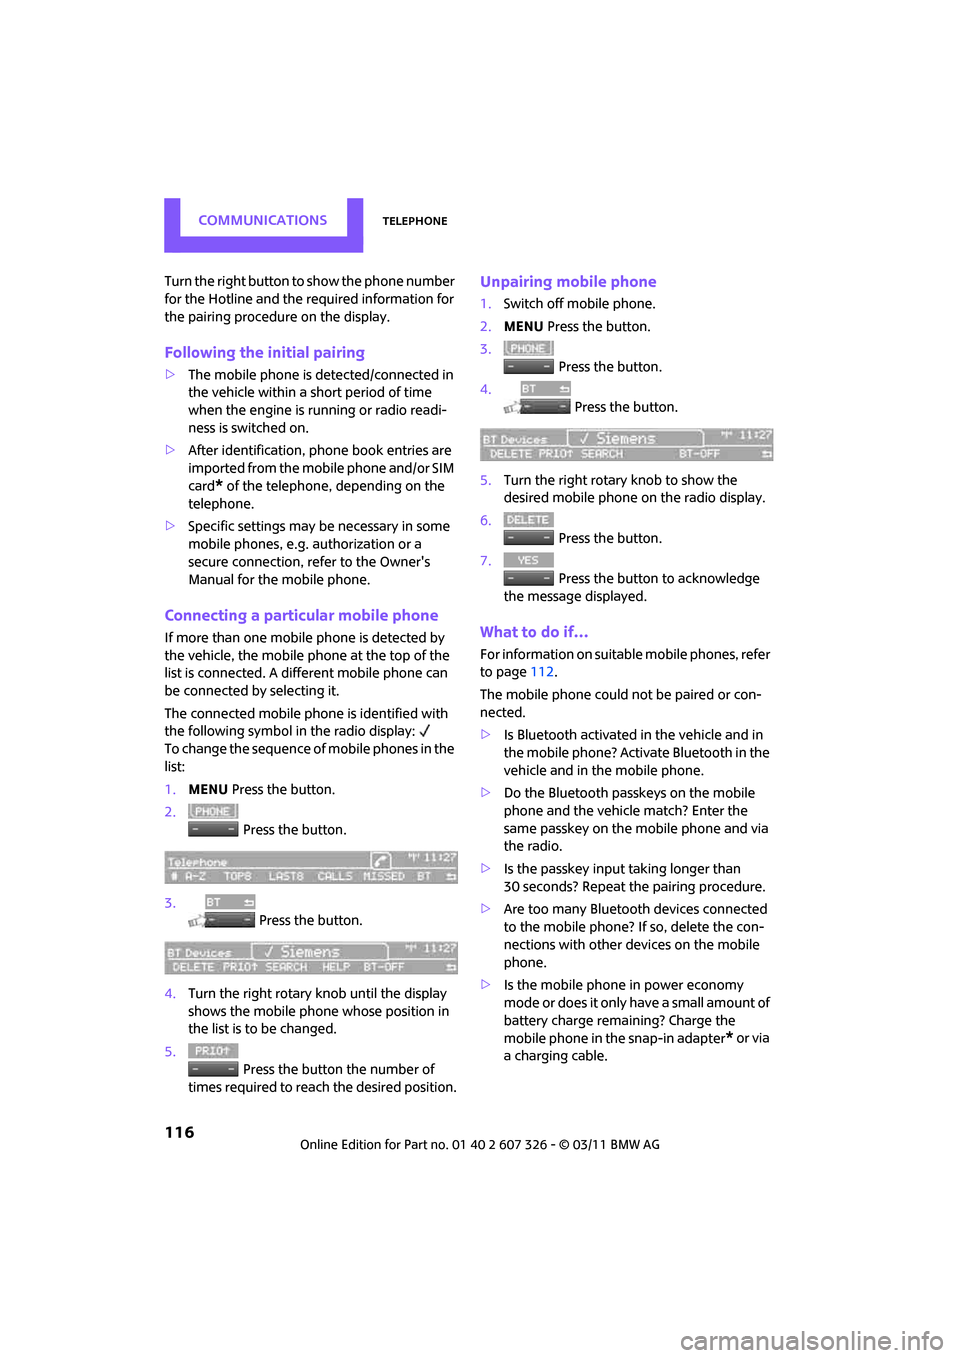
Connecting a particular mobile phone
If more than one mobile phone is detected by
the vehicle, the mobile phone at the top of the
list is connected. A different mobile phone can
be connected by selecting it.
The connected mobile phone is identified with
the following symbol in the radio display:
To change the sequence of mobile phones in the
list:
1. MENU Press the button.
2. Press the button.
3. Press the button.
4. Turn the right rotary knob until the display
shows the mobile phone whose position in
the list is to be changed.
5. Press the button the number of
times required to reach the desired position.
Unpairing mobile phone
1. Switch off mobile phone.
2. MENU Press the button.
3. Press the button.
4. Press the button.
5. Turn the right rotary knob to show the
desired mobile phone on the radio display.
6. Press the button.
7. Press the button to acknowledge
the message displayed.
What to do if…
For information on suitab le mobile phones, refer
to page 112.
The mobile phone could not be paired or con-
nected.
> Is Bluetooth activated in the vehicle and in
the mobile phone? Activate Bluetooth in the
vehicle and in the mobile phone.
> Do the Bluetooth passkeys on the mobile
phone and the vehicle match? Enter the
same passkey on the mobile phone and via
the radio.
> Is the passkey input taking longer than
30 seconds? Repeat th e pairing procedure.
> Are too many Bluetoot h devices connected
to the mobile phone? If so, delete the con-
nections with other devices on the mobile
phone.
> Is the mobile phone in power economy
m o d e o r d o e s i t o n l y have a small amount of
battery charge remaining? Charge the
mobile phone in the snap-in adapter
* or via
a charging cable.
Page 128 of 196

MOBILITYRefueling
126
Refueling
Switch off the engine before refueling;
otherwise, fuel cannot be added to the
tank and a message will be displayed. <
Take all precautionary measures and
observe all applicable regulations when
handling fuel. Do not carry any spare fuel con-
tainers in your vehicle. They can develop a leak
and cause an explosion or cause a fire in the
event of an accident. <
Fuel filler flap
Opening
1.Open the fuel filler flap.
2. Turn the fuel cap counterclockwise.
3. Place the fuel cap in the bracket attached to
the fuel filler flap.
Closing
Fit the cap and turn it clockwise until you clearly
hear a click.
Do not pinch the band attached to the
cap; otherwise, the cap cannot be closed
properly and fuel vapors can escape. A message
will be displayed if the fuel cap is loose or miss-
ing. <
Manually releasing the fuel filler flap
In the event of an electrical malfunction, you can
manually release the fuel filler flap:
Pull on the green knob with the fuel pump sym-
bol; the fuel filler flap opens.
Observe the following when refueling
Take all precautionary measures and
observe all applicable regulations when
handling fuel; otherwise, there is a danger of
personal injury an d property damage. <
When refueling, insert the filler nozzle com-
pletely into the filler pipe . Avoid lifting the filler
nozzle while filling the tank, as that would lead
to
> Premature pump shutoff
> Reduced efficiency of the fuel-vapor recov-
ery system.
The fuel tank is full when the filler nozzle clicks
off the first time.
Fuel tank capacity
If the range displayed is less than
30 miles/50 km, be sure to refuel; other-
wise, engine functions are not guaranteed and
damage could occur. <
Approx. 13.2 US gal/50 liters, including the
reserve capacity of 2.1 US gal/8 liters.
Page 129 of 196

RefuelingMOBILITY
127
Fuel specifications
Fuels that are labeled at the pump as containing
metal may not be used.
Do not fill the tank with leaded gasoline or
gasoline that contains metal additives,
such as manganese or iron; otherwise, long term
damage to the catalytic converter or other com-
ponents may result.
Do not fill the tank with E85, i.e. fuel containing
85 % ethanol, nor with FlexFuel. Otherwise, the
engine and fuel supply system will be dam-
aged. <
Required fuel
Super premium gasoline/AKI 91
This gasoline is highly recommended.
However, you may also use gasoline with less
AKI. The minimum AKI rating is:
> Cooper S, John Cooper Works: 89
> Cooper: 87
If you use gasoline with this minimum AKI rating,
the engine may produce knocking sounds when
starting at high outsid e temperatures. This has
no effect on the engine life.
Do not use any gasoline below the speci-
fied minimum fuel grade. Otherwise, the
engine could be damaged. <
Use high-quality brands
Field experience has indicated significant differ-
ences in fuel quality: volatility, composition,
additives, etc., among ga solines offered for sale
in the United States and Canada. Fuels contain-
ing up to and including 10 % ethanol or other
oxygenates with up to 2.8 % oxygen by weight,
that is, 15 % MTBE or 3 % methanol plus an
equivalent amount of cosolvent, will not void
the applicable warranties with respect to defects
in materials or workmanship. The use of poor-quality fuels may result in
drivability, starting
and stalling problems
especially under certain environmental condi-
tions such as high am bient temperature and
high altitude.
Should you encounter drivability problems
which you suspect could be related to the fuel
you are using, we recommend that you respond
by switching to a recogn ized high-quality brand
such as gasoline that is advertised as Top Tier
Detergent Gasoline.
Failure to comply with these recommendations
may also result in un scheduled maintenance. <