display MINI Clubman 2011 Workshop Manual
[x] Cancel search | Manufacturer: MINI, Model Year: 2011, Model line: Clubman, Model: MINI Clubman 2011Pages: 196, PDF Size: 3.08 MB
Page 122 of 196

COMMUNICATIONSTelephone
120
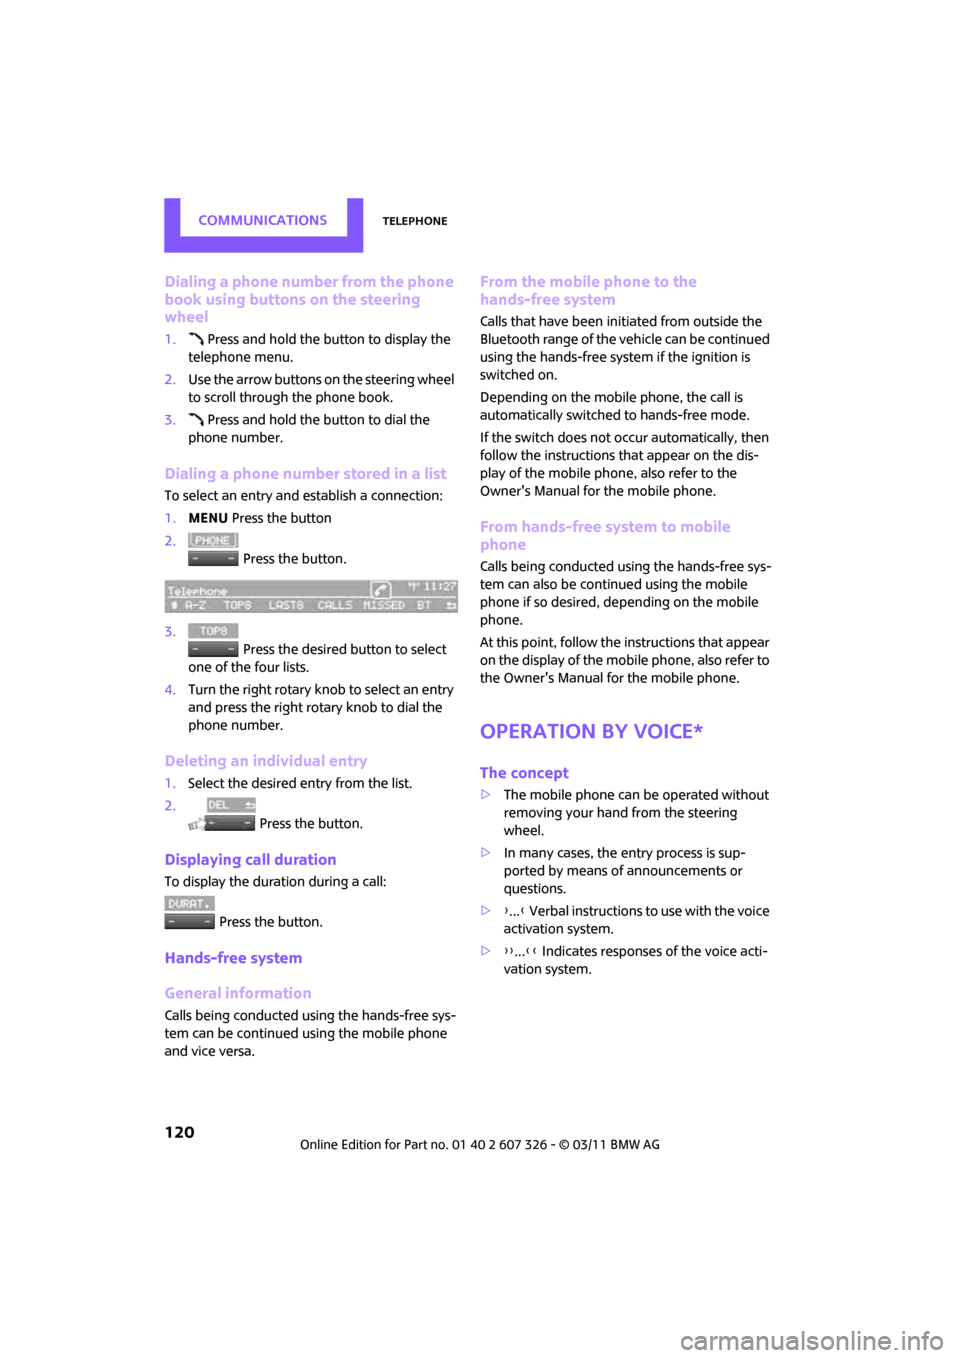
Dialing a phone number from the phone
book using buttons on the steering
wheel
1. Press and hold the button to display the
telephone menu.
2. Use the arrow buttons on the steering wheel
to scroll through the phone book.
3. Press and hold the button to dial the
phone number.
Dialing a phone number stored in a list
To select an entry and establish a connection:
1. MENU Press the button
2. Press the button.
3. Press the desired button to select
one of the four lists.
4. Turn the right rotary knob to select an entry
and press the right rotary knob to dial the
phone number.
Deleting an individual entry
1.Select the desired entry from the list.
2. Press the button.
Displaying call duration
To display the duration during a call:
Press the button.
Hands-free system
General information
Calls being conducted using the hands-free sys-
tem can be continued using the mobile phone
and vice versa.
From the mobile phone to the
hands-free system
Calls that have been initiated from outside the
Bluetooth range of the ve hicle can be continued
using the hands-free system if the ignition is
switched on.
Depending on the mobile phone, the call is
automatically switched to hands-free mode.
If the switch does not occur automatically, then
follow the instructions that appear on the dis-
play of the mobile phone, also refer to the
Owner's Manual for the mobile phone.
From hands-free system to mobile
phone
Calls being conducted using the hands-free sys-
tem can also be continued using the mobile
phone if so desired, de pending on the mobile
phone.
At this point, follow the instructions that appear
on the display of the mobile phone, also refer to
the Owner's Manual for the mobile phone.
Operation by voice*
The concept
> The mobile phone can be operated without
removing your hand from the steering
wheel.
> In many cases, the entry process is sup-
ported by means of announcements or
questions.
> {... } Verbal instructions to use with the voice
activation system.
> {{...}} Indicates responses of the voice acti-
vation system.
Page 123 of 196

TelephoneCOMMUNICATIONS
121
Voice commands
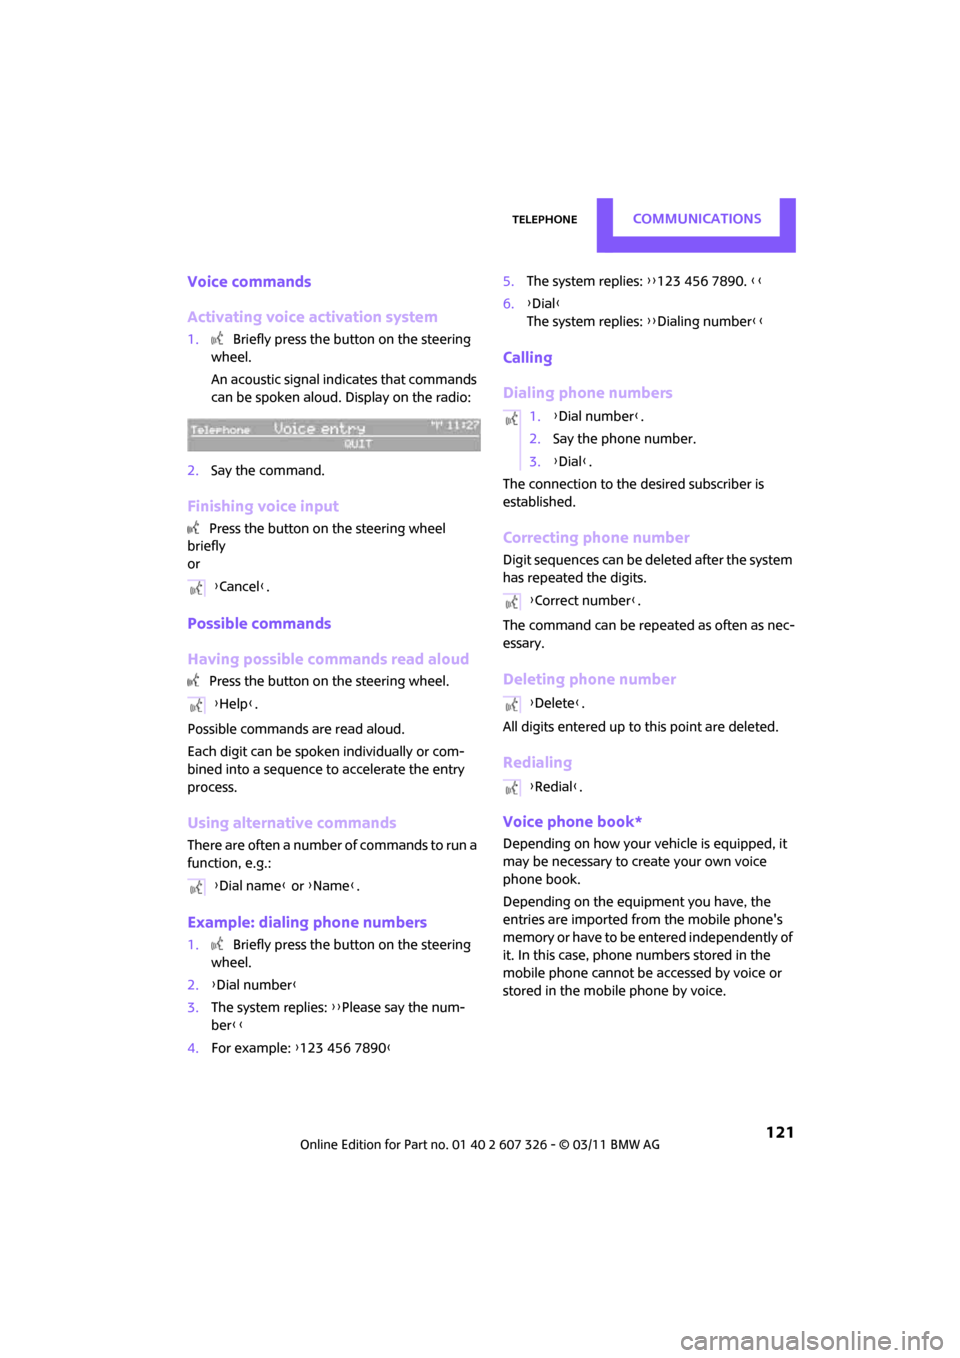
Activating voice activation system
1. Briefly press the button on the steering
wheel.
An acoustic signal in dicates that commands
can be spoken aloud. Display on the radio:
2. Say the command.
Finishing voice input
Press the button on the steering wheel
briefly
or
Possible commands
Having possible commands read aloud
Press the button on the steering wheel.
Possible commands are read aloud.
Each digit can be spoken individually or com-
bined into a sequence to accelerate the entry
process.
Using alternative commands
There are often a number of commands to run a
function, e.g.:
Example: dialing phone numbers
1. Briefly press the button on the steering
wheel.
2. {Dial number }
3. The system replies: {{Please say the num-
ber }}
4. For example: {123 456 7890 } 5.
The system replies: {{123 456 7890. }}
6. {Dial }
The system replies: {{Dialing number}}
Calling
Dialing phone numbers
The connection to the desired subscriber is
established.
Correcting phone number
Digit sequences can be de leted after the system
has repeated the digits.
The command can be repeated as often as nec-
essary.
Deleting phone number
All digits entered up to this point are deleted.
Redialing
Voice phone book*
Depending on how your vehicle is equipped, it
may be necessary to create your own voice
phone book.
Depending on the equipment you have, the
entries are imported from the mobile phone's
memory or have to be entered independently of
it. In this case, phone numbers stored in the
mobile phone cannot be accessed by voice or
stored in the mobile phone by voice.
{
Cancel }.
{ Help }.
{ Dial name } or {Name }.
1.{Dial number }.
2. Say the phone number.
3. {Dial }.
{ Correct number }.
{ Delete }.
{ Redial }.
Page 124 of 196

COMMUNICATIONSTelephone
122
Storing the input
Deleting input
Deleting all inputs
Reading entries and selecting
Selecting an entry
Adjusting volume
Turn knob during announcement.
>The volume remains the same, even if the
volume of other audi o sources is changed.
> The volume is stored for the remote control
currently in use.
Notes
Do not use the voice activation system to initiate
an emergency call. In stressful situations, the
voice and vocal pitch can change. This can
unnecessarily delay the establishment of a tele-
phone connection.
Ambient conditions
> Say the commands, numbers and letters
smoothly and with normal volume, empha-
sis and speed.
> Always say the commands in the language
of the system.
> Keep doors, windows, glass sunroof
*/pan-
oramic sunroof
*, or convertible top* closed
to avoid noise interference.
> Avoid ambient noise in the vehicle while
speaking.
MINI contact*
When the ignition is on, several dealer phone
numbers can be displayed.
>"Road Assist": roadside service
*, if you
require assistance in th e event of a flat tire.
> "Service": MINI dealer, for example if you
need to make a service appointment.
> "Cust Relat": MINI Hotline
* for information
about your vehicle.
Displaying phone numbers
1. MENU Press the button.
2. Press the button.
3. Turn the right rotary knob until the desired
phone number is displayed.
1.
{Save name }.
2. Say the name aloud. Do not exceed a
speaking duration of about 2 seconds.
3. Say the phone number after being
prompted to do so by the system.
4. {Save }.
1. {Delete name }.
2. Say the name when prompted.
3. Confirm the query with {Yes }.
1. {Delete phonebook }.
The dialog for deleting phone book is
opened.
2. Confirm the query with {Yes }.
3. Confirm the query again with {Yes }.
1. {Read phonebook }.
The dialog for reading phone book is
opened.
2. Say {Dial number } when the desired
entry is read.
1. {Dial name }.
2. Say the name when prompted.
3. Confirm the query with {Yes }.
Page 128 of 196

MOBILITYRefueling
126
Refueling
Switch off the engine before refueling;
otherwise, fuel cannot be added to the
tank and a message will be displayed. <
Take all precautionary measures and
observe all applicable regulations when
handling fuel. Do not carry any spare fuel con-
tainers in your vehicle. They can develop a leak
and cause an explosion or cause a fire in the
event of an accident. <
Fuel filler flap
Opening
1.Open the fuel filler flap.
2. Turn the fuel cap counterclockwise.
3. Place the fuel cap in the bracket attached to
the fuel filler flap.
Closing
Fit the cap and turn it clockwise until you clearly
hear a click.
Do not pinch the band attached to the
cap; otherwise, the cap cannot be closed
properly and fuel vapors can escape. A message
will be displayed if the fuel cap is loose or miss-
ing. <
Manually releasing the fuel filler flap
In the event of an electrical malfunction, you can
manually release the fuel filler flap:
Pull on the green knob with the fuel pump sym-
bol; the fuel filler flap opens.
Observe the following when refueling
Take all precautionary measures and
observe all applicable regulations when
handling fuel; otherwise, there is a danger of
personal injury an d property damage. <
When refueling, insert the filler nozzle com-
pletely into the filler pipe . Avoid lifting the filler
nozzle while filling the tank, as that would lead
to
> Premature pump shutoff
> Reduced efficiency of the fuel-vapor recov-
ery system.
The fuel tank is full when the filler nozzle clicks
off the first time.
Fuel tank capacity
If the range displayed is less than
30 miles/50 km, be sure to refuel; other-
wise, engine functions are not guaranteed and
damage could occur. <
Approx. 13.2 US gal/50 liters, including the
reserve capacity of 2.1 US gal/8 liters.
Page 137 of 196

Wheels and tiresMOBILITY
135
marked with a clearly visible MINI designation
on the sidewall of the tire.
When properly used, these tires meet the high-
est standards in terms of safety and handling
characteristics.
Run-flat tires*
When mounting new tires or changing over from
summer to winter tires and vice versa, mount
run-flat tires for your own safety. Keep in mind
that no space-saver spare tire is available in the
event of a flat. Your MINI dealer will be glad to
advise you.
Special characteristics of winter tires
The manufacturer of MINI recommends the use
of winter tires on roads during the winter, or if
temperatures drop below 45 7/ +7 6.
Although all-season M+S tires provide better
winter traction than summer tires, they gener-
ally fail to provide the same levels of cold-
weather performance as winter tires.
Pay attention to speed
Always comply with the speed limit for the
winter tires mounted on your car; failure
to do so could result in tire damage and acci-
dents. <
If the car is capable of speeds higher than that
permitted for the winter ti res, a label stating the
maximum permitted speed for the mounted
tires must be displayed in your field of view. This
label is available at your tire dealer or MINI
dealer.
Storage
Always store wheels and tires in a cool, dry place
with as little exposure to light as possible.
Always protect tires agains t all contact with oil,
grease and fuels.
Do not exceed the maximum tire inflation pres-
sure indicated on the sidewall of the tire.
Swapping wheels among the axles
Depending on the individual use, front and rear
tires may exhibit diff erent wear and tear.
In order to maintain an even wear and tear, the
wheels may be rotated between the axles. Your
MINI dealer will be glad to advise you.
Always check the inflation pressure after the tire
rotation, if necessary change the pressure.
Snow chains*
Only certain types of fi ne-link snow chains have
been tested by the manufacturer of your MINI,
classified as road-saf e and recommended. Con-
tact your MINI deal er for more details.
Only attach snow chains in pairs to the front
wheels with the following tires.
> 175/65 R 15 M+S
> 175/60 R 16 M+S
John Cooper Works:
> 185/50 R 17 86 H M+S XL RSC
Observe the manufacturer's instructions when
mounting snow chains. Do not exceed a speed
of 30 mph or 50 km/h. Do not initialize the Flat Tire Monitor if
snow chains are mounted; otherwise, the
instrument might issue an incorrect reading.
When driving with snow chains, it can be useful
to briefly deactivate the DSC or activate the DTC,
refer to page 62.<
Page 142 of 196

MOBILITYMaintenance
140
Maintenance
MINI Maintenance System
The MINI Maintenance System supports the
preservation of the traffic and operating safety
of your MINI. The objective is to optimize efforts
with respect to minimal vehicle maintenance
costs.
If and when you come to sell your MINI, a com-
prehensive record of serv icing will prove a signif-
icant benefit.
Condition Based Service CBS
Sensors and special algorithms take the different
driving conditions of your MINI into account.
Condition Based Service uses this to determine
the current and future se rvice requirements. By
letting you define a service and maintenance
regimen that reflects your own individual
requirements, the system builds the basis for
trouble-free driving.
In the tachometer, you can have the remaining
times or distances for selected maintenance
tasks and any legally prescribed dates displayed,
page 56.
Service data in the remote control
Your vehicle continuously stores service-
requirement information in the remote control
while you are driving. Your MINI dealer can read
out this data from the remote control unit, and
propose an optimized maintenance approach.
Whenever you take your car in for servicing you should therefore hand your MINI dealer the
remote control unit that you last used.
Make sure that the date in the tachometer
is always set correctly, page 58; otherwise,
the effectiveness of Condition Based Service CBS
is not assured. <
Service and Warranty Information
Booklet for US mode ls and Warranty and
Service Guide Booklet for Canadian
models
Please consult your Service and Warranty Infor-
mation Booklet for US models and Warranty and
Service Guide Booklet for Canadian models for
additional information on service requirements.
The manufacturer of the MINI recom-
mends that you have service and repair
operations performed at your MINI dealer.
Take the time to ensure that these service pro-
cedures are confirmed by entries in your vehi-
cle's Service and Warran ty Information Booklet
for US models and Warranty and Service Guide
Booklet for Canadian models. These entries ver-
ify that your vehicle has received the specified
regular maintenance. <
Page 143 of 196

MaintenanceMOBILITY
141
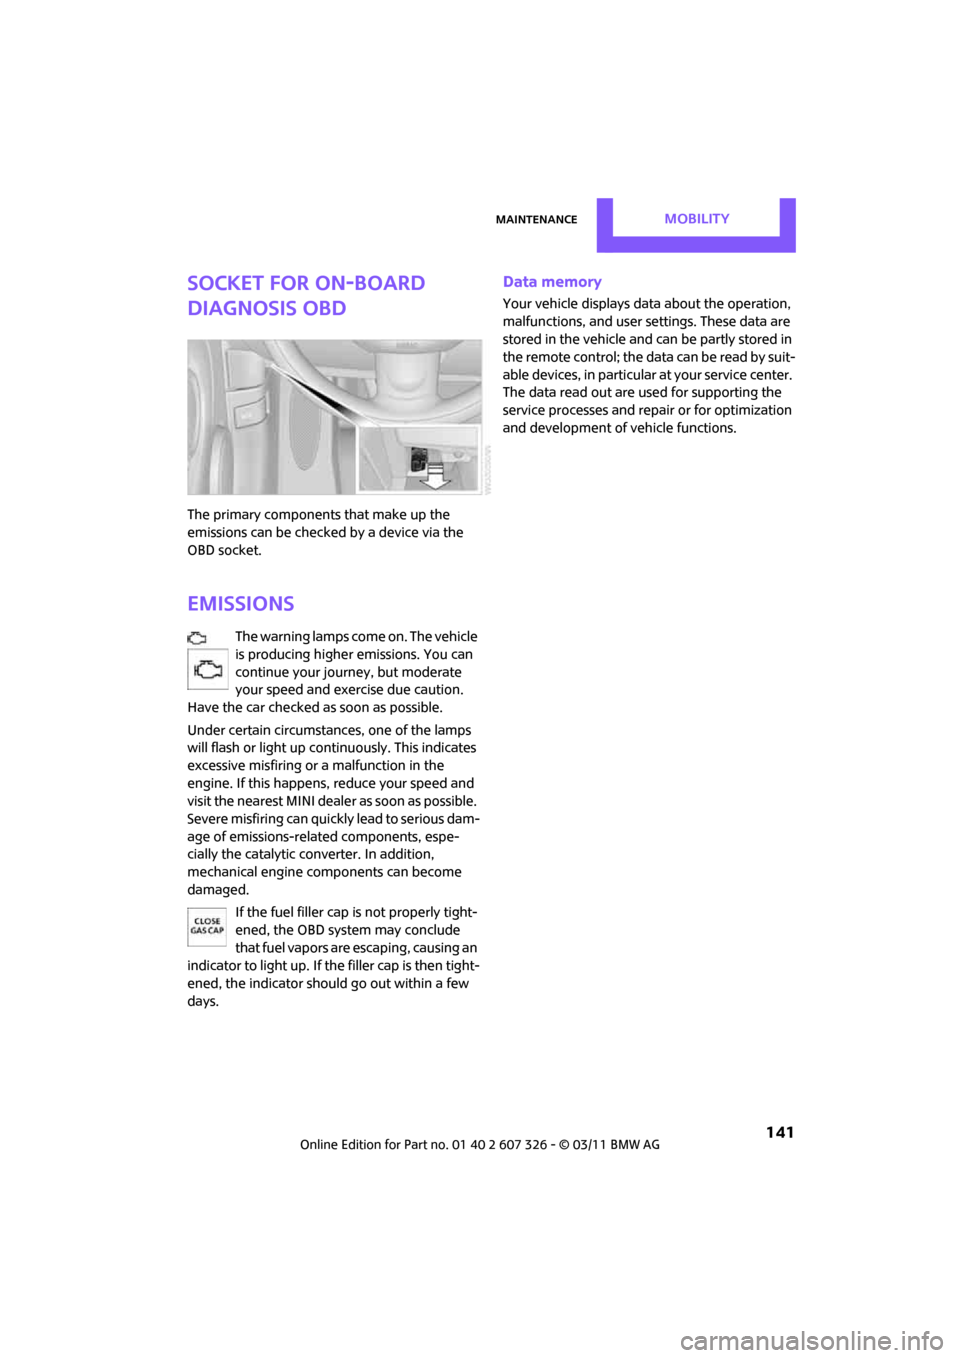
Socket for On-Board
Diagnosis OBD
The primary components that make up the
emissions can be checked by a device via the
OBD socket.
Emissions
The warning lamps come on. The vehicle
is producing higher emissions. You can
continue your journey, but moderate
your speed and exercise due caution.
Have the car checked as soon as possible.
Under certain circumstances, one of the lamps
will flash or light up continuously. This indicates
excessive misfiring or a malfunction in the
engine. If this happens, reduce your speed and
visit the nearest MINI dealer as soon as possible.
Severe misfiring can quickly lead to serious dam-
age of emissions-related components, espe-
cially the catalytic converter. In addition,
mechanical engine components can become
damaged.
If the fuel filler cap is not properly tight-
ened, the OBD system may conclude
that fuel vapors are escaping, causing an
indicator to light up. If the filler cap is then tight-
ened, the indicator should go out within a few
days.
Data memory
Your vehicle displays data about the operation,
malfunctions, and user settings. These data are
stored in the vehicle and can be partly stored in
the remote control; the da ta can be read b y su it-
able devices, in particular at your service center.
The data read out are used for supporting the
service processes and repair or for optimization
and development of vehicle functions.
Page 146 of 196

MOBILITYCare
144
Chrome parts*
Carefully clean vehicle parts such as the radiator
grill and door handles with copious quantities of
water and, if necessary, a shampoo additive,
especially when contaminated with road salt.
For additional treatmen t, use chrome polish.
Light alloy wheels*
The system produces brake dust that collects on
the light alloy wheels. Clean them regularly with
acid-free wheel cleaner.
Do not use aggressive, acid-containing,
highly alkaline, or abrasive cleansers or
steam jets hotter than 140 7/60 6 a s t h e y m a y
cause damage. <
External sensors
Keep the outside sensors on the vehicle
such as the Park Di stance Control clean
and ice-free to ensure that they function prop-
erly. <
Careinternal
Upholstery/fabrics
Regularly use a vacuum cleaner to remove sur-
face dirt.
In case of serious spots su ch as liquid stains, use
a soft sponge or lint-free microfiber cloth and
suitable interior cleaners. Observe the instruc-
tions on the packaging.
Clean upholstery up to the seams. Do not
rub forcefully. <
Velcro fasteners on pa nts or other items of
clothing can damage seat covers. Make
sure that all Velcro fasteners are closed. <
Leather/leather coverings*
The leather processed by the manufac-
turer of your MINI is a high-quality natural
product. Light variations in the grain is one of
the typical properties of natural leather.
leather have an abrasive effect, leading to
increased wear and causing the leather surface
to become brittle prematurely. Use a cloth or
vacuum cleaner to remo ve dust on a regular
basis.
Especially when the leather has a light color, it
should be cleaned regularl y since it tends to get
heavily soiled.
Treat the leather twice a year using a leather
lotion since dirt and grease will gradually attack
the leather's protective layer.
Carpets/floor mats*
Keep floor mats, carpet, and other objects
out of the movement range of the pedals;
otherwise, they may inhibit the function of the
pedals during driving.
Do not place additional floor mats onto an exist-
ing one or onto other objects.
Only use floor mats that have been approved for
the vehicle and can be appropriately fastened.
Make sure that the floo r mats are securely fas-
tened again after they ha ve been removed, e.g.
for cleaning. <
Floor mats can be removed to be cleaned.
If the carpets are very di rty, clean with a microfi-
ber cloth and water or an interior cleaner. When
doing so, rub forward and back in the driving
direction; otherwise, the carpet may become
matted.
Interior plastic parts
These include:
> Plastic surfaces
> Lamp glass
> Display panes
> Mat parts
Only clean with water and, if necessary, solvent-
free plastic cleaners. Do not use solvents such as alcohol, lac-
quer thinner, cold clea ners, fuel, or similar,
as these will damage the surfaces. <
Page 147 of 196

CareMOBILITY
145
Decorative strips*
Only clean decorative strips with moist cloths.
Wipe dry with a soft cloth.
Safety belts
Dirty belt straps impede the reeling action and
thus have a negative impact on safety.
Do not clean chemically, as this may
destroy the webbing. <
Displays
To clean displays such as radios or display ele-
ments, use a display cleaning cloth or a soft,
non-scratching, lint-free cloth.
Avoid pressing too hard when cleaning
the display as this can cause damage. <
Do not use chemical or abrasive house-
hold cleaning agents. Keep fluids of any
kind away from the device . Surfaces or electrical
components may otherwise become corroded
or damaged. <
CD/DVD drives
Do not use cleaning CDs as this could
damage parts of the drive. <
Vehicle storage
If you are not going to drive your car for more
than three months, please ask for advice from
your MINI dealer or a workshop that works
according to MINI manufacturer specifications.
Page 149 of 196

Replacing componentsMOBILITY
147
4.Unhook the wiper blade toward the wind-
shield.
5. Pull the wiper blade past the wiper arm
toward the top.
6. Insert the new wiper blade.
7. Press into position until you hear it engage.
8. Fold down the wiper arm.
To avoid damage, make sure that the
wiper arms are against the windshield
before you open the hood. <
Changing the rear wiper blade
1.Fold out the wiper arm and hold it.
2. Press together the locking spring, arrow 1,
and fold out the wiper blade.
3. Pull the wiper blade away from and out of
the catch mechanism, arrow 2.
4. Press the new wiper blade into the fixture
until it engages audibly.
Lamps and bulbs
Lamps and bulbs make an essential contribution
to vehicle safety. They should, therefore, be
handled carefully. The manufacturer of your
MINI recommends having your MINI dealer per-
form any work that you do not feel competent to
perform yourself or that is not described here.
Never touch the glass of new bulbs with
your bare fingers, as even minute
amounts of contaminatio n will burn into the
bulb's surface and reduce its service life. Use a clean tissue, cloth or some
thing similar, or hold
the bulb by its base.<
You can obtain a selectio n of replacement bulbs
at your MINI dealer.
When working on electrical systems,
always begin by switching off the con-
sumer in question; otherwise, short circuits
could result. To avoid possible injury or equip-
ment damage when replacing bulbs, observe
any instructions provided by the bulb manufac-
turer. <
Caring for headlamps, refer to page 143.
For any bulb replacement not described
below, contact a MINI dealer or a work-
shop that has specially trained personnel work-
ing in accordance with th e specifications of the
MINI manufacturer. <
For checking and adjusting headlamp aim,
please contact your MINI dealer. <
Light-emitting diodes LEDs
Light-emitting diodes installed behind translu-
cent lenses serve as the light sources for many of
the controls and displays in your vehicle. These
light-emitting diodes are related to conven-
tional laser diodes, and legislation defines them
as Class 1 light-emitting diodes.
Do not remove the covers or expose the
eyes directly to the unfiltered light source
for several hours; otherwise, this could cause
irritation of the retina. <
Headlamp glass lens
In cool or humid weather, condensation may
occur on the interior of outside lights. The con-
densation disappears a short time after the light
is switched on. The headlamp glasses do not
need to be changed. If a lot of moisture is
present, e.g. water droplets in the light, have
them checked by your service center.