key MINI Clubman 2011 Owner's Manual
[x] Cancel search | Manufacturer: MINI, Model Year: 2011, Model line: Clubman, Model: MINI Clubman 2011Pages: 196, PDF Size: 3.08 MB
Page 22 of 196

CONTROLSOpening and closing
20
Opening and closing
Keys/remote controls
Buttons for the remote control
1Opening the liftgate
2 Unlocking
3 Locking
General information
Each remote control co ntains a rechargeable
battery that is recharged when it is in the igni-
tion lock while the car is being driven. You
should therefore use each remote control at
least twice a year to maintain the charge status.
In vehicles equipped with Comfort Access
*, the
remote control contains a replaceable battery,
page 30.
If more than one remote control unit is used, the
settings called up and implemented depend on
which remote control is recognized when the
car is unlocked, refer to Personal Profile,
page 20.
In addition, information about service require-
ments is stored in the remote control, refer to
Service data in the remote control, page 140.
New remote controls
Your MINI dealer can supply new remote con-
trols as additional units or as replacements in the
event of loss.
Integrated key
Press button1 to release the key.
The integrated key fits the following locks:
> Driver's door, page 24
Personal Profile
The concept
The functions of your MINI can be set individu-
ally. By means of Personal Profiles, most of these
settings are stored for the remote control cur-
rently in use. When you unlock the car, the
remote control is recognized and the settings
stored for it are called up and implemented.
This means that your settings will be activated
for you, even if in the meantime your car was
used by someone else with another remote con-
trol and the corresponding settings.
At most three remote co ntrols can be set for
three different people. A prerequisite is that
each person uses a se parate remote control.
Page 23 of 196
Opening and closingCONTROLS
21
Personal Profile settings
For more information on specific settings, refer
to the specified pages.
> Response of the central locking system
when the car is being unlocked 21
> Automatic locking of the vehicle 25
> Triple turn signal activation 46
> Settings for the displays in the speedometer
and tachometer:
>12 h/24 h mode of the clock, refer to For-
mats and units of measure 55
> Date format, refer to Formats and units
of measure 55
> Units of measure for fuel consumption,
distance covered/re maining distances
and temperature, refer to Formats and
units of measure 55
> Light settings:
>Pathway lighting 73
> Daytime running lights 73
> Automatic climate control
*: activating/
deactivating the AUTO program, setting the
temperature, air volume and air
distribution 80
> Entertainment:
>Adjusting vo lume levels 100
> Tone control 101
Central lock ing system
The concept
The central locking system is ready for operation
whenever the driver's door is closed.
The system simultaneously engages and
releases the locks on the following:
>Doors
> Split Rear Barn Doors
> Fuel filler flap
Operating from outside
>Via the remote control
> Via the door lock
*
>In cars with Comfort Access*, via the door
handles on the driver's and passenger's
sides
The anti-theft system is also operated at the
same time. It prevents the doors from being
unlocked using the lock buttons or door han-
dles. The remote control can also be used to
switch on/off the welcome lamps and interior
lamps. The alarm system
* is also activated or
deactivated, page 27.
Operating from inside
Button for central locking system, page 24.
In the event of a sufficiently severe accident, the
central locking system unlocks automatically. In
addition, the hazard warning flashers and inte-
rior lamps come on.
Opening and closing:
from outside
Persons or animals in a parked vehicle
could lock the doors from the inside. Take
the key with you when you leave the vehicle so
that the vehicle can be opened from the out-
side. <
Using the remote control
Unlocking
Press the button.
The welcome lamps and interior lamps come on.
Unlocking mode
You can also set which parts of the car are
unlocked. The setting is stored for the remote
control in use.
Page 25 of 196

Opening and closingCONTROLS
23
1.Switch on the ignition, refer to page 41.
2. Press the button on the turn signal indicator
as often as necessary until "SET/INFO" is dis-
played.
3. Press and hold the butt on until the display
changes.
4. Press the button as of ten as necessary until
the symbol and "SET" are displayed.
5. Press and hold the butt on until the display
changes.
6. Press the button to select, arrow:
> Confirmation signal during unlocking
> Confirmation signal during locking
7. Press and hold the butt on until the display
changes. 8.
Press the button to select:
>
The hazard warning flashers light up dur-
ing unlocking/locking.
> An acoustic signal sounds during unlock-
ing/locking.
> The hazard warning flashers light up and
an acoustic signal
* sounds during
unlocking/locking.
9. Press and hold the butt on until the display
changes. The setting is stored.
Switching on interior lamps
While the car is locked:
Press the button.
You can also use this function to locate your
vehicle in parking garages, etc.
Unlocking the Split Rear Barn Doors
Press the button for approx. 1 second
and then release it.
When they are opened, the Split Rear Barn
Doors swing upward and outward to the
rear. Make sure that adequate clearance is avail-
able before opening.
To prevent accidentally locking yourself out, do
not place the key down in the cargo area. If the
Split Rear Barn Doors were locked before open-
ing, they will be lock ed again after they are
closed.
Before and after each trip, check that the Split
Rear Barn Doors have not been inadvertently
unlocked. <
Malfunctions
The remote control may malfunction due to
local radio waves. If this occurs, unlock and lock
the car at the door lock with the integrated key.
If the car can no longer be locked with a remote
control, the battery in the remote control is dis-
charged. Use this remo te control during an
extended drive; this wi ll recharge the battery,
page 20.
Page 26 of 196
CONTROLSOpening and closing
24
For US owners only
The transmitter and receiver units comply with
part 15 of the FCC/Federal Communications
Commission regulations. Operation is governed
by the following:
FCC ID:
LX8766S
LX8766E
LX8CAS
Compliance statement:
This device complies with part 15 of the FCC
Rules. Operation is subject to the following two
conditions:
> This device must not cause harmful interfer-
ence, and
> This device must accept any interference
received, including in terference that may
cause undesired operation.
Any unauthorized modifications or
changes to these devices could void the
user's authority to operate this equipment. <
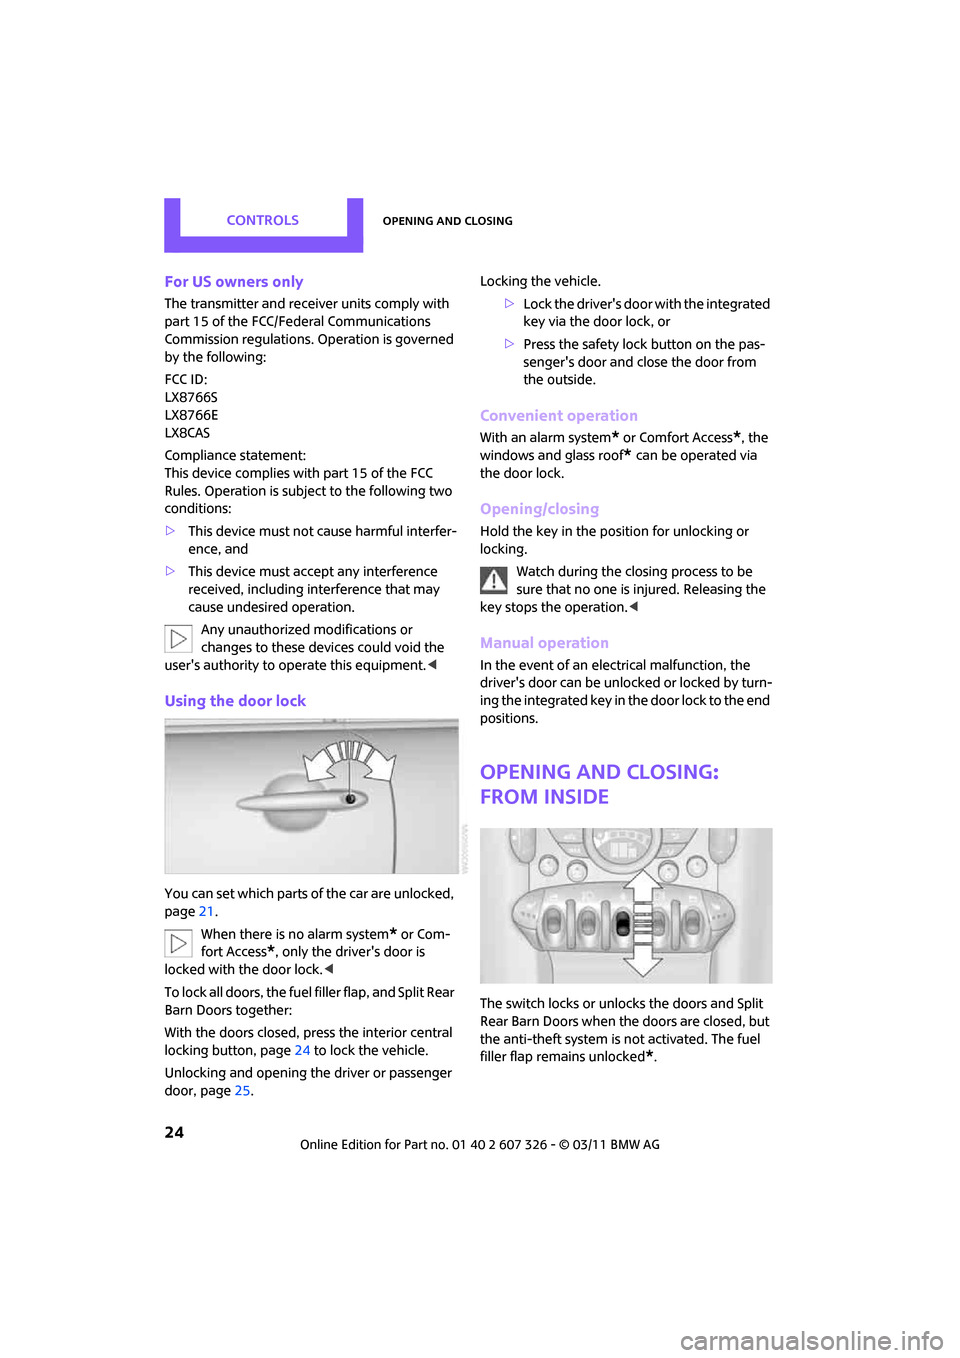
Using the door lock
You can set which parts of the car are unlocked,
page21.
When there is no alarm system
* or Com-
fort Access
*, only the driver's door is
locked with the door lock. <
To lock all doors, the fuel filler flap, and Split Rear
Barn Doors together:
With the doors closed, press the interior central
locking button, page 24 to lock the vehicle.
Unlocking and opening the driver or passenger
door, page 25. Locking the vehicle.
>Lock the driver's door with the integrated
key via the door lock, or
> Press the safety lock button on the pas-
senger's door and close the door from
the outside.
Convenient operation
With an alarm system* or Comfort Access*, the
windows and glass roof
* can be operated via
the door lock.
Opening/closing
Hold the key in the position for unlocking or
locking.
Watch during the closing process to be
sure that no one is injured. Releasing the
key stops the operation. <
Manual operation
In the event of an electrical malfunction, the
driver's door can be unlocked or locked by turn-
ing the integrated key in the door lock to the end
positions.
Opening and closing:
from inside
The switch locks or unlocks the doors and Split
Rear Barn Doors when the doors are closed, but
the anti-theft system is not activated. The fuel
filler flap remains unlocked
*.
Page 27 of 196

Opening and closingCONTROLS
25
Unlocking and opening
>Either unlock the doors together using the
switch for the central locking system and
then pull the door handle above the armrest
or
> Pull on the door handle of either door twice:
the first time unlocks the door, the second
time opens it.
Locking
>Press the switch or
> Press down the safety lo ck button of a door.
To prevent you from being locked out, the
open driver's door cannot be locked using
the lock button.
Persons or animals in a parked vehicle
could lock the doors from the inside. Take
the key with you when you leave the vehicle so
that the vehicle can be opened from the out-
side. <
Automatic locking
You can also set the situ ations in which the car
locks. The setting is st ored for the remote con-
trol in use.
1. Switch on the ignition, refer to page 41.
2. Press the button on the turn signal indicator
as often as necessary until "SET/INFO" is dis-
played.
3. Press and hold the butt on until the display
changes.
4. Press the button as of ten as necessary until
the symbol and "SET" are displayed. 5.
Press and hold the butt on until the display
changes.
6. Briefly press the button repeatedly until the
display shows the illu strated symbol, arrow.
7. Press and hold the butt on until the display
changes.
8. Press the button to select:
>
The central locking system automatically
locks the vehicle after some time if no
door has been opened.
> The central locking system automatically
locks the vehicle as soon as you drive off.
> The central locking system automatically
locks the vehicle after some time if no
door has been opened, or as soon as you
drive off.
> The central locking system remains
unlocked.
9. Press and hold the butt on until the display
changes. The setting is stored.
Page 29 of 196

Opening and closingCONTROLS
27
Alarm system*
The concept
The alarm system, when activated, reacts if:
>A door, the engine compartment lid or the
liftgate is opened
> There is movement inside the car
> The car's inclination changes, for instance if
an attempt is made to jack it up and steal the
wheels or to raise it prior to towing away
> There is an interruption in the power supply
from the battery
The alarm system briefly indicates unauthorized
entry or tampering by means of:
> An acoustic alarm
> Switching on the hazard warning flashers
Arming and disarming
Whenever the car is locked or unlocked, the
alarm system is armed or disarmed.
Even when the alarm syst em is armed, you can
open the liftgate by means of the button
on the remote control.
When you subsequently close the liftgate it is
again locked and monitored.
In certain market-specific versions,
unlocking via the door lock triggers the
alarm. <
Panic mode*
You can activate the alarm system if you find
yourself in a da ngerous situation.
Press the button for at least two seconds.
Switching off the alarm:
Press any button.
Switching off an alarm
> Unlock the car with the remote control.
> Insert the key fully into the ignition lock.
> In cars with Comfort Access
*, press the but-
ton on the door lock.
Display on the revolution counter
When the system is armed, all LEDs pulse. After
approx. 16 minutes one LED flashes.
> LEDs pulse or LED flashes: system is armed.
> One LED flashes at short intervals:
A door, the hood or the liftgate is not prop-
erly closed. Even if these are not closed fully,
the remaining items are deadlocked and the
LEDs pulse after approx. 10 seconds for
approx. 16 minutes. Afterwards, one LED
flashes.
The interior movement detector is not acti-
vated.
> LEDs go out after the vehicle is unlocked:
No attempt was made to tamper with the
car.
> LEDs flash after unlocking until the key is
inserted in the ignition, but for no longer
than approx. 5 minutes: an attempt was
made to tamper with the car.
Tilt alarm sensor
The vehicle's inclination is monitored. The alarm
is triggered, for instance, if an attempt is made
to steal the car's wheels or tow it away.
Interior movement detector
Before the interior mo vement detector can
operate correctly, the windows and glass roof
must be closed.
Avoiding false alarms
The tilt alarm sensor an d the interior movement
detector can be switched off together.
Page 30 of 196

CONTROLSOpening and closing
28
This prevents false alarms, e.g. in the following
situations:
>In duplex garages
> When being transported on car-carrying
trains, ferries or trailers
> If pets are to remain inside the car
Switching off the tilt alarm sensor and
interior movement detector
>Press the button on the remote con-
trol twice in succession.
> Lock the vehicle twice with the integrated
key.
LEDs flash in short succession for approx.
2seconds.
The tilt alarm sensor and the interior movement
detector are switched off until the car is next
unlocked and locked.
Comfort Access*
Comfort Access enables you to enter your vehi-
cle without having to hold the remote control in
your hand. All you need to do is wear the remote
control close to your body, e.g. in your jacket
pocket. The vehicle automatically detects the
remote control within the immediate vicinity or
in the passenger compartment.
Functional requirements
> The vehicle or the Split Rear Barn Doors can
only be locked when the vehicle detects that
the remote control currently in use is outside
of the vehicle.
> The vehicle cannot be locked or unlocked
again until after approx. 2 seconds.
> The engine can only be started when the
vehicle detects that the remote control is
inside the vehicle.
> The doors and Split Rear Barn Doors must be
closed to be able to operate the windows
and glass roof
*. Comfort Access support
s the following func-
tions:
> Unlocking/locking the vehicle
> Unlocking the Split Rear Barn Doors sepa-
rately
> Starting the engine
Comparison to standard remote controls
Essentially, it makes no difference whether you
control the above-mentioned functions using
Comfort Access or by pr essing the buttons on
the remote contro l for Comfort Access.
Instructions on opening and closing are found
starting on page 20.
Special features regarding the use of Comfort
Access are described below.
If you notice a brief delay while opening or
closing the windows or glass roof, the sys-
tem is checking whether a remote control is
inside the vehicle. Repeat the opening or closing
procedure, if necessary. <
To unlock
Press button 1.
Depending on the setting, refer to Unlocking
mode on page 21, only the driver's door or the
entire vehicle is unlocked.
Press the button again to lock the vehicle
again. <
Convenient opening with the remote control,
refer to page 22.
Locking
Press button 1.
Page 31 of 196
Opening and closingCONTROLS
29
Unlocking the Split Rear Barn Doors
separately
Press the button on the outside of the Split Rear
Barn Doors.If the vehicle detects that a remote control
has been accidentally left inside the
locked vehicle's cargo area after the Split Rear
Barn Doors are closed, the Split Rear Barn Doors
will reopen slightly. The hazard warning flashers
flash and an acoustic signal
* sounds. <
Windows and glass roof, electric*
If the engine is switched off, you can still operate
the windows and glass roof so long as a door or
the Split Rear Barn Doors have not been opened.
If the doors and Split Rear Barn Doors are closed
again and the remote control is located inside
the vehicle, the windows and the glass roof can
be operated again.
Insert the remote control into the ignition lock to
be able to operate the windows or glass roof
when the engine is switched off and the doors
are open.
Switching on radio readiness
Switch on radio readiness by briefly pressing the
Start/Stop button, page 41.
Do not depress the brake or the clutch;
otherwise, the engine will start. <
Starting the engine
The engine can be started or the ignition can be
switched on when a remote control is inside the
vehicle. It is not necessary to insert a remote
control into the ignition lock, page 41.
Switching off the engine in cars with
automatic transmission
The engine can only be switched off when the
selector lever is in position P, page 43.
To switch the engine off when the selector lever
is in position N, the re mote control must be in
the ignition lock.
Before driving a vehicle with automatic
transmission into a car wash
1. Insert remote control into ignition lock.
2. Depress the brake.
3. Move the selector lever to position N.
4. Switch off the engine.
The vehicle can roll.
Malfunction
Comfort Access may malfunction due to local
radio waves.
If this happens, open or close the vehicle via the
buttons on the remote control or using the inte-
grated key.
Insert the remote control into the ignition lock
and start the engine.
Warning lamps
The warning lamp lights up when an
attempt is made to start the engine: the
engine cannot be started. The remote
control is not inside th e vehicle or is malfunc-
tioning. Take the remote control with you inside
the vehicle or have it checked. If necessary,
insert another remote co ntrol into the ignition
lock.
The warning lamp lights up when the
engine is running: the remote control is
no longer inside the vehicle. After the
engine is switched off, the engine can only be
restarted within approx. 10 seconds.
The indicator lamp comes on: replace
the battery in the remote control.
Page 32 of 196
CONTROLSOpening and closing
30
Replacing the battery
The remote control for Comfort Access contains
a b a t t e r y t h a t w i l l n e e d t o b e r e p l a c e d f r o m t i m e
to time.
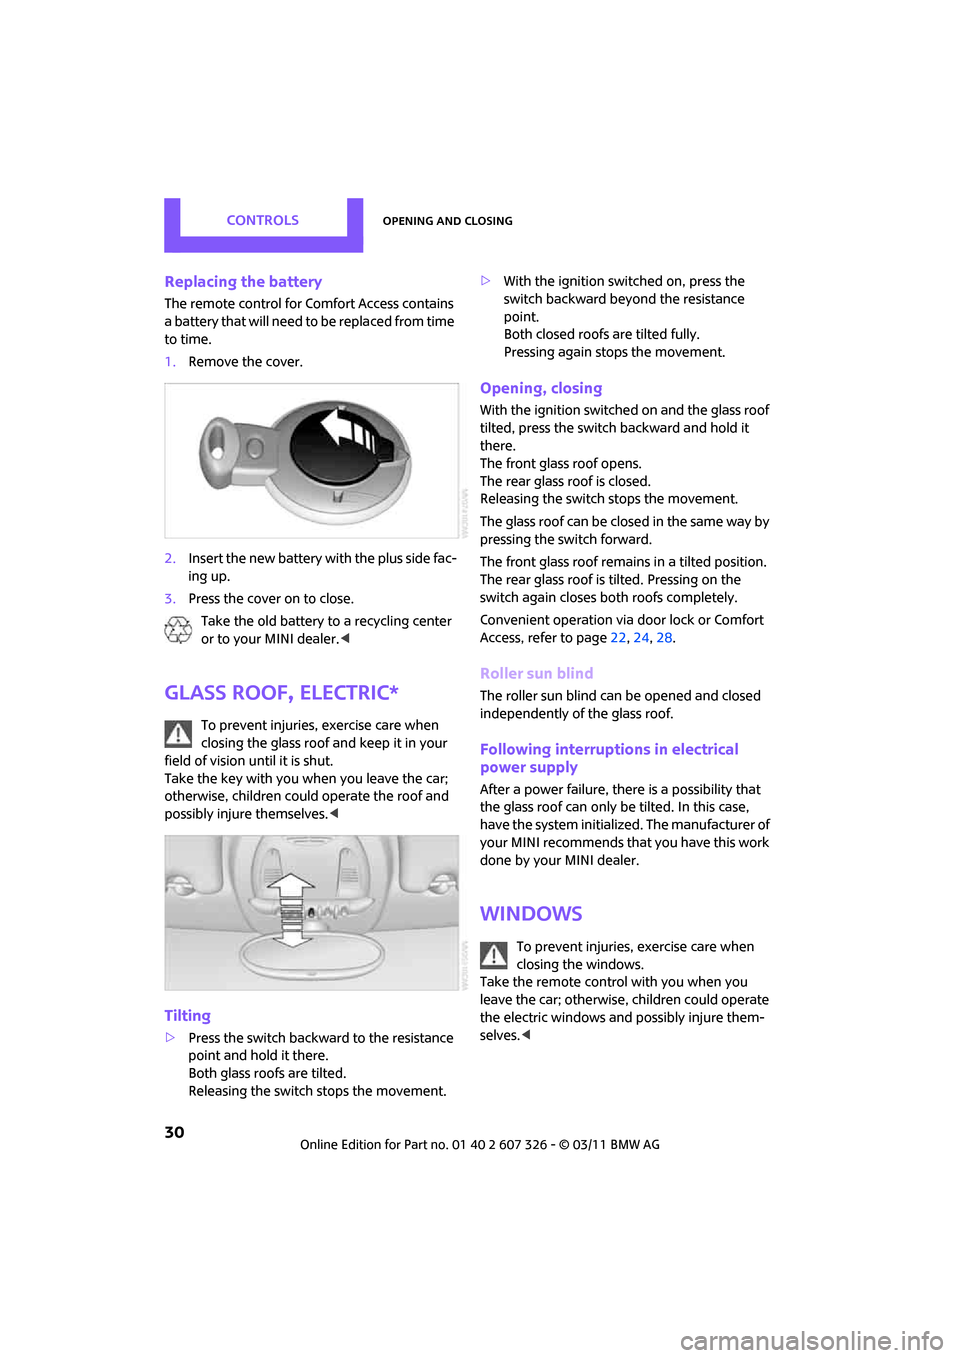
1. Remove the cover.
2. Insert the new battery with the plus side fac-
ing up.
3. Press the cover on to close.
Take the old battery to a recycling center
or to your MINI dealer. <
Glass roof, electric*
To prevent injuries, exercise care when
closing the glass roof and keep it in your
field of vision until it is shut.
Take the key with you when you leave the car;
otherwise, children could operate the roof and
possibly injure themselves. <
Tilting
>Press the switch backwa rd to the resistance
point and hold it there.
Both glass roofs are tilted.
Releasing the switch stops the movement. >
With the ignition switched on, press the
switch backward beyond the resistance
point.
Both closed roofs are tilted fully.
Pressing again stops the movement.
Opening, closing
With the ignition switched on and the glass roof
tilted, press the switch backward and hold it
there.
The front glass roof opens.
The rear glass roof is closed.
Releasing the switch stops the movement.
The glass roof can be closed in the same way by
pressing the sw itch forward.
The front glass roof remain s in a tilted position.
The rear glass roof is tilted. Pressing on the
switch again closes both roofs completely.
Convenient operation via door lock or Comfort
Access, refer to page 22,24, 28.
Roller sun blind
The roller sun blind can be opened and closed
independently of the glass roof.
Following interruptio ns in electrical
power supply
After a power failure, there is a possibility that
the glass roof can only be tilted. In this case,
have the system initiali zed. The manufacturer of
your MINI recommends that you have this work
done by your MINI dealer.
Windows
To prevent injuries, exercise care when
closing the windows.
Take the remote control with you when you
leave the car; otherwise, children could operate
the electric windows and possibly injure them-
selves. <
Page 33 of 196
Opening and closingCONTROLS
31
If, after a window is opened and closed
several times in close succession, the win-
dow can only be closed and not opened, the sys-
tem is overheated. Let the system cool for sev-
eral minutes with the igni tion switched on or the
engine running. <
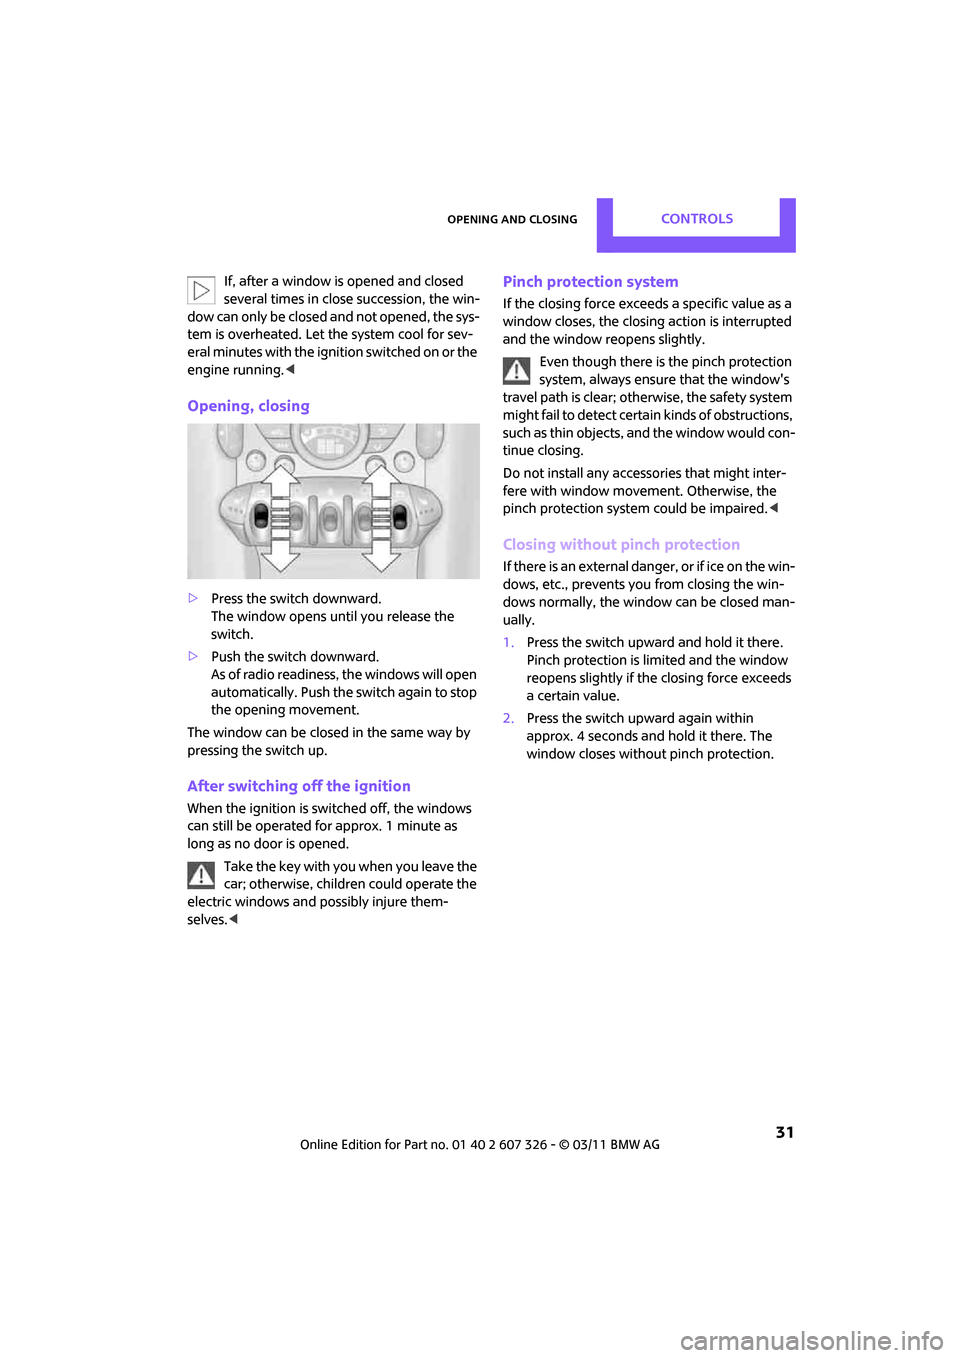
Opening, closing
>Press the switch downward.
The window opens until you release the
switch.
> Push the switch downward.
As of radio readiness, the windows will open
automatically. Push the switch again to stop
the opening movement.
The window can be closed in the same way by
pressing the switch up.
After switching off the ignition
When the ignition is sw itched off, the windows
can still be operated for approx. 1 minute as
long as no door is opened.
Take the key with you when you leave the
car; otherwise, children could operate the
electric windows and possibly injure them-
selves. <
Pinch protection system
If the closing force exceeds a specific value as a
window closes, the closing action is interrupted
and the window reopens slightly.
Even though there is the pinch protection
system, always ensure that the window's
travel path is clear; otherwise, the safety system
might fail to detect certain kinds of obstructions,
such as thin objects, and the window would con-
tinue closing.
Do not install any accesso ries that might inter-
fere with window movement. Otherwise, the
pinch protection system could be impaired. <
Closing without pinch protection
If there is an external danger, or if ice on the win-
dows, etc., prevents you from closing the win-
dows normally, the window can be closed man-
ually.
1.Press the switch upward and hold it there.
Pinch protection is limited and the window
reopens slightly if the closing force exceeds
a certain value.
2. Press the switch up ward again within
approx. 4 seconds and hold it there. The
window closes without pinch protection.