ESP MINI Clubman 2012 Owner's Guide
[x] Cancel search | Manufacturer: MINI, Model Year: 2012, Model line: Clubman, Model: MINI Clubman 2012Pages: 207, PDF Size: 3.26 MB
Page 97 of 207
DRIVING TIPSThings to remember when driving
96
sary. This strategy helps you avoid placing
excessive loads on the brake system. Down-
shifting in manual mode of the automatic trans-
mission, page48.
Never drive with the clutch held down,
with the transmission in neutral or with
the engine switched off; otherwise, engine
braking action will not be present or there will be
no power assistance to the brakes or steering.
Never allow floor mats, carpets or any other
objects to protrude into the area around the
pedals; otherwise, pedal function could be
impaired. <
Corrosion on brake rotors
When the vehicle is driven only occasionally,
during extended periods when the vehicle is not
used at all, and in op erating conditions where
brake applications are less frequent, there is an
increased tendency for corrosion to form on
rotors, while contaminan ts accumulate on the
brake pads. This occurs because the minimum
pressure which must be exerted by the pads
during brake applications to clean the rotors is
not reached.
Should corrosion form on the brake rotors, the
brakes will tend to respond with a pulsating
effect that even extended application will fail to
cure.
When the vehicle is parked
Condensation forms while the automatic climate
control is in operation, and then exits under the
vehicle. Traces of condensed water under the
vehicle are therefore normal.
In the MINI Cooper S, the coolant pump may
continue to run for some time after the engine is
switched off. This will generate noise in the
engine compartment.
Cargo loading
To avoid loading the tires beyond their
approved carrying capacity, never over-
load the vehicle. Overloading can lead to over-
heating and increases the rate at which damage
develops inside the tires. The ultimate result can
assume the form of a sudden blowout. <
Avoid fluid spills in the cargo area as they
could damage the vehicle. <
MINI: cargo area cover
Do not place any objects on the cover;
otherwise, they could endanger the car's
occupants, e.g. in the case of braking or sudden
swerving, or they may damage the cover. <
When you open the tailgate, the roll-up cover is
raised.
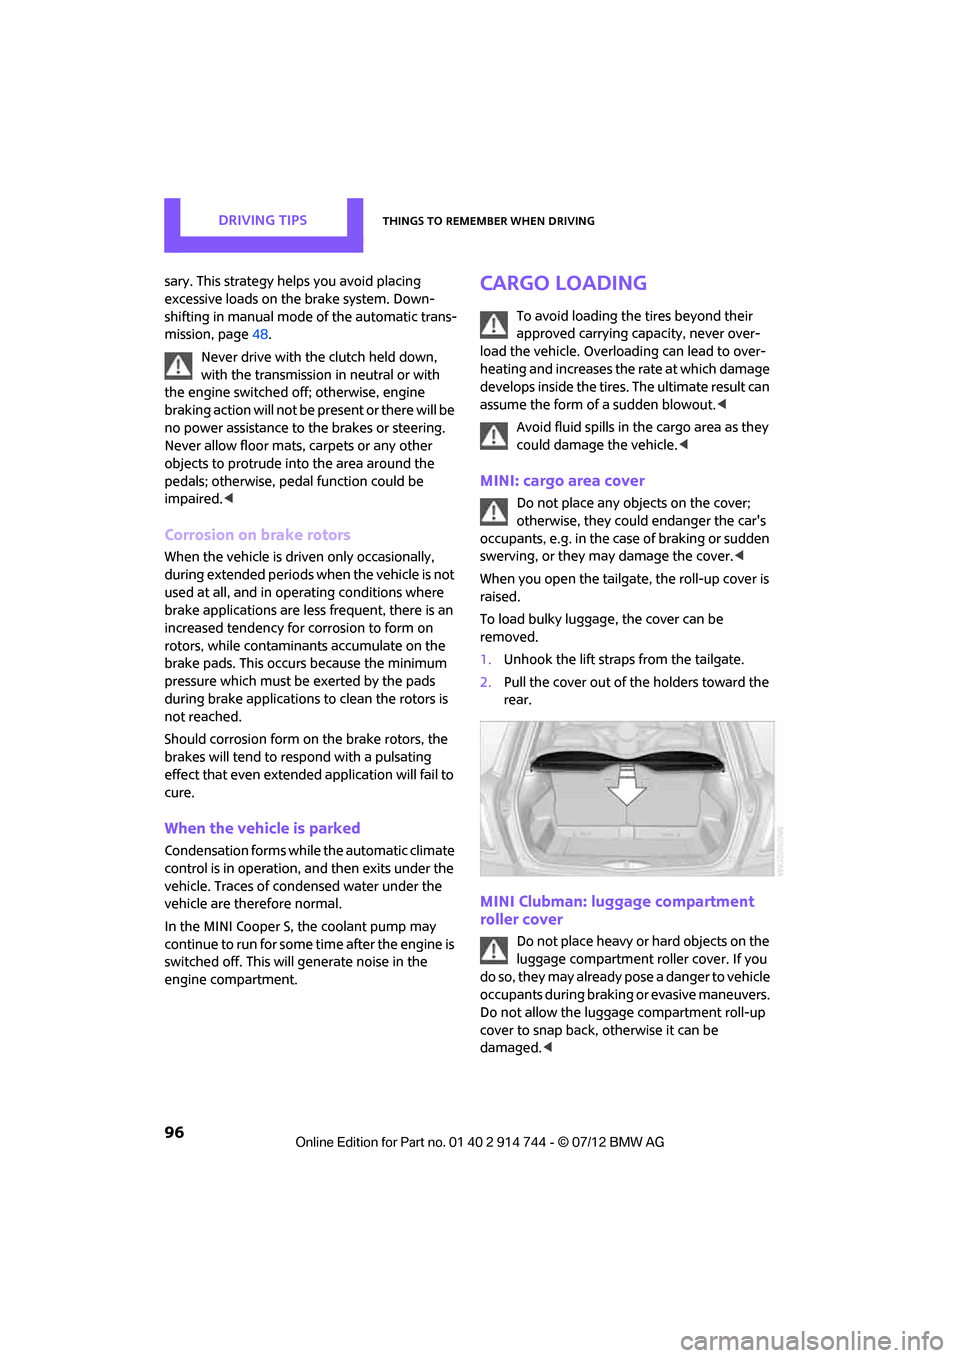
To load bulky luggage, the cover can be
removed.
1. Unhook the lift straps from the tailgate.
2. Pull the cover out of the holders toward the
rear.
MINI Clubman: luggage compartment
roller cover
Do not place heavy or hard objects on the
luggage compartment roller cover. If you
do so, they may already po s e a d a n g e r t o v e h i c l e
occupants during braking or evasive maneuvers.
Do not allow the luggage compartment roll-up
cover to snap back, otherwise it can be
damaged. <
Online Edition for Part no. 01 40 2 914 744 - \251 07/12 BMW AG
Page 99 of 207
DRIVING TIPSThings to remember when driving
98
MINI Clubman: cargo net
Ensure that the cargo net is firmly
attached; otherwise, injuries may occur.<
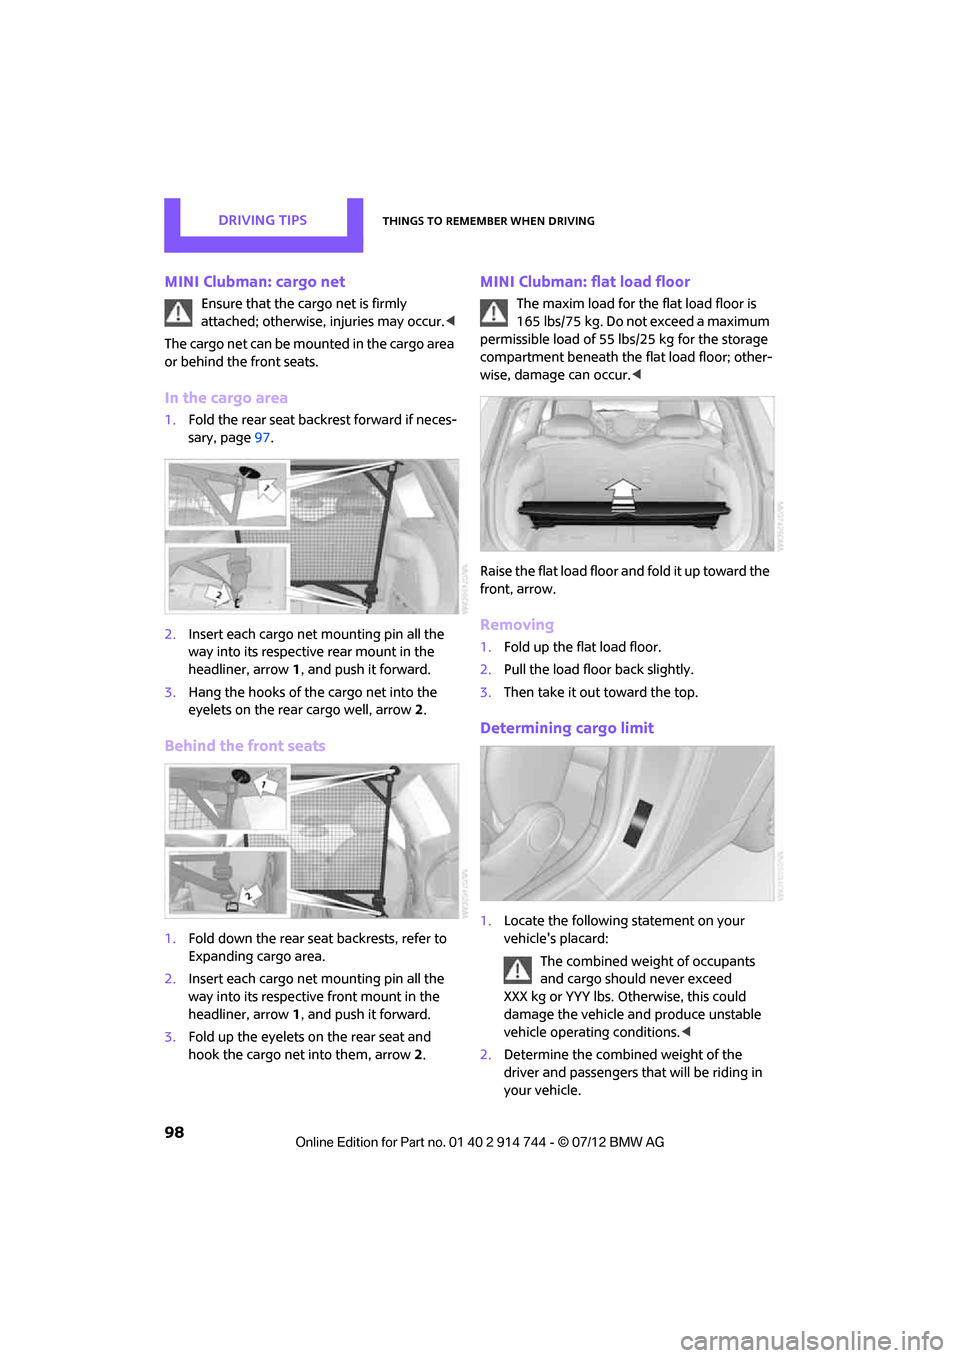
The cargo net can be mounted in the cargo area
or behind the front seats.
In the cargo area
1. Fold the rear seat backrest forward if neces-
sary, page 97.
2. Insert each cargo net mounting pin all the
way into its respective rear mount in the
headliner, arrow 1, and push it forward.
3. Hang the hooks of the cargo net into the
eyelets on the rear cargo well, arrow2.
Behind the front seats
1. Fold down the rear seat backrests, refer to
Expanding cargo area.
2. Insert each cargo net mounting pin all the
way into its respective front mount in the
headliner, arrow 1, and push it forward.
3. Fold up the eyelets on the rear seat and
hook the cargo net into them, arrow 2.
MINI Clubman: flat load floor
The maxim load for the flat load floor is
165 lbs/75 kg. Do not exceed a maximum
permissible load of 55 lbs/25 kg for the storage
compartment beneath the flat load floor; other-
wise, damage can occur. <
Raise the flat load floor an d fold it up toward the
front, arrow.
Removing
1. Fold up the flat load floor.
2. Pull the load floor back slightly.
3. Then take it out toward the top.
Determining cargo limit
1.Locate the following statement on your
vehicle's placard:
The combined weight of occupants
and cargo should never exceed
XXX kg or YYY lbs. Otherwise, this could
damage the vehicle and produce unstable
vehicle operating conditions. <
2. Determine the combined weight of the
driver and passengers that will be riding in
your vehicle.
Online Edition for Part no. 01 40 2 914 744 - \251 07/12 BMW AG
Page 100 of 207
Things to remember when drivingDRIVING TIPS
99
3.Subtract the combined weight of the driver
and passengers from XXX pounds or YYY
kilograms.
4. The resulting figure equals the available
amount of cargo and luggage load capacity.
For example, if the XXX amount equals
1,400 lbs and there will be four 150 lbs
passengers in your vehicle, the amount of
available cargo and luggage load capacity is
650 lbs:
1,400 lbs minus 750 lbs = 650 lbs.
5. Determine the combined weight of luggage
and cargo being loaded on the vehicle. That
weight may not safely exceed the available
cargo and luggage load capacity calculated
in step 4.
6. If your vehicle will be towing a trailer, part of
the load from your trail er will be transferred
to your vehicle. Consult the manual for
transporting a trailer to determine how this
may reduce the available cargo and luggage
load capacity of your vehicle.
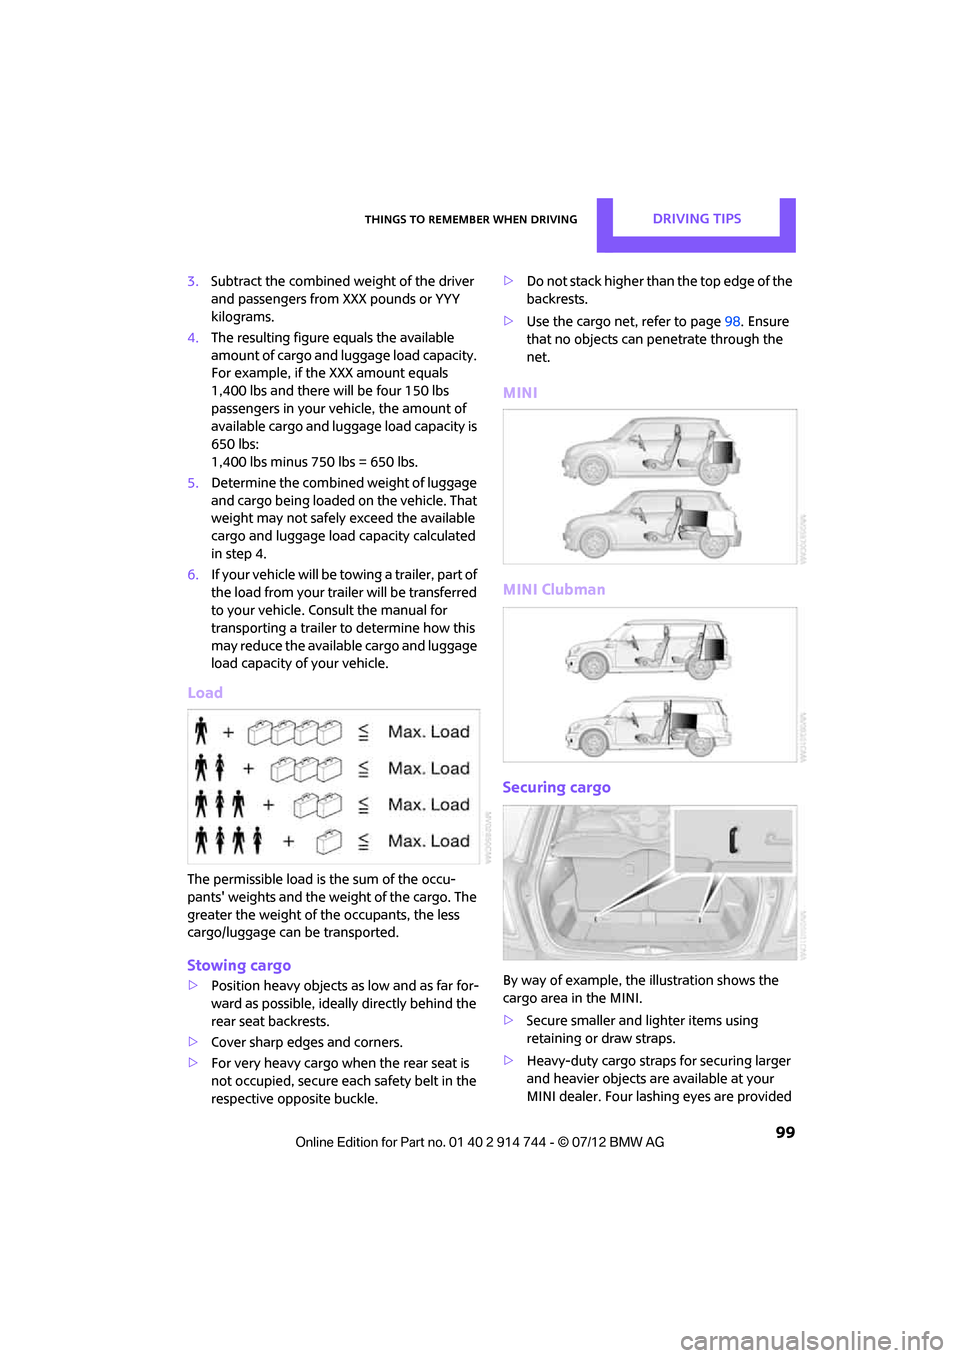
Load
The permissible load is the sum of the occu-
pants' weights and the weight of the cargo. The
greater the weight of the occupants, the less
cargo/luggage can be transported.
Stowing cargo
> Position heavy objects as low and as far for-
ward as possible, ideally directly behind the
rear seat backrests.
> Cover sharp edges and corners.
> For very heavy cargo when the rear seat is
not occupied, secure each safety belt in the
respective opposite buckle. >
Do not stack higher than the top edge of the
backrests.
> Use the cargo net, refer to page 98. Ensure
that no objects can penetrate through the
net.
MINI
MINI Clubman
Securing cargo
By way of example, the illustration shows the
cargo area in the MINI.
> Secure smaller and lighter items using
retaining or draw straps.
> Heavy-duty cargo straps for securing larger
and heavier objects ar e available at your
MINI dealer. Four lashing eyes are provided
Online Edition for Part no. 01 40 2 914 744 - \251 07/12 BMW AG
Page 101 of 207
DRIVING TIPSThings to remember when driving
100
for attaching the cargo straps. Two of them
are located on the forward wall of the cargo
area.
Comply with the information enclosed with
the load-securing devices.
Always position and secure the cargo as
described above, so that it cannot endan-
ger the car's occupants, for example if sudden
braking or swerves are necessary.
Do not exceed the approved gross vehicle
weight and axle loads, page 191; otherwise, the
operating safety of the vehicle is no longer
assured and the vehicle will not be in compli-
ance with the construction and use regulations.
Heavy or hard objects should not be carried
loose inside the car, since they could be thrown
around, for example as a result of heavy braking,
sudden swerves, etc., and endanger the occu-
pants. Do not secure cargo using the fastening
points for the tether strap, page 42; they may
become damaged. <
Roof-mounted luggage
rack
A special rack system is available as an option for
your MINI. Your MINI dealer will be glad to
advise you. Comply with the installation instruc-
tions supplied with the rack system.
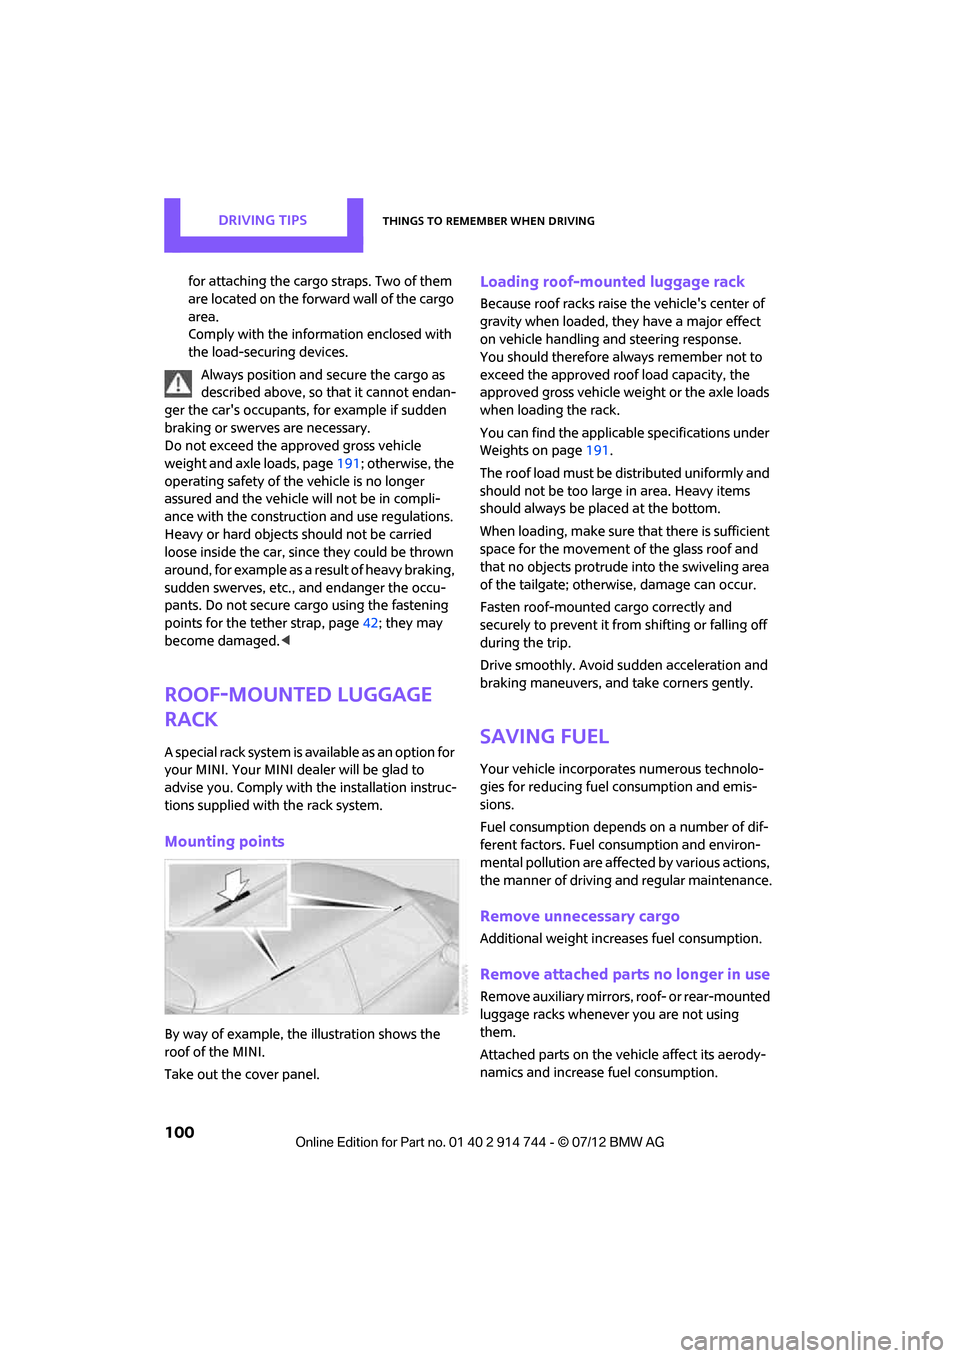
Mounting points
By way of example, the illustration shows the
roof of the MINI.
Take out the cover panel.
Loading roof-mounted luggage rack
Because roof racks raise the vehicle's center of
gravity when loaded, they have a major effect
on vehicle handling and steering response.
You should therefore always remember not to
exceed the approved roof load capacity, the
approved gross vehicle we ight or the axle loads
when loading the rack.
You can find the applicable specifications under
Weights on page 191.
The roof load must be distributed uniformly and
should not be too large in area. Heavy items
should always be placed at the bottom.
When loading, make sure that there is sufficient
space for the movement of the glass roof and
that no objects protrude into the swiveling area
of the tailgate; otherwise, damage can occur.
Fasten roof-mounted cargo correctly and
securely to prevent it from shifting or falling off
during the trip.
Drive smoothly. Avoid su dden acceleration and
braking maneuvers, and take corners gently.
Saving fuel
Your vehicle incorporates numerous technolo-
gies for reducing fuel consumption and emis-
sions.
Fuel consumption depends on a number of dif-
ferent factors. Fuel consumption and environ-
mental pollution are affect ed by various actions,
the manner of driving and regular maintenance.
Remove unnecessary cargo
Additional weight increases fuel consumption.
Remove attached parts no longer in use
Remove auxiliary mirrors, roof- or rear-mounted
luggage racks whenever you are not using
them.
Attached parts on the ve hicle affect its aerody-
namics and increase fuel consumption.
Online Edition for Part no. 01 40 2 914 744 - \251 07/12 BMW AG
Page 102 of 207
Things to remember when drivingDRIVING TIPS
101
Closing windows
Open windows increase air resistance and
therefore fuel consumption.
Check tire inflation pressure regularly
Check and, if necessary, correct tire inflation
pressure at least twic e a month and before
starting on a long trip.
Low inflation pressure increases rolling resis-
tance and thus leads to greater fuel consump-
tion and tire wear.
Drive off immediately
Do not wait for the engine to warm up while the
vehicle remains stationary. Start driving right
away, but at moderate engine speeds. This is the
fastest way for the cold engine to reach its oper-
ating temperature.
Think ahead while driving
Avoid unnecessary accelera tion and braking. by
maintaining a suitable di stance to the vehicle
driving ahead.
Looking-ahead an d smooth driving reduces fuel
consumption.
Avoid high engine speeds
Use first gear only for dr iving off. In second and
higher gears, accelerate smoothly to a suitable
engine and road speed. In doing so, avoid high
engine speeds and shift up early.
When you reach your desired traveling speed,
shift to the highest suitable gear and drive at
constant speed.
As a rule: driving at lo w engine speeds lowers
fuel consumption and reduces wear.
Coasting
When approaching a red traffic light, take your
foot off the accelerator and let the car roll to a
stop in the highest gear possible.
On a downhill gradient, take your foot off the
accelerator and let the vehi cle coast in a suitable
gear. Fuel supply is shut off automatically when the
vehicle is coasting.
Switch off the engine during lengthy
stops
Switch off the engine when stopping for lengthy
periods, e.g. at traffic lights, railroad crossings or
in traffic jams.
Switch off any features that are not
currently required
Features such as air conditioning, seat heaters
and the rear window defroster require a great
deal of energy and result in greater fuel con-
sumption, especially in
city driving and during
Stop & Go operation. For this reason, switch off
these features if they are not really needed.
Have the vehicle serviced
Have your vehicle serviced regularly to achieve
good economy and a long vehicle life. The
manufacturer of your MINI recommends having
the vehicle serviced by a MINI dealer. Also note
the MINI Maintenance System, page 147.
Online Edition for Part no. 01 40 2 914 744 - \251 07/12 BMW AG
Page 105 of 207
ENTERTAINMENTRadio MINI Boost CD
104
Radio MINI Boost CD
Vehicle equipment
In this chapter, all production, country, and
optional equipment that is offered in the model
range is described. Equipment is also described
that is not available because of, for example,
selected options or coun try version. This also
applies to safety relate d functions and systems.
Switching radio on/off
Press the left rotary knob. The radio
selects the last set audio source:
> Radio
> HD Radio
> Satellite radio
> CD
> External audio device
> USB audio interface.
Listening to the radi o when the ignition
is switched off
After switching off the radio readiness, the radio
functions are available for approx. 20 minutes.
To do so, switch the radio on again.
To spare the battery, ensure that the radio
is switched off when leaving the vehicle. <
Adjusting volume
Turn left rotary knob. The setting is
stored for the remote control in use.
As soon as you make a phone call using
the hands-free device, the radio will auto-
matically be muted. <
Setting the volume for the PDC and gong
You can raise or lower the audio signals for the
PDC or gong with respect to the volume of the
audio sources.
The audio signals have a set minimum and max-
imum volume, below which they can not fall and
above which they can not go.
Set the audio source to a high volume to
be able to better set the volume of the
audio signals. <
1. Press the button.
2. Press the button if necessary.
3. Press the button.
or
Press the button.
4. Select the desired vo lume and press the
knob on the right.
Setting the speed-dependent volume
The speed-dependent volume controls auto-
matically increases the volume as the speed of
the vehicle increases. You can set different levels
for increasing the volume.
1. Press the button.
2. Press the button if necessary.
3. Press the button.
4. Select the desired vo lume and press the
knob on the right.
Setting the volume for external audio
devices
Your radio has the option of connecting an
external audio device, e.g., an MP3 player, and
playing it over the loudspeakers in the vehicle.
You can set the volume by using the radio.
Online Edition for Part no. 01 40 2 914 744 - \251 07/12 BMW AG
Page 106 of 207
Radio MINI Boost CDENTERTAINMENT
105
Connecting an external device, refer to
page111.
To adjust the volume of an external audio device
to the radio:
1. Press the MODEbutton.
2. Press the button.
3. Press the button.
4. Select the desired volume and press the
knob on the right.
Setting tone controls
You can select between the following settings:
>Bass: bass adjustment.
> Treble: treble adjustment.
> Balance: volume distribution left/right.
> Fader: volume distri bution front/back.
The tone settings are set for all audio sources at
once.
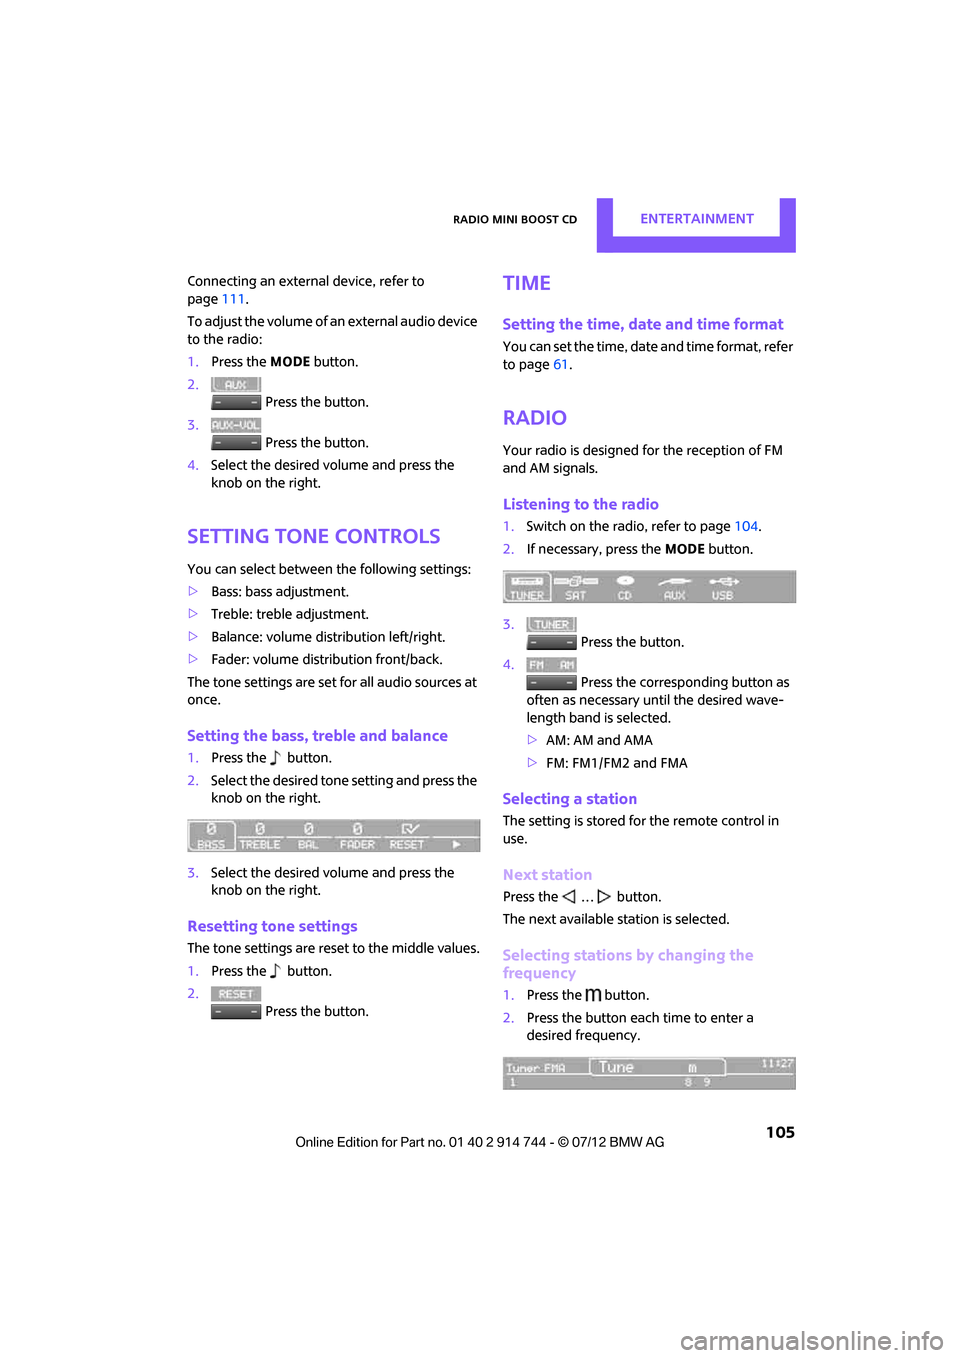
Setting the bass, treble and balance
1. Press the button.
2. Select the desired tone setting and press the
knob on the right.
3. Select the desired volume and press the
knob on the right.
Resetting tone settings
The tone settings are reset to the middle values.
1.Press the button.
2. Press the button.
Time
Setting the time, date and time format
You can set the time, date and time format, refer
to page61.
Radio
Your radio is designed for the reception of FM
and AM signals.
Listening to the radio
1.Switch on the radio, refer to page 104.
2. If necessary, press the MODEbutton.
3. Press the button.
4. Press the corresponding button as
often as necessary until the desired wave-
length band is selected.
> AM: AM and AMA
> FM: FM1/FM2 and FMA
Selecting a station
The setting is stored for the remote control in
use.
Next station
Press the … button.
The next available st ation is selected.
Selecting stations by changing the
frequency
1. Press the button.
2. Press the button each time to enter a
desired frequency.
Online Edition for Part no. 01 40 2 914 744 - \251 07/12 BMW AG
Page 107 of 207
ENTERTAINMENTRadio MINI Boost CD
106
Or, by using the knob on the right:
1.Press the button.
2. Turn the knob on the right until the desired
frequency is reached.
Automatically updating strongest
stations
Press the correspon ding button until
"Autostore" is displayed.
Several seconds may go by until the stations are
stored and one of the stations can be heard.
If you do not wish to use the Autostore
feature, you can store six stations of your
choice in the FMA or AMA memory levels.<
Playing and selecting stations, scan
You can listen to all the receivable stations for
approx. 10 seconds.
Press the button.
Interrupting the scan an d selecting a station:
Press the button.
When a traffic information station is selected,
only traffic information broadcasts will be
played.
Storing and recalling stations
Memory presets
Your radio can store 30 stations:
> FM1, FM2: six stations each of your choice
> AM: six stations each of your choice
> FMA/AMA: the six stro ngest stations auto-
matically
Storing a station
1.
Press the corresponding button as
often as necessary until the desired fre-
quency range is selected.
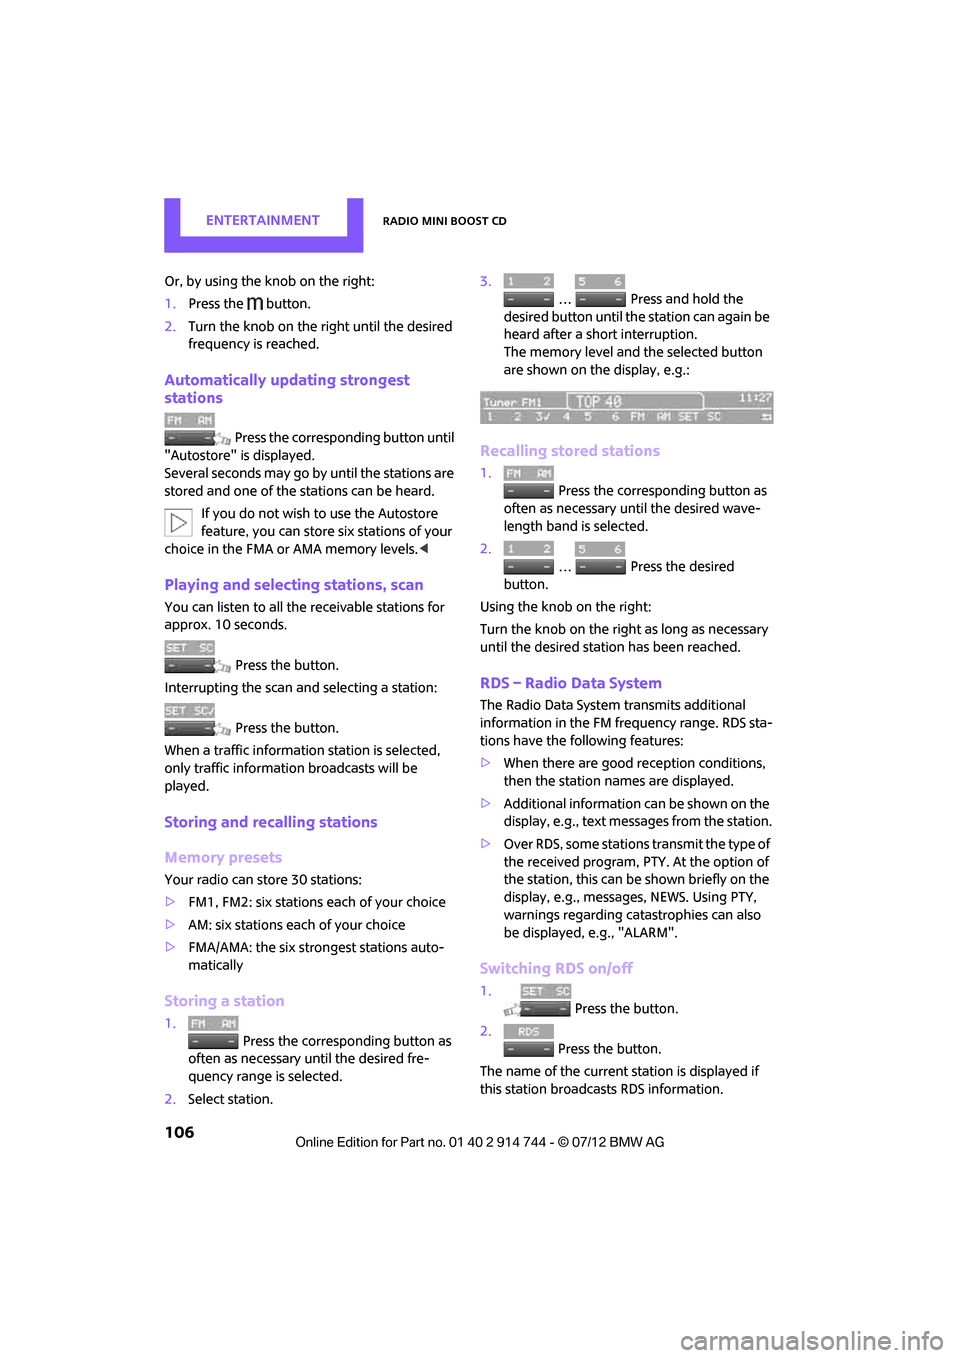
2. Select station. 3.
… Press and hold the
desired button until th e station can again be
heard after a short interruption.
The memory level and the selected button
are shown on the display, e.g.:
Recalling stored stations
1. Press the corresponding button as
often as necessary until the desired wave-
length band is selected.
2.
… Press the desired
button.
Using the knob on the right:
Turn the knob on the right as long as necessary
until the desired stat ion has been reached.
RDS – Radio Data System
The Radio Data System transmits additional
information in the FM frequency range. RDS sta-
tions have the following features:
>When there are good reception conditions,
then the station names are displayed.
> Additional information can be shown on the
display, e.g., text me ssages from the station.
> Over RDS, some stations transmit the type of
the received program, PTY. At the option of
the station, this can be shown briefly on the
display, e.g., message s, NEWS. Using PTY,
warnings regarding ca tastrophies can also
be displayed, e.g., "ALARM".
Switching RDS on/off
1. Press the button.
2. Press the button.
The name of the current station is displayed if
this station broadcasts RDS information.
Online Edition for Part no. 01 40 2 914 744 - \251 07/12 BMW AG
Page 110 of 207

Radio MINI Boost CDENTERTAINMENT
109
Changing to the current channel
Press the button.
Additional information
The name of the channel and additional infor-
mation about the current track is displayed, e.g.,
the name of the artist.
1.Select the desired channel.
2. Press the button.
Changing channels using buttons
Press the … button for the corresponding
direction.
The next activated channel is recalled.
Search function
1.Press and hold the … button for the
corresponding direction.
The activated channels are shown, one after
another, on the display.
2. Release the button to select the displayed
channel.
Notes
When there is a signal blockage or the transmis-
sion is suspended mome ntarily for more than
4 seconds, a message appears on the Control
Display.
Service may be interrupted or unavailable
for specific reasons such as environmental
or topographic conditions and others that Satel-
lite Radio cannot directly control.
Signals may not be available under tunnels, in
parking garages, next to tall buildings, nearby trees with dense foliage, nearby mountains or
other possible strong so
urces of radio inter-
ference.
Service should resume no rmally after the source
of signal unavailabil ity has been cleared.<
CD player
Starting the CD player
Some time may pass until the CD player starts.
1.Switch on the radio, refer to page 104.
2. Insert the CD with the printed side up into
the CD slot.
If there is already a CD in the CD slot:
1. Switch on the radio, if necessary.
2. Press the MODEbutton.
3. Press the button.
Changing the music track
Skipping tracks
Press the … button as often as necessary
until the desired track is reached.
Using the knob on the right:
Turn the knob on the right until the desired track
has been reached.
Fast forward/reverse
1.Press and hold the … button.
The track can be heard but is distorted.
2. To cancel the fast fo rward/reverse, release
the button.
Random order
Press the button.
To terminate the random generator:
Press the button.
Online Edition for Part no. 01 40 2 914 744 - \251 07/12 BMW AG
Page 122 of 207
TelephoneCOMMUNICATIONS
121
>Depending on the mobile phone, it may only
be possible to connect one device to the
vehicle. Unpair the connected device from
the vehicle and only pair and connect one
device.
> Is the mobile phone no longer responding?
Switch the mobile ph one off and back on
again. Repeat the pairing procedure.
> Delete connection to the mobile phone and,
if necessary, to the radio and try again.
Is the mobile phone no longer responding?
> Switch the mobile ph one off and back on
again. Repeat the pairing procedure.
> Is the ambient temperature too high or too
low? Do not subject your mobile phone to
extreme ambient temperatures.
Phone book entries are not displayed, not all of
them are displayed, or they are displayed
incompletely.
> The transfer of phone book entries has not
yet completed.
> It is possible that only the phone book
entries of the mobile phone or the SIM card
are transferred.
> It may not be possible to display phone book
entries with special characters.
> The number of phone book entries to be
stored is too high.
> The data volume of the phone book entry is
too great, e.g. due to additionally stored
information such as notes? Reduce the data
volume.
The telephone connection quality is low.
> Depending on the mobile phone, it is possi-
ble to adjust the strength of the Bluetooth
signal.
> Insert the mobile phone into the snap-in
adapter or place it in the vicinity of the
center console.
> Adjust the volume of the microphone and
speaker separately.
If you have gone through all items in the list and
still cannot activate the desired function please
contact the Hotline or your MINI dealer.Operation
Overview
The following functions can be operated using
the radio:
> Accepting/refusing a call
> Dialing phone numbers
> Dialing a phone number from the phone
book
> Dialing a stored number, e.g., from a list of
accepted calls
> Ending a call
When the ignition is switched off and radio
readiness switched on, e. g. after removal of the
infrared remote control, an ongoing conversa-
tion can be continued for a maximum of
25 minutes using the hands-free system.
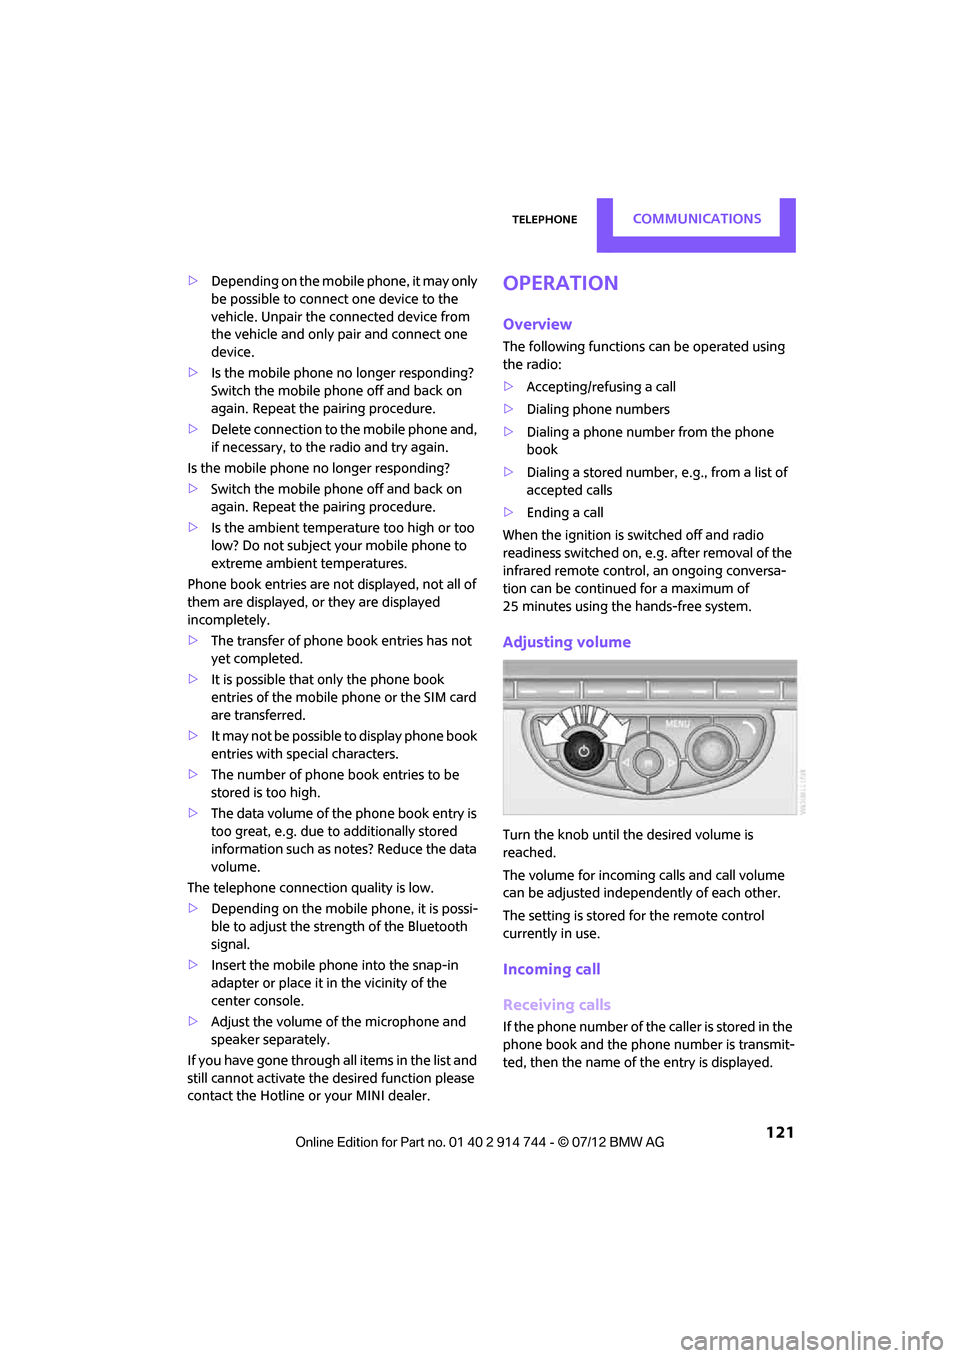
Adjusting volume
Turn the knob until the desired volume is
reached.
The volume for incoming calls and call volume
can be adjusted indepe ndently of each other.
The setting is stored for the remote control
currently in use.
Incoming call
Receiving calls
If the phone number of the caller is stored in the
phone book and the phone number is transmit-
ted, then the name of the entry is displayed.
Online Edition for Part no. 01 40 2 914 744 - \251 07/12 BMW AG