engine MINI Clubman 2012 Service Manual
[x] Cancel search | Manufacturer: MINI, Model Year: 2012, Model line: Clubman, Model: MINI Clubman 2012Pages: 207, PDF Size: 3.26 MB
Page 121 of 207

COMMUNICATIONSTelephone
120
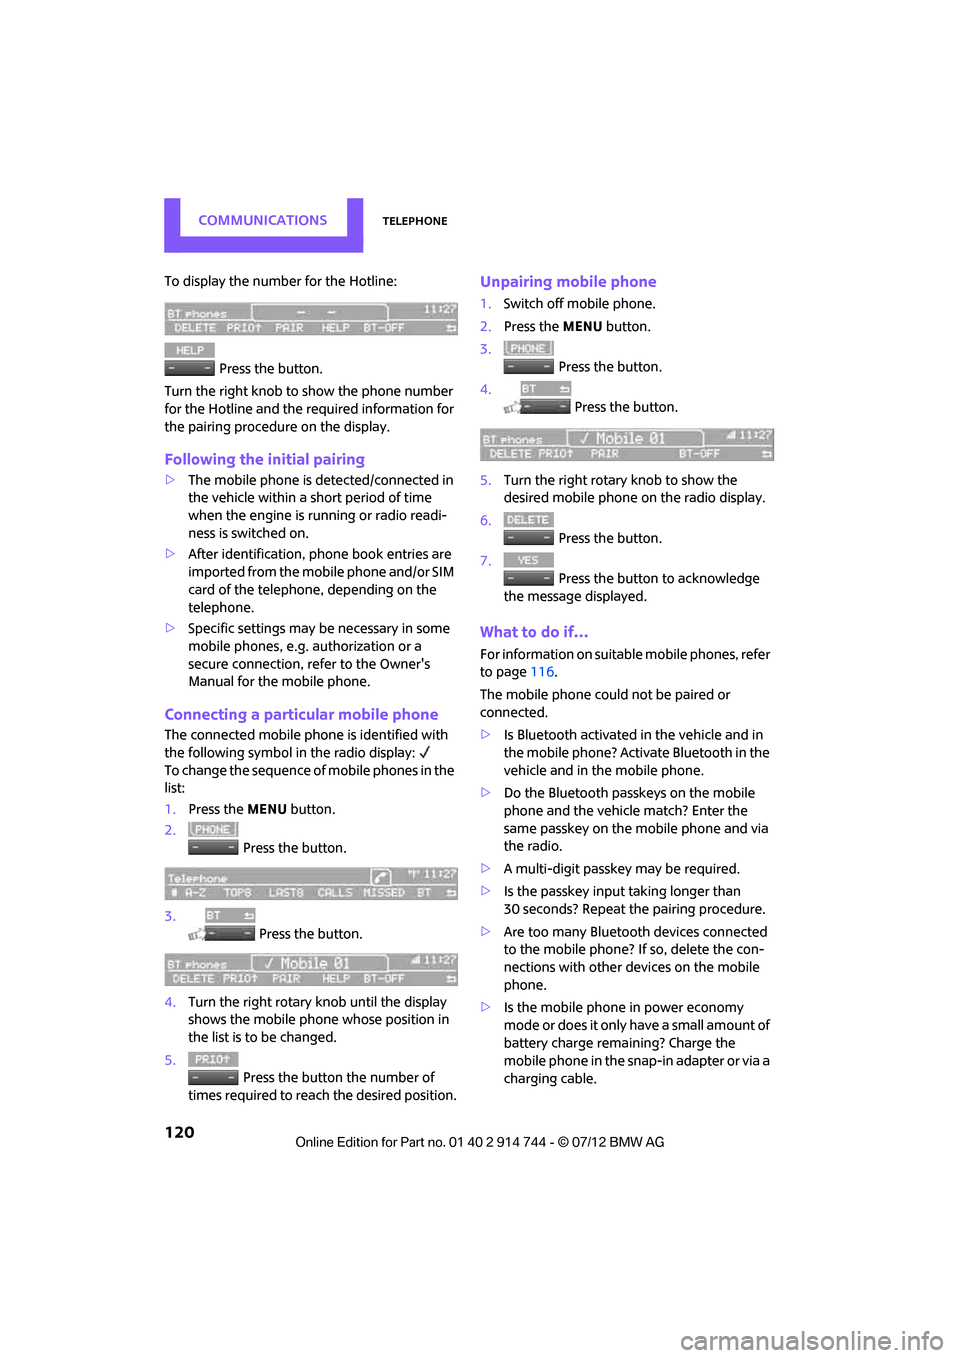
To display the number for the Hotline: Press the button.
Turn the right knob to show the phone number
for the Hotline and the re quired information for
the pairing procedure on the display.
Following the initial pairing
> The mobile phone is detected/connected in
the vehicle within a short period of time
when the engine is running or radio readi-
ness is switched on.
> After identification, phone book entries are
imported from the mobile phone and/or SIM
card of the telephone, depending on the
telephone.
> Specific settings may be necessary in some
mobile phones, e.g. authorization or a
secure connection, re fer to the Owner's
Manual for the mobile phone.
Connecting a particular mobile phone
The connected mobile phone is identified with
the following symbol in the radio display:
To change the sequence of mobile phones in the
list:
1. Press the MENU button.
2. Press the button.
3. Press the button.
4. Turn the right rotary knob until the display
shows the mobile phone whose position in
the list is to be changed.
5. Press the button the number of
times required to reach the desired position.
Unpairing mobile phone
1. Switch off mobile phone.
2. Press the MENU button.
3. Press the button.
4. Press the button.
5. Turn the right rotary knob to show the
desired mobile phone on the radio display.
6. Press the button.
7. Press the button to acknowledge
the message displayed.
What to do if…
For information on suitab le mobile phones, refer
to page 116.
The mobile phone could not be paired or
connected.
> Is Bluetooth activated in the vehicle and in
the mobile phone? Activate Bluetooth in the
vehicle and in the mobile phone.
> Do the Bluetooth passkeys on the mobile
phone and the vehicle match? Enter the
same passkey on the mobile phone and via
the radio.
> A multi-digit passkey may be required.
> Is the passkey input taking longer than
30 seconds? Repeat th e pairing procedure.
> Are too many Bluetoot h devices connected
to the mobile phone? If so, delete the con-
nections with other devices on the mobile
phone.
> Is the mobile phone in power economy
m o d e o r d o e s i t o n l y have a small amount of
battery charge remaining? Charge the
mobile phone in the snap-in adapter or via a
charging cable.
Online Edition for Part no. 01 40 2 914 744 - \251 07/12 BMW AG
Page 129 of 207

MOBILITYRefueling
128
Refueling
Vehicle equipment
In this chapter, all production, country, and
optional equipment that is offered in the model
range is described. Equipment is also described
that is not available because of, for example,
selected options or coun try version. This also
applies to safety relate d functions and systems.
General information
Switch off the engine before refueling;
otherwise, fuel cannot be added to the
tank and a message will be displayed. <
Take all precautionary measures and
observe all applicable regulations when
handling fuel. Do not carry any spare fuel con-
tainers in your vehicle. They can develop a leak
and cause an explosion or cause a fire in the
event of an accident. <
Fuel filler flap
Opening
1.Open the fuel filler flap.
2. Turn the fuel cap counterclockwise.
3. Place the fuel cap in the bracket attached to
the fuel filler flap.
Closing
Fit the cap and turn it clockwise until you clearly
hear a click.
Do not pinch the band attached to the
cap; otherwise, the ca p cannot be closed
properly and fuel vapors can escape. A message
will be displayed if the fuel cap is loose or
missing. <
Manually releasing the fuel filler flap
In the event of an electrical malfunction, you can
manually release the fuel filler flap:
MINI:
1.Remove the cover from the left-hand side-
wall of the cargo area.
2. Pull on the green knob with the fuel pump
symbol. The fuel filler flap is released.
Online Edition for Part no. 01 40 2 914 744 - \251 07/12 BMW AG
Page 130 of 207

RefuelingMOBILITY
129
MINI Clubman:
Pull on the green knob with the fuel pump
symbol; the fuel filler flap opens.
Observe the following when refueling
Take all precautionary measures and
observe all applicable regulations when
handling fuel; otherwise, there is a danger of
personal injury and property damage. <
Do not overfill the fuel tank; otherwise,
overflowing fuel can cause damage to the
environment and the vehicle.<
When refueling, insert the filler nozzle com-
pletely into the filler pipe. Avoid lifting the filler
nozzle while filling the tank, as that would lead
to
> premature pump shutoff
> reduced efficiency of the fuel-vapor
recovery system.
The fuel tank is full when the filler nozzle clicks
off the first time.
Fuel tank capacity
If the range displayed is less than
30 miles/50 km, be sure to refuel; other-
wise, engine functions are not guaranteed and
damage could occur. <
Approx. 13.2 US gal/50 liters, including the
reserve capacity of 2.1 US gal/8 liters.
Fuel specifications
Gasoline
For optimum fuel efficiency, the gasoline should
be free of sulfur or as low in sulfur as possible.
Fuels that are labeled at the pump as containing
metal may not be used.
Do not fill the tank with leaded gasoline or
gasoline that contai ns metal additives,
such as manganese or iron; otherwise, long term
damage to the catalytic converter or other com-
ponents may result. <
Fuels with a maximum ethanol content of up to
10 %, that is, E10, can be used.
The ethanol should meet the following quality
standards:
US: ASTM 4806-xx
CAN: CGSB-3.511-xx
xx: Always observe currently valid standards.
Do not fill the tank with E85, i.e. fuel con-
taining 85 % ethanol, nor with FlexFuel.
Otherwise, the engine and fuel supply system
will be damaged. <
The engine is knocking regulated. Therefore,
different grades of gasoline can be used for
refueling.
Recommended gasoline grades
The manufacturer of your MINI recommends:
> AKI 91.
> John Cooper Works AKI 93.
Minimum grade
The manufacturer of your MINI recommends
AKI 89.
Do not use any gasoline below the speci-
fied minimum fuel grade. Otherwise, the
engine could be damaged. <
If you use gasoline with this minimum AKI rating,
the engine may produce knocking sounds when
starting at high external temperatures. This has
no effect on the engine life.
Online Edition for Part no. 01 40 2 914 744 - \251 07/12 BMW AG
Page 131 of 207

MOBILITYRefueling
130
The use of poor quality fuels may result in
harmful engine deposits or damage.
Additionally, problems re lating to driveability,
starting and stalling, es pecially under certain
environmental conditions such as high ambient
temperatures and high altitudes, may occur.
If driveability problems are encountered, we
recommend switching to a high quality gasoline
brand and a higher octane grade - AKI number -
for a few tankfuls. To avoid harmful engine
deposits, it is highly recommended to purchase
gasoline from BP or Top Tier retailers.
Failure to comply with these recommendations
may result in a need for unscheduled mainte-
nance. <
Online Edition for Part no. 01 40 2 914 744 - \251 07/12 BMW AG
Page 144 of 207

Engine compartmentMOBILITY
143
Engine compartment
Vehicle equipment
In this chapter, all production, country, and
optional equipment that is offered in the model
range is described. Equipment is also described
that is not available because of, for example,
selected options or count ry version. This also
applies to safety related functions and systems.
General information
Never attempt to perform any service or
repair operations on your vehicle without
the required professional technical training. If
you do not know how to follow the specified
instructions, then have the work carried out by
your MINI dealer. If this work is not carried out
properly, there is a danger of subsequent
damage and related safety hazards. <
Important parts of the engine compartment
1Vehicle identification number
2 Battery, under the cover 168
3 Engine oil dipstick 144
4 Engine oil filler neck 145 5
Coolant expansion tank 146
6 Reservoir for washer fl uid for the headlamp
and window washer system 52
7 Engine compartment fuse box 166
Online Edition for Part no. 01 40 2 914 744 - \251 07/12 BMW AG
Page 145 of 207

MOBILITYEngine compartment
144
Hood
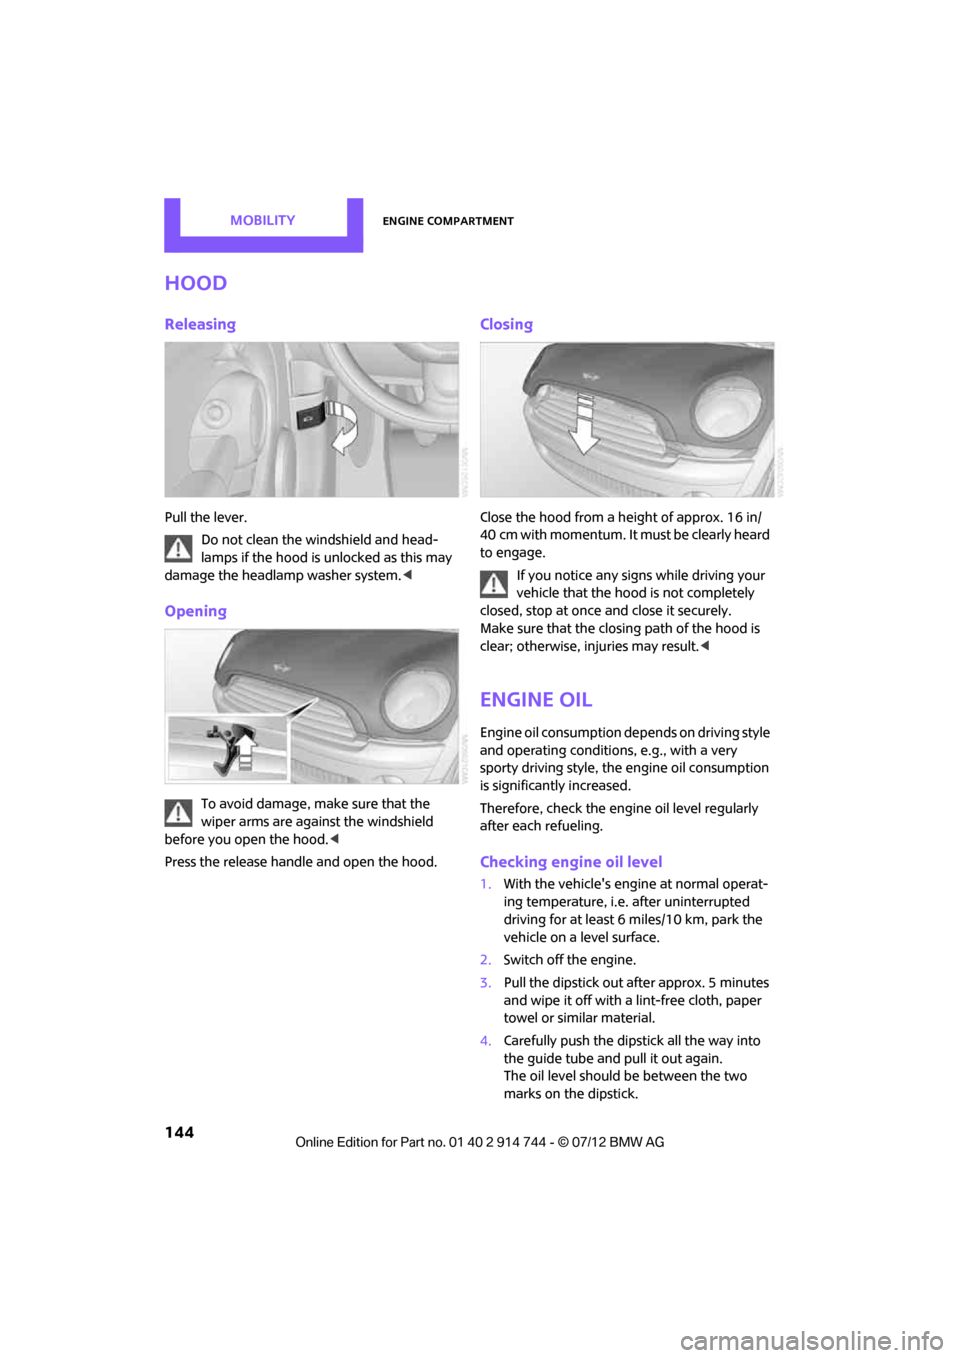
Releasing
Pull the lever.Do not clean the windshield and head-
lamps if the hood is unlocked as this may
damage the headlamp washer system. <
Opening
To avoid damage, make sure that the
wiper arms are against the windshield
before you open the hood. <
Press the release handle and open the hood.
Closing
Close the hood from a height of approx. 16 in/
40 cm with momentum. It must be clearly heard
to engage.
If you notice any signs while driving your
vehicle that the hood is not completely
closed, stop at once and close it securely.
Make sure that the closing path of the hood is
clear; otherwise, injuries may result. <
Engine oil
Engine oil consumption depends on driving style
and operating conditions, e.g., with a very
sporty driving style, the engine oil consumption
is significantly increased.
Therefore, check the engine oil level regularly
after each refueling.
Checking engine oil level
1. With the vehicle's engine at normal operat-
ing temperature, i.e. after uninterrupted
driving for at least 6 miles/10 km, park the
vehicle on a level surface.
2. Switch off the engine.
3. Pull the dipstick out after approx. 5 minutes
and wipe it off with a lint-free cloth, paper
towel or similar material.
4. Carefully push the dipstick all the way into
the guide tube and pull it out again.
The oil level should be between the two
marks on the dipstick.
Online Edition for Part no. 01 40 2 914 744 - \251 07/12 BMW AG
Page 146 of 207

Engine compartmentMOBILITY
145
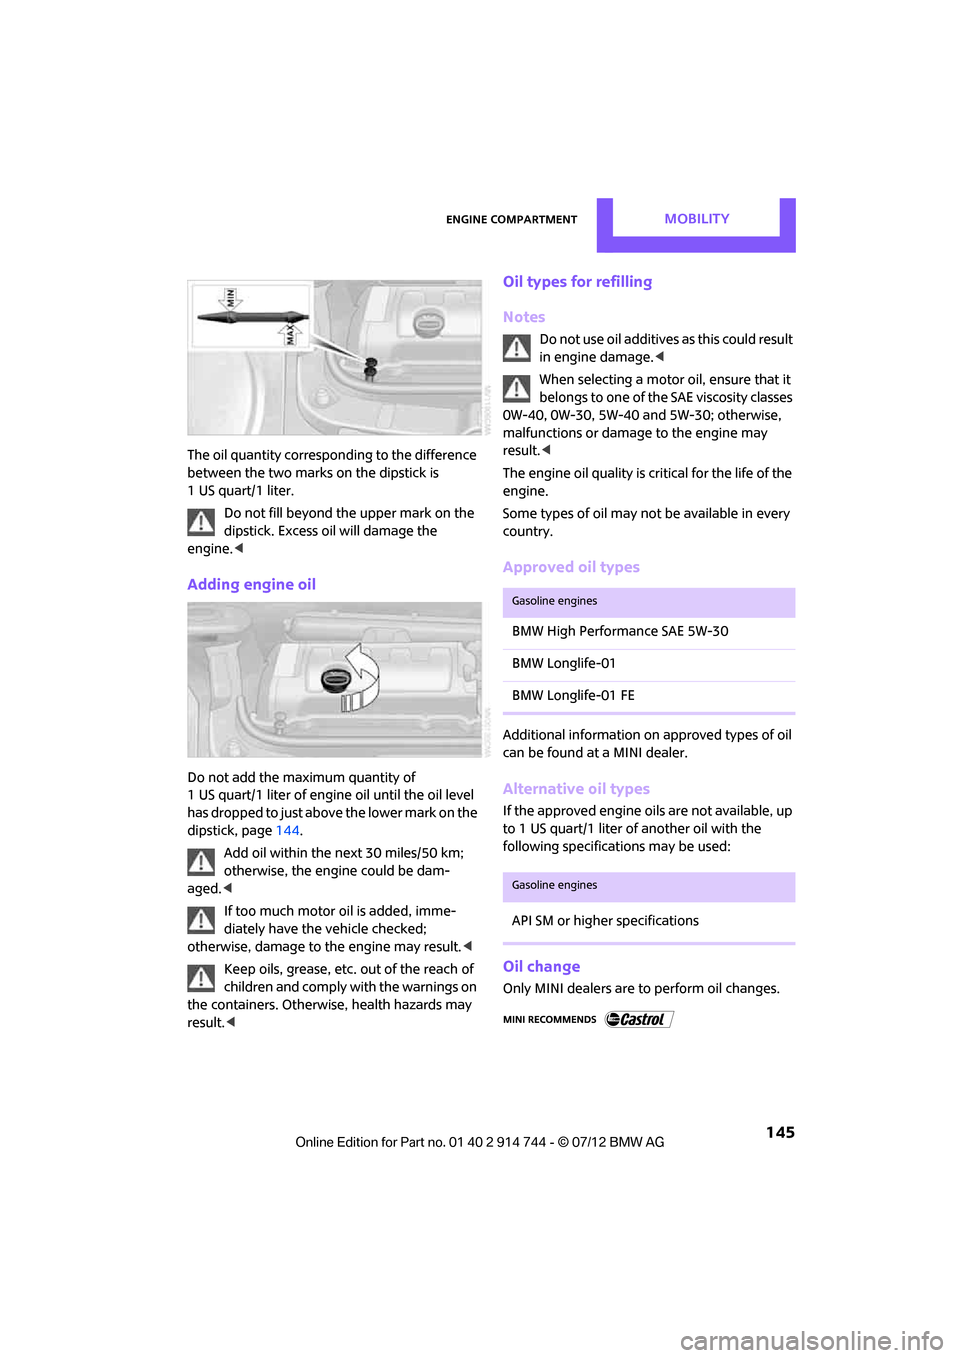
The oil quantity corresponding to the difference
between the two marks on the dipstick is
1 US quart/1 liter.Do not fill beyond the upper mark on the
dipstick. Excess oil will damage the
engine. <
Adding engine oil
Do not add the maximum quantity of
1 US quart/1 liter of engine oil until the oil level
has dropped to just abov e the lower mark on the
dipstick, page 144.
Add oil within the next 30 miles/50 km;
otherwise, the engine could be dam-
aged. <
If too much motor oil is added, imme-
diately have the vehicle checked;
otherwise, damage to the engine may result. <
Keep oils, grease, etc. out of the reach of
children and comply with the warnings on
the containers. Otherwise, health hazards may
result. <
Oil types for refilling
Notes
Do not use oil additives as this could result
in engine damage. <
When selecting a motor oil, ensure that it
belongs to one of the SAE viscosity classes
0W-40, 0W-30, 5W-40 and 5W-30; otherwise,
malfunctions or damage to the engine may
result. <
The engine oil quality is critical for the life of the
engine.
Some types of oil may not be available in every
country.
Approved oil types
Additional information on approved types of oil
can be found at a MINI dealer.
Alternative oil types
If the approved engine oi ls are not available, up
to 1 US quart/1 liter of another oil with the
following specifications may be used:
Oil change
Only MINI dealers are to perform oil changes.
Gasoline engines
BMW High Performance SAE 5W-30
BMW Longlife-01
BMW Longlife-01 FE
Gasoline engines
API SM or higher specifications
Online Edition for Part no. 01 40 2 914 744 - \251 07/12 BMW AG
Page 147 of 207

MOBILITYEngine compartment
146
Coolant
Coolant consists of half water and half additive.
Not all commercially available additives are
suitable for your MINI. Your MINI dealer knows
which additives are suitab le and will be glad to
advise you.
Only use suitable additives; otherwise,
engine damage may result. Because addi-
tives are harmful to your health, it is important
to follow the instructions on the containers. <
Comply with the appropriate environmen-
tal protection regulations when disposing
of coolant additives. <
Coolant temperature
If the coolant, and therefore the engine, should
overheat, then a warning lamp will go on, refer
to page175.
Checking coolant level
Do not add coolant to the cooling system
when the engine is hot. Escaping coolant
can cause burns. <
Do not open the hood until the engine has
cooled down.
The coolant level is correct if it is between the
marks.
Topping off
1. Turn the cap of the expansion tank a little
counterclockwise to allow any accumulated
pressure to escape, then continue turning to
open.
2. Slowly fill to the correct fluid level; do not
overfill.
3. Close by turning the cap.
Have the reason for the coolant loss eliminated
as soon as possible.
Online Edition for Part no. 01 40 2 914 744 - \251 07/12 BMW AG
Page 149 of 207

MOBILITYMaintenance
148
Socket for On-Board
Diagnosis OBD
The primary components that make up the
emissions can be checked by a device via the
OBD socket.
Emissions
The warning lamps come on. The vehicle
is producing higher emissions. You can
continue your journey, but moderate
your speed and exercise due caution.
Have the car checked as soon as possible.
Under certain circumstances, one of the lamps
will flash or light up cont inuously. This indicates
excessive misfiring or a malfunction in the
engine. If this happens, reduce your speed and
visit the nearest MINI dealer as soon as possible.
Severe misfiring can quickly lead to serious
damage of emissions-related components,
especially the catalytic converter. In addition,
mechanical engine components can become
damaged.
If the fuel cap is not properly tightened,
the OBD system may conclude that fuel
vapors are escaping, causing an indica-
tor to light up. If the fuel cap is then tightened,
the indicator should go out within a few days.
Data memory
Your vehicle displays da ta about the operation,
malfunctions, and user settings. These data are
stored in the vehicle and can be partly stored in
the remote control; the data can be read by suitable devices, in pa
rticular at your MINI
dealer. The data read out are used for support-
ing the service processe s and repair or for
optimization and development of vehicle
functions.
Online Edition for Part no. 01 40 2 914 744 - \251 07/12 BMW AG
Page 151 of 207

MOBILITYCare
150
Automatic transmission
Before driving into the car wash, make sure that
the vehicle can roll:
1.Place the remote control, even with Comfort
Access, in the ignition lock.
2. Move the selector lever to position N.
3. Release the parking brake.
4. Switch off the engine.
5. Insert the remote control in the ignition lock
so that the vehicle can roll.
Steam jets/high-pressure washers
When using steam jets or high-pressure
washers, make sure that you maintain
sufficient distance from the vehicle and do not
exceed a maximum temperature of 140 7/
60 6 .
If the distance is too close, the pressure too high,
or the temperature too high, parts of the vehicle
can be damaged, or water can penetrate.
Observe the operating instructions for high-
pressure washers. <
Do not spray sensors, such as the Park Dis-
tance Control, with high-pressure washers
for a long time or at a distance of less than 1 ft/
30 cm. <
Manual washing
Use a great deal of water and, if necessary, car
shampoo when washing your car by hand. Clean
the vehicle with a sponge or a washing brush
applying a slight amount of pressure.
Before cleaning the windshield, deacti-
vate the rain sensor or turn off the ignition
to prevent unintentional wiping. <
Observe local regulations regarding
washing vehicles by hand. <
Headlamps
Do not wipe dry and do not use abrasive or
corrosive cleaning agents. Remove dirt and
contamination, such as in sects, by soaking with shampoo and then washing with plenty of
water.
Do not remove accumulated ice and snow with
an ice scraper; use window deicers instead.
Windows
Clean the outside and inside of the windows and
mirrors with a window cleaner.
Do not clean the mirrors with cleaners
containing quartz. <
Wiper blades
Clean with soapy water and change regularly to
prevent the formation of streaks.
Wax, preservatives and dirt on the win-
dows cause streaks wh en the windshield
wipers are on, and can cause premature wear of
the wiper blades and interfere with the rain
sensor. <
Paintwork, care
Regular care helps your vehicle retain its value
and protects the paint from the long-term
effects of aggressive substances.
Environmental influences in areas with
increased air pollution or natural contaminants,
such as tree sap or pollen, can affect the vehicle
paintwork. It is therefore important to adjust the
frequency and extent of vehicle care corre-
spondingly.
Immediately remove any pa rticularly aggressive
substances, such as fuel that has overflowed, oil,
grease, brake fluid, or bird droppings; otherwise,
paint damage can be caused.
Removing paintwork damage
Depending on the severity of the damage,
immediately repair stone damage or
scratches to prevent rusting. <
The manufacturer of the MINI recommends
repairing paint damage professionally according
to factory specifications with original MINI
paints.
Online Edition for Part no. 01 40 2 914 744 - \251 07/12 BMW AG