remote start MINI Clubman 2012 Owner's Manual
[x] Cancel search | Manufacturer: MINI, Model Year: 2012, Model line: Clubman, Model: MINI Clubman 2012Pages: 207, PDF Size: 3.26 MB
Page 31 of 207
CONTROLSOpening and closing
30
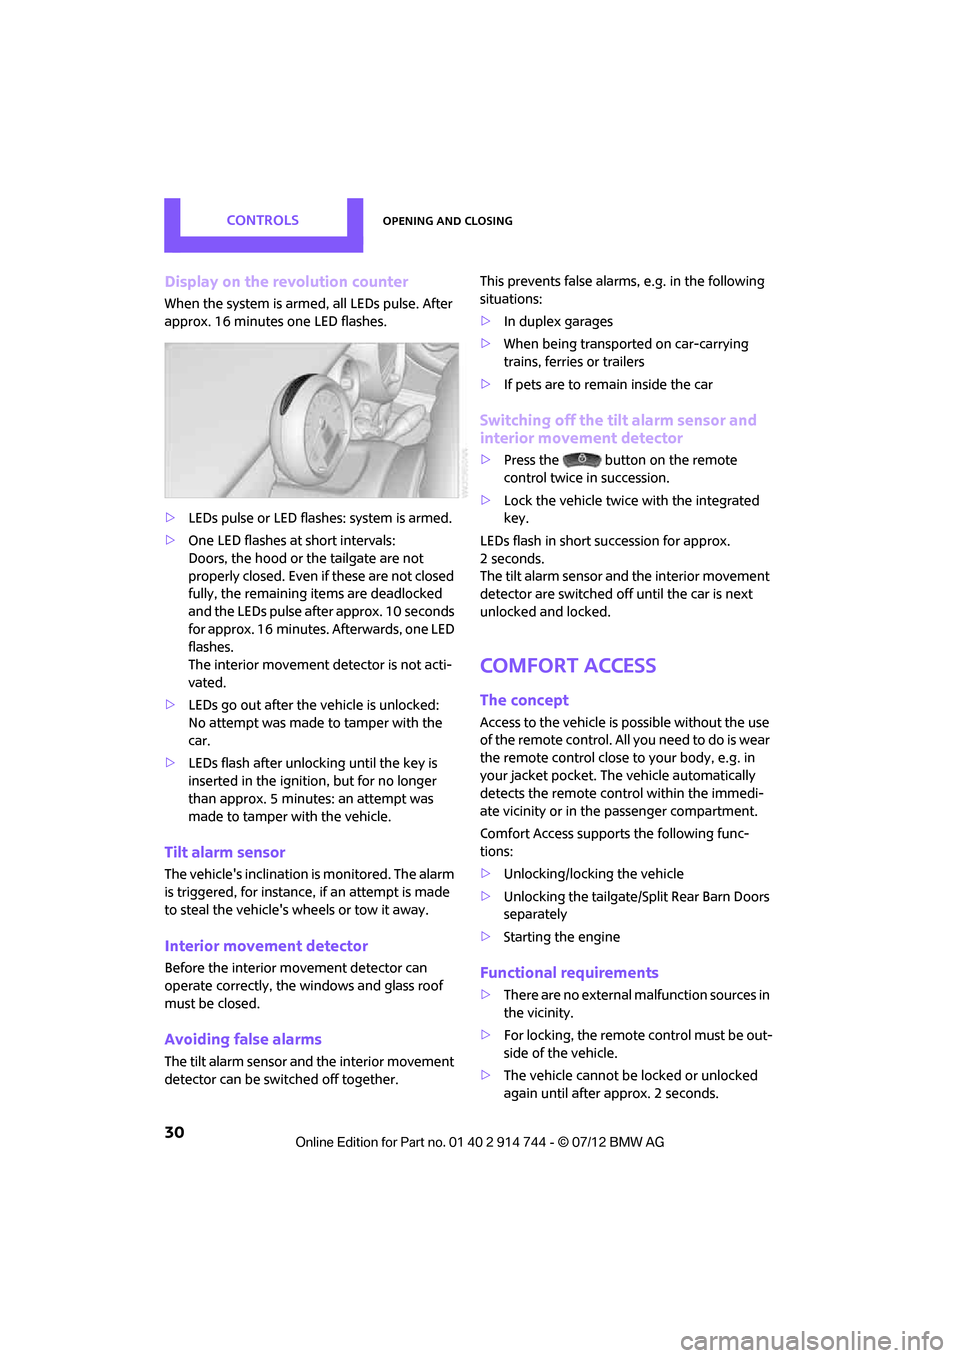
Display on the revolution counter
When the system is armed, all LEDs pulse. After
approx. 16 minutes one LED flashes.
>LEDs pulse or LED flashes: system is armed.
> One LED flashes at short intervals:
Doors, the hood or the tailgate are not
properly closed. Even if these are not closed
fully, the remaining items are deadlocked
and the LEDs pulse after approx. 10 seconds
for approx. 16 minutes. Afterwards, one LED
flashes.
The interior movement detector is not acti-
vated.
> LEDs go out after the vehicle is unlocked:
No attempt was made to tamper with the
car.
> LEDs flash after unlocking until the key is
inserted in the ignition, but for no longer
than approx. 5 minutes: an attempt was
made to tamper with the vehicle.
Tilt alarm sensor
The vehicle's inclination is monitored. The alarm
is triggered, for instance, if an attempt is made
to steal the vehicle's wheels or tow it away.
Interior movement detector
Before the interior movement detector can
operate correctly, the windows and glass roof
must be closed.
Avoiding false alarms
The tilt alarm sensor and the interior movement
detector can be switched off together. This prevents false alarms, e.g. in the following
situations:
>
In duplex garages
> When being transported on car-carrying
trains, ferries or trailers
> If pets are to remain inside the car
Switching off the tilt alarm sensor and
interior movement detector
>Press the button on the remote
control twice in succession.
> Lock the vehicle twice with the integrated
key.
LEDs flash in short succession for approx.
2seconds.
The tilt alarm sensor and the interior movement
detector are switched off until the car is next
unlocked and locked.
Comfort Access
The concept
Access to the vehicle is possible without the use
of the remote control. All you need to do is wear
the remote control close to your body, e.g. in
your jacket pocket. The vehicle automatically
detects the remote control within the immedi-
ate vicinity or in the passenger compartment.
Comfort Access support s the following func-
tions:
> Unlocking/locking the vehicle
> Unlocking the tailgate/S plit Rear Barn Doors
separately
> Starting the engine
Functional requirements
>There are no external malfunction sources in
the vicinity.
> For locking, the remote control must be out-
side of the vehicle.
> The vehicle cannot be locked or unlocked
again until after approx. 2 seconds.
Online Edition for Part no. 01 40 2 914 744 - \251 07/12 BMW AG
Page 32 of 207

Opening and closingCONTROLS
31
>The engine can only be started if the remote
control is in the vehicle.
> The doors and tailgate/Split Rear Barn Doors
must be closed to be able to operate the
windows and glass roof.
Comparison to standard remote controls
The indicated function can be operated by
pressing the buttons or via Comfort Access.
Instructions on openin g and closing are found
starting on page 22.
If you notice a brief delay while opening or
closing the windows or glass roof, the
system is checking whether a remote control is
inside the vehicle. Repeat the opening or closing
procedure, if necessary. <
Unlocking
Press button 1.
Depending on the setting, refer to Unlocking
mode on page 23, only the driver's door or the
entire vehicle is unlocked.
Press the button again to lock the vehicle
again. <
Convenient opening with the remote control,
refer to page 24.
Locking
Press button 1.
Unlocking the tailgate/Split Rear Barn
Doors separately
Press the button on the outside of the tailgate/
Split Rear Barn Doors. Corresponds to pre
ssing the button.
If the vehicle detects that a remote control
has been accidentally left inside the
locked vehicle's cargo area after the tailgate/
Split Rear Barn Doors ar e closed, the tailgate/
Split Rear Barn Doors will reopen slightly. The
hazard warning flashers flash and an acoustic
signal sounds. <
Windows and glass roof, electric
If the engine is switched off, you can still operate
the windows and glass sunr oof so long as a door
or the tailgate/Split Re ar Barn Doors have not
been opened.
If the doors and tailgate/Split Rear Barn Doors
are closed again and the remote control is
located inside the vehicle, the windows and the
glass roof can be operated again.
Insert the remote control into the ignition lock to
be able to operate the windows or glass roof
when the engine is switched off and the doors
are open.
Switching on radio readiness
Switch on radio readiness by pressing the Start/
Stop button, page 44.
Do not depress the brake or the clutch;
otherwise, the engine will start. <
Starting the engine
The engine can be started or the ignition can be
switched on when a remote control is inside the
vehicle. It is not necessa ry to insert a remote
control into the ignition lock, page 44.
Switching off the engine in cars with
automatic transmission
The engine can only be switched off when the
selector lever is in position P, page46.
To switch the engine off when the selector lever
is in position N, the remote control must be in
the ignition lock.
Online Edition for Part no. 01 40 2 914 744 - \251 07/12 BMW AG
Page 33 of 207

CONTROLSOpening and closing
32
Before driving a vehicle with automatic
transmission into a car wash
1.Insert remote control into ignition lock.
2. Depress the brake.
3. Move the selector lever to position N.
4. Switch off the engine.
The vehicle can roll.
Malfunction
Comfort Access may malf unction due to local
radio waves, e. g. due to the presence of a
mobile phone in the immediate vicinity of the
remote control or the charging of a mobile
phone in the vehicle.
If this happens, open or close the vehicle via the
buttons on the remote control or using the
integrated key.
Insert the remote control into the ignition lock
and start the engine.
Warning lamps
The warning lamp lights up when an
attempt is made to start the engine: the
engine cannot be started. The remote
control is not inside the vehicle or is malfunc-
tioning. Take the remote control with you inside
the vehicle or have it checked. If necessary,
insert another remote co ntrol into the ignition
lock.
The warning lamp lights up when the
engine is running: the remote control is
no longer inside the vehicle. After the
engine is switched off, the engine can only be
restarted within approx. 10 seconds.
The indicator lamp comes on: replace
the battery in the remote control.
Replacing the battery
The remote control for Comfort Access contains
a b a t t e r y t h a t w i l l n e e d t o b e r e p l a c e d f r o m t i m e
to time. 1.
Remove the cover.
2. Insert the new battery with the plus side
facing up.
3. Press the cover on to close.
Take the old battery to a recycling center
or to your MINI dealer. <
Glass roof, electric
To prevent injuries, exercise care when
closing the glass roof and keep it in your
field of vision until it is shut.
Take the key with you when you leave the car;
otherwise, children could operate the roof and
possibly injure themselves. <
Tilting
>Press the switch backwa rd to the resistance
point and hold it there.
Both glass roofs are tilted.
Releasing the switch stops the movement.
> With the ignition switched on, press the
switch backward beyond the resistance
point.
Both closed roofs are tilted fully.
Pressing again stops the movement.
Online Edition for Part no. 01 40 2 914 744 - \251 07/12 BMW AG
Page 45 of 207
CONTROLSDriving
44
Driving
Vehicle equipment
In this chapter, all production, country, and
optional equipment that is offered in the model
range is described. Equipment is also described
that is not available because of, for example,
selected options or coun try version. This also
applies to safety relate d functions and systems.
Ignition lock
Inserting the key into the ignition lock
Insert the key all the way into the ignition lock.
Radio readiness
Individual electrical consumers can operate.
Removing the key from the ignition lock
Press in the key briefly. It is ejected slightly.
At the same time:
>The ignition is switched off if it was on
beforehand.
Automatic transmission
The key can only be removed if the selector lever
is in position P: interlock.
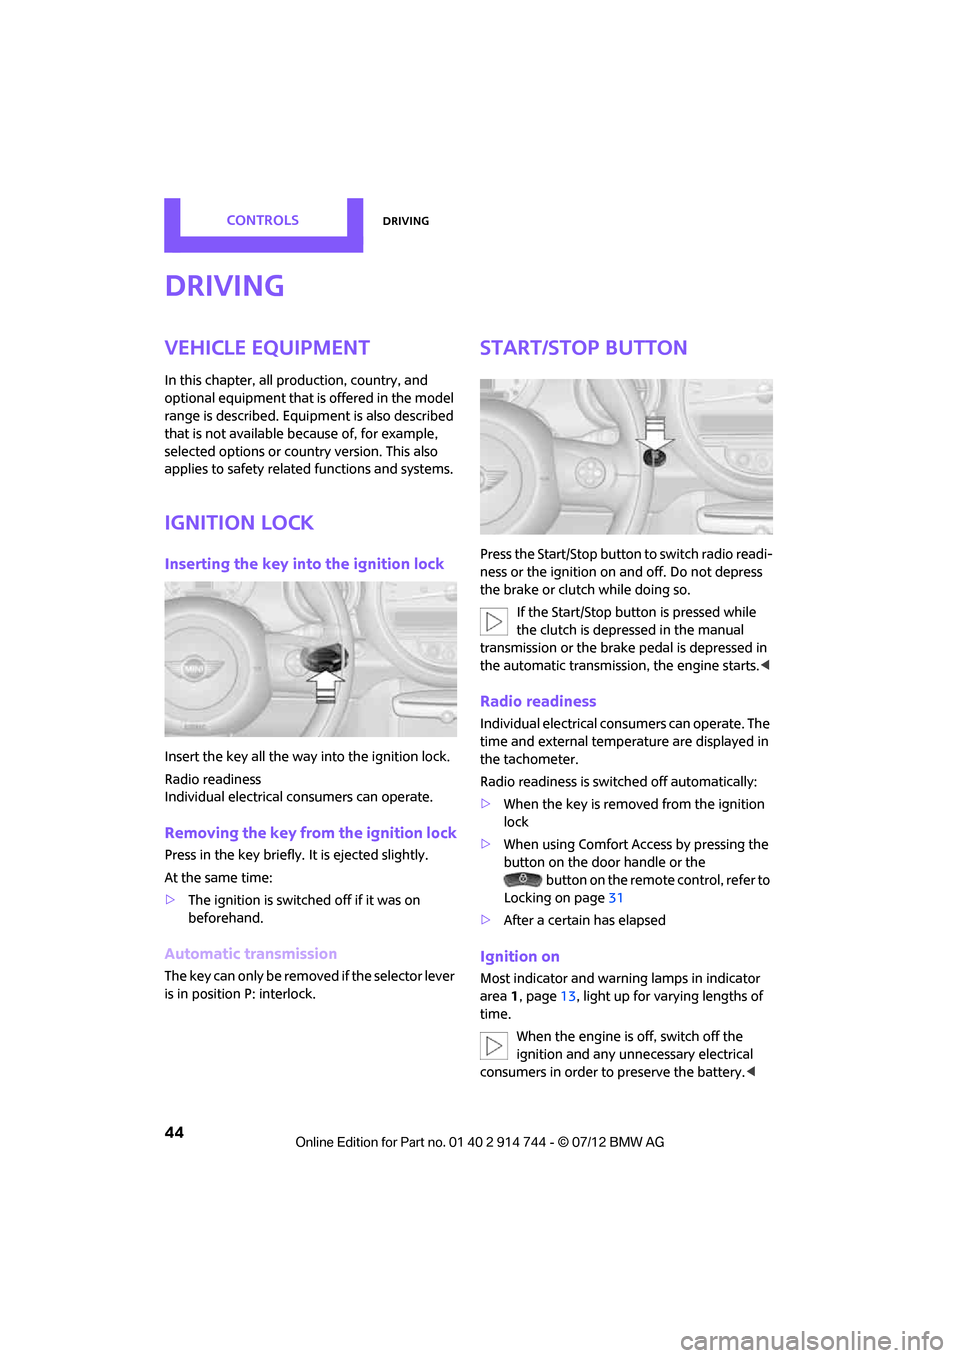
Start/Stop button
Press the Start/Stop button to switch radio readi-
ness or the ignition on and off. Do not depress
the brake or clutch while doing so.
If the Start/Stop button is pressed while
the clutch is depressed in the manual
transmission or the brake pedal is depressed in
the automatic transmission, the engine starts. <
Radio readiness
Individual electrical consumers can operate. The
time and external temperature are displayed in
the tachometer.
Radio readiness is switched off automatically:
>When the key is removed from the ignition
lock
> When using Comfort Access by pressing the
button on the door handle or the
button on the remote control, refer to
Locking on page 31
> After a certain has elapsed
Ignition on
Most indicator and warn ing lamps in indicator
area 1, page 13, light up for varying lengths of
time.
When the engine is off, switch off the
ignition and any unnecessary electrical
consumers in order to preserve the battery. <
Online Edition for Part no. 01 40 2 914 744 - \251 07/12 BMW AG
Page 47 of 207
CONTROLSDriving
46
Automatic transmission
1.With the car at a stop, move the selector
lever to position P.
2. Press the Start/Stop button.
3. Forcefully apply the parking brake.
Before driving into a car wash
By following these steps, the vehicle is able to
roll:
1.Place the remote control, even with Comfort
Access, in the ignition lock.
2. Depress the brake.
3. Move the selector lever to position N.
4. Switch off the engine.
Parking brake
The parking brake is primarily intended to
prevent the vehicle from rolling while parked;
it brakes the rear wheels.
In addition, follow the instructions on page 45
under Switching off the engine.
Applying
The lever locks in position automatically.
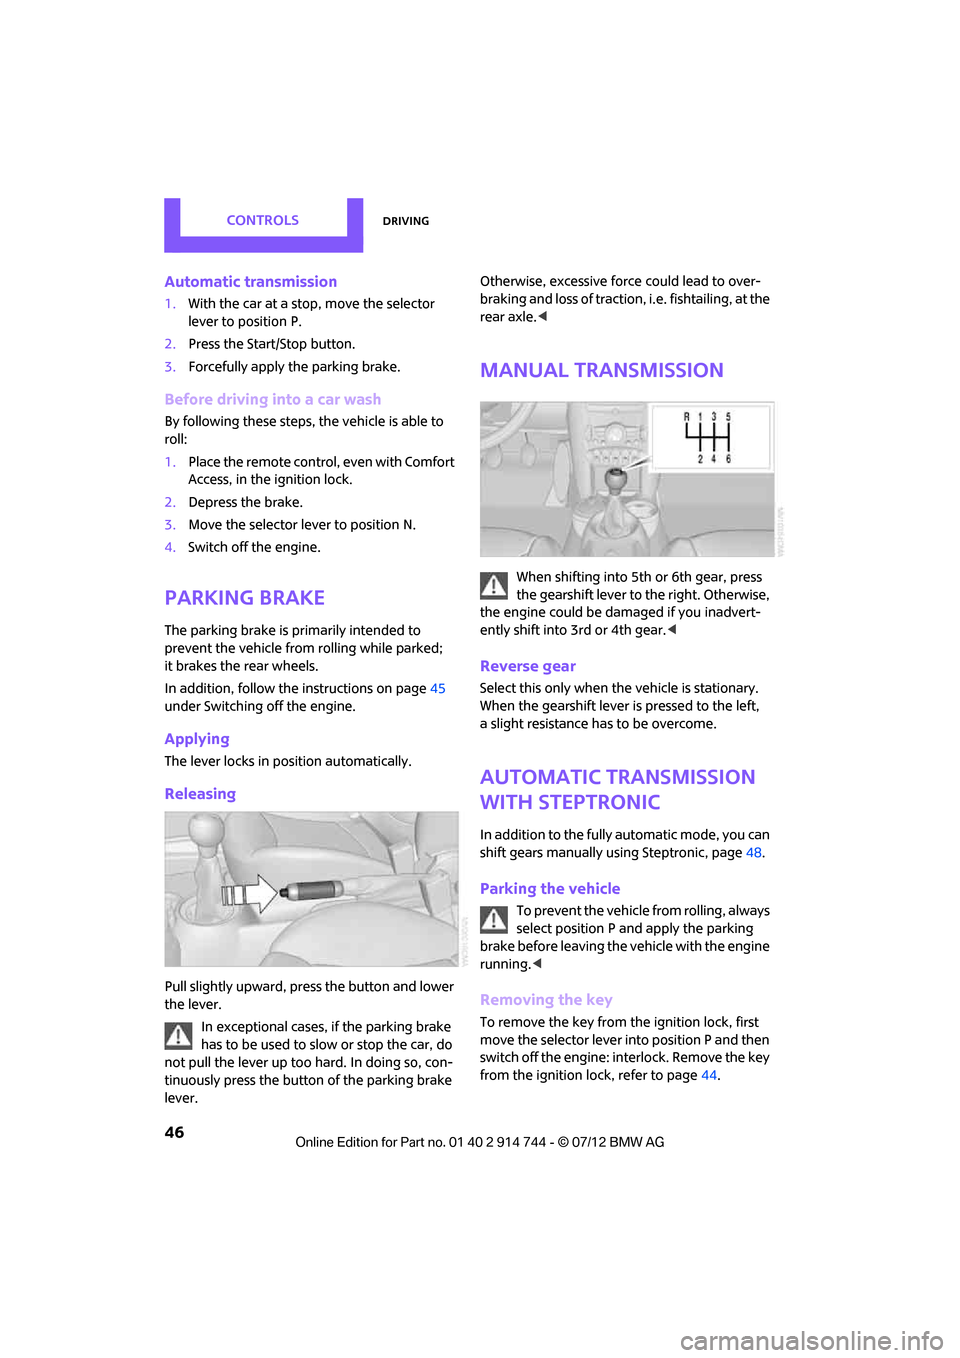
Releasing
Pull slightly upward, press the button and lower
the lever.
In exceptional cases, if the parking brake
has to be used to slow or stop the car, do
not pull the lever up too hard. In doing so, con-
tinuously press the button of the parking brake
lever. Otherwise, excessive force could lead to over-
braking and loss of traction
, i.e. fishtailing, at the
rear axle. <
Manual transmission
When shifting into 5t h or 6th gear, press
the gearshift lever to the right. Otherwise,
the engine could be damaged if you inadvert-
ently shift into 3rd or 4th gear. <
Reverse gear
Select this only when the vehicle is stationary.
When the gearshift lever is pressed to the left,
a slight resistance ha s to be overcome.
Automatic transmission
with Steptronic
In addition to the fully automatic mode, you can
shift gears manually using Steptronic, page 48.
Parking the vehicle
To prevent the vehicle from rolling, always
select position P and apply the parking
brake before leaving the vehicle with the engine
running. <
Removing the key
To remove the key from the ignition lock, first
move the selector lever into position P and then
switch off the engine: in terlock. Remove the key
from the ignition lock, refer to page 44.
Online Edition for Part no. 01 40 2 914 744 - \251 07/12 BMW AG
Page 86 of 207
Practical interior accessoriesCONTROLS
85
Practical interior accessories
Vehicle equipment
In this chapter, all production, country, and
optional equipment that is offered in the model
range is described. Equipment is also described
that is not available because of, for example,
selected options or count ry version. This also
applies to safety related functions and systems.
Integrated universal
remote control
The concept
By using the integrated universal remote con-
trol, up to 3 functions of remote controlled
devices, e.g., garage door openers or lighting
systems, can be operated . As a result, the uni-
versal remote control can replace up to 3 differ-
ent remote controls. To operate, the buttons on
the rearview mirror must be programmed with
the desired functions. For programming, the
remote control for each device is needed.
To prevent possible damage or injury,
before programming or using the inte-
grated universal remote control, always inspect
the immediate area to make certain that no
people, animals or objects are within the travel
range of the device.
Comply also with the safe ty instructions supplied
with the original hand-held transmitter. <
Before selling the vehicle, delete the stored
functions as a safety precaution, page 87.
Compatibility
Depending on your vehicle's equip-
ment, the glove compartment can be
ventilated and, if the cooling function is
switched on, can also be cooled.
For additional information, please contact your
MINI dealer or call: 1-800-355-3515. A list of compatible remo
te controls is available
on the Internet at www.homelink.com.
HomeLink is a registered trademark of Johnson
Controls, Inc.
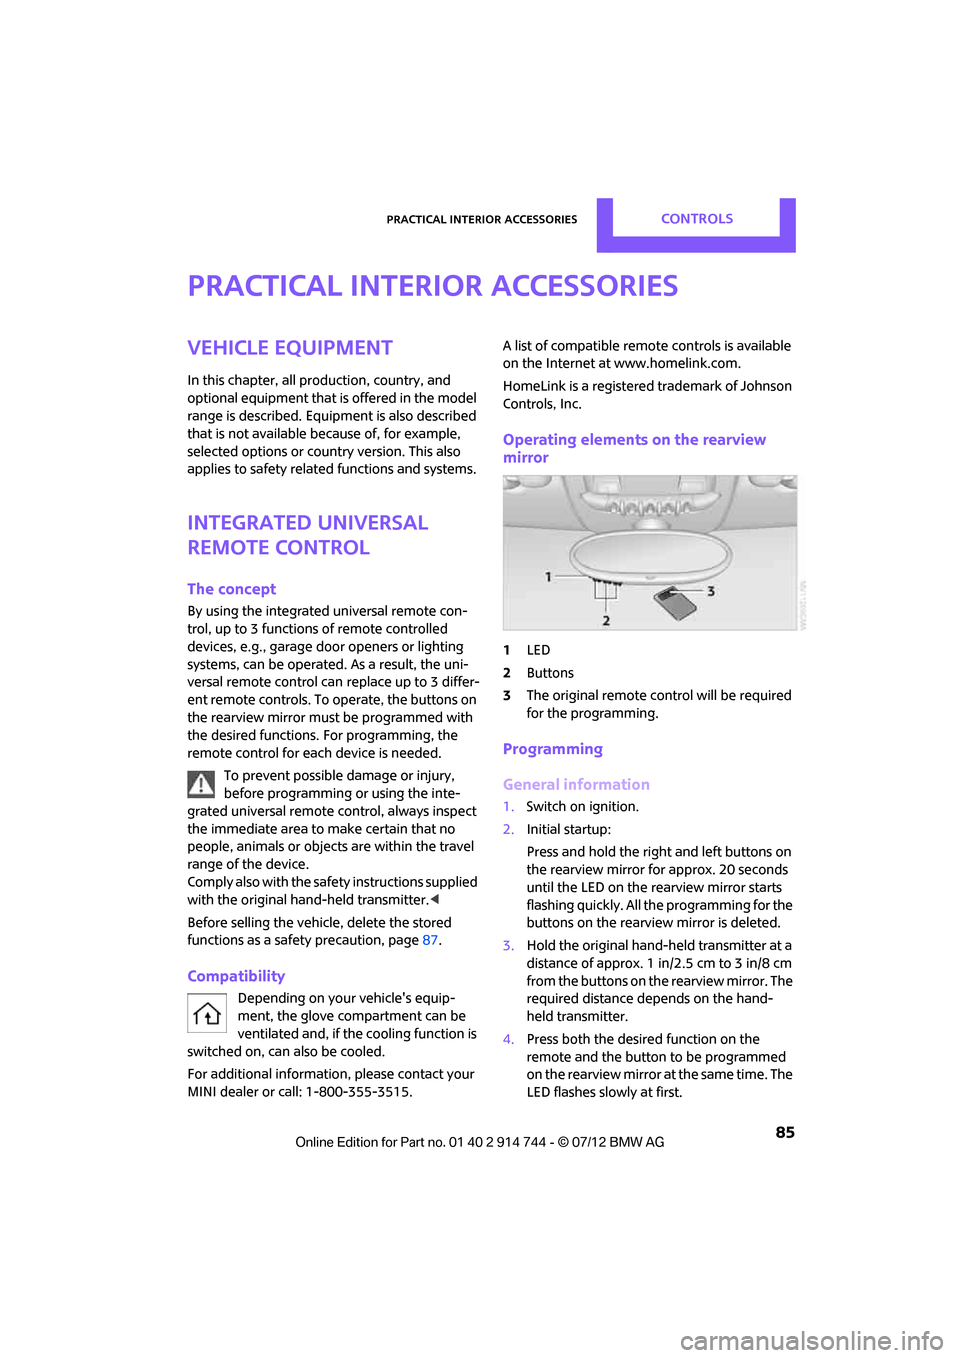
Operating elements on the rearview
mirror
1 LED
2 Buttons
3 The original remote control will be required
for the programming.
Programming
General information
1.Switch on ignition.
2. Initial startup:
Press and hold the righ t and left buttons on
the rearview mirror for approx. 20 seconds
until the LED on the rearview mirror starts
flashing quickly. All the programming for the
buttons on the rearview mirror is deleted.
3. Hold the original hand-held transmitter at a
distance of approx. 1 in/2.5 cm to 3 in/8 cm
from the buttons on the rearview mirror. The
required distance depends on the hand-
held transmitter.
4. Press both the desire d function on the
remote and the button to be programmed
on the rearview mirror at the same time. The
LED flashes slowly at first.
Online Edition for Part no. 01 40 2 914 744 - \251 07/12 BMW AG
Page 87 of 207
CONTROLSPractical interior accessories
86
5.As soon as the LED flashes rapidly, release
both buttons. The quick flashing indicates
that the button on the rearview mirror has
been programmed.
If the LED does not flash rapidly after
approx. 60 seconds, alter the distance
between the rearview mirror and hand-held
transmitter and repeat this step. Several
attempts at different distances may be
necessary. Wait at le ast 15 seconds before
each attempt.
Canada: if the programming was interrupted
by the hand-held transm itter, press and hold
the memory button and press the button on
the hand-held transmit ter for 2 seconds and
release several times.
6. To program other functions on other
buttons, repeat steps 3 to 5.
You can operate the system with the engine
running or with the ignition switched on.
Special features of hopping-code
transmitter systems
If the device cannot be operated after being
programmed repeatedly, then check if the
device to be operated is equipped with a hop-
ping-code system. In a ddition, check in the
operating instructions for the device or press the
programmed button on the rearview mirror for a
longer period of time. If the LED on the rearview
mirror first flashes quickl y and then is on for
2 seconds, then the device is equipped with a
hopping-code system. The flashing and the LED
being on repeats itself for approx. 20 seconds.
In addition, for devices with hopping-code
systems, the integrated universal remote control
and the device must be synchronized.
Information about synchr onizing can be found
in the operating in structions for the device to be
set.
Programming will be easier with the aid of a
second person. Synchronizing:
1.
Park your vehicle within the range of the
remote-controlled device.
Do not exceed the 164 ft/50 m range of the
remote-controlled device.
2. Program the particular button on the rear-
view mirrors as described.
3. Find and press the button for synchronizing
the device to be set. There remain approx.
30 seconds for the next step.
4. Press and hold the programmed button on
the rearview mirror for approx. 3 seconds
and then release. Repeat this step, possibly
up to three times, to complete the synchro-
nization. After the sy nchronization is com-
pleted, the programmed function is imple-
mented.
To reprogram individual buttons
1. Switch on ignition.
2. Press and hold the button to be pro-
grammed on the rearview mirror.
3. As soon as the LED on the rearview mirror
starts flashing slowly, hold the hand-held
transmitter of the device to be operated
approx. 1in/2.5cm to 3in/8cm from the
buttons on the rearview mirror. The required
distance depends on the hand-held trans-
mitter.
4. Press and also hold the button with the
desired function on the hand-held trans-
mitter.
5. As soon as the LED on the rearview mirror
starts blinking faster, release both buttons.
The quick flashing indicates that the button
on the rearview mirror has been pro-
grammed. The device can now be operated
using the button on the rearview mirror.
Canada: if the LED is not flashing rapidly
after 60 seconds, change the distance and
repeat the step or, if the programming was
interrupted by the hand-held transmitter,
press and hold the memory button and
press the button on the hand-held transmit-
ter for 2 seconds and release several times.
Online Edition for Part no. 01 40 2 914 744 - \251 07/12 BMW AG
Page 88 of 207
Practical interior accessoriesCONTROLS
87
Operation
Before using the integrated universal
remote control, always inspect the imme-
diate area to make certain that no people, ani-
mals or objects are within the travel range of the
device.
Comply also with the safe ty instructions supplied
with the original hand-held transmitter. <
The device, for example a garage door, can be
operated while the engine is running or when
the ignition is on by using the button on the
rearview mirror. In addi tion, while within the
reception range of the device, press the button
until the function is deleted. The LED on the
rearview mirror is constant ly on while the signal
is being transmitted.
Deleting stored functions
Press and hold the right and left buttons on the
rearview mirror for approx. 20 seconds until the
LED on the rearview mirror starts flashing
quickly. All stored functions are deleted. The
functions can not be deleted individually.
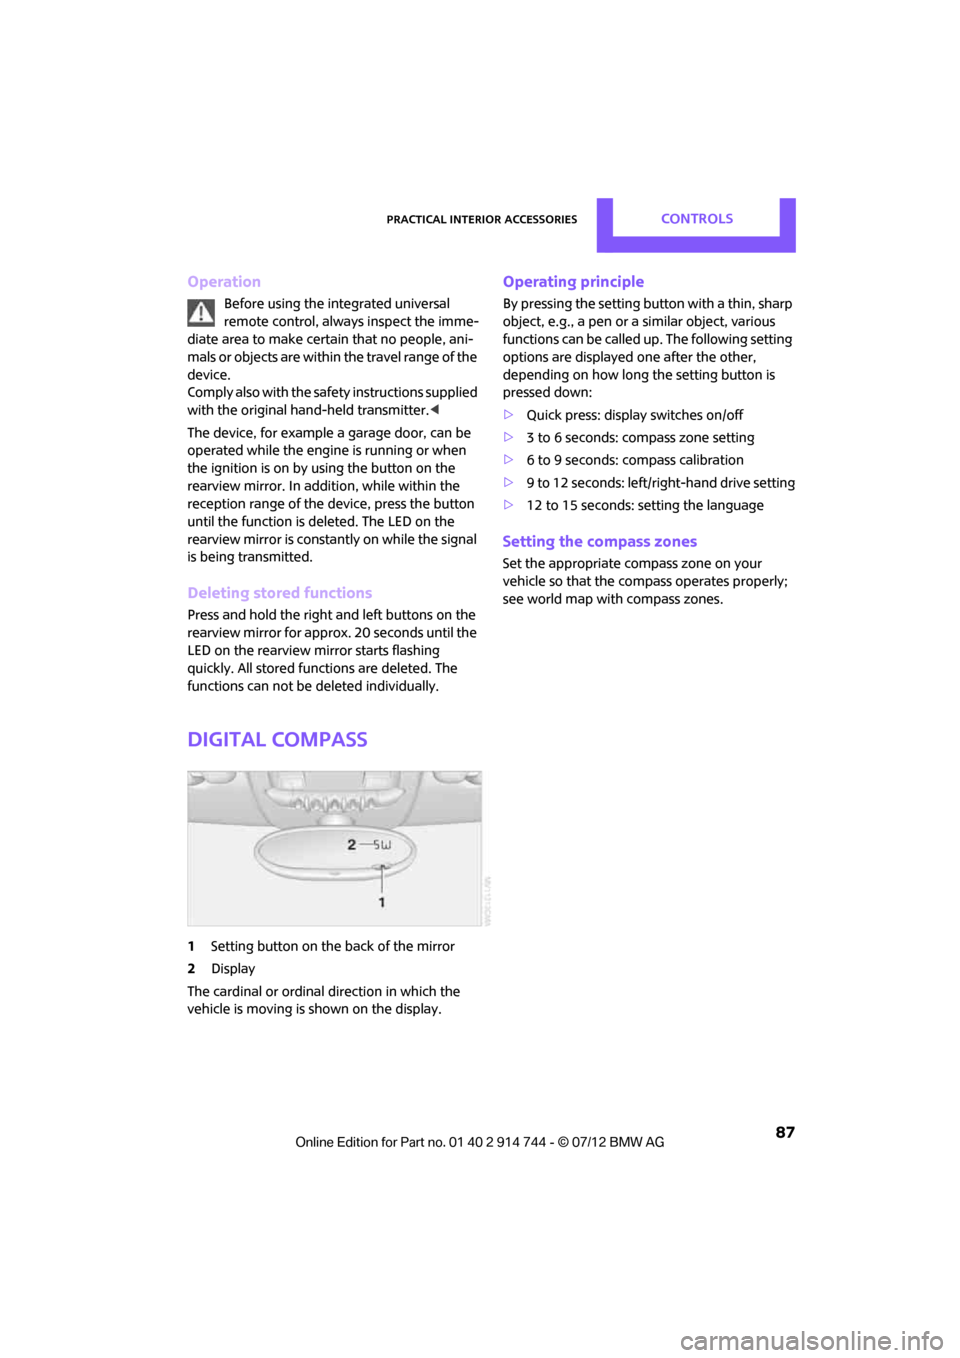
Digital compass
1 Setting button on the back of the mirror
2 Display
The cardinal or ordinal direction in which the
vehicle is moving is shown on the display.
Operating principle
By pressing the setting button with a thin, sharp
object, e.g., a pen or a similar object, various
functions can be called up. The following setting
options are displayed one after the other,
depending on how long the setting button is
pressed down:
> Quick press: display switches on/off
> 3 to 6 seconds: compass zone setting
> 6 to 9 seconds: compass calibration
> 9 to 12 seconds: left/right-hand drive setting
> 12 to 15 seconds: setting the language
Setting the compass zones
Set the appropriate compass zone on your
vehicle so that the compass operates properly;
see world map with compass zones.
Online Edition for Part no. 01 40 2 914 744 - \251 07/12 BMW AG
Page 119 of 207
COMMUNICATIONSTelephone
118
10Switching displays 122
> "PHONE": telephone
> "COMP": computer
> "CONFIG": adjusting
> "MINI": MINI contact
11 Radio on/off, volume
>Press: switchin g radio on/off
> Turn: adjusting volume 121
12 Ejecting CD
Pairing/unpairing mobile
phone
Overview
The pairing data of four mobile phones can be
stored simultaneously in the vehicle. When the
engine is running or the ignition is switched on,
each paired mobile phone is automatically
detected as soon as it is present in the passenger
compartment.
Requirements
>Suitable mobile ph one, refer to page116.
> Mobile phone operational.
> Bluetooth activated in vehicle, refer to
page 118, and in the mobile phone.
> Bluetooth presets in the mobile phone are
required, e.g. connection not confirmed or
visible, refer to Owner's Manual for the
mobile phone.
> A number with at least 4 and at most
16 digits has been established as the
Bluetooth passkey. Only required once for
pairing. >
Ignition switched on.
Activating/deactivating Bluetooth link
Bluetooth is not permitted everywhere. Comply
with all safety guidelines and regulations.
To deactivate the Bluetooth connection:
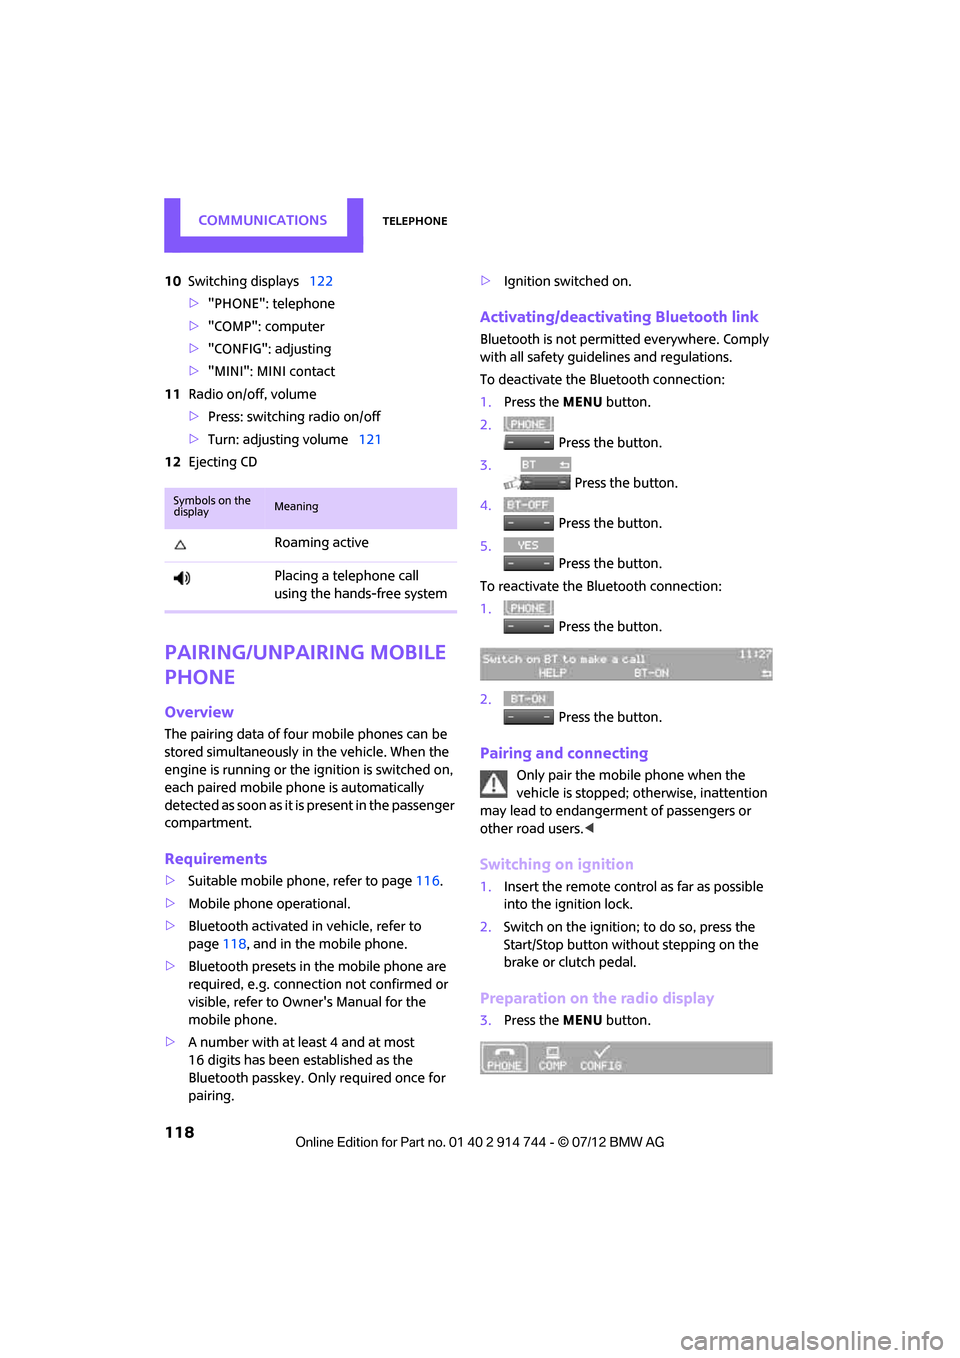
1.Press the MENU button.
2. Press the button.
3. Press the button.
4. Press the button.
5. Press the button.
To reactivate the Bluetooth connection:
1. Press the button.
2. Press the button.
Pairing and connecting
Only pair the mobile phone when the
vehicle is stopped; otherwise, inattention
may lead to endangerment of passengers or
other road users. <
Switching on ignition
1.Insert the remote control as far as possible
into the ignition lock.
2. Switch on the ignition; to do so, press the
Start/Stop button without stepping on the
brake or clutch pedal.
Preparation on the radio display
3.Press the MENU button.
Symbols on the
displayMeaning
Roaming active
Placing a telephone call
using the hands-free system
Online Edition for Part no. 01 40 2 914 744 - \251 07/12 BMW AG
Page 175 of 207

MOBILITYIndicator and warning lamps
174
Fuel cap missing or looseMake sure that the fuel cap is correctly
positioned and close it until it audibly
clicks. Do not jam the strap between
the fuel cap and the vehicle.
Window washer fluid level too low Add washer fluid as soon as possible,
page 52.
Lights up in red:
Service due Arrange a service appointment.
Check service requirements,
page 147.
Lights up in yellow:
The next time that the Start/Stop
button is pressed, the engine starts,
possibly even without a foot on the
brakes or without depressing the
clutch
Remote control malfunctioning or, in
cars with Comfort Access, not
detected The engine cannot be started. Have
the remote control checked, if
necessary.
Remote control battery is discharged Use the remote control for a longer journey or, in cars with Comfort
Access, replace the battery.
Belt tensioners and/ or airbag system
failed Have the system checked
immediately. Fasten the safety belts
anyway.
Power steering failed You can continue your journey, but
moderate your speed and exercise
due caution. Steering response will be
markedly different. Have the system
checked without delay.
12Cause What to do
Online Edition for Part no. 01 40 2 914 744 - \251 07/12 BMW AG