remote control MINI Clubman 2013 User Guide
[x] Cancel search | Manufacturer: MINI, Model Year: 2013, Model line: Clubman, Model: MINI Clubman 2013Pages: 267, PDF Size: 3.63 MB
Page 37 of 267
CONTROLSOpening and closing
36
Tilting
>Press the switch backwa rd to the resistance
point and hold it there.
Both glass roofs are tilted.
Releasing the switch stops the movement.
> With the ignition switched on, press the
switch backward beyo nd the resistance
point.
Both closed roofs are tilted fully.
Pressing again st ops the movement.
Opening, closing
With the ignition switched on and the glass roof
tilted, press the switch backward and hold it
there.
The front glass roof opens.
The rear glass roof is closed.
Releasing the switch stops the movement.
The glass roof can be closed in the same way by
pressing the switch forward.
The front glass roof remains in a tilted position.
The rear glass roof is tilted. Pressing on the
switch again closes both roofs completely.
Convenience operation via door lock or Comfort
Access, refer to page 28,29, 34.
Roller sunblind
The roller sunblind can be opened and closed
independently of the glass roof.
Following interruptions in electrical
power supply
After a power failure, there is a possibility that
the glass roof can only be tilted. In this case,
have the system initializ ed. The manufacturer of
your MINI recommends that you have this work
done by your MINI dealer.
Windows
To prevent injuries, exercise care when
closing windows and ke ep them in your
field of vision until they are shut.
Take the remote control with you when you
leave the car; otherwise, children could operate
the electric windows and possibly injure them-
selves. <
If, after a window is opened and closed
several times in close succession, the win-
dow can only be closed and not opened, the sys-
tem is overheated. Let the system cool for sev-
eral minutes with the ignition switched on or the
engine running. <
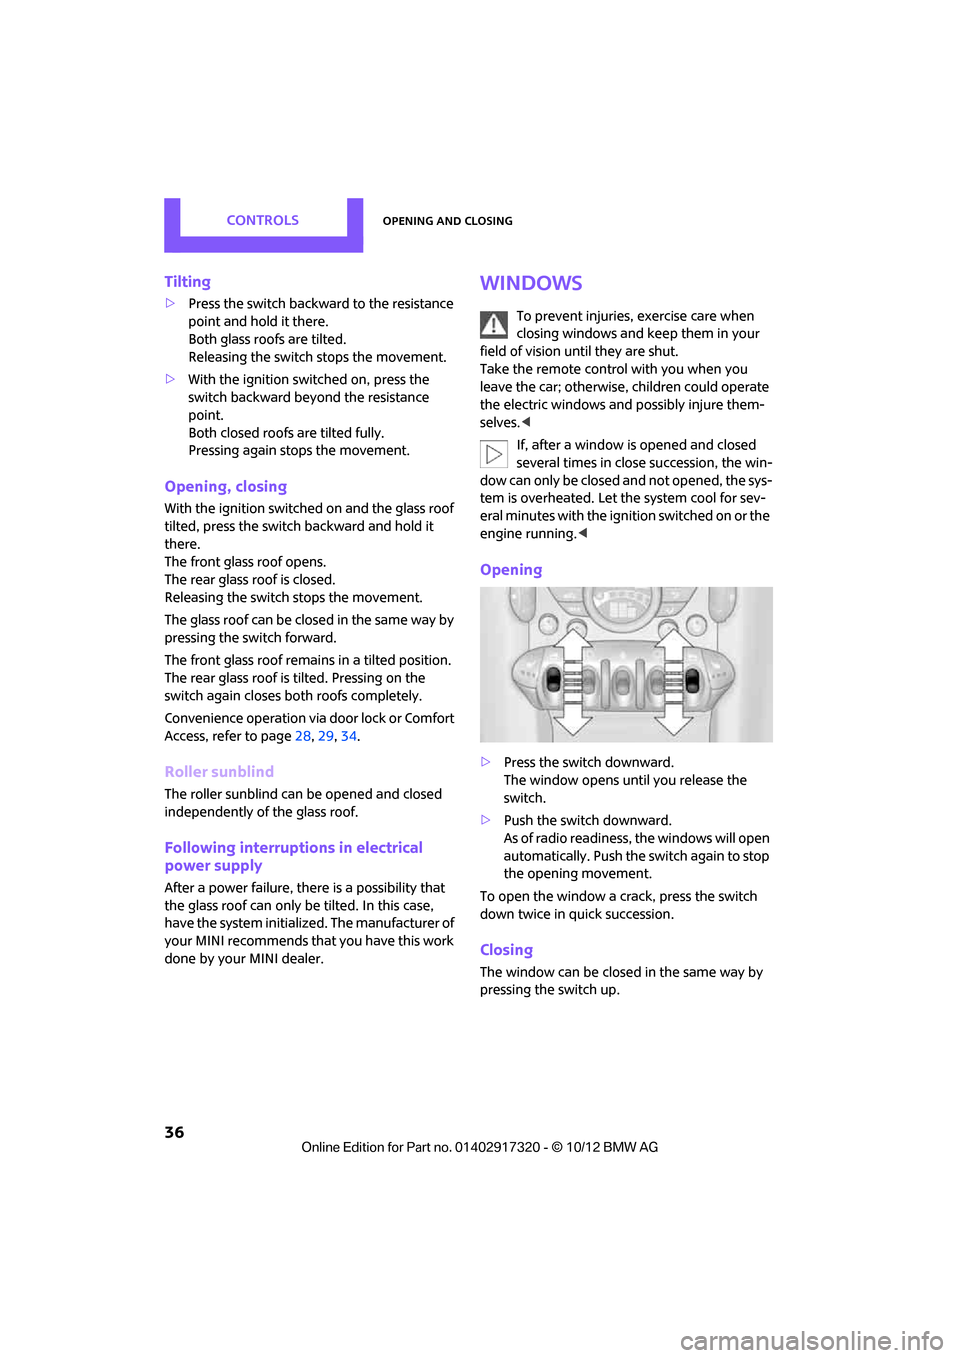
Opening
>Press the swit ch downward.
The window opens until you release the
switch.
> Push the switch downward.
As of radio readiness, the windows will open
automatically. Push the switch again to stop
the opening movement.
To open the window a crack, press the switch
down twice in quick succession.
Closing
The window can be closed in the same way by
pressing the switch up.
00320051004F004C00510048000300280047004C0057004C005200510003
Page 48 of 267
DrivingCONTROLS
47
Driving
Vehicle equipment
In this chapter, all production, country, and
optional equipment that is offered in the model
range is described. Equipment is also described
that is not available because of, for example,
selected options or count ry version. This also
applies to safety related functions and systems.
Ignition lock
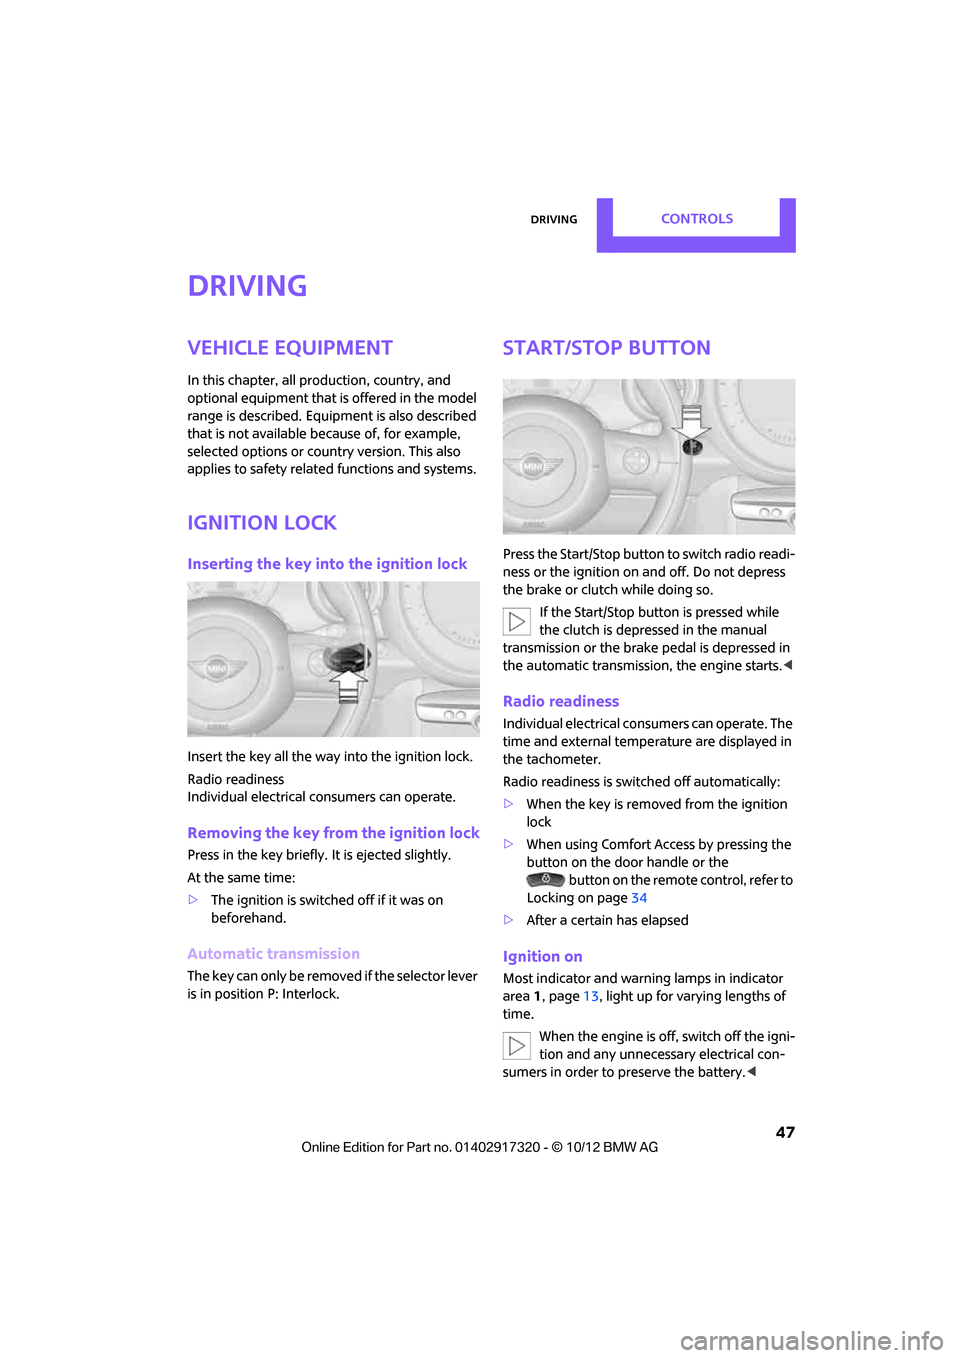
Inserting the key into the ignition lock
Insert the key all the way into the ignition lock.
Radio readiness
Individual electrical consumers can operate.
Removing the key from the ignition lock
Press in the key briefly. It is ejected slightly.
At the same time:
> The ignition is switched off if it was on
beforehand.
Automatic transmission
The key can only be removed if the selector lever
is in position P: Interlock.
Start/Stop button
Press the Start/Stop button to switch radio readi-
ness or the ignition on and off. Do not depress
the brake or clutch while doing so.
If the Start/Stop button is pressed while
the clutch is depressed in the manual
transmission or the brak e pedal is depressed in
the automatic transmission, the engine starts. <
Radio readiness
Individual electrical consumers can operate. The
time and external temperature are displayed in
the tachometer.
Radio readiness is switched off automatically:
>When the key is removed from the ignition
lock
> When using Comfort Access by pressing the
button on the door handle or the
button on the remote control, refer to
Locking on page 34
> After a certain has elapsed
Ignition on
Most indicator and warning lamps in indicator
area 1, page 13, light up for va rying lengths of
time.
When the engine is off, switch off the igni-
tion and any unnecessary electrical con-
sumers in order to preserve the battery. <
00320051004F004C00510048000300280047004C0057004C005200510003
Page 50 of 267
DrivingCONTROLS
49
Automatic transmission
1.With the car at a stop, move the selector
lever to position P.
2. Press the Start/Stop button.
3. Forcefully apply the parking brake.
Before driving into a car wash
By following these steps, the vehicle is able to
roll:
1.Place the remote control, even with Comfort
Access, in the ig nition lock.
2. Depress the brake.
3. Move the selector lever to position N.
4. Switch off the engine.
Parking brake
The parking brake is primarily intended to pre-
vent the vehicle from rolling while parked; it
brakes the rear wheels.
In addition, follow the instructions on page 48
under Switching off the engine.
Applying
The lever locks in position automatically.
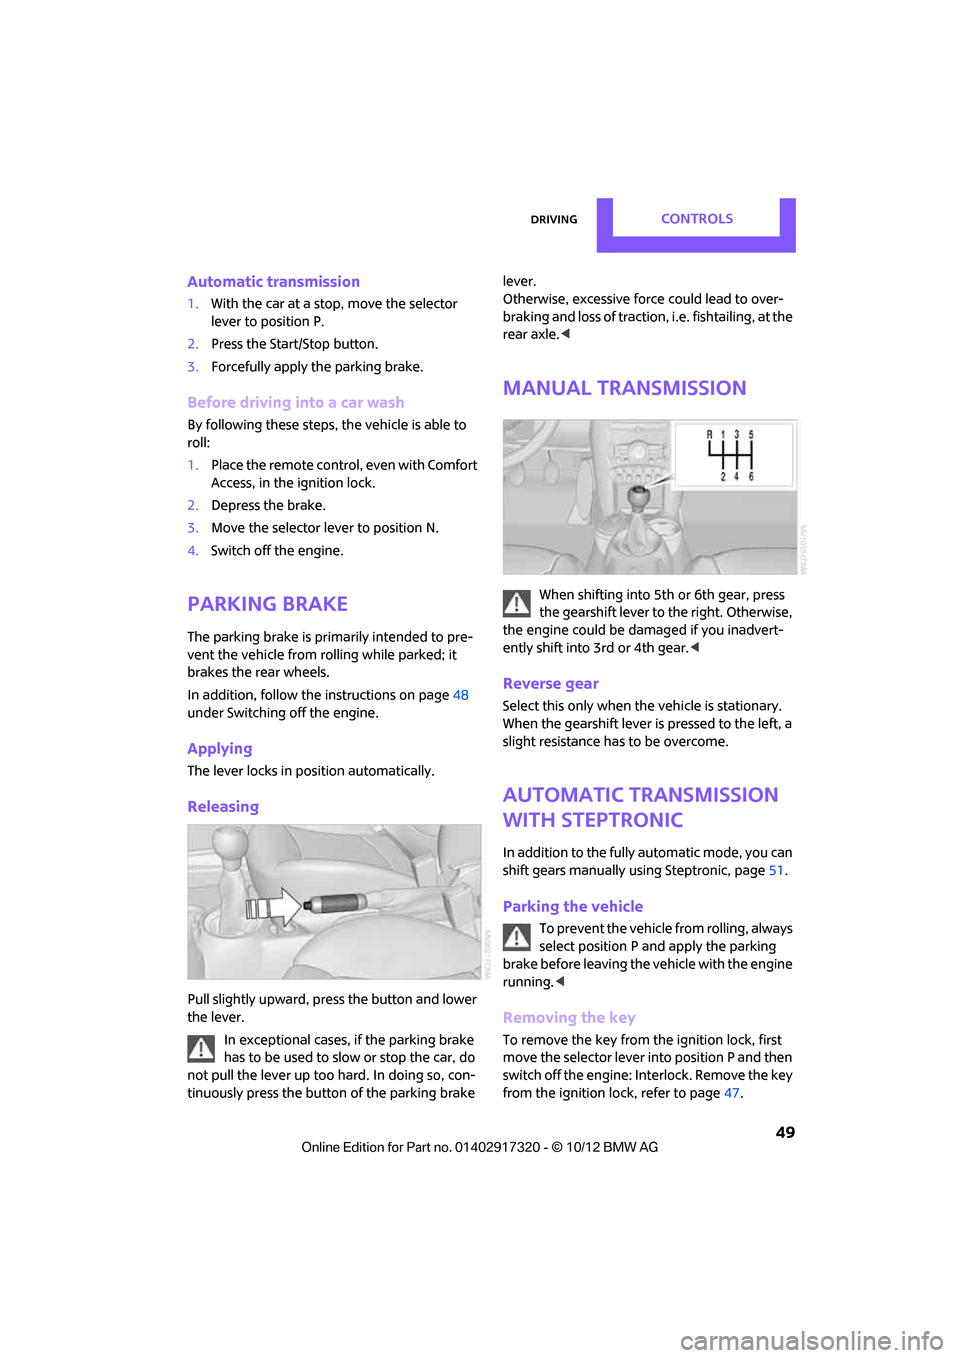
Releasing
Pull slightly upward, pre ss the button and lower
the lever.
In exceptional cases, if the parking brake
has to be used to slow or stop the car, do
not pull the lever up too hard. In doing so, con-
tinuously press the button of the parking brake lever.
Otherwise, excessive force could lead to over-
braking and loss of traction, i.e. fishtailing, at the
rear axle.
<
Manual transmission
When shifting into 5th or 6th gear, press
the gearshift lever to the right. Otherwise,
the engine could be damaged if you inadvert-
ently shift into 3rd or 4th gear.<
Reverse gear
Select this only when the vehicle is stationary.
When the gearshift lever is pressed to the left, a
slight resistance ha s to be overcome.
Automatic transmission
with Steptronic
In addition to the fully automatic mode, you can
shift gears manually using Steptronic, page 51.
Parking the vehicle
To prevent the vehicle from rolling, always
select position P and apply the parking
brake before leaving the vehicle with the engine
running. <
Removing the key
To remove the key from the ignition lock, first
move the selector lever into position P and then
switch off the engine: Interlock. Remove the key
from the ignition lock, refer to page 47.
00320051004F004C00510048000300280047004C0057004C005200510003
Page 53 of 267
CONTROLSDriving
52
5.Move the selector lever into the desired
position by pressing the button on the front
of the selector lever.
Before manually unlo cking the selector
lever lock, firmly set the parking brake to
prevent the vehicle from rolling away. <
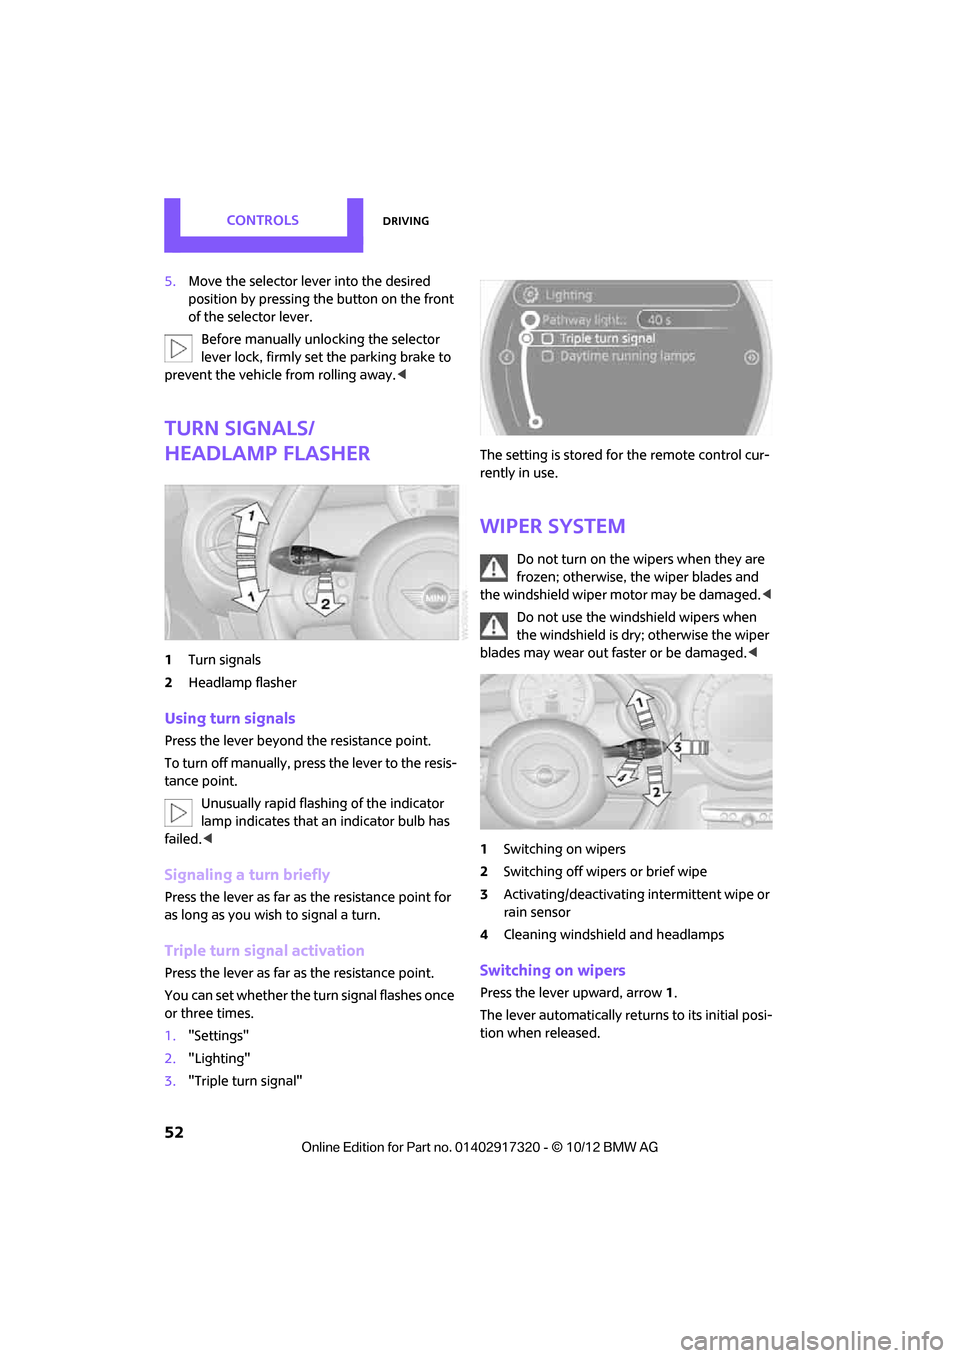
Turn signals/
headlamp flasher
1Turn signals
2 Headlamp flasher
Using turn signals
Press the lever beyond the resistance point.
To turn off manually, press the lever to the resis-
tance point. Unusually rapid flashing of the indicator
lamp indicates that an indicator bulb has
failed. <
Signaling a turn briefly
Press the lever as far as the resistance point for
as long as you wish to signal a turn.
Triple turn signal activation
Press the lever as far as the resistance point.
You can set whether the turn signal flashes once
or three times.
1."Settings"
2. "Lighting"
3. "Triple turn signal" The setting is stored fo
r the remote control cur-
rently in use.
Wiper system
Do not turn on the wipers when they are
frozen; otherwise, th e wiper blades and
the windshield wiper motor may be damaged. <
Do not use the windshield wipers when
the windshield is dry; otherwise the wiper
blades may wear out faster or be damaged.<
1 Switching on wipers
2 Switching off wipers or brief wipe
3 Activating/deactivating intermittent wipe or
rain sensor
4 Cleaning windshield and headlamps
Switching on wipers
Press the lever upward, arrow 1.
The lever automatically returns to its initial posi-
tion when released.
00320051004F004C00510048000300280047004C0057004C005200510003
Page 61 of 267

CONTROLSControls overview
60
Settings and information
Operating principle
Certain settings and information are only avail-
able when the ignition is switched on, the vehi-
cle is at a standstill and the doors are closed.
1 Button for:
>Selecting display
> Setting values
> Confirming selected display or set values
> Calling up computer information 58
Exiting displays
1.Press the button in the turn signal lever
repeatedly until "HOME" is displayed.
2. Press the button for a longer period.
Current vehicle speed is once again displayed.
Displays are also exited if no entries are made
for approx. 8 seconds.
Next setting or item of information
1. While in a setting or information item, press
the button in the turn signal indicator
repeatedly until "NEXT" is displayed.
2. Press the button for a longer period.
The display changes direct ly to the next setting
or item of information.
Units of measure
To set the units of measure. The settings are
stored for the remote co ntrol currently in use,
refer also to Personal Profile on page 26.
SymbolFunction
Adjusting rain sensor53
Calling up Check
Control 63
Exiting the menu
00320051004F004C00510048000300280047004C0057004C005200510003
Page 64 of 267

Controls overviewCONTROLS
63
Setting the time format
The settings are stored for the remote control
currently in use, refer also to Personal Profile on
page 26.
1. "Settings"
2. "Time/Date"
3. "Format:"
4. Select the desired format and press the MINI
joystick.
The time format is stored.
Setting time zone
1. "Settings"
2. "Time/Date"
3. "Time zone:"
4. Turn MINI joystick until the desired time
zone is set and press the MINI joystick.
The time zone is stored.
Date
Setting date
1."Settings"
2. "Time/Date"
3. "Date:"
4. Turn MINI joystick until the desired day is
displayed and press the MINI joystick.
5. Create the necessary settings for the month
and year.
The date is stored.
Setting the date format
1. "Settings"
2. "Time/Date" 3.
"Format:"
4. Select the desired format.
The settings are stored for the remote control
currently in use, refer also to Personal Profile on
page 26.
Check Control
The concept
The Check Control monitors vehicle functions
and alerts you to any malfunctions in the sys-
tems monitored. Check Control messages
involve indicator and warning lamps in the dis-
play and, in some circ umstances, an acoustic
signal as well as text messages at the bottom of
the Control Display.
Indicator and warning lamps
Indicator and warning lamps can light up in var-
ious combinations and colors in the indicator
areas 1 and 2.
00320051004F004C00510048000300280047004C0057004C005200510003
Page 67 of 267

CONTROLSControls overview
66
Activating/deactivating the limit
1."Settings"
2. "Speed"
3. "Warning"
4. Press the MINI joystick.
Altering settings
Language on the Control Display
You can set the language on the Control Display.
1."Settings"
2. "Language/Units"
3. "Language:" 4.
Select the desired language.
The setting is stored fo r the remote control cur-
rently in use.
Setting the voice dialog
Switch between a standa rd dialog and a short
dialog.
1. "Settings"
2. "Language/Units"
3. "Speech mode:"
4. Select the desired dialog.
The setting is stored fo r the remote control cur-
rently in use.
Brightness of the Control Display
The brightness is automa tically adapted to the
ambient lighting conditions. Note, however,
that you can change the basic setting while the
low beams are switched on. The setting is stored
for the remote control currently in use.
1. "Settings"
2. "Control display"
3. "Brightness"
00320051004F004C00510048000300280047004C0057004C005200510003
Page 68 of 267
Controls overviewCONTROLS
67
4.Turn the MINI joystick until the desired set-
ting is reached.
5. Press the MINI joystick.
The setting is stored for the remote control cur-
rently in use. In bright conditions, for example,
the brightness control may not be clearly visible.
00320051004F004C00510048000300280047004C0057004C005200510003
Page 83 of 267

CONTROLSLamps
82
Welcome lamps
If you leave the light switch in the low beam or
automatic headlamp control position when you
switch off the ignition, the parking lamps and
interior lamps come on for a certain time as soon
as the vehicle is unlocked.
Pathway lighting
If you activate the headlamp flasher after
switching off the ignition with the lamps
switched off, the lo w beams come on and
remain on for a certain time.
The setting is stored for the remote control in
use, refer to Pers onal Profile, page 26.
Setting the duration or deactivating the
function
1."Settings"
2. "Lighting"
3. "Pathway light.:"
4. Set a time of duration or deactivate the func-
tion.
The setting is stored fo r the remote control cur-
rently in use.
Daytime running lights
The light switch can remain in the lamps off,
parking lamps or automatic headlamp control
position.
In the lamps off position, the exterior lighting is
automatically switched off after the vehicle is
parked. In the parking lamps position, the park-
ing lamps will stay on after the ignition is
switched off. Switch on the parking
lamps separately if
needed.
Depending on the national-market version, it
may not be possible to deactivate the daytime
running lights.
Activating/deactivating daytime
running lights
The setting is stored for the remote control in
use, refer to Pers onal Profile, page 26.
1. "Settings"
2. "Lighting"
3. "Daytime running lamps"
The setting is stored fo r the remote control cur-
rently in use.
Adaptive Light Control
The concept
Adaptive Light Control is a variable headlamp
control system that enables better illumination
of the road surface. Depending on the steering
angle and other parameters, the light from the
headlamp follows the course of the road.
Activating Adaptive Light Control
With the ignition switched on, turn the light
switch to position 3, refer to page 81.
Standstill function: to avoid blinding oncoming
traffic, the Adaptive Light Control does not pivot
toward the driver's side when the vehicle is at a
standstill.
00320051004F004C00510048000300280047004C0057004C005200510003
Page 89 of 267
CONTROLSClimate
88
Comfortable interior climate
AUTO program2 offers the ideal air distribution
and air flow rate for almo st all conditions, refer
to AUTO program below. All you need to do is
select an interior temperature which is comfort-
able for you.
The following sections inform you in detail about
how to adjust the settings.
Most settings are stored for the remote control
currently in use, refer also to Personal Profile set-
tings on page 27.
Air flow rate, manual
Press the – button to reduce air flow. Press
the + button to increase it.
You can reactivate the automatic mode
for the air flow rate with the AUTO button.
The air flow rate is lo wered or switched off
entirely to reduce the drain on the battery. The
display remains the same.
Switching the system on/off
Reduce the air flow by pressing the – button
repeatedly until the system is switched off. All
displays go out.
Press the AUTO button to switch the automatic
climate control back on.
AUTO program
The AUTO program adjusts the air
distribution to the windshield and
side windows, toward the upper body area and
into the footwell for you. The air flow rate and
your temperature specifications will be adapted
to outside influences in accordance with sea-
sonal changes, e.g. sunlight.
The cooling function is automatically switched
on along with the AUTO program.
The program is switched off if the air distribution
is manually adjusted or if the button is pressed
again.
Recirculated-air mode
If there are odors or pollutants in
the outside air, the supply of out-
side air can be shut off. The system
then recirculates the air currently within the
vehicle.
If condensation starts to form on the inside win-
dow surfaces, press the AUTO button or switch
off the recirculated-air mode and, if necessary,
increase the air flow ra te. Ensure that air can
flow onto the windshield.
The recirculated-air mode is automatically deac-
tivated at low outside temperatures.
The recirculated-air mode should not be
used over an extended period of time;
otherwise, the air quality in the passenger com-
partment will deteriorate continuously. <
Maximum cooling
The automatic climate control
switches to the lowest tempera-
ture, high airflow and the recircu-
lated-air mode.
For maximum cooling, open the air vents for the
upper body area.
The air is cooled as quickly as possible:
> for an outside temper ature of more than
32 7 /06
> while the motor is running.
Air distribution, manual
The flow of air is directed to the
windows, to the upper body area or
to the footwell as selected.
You can switch the automatic air
distribution back on by pressing the AUTO but-
ton.
00320051004F004C00510048000300280047004C0057004C005200510003