manual radio set MINI Clubman 2013 Owner's Manual
[x] Cancel search | Manufacturer: MINI, Model Year: 2013, Model line: Clubman, Model: MINI Clubman 2013Pages: 267, PDF Size: 3.63 MB
Page 18 of 267
Onboard computerAT A GLANCE
17
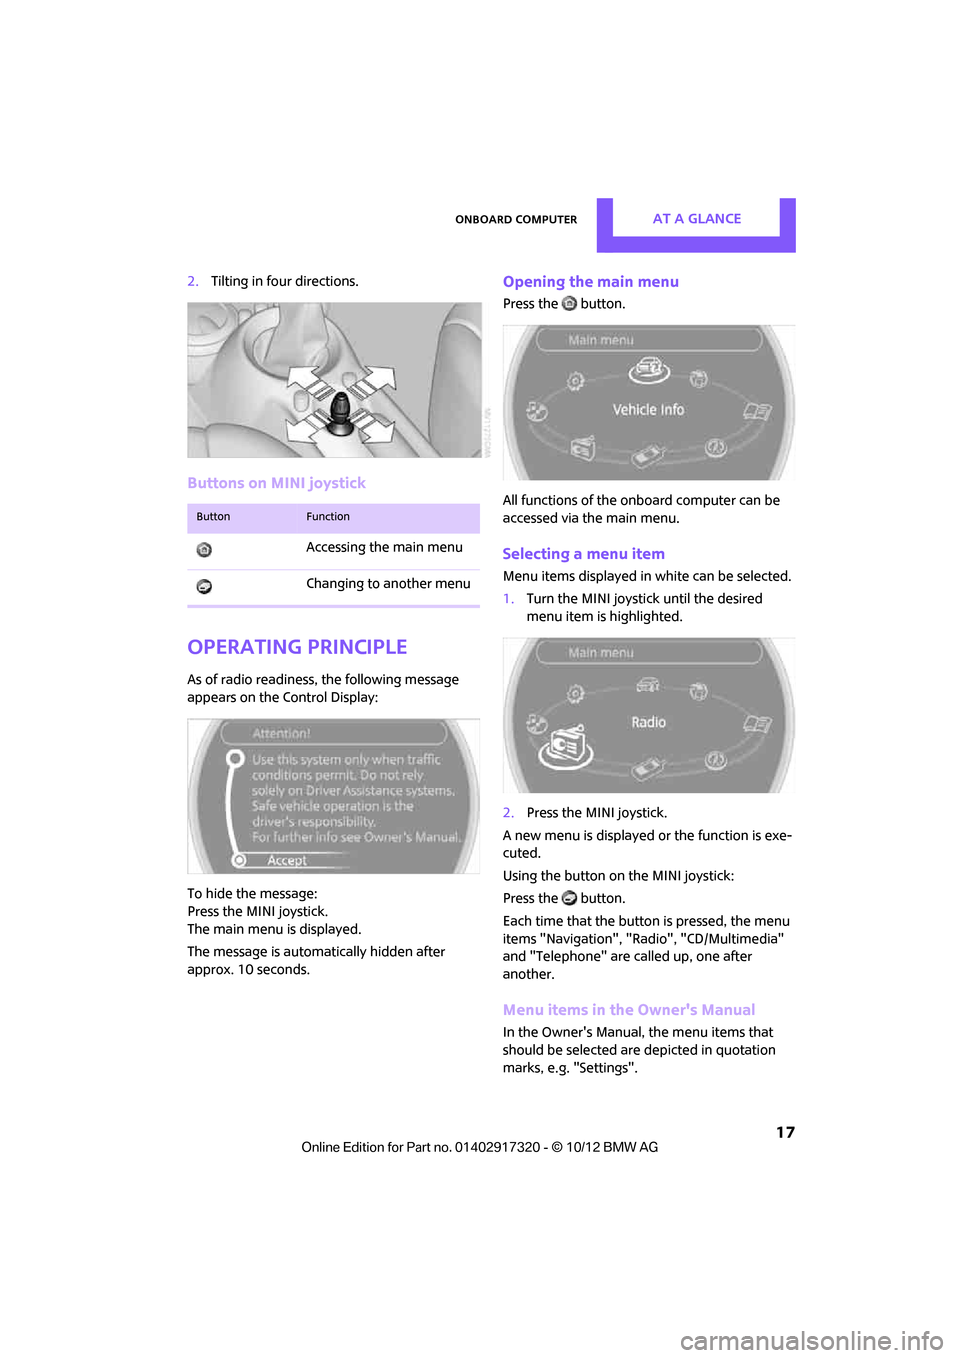
2.Tilting in four directions.
Buttons on MINI joystick
Operating principle
As of radio readiness, the following message
appears on the Control Display:
To hide the message:
Press the MINI joystick.
The main menu is displayed.
The message is automatically hidden after
approx. 10 seconds.
Opening the main menu
Press the button.
All functions of the onboard computer can be
accessed via the main menu.
Selecting a menu item
Menu items displayed in white can be selected.
1. Turn the MINI joystick until the desired
menu item is highlighted.
2. Press the MINI joystick.
A new menu is displayed or the function is exe-
cuted.
Using the button on the MINI joystick:
Press the button.
Each time that the button is pressed, the menu
items "Navigation", "Rad io", "CD/Multimedia"
and "Telephone" are called up, one after
another.
Menu items in the Owner's Manual
In the Owner's Manual, the menu items that
should be selected are depicted in quotation
marks, e.g. "Settings".
ButtonFunction
Accessing the main menu
Changing to another menu
00320051004F004C00510048000300280047004C0057004C005200510003
Page 30 of 267
Opening and closingCONTROLS
29
Malfunctions
The remote control may malfunction due to
local radio waves. If this occurs, unlock and lock
the car at the door lock with the integrated key.
If the car can no longer be locked with a remote
control, the battery in the remote control is dis-
charged. Use this remote control during an
extended drive; this wi ll recharge the battery,
page 26.
For US owners only
The transmitter and receiv er units comply with
part 15 of the FCC/Federal Communications
Commission regulations. Operation is governed
by the following:
FCC ID:
LX8766S
LX8766E
LX8CAS
Compliance statement:
This device complies with part 15 of the FCC
Rules. Operation is subj ect to the following two
conditions:
> This device must not cause harmful interfer-
ence, and
> this device must accept any interference
received, including in terference that may
cause undesired operation.
Any unauthorized modifications or
changes to these devices could void the
user's authority to op erate this equipment. <
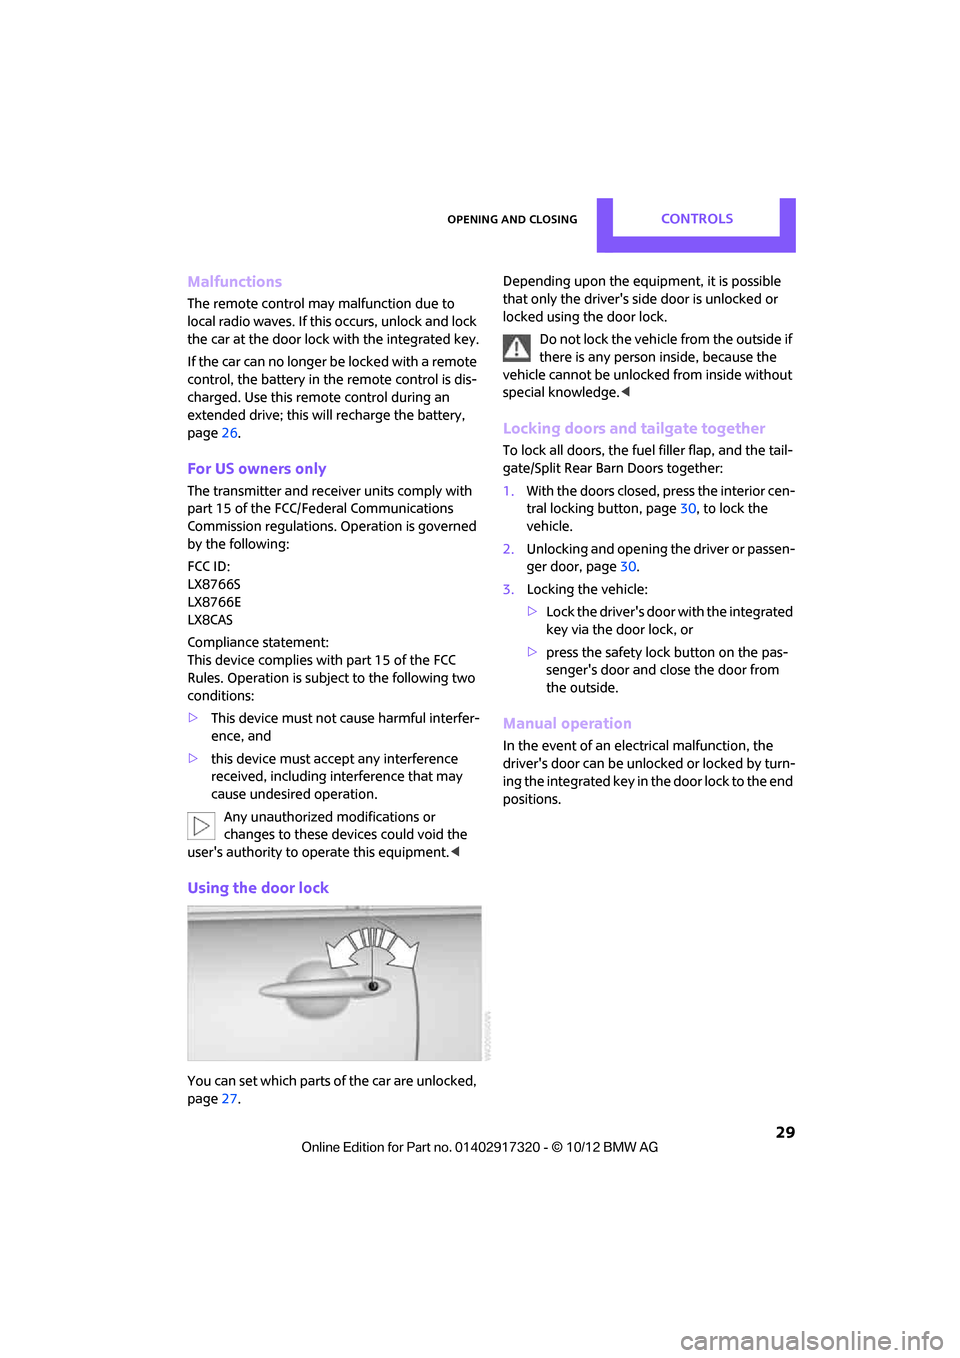
Using the door lock
You can set which parts of the car are unlocked,
page27. Depending upon the equipment, it is possible
that only the driver's side door is unlocked or
locked using the door lock.
Do not lock the vehicle from the outside if
there is any person inside, because the
vehicle cannot be unlocked from inside without
special knowledge. <
Locking doors and tailgate together
To lock all doors, the fuel filler flap, and the tail-
gate/Split Rear Barn Doors together:
1.With the doors closed, press the interior cen-
tral locking button, page 30, to lock the
vehicle.
2. Unlocking and opening the driver or passen-
ger door, page 30.
3. Locking the vehicle:
>Lock the driver's door with the integrated
key via the door lock, or
> press the safety lock button on the pas-
senger's door and close the door from
the outside.
Manual operation
In the event of an electrical malfunction, the
driver's door can be unlo cked or locked by turn-
ing the integrated key in the door lock to the end
positions.
00320051004F004C00510048000300280047004C0057004C005200510003
Page 159 of 267

COMMUNICATIONSHands-free device Bluetooth
158
If pairing was successful, the mobile phone
appears at the top of the list of mobile phones.
If the pairing was not successful: What to do if…,
refer to page158.
Following the initial pairing
>The mobile phone is detected/connected in
the vehicle within a short period of time
when the engine is running or radio readi-
ness is switched on.
> After identification, phone book entries are
imported from the mobile phone and/or SIM
card of the telephone, depending on the
telephone.
> Four mobile phones can be paired.
> Specific settings may be necessary in some
mobile phones, e.g. authorization or a
secure connection, re fer to the Owner's
Manual for the mobile phone.
Connecting a particular mobile phone
1. "Telephone"
2. "Bluetooth® (phone)"
All paired mobile phones are listed.
3. Select the mobile phone to be connected.
Unpairing mobile phone
1."Telephone"
2. "Bluetooth® (phone)"
All paired mobile phones are listed.
3. Highlight the mobile phone to be unpaired.
4. Open "Options". 5.
"Remove phone from list"
What to do if…
For information on suitab le mobile phones, refer
to page 156.
The mobile phone could not be paired or con-
nected.
> Is Bluetooth activated in the vehicle and in
the mobile phone? Activate Bluetooth in the
vehicle and in the mobile phone.
> Do the Bluetooth passkeys on the mobile
phone and the vehicle match? Enter the
same passkey on the mobile phone and via
the onboard computer.
> A multi-digit passkey may be required.
> Is the passkey input taking longer than
30 seconds? Repeat th e pairing procedure.
> Are too many Bluetoot h devices connected
to the mobile phone? If so, delete the con-
nections with other devices on the mobile
phone.
> Is the mobile phone in power economy
m o d e o r d o e s i t o n l y have a small amount of
battery charge remaining? Charge the
mobile phone using a charging cable.
> Depending on the mobile phone, it may only
be possible to connect one device to the
vehicle. Unpair the connected device from
the vehicle and only pair and connect one
device.
> Is the mobile phone no longer responding?
Switch the mobile phone off and back on
again. Repeat the pairing procedure.
00320051004F004C00510048000300280047004C0057004C005200510003
Page 170 of 267

Mobile phone preparation BluetoothCOMMUNICATIONS
169
7.Select the functions that are to be used for
the mobile phone.
8. "OK"
9. Move the MINI joystick to the left.
If pairing was successful, the mobile phone
appears at the top of the list of mobile phones.
If the pairing was not succe ssful: What to do if…,
refer to page 170.
Following the initial pairing
>The mobile phone is detected/connected in
the vehicle within a short period of time
when the engine is running or radio readi-
ness is switched on.
> After identification, phone book entries are
imported from the mobile phone and/or SIM
card of the telephone, depending on the
telephone.
> Specific settings may be necessary in some
mobile phones, e.g. authorization or a
secure connection, re fer to the Owner's
Manual for the mobile phone.
Connecting a particular mobile phone
1. "Telephone"
2. "Bluetooth® (phone)"
All paired mobile phones are listed. 3.
Select the mobile phone to be connected.
The assigned functions be fore the unpairing of
the mobile phone are assigned to the mobile
phone when it is reconnected. If a mobile phone
is already connected, then these functions are
deactivated if necessary.
Device options
Device options in device s that are paired and
connected can be activated or deactivated.
Configuring device
1. "Telephone"
2. "Bluetooth® (phone)"
3. Highlight the device to be configured.
4. Open "Options".
5. "Configure phone"
6. Activate/deactivate func tions. At least one
function must be selected.
> "Telephone"
> "Additional telephone"
> "Audio"
7. "OK"
00320051004F004C00510048000300280047004C0057004C005200510003
Page 258 of 267

Everything from A to ZREFERENCE
257
Gear shifting
– automatic transmission50
– manual transmission 49
Gearshift lever
– automatic transmission with Steptronic 50
– manual transmission 49
General driving notes 100
Glass roof, electric 35
– convenience operation 28
– opening, closing 36
– remote control 28
– tilting 36
Glove compartment 94
GPS navigation, refer to Navigation system 110
Grills, refer to Air vents 86
Gross vehicle weight, refer to Weights 242
H
Halogen lamps
– replacing bulb 220
Handbrake, refer to Parking
brake 49
Hands-free device Bluetooth 156
Hands-free system 14,163 ,175
Hazard warning flashers 14
HD Radio 136
Head airbags 78
Headlamp control, automatic 81
Headlamp flasher 52
– indicator lamp 11,13,86
Headlamp glass lens 219
Headlamps
– replacing bulb 220
Headlamps, care 214
Head Light, refer to Adaptive
Light Control 82
Head restraints 40
– sitting safely 38 Heated
– mirrors
42
– rear window 87,89
– seats 41
Heating 85
– mirrors 42
– rear window 87,89
– seats 41
Heavy loads, refer to Stowing cargo 105
Height, refer to Dimensions 239
Height adjustment
– seats 39
– steering wheel 43
High beams 83
– headlamp flasher 83
– indicator lamp 13,86
– replacing bulb 220
High water, refer to Driving through water 101
Highway, refer to Route
criteria 121
Hill Assist 71
Hills 102
Holders for cups 96
Homepage 4
Hood 208
Horn 10
Hot exhaust system 101
Hydroplaning 101
I
IBOC, refer to HD Radio 136
iDrive
– status information 19
Ignition 47
– switched off 48
– switched on 47
Ignition key, refer to Integrated key/remote
control 26
Ignition key position 1, refer to Radio readiness 47
Ignition key position 2, refer to Ignition on 47 Ignition lock
47
Imprint 2
Incoming call 159,171
Indicator and warning
lamps 13
– Tire Pressure Monitor TPM 75
Indicator lighting, refer to
Instrument lighting 83
Individual air distribution 87
Individual settings, refer to
Personal Profile 26
Inflation pressure monitoring, refer to Tire Pressure Monitor
TPM 74
Information
– on another location 116
– on current position 116
– on destination location 116
Initializing
– Flat Tire Monitor FTM 72
– glass roof, electric 36
– radio, refer to Station,
storing 136
Initializing the
– compass, see Calibration 93
Instructions for navigation system, refer to Voice
instructions 125
Instrument lighting 83
Instrument pane l, refer to
Cockpit 10
Instrument pane l, refer to
Displays 12
Integrated key 26
Integrated universal remote control 90
Interactive map 118
Interesting destination for navigation 116
Interior lamps 84
– remote control 28
Interior rearview mirror 42
– automatic dimming feature 43
Interlock 50
Intermittent mode of the wipers 53
00320051004F004C00510048000300280047004C0057004C005200510003
Page 261 of 267
REFERENCEEverything from A to Z
260
P
Paintwork, care214
Park Distance Control PDC 68
Parking
– vehicle 48
Parking aid, refer to Park
Distance Control PDC 68
Parking brake 49
– indicator lamp 13
Parking lamps, replacing bulb 220
Parking lamps/low beams 81
Parts and accessories, see Vehicle equipment 4
Pathway lighting 82
Personal Profile 26
Phone numbers
– dialing 160,172
Pinch protection system
– windows 37
Plastic parts, care 216
Pollen
– refer to Microfilter/activated- charcoal filter for automatic
climate control 89
– refer to Microfilter for air conditioner 87
Power failure 230
Power windows 36
Power windows, refer to Windows 36
Pressure, tires 195
Pressure moni toring, tires71
– Flat Tire Monitor 71
Pressure monitoring of tires,
refer to Tire Pressure Monitor
TPM 74
Protective function, refer to
Pinch protection system
– windows 37
Puncture
– Flat Tire Monitor 71
R
Radio
– controls132
– HD Radio 136
– satellite radio 137
– select waveband 135
– storing stations 136
– tone control 133
– volume 133
Radio key, refer to Integrated key/remote control 26
Radio position, refer to Radio
readiness 47
Radio readiness 47
– switched off 48
– switched on 47
Rain sensor 53
Random play sequence
– external devices 148
Range, refer to Cruising range 58
Reading aloud 185
Reading lamps 84
Rear door, re fer to Club
Door 30
Rear doors, refer to Split Rear Barn Doors 31
Rear double doors, refer to Split Rear Barn Doors 31
Rear fog lamp 83
– indicator lamp 13
– replacing bulb 223
Rear lamps
– bulb replacement 222,223
Rear lamps, refer to Tail
lamps 222
Rear seat back rest, folding103
Rear seats
– folding down the backrests 103
Rearview mirror
– compass 92
Rearview mirror, refer to Mirrors 42
Rear window defroster 87,89 Reception
– quality
136
– radio station 136
Recirculated-air mode 86,88
Recirculation of air, refer to Recirculated-air
mode 86,88
Reclining seat , refer to
Backrest 39
Refueling 192
Rejecting a call 160,172
Rele asing
– hood 208
Reminders 184
Remote con
trol26
– battery renewal 35
– Comfort Access 33
– garage door opener 90
– malfunctions 29,35
– service data 211
– Split Rear Barn Doors 28
Replacement remote
control 26
Replacing bulbs, refer to Lamps and bulbs 219
Replacing tires, refer to New
wheels and tires 205
Reporting safety defects 7
Reserve warning, refer to Fuel gauge 57
Reservoir for washer systems 55
Reset, refer to Resetting tone
settings 134
Restraint systems
– for children 44
– refer to Safety belts 41
Reverse
– CD player 144
Reverse gear
– automatic transmission with Steptronic 50
– manual transmission 49
Road map 123
Roadside Assistance 231
Roadside parking lamps 83
– replacing bulb 220
00320051004F004C00510048000300280047004C0057004C005200510003
Page 262 of 267
Everything from A to ZREFERENCE
261
Road worthiness test, refer to Service requirements 61
Roof load capacity 242
Roof-mounted luggage
rack 106
Rope, refer to Tow-starting, towing away 234
Route 121,122
– bypassing sections 122
– changing 121,122
– changing criteria 121
– displaying arrow view 122
– displaying map view 123
– displaying streets or towns/ cities 122
– selecting 121
Route guidance 121
– bypassing a route section 122
– changing specified route 121
– distance and arrival 121
– voice instructions 125
– volume of voice instructions 125
Route section, changing 122
Route selection 121
RSC Run-flat System Component, refer to Run-flat
tires 205
Rubber parts, care 215
Run-flat System Component RSC, refer to Run-flat
tires 205
Run-flat tires 205
– flat tire 73
– tire inflation pressure 195
– tire replacement 205
– winter tires 206
S
Safety belt
– number38
Safety Belt Reminder 41 Safety belts
41
– damage 42
– indicator lamp 41
– reminder 41
– sitting safely 38
Safety belts, care 216
Safety systems
– airbags 78
– Antilock Brake System ABS 69
– Dynamic Stability Control DSC 69
– safety belts 41
Safety tires, refer to Run-flat tires 205
Satellite radio 137
– channel, activating or deactivating 138
– channel, selecting 138
– channel, storing 139
– favorites 140
– time shift 139
– Traffic Jump 141
Screen, refer to Onboard computer controls 16
Screw thread for tow fitting 233
SDARS, refer to Satellite
radio 137
Seat adjustment
– mechanical 39
Seats 39
– adjusting the seats 39
– heating 41
– sitting safely 38
Securing the vehicle
– from inside 30
– from outside 27
Selecting navigation
system 110
Selecting new scale for navigation 124
Selector lever
– automatic transmission with Steptronic 50 Selector lever lock
– automatic transmission with
Steptronic, refer to
Shiftlock 50
– overriding manually 51
Selector lever positions
– automatic transmission with
Steptronic 50
Service, refer to Roadside Assistance 231
Service car, refer to Roadside Assistance 231
Service data in the remote
control 211
Service Interval Display, refer to Condition Based Service
CBS 211
Service requ irement display,
refer to Condit i
on Based
Service CBS 211
Service requirements 61
Settings
– clock, 12 h/24 h mode 63
– date format 63
Setting time and date 63
Setting time zone, time, and date 63
Shifting gears
– automatic transmission with Steptronic 51
– manual transmission 49
Shiftlock
– automatic transmission, refer
to Changing selector lever
positions 50
Short commands for the voice
activation system 245
Short route in navigation, refer to Selecting route 121
Shuffled, refer to Random
– CD player 144
Side airbags 78
Side door, rear, refer to Club
Door 30
Side turn signal
– replacing bulb 222
00320051004F004C00510048000300280047004C0057004C005200510003
Page 263 of 267
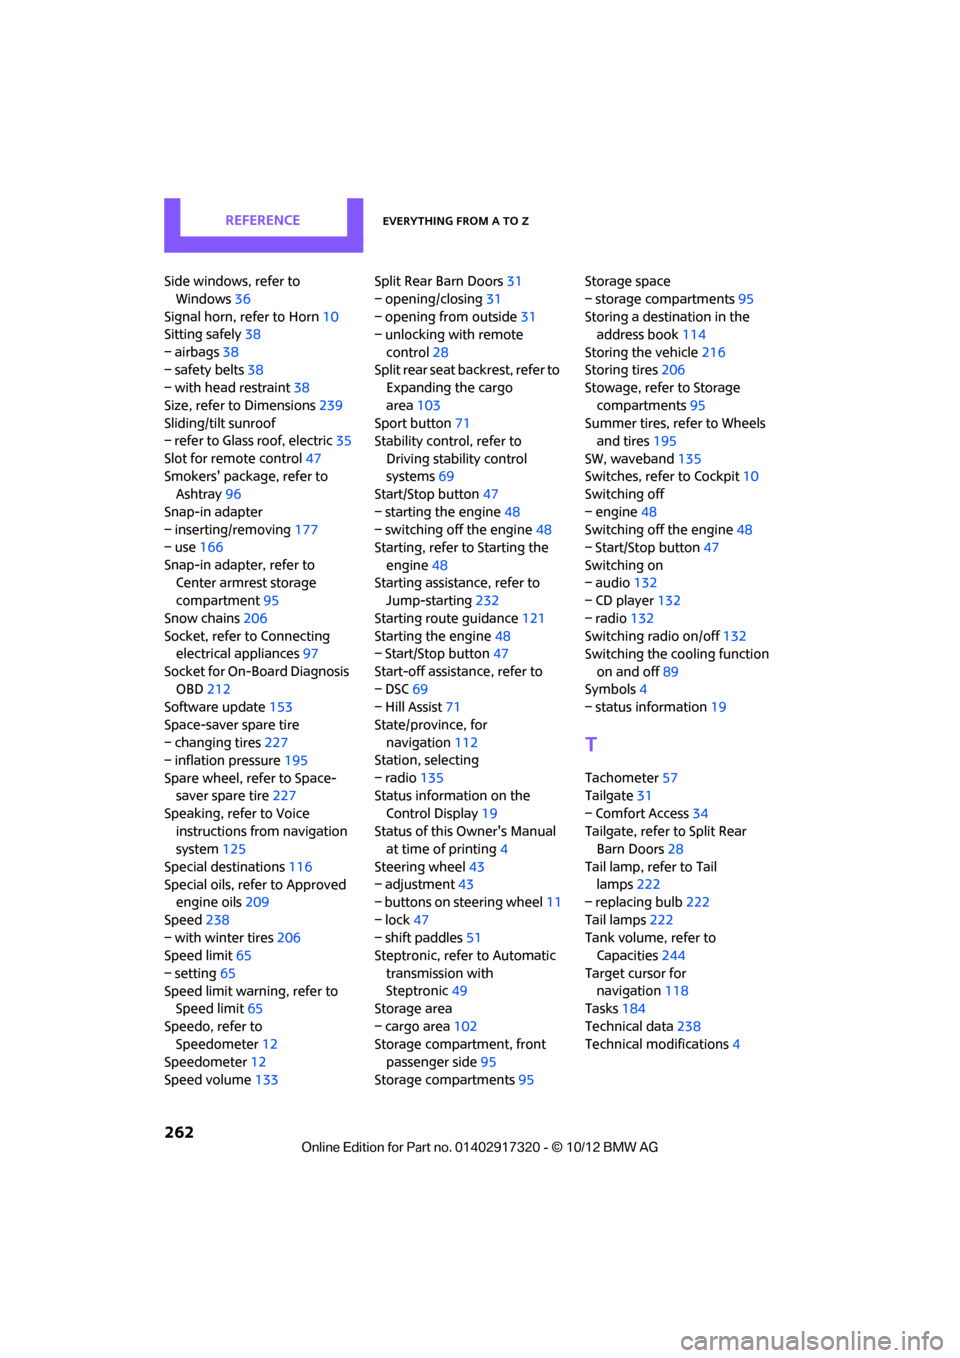
REFERENCEEverything from A to Z
262
Side windows, refer to Windows 36
Signal horn, refer to Horn 10
Sitting safely 38
– airbags 38
– safety belts 38
– with head restraint 38
Size, refer to Dimensions 239
Sliding/tilt sunroof
– refer to Glass roof, electric 35
Slot for remote control 47
Smokers' package, refer to Ashtray 96
Snap-in adapter
– inserting/removing 177
– use 166
Snap-in adapter, refer to Center armrest storage
compartment 95
Snow chains 206
Socket, refer to Connecting electrical appliances 97
Socket for On-Board Diagnosis OBD 212
Software update 153
Space-saver spare tire
– changing tires 227
– inflation pressure 195
Spare wheel, refer to Space- saver spare tire 227
Speaking, refer to Voice instructions from navigation
system 125
Special destinations 116
Special oils, refer to Approved engine oils 209
Speed 238
– with winter tires 206
Speed limit 65
– setting 65
Speed limit warning, refer to Speed limit 65
Speedo, refer to Speedometer 12
Speedometer 12
Speed volume 133 Split Rear Barn Doors
31
– opening/closing 31
– opening from outside 31
– unlocking with remote
control 28
Split rear seat backrest, refer to Expanding the cargo
area 103
Sport button 71
Stability contro l, refer to
Driving stability control
systems 69
Start/Stop button 47
– starting the engine 48
– switching off the engine 48
Starting, refer to Starting the
engine 48
Sta rting assistance, refer to
Jump-sta r
ting232
Starting route guidance 121
Starting the engine 48
– Start/Stop button 47
Start-off assistance, refer to
– DSC 69
– Hill Assist 71
State/province, for navigation 112
Station, selecting
– radio 135
Status information on the
Control Display 19
Status of this Owner's Manual at time of printing 4
Steering wheel 43
– adjustment 43
– buttons on steering wheel 11
– lock 47
– shift paddles 51
Steptronic, refer to Automatic
transmission with
Steptronic 49
Storage area
– cargo area 102
Storage compartment, front passenger side 95
Storage compartments 95Storage space
– storage compartments
95
Storing a destination in the address book 114
Storing the vehicle 216
Storing tires 206
Stowage, refer to Storage
compartments 95
Summer tires, refer to Wheels and tires 195
SW, waveband 135
Switches, refer to Cockpit 10
Switching off
– engine 48
Switching off the engine 48
– Start/Stop button 47
Switching on
– audio 132
– CD player 132
– radio 132
Switching radio on/off 132
Switching the cooling function
on and off 89
Symbols 4
– status information 19
T
Tachometer57
Tailgate 31
– Comfort Access 34
Tailgate, refer to Split Rear Barn Doors 28
Tail lamp, refer to Tail lamps 222
– replacing bulb 222
Tail lamps 222
Tank volume, refer to Capacities 244
Target cursor for navigation 118
Tasks 184
Technical data 238
Technical modifications 4
00320051004F004C00510048000300280047004C0057004C005200510003