ESP MINI Clubman 2014 Owner's Guide
[x] Cancel search | Manufacturer: MINI, Model Year: 2014, Model line: Clubman, Model: MINI Clubman 2014Pages: 210, PDF Size: 5.12 MB
Page 79 of 210

Driving comfortVehicle equipment
This chapter describes all series equipment as
well as country-specific and special equipment
offered for this model series.Therefore, it also
describes equipment that may not be found in
your vehicle, for instance due to the selected
special equipment or the country version. This
also applies to safety-related functions and sys‐
tems.
Cruise control The concept
The system is functional at speeds beginning at
approx. 20 mph/30 km/h.
The vehicle stores and maintains the speed
specified using the controls on the steering
wheel.
Do not use cruise control
Do not use the system if unfavorable con‐
ditions make it impossible to drive at a constant
speed, for instance:▷On curvy roads.▷In heavy traffic.▷On slippery roads, in fog, snow or rain, or
on a loose road surface.
Otherwise, you could lose control of the vehicle
and cause an accident. ◀
Controls
At a glance1Maintaining, storing, and increasing the
speed2Activating/deactivating cruise control3Maintaining, storing, and reducing the
speed4Resuming cruise control
Switching on
Press button 2.
The indicator lamp lights up in thespeedometer. Cruise control is ready to
operate and can be activated.
Switching off Press button 2.
▷When activated: press twice.▷When interrupted: press once.
The displays go out. The stored target speed is
cleared.
Interrupting Press button 2.
The system is interrupted automatically if
▷The brakes are applied.▷The clutch pedal is depressed.Seite 79Driving comfortControls79
Online Edition for Part no. 01 40 2 911 429 - VI/13
Page 88 of 210

3.Hold the hand-held transmitter of the sys‐
tem to be operated a distance of approx. 1
to 3 in/2.5 to 8 cm away from the buttons
on the interior rearview mirror. The re‐
quired distance depends on the particular
hand-held transmitter.4.Press the button of the desired function on
the hand-held transmitter and the button
being programmed on the interior rearview
mirror simultaneously and hold. The LED on
the interior rearview mirror flashes slowly at
first.5.When the LED flashes more rapidly, release
both buttons. Rapid flashing indicates that
the button on the interior rearview mirror
has been programmed.
If the LED does not flash faster after 60 sec‐
onds, change the distance between the in‐
terior rearview mirror and the hand-held
transmitter and repeat the step. Multiple
trials at different distances may be neces‐
sary. Wait at least 15 seconds between tri‐
als.6.To program additional functions on other
buttons, repeat steps 3 to 5.
The systems can be operated with the buttons
on the interior rearview mirror.
Special characteristics of alternating-
code radio systems
If the system cannot be operated after re‐
peated programming, check whether the sys‐
tem to be operated uses an alternating-code
system.
Read the operating instructions of the system
or press and hold the programmed button on
the interior rearview mirror. If the LED on the
interior rearview mirror flashes rapidly at first
and then lights up continuously for 2 seconds,
the system is equipped with an alternating-
code system. This flashing LED pattern repeats
itself for approx. 20 seconds.
In systems with an alternating-code system, the
universal garage door opener and the system
must be additionally synchronized.
Please obtain additional information on syn‐
chronization in the operating instructions of the
system being set up.
The systems will be easier to synchronize with
the aid of a second person.
Synchronization:1.Park the vehicle within range of the re‐
mote-controlled system.2.Program the corresponding button on the
interior rearview mirror as described.3.Identify and press the synchronization but‐
ton on the system being set up. You have
approx. 30 seconds for the next step.4.Press and hold the button on the interior
rearview mirror for approx. 3 seconds and
then release it. Repeat this step up to three
times if necessary to complete the synchro‐
nization procedure. When synchronization
is completed, the programmed function is
executed.
Reprogramming individual buttons
1.Switch on the ignition.2.Hold the hand-held transmitter at a dis‐
tance of approx. 1 to 3 in/2.5 to 8 cm from
the memory buttons.
The required distance depends on the par‐
ticular hand-held transmitter.3.Press the memory button of the universal
garage door opener.4.If the LED flashes slowly after approx.
20 seconds, press the transmit button on
the hand-held transmitter.5.Release both buttons when the LED flashes
rapidly.
If the LED does not flash rapidly after ap‐
prox. 60 seconds, change the distance and
repeat the step.Seite 88ControlsInterior equipment88
Online Edition for Part no. 01 40 2 911 429 - VI/13
Page 89 of 210

Canada: if the LED does not flash rapidly af‐
ter approx. 60 seconds, change the dis‐
tance and repeat the step. If programming
was aborted by the hand-held transmitter,
hold down the memory button and press
and release the button on the hand-held
transmitter several times for 2 seconds.
Controls
Prior to operation
Before operating a unit with the Universal
Garage Door Opener, ensure that there are no
people, animals, or objects in the range of
movement of the system; otherwise, there is a
risk of injury or damage.
Also follow the safety instructions of the hand-
held transmitter. ◀
The system, such as the garage door, can be
operated using the button on the interior rear‐
view mirror with the engine running or the igni‐
tion switched on. When you are within the re‐
ception range of the system, press and hold the
button until the function is initiated. The LED on
the interior rearview mirror lights up continu‐
ously while the radio signal is being transmit‐
ted.
Deleting stored functions
Press the right and left buttons on the interior
rearview mirror simultaneously for approx.
20 seconds until the LED flashes rapidly. All
stored functions are deleted. The functions can‐
not be deleted individually.
Digital compass1Adjustment button on the back of the mir‐
ror2Display
The display shows the main or secondary com‐
pass direction in which the vehicle is traveling.
Operating concept
Various functions can be called up by pressing
the adjustment button with a pointed object
such as a pen. The following adjustment op‐
tions are displayed one after the other, de‐
pending on how long the adjustment button is
pressed:
▷Press briefly: switch the display on/off.▷3 to 6 seconds: set the compass zone.▷6 to 9 seconds: calibrate the compass.▷9 to 12 seconds: set left-hand/right hand
steering.▷12 to 15 seconds: set the language.
Setting compass zones
Set the compass zone corresponding to the ve‐
hicle's geographic location so that the compass
can function correctly; refer to the world map
with compass zones.
Seite 89Interior equipmentControls89
Online Edition for Part no. 01 40 2 911 429 - VI/13
Page 101 of 210

Closing the tailgate/split doorDrive with the tailgate/split door closed
Only drive with the tailgate/split door
closed; otherwise, passengers and other road
users may be endangered or the vehicle may
be damaged if an accident occurs or during
braking or swerving. In addition, exhaust fumes
may enter the passenger compartment. ◀
If, despite this, the vehicle must be driven with
the tailgate/split door open:▷Drive moderately.▷Close all windows and the glass sunroof.▷Switch off recirculated air mode and greatly
increase the blower speed.
Hot exhaust system
Hot exhaust system
High temperatures are generated in the
exhaust system.
Do not remove the heat shields installed and
never apply undercoating to them. Make sure
that flammable materials, e. g. hay, leaves,
grass, etc. do not come in contact with the hot
exhaust system during driving, while in idle po‐
sition mode, or when parked. Such contact
could lead to a fire, and with it the risk of seri‐
ous personal injury as well as property damage.
Do not touch hot exhaust pipes; otherwise,
there is the danger of getting burned. ◀
Mobile communication devices in the
vehicle
Mobile communication devices in the ve‐
hicle
It is not recommended to use mobile phones,
such as mobile phones without a direct con‐
nection to an external aerial in the vehicle's
passenger compartment. Otherwise, the vehi‐
cle electronics and mobile communication de‐
vices can interfere with each other. In addition,
there is no assurance that the radiation gener‐
ated during transmission will be discharged
from the vehicle interior. ◀
Hydroplaning On wet or slushy roads, a wedge of water can
form between the tires and road surface.
This phenomenon is referred to as hydroplan‐
ing. It is characterized by a partial or complete
loss of contact between the tires and the road
surface, ultimately undermining your ability to
steer and brake the vehicle.
Hydroplaning
When driving on wet or slushy roads, re‐
duce your speed to prevent hydroplaning. ◀
The risk of hydroplaning increases as the tire
tread depth decreases. Minimum tread depth,
refer to page 148.
Driving through water Drive though calm water only if it is not deeper
than 12 inches/30 cm and at this height, no
faster than walking speed, up to
6 mph/10 km/h.
Adhere to water depth and speed limita‐
tions
Do not exceed this water depth and walking
speed; otherwise, the vehicle's engine, the
electrical systems and the transmission may be
damaged. ◀
Using the handbrake on inclines Using the handbrake
On inclines, do not hold the vehicle sta‐
tionary with a slipping clutch for extended pe‐
riod; use the handbrake instead. Otherwise, the
clutch will be subject to increased wear. ◀
Support from the hill drive-off assistant, refer to
page 78.Seite 101Things to remember when drivingDriving tips101
Online Edition for Part no. 01 40 2 911 429 - VI/13
Page 102 of 210

Braking safelyThe vehicle is equipped with ABS as a standardfeature.
Applying the brakes fully is the most effective
way of braking in situations when this is neces‐
sary.
The vehicle maintains steering responsiveness.
You can still avoid any obstacles with a mini‐
mum of steering effort.
Pulsation of the brake pedal and sounds from
the hydraulic circuits indicate that ABS is in its
active mode.
Do not let your foot rest on the brake
pedal
Do not drive with your foot resting on the brake
pedal. Even light but consistent pedal pressure
can lead to high temperatures, brake wear and
possibly even brake failure. ◀
Objects in the area around the pedals No objects in the area around the pedals
Keep floor mats, carpets, and any other
objects out of the area of motion of the pedals;
otherwise, the function of the pedals could be
impeded while driving
Do not place additional floor mats over existing
mats or other objects.
Only use floor mats that have been approved
for the vehicle and can be properly fixed in
place.
Ensure that the floor mats are securely fastened
again when they are returned after being re‐
moved, such as for cleaning. ◀
Driving in wet conditions When roads are wet or there is heavy rain,
briefly exert gentle pressure on the brake pedal
every few miles.
Ensure that this action does not endanger other
road users.The heat generated in this process helps dry
the brake discs and pads.
In this way braking efficiency will be available
when you need it.
HillsDrive long or steep downhill gradients in the
gear in which the least braking is required. Oth‐
erwise, the brake system may overheat, result‐
ing in a reduction in the brake system effi‐
ciency.
You can increase the engine's braking effect by
shifting down, going all the way to first gear, if
necessary.
Downshifting in manual mode of the automatic
transmission, refer to page 52.
Avoid load on the brakes
Avoid placing excessive load on the brake
system. Light but consistent brake pressure can
lead to high temperatures, brake wear and
possibly even brake failure. ◀
Do not drive in neutral
Never drive with the transmission in neu‐
tral, with the engine switched off or with the
clutch depressed; otherwise, you will have nei‐
ther the braking action of the engine or nor its
power assistance when braking or steering. ◀
Brake disc corrosion
Corrosion on the brake discs and contamina‐
tion on the brake pads are furthered by:▷Low mileage.▷Extended periods when the vehicle is not
used at all.▷Infrequent use of the brakes.
Corrosion occurs when the minimum pressure
that must be exerted by the pads during brake
applications to clean the discs is not reached.
Should corrosion form on the brake discs, the
brakes will tend to respond with a pulsating ef‐
fect that generally cannot be corrected.
Seite 102Driving tipsThings to remember when driving102
Online Edition for Part no. 01 40 2 911 429 - VI/13
Page 106 of 210

Adhere to the information included with
the cargo straps.▷Four lashing eyes are available for fastening
the cargo straps. Two of them are located
on the inside wall of the cargo area.
Securing cargo
Stow and secure the cargo as described
above; otherwise it may present a danger to
the occupants, for instance during braking and
avoidance maneuvers.
Do not stow any heavy and hard objects in the
passenger compartment without securing
them; otherwise, they may present a danger to
occupants, for instance during braking and
avoidance maneuvers.
Never exceed either the approved gross vehicle
weight or either of the approved axle loads, as
excessive loads can pose a safety hazard, and
may also place you in violation of traffic safety
laws.
Do not secure cargo using the upper LATCH
mounting points, refer to page 42; otherwise,
these may become damaged. ◀
Roof-mounted luggage
rack
NotesA special rack system is available as an optionalaccessory.
Anchorage points
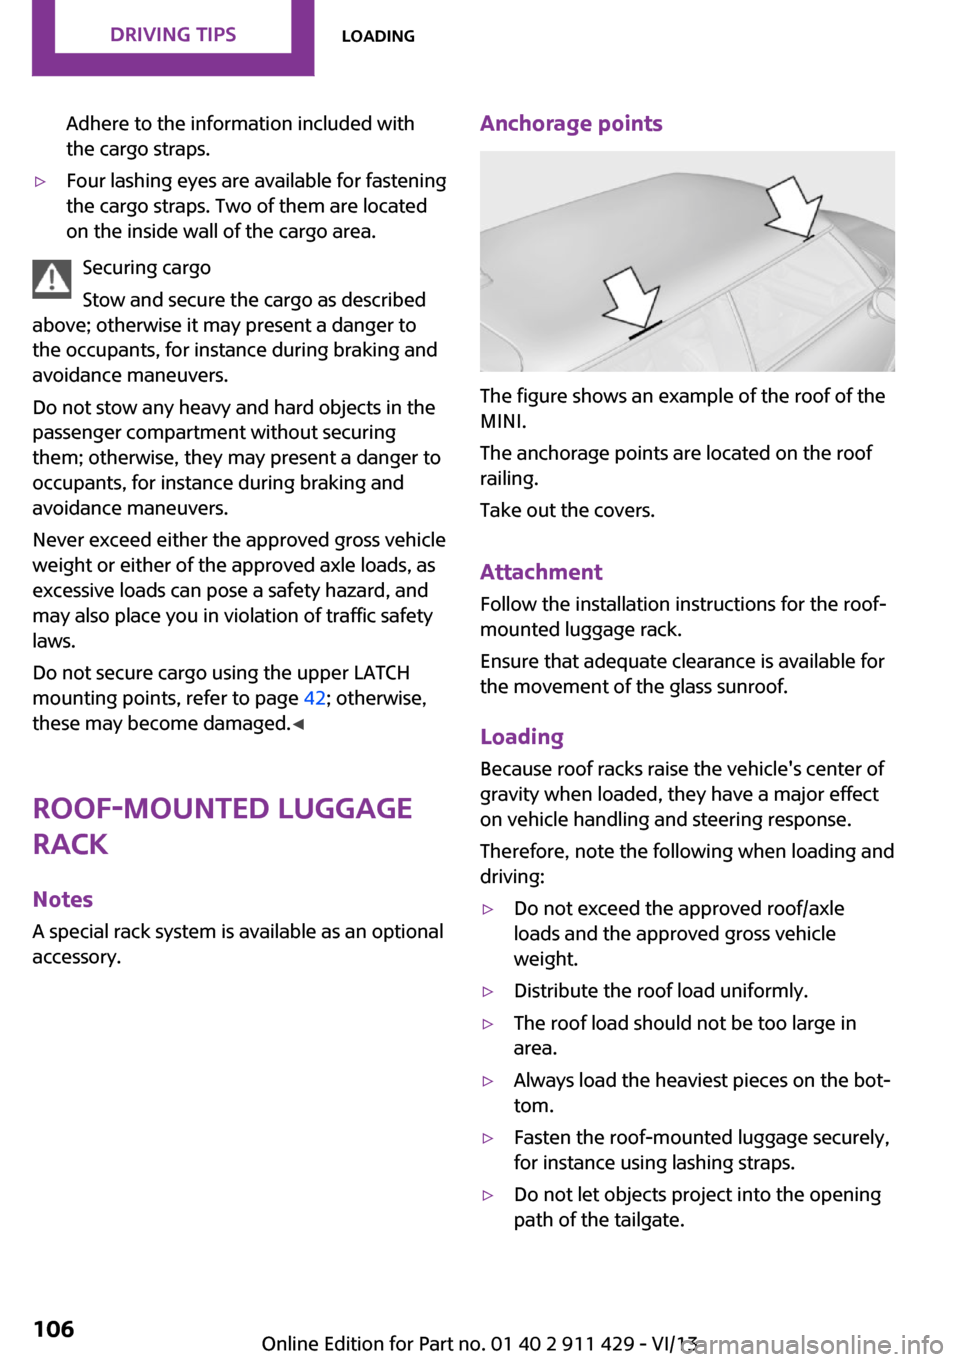
The figure shows an example of the roof of the
MINI.
The anchorage points are located on the roof
railing.
Take out the covers.
Attachment
Follow the installation instructions for the roof- mounted luggage rack.
Ensure that adequate clearance is available for
the movement of the glass sunroof.
Loading
Because roof racks raise the vehicle's center of
gravity when loaded, they have a major effect
on vehicle handling and steering response.
Therefore, note the following when loading and
driving:
▷Do not exceed the approved roof/axle
loads and the approved gross vehicle
weight.▷Distribute the roof load uniformly.▷The roof load should not be too large in
area.▷Always load the heaviest pieces on the bot‐
tom.▷Fasten the roof-mounted luggage securely,
for instance using lashing straps.▷Do not let objects project into the opening
path of the tailgate.Seite 106Driving tipsLoading106
Online Edition for Part no. 01 40 2 911 429 - VI/13
Page 109 of 210

Switch off the engine during longer
stops
Switch off the engine during longer stops, e.g.,
at traffic lights, railroad crossings or in traffic
congestion.
Fuel savings are already achieved after the en‐
gine is turned off for as little as 4 seconds.
Automatic Engine Start/Stop Function
The Automatic Engine Start/Stop Function auto‐
matically switches the engine off during a stop.
If the engine is stopped and then started again,
fuel consumption and emissions drop com‐
pared to an engine that runs permanently.
Stopping the engine even for just a few sec‐
onds can result in savings.
In addition, fuel consumption depends on other
factors as well, such as driving style, road con‐
ditions, maintenance, and environmental fac‐
tors.
Switch off any functions that are not currently needed
Functions such as seat heating and the rear
window defroster require a lot of energy and
consume additional fuel, especially in city and
stop-and-go traffic.
Therefore, switch off these functions if they are
not actually needed.
Have maintenance carried out
Have vehicles maintained regularly to achieve
optimal vehicle economy and operating life.
Have the maintenance carried out by the serv‐
ice center.
Please also note the MINI maintenance system,
refer to page 160.Seite 109Saving fuelDriving tips109
Online Edition for Part no. 01 40 2 911 429 - VI/13
Page 115 of 210

▷"LANG": select the language of the dis‐
play texts.▷"CONSMP": change the unit of measure
for the average fuel consumption.▷"TEMP": change the unit of measure for
the external temperature.5.Highlight the desired menu item and press
the button.6.Create the desired setting.
Computer
The following vehicle information can be call up
via the computer:
▷Average fuel consumption▷Average speed▷Range
Displaying information
1.Switch on the radio ready state or the igni‐
tion.2. Press the button.3."COMP"
Average fuel consumption
The average fuel consumption is calculated for
the time during which the engine is running.
To start calculation of the average fuel con‐
sumption:
1."CONSMP"2."RESET"
The previous display is set to zero and the sys‐
tem begins recalculating the average fuel con‐
sumption.
Average speed
The average speed is calculated for the time
during which the engine is running.
To start calculation of the average speed:
1."SPEED"2."RESET"
Estimated range
"RANGE"
The display shows the estimated distance that
can be still be driven on the remaining fuel,
taking into consideration the driving style over
the last 18 miles/30 km.
Radio
Listening to the radio
The radio is designed for reception in the FM
and AM wavebands.
1.Switch on the radio, refer to page 113.2. Press this button if necessary.3."TUNER"4."FM" or"AM"
Press the corresponding button repeatedly
until the desired waveband is displayed.▷FM: FM1, FM2, FMA▷AM: AM, AMA
Selecting a station
The setting is stored for the remote control cur‐
rently in use.
Next station
Press the button.
The next station with reception is selected.
Selecting the station manually by
frequency
1. Press the button.2.▷Press the respective function button to
set the desired frequency.▷Turn the right knob until the desired
frequency is set.Seite 115Radio MINI Boost CDEntertainment115
Online Edition for Part no. 01 40 2 911 429 - VI/13
Page 116 of 210

Automatically updating the stations
with the best reception, AUTOSTORE
In the FMA and AMA memory levels, stations
are automatically stored according to their re‐
ception strength. If the AUTOSTORE function is
not used, six stations can be manually stored in
each of the FMA and AMA memory levels.1."FM" or"AM"
Press the corresponding button until the
following is displayed:
"AUTOSTORE"
It may take several seconds for the stations to
be stored and for one of these stations to be
played back.
Briefly playing and selecting a station "SC"
All stations with reception are played briefly.
To interrupt the function and select a station:
"SC"
Storing and retrieving a station
Memory locations It is possible to store up to 30 stations.
▷FM1, FM2, AM: six stations each.▷FMA, AMA: the six stations with the best re‐
ception (automatically) or any six stations
(manually).
Storing a station
1."FM" or"AM"
Select the desired function repeatedly until
the desired waveband is displayed.2.Select the station.3."1" ... "6"
Press and hold the function button under
the desired memory location until the sta‐
tion is audible again after a brief interrup‐
tion.Retrieving a stored station1."FM" or"AM"
Select the desired function repeatedly until
the desired waveband is displayed.2."1" ... "6"
Press and hold the desired function button
or turn the right knob until the desired sta‐
tion is displayed.
Radio Data System, RDS
RDS broadcasts additional information, such as
the station name or text messages, in the FM
waveband. When playing a station with multi‐
ple frequencies, the system automatically
switches to the frequency with the best recep‐
tion, if needed.
Some stations broadcast the type of program
received, or PTY, via RDS. This information is
displayed briefly when the station is selected,
for instance NEWS.
PTY can also be used to display catastrophe
alerts, such as "ALARM".
The alert is issued on the loudspeakers.
Switching the RDS on/off
1."SET"2."RDS"
When the RDS is switched off, the PTY function
is switched off as well.
Switching the program type display
on/off
1."SET"2."PTY"
HD Radio™ reception
Many stations broadcast both analog and digi‐
tal signals. These stations can be received digi‐
tally and therefore with better sound quality. A
digital radio network must be available to be
able to receive digital stations.
License conditions
Seite 116EntertainmentRadio MINI Boost CD116
Online Edition for Part no. 01 40 2 911 429 - VI/13
Page 118 of 210

A phone number and the electronic serial
number, ESN, are displayed. The electronic
serial number is required for deactivation.4.To have the channels deactivated, call the
phone number.
Selecting and storing a channel
1. Press the button.2."SAT"3."CAT"4.Select the desired category.5.Select the desired channel.
To display all channels:
"ALL"
To store a channel:
1. Select the symbol.2."SAT"
Press the button repeatedly until the de‐
sired memory level, SAT 1 or SAT 2, is
reached.3."1" ... "6"
Press and hold the function button under
the desired memory location until the
channel is audible again after a brief inter‐
ruption.
Changing to the current channel
"CURR"
Additional information
The name of the channel and additional infor‐
mation on the current track are displayed, such
as the name of the artist.
1.Select the desired channel.2."INFO"Changing the channel using the buttons
Press the button for the corre‐
sponding direction. The next enabled channel
is opened.
Search
1. Press and hold the button for
the corresponding direction. The activated
channels appear on the display one after
the other.2.Release the button to select the displayed
channel.
Notes
When there is a signal blockage or the trans‐
mission is suspended momentarily for more
than 4 seconds, a message will appear on the
display.
Service may be interrupted or unavailable for
specific reasons such as environmental or topo‐
graphic conditions and others that Satellite
Radio cannot directly control. Signal may not be
available under tunnels, in parking garages,
next to tall buildings, nearby trees with dense
foliage, nearby mountains or other possible
strong sources of radio interference. Service
should resume normally after the source of sig‐
nal unavailability has been cleared.
CD player
Loading the CD player Insert the CD into the CD drive with the printed
side up.
Playback begins automatically.
Reading can take a few minutes with com‐
pressed audio files.
Seite 118EntertainmentRadio MINI Boost CD118
Online Edition for Part no. 01 40 2 911 429 - VI/13