Lug bolts MINI COOPER 2003 Owners Manual
[x] Cancel search | Manufacturer: MINI, Model Year: 2003, Model line: COOPER, Model: MINI COOPER 2003Pages: 148, PDF Size: 3.17 MB
Page 114 of 148

112
REPAIRING A FLAT TIRE CHANGING TIRES – MINI WITH SPACE-SAVER SPARE TIRE
*
Safety measures in the event of a flat
tire:
Stop the vehicle as far as possible from
passing traffic. Switch on the hazard warn-
ing flashers.
Turn the steering wheel to the straight-
ahead wheel position and engage the
steering lock. Engage the parking brake and
shift into 1st or reverse gear – selector lever
in P.
All passengers should be outside the vehi-
cle and well away from your immediate
working area – behind a guardrail, for
instance.
If a warning triangle or portable hazard
warning lamp is available, set it up on the
roadside at an appropriate distance from
the rear of the vehicle. Comply with all
safety guidelines and regulations.<
In the event of a flat tire, different proce-
dures should be followed depending on the
equipment included in your MINI:
>Vehicles with space-saver spare tire, see
the next chapter
>Vehicles with Run Flat tires, see page 116
>Vehicles with MINI Mobility System, see
page 118.
Additional safety measures in the
event of a wheel change:
Change the wheel only on a level, firm sur-
face which is not slippery.
Avoid jacking the vehicle on a soft or slip-
pery support surface – on snow, ice, loose
gravel, etc. – as either the vehicle or the
jack could slip sideways.
Do not use a wooden block or similar object
as a support base for the jack, as this would
prevent it from extending to its full support
height and reduce its load-carrying capac-
ity.
Do not lie under the vehicle or start the
engine when the vehicle is supported by
the jack – risk of fatal injury.<
To change a space-saver tire, proceed as
follows:
>Remove the space-saver spare tire, see
page 113
>Prepare the vehicle, see page 114
>Jack up the vehicle, see page 114
>Fit the space-saver spare tire, see
page 115
>Tighten the lug bolts, see page 115
>Drive with space-saver spare tire, see
page 115.
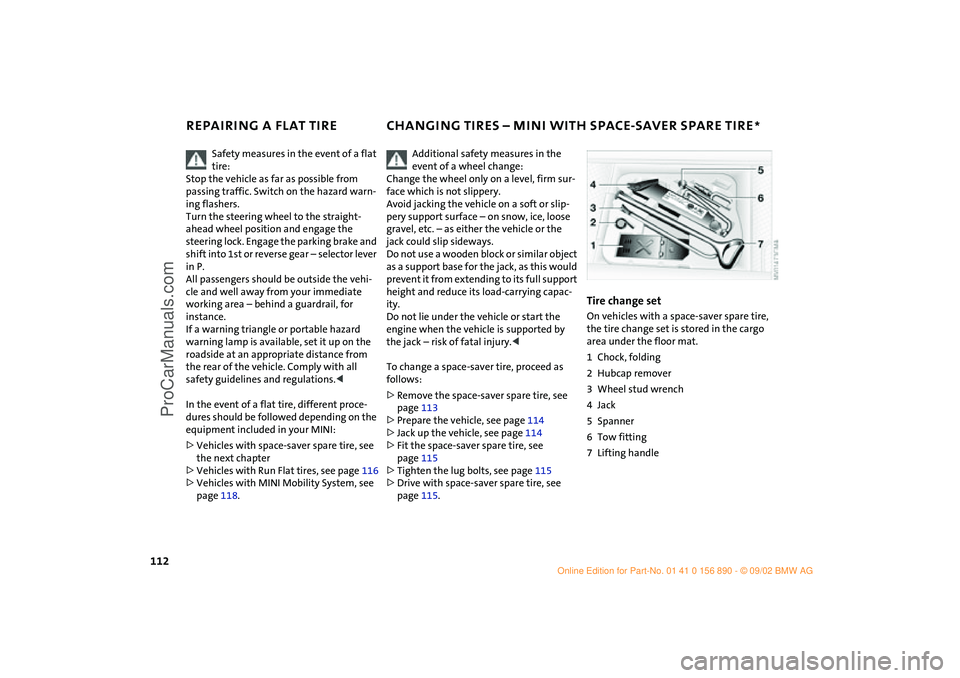
Tire change setOn vehicles with a space-saver spare tire,
the tire change set is stored in the cargo
area under the floor mat.
1Chock, folding
2Hubcap remover
3Wheel stud wrench
4Jack
5Spanner
6Tow fitting
7Lifting handle
ba.book Seite 112 Montag, 5. August 2002 8:09 20
ProCarManuals.com
Page 116 of 148

114
CHANGING TIRES – MINI WITH SPACE-SAVER SPARE TIRE
*
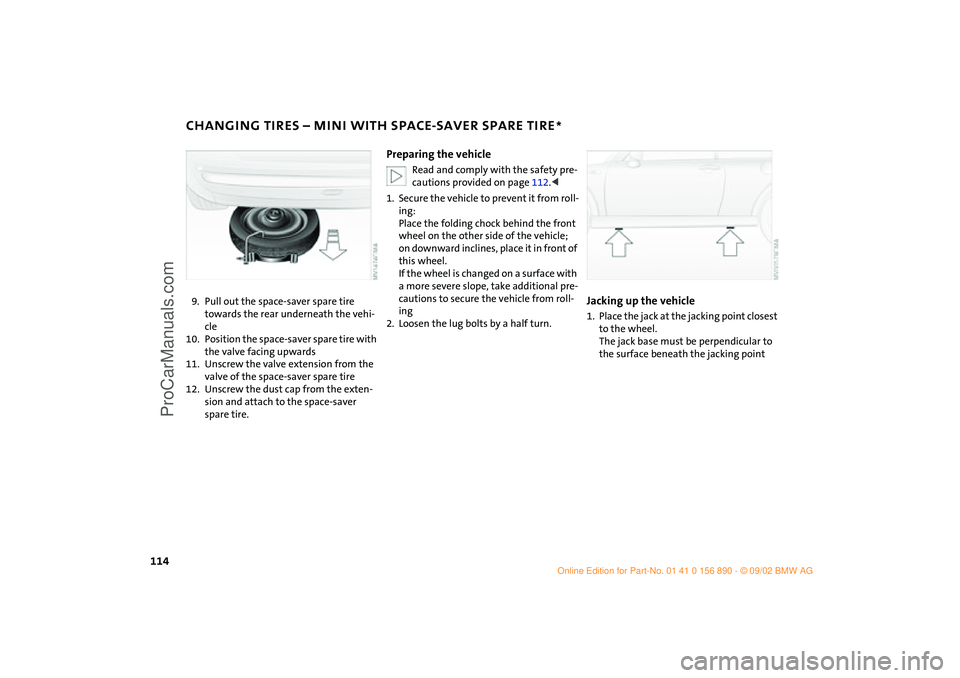
9. Pull out the space-saver spare tire
towards the rear underneath the vehi-
cle
10. Position the space-saver spare tire with
the valve facing upwards
11. Unscrew the valve extension from the
valve of the space-saver spare tire
12. Unscrew the dust cap from the exten-
sion and attach to the space-saver
spare tire.
Preparing the vehicle
Read and comply with the safety pre-
cautions provided on page 112.<
1. Secure the vehicle to prevent it from roll-
ing:
Place the folding chock behind the front
wheel on the other side of the vehicle;
on downward inclines, place it in front of
this wheel.
If the wheel is changed on a surface with
a more severe slope, take additional pre-
cautions to secure the vehicle from roll-
ing
2. Loosen the lug bolts by a half turn.
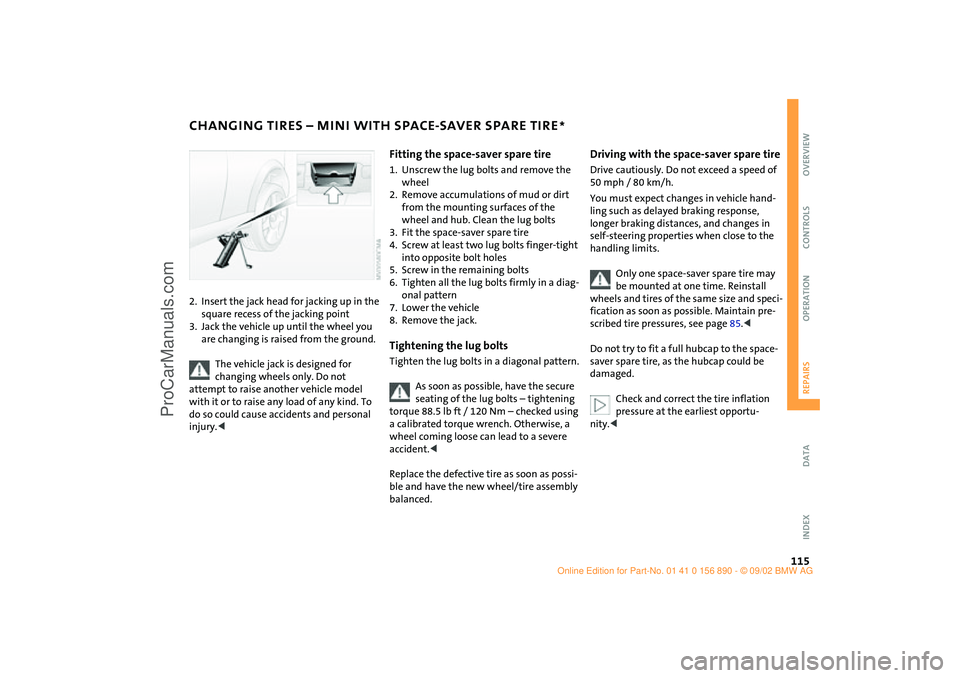
Jacking up the vehicle1. Place the jack at the jacking point closest
to the wheel.
The jack base must be perpendicular to
the surface beneath the jacking point
ba.book Seite 114 Montag, 5. August 2002 8:09 20
ProCarManuals.com
Page 117 of 148

115
OVERVIEW REPAIRSOPERATION CONTROLS DATA INDEX
CHANGING TIRES – MINI WITH SPACE-SAVER SPARE TIRE
*
2. Insert the jack head for jacking up in the
square recess of the jacking point
3. Jack the vehicle up until the wheel you
are changing is raised from the ground.
The vehicle jack is designed for
changing wheels only. Do not
attempt to raise another vehicle model
with it or to raise any load of any kind. To
do so could cause accidents and personal
injury.<
Fitting the space-saver spare tire1. Unscrew the lug bolts and remove the
wheel
2. Remove accumulations of mud or dirt
from the mounting surfaces of the
wheel and hub. Clean the lug bolts
3. Fit the space-saver spare tire
4. Screw at least two lug bolts finger-tight
into opposite bolt holes
5. Screw in the remaining bolts
6. Tighten all the lug bolts firmly in a diag-
onal pattern
7. Lower the vehicle
8. Remove the jack.Tightening the lug boltsTighten the lug bolts in a diagonal pattern.
As soon as possible, have the secure
seating of the lug bolts – tightening
torque 88.5 lb ft / 120 Nm – checked using
a calibrated torque wrench. Otherwise, a
wheel coming loose can lead to a severe
accident.<
Replace the defective tire as soon as possi-
ble and have the new wheel/tire assembly
balanced.
Driving with the space-saver spare tireDrive cautiously. Do not exceed a speed of
50 mph / 80 km/h.
You must expect changes in vehicle hand-
ling such as delayed braking response,
longer braking distances, and changes in
self-steering properties when close to the
handling limits.
Only one space-saver spare tire may
be mounted at one time. Reinstall
wheels and tires of the same size and speci-
fication as soon as possible. Maintain pre-
scribed tire pressures, see page 85.<
Do not try to fit a full hubcap to the space-
saver spare tire, as the hubcap could be
damaged.
Check and correct the tire inflation
pressure at the earliest opportu-
nity.<
ba.book Seite 115 Montag, 5. August 2002 8:09 20
ProCarManuals.com
Page 142 of 148

EVERYTHING FROM A TO Z
140
turn signal indicators108
xenon lamps107
Lashing eyes75
LATCH
child seat fastening
system43
identification43
Leather care101
LED light-emitting diodes54
Length131
License plate lamp
bulb replacement110
Lifting handle, space-saver
spare tire112
Light-alloy wheels100
Lighting
cargo area lamps53
"Lights on" warning52
Liquid sealant
filling119
Load securing devices75
Loading75
Loading cargo75
Low beams52,107
Lug bolts114
Luggage compartment
see Cargo area
Luggage compartment cover,
see Cargo area cover74
Luggage compartment lamps,
see Cargo area lamps111 Luggage rack,
see Roof-mounted luggage
rack76
Lumbar support35
M
M+S tires89
Maintenance60,98
Maintenance System98
Manual operation
driver's door25
sliding/tilt sunroof30
tailgate27
Manual transmission48
Manufacturer6
Master key
initialization22
with remote control22
Mechanical key22
MINI Maintenance System98
MINI manufacturer6
MINI Mobility System
compressor120
liquid sealant119
on-board tools118
Mirror heater39
Mirrors39
Modifications, technical103
Multifunction steering
wheel19
Multifunction switch52 N
Navigation system, see
separate Owner's
Manual14
Non-smoker's equipment
package, see Cigarette lighter
socket73
Nozzles69,72
Nylon rope126
O
OBD interface socket102
Odometer58
Oil94
additives95
consumption94
dipstick94
High Performance Synthetic
Oil96
level15
pressure15
recommended grades of
oil95
viscosities96
Oil change intervals, see Service
and Warranty Booklet for US
models, or Warranty and
Service Guide Booklet for
Canadian models
Oil service60
Old batteries122 On-board tool kit106
On-board tools112,118
Opening
from inside26
from outside23
Outside temperature
display61
P
Park Distance Control
(PDC)66
Parking brake16,47
Parking lamps52
bulb replacement108
Parking lamps/Low beams52
Parking vehicle81
Particle filter69,72
PDC (Park Distance
Control)66
Phillips screwdriver118
Plastic100
Pollen69,72
Power output17,130
Power supply 12 V73
Power windows
electric power windows28
initialize28
Pressure, tires85,115,120
Pushing/Towing126
ba.book Seite 140 Montag, 5. August 2002 8:09 20
ProCarManuals.com
Page 144 of 148

EVERYTHING FROM A TO Z
142
automatic climate
control71
engine coolant59
high81
layering69,72
outside temperature61
tires88
The right tires89
Third brake lamp
bulb replacement110
Tilt alarm sensor31
remote control25
turning off32
Tire change set112,117
Tire failure16
Tire inflation pressure85,90
Tires85,89
all-season tires89
break-in80
changing112
condition87,90
damage87
inflation pressure85
M+S tires89
pressure85
replacement87
Run Flat tires85,88,116
snow chains90
storage89
temperature88
the right choice89 tread87
winter tires89
with emergency running
properties, see Run Flat
tires85,88,116
Tools106
Torque130
Total weight132
Tow bar126
Tow socket for towing
eyelet126
Towing126
with Continuously Variable
automatic Transmission
(CVT)127
Towing eyelet126
Towing rope126
Traction88
Transmission48
Transmission malfunction
Continuously Variable
automatic Transmission
(CVT)51
Transporting children
safely41
Tread wear88
Trip odometer58
Trunk
cover, see Cargo area
cover74
lid, see Tailgate27 opening, remote control24
see Cargo area
volume132
Turn signal indicators18,52
bulb replacement108
Turning off
engine47
U
Uniform Tire Quality
Grading88
Unwanted alarm32
V
Valve core and
spare valve118
Valve remover118
Vanity mirror
bulb replacement111
illuminated39
Vehicle
breaking-in80
dimensions131
exterior finish99
operating46
parking81
starting46
storing101
turning off47
washing99
weight132 Vehicle Memory44
Ventilation
draft-free69,72
heater67
Vents, ventilation72
W
Warning lamp15
Warning triangle124
Warranty98
see Service and Warranty
Information Booklet
for US models, Warranty and
Service Guide Booklet
for Canadian models
Warranty and Service Guide
Booklet for Canadian
models98
Washer systems94
Washer/wiper system54
Waste container73
Water on roadways
deep water81
Weight132
Wheel and tire
combination89
Wheel chock
foldable112,117,118
Wheel lug bolts
wrench112,113,118
Wheelbase131
ba.book Seite 142 Montag, 5. August 2002 8:09 20
ProCarManuals.com