display MINI COOPER 2003 Owners Manual
[x] Cancel search | Manufacturer: MINI, Model Year: 2003, Model line: COOPER, Model: MINI COOPER 2003Pages: 148, PDF Size: 3.17 MB
Page 4 of 148
CONTENTS
2
© 2002 Bayerische Motoren Werke
Aktiengesellschaft
Munich, Germany
Reprinting, including excerpts, only with the
written consent of BMW AG, Munich.
Order No. 01 41 0 156 890
US English VIII/02
Printed in Germany
Printed on environmentally friendly paper –
bleached without chlorine, suitable for recycling.
Notes
About this Owner's Manual6
Symbols used6
Your individual vehicle6
Editorial notice7
For your own safety7
Symbol on vehicle parts8
Service and warranty8
Reporting safety defects8
At a glance
Cockpit12
Display elements13
Display elements with navigation
system14
Indicator and warning lamps15
Multifunction steering wheel19
Controls and features
Opening and closing:
Keys22
Central locking system23
Opening and closing – from outside23
Opening and closing – from inside26
Tailgate27
Electric power windows28
Sliding/tilt sunroof29
Roller sun blind30
Alarm system31
Adjustments:
Safe seating position33
Seat adjustment34
Entry to the rear35
Heated seats36
Head restraints37
Safety belts38
Steering wheel38
Mirrors39
Airbags40
Transporting children safely41
Vehicle Memory44
ba.book Seite 2 Montag, 5. August 2002 8:09 20
ProCarManuals.com
Page 5 of 148
3
OVERVIEW REPAIRS OPERATION CONTROLS DATA INDEX
Driving:
Ignition lock45
Starting the engine46
Switching off the engine47
Parking brake47
Manual transmission48
Continuously Variable automatic Trans-
mission (CVT)49
Parking lamps/Low beams52
Turn signal indicator/Headlamp
flasher52
Instrument lighting53
Fog lamps53
Interior lamps53
Light-emitting diodes54
Washer/wiper system54
Cruise control56
Everything under control:
Odometer58
Tachometer58
Fuel gauge58
Coolant temperature gauge59
Service interval display60
Clock60
Computer60
Technology for safety and driving
convenience:
Automatic Stability Control plus Traction
(ASC+T)62
Dynamic Stability Control (DSC)63
Flat Tire Monitor64
Park Distance Control (PDC)66
Controlling the climate for pleasant
driving:
Air conditioning system67
Automatic climate control70
Interior conveniences:
Glove compartment73
Ashtray/Beverage holder73
Cigarette lighter/12 V power supply73
Loading and transporting cargo:
Cargo area cover74
Foldable rear backrest74
Loading cargo75
Roof-mounted luggage rack76
Operation, care, maintenance
Special operating instructions:
Break-in procedures80
General driving notes81
Refueling82
Fuel specifications83
Antilock Brake System (ABS)83
Brake system84
Wheels and tires:
Tire inflation pressure85
Tire condition87
Tire replacement87
Wheel and tire combinations89
Winter tires89
Snow chains90
ba.book Seite 3 Montag, 5. August 2002 8:09 20
ProCarManuals.com
Page 15 of 148
13
OVERVIEW REPAIRS OPERATION CONTROLS DATA INDEX
DISPLAY ELEMENTS
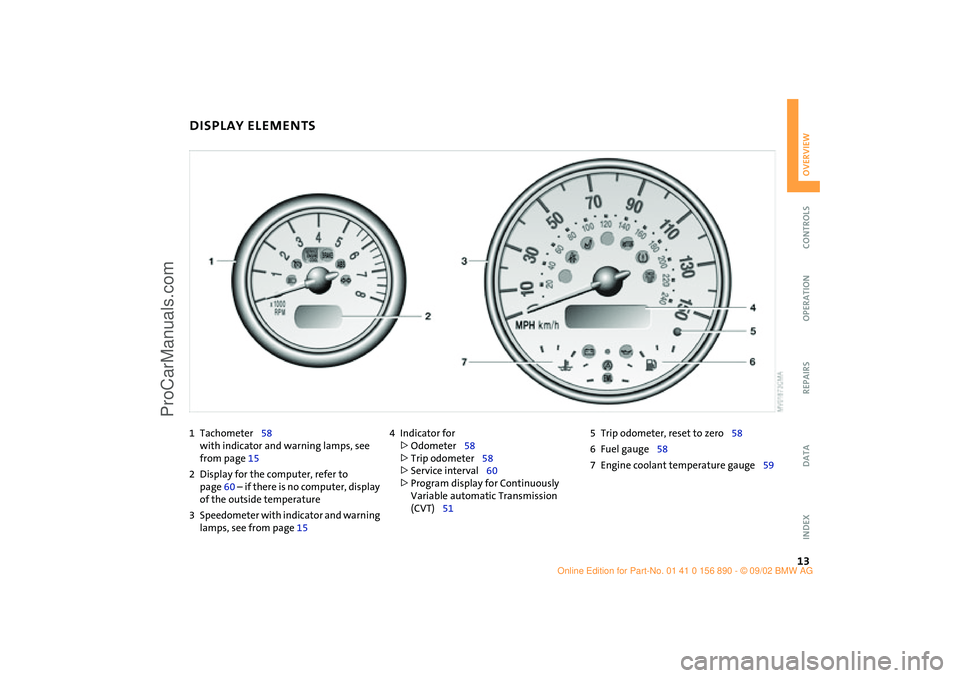
1Tachometer58
with indicator and warning lamps, see
from page 15
2Display for the computer, refer to
page 60 – if there is no computer, display
of the outside temperature
3Speedometer with indicator and warning
lamps, see from page 154Indicator for
>
Odometer58
>
Trip odometer58
>
Service interval60
>
Program display for Continuously
Variable automatic Transmission
(CVT)515Trip odometer, reset to zero58
6Fuel gauge58
7Engine coolant temperature gauge59
ba.book Seite 13 Montag, 5. August 2002 8:09 20
ProCarManuals.com
Page 16 of 148

14
DISPLAY ELEMENTS WITH NAVIGATION SYSTEM
*
1Tachometer58
with indicator and warning lamps, see
from page 15
2Additional indicator and warning lamps,
refer to page 16 – Display for computer
in navigation system, see separate
Owner's Manual 3Speedometer with indicator and warning
lamps, see from page 15
4Trip odometer, reset to zero585Indicator for
>
Odometer58
>
Trip odometer58
>
Service interval60
>
Program display for Continuously
Variable automatic Transmission
(CVT)51
ba.book Seite 14 Montag, 5. August 2002 8:09 20
ProCarManuals.com
Page 46 of 148
44
VEHICLE MEMORY How the system functionsNo doubt you have often reflected on how
great it would be if you could configure
your vehicle's various adjustment settings
to meet your own personal requirements.
In developing this vehicle, the manufac-
turer of the MINI has incorporated a num-
ber of options that your MINI Dealer can
program to reflect your individual prefer-
ences.
What the system can doYour MINI Dealer can provide you with
details on the capabilities of the Vehicle
Memory system.
Examples for Vehicle Memory:
>Automatic locking after starting to drive,
see page 26
>Selective central locking system, see
pages 24, 25
>Automatically opening the sliding/tilt
sunroof, see page 29
>Convenience opening, see pages 24,
25, 26
>Delayed lighting shut off, "Follow-me-
home" lamps, see page 52
>Daytime driving lamps, see page 52
>Speed-dependent windshield wipers, see
page 55
>Acoustic ignition key warning,
see page 45
>Fuel consumption display, see page 61
>Temperature display, see page 61
>Volume control PDC, see page 66
>Acoustic alarm for starting PDC
activation, see page 66This symbol alerts you to Vehicle
Memory functions in the Owner's
Manual<
ba.book Seite 44 Montag, 5. August 2002 8:09 20
ProCarManuals.com
Page 51 of 148
49
OVERVIEW REPAIRS OPERATIONCONTROLS DATA INDEX
CONTINUOUSLY VARIABLE AUTOMATIC TRANSMISSION (CVT)
*
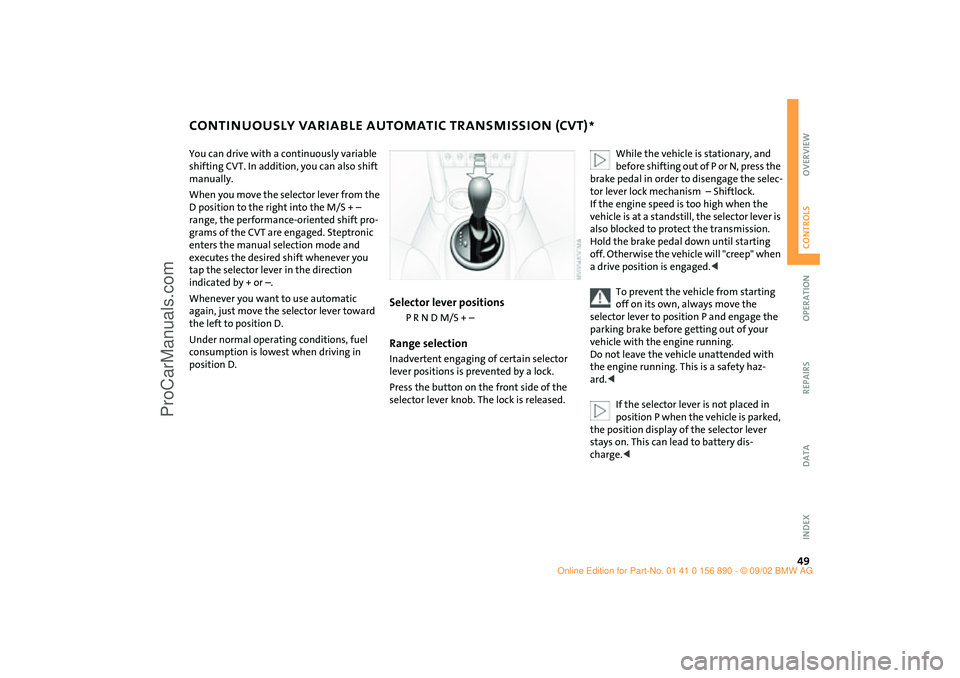
You can drive with a continuously variable
shifting CVT. In addition, you can also shift
manually.
When you move the selector lever from the
D position to the right into the M/S + –
range, the performance-oriented shift pro-
grams of the CVT are engaged. Steptronic
enters the manual selection mode and
executes the desired shift whenever you
tap the selector lever in the direction
indicated by + or –.
Whenever you want to use automatic
again, just move the selector lever toward
the left to position D.
Under normal operating conditions, fuel
consumption is lowest when driving in
position D.
Selector lever positions
P R N D M/S + –
Range selectionInadvertent engaging of certain selector
lever positions is prevented by a lock.
Press the button on the front side of the
selector lever knob. The lock is released.
While the vehicle is stationary, and
before shifting out of P or N, press the
brake pedal in order to disengage the selec-
tor lever lock mechanism – Shiftlock.
If the engine speed is too high when the
vehicle is at a standstill, the selector lever is
also blocked to protect the transmission.
Hold the brake pedal down until starting
off. Otherwise the vehicle will "creep" when
a drive position is engaged.<
To prevent the vehicle from starting
off on its own, always move the
selector lever to position P and engage the
parking brake before getting out of your
vehicle with the engine running.
Do not leave the vehicle unattended with
the engine running. This is a safety haz-
ard.<
If the selector lever is not placed in
position P when the vehicle is parked,
the position display of the selector lever
stays on. This can lead to battery dis-
charge.<
ba.book Seite 49 Montag, 5. August 2002 8:09 20
ProCarManuals.com
Page 52 of 148

50
CONTINUOUSLY VARIABLE AUTOMATIC TRANSMISSION (CVT)
*
PPark
Select "P" only when the vehicle is com-
pletely stopped. The transmission locks to
prevent the rear wheels from turning.RReverseSelect "R" only when the vehicle is com-
pletely stopped.NNeutralSelect "N" only if your journey is inter-
rupted for a long period.DDrive – CVT driving positionThis position is designed for driving under
all normal operating conditions. KickdownIn "kickdown" mode, you achieve maxi-
mum acceleration and maximum speed in
position D.
Press the accelerator pedal past the
increased resistance point at the full-throt-
tle position.
M/S + – Manual mode and
Sport programSwitch from D into M/S + –:
Activates the Sport program and displays
SD in the gear indicator in the speedome-
ter.
>Press briefly:
CVT shifts from the Sport program to the
manual mode
>Press selector lever briefly towards +:
Transmission shifts upwards
>Press selector lever briefly towards – :
Transmission shifts back.
1 to 6 appear in the gear indicator.
The transmission will only execute upshifts
and downshifts that will result in a plausi-
ble combination of vehicle speed and
engine rpm. For instance, downshifts that
would result in excessive engine speed are
not executed.
Switching from M/S + – into the selector
lever positions P, R and N and switching
from manual mode back into the Sport pro-
gram is only possible via D.
ba.book Seite 50 Montag, 5. August 2002 8:09 20
ProCarManuals.com
Page 53 of 148

51
OVERVIEW REPAIRS OPERATIONCONTROLS DATA INDEX
CONTINUOUSLY VARIABLE AUTOMATIC TRANSMISSION (CVT)
*
Available displays
P R N D SD 1 2 3 4 5 6 EP
Electronic transmission control moduleIf there is a malfunction in the transmission
system, EP appears in the display.
All selector lever positions can still be
selected. In positions for driving forward:
the vehicle can now only be driven with a
limited gear selection.
Avoid high engine loads. Proceed to
the nearest MINI Dealer.<
Do not work in the engine compart-
ment when a drive gear – forward or
reverse – is engaged. If you do this, the
vehicle could move.<
Jump-starting and towing, refer to
pages 124, 126.<
ba.book Seite 51 Montag, 5. August 2002 8:09 20
ProCarManuals.com
Page 60 of 148

58
ODOMETER TACHOMETER FUEL GAUGE 1Trip odometerTo set to zero:
With ignition key in position 1, press the
button until the trip odometer is at zero.2Odometer You can activate the displays shown in the
illustration, with the ignition key in
position 0, by pressing the button in the
instrument cluster.
Do not operate the engine with the needle
in the red overspeed zone of the gauge.
To protect the engine, the power is reduced
when you approach a certain engine speed
in this sector.
In the speedometerIf the indicator light 1 begins to be lit con-
tinuously, there are approx. 2.1 gallons /
8 liters of fuel in the tank.
Fuel tank capacity:
approx. 13.2 gallons / 50 liters.
When you switch on the ignition, the indi-
cator lamp lights up briefly to confirm that
the system is operational.
If the angle of the vehicle varies, for exam-
ple when you are driving in mountainous
areas, the needle may fluctuate slightly.
Refill the gas tank early. If you drive
to the last drop of fuel, engine func-
tions are not guaranteed and damage can
occur.<
ba.book Seite 58 Montag, 5. August 2002 8:09 20
ProCarManuals.com
Page 62 of 148
60
SERVICE INTERVAL DISPLAY CLOCK COMPUTER
*
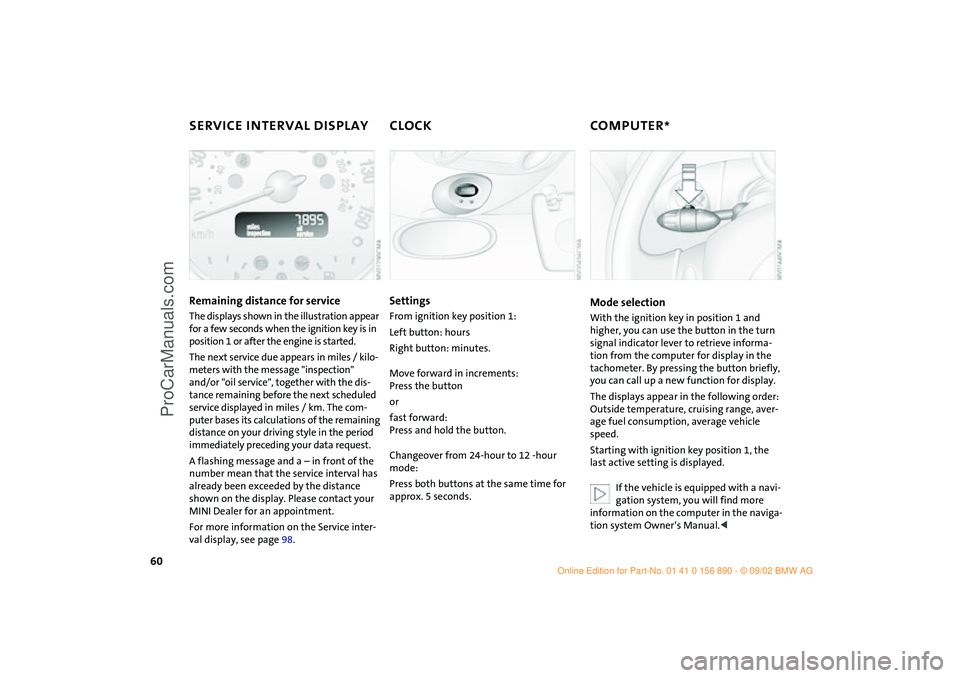
Remaining distance for service
The displays shown in the illustration appear
for a few seconds when the ignition key is in
position 1 or after the engine is started.
The next service due appears in miles / kilo-
meters with the message "inspection"
and/or "oil service", together with the dis-
tance remaining before the next scheduled
service displayed in miles / km. The com-
puter bases its calculations of the remaining
distance on your driving style in the period
immediately preceding your data request.
A flashing message and a – in front of the
number mean that the service interval has
already been exceeded by the distance
shown on the display. Please contact your
MINI Dealer for an appointment.
For more information on the Service inter-
val display, see page 98.
SettingsFrom ignition key position 1:
Left button: hours
Right button: minutes.
Move forward in increments:
Press the button
or
fast forward:
Press and hold the button.
Changeover from 24-hour to 12 -hour
mode:
Press both buttons at the same time for
approx. 5 seconds.
Mode selectionWith the ignition key in position 1 and
higher, you can use the button in the turn
signal indicator lever to retrieve informa-
tion from the computer for display in the
tachometer. By pressing the button briefly,
you can call up a new function for display.
The displays appear in the following order:
Outside temperature, cruising range, aver-
age fuel consumption, average vehicle
speed.
Starting with ignition key position 1, the
last active setting is displayed.
If the vehicle is equipped with a navi-
gation system, you will find more
information on the computer in the naviga-
tion system Owner‘s Manual.<
ba.book Seite 60 Montag, 5. August 2002 8:09 20
ProCarManuals.com