seat adjustment MINI COOPER 2004 Owners Manual
[x] Cancel search | Manufacturer: MINI, Model Year: 2004, Model line: COOPER, Model: MINI COOPER 2004Pages: 152, PDF Size: 1.53 MB
Page 4 of 152

CONTENTS
2
© 2003 Bayerische Motoren Werke
Aktiengesellschaft
Munich, Germany
Reprinting, including excerpts, only with the
written consent of BMW AG, Munich.
Order No. 01 41 0 157 644
US English VIII/03
Printed in Germany
Printed on environmentally friendly paper,
bleached without chlorine, suitable for recycling.
NOTES
About this Owner's Manual6
Symbols used6
Your individual vehicle6
Editorial notice7
For your own safety7
Symbol on vehicle parts8
Service and warranty8
Reporting safety defects9
OVERVIEW
Cockpit12
Display elements13
Display elements with navigation
system14
Indicator and warning lamps15
Multifunction steering wheels18
CONTROLS
Opening and closing:
Keys22
Central locking system23
Opening and closing: from outside23
Opening and closing: from inside26
Tailgate27
Electric power windows28
Glass sunroof, electric29
Roller sun blind30
Adjustments:
Safe seating position31
Seat adjustment32
Head restraints33
Entry to the rear34
Safety belts35
Seat heating35
Steering wheel36
Mirrors36
Vehicle Memory37
Transporting children safely38
ProCarManuals.com
Page 34 of 152

32
SEAT ADJUSTMENTImportant adjustment information
Never try to adjust your seat while
operating the vehicle. The seat could
respond with an unexpected movement,
and the ensuing loss of vehicle control
could lead to an accident.
While driving, do not recline the backrest
too far toward the rear. This especially
applies to the front passenger side. If you
do so, there is a risk that you will slide
under the safety belt in an accident, thus
reducing the protection provided by the
safety belt.<
Longitudinal adjustment1. Lift the handle
2. Push the seat into the desired position
3. After releasing the handle, apply pres-
sure to the seat to ensure that the latch
engages securely.
Height adjustment 1. To raise:
Pull the handle up repeatedly, continu-
ing until the seat reaches the desired
height
2. To lower:
Push the handle repeatedly, continuing
until the seat reaches the desired height.
ProCarManuals.com
Page 35 of 152

33
OVERVIEW REPAIRS OPERATIONCONTROLS DATA INDEX
SEAT ADJUSTMENT HEAD RESTRAINTS Lumbar support*You can adjust the contour of the backrest
for additional support in the curvature of
your spine's lumbar region. The upper hips
and spinal column receive supplementary
support to help you maintain a relaxed,
upright posture.
Turn the wheel. The contour is strengthened or weakened.
Backrest tilt 1. Pull up the lever at the inside of the seat
2. Apply weight to or remove weight from
the backrest as required
3. Release the lever so that the backrest
locks into place.
AdjustingTo raise: pull the head restraint upward.
To lower: press the button and push the
head restraint downward.
You can reduce the risk of spinal
injury and whiplash by adjusting the
head restraint to a height at which it is cen-
tered roughly at ear level.<
ProCarManuals.com
Page 37 of 152

35
OVERVIEW REPAIRS OPERATIONCONTROLS DATA INDEX
SAFETY BELTS SEAT HEATING
*
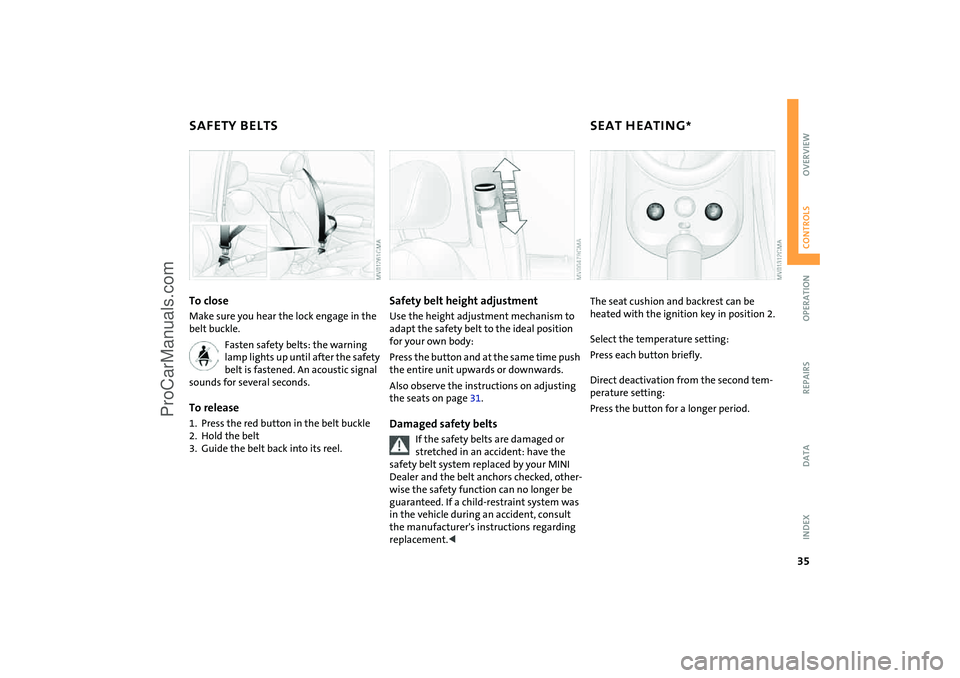
To close
Make sure you hear the lock engage in the
belt buckle.
Fasten safety belts: the warning
lamp lights up until after the safety
belt is fastened. An acoustic signal
sounds for several seconds.To release1. Press the red button in the belt buckle
2. Hold the belt
3. Guide the belt back into its reel.
Safety belt height adjustmentUse the height adjustment mechanism to
adapt the safety belt to the ideal position
for your own body:
Press the button and at the same time push
the entire unit upwards or downwards.
Also observe the instructions on adjusting
the seats on page 31.Damaged safety belts
If the safety belts are damaged or
stretched in an accident: have the
safety belt system replaced by your MINI
Dealer and the belt anchors checked, other-
wise the safety function can no longer be
guaranteed. If a child-restraint system was
in the vehicle during an accident, consult
the manufacturer's instructions regarding
replacement.<
The seat cushion and backrest can be
heated with the ignition key in position 2.
Select the temperature setting:
Press each button briefly.
Direct deactivation from the second tem-
perature setting:
Press the button for a longer period.
ProCarManuals.com
Page 144 of 152

EVERYTHING FROM A TO Z
142
Gasoline, refer to Fuel
quality 85
Gear indicator 47
Gearshift lever
Continuously Variable
automatic Transmission
(CVT) 45
manual transmission 44
General driving notes 83
Glass sunroof, electric 29
convenience
operation 24, 25
pinch protection 30
Glove compartment 73
Glove compartment lamp
bulb replacement 116
Gross weight, refer to
Weights 134
H
Handbrake, refer to Parking
brake 43
Hazard warning flashers 12
Head airbags 65
Head restraints 33
Headlamp flasher 49
indicator lamp 17
Headlamp washer
cleaning headlamps 51
washer fluid 98 Headlamp washer reservoir 98
capacity, refer to
Capacities 135
Headlamps
bulb replacement 112
care 103
cleaning 51
Heated mirrors 36
Heated rear window
air conditioning system 68
automatic climate control 71
Heating 67
exterior mirrors 36
rear window 68, 71
seats 35
windshield 68, 71
Heavy load, refer to Loading
cargo 77
Height adjustment
seats 32
steering wheel 36
Height, refer to
Dimensions 133
Hex wrench 121
High beams 49
bulb replacement 112
headlamp flasher 49
indicator lamp 17 High Performance Synthetic
Oil, refer to Engine oil 99
alternative oils 99
capacity 135
recommended oils 99
specified oils 99
High temperatures 83
Holders for beverages 74
Horn 12
Hydroplaning 83
I
Ice warning 57
Identification mark
Run Flat tires 93
Ignition 41
Ignition key 22
Ignition lock 41
Illuminated vanity mirror 36
Illumination
of instruments 49
Imitation leather 104
Imprint 2
Index 138
Indicator and warning lamps,
overview 15 Indicator/warning lamp
airbags 65
ASC 59
brakes 101
coolant temperature 55
DSC 60
fasten safety belts 35
Flat Tire Monitor 63
fog lamps 49
reserve fuel capacity 54, 55
Individual air distribution 72
Individual settings, refer to
Vehicle Memory 37
Inflation pressure monitor,
refer to Flat Tire Monitor 62
Inflation pressure, tires 87
Inspection 56
Instrument cluster, refer to
Display elements 13
Instrument lighting 49
Instrument panel, refer to
Cockpit 12
Interior lamps 50
bulb replacement 115
Interior rearview mirror 36
automatic dimming 37
Interior temperature
settings 68, 71
Interlock, refer to Steering
locked 41
ProCarManuals.com
Page 147 of 152

EVERYTHING FROM A TO Z
145
OVERVIEW REPAIRS OPERATION CONTROLS DATA INDEX
Rear turn signal indicator
bulb replacement 113
Rear window wiper 51
replacement 111
Rearview mirror 36
Recirculated air mode
air conditioning system 68
automatic climate control 71
Reclining seat, refer to Backrest
tilt 33
Refueling 84
Remaining distance for
service 56
Remaining distance, refer to
Range 58
Remote control 23
changing battery 22
initializing 22
malfunctions 25
Remote control key, refer to
Master key with remote
control 22
Replacement key 22
Replacement of tires 92
changing tires 117
Reporting safety defects 9
Reserve indicator light, refer to
Fuel gauge 54, 55
Reservoir
washer system 98 Restraint systems
for children 38
refer to Safety belts 35
Reverse
Continuously Variable
automatic Transmission
(CVT) 46
manual transmission 44
Rod antenna 103
Roller sun blind 30
Roof load, refer to Weights 134
Roof-mounted luggage rack 78
Rope, refer to Towing 128
RSC Runflat System
Component, refer to Run Flat
tires 93
Rubber parts 104
Run Flat tires 93
tire failure 93
tire inflation pressure 87
Runflat System Component
(RSC), refer to Run Flat
tires 93
S
Safety belt height
adjustment 35 Safety belts 35
care 104
height adjustment 35
safe seating position 31
warning lamp 16, 35
Safety lock buttons, doors,
refer to Locking 26
Safety systems, refer to
All Season traction Control
(ASC) 59
Antilock Brake System
(ABS) 61
Dynamic Stability Control
(DSC) 60
Screwdriver, refer to Onboard
tool kit 110
Seat adjustment 32
Seat heating 35
Securing loads, refer to Loading
cargo 76
Securing the load 77
Securing the vehicle
from inside 26
from outside 24
Selector lever
Continuously Variable
automatic Transmission
(CVT) 45 Selector lever positions
Continuously Variable
automatic Transmission
(CVT) 45
Selector lever shiftlock, refer to
Shiftlock 45
Service 56
Service interval display 56, 102
Service, refer to Service and
Warranty Information
Booklet for US models,
Warranty and Service Guide
Booklet for Canadian
models 102
Shifting
Continuously Variable
automatic Transmission
(CVT) 46
manual transmission 44
Shifting gears, refer to
Continuously Variable
automatic Transmission
(CVT) 45
Shiftlock, refer to Range
selection 45
Side airbags 65
Side turn signal indicators
bulb replacement 113
Signal horn, refer to Horn 12
ProCarManuals.com