warning MINI COOPER 2005 User Guide
[x] Cancel search | Manufacturer: MINI, Model Year: 2005, Model line: COOPER, Model: MINI COOPER 2005Pages: 165, PDF Size: 4.64 MB
Page 26 of 165

24
KEYS
CENTRAL LOCKING SYSTEM
The key set It includes three keys. Depending on the
equipment version, it contains the follow
-
ing types of keys:1 Master keys with remote control.
They determine the functions of the Key
Memory. Certain functions in your vehi
-
cle may operate differently depending
on the key
In every master key there is an extended-life battery that is
charged automatically in the ignition
lock as you drive.
Therefore, use any otherwise unused
master key for a longer journey every six
months so that its battery can be
charged.<
2 Spare key
For keeping in a safe place, e.g. in your
wallet. This key is not intended for con
-
stant use
The conceptThe central locking system is ready for
operation whenever the driver's door is
closed. The doors, the tailgate and the fuel
filler door are unlocked or locked.The central locking system locks or unlocks
your vehicle:>When operated from the outside via the
remote control as well as via the door
lock>When operated from the inside via a
switch.If operated from outside, the anti-theft sys
-
tem is activated at the same time. This pre
-
vents the doors from being unlocked via
safety lock buttons or door handles.In the event of a sufficiently severe acci
-
dent, the central locking system unlocks
automatically. The hazard warning system
and interior lamps are also switched on.
ProCarManuals.com
Page 28 of 165

26
OPENING AND CLOSING: FROM OUTSIDE 1Unlocking and convenience opening2 Locking and securing3 Unlocking the tailgateTo unlock1. Press the
button once.
The driver's door is unlocked.
The interior lamps are switched on and
the hazard warning flashers flash twice
*
2. Press the
button twice.
First the driver's door will unlock, then
the entire vehicle.
You can have this function activated/deactivated.
locking system locks the vehicle automati
-
cally. The anti-theft system is not activated.
To deadlock the vehicle, refer to the next
column.<
You can have the vehicle's automatic locking feature activated/deacti
-
vated.
period.
In the MINI, the windows and the glass
sunroof are opened.
In the MINI Convertible, the windows and
the folding roof are opened.To open the convertible top on the MINI
Convertible: release the button and press it
again until the convertible top is com
-
pletely open.
Convenience closing is not possible by means of the remote control.
vertible top activated/deactivated.<
Locking and securingPress button
.
The hazard warning system flashes once.Unlocking the tailgate Press the
button briefly.
The rear and side turn signal indicators
flash twice.The tailgate can be unlocked separately if
the vehicle has been locked via central lock
-
ing.
Open the tailgate within 20
seconds,
refer to page
29, or it will otherwise
be locked again automatically. The rear and
side turn signal indicators flash once.
If the tailgate was previously locked, then it
is locked again after it is closed.
Before and after each journey, make sure
that the tailgate was not opened acciden
-
tally.<
ProCarManuals.com
Page 29 of 165

27
OVERVIEW REPAIRS OPERATIONCONTROLS DATA INDEX
OPENING AND CLOSING: FROM OUTSIDEMalfunctionLocal radio waves can interfere with func
-
tions of the remote control.If this occurs, lock and unlock the vehicle
via a door lock.In the event of a system malfunction,
please contact your MINI Dealer. You can
also obtain replacement keys there.
If it is no longer possible to lock the vehicle with the remote control, then
the battery is discharged. Use the corre
-
sponding key for a longer journey so that
its battery can be recharged, refer to
page
24.<
Via the door lock1. One turn of the key in the driver's door
lock unlocks the driver’s door only. 2. Turning the key a second time unlocks
the other door, the tailgate and the fuel
filler door.
You can have this function activated/deactivated.<
If the vehicle has been properly locked, the
hazard warning system flashes once.
When the vehicle is unlocked, the hazard
warning system flashes twice
*.
Manual operationIn the event of an electrical malfunction,
the driver's door can be unlocked or locked
by turning the key in the door lock to the
end positions.Convenience closing via the door lockYou can also close the power windows,
glass sunroof or the convertible top via the
door lock.With the door closed, hold the key in the
locking position.In the MINI Convertible, the convertible top
is closed first and then the side windows.
You can have the closing of the win
-
dows and glass sunroof via the door
lock activated/deactivated.<
ProCarManuals.com
Page 59 of 165
57
OVERVIEW REPAIRS OPERATIONCONTROLS DATA INDEX
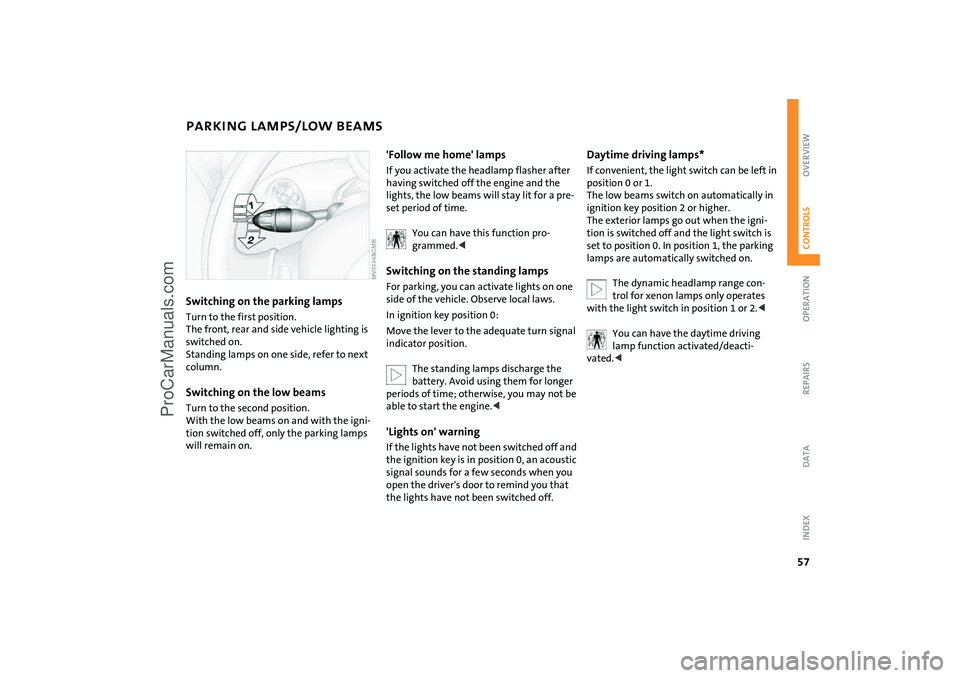
PARKING LAMPS/LOW BEAMS Switching on the parking lamps Turn to the first position.
The front, rear and side vehicle lighting is
switched on.
Standing lamps on one side, refer to next
column.Switching on the low beamsTurn to the second position.
With the low beams on and with the igni
-
tion switched off, only the parking lamps
will remain on.
'Follow me home' lampsIf you activate the headlamp flasher after
having switched off the engine and the
lights, the low beams will stay lit for a pre
-
set period of time.
You can have this function pro
-
grammed.<
Switching on the standing lamps For parking, you can activate lights on one
side of the vehicle. Observe local laws.In ignition key position
0:
Move the lever to the adequate turn signal
indicator position.
The standing lamps discharge the battery. Avoid using them for longer
periods of time; otherwise, you may not be
able to start the engine.<
'Lights on' warning If the lights have not been switched off and
the ignition key is in position
0, an acoustic
signal sounds for a few seconds when you
open the driver's door to remind you that
the lights have not been switched off.
Daytime driving lamps* If convenient, the light switch can be left in
position
0 or 1.
The low beams switch on automatically in
ignition key position 2 or higher.
The exterior lamps go out when the igni
-
tion is switched off and the light switch is
set to position 0. In position 1, the parking
lamps are automatically switched on.
The dynamic headlamp range con
-
trol for xenon lamps only operates
with the light switch in position
1 or 2.<
You can have the daytime driving lamp function activated/deacti
-
vated.<
ProCarManuals.com
Page 66 of 165
64
FUEL GAUGE
COOLANT TEMPERATURE GAUGE
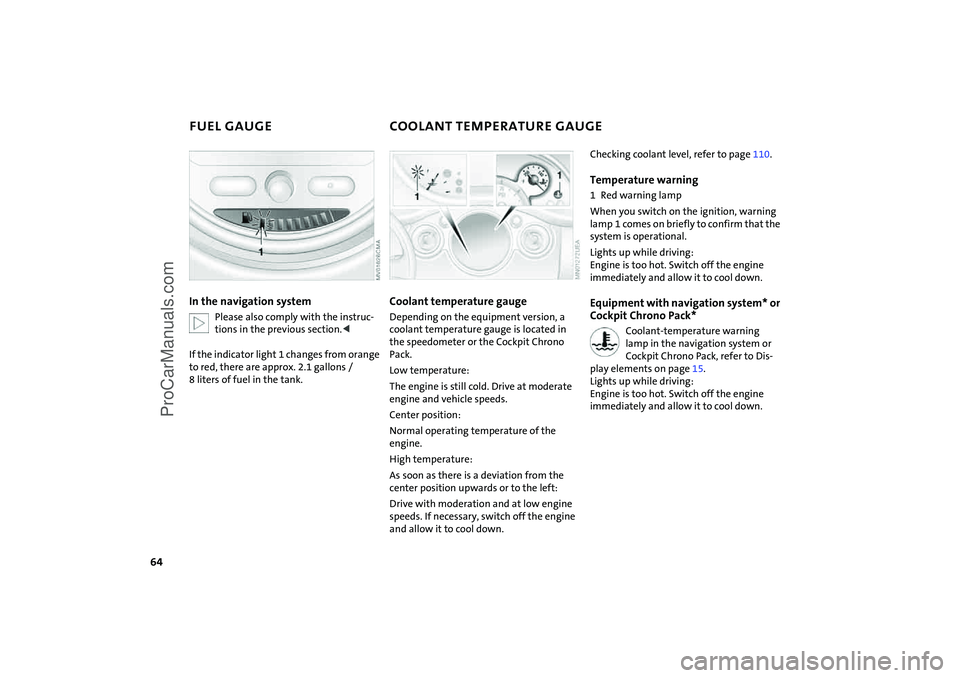
In the navigation system
Please also comply with the instruc
-
tions in the previous section.<
If the indicator light
1 changes from orange
to red, there are approx. 2.1
gallons
/
8
liters of fuel in the tank.
Coolant temperature gaugeDepending on the equipment version, a
coolant temperature gauge is located in
the speedometer or the Cockpit Chrono
Pack.Low temperature:The engine is still cold. Drive at moderate
engine and vehicle speeds.Center position:Normal operating temperature of the
engine.High temperature:As soon as there is a deviation from the
center position upwards or to the left:Drive with moderation and at low engine
speeds. If necessary, switch off the engine
and allow it to cool down.
Checking coolant level, refer to page
110
.
Temperature warning 1 Red warning lampWhen you switch on the ignition, warning
lamp
1 comes on briefly to confirm that the
system is operational.
Lights up while driving:
Engine is too hot. Switch off the engine
immediately and allow it to cool down.Equipment with navigation system* or
Cockpit Chrono Pack*
Coolant-temperature warning lamp in the navigation system or
Cockpit Chrono Pack, refer to Dis
-
play elements on page
15.
Lights up while driving:
Engine is too hot. Switch off the engine
immediately and allow it to cool down.
ProCarManuals.com
Page 68 of 165

66
ONBOARD COMPUTER
*
Mode selectionFrom ignition key position
1, you can use
the button in the turn signal indicator lever
to retrieve information from the onboard
computer for display in the tachometer. By
pressing the button briefly, you can call up
a new function for display.
The displays appear in the following order:Outside temperature, range, average con
-
sumption and current consumption, aver
-
age speed and current speed.From ignition key position
1, the most
recently selected setting is displayed.
If the vehicle is equipped with a navi
-
gation system, you will find more
information on the onboard computer in
the Owner's Manual for Navigation Sys
-
tem.<
Outside temperature If the vehicle is not equipped with an
onboard computer, only the outside tem
-
perature is displayed.
You can have the unit of measure set to 7 or
6.<
Ice warning If the outside temperature falls below
approx. 37
7 / 3
6, the onboard com
-
puter automatically switches to the outside
temperature display.
In addition, an acoustic signal can be heard
and the display flashes for a short time.
The ice warning does not exclude the possibility that surface ice can form
at temperatures above 37
7 / 3
6, e.g. on
bridges and shaded roads.<
With navigation system option:The temperature is displayed in the status
line of the navigation system, refer to the
Owner's Manual for Navigation System.Current vehicle speedIf the vehicle is not equipped with an
onboard computer, only the current speed
is displayed.With the ignition key in position
1 or
higher, you can use the button in the turn
signal indicator lever to switch the display
from outside temperature to current speed
and vice versa.
RangeThe display shows a range estimate based
on the available fuel. The amount of fuel
remaining in the tank is measured, and the
range is estimated from your driving style
over the last 20
miles
/ 30 km.
If the range displayed is less than 35 miles
/ 50 km, be sure to refuel;
otherwise engine functions are not guaran
-
teed and damage could occur.<
ProCarManuals.com
Page 73 of 165
71
OVERVIEW REPAIRS OPERATIONCONTROLS DATA INDEX
FLAT TIRE MONITOR The conceptAs you drive, the Flat Tire Monitor keeps
track of the tire inflation pressure in all four
tires. The system alerts you when there is a
substantial pressure loss in one of the tires
relative to another.The tire inflation pressures are monitored
based on the speeds of the four wheels in
relation to one another. A flat tire is
detected as the result of differences in cer
-
tain speed ratios, and a warning is gener
-
ated.System requirementsSo that the system can 'familiarize' itself
with the correct inflation pressure, please
do the following:1. Check the tire inflation pressure in all
tires2. Compare them with the inflation pres
-
sure table, refer to page
98, and adjust
the pressures if necessary
3. Initialize the system.
System limitations
The Flat Tire Monitor cannot alert you to severe and sudden tire damage
caused by external factors, nor does it
detect the gradual and minor loss of pres
-
sure in all four tires.
-
sure loss or to the system not functioning:>Driving on snow-covered or slippery
roads>Performance-oriented driving: slip at the
drive wheels, high rates of lateral accel
-
eration>When driving with snow chains, false
warnings and undetected pressure loss
may occur>When driving with a space-saver spare
tire, the Flat Tire Monitor cannot func
-
tion.
Initializing the system
The system must be reinitialized immediately after changing a tire
and wheel, or after correcting the pressure
in any tire. This requires a bit of driving.<
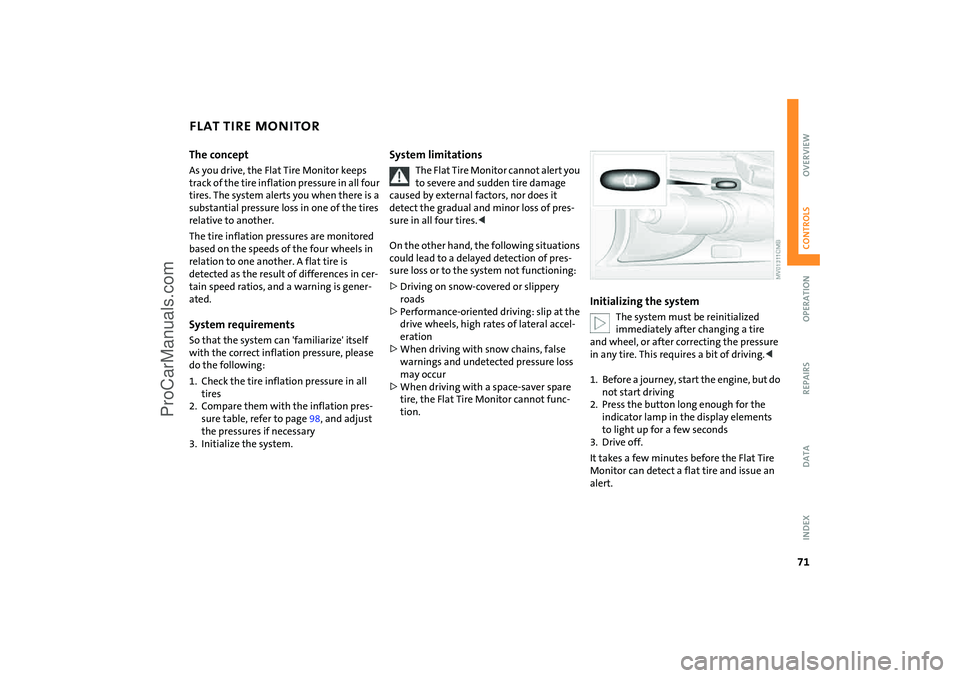
1. Before a journey, start the engine, but do
not start driving2. Press the button long enough for the
indicator lamp in the display elements
to light up for a few seconds3. Drive off.It takes a few minutes before the Flat Tire
Monitor can detect a flat tire and issue an
alert.
ProCarManuals.com
Page 74 of 165
72
FLAT TIRE MONITOR
AIRBAGS
Do not initialize the system if you are driving with snow chains or a space-
saver spare tire.<
Flat tire
The warning lamp lights up in yel
-
low. An acoustic signal also sounds.
There is a flat tire or a siginificant
loss of pressure in a tire.
1. Reduce speed and stop the vehicle with
caution. Avoid hard brake applications
and steering maneuvers2. Determine which tire is damaged
If this cannot be determined, con
-
tact your MINI Dealer.<
3. Repair the flat tire, refer to page
125
.
With Run Flat tires:1. Reduce vehicle speed carefully to under
50
mph
/ 80 km/h. Avoid hard brake
applications and steering maneuvers. Do
not exceed a speed of 50
mph
/ 80
km/h
2. Check the tire inflation pressure in all
four tires at the earliest opportunity.
If the tire inflation pressure is cor
-
rect in all four tires, it is possible
that the Flat Tire Monitor was not initial
-
ized. In this case, initialize the system.<
3. To continue driving, follow the instruc
-
tions on driving with damaged tires on
page
101
.
Malfunction
The warning lamp lights up in yel
-
low. There is a malfunction in the
Flat Tire Monitor or the system has
failed. Have the system checked as soon as
possible.
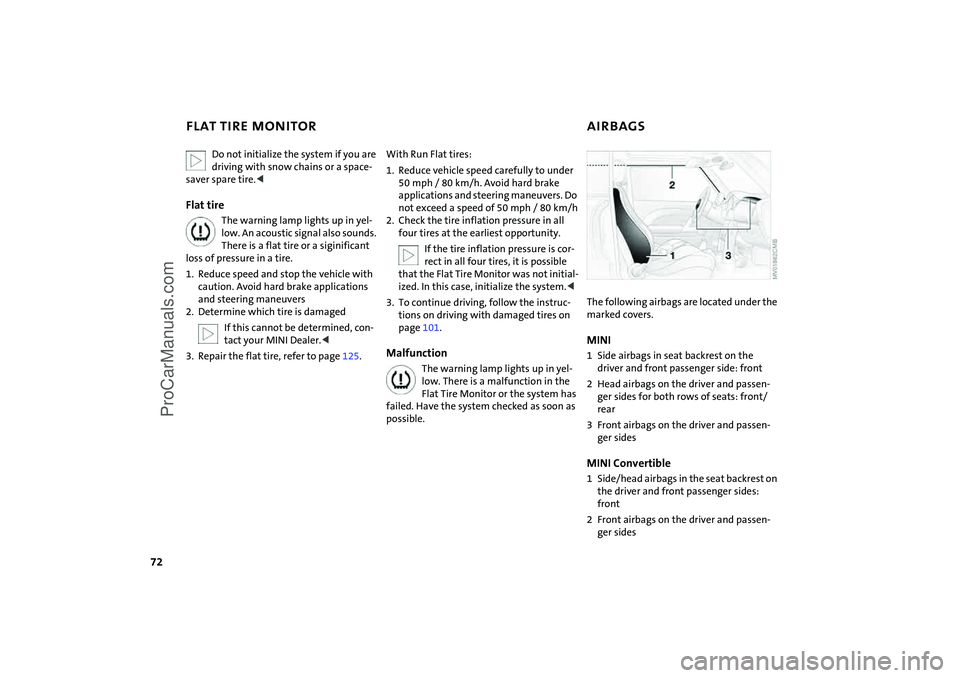
The following airbags are located under the marked covers.MINI 1 Side airbags in seat backrest on the
driver and front passenger side: front2 Head airbags on the driver and passen
-
ger sides for both rows of seats: front/
rear3 Front airbags on the driver and passen
-
ger sidesMINI Convertible1 Side/head airbags in the seat backrest on
the driver and front passenger sides:
front2 Front airbags on the driver and passen
-
ger sides
ProCarManuals.com
Page 75 of 165
73
OVERVIEW REPAIRS OPERATIONCONTROLS DATA INDEX
AIRBAGSProtective effectThe front airbags supplement the safety
belts by providing additional protection for
the driver and front passenger in the event
of a frontal collision in which the protec
-
tion afforded by the belts alone may no
longer be sufficient. When needed, the
head and side airbags help to furnish pro
-
tection in the event of side impact. Each of
the side airbags is designed to help support
the seat occupant's upper body. The corre
-
sponding side/head airbag in the MINI Con
-
vertible or the head airbag in the MINI sup
-
ports the head.The airbags are designed to not be trig
-
gered in certain types of collisions, e.g. in
minor accidents, certain kinds of vehicle
rollover and rear impact.For information on the ideal seating posi
-
tion, refer to page
41.
Do not apply adhesive materials to the cover panels of the airbags, cover
them or modify them in any other way. Do
not fit covers, cushions or other items to
the front seats that have not been specially
approved for seats with side airbags. Do
not hang clothing, e.
g. jackets, over the
backrests.
Do not attempt to remove the airbag
restraint system from the vehicle. Do not
touch the individual components directly
after the system has been triggered, as oth
-
erwise there is a danger of burns. In the
event of malfunctions, deactivation or
deployment of the airbag restraint system,
have the system checked, repaired or disas
-
sembled only by a MINI Dealer or a work
-
shop with specially trained personnel work
-
ing in accordance with the specifications of
the MINI manufacturer and having the nec
-
essary permits for handling explosive
devices. Unprofessional attempts to service
the system could lead to failure in an emer
-
gency or undesired airbag activation, either
of which could result in personal injury.
vided on the sun visors.Airbag system operational
The warning lamp in the display elements shows the status of the
entire airbag system and the seat
belt tensioners starting from ignition key
position 1. The warning lamp goes out after
several seconds.
Airbag system malfunctioning >The warning lamp does not come on
starting from ignition key position
1
>The warning lamp stays lit>The warning lamp lights up while driv
-
ing.
In the event of a malfunction, have the airbag system checked immedi
-
ately. Otherwise, there is a risk that the sys
-
tem will not function as intended in
response to a severe impact occurring
within the system's normal triggering
range.<
ProCarManuals.com
Page 76 of 165

74
PARK DISTANCE CONTROL (PDC)
*
The conceptThe PDC assists you when you back into a
parking space. A signal tone tells you the
current distance to an object behind your
vehicle. To do this, four ultrasonic sensors
in the rear bumper measure the distance to
the nearest object.
The sensors on each side have a range of
approx. 2
ft / 60
cm, the middle sensors
one of approx. 5 ft / 1.5
m.
PDC is a parking aid that can identify objects if they are approached slowly,
as is generally the case when parking.
Avoid driving towards objects rapidly; due
to underlying physical principles, the sys
-
tem may otherwise alert you too late for
you to take evasive steps.
-
tem starts to operate automatically about
one second after you select reverse gear or
place the selector lever in position R.
Wait for this one second before you drive backwards.<
The system is deactivated when you shift
away from Reverse.
You can have a signal tone set as a confirmation that PDC has been acti
-
vated.
between vehicle and object decreases, the
intervals between the tones become
shorter. A continuous tone indicates the
presence of an object less than 8
in / 20
cm
away.
The warning signal is canceled after
approx. three seconds if the distance to the
object remains constant during this time,
for instance if you are moving parallel to a
wall.MalfunctionA continuous high-pitched tone will sound
during initial activation. The system is mal
-
functioning. Have the system checked.Volume controlThe volume of the Park Distance Control
signal can be adjusted from level
1, soft, to
level
6, loud.You can have this function set.<
System limitations
Even with PDC, final responsibility for estimating the distance between the
vehicle and any objects always remains
with the driver.
Even when sensors are involved, there is a
blind spot in which objects cannot be
detected. Recognition of some objects can
be beyond the limits of physical ultrasonic
measurement, for example with towing
bars or hitches or with thin or wedge-
shaped objects. Moreover, low objects that
have already been detected, such as a curb
edge, can disappear out of the range of the
sensors before a continuous tone sounds.
Loud sources of sound outside and inside
your vehicle can drown the PDC signal
tone.<
Keep the sensors clean and free of ice or snow in order to ensure that they
will continue to operate effectively.
Do not apply high pressure spray to the
sensors for a prolonged period of time.
Always maintain a distance which is
greater than 4
in / 10
cm.<
ProCarManuals.com