check engine light MINI COOPER 2005 Owners Manual
[x] Cancel search | Manufacturer: MINI, Model Year: 2005, Model line: COOPER, Model: MINI COOPER 2005Pages: 165, PDF Size: 4.64 MB
Page 18 of 165
16
INDICATOR AND WARNING LAMPS Technology that monitors itselfThe system runs a check on the indicator
and warning lamps marked by
+ each time
you switch on the ignition. They each light
up once for different periods of time.
If a malfunction should occur in one of
these systems, the corresponding lamp
does not go out after the engine is started
or it lights up while the vehicle is moving.
You will see below the correct way to react
to this.
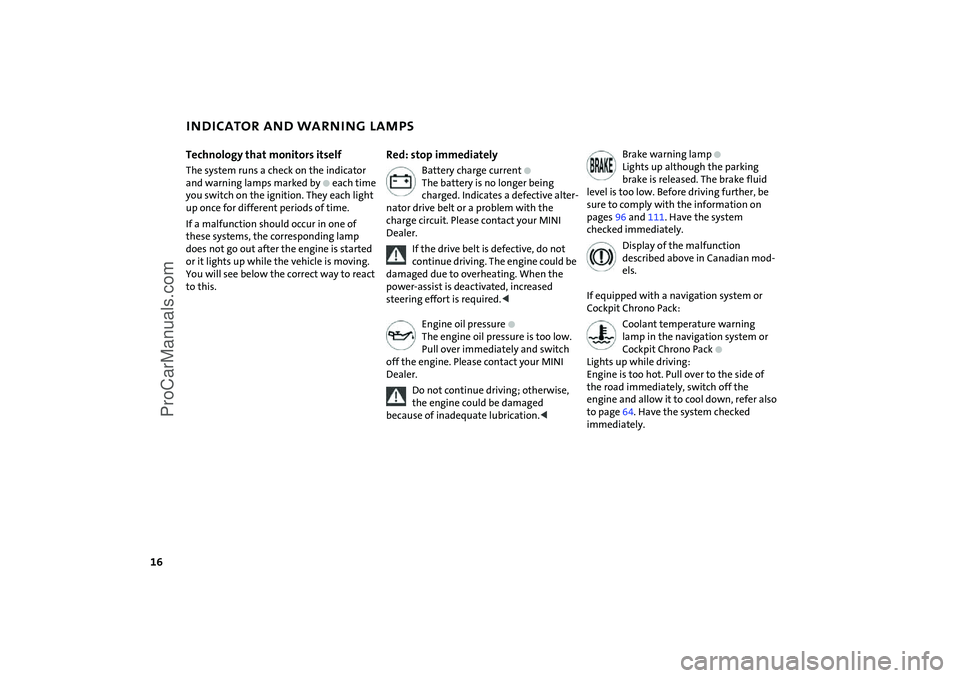
Red: stop immediately
Battery charge current
+
The battery is no longer being
charged. Indicates a defective alter
-
nator drive belt or a problem with the
charge circuit. Please contact your MINI
Dealer.
If the drive belt is defective, do not continue driving. The engine could be
damaged due to overheating. When the
power-assist is deactivated, increased
steering effort is required.
The engine oil pressure is too low.
Pull over immediately and switch
off the engine. Please contact your MINI
Dealer.Do not continue driving; otherwise, the engine could be damaged
because of inadequate lubrication.<
Brake warning lamp
+
Lights up although the parking
brake is released. The brake fluid
level is too low. Before driving further, be
sure to comply with the information on
pages 96 and
111
. Have the system
checked immediately.
Display of the malfunction described above in Canadian mod
-
els.
If equipped with a navigation system or
Cockpit Chrono Pack:
Coolant temperature warning lamp in the navigation system or
Cockpit Chrono Pack
+
Lights up while driving:
Engine is too hot. Pull over to the side of
the road immediately, switch off the
engine and allow it to cool down, refer also
to page
64. Have the system checked
immediately.
ProCarManuals.com
Page 19 of 165
17
OVERVIEW REPAIRS OPERATION CONTROLS DATA INDEX
INDICATOR AND WARNING LAMPSYellow: stop immediately
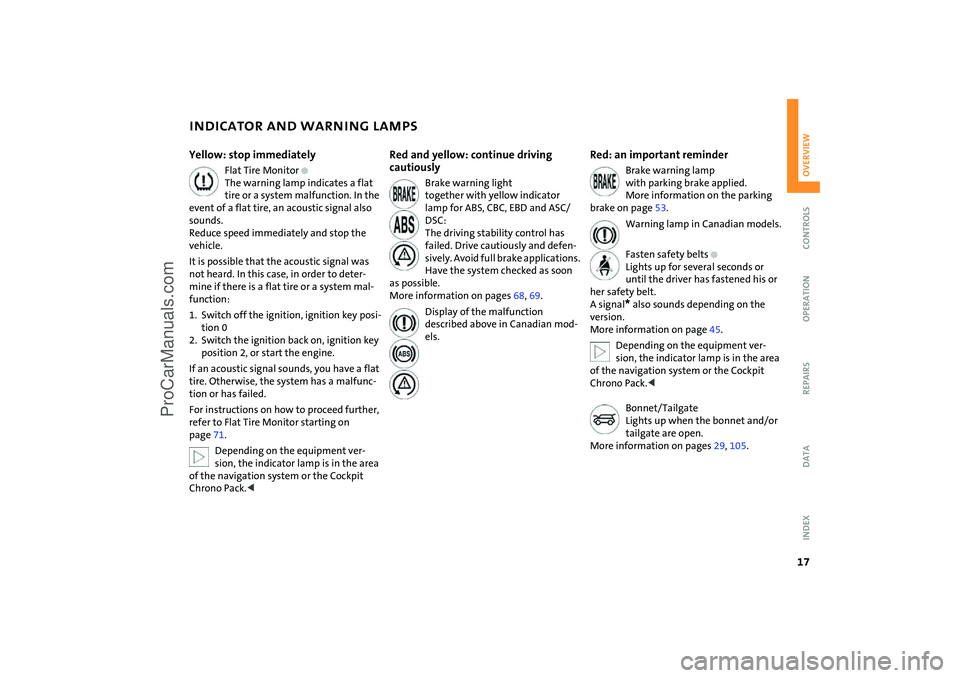
Flat Tire Monitor
+
The warning lamp indicates a flat
tire or a system malfunction. In the
event of a flat tire, an acoustic signal also
sounds.
Reduce speed immediately and stop the
vehicle.It is possible that the acoustic signal was
not heard. In this case, in order to deter
-
mine if there is a flat tire or a system mal
-
function:1. Switch off the ignition, ignition key posi
-
tion 0
2. Switch the ignition back on, ignition key
position 2, or start the engine.If an acoustic signal sounds, you have a flat
tire. Otherwise, the system has a malfunc
-
tion or has failed.For instructions on how to proceed further,
refer to Flat Tire Monitor starting on
page
71.Depending on the equipment ver
-
sion, the indicator lamp is in the area
of the navigation system or the Cockpit
Chrono Pack.<
Red and yellow: continue driving
cautiously
Brake warning light
together with yellow indicator
lamp for ABS, CBC, EBD and ASC/
DSC:
The driving stability control has
failed. Drive cautiously and defen
-
sively. Avoid full brake applications.
Have the system checked as soon
as possible.
More information on pages
68, 69
.
Display of the malfunction described above in Canadian mod
-
els.
Red: an important reminder
Brake warning lamp
with parking brake applied.
More information on the parking
brake on page
53.
Warning lamp in Canadian models.
Fasten safety belts
+
Lights up for several seconds or
until the driver has fastened his or
her safety belt.
A signal
* also sounds depending on the
version.
More information on page
45.
Depending on the equipment ver
-
sion, the indicator lamp is in the area
of the navigation system or the Cockpit
Chrono Pack.
Lights up when the bonnet and/or
tailgate are open.
More information on pages
29, 105
.
ProCarManuals.com
Page 66 of 165
64
FUEL GAUGE
COOLANT TEMPERATURE GAUGE
In the navigation system
Please also comply with the instruc
-
tions in the previous section.<
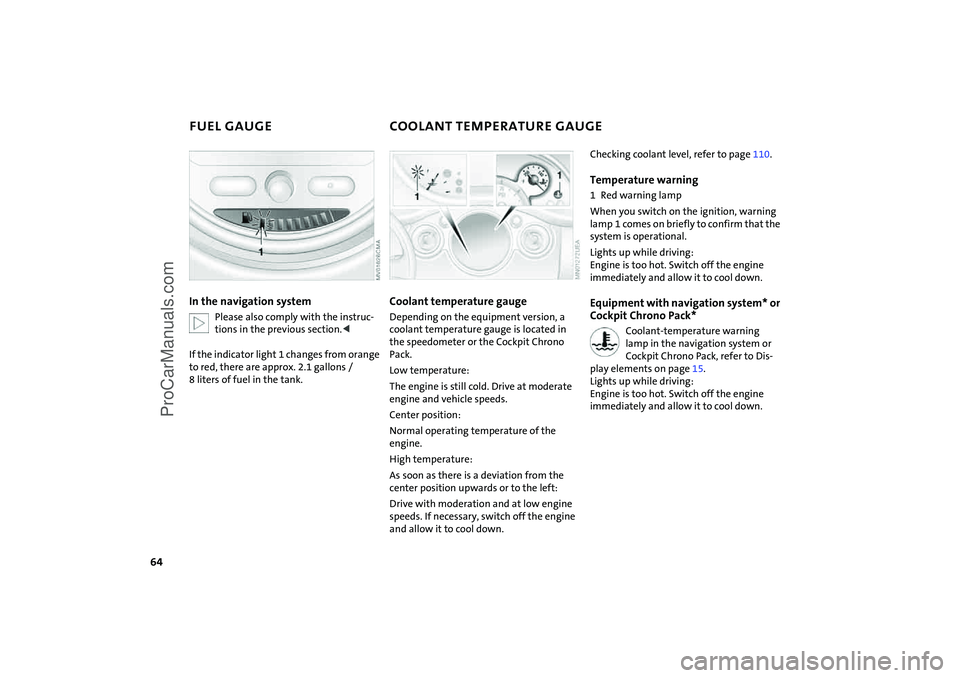
If the indicator light
1 changes from orange
to red, there are approx. 2.1
gallons
/
8
liters of fuel in the tank.
Coolant temperature gaugeDepending on the equipment version, a
coolant temperature gauge is located in
the speedometer or the Cockpit Chrono
Pack.Low temperature:The engine is still cold. Drive at moderate
engine and vehicle speeds.Center position:Normal operating temperature of the
engine.High temperature:As soon as there is a deviation from the
center position upwards or to the left:Drive with moderation and at low engine
speeds. If necessary, switch off the engine
and allow it to cool down.
Checking coolant level, refer to page
110
.
Temperature warning 1 Red warning lampWhen you switch on the ignition, warning
lamp
1 comes on briefly to confirm that the
system is operational.
Lights up while driving:
Engine is too hot. Switch off the engine
immediately and allow it to cool down.Equipment with navigation system* or
Cockpit Chrono Pack*
Coolant-temperature warning lamp in the navigation system or
Cockpit Chrono Pack, refer to Dis
-
play elements on page
15.
Lights up while driving:
Engine is too hot. Switch off the engine
immediately and allow it to cool down.
ProCarManuals.com
Page 73 of 165
71
OVERVIEW REPAIRS OPERATIONCONTROLS DATA INDEX
FLAT TIRE MONITOR The conceptAs you drive, the Flat Tire Monitor keeps
track of the tire inflation pressure in all four
tires. The system alerts you when there is a
substantial pressure loss in one of the tires
relative to another.The tire inflation pressures are monitored
based on the speeds of the four wheels in
relation to one another. A flat tire is
detected as the result of differences in cer
-
tain speed ratios, and a warning is gener
-
ated.System requirementsSo that the system can 'familiarize' itself
with the correct inflation pressure, please
do the following:1. Check the tire inflation pressure in all
tires2. Compare them with the inflation pres
-
sure table, refer to page
98, and adjust
the pressures if necessary
3. Initialize the system.
System limitations
The Flat Tire Monitor cannot alert you to severe and sudden tire damage
caused by external factors, nor does it
detect the gradual and minor loss of pres
-
sure in all four tires.
-
sure loss or to the system not functioning:>Driving on snow-covered or slippery
roads>Performance-oriented driving: slip at the
drive wheels, high rates of lateral accel
-
eration>When driving with snow chains, false
warnings and undetected pressure loss
may occur>When driving with a space-saver spare
tire, the Flat Tire Monitor cannot func
-
tion.
Initializing the system
The system must be reinitialized immediately after changing a tire
and wheel, or after correcting the pressure
in any tire. This requires a bit of driving.<
1. Before a journey, start the engine, but do
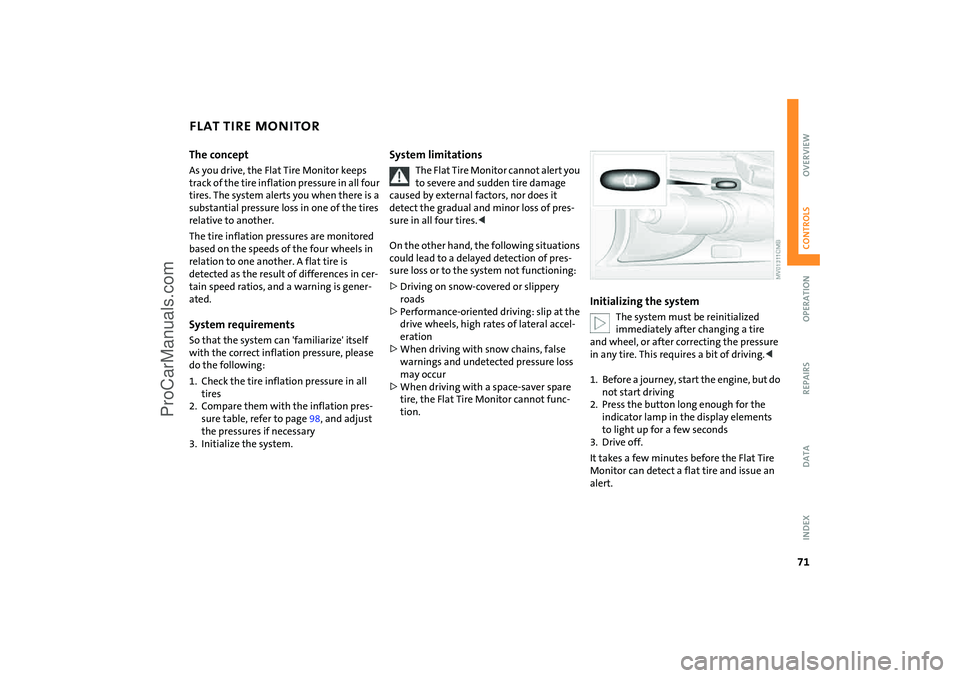
not start driving2. Press the button long enough for the
indicator lamp in the display elements
to light up for a few seconds3. Drive off.It takes a few minutes before the Flat Tire
Monitor can detect a flat tire and issue an
alert.
ProCarManuals.com
Page 112 of 165
110
COOLANT
Do not add coolant to the cooling sys
-
tem when the engine is hot. Escaping
coolant can cause burns.<
Coolant consists of water and a coolant
additive. Not all commercially available
additives are suitable for your MINI. Your
MINI Dealer knows which additives are
suitable and will be glad to advise you.
Only use suitable additives, other
-
wise the engine can be damaged. The
additives are hazardous to your health.
mental laws regulating the disposal
of coolant additives.<
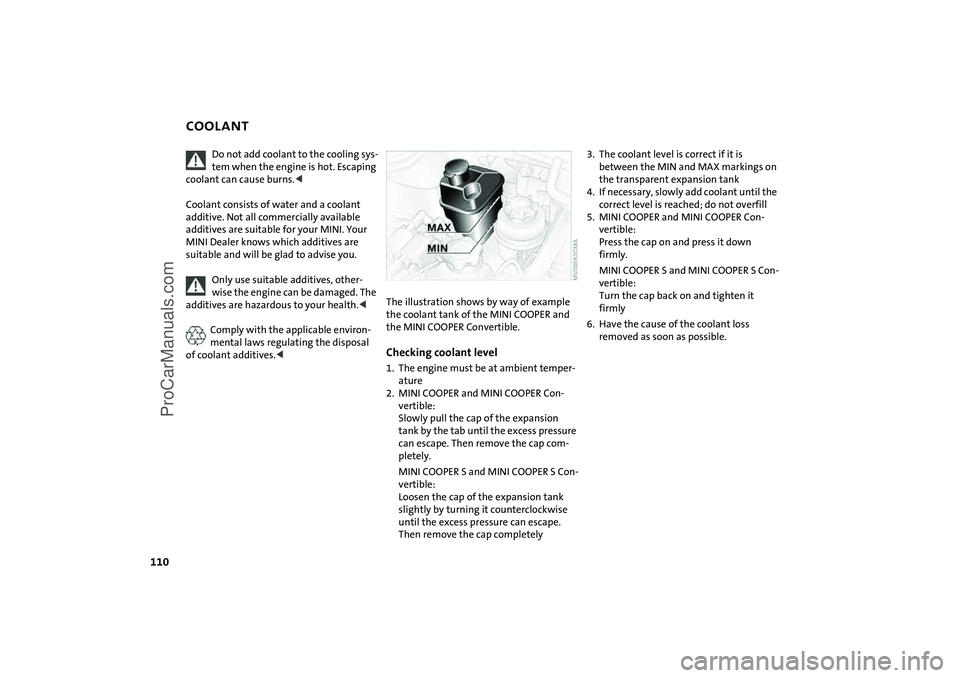
The illustration shows by way of example the coolant tank of the MINI
COOPER and
the MINI
COOPER Convertible.
Checking coolant level 1. The engine must be at ambient temper
-
ature
2. MINI COOPER and MINI COOPER Con
-
vertible:
Slowly pull the cap of the expansion
tank by the tab until the excess pressure
can escape. Then remove the cap com
-
pletely.MINI COOPER
S and MINI COOPER
S Con
-
vertible:
Loosen the cap of the expansion tank
slightly by turning it counterclockwise
until the excess pressure can escape.
Then remove the cap completely
3. The coolant level is correct if it is
between the MIN and MAX markings on
the transparent expansion tank4. If necessary, slowly add coolant until the
correct level is reached; do not overfill5. MINI COOPER and MINI COOPER Con
-
vertible:
Press the cap on and press it down
firmly. MINI COOPER
S and MINI COOPER
S Con
-
vertible:
Turn the cap back on and tighten it
firmly
6. Have the cause of the coolant loss
removed as soon as possible.
ProCarManuals.com
Page 115 of 165
113
OVERVIEW REPAIRSOPERATIONCONTROLS DATA INDEX
OBD SOCKET
CARING FOR YOUR VEHICLE
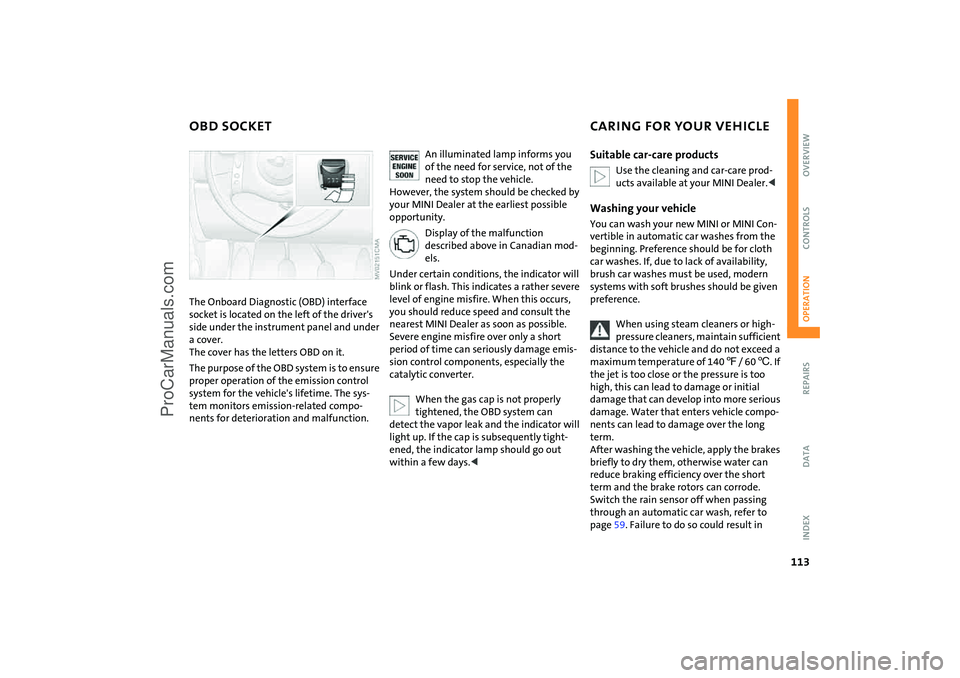
The Onboard Diagnostic (OBD) interface socket is located on the left of the driver's
side under the instrument panel and under
a cover.
The cover has the letters OBD on it.The purpose of the OBD system is to ensure
proper operation of the emission control
system for the vehicle's lifetime. The sys
-
tem monitors emission-related compo
-
nents for deterioration and malfunction.
An illuminated lamp informs you of the need for service, not of the
need to stop the vehicle.
However, the system should be checked by
your MINI Dealer at the earliest possible
opportunity.
Display of the malfunction described above in Canadian mod
-
els.
Under certain conditions, the indicator will
blink or flash. This indicates a rather severe
level of engine misfire. When this occurs,
you should reduce speed and consult the
nearest MINI Dealer as soon as possible.
Severe engine misfire over only a short
period of time can seriously damage emis
-
sion control components, especially the
catalytic converter.
When the gas cap is not properly tightened, the OBD system can
detect the vapor leak and the indicator will
light up. If the cap is subsequently tight
-
ened, the indicator lamp should go out
within a few days.<
Suitable car-care products
Use the cleaning and car-care prod
-
ucts available at your MINI Dealer.<
Washing your vehicleYou can wash your new MINI or MINI Con
-
vertible in automatic car washes from the
beginning. Preference should be for cloth
car washes. If, due to lack of availability,
brush car washes must be used, modern
systems with soft brushes should be given
preference.
When using steam cleaners or high-pressure cleaners, maintain sufficient
distance to the vehicle and do not exceed a
maximum temperature of 140
7/ 60
6. If
the jet is too close or the pressure is too
high, this can lead to damage or initial
damage that can develop into more serious
damage. Water that enters vehicle compo
-
nents can lead to damage over the long
term.
After washing the vehicle, apply the brakes
briefly to dry them, otherwise water can
reduce braking efficiency over the short
term and the brake rotors can corrode.
Switch the rain sensor off when passing
through an automatic car wash, refer to
page
59. Failure to do so could result in
ProCarManuals.com
Page 137 of 165

135
OVERVIEW REPAIRSOPERATION CONTROLS DATA INDEX
JUMP-STARTING
>MINI COOPER
S and MINI COOPER
S
Convertible:
Open the cover of the auxiliary jump-
starting terminal, arrow
1
2. Connect one terminal clamp of the
plus/+
jumper cable to the positive bat
-
tery terminal or to an auxiliary jump-
starting terminal of the support vehicle
3. Connect the other terminal clamp of the
plus/+ jumper cable to the positive bat
-
tery terminal or to an auxiliary jump-
starting terminal of the vehicle to be
started
Engine or body ground in your MINI or MINI
Convertible: arrow
2.
4. Connect one terminal clamp of the
minus/– jumper cable to the negative
battery terminal or to an engine or body
ground of the support vehicle5. Connect the second terminal clamp of
the minus/– jumper cable to the nega
-
tive terminal of the battery or to the
engine or body ground of the vehicle to
be started.
Performing the jump-start1. Start the engine of the support vehicle
and allow it to run at a fast idle speed for
several minutes2. Start the engine of the other vehicle in
the usual manner.
If the first start attempt is not success
-
ful, wait a few minutes before another
attempt in order to allow the discharged
battery to recharge
3. Allow the engines of both vehicles to run
for several minutes
On the MINI or MINI Convertible:
Before disconnecting the jumper
cables, switch on the lighting, the rear
window defroster and the highest
blower speed to prevent a voltage surge
from the regulator to the electrical sys
-
tems and components.<
4. Then disconnect the jumper cables in
the reverse order.If necessary have the battery checked and
completely charged at a MINI Dealer.
Do not use spray starter fluids to start the engine.<
ProCarManuals.com
Page 139 of 165

137
OVERVIEW REPAIRSOPERATION CONTROLS DATA INDEX
TOWING AND TOW-STARTINGWith a tow bar:
The towing vehicle must not be lighter than the vehicle being towed;
otherwise, vehicle handling can no longer
be controlled.<
The towing eyelets of both vehicles should
be on the same side. If the tow bar can only
be used in a diagonal position, please note
the following:>Clearance and maneuverability will be
strictly limited in corners>The inclination of the tow bar produces
lateral force.
Only attach the tow bar to the towing eyelets. Other parts of the vehicles
could otherwise be damaged.<
With a tow rope: When the towing vehicle is driving off,
make sure that the tow rope is taut.
Use nylon ropes or straps for towing because they prevent sudden jerking
movements. Attach the tow rope only to
the towing eyelets. Other parts of the vehi
-
cles could otherwise be damaged.<
With a tow truck:Have the MINI or MINI Convertible trans
-
ported by a tow truck with a lift sling, or on
a flatbed.
Only tow vehicles with Continuously Variable automatic Transmission
(CVT) with the front wheels raised or on a
special transport vehicle, otherwise the
transmission can be damaged.
Do not lift the vehicle by the towing eyelet,
nor by parts of the body or chassis. Other
-
wise damage could result.<
Tow-starting
Do not tow-start vehicles with Con
-
tinuously Variable automatic Trans
-
mission (CVT).
Jump-starting, refer to page
134
.<
Only tow-start vehicles with catalytic con
-
verters if the engine is cold. It is better to
have the engine jump-started, refer to
page
134
.
1. Turn on the hazard warning flashers;
comply with national regulations2. Turn the ignition key to position
2
3. Engage the 3rd
gear
4. Have the vehicle towed with the clutch
pedal completely depressed and then
slowly release the clutch pedal. After the
engine has started, immediately depress
the clutch pedal again completely5. Pull over at a suitable location, remove
the tow bar or tow rope, and turn off the
hazard warning flashers6. Have the vehicle checked.
ProCarManuals.com