mirror controls MINI COOPER 2009 Owners Manual
[x] Cancel search | Manufacturer: MINI, Model Year: 2009, Model line: COOPER, Model: MINI COOPER 2009Pages: 160, PDF Size: 2.84 MB
Page 12 of 160
Cockpit
10
Cockpit
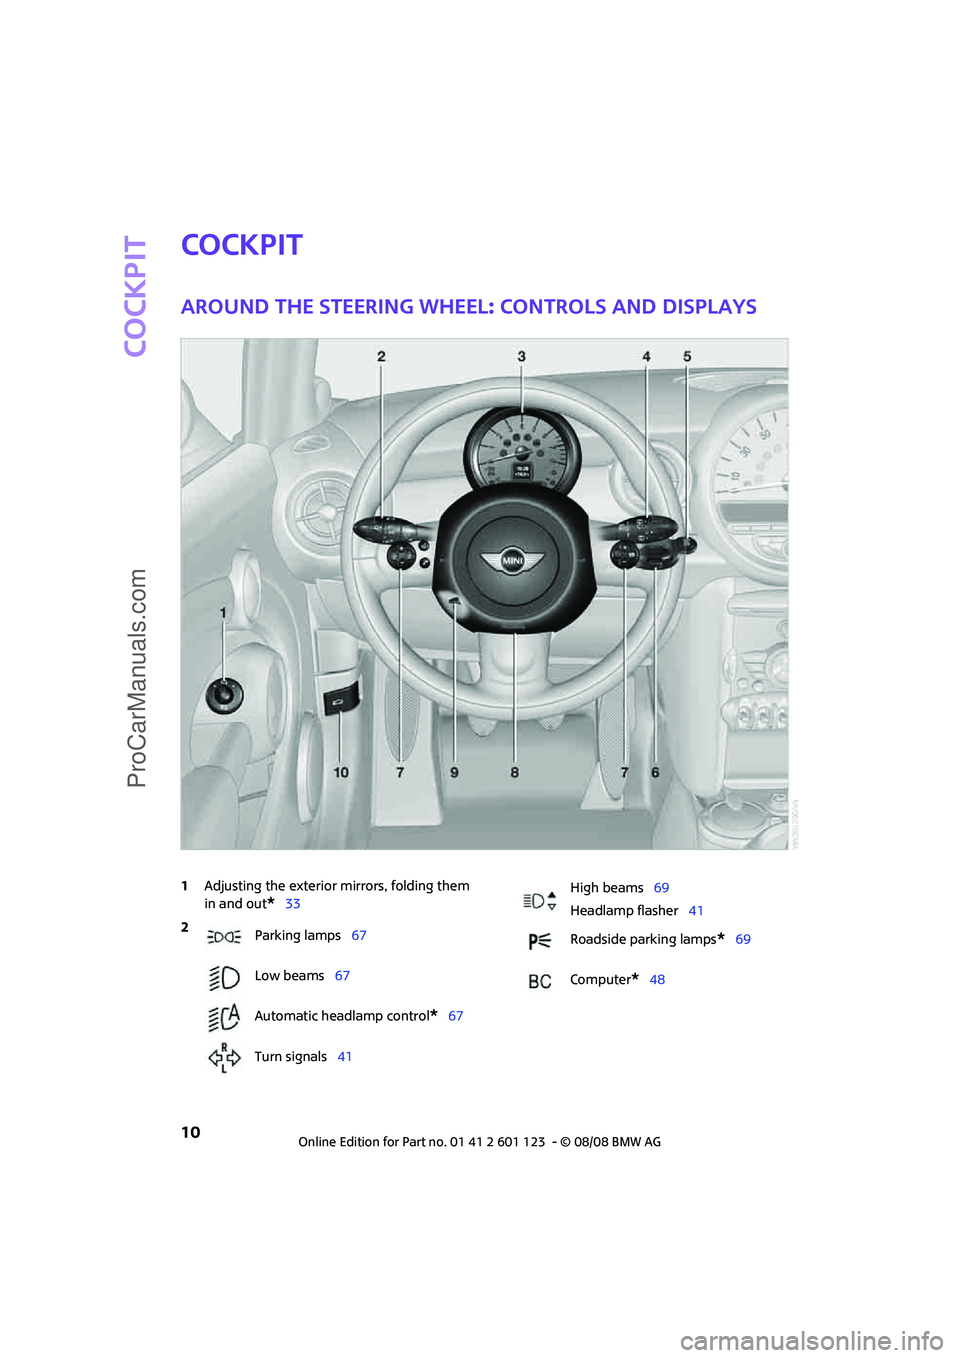
Around the steering wheel: Controls and displays
1Adjusting the exterior mirrors, folding them
in and out
*33
2
Parking lamps67
Low beams67
Automatic headlamp control
*67
Turn signals41
High beams69
Headlamp flasher41
Roadside parking lamps
*69
Computer
*48
ProCarManuals.com
Page 35 of 160

REFERENCEAT A GLANCE CONTROLS DRIVING TIPS MOBILITY
33
Mirrors
Exterior mirrors
The front passenger's mirror is more con-
vex than the driver's mirror. The objects
seen in the mirror are closer than they appear.
Do not gauge your distance from traffic behind
you on the basis of what you see in the mirror;
otherwise there is an increased risk of an acci-
dent.<
1Adjusting the left or right exterior mirror
2Folding mirrors in and out
*
Manual adjustment
The mirrors can also be adjusted manually: press
the edge of the glass.
Folding mirrors in and out*
Turn the knob beyond the pressure point in
direction 2. The mirrors can be folded in at road
speeds up to approx. 20 mph/30 km/h.
This can be beneficial in narrow streets, for
example, or for moving mirrors that were folded
in by hand back out into their correct positions.
Automatic heating*
At outside temperatures below a certain limit,
both exterior mirrors are automatically heated
while the engine is running or the ignition
switched on.
Interior rearview mirror
To reduce glare from vehicles behind you when
you are driving at night:
Turn the knob.
Interior mirror, automatic dimming*
The automatic dimming feature of the interior
rearview mirror
* is controlled by two photo cells
in the mirror. One photo cell is in the mirror
frame, arrow; the other is on the back of the mir-
ror.
In order to ensure that the system functions cor-
rectly, keep the photo cells clean, do not cover
the area between the interior rearview mirror
and windshield, and do not affix adhesive labels
or stickers of any kind to the windshield directly
in front of the mirror.
ProCarManuals.com
Page 45 of 160
REFERENCEAT A GLANCE CONTROLS DRIVING TIPS MOBILITY
43
Intermittent wipe or rain sensor*
If the car is not equipped with a rain sensor, the
intermittent-wipe time is preset.
If the car is equipped with a rain sensor, the time
between wipes is controlled automatically and
depends on the intensity of the rainfall. The rain
sensor is mounted on the windshield, directly in
front of the interior rearview mirror.
Activating intermittent wipe or rain
sensor
Press button, arrow3.
Deactivate the rain sensor before entering
an automatic car wash. Failure to do so
could result in damage caused by undesired
wiper activation.<
Adjusting the sensitivity of the rain
sensor
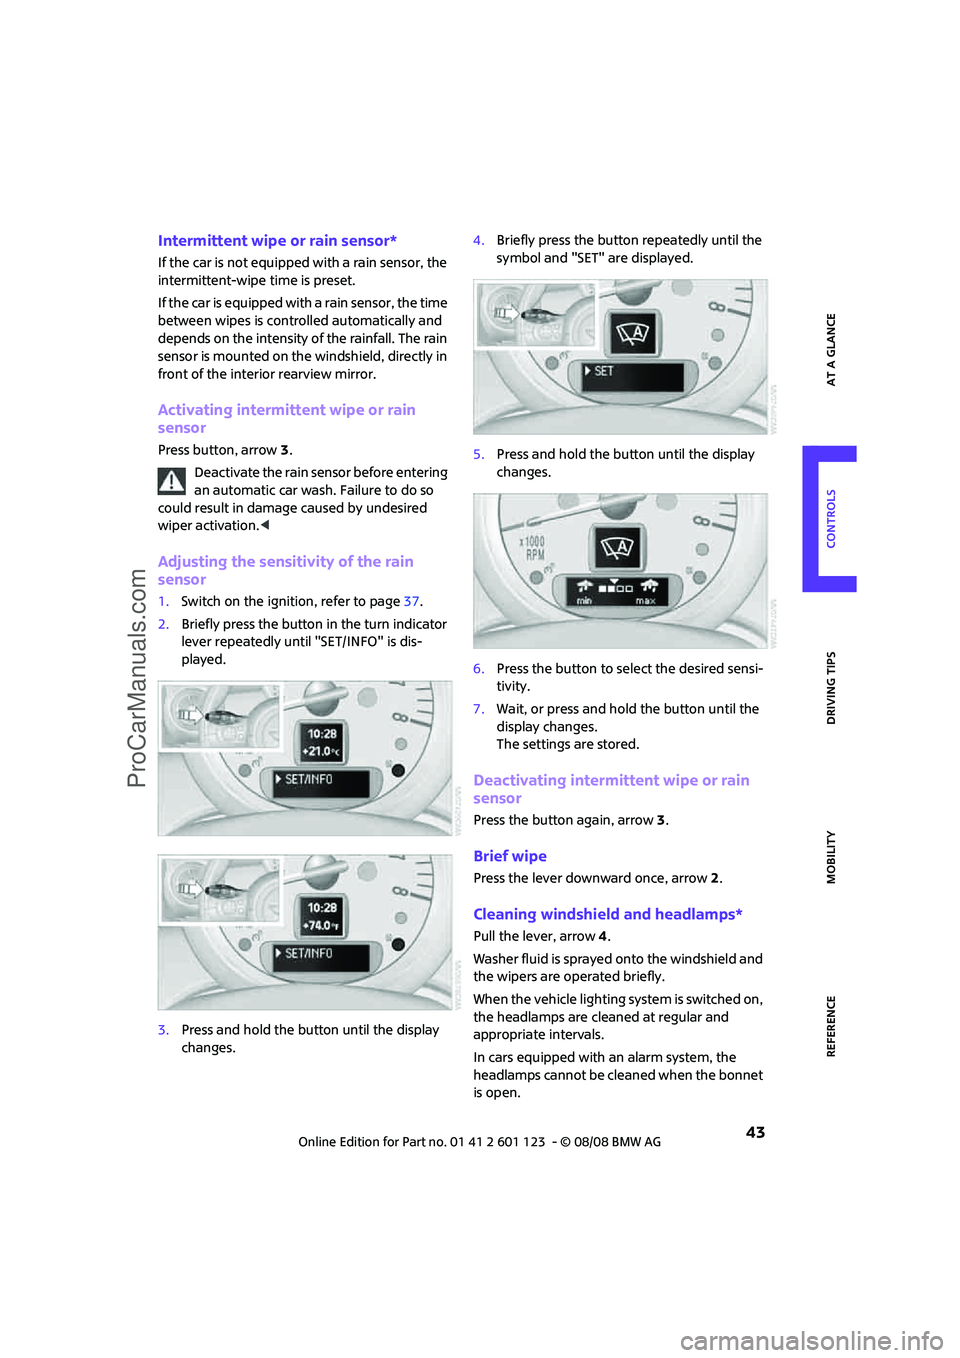
1.Switch on the ignition, refer to page37.
2.Briefly press the button in the turn indicator
lever repeatedly until "SET/INFO" is dis-
played.
3.Press and hold the button until the display
changes.4.Briefly press the button repeatedly until the
symbol and "SET" are displayed.
5.Press and hold the button until the display
changes.
6.Press the button to select the desired sensi-
tivity.
7.Wait, or press and hold the button until the
display changes.
The settings are stored.
Deactivating intermittent wipe or rain
sensor
Press the button again, arrow3.
Brief wipe
Press the lever downward once, arrow2.
Cleaning windshield and headlamps*
Pull the lever, arrow 4.
Washer fluid is sprayed onto the windshield and
the wipers are operated briefly.
When the vehicle lighting system is switched on,
the headlamps are cleaned at regular and
appropriate intervals.
In cars equipped with an alarm system, the
headlamps cannot be cleaned when the bonnet
is open.
ProCarManuals.com
Page 67 of 160
REFERENCEAT A GLANCE CONTROLS DRIVING TIPS MOBILITY
65
Automatic deactivation of the front
passenger airbags
An analysis of the impression in the front pas-
senger seat cushion determines whether and
how the seat is occupied. The front and side air-
bags for the front passenger are activated or
deactivated by the system accordingly.
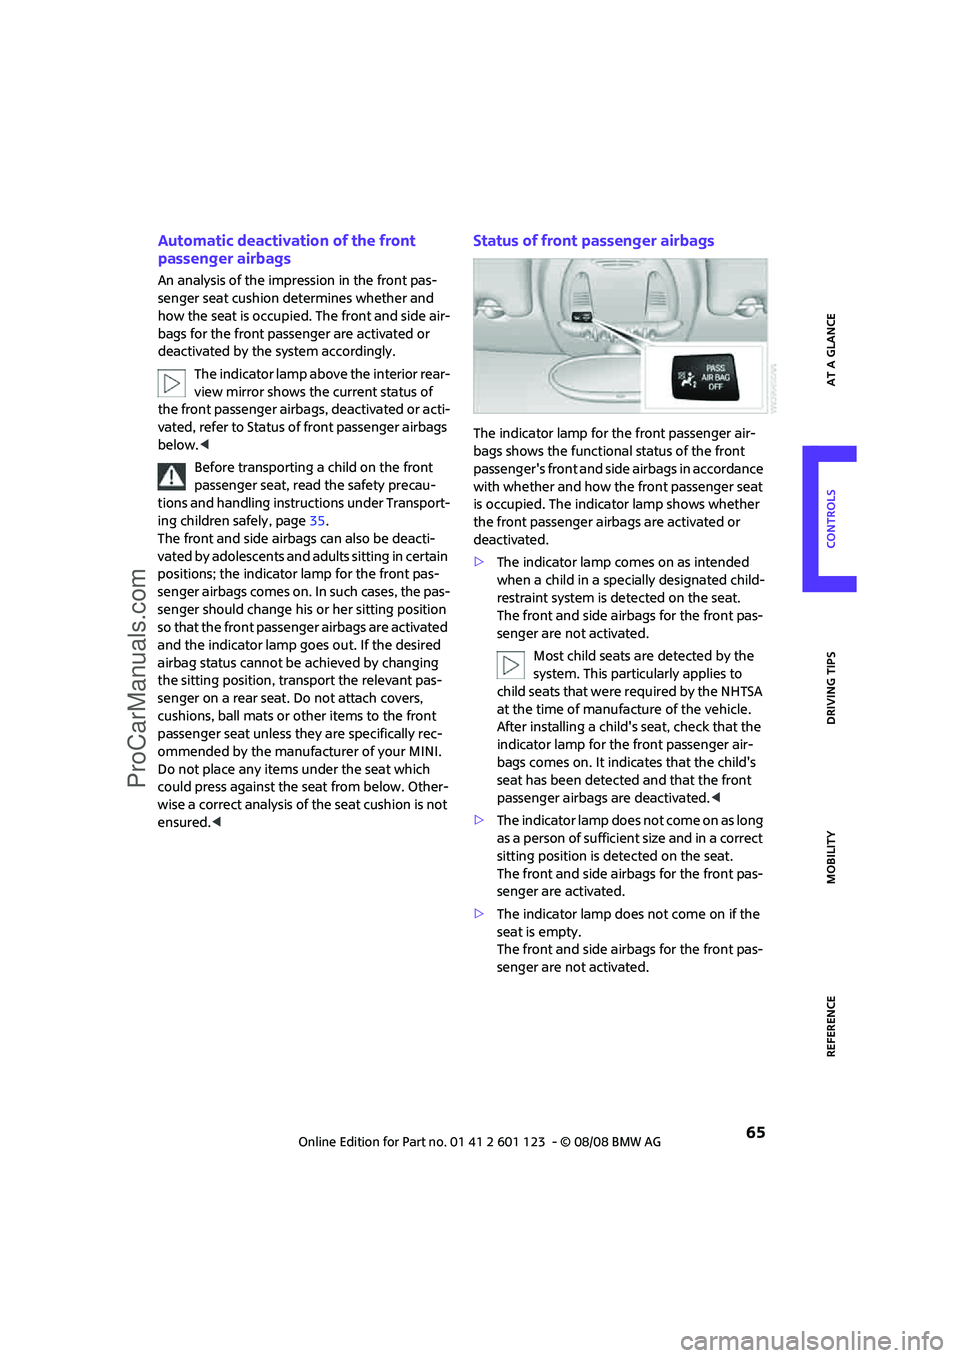
The indicator lamp above the interior rear-
view mirror shows the current status of
the front passenger airbags, deactivated or acti-
vated, refer to Status of front passenger airbags
below.<
Before transporting a child on the front
passenger seat, read the safety precau-
tions and handling instructions under Transport-
ing children safely, page35.
The front and side airbags can also be deacti-
vated by adolescents and adults sitting in certain
positions; the indicator lamp for the front pas-
senger airbags comes on. In such cases, the pas-
senger should change his or her sitting position
so that the front passenger airbags are activated
and the indicator lamp goes out. If the desired
airbag status cannot be achieved by changing
the sitting position, transport the relevant pas-
senger on a rear seat. Do not attach covers,
cushions, ball mats or other items to the front
passenger seat unless they are specifically rec-
ommended by the manufacturer of your MINI.
Do not place any items under the seat which
could press against the seat from below. Other-
wise a correct analysis of the seat cushion is not
ensured.<
Status of front passenger airbags
The indicator lamp for the front passenger air-
bags shows the functional status of the front
passenger's front and side airbags in accordance
with whether and how the front passenger seat
is occupied. The indicator lamp shows whether
the front passenger airbags are activated or
deactivated.
>The indicator lamp comes on as intended
when a child in a specially designated child-
restraint system is detected on the seat.
The front and side airbags for the front pas-
senger are not activated.
Most child seats are detected by the
system. This particularly applies to
child seats that were required by the NHTSA
at the time of manufacture of the vehicle.
After installing a child's seat, check that the
indicator lamp for the front passenger air-
bags comes on. It indicates that the child's
seat has been detected and that the front
passenger airbags are deactivated.<
>T h e i n d i c a t o r l a m p d o e s n o t c o m e o n a s l o n g
as a person of sufficient size and in a correct
sitting position is detected on the seat.
The front and side airbags for the front pas-
senger are activated.
>The indicator lamp does not come on if the
seat is empty.
The front and side airbags for the front pas-
senger are not activated.
ProCarManuals.com
Page 91 of 160

REFERENCEAT A GLANCE CONTROLS DRIVING TIPS MOBILITY
89
Remove unnecessary cargo
Additional weight increases fuel consumption.
Remove attached parts no longer in use
Remove auxiliary mirrors, roof- or rear-mounted
luggage racks whenever you are not using
them.
Attached parts on the vehicle affect its aerody-
namics and increase fuel consumption.
Check tire inflation pressure regularly
Check and, if necessary, correct tire inflation
pressure at least twice a month and before start-
ing on a long trip.
Low inflation pressure increases rolling resis-
tance and thus leads to greater fuel consump-
tion and tire wear.
Drive off immediately
Do not wait for the engine to warm up while the
vehicle remains stationary. Start driving right
away, but at moderate engine speeds. This is the
fastest way for the cold engine to reach its oper-
ating temperature.
Think ahead while driving
Avoid unnecessary acceleration and braking by
maintaining a suitable distance to the vehicle
driving ahead.
Driving smoothly and anticipating impending
traffic situations reduces fuel consumption.
Avoid high engine speeds
Use first gear only for driving off. In second and
higher gears, accelerate smoothly to a suitable
engine and road speed. In doing so, avoid high
engine speeds and shift up early.
When you reach your desired traveling speed,
shift to the highest suitable gear and drive at
constant speed.
As a rule: driving at low engine speeds lowers
fuel consumption and reduces wear.
Coasting
When approaching a red traffic light, take your
foot off the accelerator and let the vehicle coast
to a halt in the highest suitable gear.
On a downhill gradient, take your foot off the
accelerator and let the vehicle coast in a suitable
gear.
Fuel supply is shut off automatically when the
vehicle is coasting.
Switch off the engine during lengthy
stops
Switch off the engine when stopping for lengthy
periods, e.g. at traffic lights, railroad crossings or
in traffic congestions.
Have the vehicle serviced
Have your vehicle serviced regularly to achieve
good economy and a long vehicle life. The man-
ufacturer of your MINI recommends having the
vehicle serviced by a MINI Dealer. Also note the
MINI Maintenance System, page107.
ProCarManuals.com
Page 111 of 160
REFERENCEAT A GLANCE CONTROLS DRIVING TIPS MOBILITY
109
Care
Car-care products
Regular cleaning and care helps to maintain the
value of your MINI.
The manufacturer of your MINI recommends
using manufacturer-approved products to clean
and care for your vehicle.
MINI Service would be pleased to advise you on
cleaning and care products and services for your
MINI.
The ingredients of original MINI CareProd-
ucts have been tested, and the products
have been tested in the laboratory and in prac-
tice. They offer optimum care and protection for
your vehicle.<
Do not use any cleansers containing alco-
hol or solvents as these may cause dam-
age.<
Cleaning agents may contain hazardous
or health-damaging substances. Follow
the warning and hazard instructions on the
packaging. For interior cleaning, always open
the doors or windows of the vehicle.
Do not use any products that are not intended
for cleaning the vehicle.<
External care
Washing your vehicle
Especially during the winter months the
vehicle should be frequently washed. Dirt
and road salt can damage the vehicle.<
After washing the vehicle, apply the
brakes briefly to dry them, otherwise
water can reduce braking efficiency over the
short term and the brake rotors can corrode.<
Car washes
Preference should be given to cloth car washes.Do not use high-pressure car washes
because drops of water can penetrate
around the windows.<
Before driving into the car wash, check if the sys-
tem is suitable for your MINI. Observe the fol-
lowing points:
>Dimensions of the vehicle, page143
>If necessary: Fold in the outside mirrors
(page 33)
>Maximum permissible tire width
Preparations for driving into the car wash:
>Unscrew the rod antenna.
>Deactivate the rain sensor
* to prevent unin-
tentional wiping.
>Deactivate the rear windshield wiper and
protect it from damage. Ask the car wash
operator about measures that can be taken
to protect the wipers.
>Remove additional detachable body com-
ponents such as spoilers or telephone
antennas that could be damaged.
Automatic transmission
Before driving into the car wash, make sure that
the vehicle can roll:
1.Place the remote control, even with conve-
nient access, in the ignition lock.
2.Move the selector lever to position N.
3.Release the parking brake.
4.Switch off the engine.
5.Insert the remote control in the ignition lock
so that the vehicle can roll.
Steam jets/high-pressure washers
When using steam jets or high-pressure
washers, ensure that you maintain a suffi-
cient distance to the vehicle and do not exceed a
maximum temperature of 1407/606.
If the distance is too close, the pressure too high,
or the temperature too high, parts of the vehicle
can be damaged, or water can penetrate.
ProCarManuals.com
Page 151 of 160
REFERENCEAT A GLANCE CONTROLS DRIVING TIPS MOBILITY
149
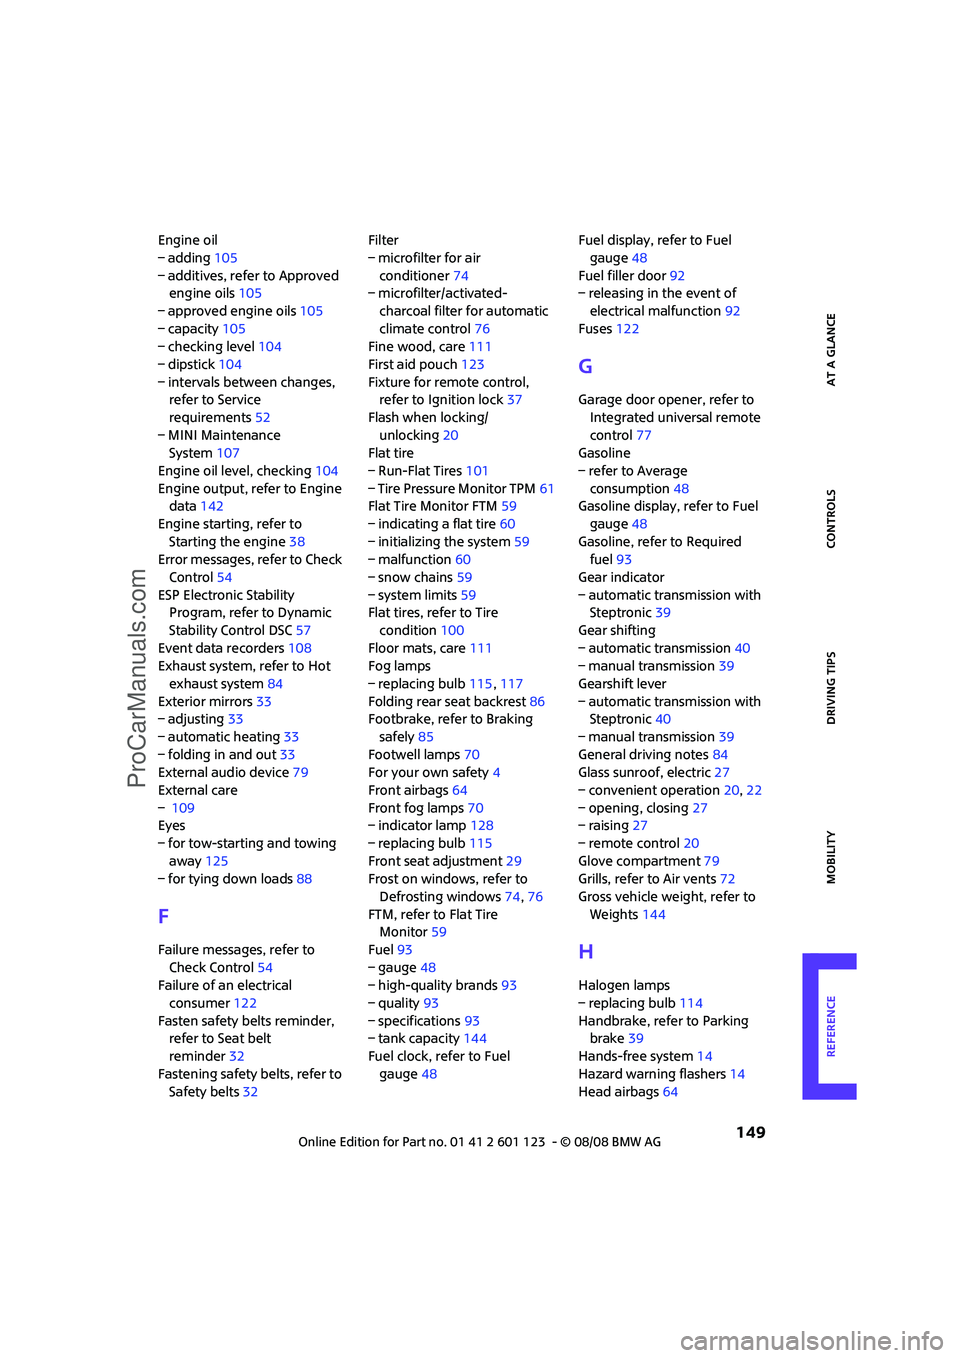
Engine oil
– adding105
– additives, refer to Approved
engine oils105
– approved engine oils105
– capacity105
– checking level104
– dipstick104
– intervals between changes,
refer to Service
requirements52
– MINI Maintenance
System107
Engine oil level, checking104
Engine output, refer to Engine
data142
Engine starting, refer to
Starting the engine38
Error messages, refer to Check
Control54
ESP Electronic Stability
Program, refer to Dynamic
Stability Control DSC57
Event data recorders108
Exhaust system, refer to Hot
exhaust system84
Exterior mirrors33
– adjusting33
– automatic heating33
– folding in and out33
External audio device79
External care
– 109
Eyes
– for tow-starting and towing
away125
– for tying down loads88
F
Failure messages, refer to
Check Control54
Failure of an electrical
consumer122
Fasten safety belts reminder,
refer to Seat belt
reminder32
Fastening safety belts, refer to
Safety belts32Filter
– microfilter for air
conditioner74
– microfilter/activated-
charcoal filter for automatic
climate control76
Fine wood, care111
First aid pouch123
Fixture for remote control,
refer to Ignition lock37
Flash when locking/
unlocking20
Flat tire
– Run-Flat Tires101
– Tire Pressure Monitor TPM61
Flat Tire Monitor FTM59
– indicating a flat tire60
– initializing the system59
– malfunction60
– snow chains59
– system limits59
Flat tires, refer to Tire
condition100
Floor mats, care111
Fog lamps
– replacing bulb115,117
Folding rear seat backrest86
Footbrake, refer to Braking
safely85
Footwell lamps70
For your own safety4
Front airbags64
Front fog lamps70
– indicator lamp128
– replacing bulb115
Front seat adjustment29
Frost on windows, refer to
Defrosting windows74,76
FTM, refer to Flat Tire
Monitor59
Fuel93
– gauge48
– high-quality brands93
– quality93
– specifications93
– tank capacity144
Fuel clock, refer to Fuel
gauge48Fuel display, refer to Fuel
gauge
48
Fuel filler door92
– releasing in the event of
electrical malfunction92
Fuses122
G
Garage door opener, refer to
Integrated universal remote
control77
Gasoline
– refer to Average
consumption48
Gasoline display, refer to Fuel
gauge48
Gasoline, refer to Required
fuel93
Gear indicator
– automatic transmission with
Steptronic39
Gear shifting
– automatic transmission40
– manual transmission39
Gearshift lever
– automatic transmission with
Steptronic40
– manual transmission39
General driving notes84
Glass sunroof, electric27
– convenient operation20,22
– opening, closing27
– raising27
– remote control20
Glove compartment79
Grills, refer to Air vents72
Gross vehicle weight, refer to
Weights144
H
Halogen lamps
– replacing bulb114
Handbrake, refer to Parking
brake39
Hands-free system14
Hazard warning flashers14
Head airbags64
ProCarManuals.com
Page 152 of 160
From A to Z
150
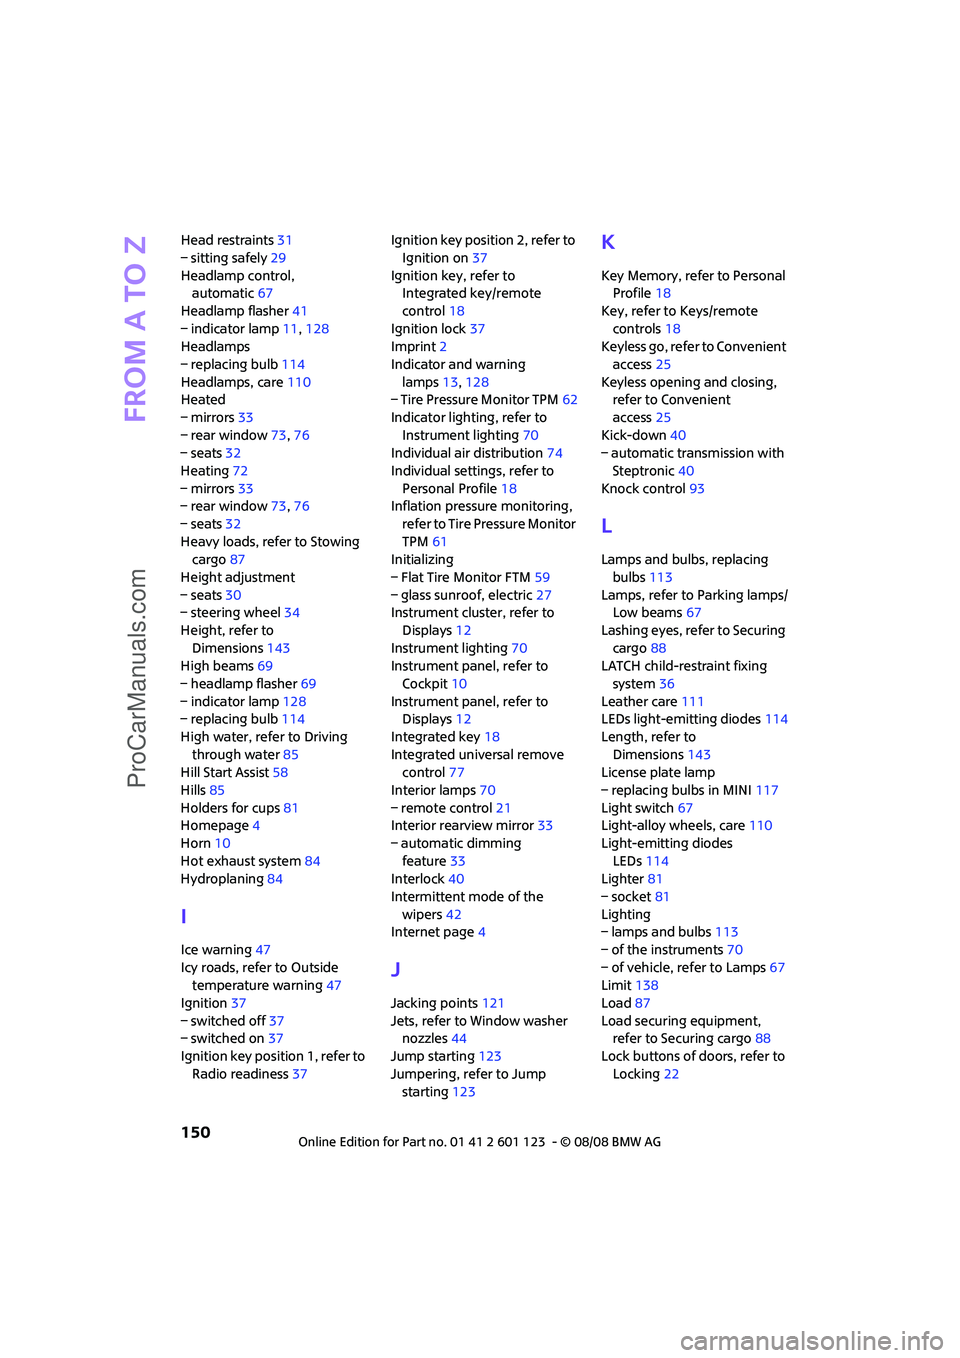
Head restraints31
– sitting safely29
Headlamp control,
automatic67
Headlamp flasher41
– indicator lamp11,128
Headlamps
– replacing bulb114
Headlamps, care110
Heated
– mirrors33
– rear window73,76
– seats32
Heating72
– mirrors33
– rear window73,76
– seats32
Heavy loads, refer to Stowing
cargo87
Height adjustment
– seats30
– steering wheel34
Height, refer to
Dimensions143
High beams69
– headlamp flasher69
– indicator lamp128
– replacing bulb114
High water, refer to Driving
through water85
Hill Start Assist58
Hills85
Holders for cups81
Homepage4
Horn10
Hot exhaust system84
Hydroplaning84
I
Ice warning47
Icy roads, refer to Outside
temperature warning47
Ignition37
– switched off37
– switched on37
Ignition key position 1, refer to
Radio readiness37Ignition key position 2, refer to
Ignition on37
Ignition key, refer to
Integrated key/remote
control18
Ignition lock37
Imprint2
Indicator and warning
lamps13,128
– Tire Pressure Monitor TPM62
Indicator lighting, refer to
Instrument lighting70
Individual air distribution74
Individual settings, refer to
Personal Profile18
Inflation pressure monitoring,
refer to Tire Pressure Monitor
TPM61
Initializing
– Flat Tire Monitor FTM59
– glass sunroof, electric27
Instrument cluster, refer to
Displays12
Instrument lighting70
Instrument panel, refer to
Cockpit10
Instrument panel, refer to
Displays12
Integrated key18
Integrated universal remove
control77
Interior lamps70
– remote control21
Interior rearview mirror33
– automatic dimming
feature33
Interlock40
Intermittent mode of the
wipers42
Internet page4
J
Jacking points121
Jets, refer to Window washer
nozzles44
Jump starting123
Jumpering, refer to Jump
starting123
K
Key Memory, refer to Personal
Profile18
Key, refer to Keys/remote
controls18
Keyless go, refer to Convenient
access25
Keyless opening and closing,
refer to Convenient
access25
Kick-down40
– automatic transmission with
Steptronic40
Knock control93
L
Lamps and bulbs, replacing
bulbs113
Lamps, refer to Parking lamps/
Low beams67
Lashing eyes, refer to Securing
cargo88
LATCH child-restraint fixing
system36
Leather care111
LEDs light-emitting diodes114
Length, refer to
Dimensions143
License plate lamp
– replacing bulbs in MINI117
Light switch67
Light-alloy wheels, care110
Light-emitting diodes
LEDs114
Lighter81
– socket81
Lighting
– lamps and bulbs113
– of the instruments70
– of vehicle, refer to Lamps67
Limit138
Load87
Load securing equipment,
refer to Securing cargo88
Lock buttons of doors, refer to
Locking22
ProCarManuals.com
Page 153 of 160

REFERENCEAT A GLANCE CONTROLS DRIVING TIPS MOBILITY
151
Locking
– adjusting confirmation
signal20
– from inside22
– from outside20
– without remote control, refer
to Convenient access25
Locking and unlocking doors
– confirmation signals20
– from inside22
– from outside19
Low beams67
– automatic67
– replacing bulb114
Lower back support, refer to
Lumbar support30
Luggage compartment lid,
refer to Tailgate23
Luggage compartment, refer
to Cargo bay23
Luggage rack, refer to Roof-
mounted luggage rack88
Lumbar support30
M
M+S tires, refer to Winter
tires102
Maintenance, refer to Service
Booklet
Maintenance system107
Malfunction warnings, refer to
Check Control54
Manual air distribution74
Manual mode
– automatic transmission with
Steptronic40
Manual operation
– door lock22
– fuel filler door92
– transmission lock, automatic
transmission41
Manual transmission39
Manual washing110
Master key, refer to Integrated
key/remote control18
Maximum cooling75
Maximum speed
– with winter tires102Medical assistance, refer to
First aid pouch123
Microfilter
– for air conditioner74
– for automatic climate
control76
– MINI Maintenance
System107
Microfilter/activated-charcoal
filter
– MINI Maintenance
System107
Microphone for telephone14
MINI Internet page4
MINI Maintenance System107
Mirror dimming feature33
Mirrors33
– exterior mirrors33
– heating33
– interior rearview mirror33
Mobile phone
– installation location, refer to
Center armrest79
– refer to separate Owner's
Manual
Mobile phone, installation
location, refer to Center
armrest79
Mobile phone, refer to the
separate Owner's Manual
Mobility System117
Modifications, technical, refer
to For your own safety4
Monitoring system for tire
pressures, refer to Flat Tire
Monitor59
Multifunction switch
– refer to Turn signals/
headlamp flasher41
– refer to Wiper system42
Multifunctional steering
wheel, refer to Buttons on
the steering wheel11
N
Neck support, refer to Head
restraints31Nets, refer to Storage
compartments80
New tires101
Number of cylinders, refer to
Engine data142
Nylon rope, refer to Tow
rope126
O
OBD socket, refer to Socket for
Onboard Diagnosis107
Octane ratings, refer to Fuel
specifications93
Odometer47
Oil consumption104
Oil level104
Oil, refer to Engine oil104
Old batteries, refer to
Disposal122
Onboard tool kit113
Opening and closing
– convenient access25
– from inside22
– from outside19
– using the door lock22
– via the remote control19
Opening and unlocking
– from inside22
Outlets
– refer to Ventilation76
Outlets, refer to Air vents72
Output, refer to Engine
data142
Outside temperature
display47
– changing unit of measure50
– on onboard computer50
Outside-air mode
– automatic climate control75
Overheated engine, refer to
Coolant temperature47
P
Paintwork, care110
Park Distance Control PDC56
Parking
– vehicle38
ProCarManuals.com