start stop button MINI COOPER 2011 Owners Manual
[x] Cancel search | Manufacturer: MINI, Model Year: 2011, Model line: COOPER, Model: MINI COOPER 2011Pages: 210, PDF Size: 3.19 MB
Page 13 of 210
CockpitAT A GLANCE
11
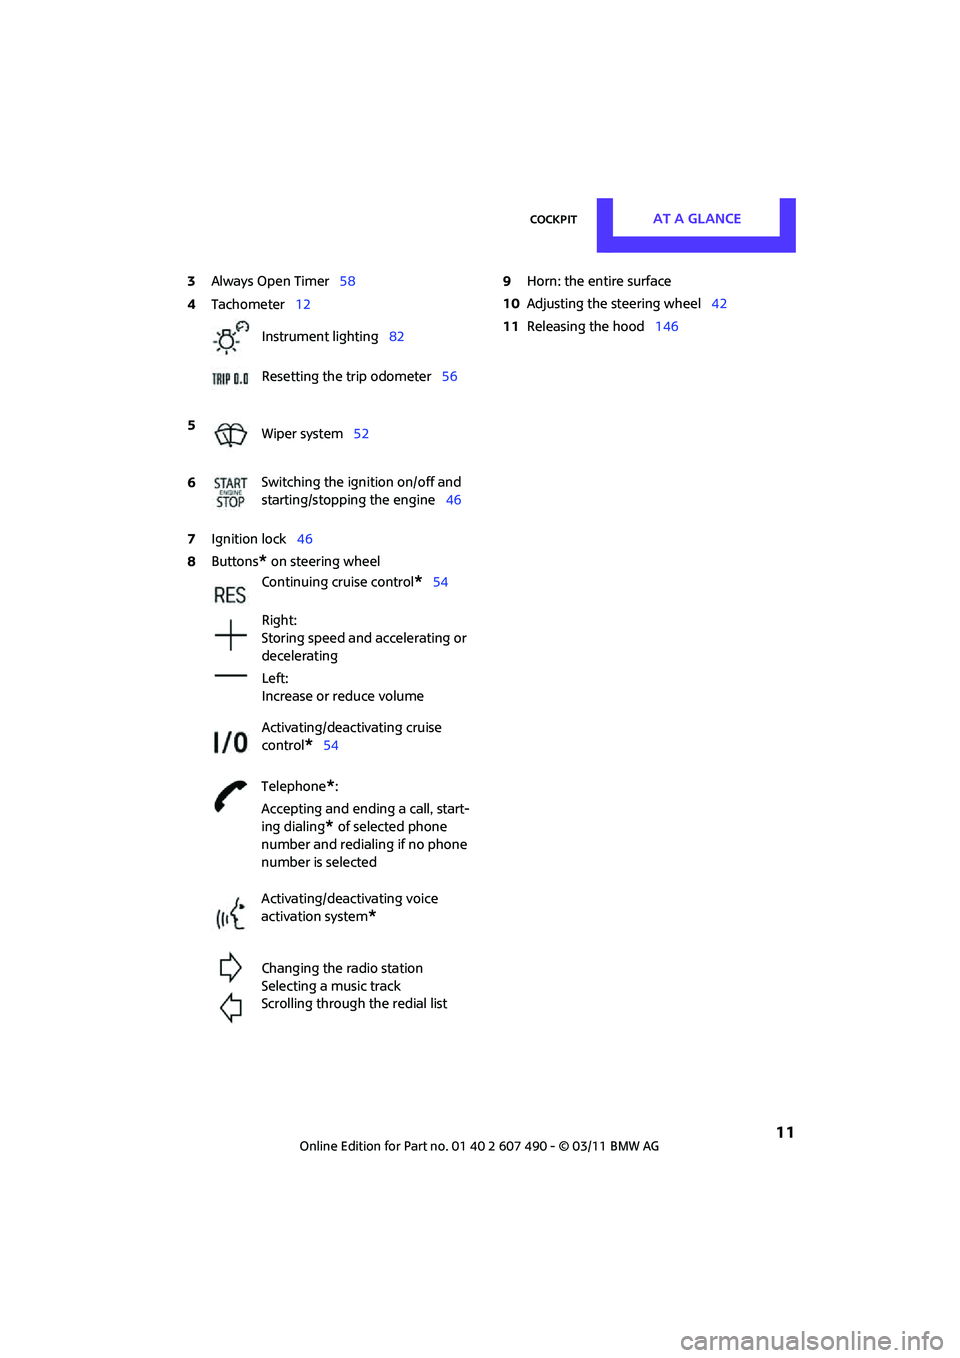
3Always Open Timer 58
7 Ignition lock 46
8 Buttons
* on steering wheel 9
Horn: the entire surface
10 Adjusting the steering wheel 42
11 Releasing the hood 146
4
Tachometer 12
Instrument lighting 82
Resetting the trip odometer 56
5 Wiper system 52
6 Switching the ignition on/off and
starting/stopping the engine
46
Continuing cruise control
*54
Right:
Storing speed and accelerating or
decelerating
Left:
Increase or reduce volume
Activating/deactivating cruise
control
*54
Telephone
*:
Accepting and ending a call, start-
ing dialing
* of selected phone
number and redialing if no phone
number is selected
Activating/deactivating voice
activation system
*
Changing the radio station
Selecting a music track
Scrolling through the redial list
Page 31 of 210
Opening and closingCONTROLS
29
If you notice a brief delay while opening or
closing the windows, the glass roof or the
convertible top, the system is checking whether
a remote control is inside the vehicle. Repeat the
opening or closing procedure, if necessary. <
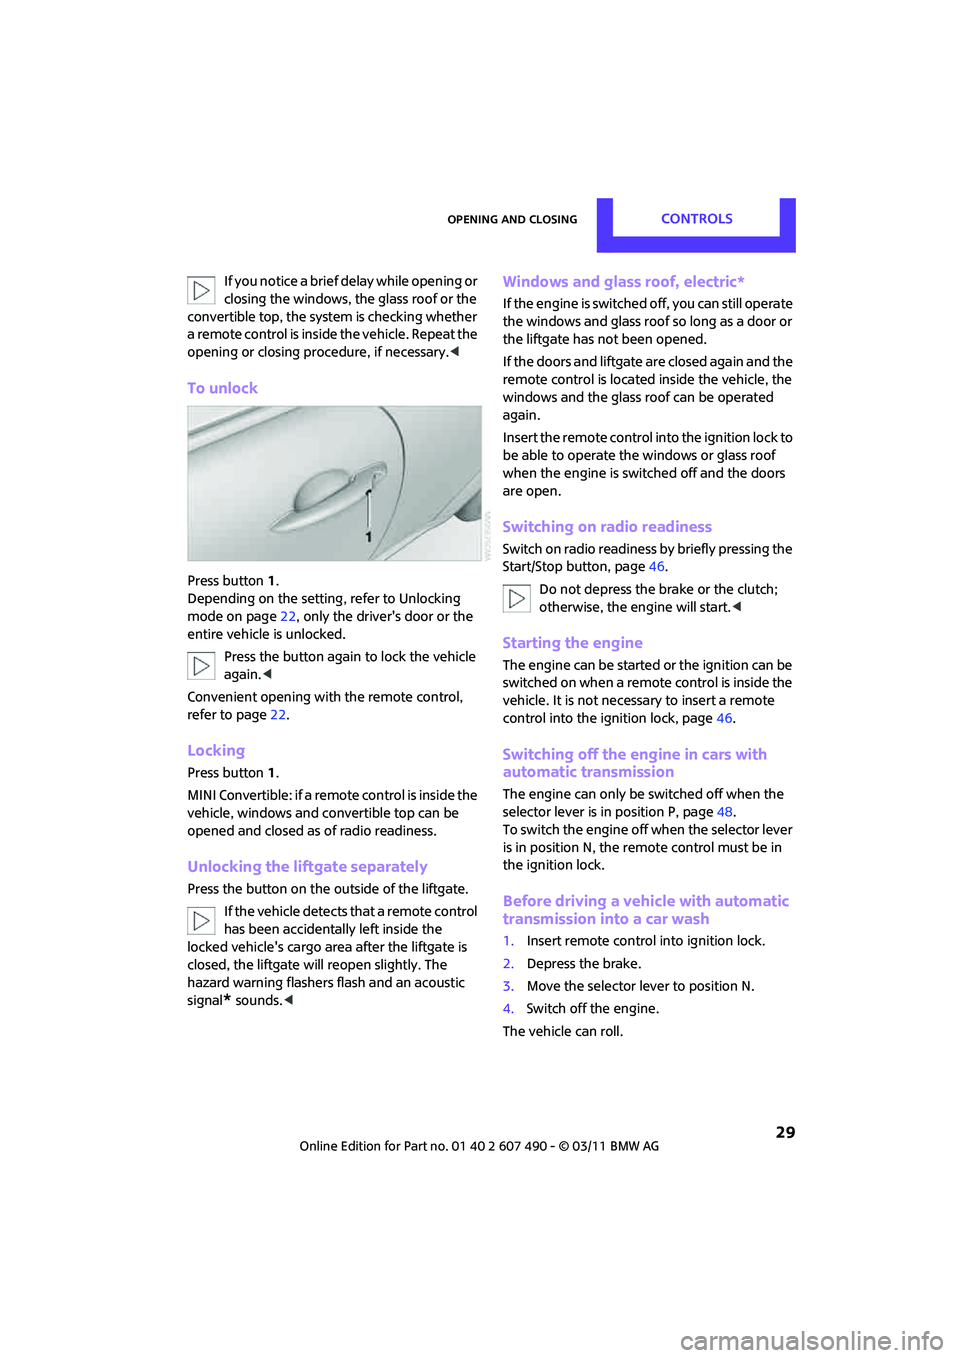
To unlock
Press button 1.
Depending on the setting, refer to Unlocking
mode on page 22, only the driver's door or the
entire vehicle is unlocked.
Press the button again to lock the vehicle
again. <
Convenient opening with the remote control,
refer to page 22.
Locking
Press button 1.
MINI Convertible: if a remote control is inside the
vehicle, windows and convertible top can be
opened and closed as of radio readiness.
Unlocking the liftgate separately
Press the button on the outside of the liftgate.
If the vehicle detects that a remote control
has been accidentally left inside the
locked vehicle's cargo area after the liftgate is
closed, the liftgate will reopen slightly. The
hazard warning flashers flash and an acoustic
signal
* sounds. <
Windows and glass roof, electric*
If the engine is switched off, you can still operate
the windows and glass roof so long as a door or
the liftgate has not been opened.
If the doors and liftgate are closed again and the
remote control is located inside the vehicle, the
windows and the glass ro of can be operated
again.
Insert the remote control into the ignition lock to
be able to operate the windows or glass roof
when the engine is switched off and the doors
are open.
Switching on radio readiness
Switch on radio readiness by briefly pressing the
Start/Stop button, page 46.
Do not depress the brake or the clutch;
otherwise, the engine will start. <
Starting the engine
The engine can be started or the ignition can be
switched on when a remote control is inside the
vehicle. It is not necessa ry to insert a remote
control into the ignition lock, page 46.
Switching off the engine in cars with
automatic transmission
The engine can only be switched off when the
selector lever is in position P, page48.
To switch the engine off when the selector lever
is in position N, the remote control must be in
the ignition lock.
Before driving a vehicle with automatic
transmission into a car wash
1. Insert remote control into ignition lock.
2. Depress the brake.
3. Move the selector lever to position N.
4. Switch off the engine.
The vehicle can roll.
Page 32 of 210
CONTROLSOpening and closing
30
Malfunction
Comfort Access may malfunction due to local
radio waves.
If this happens, open or close the vehicle via the
buttons on the remote control or using the
integrated key.
Insert the remote control into the ignition lock
and start the engine.
Warning lamps
The warning lamp lights up when an
attempt is made to start the engine: the
engine cannot be started. The remote
control is not inside the vehicle or is malfunction-
ing. Take the remote control with you inside the
vehicle or have it checked. If necessary, insert
another remote control in to the ignition lock.
The warning lamp lights up when the
engine is running: the remote control is
no longer inside the vehicle. After the
engine is switched off, the engine can only be
restarted within approx. 10 seconds.
The indicator lamp comes on: replace
the battery in the remote control.
Replacing the battery
The remote control for Comfort Access contains
a b a t t e r y t h a t w i l l n e e d t o b e r e p l a c e d f r o m t i m e
to time.
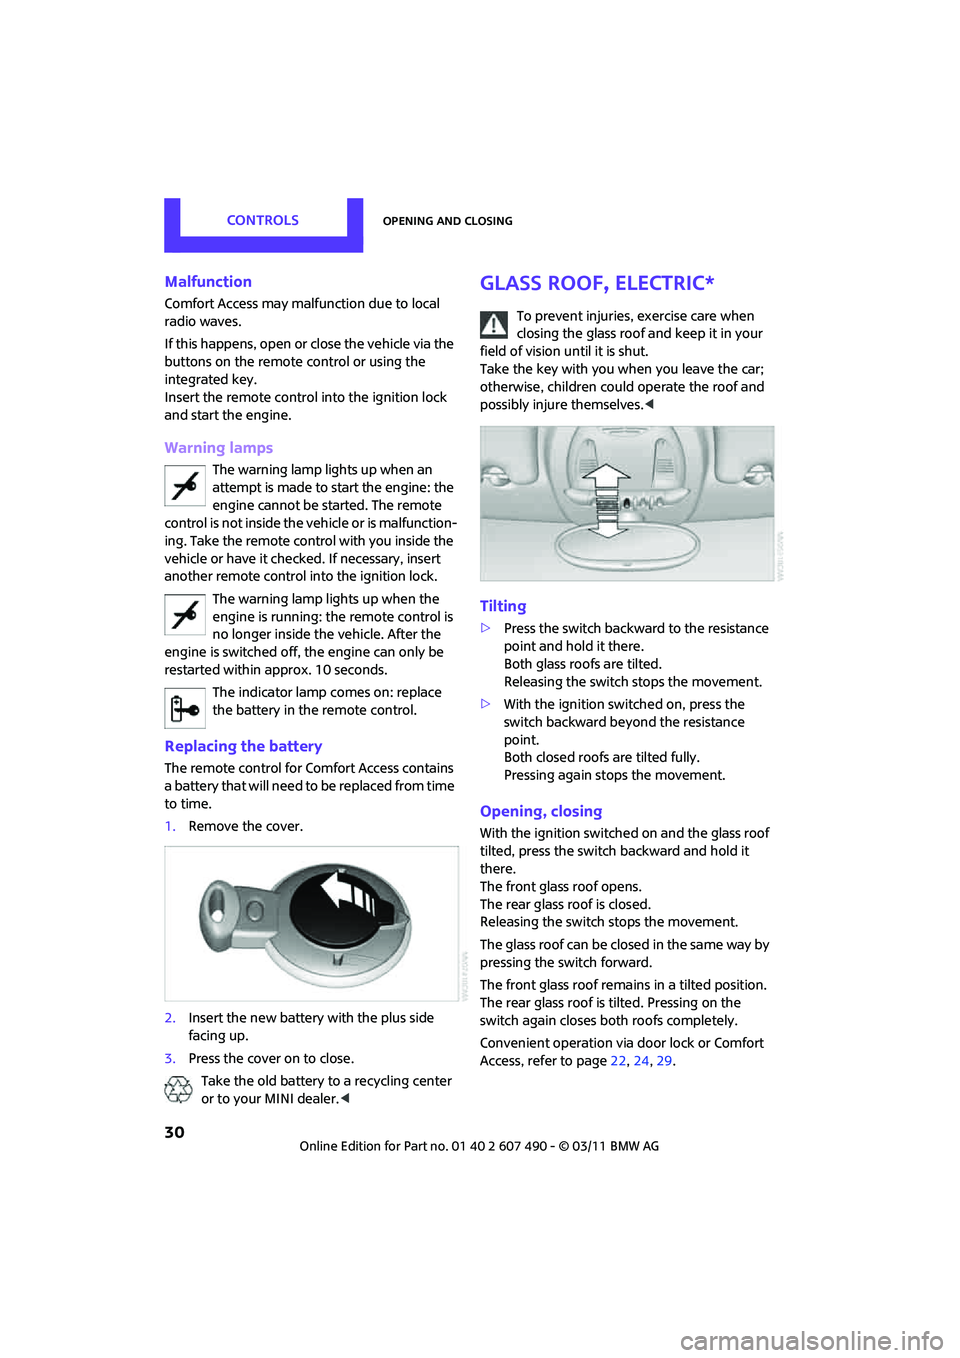
1. Remove the cover.
2. Insert the new battery with the plus side
facing up.
3. Press the cover on to close.
Take the old battery to a recycling center
or to your MINI dealer. <
Glass roof, electric*
To prevent injuries, exercise care when
closing the glass roof and keep it in your
field of vision until it is shut.
Take the key with you when you leave the car;
otherwise, children could operate the roof and
possibly injure themselves. <
Tilting
>Press the switch backwa rd to the resistance
point and hold it there.
Both glass roofs are tilted.
Releasing the switch stops the movement.
> With the ignition switched on, press the
switch backward beyond the resistance
point.
Both closed roofs are tilted fully.
Pressing again stops the movement.
Opening, closing
With the ignition switched on and the glass roof
tilted, press the switch backward and hold it
there.
The front glass roof opens.
The rear glass roof is closed.
Releasing the switch stops the movement.
The glass roof can be closed in the same way by
pressing the sw itch forward.
The front glass roof remain s in a tilted position.
The rear glass roof is tilted. Pressing on the
switch again closes both roofs completely.
Convenient operation via door lock or Comfort
Access, refer to page 22,24, 29.
Page 48 of 210

CONTROLSDriving
46
Driving
Ignition lock
Inserting the key into the ignition lock
Insert the key all the way into the ignition lock.
Radio readiness
Individual electrical consumers can operate.
Removing the key from the ignition lock
Press in the key briefly. It is ejected slightly.
At the same time:
>The ignition is switched off if it was on
beforehand.
Automatic transmission
The key can only be removed if the selector lever
is in position P: interlock.
Start/Stop button
Press the Start/Stop button to switch radio readi-
ness or the ignition on and off. Do not depress
the brake or clutch while doing so.
If the Start/Stop button is pressed while
the clutch is depressed in the manual
transmission or the brake pedal is depressed in
the automatic transmission, the engine starts. <
Radio readiness
Individual electrical consumers can operate. The
time and external temperature are displayed in
the tachometer.
Radio readiness is switched off automatically:
>When the key is removed from the ignition
lock
> When using Comfort Access
* by pushing the
button on the door handle or the
button on the remote control, refer to
Locking on page 29
> After a certain has elapsed
Ignition on
Most indicator and warn ing lamps in indicator
area 1, page 13, light up for varying lengths of
time.
When the engine is off, switch off the
ignition and any unnecessary electrical
consumers in order to preserve the battery. <
Page 49 of 210

DrivingCONTROLS
47
Radio readiness and ignition off
All indicator and warning lamps in the displays
go out.
The ignition automatically turns off
* when the
driver's door is opened. Pressing the Start/Stop
button again switches the ignition back on.
The ignition is not switched off in situations such
as the following:
> The clutch or brake is depressed
> The low beams are switched on
Starting the engine
Do not allow the engine to run in enclosed
areas; otherwise, inhalation of the noxious
exhaust gases can lead to loss of consciousness
and death. Exhaust gases contain carbon mon-
oxide, an odorless and colorless, but highly toxic
gas. Never leave an unattended vehicle with
the engine running; otherwise, such a vehicle
represents a potent ial safety hazard.
Before leaving the car while the engine is run-
ning, place the transmission in neutral or move
the selector lever to position P and forcefully
apply the parking brake to prevent the car from
moving. <
Avoid frequent starting in quick succes-
sion or repeated start attempts in which
the engine does not start. Otherwise, the fuel is
not burned or inadequately burned and there is
a danger of overheating and damaging the
catalytic converter. <
Do not let the engine warm up with the vehicle
at a standstill. Move of f immediately at a moder-
ate engine speed.
When starting the engine, do not depress the
accelerator pedal.
Manual transmission
Key in ignition lock or inside vehicle with
Comfort Access, refer to page 28.
1. Depress the brake.
2. Depress the clutch.
3. Press the Start/Stop button.
Automatic transmission*
Key in ignition lock or inside vehicle with
Comfort Access, refer to page 28.
1. Depress the brake.
2. Shift the selector lever into position P or N.
3. Press the Start/Stop button.
The starter operates auto matically for a certain
time, and stops automatically as soon as the
engine has started.
Switching off the engine
Always take the key with you when you
leave the vehicle.
When parking, apply the parking brake force-
fully; otherwise, the vehicle could begin to roll. <
Manual transmission
1.With the car at a standstill, press the Start/
Stop button.
2. Shift into first gear or reverse.
3. Forcefully apply the parking brake.
Page 50 of 210

CONTROLSDriving
48
Automatic transmission*
1.With the car at a stop, move the selector
lever to position P.
2. Press the Start/Stop button.
3. Forcefully apply the parking brake.
Before driving into a car wash
By following these steps, the vehicle is able to
roll:
1.Place the remote control, even with Comfort
Access, in the ignition lock.
2. Depress the brake.
3. Move the selector lever to position N.
4. Switch off the engine.
Parking brake
The parking brake is primarily intended to
prevent the vehicle from rolling while parked;
it brakes the rear wheels.
Applying
The lever locks in position automatically.
Releasing
Pull slightly upward, press the button and lower
the lever.
In exceptional cases, if the parking brake
has to be used to slow or stop the car,
do not pull the lever up too hard. In doing so,
continuously press the button of the parking
brake lever.
Otherwise, excessive force could lead to over-
braking and loss of traction, i.e. fishtailing, at the
rear axle. <
Manual transmission
When shifting into 5t h or 6th gear, press
the gearshift lever to the right. Otherwise,
the engine could be damaged if you inadvert-
ently shift into 3rd or 4th gear. <
Reverse gear
Select this only when the vehicle is stationary.
When the gearshift lever is pressed to the left, a
slight resistance has to be overcome.
Automatic transmission*
with Steptronic
In addition to the fully automatic mode, you can
shift gears manually using Steptronic, page 49.
Parking the vehicle
To prevent the vehicle from rolling, always
select position P and apply the parking
brake before leaving the vehicle with the engine
running. <
Removing the key
To remove the key from the ignition lock, first
move the selector lever into position P and then
switch off the engine: in terlock. Remove the key
from the ignition lock, refer to page 46.
Selector lever positions
P R N D M/S + –
Page 84 of 210
CONTROLSLamps
82
If the automatic headlamp control is acti-
vated, the low beams will come on auto-
matically when you switch on the fog lamps. <
Rear fog lamp*
The low beams or parking lamps with fog lamps
must be switched on. The yellow indicator lamp
c o m e s o n w h e n t h e r e a r f o g l a m p i s s w i t c h e d o n .
Instrument lighting
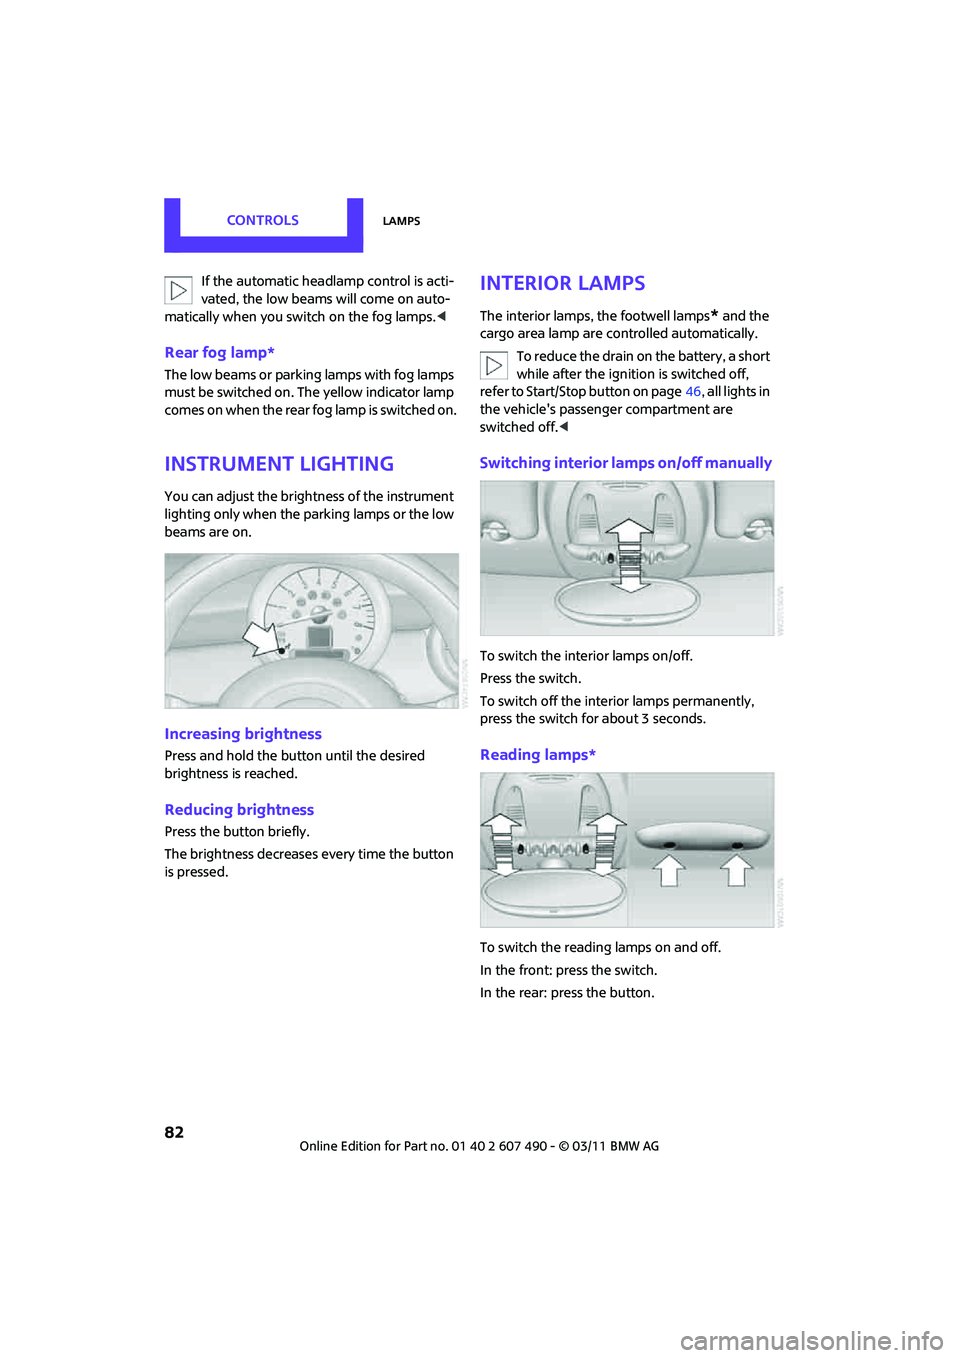
You can adjust the brightness of the instrument
lighting only when the parking lamps or the low
beams are on.
Increasing brightness
Press and hold the button until the desired
brightness is reached.
Reducing brightness
Press the button briefly.
The brightness decreases every time the button
is pressed.
Interior lamps
The interior lamps, the footwell lamps* and the
cargo area lamp are co ntrolled automatically.
To reduce the drain on the battery, a short
while after the ignition is switched off,
refer to Start/Stop button on page 46, all lights in
the vehicle's passenger compartment are
switched off. <
Switching interior lamps on/off manually
To switch the interior lamps on/off.
Press the switch.
To switch off the interior lamps permanently,
press the switch for about 3 seconds.
Reading lamps*
To switch the reading lamps on and off.
In the front: press the switch.
In the rear: press the button.
Page 122 of 210

COMMUNICATIONSTelephone
120
10Switching displays 124
> "PHONE": telephone
> "COMP": computer
> "CONFIG": adjusting
11 Radio on/off, volume
>Press: to switch radio on/off
> Turn: adjusting volume 124
12 Ejecting CD
This symbol appears on the radio display
when a phone call is being made with the
hands-free system.
Pairing/unpairing mobile
phone
Overview
The pairing data of four mobile phones can be
stored simultaneously in the vehicle. When the
engine is running or the ignition is switched on,
each paired mobile phone is automatically
detected as soon as it is present in the passenger
compartment.
Requirements
> Suitable mobile ph one, refer to page118.
> Mobile phone operational.
> Bluetooth activated in vehicle, refer to
page 120, and in the mobile phone.
> Bluetooth presets in the mobile phone are
required, e.g. connection not confirmed or
visible, refer to Owner's Manual for the
mobile phone.
> A number with at least 4 and at most
16 digits has been established as the Blue-
tooth passkey. Only required once for
pairing.
> Ignition switched on.
Activating/deactivating Bluetooth link
Bluetooth is not permitted everywhere. Comply
with all safety guidelines and regulations.
To deactivate the Bluetooth connection:
1.MENU Press the button.
2. Press the button.
3. Press the button.
4. Press the button.
5. Press the button.
To reactivate the Bluetooth connection:
1. Press the button.
2. Press the button.
Pairing and connecting
Only pair the mobile phone when the
vehicle is stopped; otherwise, inattention
may lead to endangerment of passengers or
other road users. <
Switching on ignition
1.Insert the remote control as far as possible
into the ignition lock.
2. Switch on the ignition; to do so, press the
Start/Stop button without stepping on the
brake or clutch pedal.
Page 178 of 210

MOBILITYIndicator and warning lamps
176
Lights up in red:
Service due Arrange a service appointment.Check service requirements, page,
151.
Lights up in yellow:
The next time that the Start/Stop
button is pressed, the engine starts,
possibly even without a foot on the
brakes or without depressing the
clutch
Remote control malfunctioning or, in
cars with Comfort Access, not
detected The engine cannot be started. Have
the remote control
checked, if neces-
sary.
Remote control battery is discharged Use the remote control for a longer journey or, in cars with Comfort
Access, replace the battery.
Belt tensioners and/ or airbag system
failed Have the system checked immedi-
ately. Fasten the safety belts anyway.
Power steering failed You can continue your journey, but moderate your speed and exercise
due caution. Steering response will be
markedly different. Have the system
checked without delay.
Lights up in red:
Engine malfunction Stop the car and switch off the
engine. You cannot continue your
journey. Contact your MINI dealer.
Lights up in yellow:
Full engine power no longer available Y ou can continue your journey, but
moderate your speed and exercise
due caution. Have the engine
checked as soon as possible.
12Cause What to do
Page 204 of 210
REFERENCEEverything from A to Z
202
Run-flat tires144
– flat tire 71
– tire inflation pressure 134
– tire replacement 144
– winter tires 145
S
Safety belt
– number37
Safety Belt Reminder 41
Safety belts 40
– damage 41
– indicator lamp 41
– reminder 41
– sitting safely 37
Safety belts, care 156
Safety systems
– airbags 75
– Antilock Brake System ABS 67
– Dynamic Stability Control
DSC 67
– safety belts 40
Safety tires, refer to Run-flat
tires 144
Satellite radio 110
– enabling 110
Scan, listening to test
– Radio MINI Boost CD 108
Screw thread for tow fitting 171
Searching
– CD player 112
– radio 107
Searching for a music track
– CD 112
Seat adjustment
– mechanical 38
Seats 38
– adjusting the seats 38
– heating 40
– sitting safely 37
Securing the vehicle
– from inside 25
– from outside 21 Selector lever
– automatic transmission with
Steptronic 49
Selector lever lock
– automatic transmission with Steptronic, refer to
Shiftlock 49
– overriding manually 50
Selector lever positions
– automatic transmission with
Steptronic 49
Service, refer to Roadside Assistance 169
Service car, refe r to Roadside
Assistance 169
Service data in the remote
control 151
Service Interval Display, refer to Condition Based Service
CBS 151
Service requirement display, refer to Condition Based
Service CBS 151
Service requirements 62
Settings
– clock, 12 h/24 h mode 61
Setting the time format 107
Shifting gears
– automatic transmission with Steptr
onic49
– manual transmission 48
Shiftlock
– automatic transmission, refer
to Changing selector lever
positions 49
Side airbags 75
Side turn signal
– replacing bulb 161
Side windows, refer to
Windows 31
Signal horn, refer to Horn 10
Sitting safely 37
– airbags 37
– safety belts 37
– with head restraint 37
Size, refer to Dimensions 189Sliding/tilt sunroof
– refer to Glass roof, electric
30
Slipstream deflector, refer to Wind deflector 36
Slot for remote control 46
Smokers' package, refer to Ashtray 93
Snap-in adapter
– inserting/removing 129
– use 118
Snap-in adapter, refer to Center armrest storage
compartment 92
Snow chains 145
Socket, refer to Connecting electrical appliances 93
Socket for On-Board Diagnosis OBD 152
Space-saver spare tire
– changing tires 165
– inflation pressure 134
Spare wheel, refer to Space-
saver spare tire 165
Special oils, refer to Approved engine oils 149
Speed 188
– with winter tires 145
Speed-dependent volume 106
Speedo, refer to Speedometer 12
Speedometer 12
Split-folding rear seats 100
Split rear backrest, refer to
Split-folding rear seats 100
Split rear seat backrest, refer to Expanding the cargo area 98
Sport button 69
Stability control, refer to Driving stability control
systems 67
Start/Stop button 46
– starting the engine 47
– switching off the engine 47
Starting, refer to Starting the engine 47