light MINI COOPER 2012 User Guide
[x] Cancel search | Manufacturer: MINI, Model Year: 2012, Model line: COOPER, Model: MINI COOPER 2012Pages: 207, PDF Size: 3.18 MB
Page 37 of 207
CONTROLSAdjustments
36
clothing and regularly pull the belt in the upper-
body area taut; otherwise, its restraining effect
could be impaired.<
Safety belts, refer to page 38.
Seats
Note before adjusting
Never attempt to adjust your seat while
the vehicle is moving. The seat could
respond with unexpected movement, and the
ensuing loss of vehicle control could lead to an
accident.
On the front passenger seat as well, do not
incline the backrest too far to the rear while the
vehicle is being driven; otherwise, there is a
danger in the event of an accident of sliding
under the safety belt, eliminating the protection
normally provided by the belt. <
Comply with the instruct ions on head restraint
height on page 37 and on damaged safety belts
on page 39.
Seat adjustment
Observe the instructions on page 36 to
ensure the best possible personal protec-
tion. <
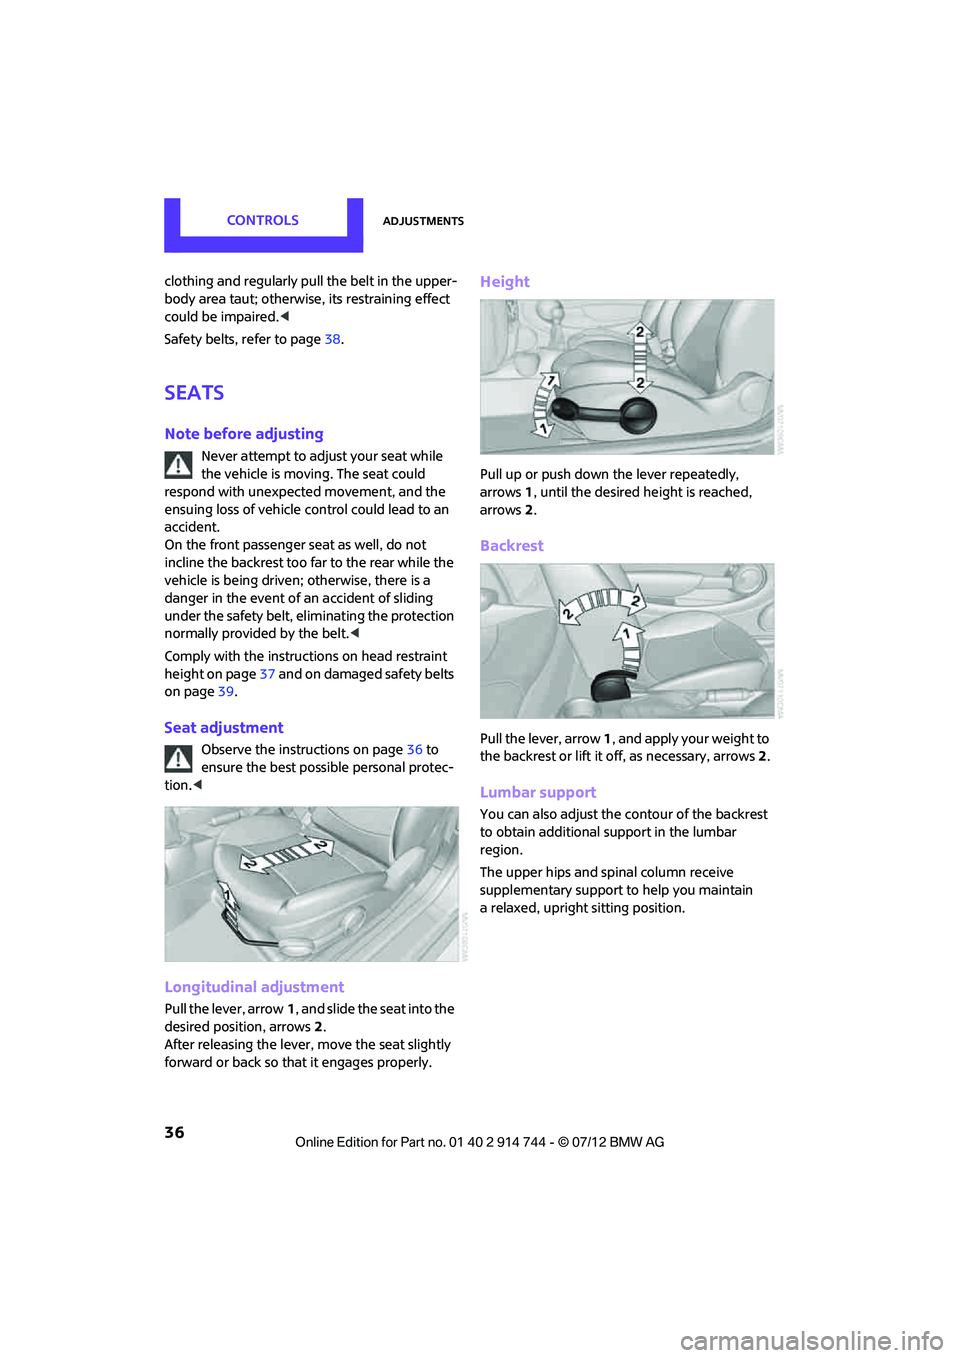
Longitudinal adjustment
Pull the lever, arrow 1, and slide the seat into the
desired position, arrows 2.
After releasing the lever, move the seat slightly
forward or back so that it engages properly.
Height
Pull up or push down the lever repeatedly,
arrows 1, until the desired he ight is reached,
arrows 2.
Backrest
Pull the lever, arrow 1, and apply your weight to
the backrest or lift it off, as necessary, arrows 2.
Lumbar support
You can also adjust the contour of the backrest
to obtain additional support in the lumbar
region.
The upper hips and spinal column receive
supplementary support to help you maintain
a relaxed, upright sitting position.
Online Edition for Part no. 01 40 2 914 744 - \251 07/12 BMW AG
Page 39 of 207
CONTROLSAdjustments
38
Front
1.Pull up as far as it will go.
2. Fold the backrest forward slightly.
3. Press button 1 and pull the head restraint
out as far as it will go.
4. Fold back the backrest.
Rear
1.Pull up as far as it will go.
2. Press button 1 and pull the head restraint
out completely.
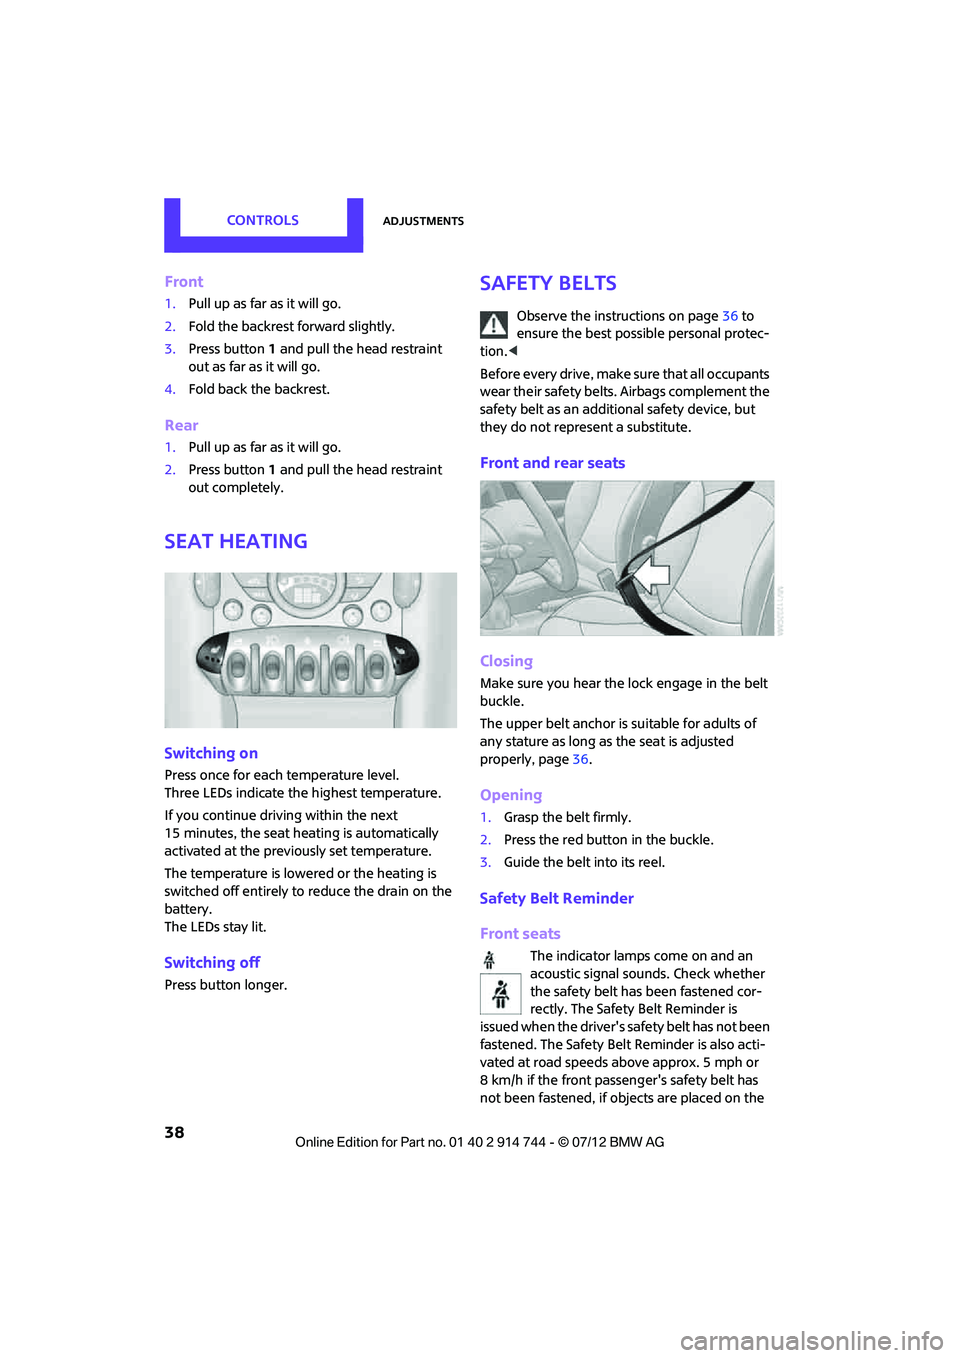
Seat heating
Switching on
Press once for each temperature level.
Three LEDs indicate the highest temperature.
If you continue driving within the next
15 minutes, the seat heat ing is automatically
activated at the previously set temperature.
The temperature is lowe red or the heating is
switched off entirely to reduce the drain on the
battery.
The LEDs stay lit.
Switching off
Press button longer.
Safety belts
Observe the instructions on page 36 to
ensure the best possible personal protec-
tion. <
Before every drive, make sure that all occupants
wear their safety belts. Airbags complement the
safety belt as an additional safety device, but
they do not represent a substitute.
Front and rear seats
Closing
Make sure you hear the lock engage in the belt
buckle.
The upper belt anchor is suitable for adults of
any stature as long as the seat is adjusted
properly, page 36.
Opening
1. Grasp the belt firmly.
2. Press the red button in the buckle.
3. Guide the belt into its reel.
Safety Belt Reminder
Front seats
The indicator lamps come on and an
acoustic signal sounds. Check whether
the safety belt has been fastened cor-
rectly. The Safety Be lt Reminder is
issued when the driver's safety belt has not been
fastened. The Safety Belt Reminder is also acti-
vated at road speeds above approx. 5 mph or
8 km/h if the front passeng er's safety belt has
not been fastened, if objects are placed on the
Online Edition for Part no. 01 40 2 914 744 - \251 07/12 BMW AG
Page 45 of 207
CONTROLSDriving
44
Driving
Vehicle equipment
In this chapter, all production, country, and
optional equipment that is offered in the model
range is described. Equipment is also described
that is not available because of, for example,
selected options or coun try version. This also
applies to safety relate d functions and systems.
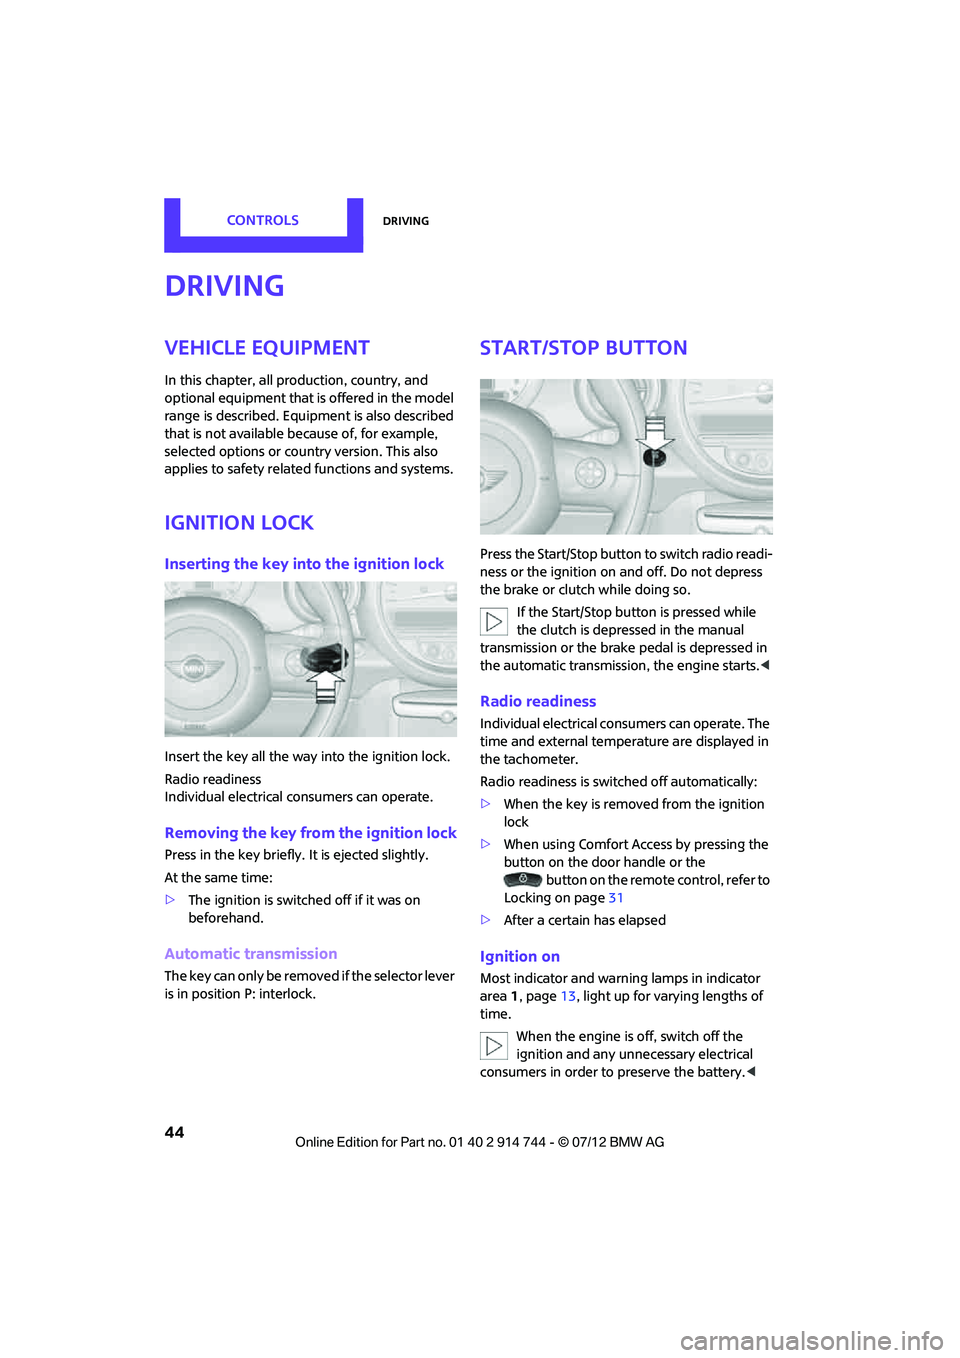
Ignition lock
Inserting the key into the ignition lock
Insert the key all the way into the ignition lock.
Radio readiness
Individual electrical consumers can operate.
Removing the key from the ignition lock
Press in the key briefly. It is ejected slightly.
At the same time:
>The ignition is switched off if it was on
beforehand.
Automatic transmission
The key can only be removed if the selector lever
is in position P: interlock.
Start/Stop button
Press the Start/Stop button to switch radio readi-
ness or the ignition on and off. Do not depress
the brake or clutch while doing so.
If the Start/Stop button is pressed while
the clutch is depressed in the manual
transmission or the brake pedal is depressed in
the automatic transmission, the engine starts. <
Radio readiness
Individual electrical consumers can operate. The
time and external temperature are displayed in
the tachometer.
Radio readiness is switched off automatically:
>When the key is removed from the ignition
lock
> When using Comfort Access by pressing the
button on the door handle or the
button on the remote control, refer to
Locking on page 31
> After a certain has elapsed
Ignition on
Most indicator and warn ing lamps in indicator
area 1, page 13, light up for varying lengths of
time.
When the engine is off, switch off the
ignition and any unnecessary electrical
consumers in order to preserve the battery. <
Online Edition for Part no. 01 40 2 914 744 - \251 07/12 BMW AG
Page 47 of 207
CONTROLSDriving
46
Automatic transmission
1.With the car at a stop, move the selector
lever to position P.
2. Press the Start/Stop button.
3. Forcefully apply the parking brake.
Before driving into a car wash
By following these steps, the vehicle is able to
roll:
1.Place the remote control, even with Comfort
Access, in the ignition lock.
2. Depress the brake.
3. Move the selector lever to position N.
4. Switch off the engine.
Parking brake
The parking brake is primarily intended to
prevent the vehicle from rolling while parked;
it brakes the rear wheels.
In addition, follow the instructions on page 45
under Switching off the engine.
Applying
The lever locks in position automatically.
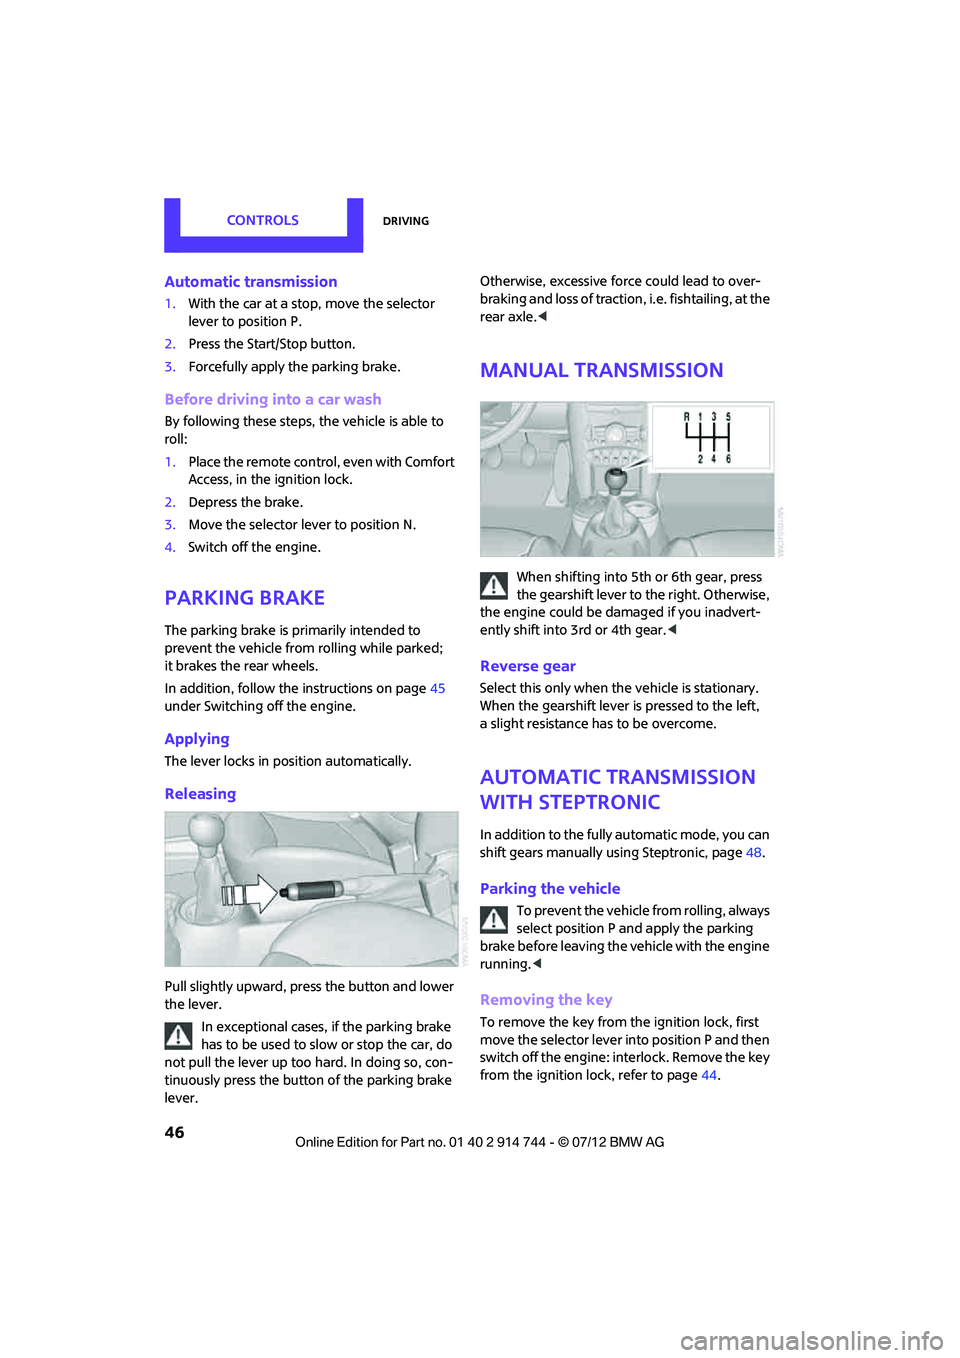
Releasing
Pull slightly upward, press the button and lower
the lever.
In exceptional cases, if the parking brake
has to be used to slow or stop the car, do
not pull the lever up too hard. In doing so, con-
tinuously press the button of the parking brake
lever. Otherwise, excessive force could lead to over-
braking and loss of traction
, i.e. fishtailing, at the
rear axle. <
Manual transmission
When shifting into 5t h or 6th gear, press
the gearshift lever to the right. Otherwise,
the engine could be damaged if you inadvert-
ently shift into 3rd or 4th gear. <
Reverse gear
Select this only when the vehicle is stationary.
When the gearshift lever is pressed to the left,
a slight resistance ha s to be overcome.
Automatic transmission
with Steptronic
In addition to the fully automatic mode, you can
shift gears manually using Steptronic, page 48.
Parking the vehicle
To prevent the vehicle from rolling, always
select position P and apply the parking
brake before leaving the vehicle with the engine
running. <
Removing the key
To remove the key from the ignition lock, first
move the selector lever into position P and then
switch off the engine: in terlock. Remove the key
from the ignition lock, refer to page 44.
Online Edition for Part no. 01 40 2 914 744 - \251 07/12 BMW AG
Page 52 of 207
DrivingCONTROLS
51
4.Press the button as of ten as necessary until
the symbol and "SET" are displayed.
5. Press and hold the butt on until the display
changes.
6. Press the button to select the desired sensi-
tivity.
7. Wait, or press and hold the button until the
display changes.
The settings are stored.
Deactivating intermittent wipe or rain
sensor
Press the button again, arrow 3.
Brief wipe
Press the lever downward once, arrow 2.
Cleaning windshield and headlamps
Pull the lever, arrow 4.
Washer fluid is sprayed onto the windshield and
the wipers are operated briefly.
When the vehicle lighting system is switched on,
the headlamps are cleaned at regular and
appropriate intervals. In cars equipped with an alarm system, the
headlamps cannot be cleaned when the hood is
open.
Do not use the washers when the washer
fluid reservoir is empty; otherwise, you will
damage the washer pump.
Only use the washers if the hood has been com-
pletely closed; otherwise, the headlamp washer
system may be damaged. Do not use the wash-
ers if there is any danger that the fluid will freeze
on the windshield. If you do, your vision could be
obscured. For this reason, use antifreeze. <
Window washer nozzles
The window washer nozzles are heated
automatically while the engine is running or
the ignition is switched on.
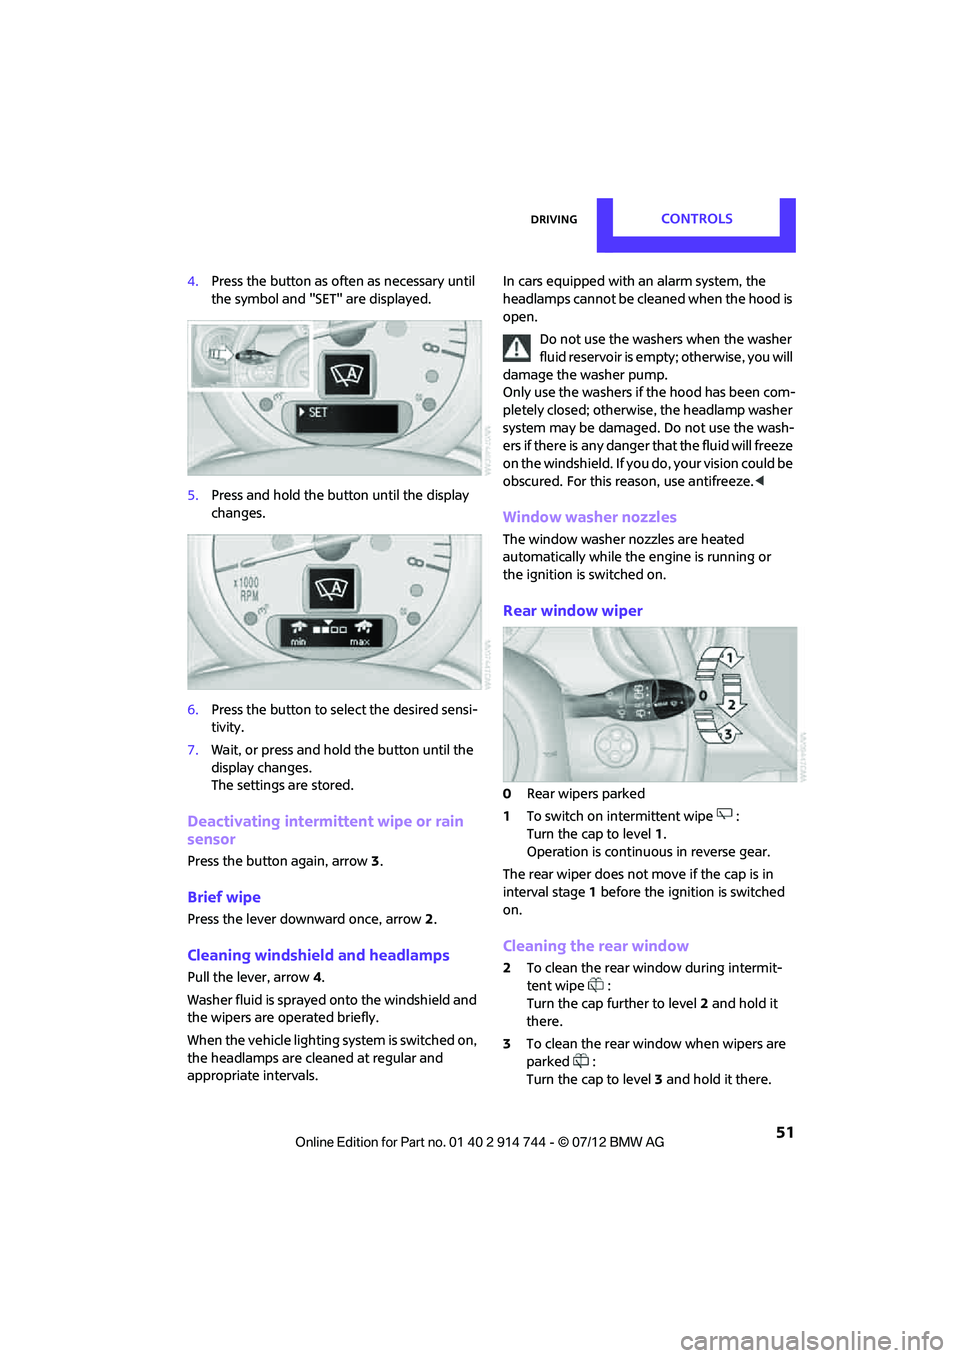
Rear window wiper
0Rear wipers parked
1 To switch on intermittent wipe :
Turn the cap to level 1.
Operation is continuous in reverse gear.
The rear wiper does not move if the cap is in
interval stage 1 before the ignition is switched
on.
Cleaning the rear window
2 To clean the rear window during intermit-
tent wipe :
Turn the cap further to level 2 and hold it
there.
3 To clean the rear window when wipers are
parked :
Turn the cap to level 3 and hold it there.
Online Edition for Part no. 01 40 2 914 744 - \251 07/12 BMW AG
Page 53 of 207

CONTROLSDriving
52
Do not use the washers when the washer
fluid reservoir is empty; otherwise, you will
damage the washer pump. <
Washer fluid
Washer fluid is flammable. Keep it away
from ignition sources, only store it in the
closed, original container, and keep out of reach
of children; otherwise, there is a danger of
injury. Comply with the instructions on the
container. <
Washer fluid reservoir
Only refill washer fl uid that contains anti-
freeze when the engine is cool, to avoid
contact with hot engine parts. Otherwise, fluid
spills constitute a fire hazard and a risk to
personal safety.<
Fill with water and, if required, with a washer
antifreeze, according to manufacturer's recom-
mendations.
Mix the water and antifreeze before filling
the washer fluid rese rvoir to make sure
the correct concentration is maintained. <
Capacity
Approx. 2.6USquarts/2.5liters.
With headlamp washer system:
approx. 4.8 US quarts/4.5 liters.
Cruise control
The concept
Cruise control is available at vehicle speeds of at
least approx. 20 mph or 30 km/h. The car then
stores and maintains the speed that you specify
using the button on the steering wheel.
Do not use cruise control when driving at
constant speed is prevented by adverse
conditions, e.g. winding roads, dense traffic or
poor road conditions due to, e.g. snow, rain, ice
or loose surfaces. Otherwise, you could lose
control of the vehicle an d cause an accident as
aresult. <
Activating
1Maintaining, storing and increasing speed
2 Activating/deactivating cruise control
3 Maintaining, storing and decreasing speed
4 Resuming cruise control
Indicator lamp in the speedometer lights up. The
cruise control system is ready and can be acti-
vated.
Activating/deactivating cruise control
Press button 2.
The system is automati cally deactivated if:
> Braking takes place
> The clutch is engaged
> The transmission is set on N
> The stability control system is on
Cruise control is not deactivated by depressing
the accelerator pedal. Once the accelerator
Online Edition for Part no. 01 40 2 914 744 - \251 07/12 BMW AG
Page 54 of 207

DrivingCONTROLS
53
pedal is released, the stored speed is achieved
again and maintained.
The stored speed is cleared when the ignition is
switched off.
Maintaining current speed
Press button 1.
The system maintains and stores the current
vehicle speed.
If, on a downhill grade, the engine braking effect
is not sufficient, the controlled speed may be
exceeded. On uphill grades vehicle speed may
drop if the engine output is insufficient.
Increasing speed
Press button 1 repeatedly until the desired
speed is reached. Every time you press the
button, the speed increases by approx. 1 mph or
1km/h.
Accelerating using the button
Press and hold button 1.
The vehicle accelerates wi thout pressure on the
accelerator pedal. After the button is released,
the driving speed is maintained and stored.
Decreasing speed
Press button 3 repeatedly until the desired
speed is reached.
The functions here are the same as for increas-
ing the speed or accelerating, except that the
speed will be decreased.
Resuming a speed stored beforehand
Press button 4.
The last speed stored is achieved again and
maintained.
The stored speed is cleared when the ignition is
switched off.
Display on tachometer
Selected speed is displayed briefly. If --- mph or --- km/h is displayed briefly in
the tachometer, the conditions necessary
for operation may not be fulfilled.<
Malfunction
The warning lamp in the tachometer
lights up if the system fails.
Online Edition for Part no. 01 40 2 914 744 - \251 07/12 BMW AG
Page 55 of 207

CONTROLSControls overview
54
Controls overview
Vehicle equipment
In this chapter, all production, country, and
optional equipment that is offered in the model
range is described. Equipment is also described
that is not available because of, for example,
selected options or coun try version. This also
applies to safety relate d functions and systems.
Fuel gauge
Fuel tank capacity
Approx. 13.2 US gal/50 liters.
You can find information on refueling on
page129.
If the tilt of the vehicle varies for a longer period,
when you are driving in mountainous areas, for
example, the indicator may fluctuate slightly.
The arrow next to the gas pump symbol of the
fuel gauge points toward the side of the vehicle
with the fuel filler flap.
Reserve
Once the fuel level has fallen to the reserve zone
of approx. 2.1 US gal/8 liters, the remaining indi-
cator lamps change from orange to red, arrow.
The tachometer displays the remaining cruising
range. A warning lamp comes on when the
remaining range is less than approx. 30 miles/
50 km. If the range displayed is less than
30 miles/50 km, be sure to refuel; other-
wise, engine functions are not guaranteed and
damage may occur. <
With a dynamic driving style, e.g. rapid corner-
ing, engine functions are not always assured.
Tachometer
Never operate the engine with the needle in the
red overspeed zone of the gauge. In this range,
the fuel supply is interrupted to protect the
engine.
Displays in tachometer
1Current vehicle speed
2 Odometer in kilometers, trip recorder,
external temperature, time
3 Resetting the trip odometer
Press button on turn signal indicator to call up
information in the display area 2.
Online Edition for Part no. 01 40 2 914 744 - \251 07/12 BMW AG
Page 56 of 207

Controls overviewCONTROLS
55
The following information is displayed sequen-
tially:
> Trip odometer
> Time
> External temperature
Trip odometer
To display trip recorder:
Briefly press button 3.
Resetting the trip odometer:
While the trip recorder is displayed and the
ignition is switched on, press button 3.
Time
To set time, see page 61.
External temperature, external
temperature warning
When the displayed temperature sinks to
approx. +37 7/+3 6, a signal sounds and a
warning lamp lights up. There is an increased
risk of black ice.
Even at temperatures above +37 7/+3 6
ice can form. Therefore, drive carefully,
e.g. on bridges and sections of road in the
shade; otherwise, there is an increased accident
risk. <
Units of measure
Select the respective units of measure, miles or
km for the odometer as well as 7 or 6 for the
external temperature, page 58.
Computer
Displays in tachometer
Press the button in the turn signal lever repeat-
edly to call up variou s items of information.
The following information is displayed sequen-
tially:
> Cruising range
> Average fuel consumption
> Current fuel consumption
> Average speed
To set the corresponding units of measure, refer
to Formats and units of measure on page 58.
Cruising range
Displays the estimated cruising range available
with the remaining fuel. The range is calculated
on the basis of the way the car has been driven
over the last 18 miles/30 km and the amount of
fuel currently in the tank.
If the range displayed is less than
30 miles/50 km, be sure to refuel; other-
wise, engine functions are not guaranteed and
damage could occur.<
Average fuel consumption
Calculated for the time the engine has been
running.
To reset average fuel consumption: press the
button in the turn signal lever for approx.
2 seconds.
Online Edition for Part no. 01 40 2 914 744 - \251 07/12 BMW AG
Page 58 of 207

Controls overviewCONTROLS
57
1Button for:
>Selecting display
> Setting values
> Confirming selected display or set values
> Calling up computer information 55
Exiting displays
1.Press the button in the turn signal lever
repeatedly until "HOME" is displayed.
2. Press the button for a longer period.
Current vehicle speed is once again displayed.
Displays are also exited if no entries are made
for approx. 8 seconds.
SymbolFunction
Adjusting rain sensor 50
Calling up Check
Control 61
Displaying vehicle
check 62
Initializing the Flat Tire
Monitor 67
Resetting the Tire
Pressure Monitor 69
Setting formats and units
of measure, resetting to
factory settings 58
Adjusting settings
>Confirmation
signals when
locking and
unlocking the
vehicle 24
> Response during
unlocking
procedure 23
> Automatic
locking 27
> Pathway
lighting 76
> Daytime running
lights 76
> Triple turn signal
activation 49
Exiting the menu
SymbolFunction
Online Edition for Part no. 01 40 2 914 744 - \251 07/12 BMW AG