belt MINI COOPER 2015 Owners Manual
[x] Cancel search | Manufacturer: MINI, Model Year: 2015, Model line: COOPER, Model: MINI COOPER 2015Pages: 248, PDF Size: 5.43 MB
Page 9 of 248
Maintenance
Maintain the vehicle regularly to sustain the
road safety, operational reliability and the New
Vehicle Limited Warranty.
Specifications for required maintenance meas‐
ures:▷MINI Maintenance system▷Service and Warranty Information Booklet
for US models▷Warranty and Service Guide Booklet for
Canadian models
If the vehicle is not maintained according to
these specifications, this could result in serious
damage to the vehicle. Such damage is not
covered by the MINI New Vehicle Limited War‐
ranty.
Data memory
Many electronic components on your vehicle
are equipped with data memories that tempo‐
rarily or permanently store technical informa‐
tion about the condition of the vehicle, events
and faults. This technical information generally
records the state of a component, a module, a
system or the environment:
▷Operating mode of system components, fill
levels for instance.▷Status messages for the vehicle and from its
individual components, e.g., wheel rotation
speed/vehicle speed, deceleration, trans‐
verse acceleration.▷Malfunctions and faults in important system
components, e.g., lights and brakes.▷Responses by the vehicle to special situa‐
tions such as airbag deployment or engag‐
ing the stability control system.▷Ambient conditions, such as temperature.
This data is purely technical in nature and is
used to detect and correct faults and to opti‐
mize vehicle functions. Motion profiles over
routes traveled cannot be created from this
data. When service offerings are used, e.g., re‐
pair services, service processes, warranty
claims, quality assurance, this technical infor‐
mation can be read out from the event and
fault memories by employees of a dealer’s
service center or another qualified service cen‐
ter or repair shop, including the manufacturer,
using special diagnostic tools. You can obtain
further information there if you need it. After
an error is corrected, the information in the
fault memory is deleted or overwritten on a
continuous basis.
With the vehicle in use there are situations
where you can associate these technical data
with individuals if combined with other infor‐
mation, e.g., an accident report, damage to the
vehicle, eye witness accounts — possibly with
the assistance of an expert.
Additional functions that are contractually
agreed with the customer - such as vehicle
emergency locating - you can transmit certain
vehicle data from the vehicle.
Event Data Recorder EDR
This vehicle is equipped with an event data re‐
corder EDR. The main purpose of an EDR is to
record, in certain crash or near crash-like situa‐
tions, such as an air bag deployment or hitting
a road obstacle, data that will assist in under‐
standing how a vehicle’s systems performed.
The EDR is designed to record data related to
vehicle dynamics and safety systems for a short
period of time, typically 30 seconds or less.
The EDR in this vehicle is designed to record
such data as:▷How various systems in your vehicle were
operating.▷Whether or not the driver and passenger
safety belts were fastened.▷How far, if at all, the driver was depressing
the accelerator and/or brake pedal.▷How fast the vehicle was traveling.Seite 9Information9
Online Edition for Part no. 01 40 2 964 625 - X/15
Page 49 of 248
AdjustingVehicle features and op‐
tions
This chapter describes all standard, country-
specific and optional features offered with the
series. It also describes features that are not
necessarily available in your car, e. g., due to
the selected options or country versions. This
also applies to safety-related functions and sys‐
tems. The respectively applicable country provi‐
sions must be observed when using the respec‐
tive features and systems.
Sitting safely The ideal seating position meeting the needs of
the occupants can make a vital contribution to
relaxed, fatigue-free driving.
The seating position plays an important role in
an accident in combination with:▷Safety belts, refer to page 51.▷Head restraints, refer to page 53.▷Airbags, refer to page 100.
Seats
Information WARNING
Seat adjustments while driving can lead
to unexpected movements of the seat. Vehicle
control could be lost. There is risk of an acci‐
dent. Only adjust the side on the driver's side
when the vehicle is stationary. ◀
WARNING
With a backrest inclined too far to the
rear, the protective effect of the safety belt
cannot be ensured anymore. There is a danger
of sliding under the safety belt in an accident.
There is risk of injuries or danger to life. Adjust
the seat prior to starting the trip. Adjust the
backrest in an as upright position as possible
and do not adjust again while driving. ◀
WARNING
There is risk of jamming when moving the
seats. There is risk of injuries or risk of property
damage. Make sure that the area of movement
of the seat is clear prior to any adjustment. ◀
Adjusting seats
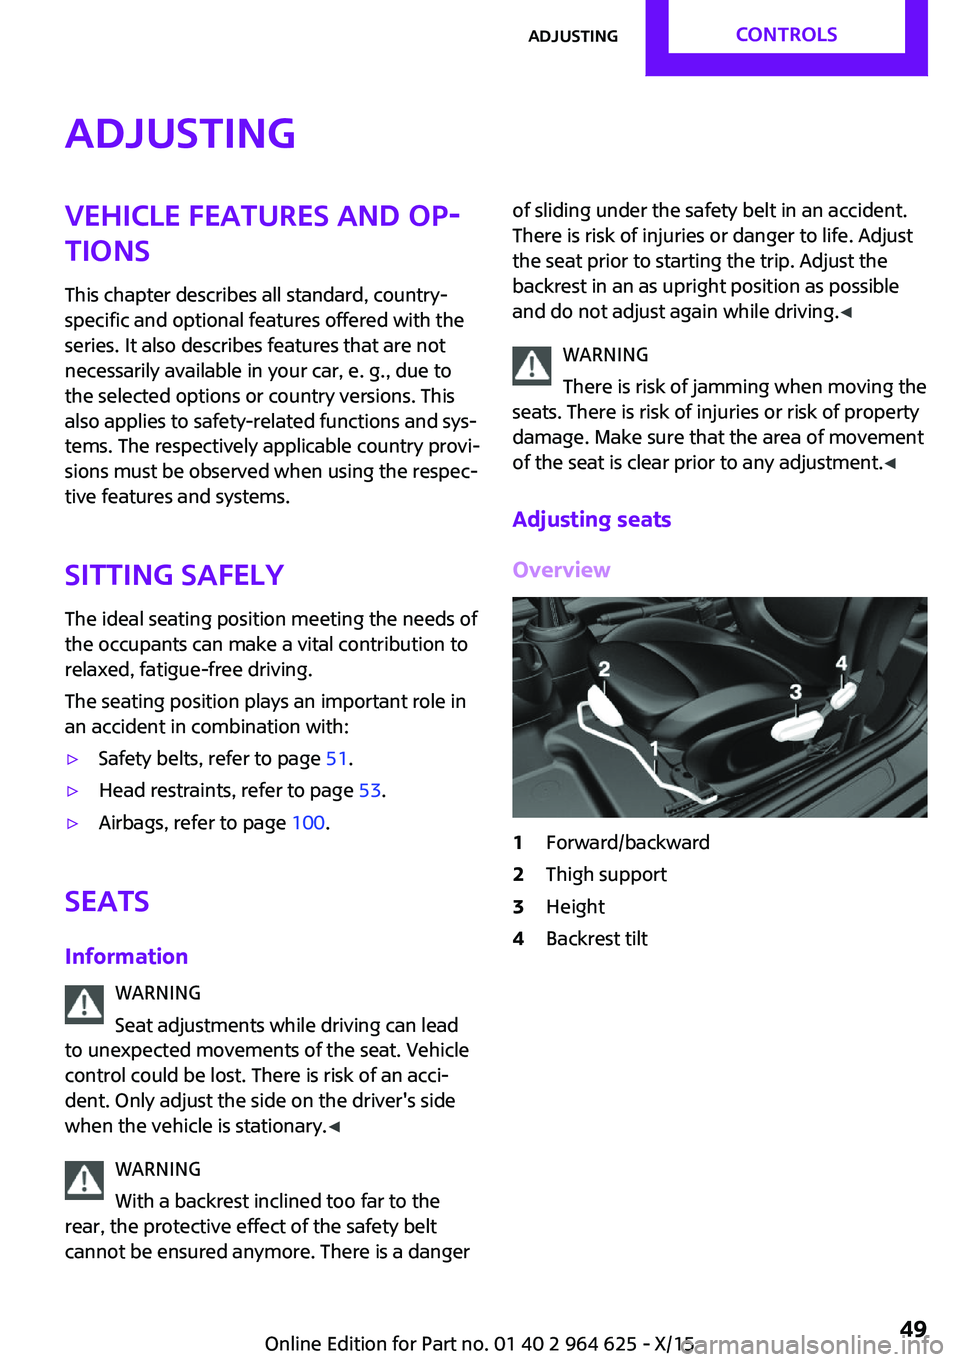
Overview1Forward/backward2Thigh support3Height4Backrest tiltSeite 49AdjustingCONTROLS49
Online Edition for Part no. 01 40 2 964 625 - X/15
Page 51 of 248
risk of injuries. Fold back and lock the backrests
before driving. ◀
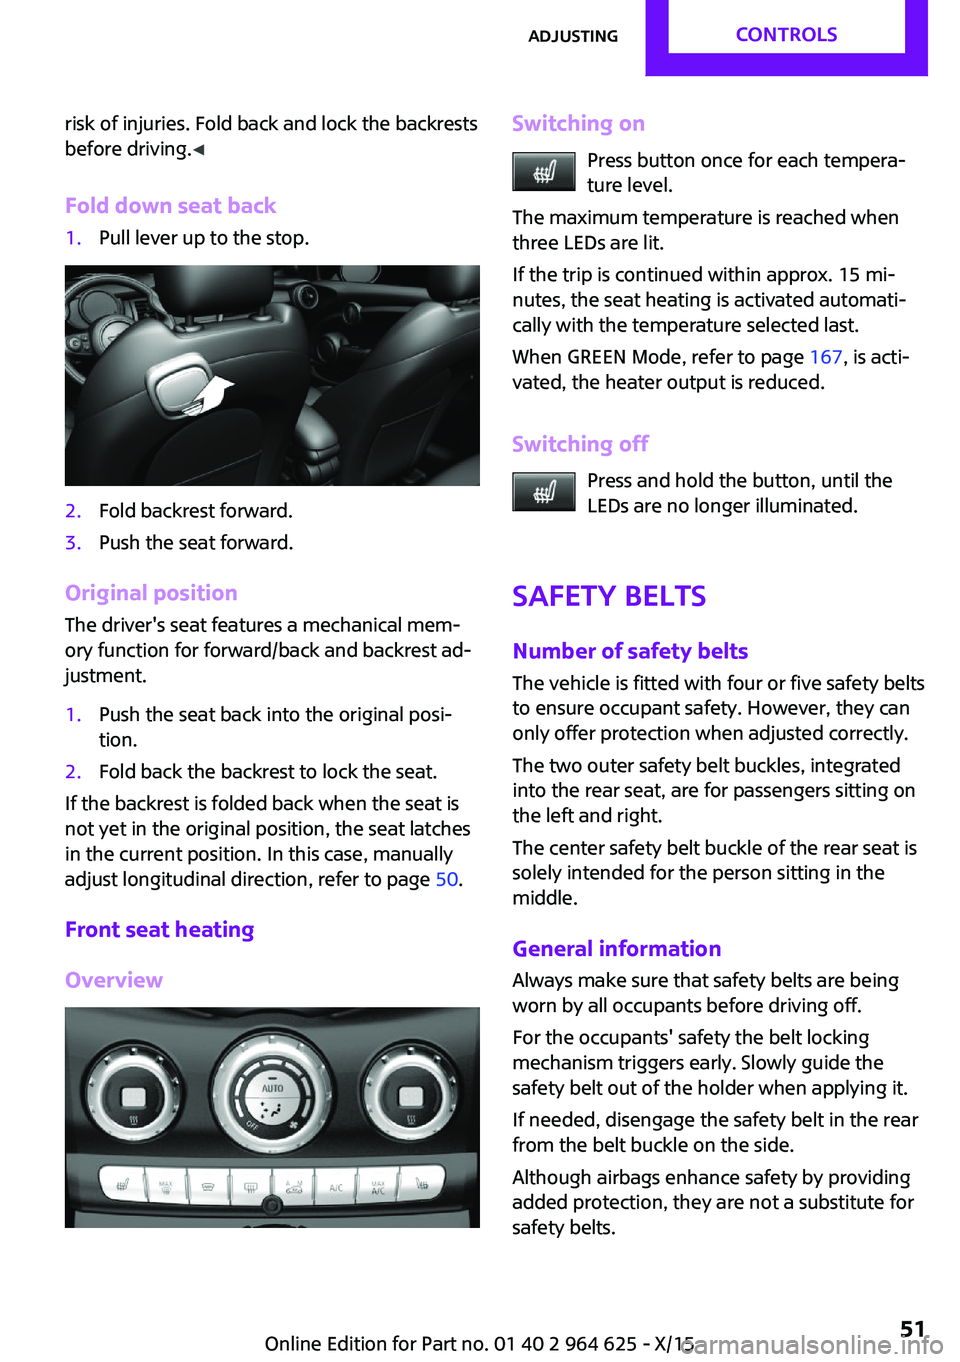
Fold down seat back1.Pull lever up to the stop.2.Fold backrest forward.3.Push the seat forward.
Original position The driver's seat features a mechanical mem‐
ory function for forward/back and backrest ad‐
justment.
1.Push the seat back into the original posi‐
tion.2.Fold back the backrest to lock the seat.
If the backrest is folded back when the seat is
not yet in the original position, the seat latches
in the current position. In this case, manually
adjust longitudinal direction, refer to page 50.
Front seat heating
Overview
Switching on Press button once for each tempera‐
ture level.
The maximum temperature is reached when
three LEDs are lit.
If the trip is continued within approx. 15 mi‐
nutes, the seat heating is activated automati‐
cally with the temperature selected last.
When GREEN Mode, refer to page 167, is acti‐
vated, the heater output is reduced.
Switching off Press and hold the button, until the
LEDs are no longer illuminated.
Safety belts Number of safety beltsThe vehicle is fitted with four or five safety belts
to ensure occupant safety. However, they can
only offer protection when adjusted correctly.
The two outer safety belt buckles, integrated
into the rear seat, are for passengers sitting on
the left and right.
The center safety belt buckle of the rear seat is
solely intended for the person sitting in the
middle.
General information Always make sure that safety belts are being
worn by all occupants before driving off.
For the occupants' safety the belt locking
mechanism triggers early. Slowly guide the
safety belt out of the holder when applying it.
If needed, disengage the safety belt in the rear
from the belt buckle on the side.
Although airbags enhance safety by providing
added protection, they are not a substitute for
safety belts.Seite 51AdjustingCONTROLS51
Online Edition for Part no. 01 40 2 964 625 - X/15
Page 52 of 248
InformationWARNING
If the safety belt is used by more than
one person, the protective effect of the safety belt cannot be ensured anymore. There is risk
of injuries or danger to life. Do not allow more
than one person to wear a single safety belt. In‐
fants and children are not allowed in an occu‐
pant's lap, but must be transported and respec‐
tively secured in designated child restraint
systems. ◀
WARNING
The protective effect of the safety belts
can be limited or lost when safety belts are fas‐
tened incorrectly. An incorrectly fastened safety
belt can cause additional injuries, for example
in the event of an accident or during braking
and evasive maneuvers. There is risk of injuries or danger to life. Make sure that all occupants
are wearing safety belts correctly. ◀
WARNING
With a rear backrest that is not locked,
the protective function of the middle safety belt
is not guaranteed. There is risk of injuries or
danger to life. If you are using the middle safety
belt, lock the wider rear backrest. ◀
Correct use of safety belts▷Wear the safety belt twist-free and as tight
to your body as possible over your lap and
shoulders.▷Wear the safety belt deep on your hips over
your lap. The safety belt may not press on
your stomach.▷Do not wear the safety belt on your throat,
rub it on sharp edges, guide it or jam it in
across hard or fragile objects.▷Avoid thick clothing.▷Re-tighten the safety belt frequently up‐
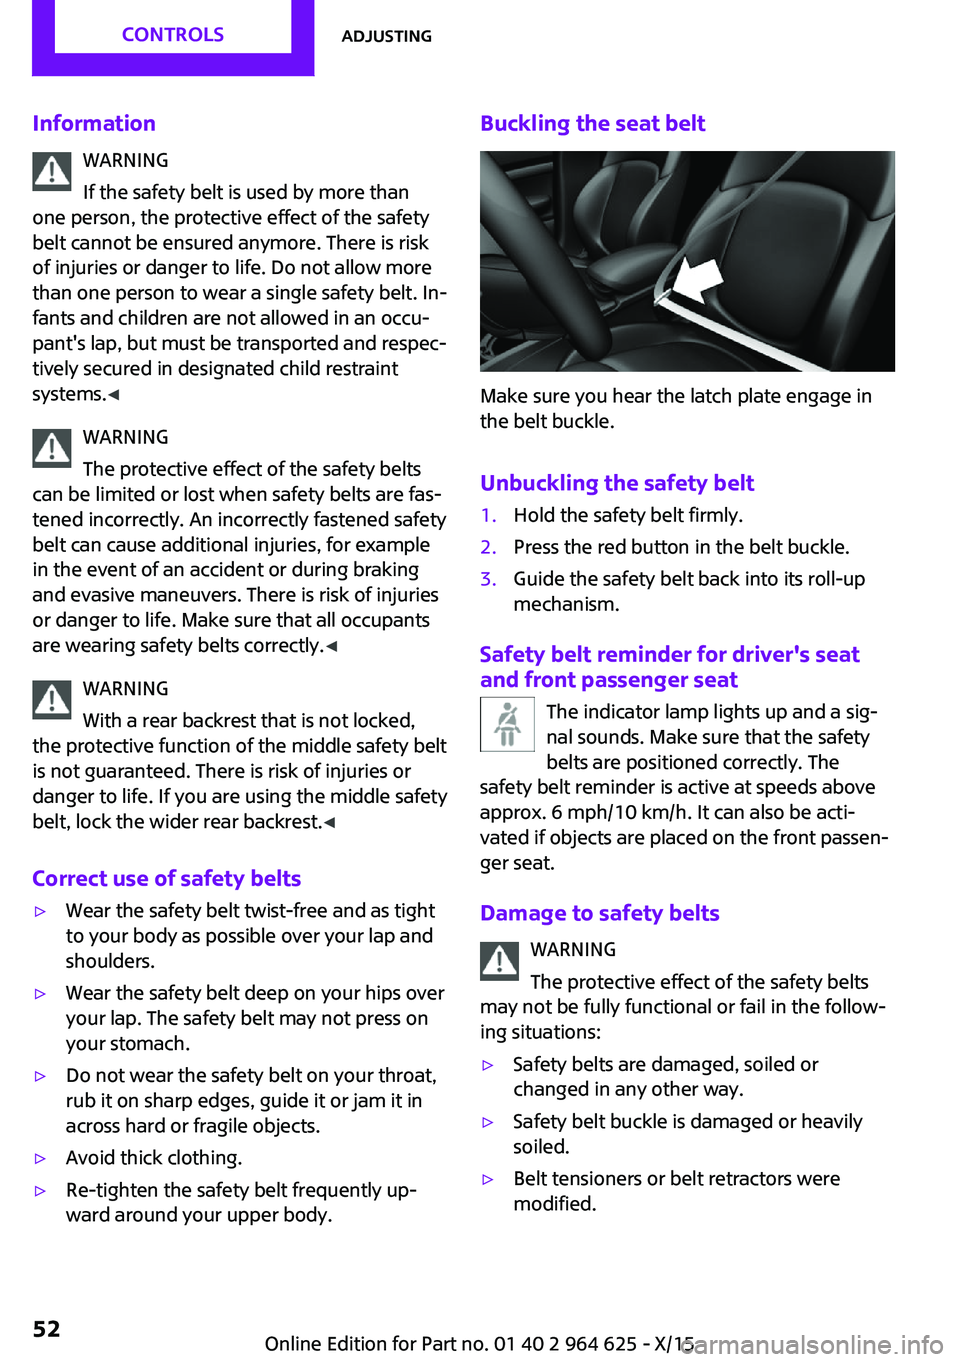
ward around your upper body.Buckling the seat belt
Make sure you hear the latch plate engage in
the belt buckle.
Unbuckling the safety belt
1.Hold the safety belt firmly.2.Press the red button in the belt buckle.3.Guide the safety belt back into its roll-up
mechanism.
Safety belt reminder for driver's seat
and front passenger seat
The indicator lamp lights up and a sig‐
nal sounds. Make sure that the safety
belts are positioned correctly. The
safety belt reminder is active at speeds above
approx. 6 mph/10 km/h. It can also be acti‐
vated if objects are placed on the front passen‐
ger seat.
Damage to safety belts WARNING
The protective effect of the safety belts
may not be fully functional or fail in the follow‐
ing situations:
▷Safety belts are damaged, soiled or
changed in any other way.▷Safety belt buckle is damaged or heavily
soiled.▷Belt tensioners or belt retractors were
modified.Seite 52CONTROLSAdjusting52
Online Edition for Part no. 01 40 2 964 625 - X/15
Page 53 of 248
Safety belts can be imperceptibly damaged in
the event of an accident. There is risk of injuries
or danger to life. Do not modify safety belts,
safety belt buckles, belt tensioners, belt retrac‐
tors or belt anchors and keep them clean. Have
the safety belts checked after an accident at
the dealer’s service center or another qualified
service center or repair shop. ◀
Front head restraints
Information WARNING
A missing protective effect due to re‐
moved or not correctly adjusted head restraints
can cause injuries in the head and neck area.
There is risk of injuries. Install head restraints
on occupied seats prior to driving and make
sure that the center of the head restraint sup‐
ports the back of the head at eye level. ◀
WARNING
Objects on the head restraint reduce the
protective effect in the head and neck area.
There is risk of injuries.▷Do not use seat or head restraint covers.▷Do not hang objects, for example, clothes
hangers, directly on the head restraint.▷Only use accessories that have been deter‐
mined to be safe for attachment to a head
restraint.▷Do not use any accessories, for example pil‐
lows, while driving. ◀
Correctly adjusted head restraint
General information
A correctly adjusted head restraint reduces the
risk of injury to cervical vertebrae in the event
of an accident.
Adjust the headrest via the backrest tilt as
needed.
Height
Adjust the head restraint so that its center is
approximately at eye level.
Distance Adjust the distance so that the head restraint is
as close as possible to the back of the head.
If necessary, adjust the distance by adjusting
the tilt of the backrest.
Adjusting the height: John Cooper
Works
The height of the head restraints cannot be ad‐
justed.
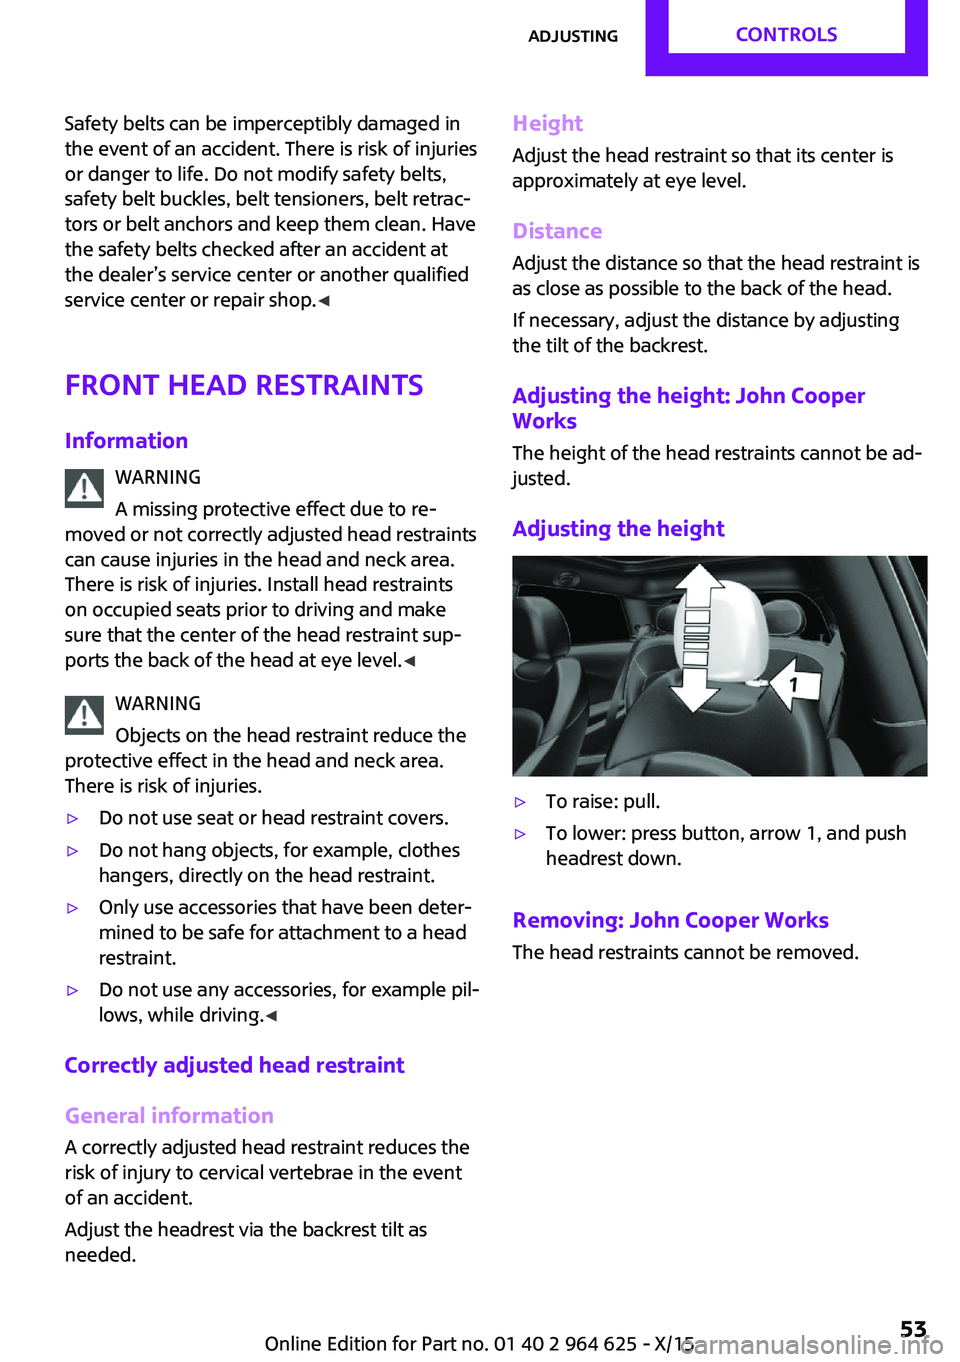
Adjusting the height▷To raise: pull.▷To lower: press button, arrow 1, and push
headrest down.
Removing: John Cooper Works
The head restraints cannot be removed.
Seite 53AdjustingCONTROLS53
Online Edition for Part no. 01 40 2 964 625 - X/15
Page 58 of 248

Transporting children safelyVehicle features and op‐
tions
This chapter describes all standard, country-
specific and optional features offered with the
series. It also describes features that are notnecessarily available in your car, e. g., due to
the selected options or country versions. This
also applies to safety-related functions and sys‐
tems. The respectively applicable country provi‐
sions must be observed when using the respec‐
tive features and systems.
The right place for children
Information
WARNING
Unattended children or animals can move
the vehicle and endanger themselves and traf‐
fic, for example with the following actions:▷Pressing the Start/Stop button.▷Releasing the parking brake.▷Opening and closing of doors or windows.▷Engaging selector lever position N.▷Using vehicle equipment.
There is risk of accidents or injuries. Do not
leave children or animals unattended in the ve‐
hicle. Carry remote control along when exiting
and lock the vehicle. ◀
Children should always be in the rear WARNING
Children shorter than 5 ft, 150 cm cannot
correctly fasten the safety belt without suitable
additional restraint systems. The protective ef‐
fect of the safety belts can be limited or lost
when safety belts are fastened incorrectly. An
incorrectly fastened safety belt can cause addi‐
tional injuries, for example in the event of an
accident or during braking and evasive maneu‐
vers. There is risk of injuries or danger to life.
Secure persons shorter than 5 ft, 150 cm using
suitable restraint systems. ◀
Accident research shows that the safest place
for children is in the rear seat.
Only transport children younger than 13 years
of age or shorter than 5 ft, 150 cm in the rear in
suitable child restraint systems provided in ac‐
cordance with the age, weight and size of the
child.
Children 13 years of age or older must wear a
safety belt as soon as a suitable child restraint
system can no longer be used due to their age,
weight and size.
Children on the front passenger seat
Before using a child restraint system on the
front passenger seat, ensure that the front,
knee, and side airbags on the front passenger
side are deactivated. Automatic deactivation of
front-seat passenger airbags, refer to
page 102.
Information WARNING
Active front-seat passenger airbags can
injure a child in a child restraint system when
the airbags are activated. There is risk of inju‐
ries. Make sure that the front-seat passenger
airbags are deactivated and that the PASSEN‐
GER AIRBAG OFF indicator lamp lights up. ◀Seite 58CONTROLSTransporting children safely58
Online Edition for Part no. 01 40 2 964 625 - X/15
Page 59 of 248
WARNING
The stability of the child restraint system
is limited or compromised with incorrect seat
adjustment or improper installation of the child
seat. There is risk of injuries or danger to life.
Make sure that the child restraint system fits
securely against the backrest. If possible, adjust
the backrest tilt for all affected backrests and
correctly adjust the seats. Make sure that seats
and backrests are securely engaged. If possible,
adjust the height of the head restraints or re‐
move them. ◀
Installing child re‐ straint systems
InformationPay attention to the specifications of the child
restraint system manufacturer when selecting,
installing, and using child restraint systems.
WARNING
The stability of the child restraint system
is limited or compromised with incorrect seat
adjustment or improper installation of the child
seat. There is risk of injuries or danger to life.
Make sure that the child restraint system fits
securely against the backrest. If possible, adjust
the backrest tilt for all affected backrests and
correctly adjust the seats. Make sure that seats
and backrests are securely engaged. If possible,
adjust the height of the head restraints or re‐
move them. ◀
In order to faciliate the installation of a back-
facing child restraint system in the rear:
Move the front passenger's seat as far up as
possible before folding down the backrest.On the front passenger seat
Deactivating airbags WARNING
Active front-seat passenger airbags can
injure a child in a child restraint system when
the airbags are activated. There is risk of inju‐
ries. Make sure that the front-seat passenger
airbags are deactivated and that the PASSEN‐
GER AIRBAG OFF indicator lamp lights up. ◀
After installing a child restraint system in the
front passenger seat, make sure that the front,
knee and side airbags on the front passenger
side are deactivated.
Deactivate the front-seat passenger airbags au‐
tomatically, refer to page 102.
Seat position and height
Before installing a child restraint system, move
the front passenger seat as far back as possible
and adjust its height to the highest and thus
best possible position for the belt and to offer
optimal protection in the event of an accident.
If the upper anchorage of the safety belt is lo‐
cated in front of the belt guide of the child seat,
move the passenger seat carefully forward until
the best possible belt guide position is reached.
Child seat security
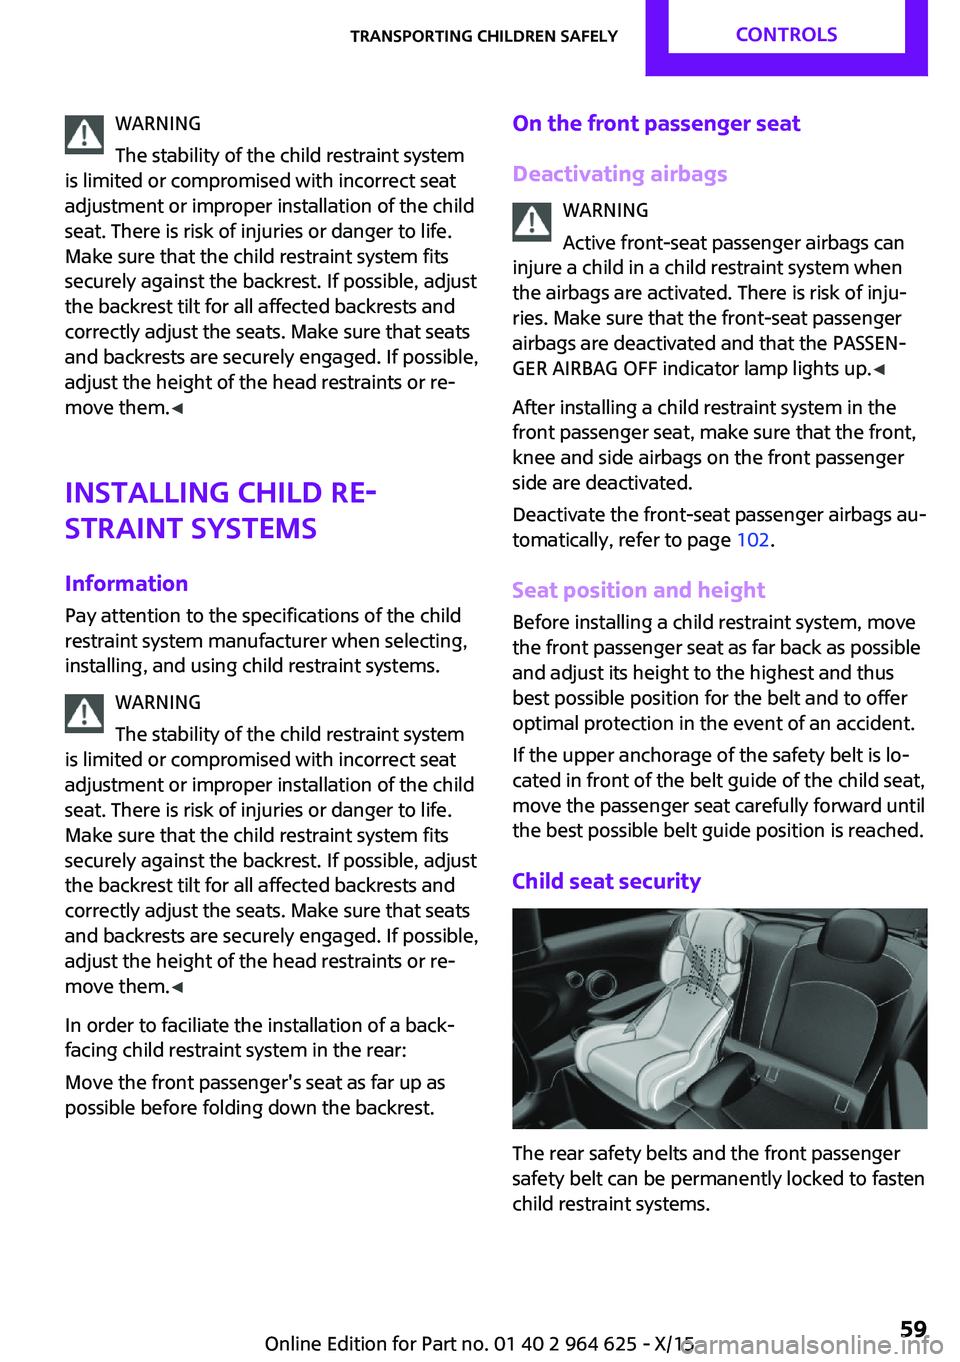
The rear safety belts and the front passenger
safety belt can be permanently locked to fasten
child restraint systems.
Seite 59Transporting children safelyCONTROLS59
Online Edition for Part no. 01 40 2 964 625 - X/15
Page 60 of 248
Locking the safety belt1.Pull out the strap completely.2.Secure the child restraint system with the
belt.3.Allow the strap to be pulled in and pull it
tight against the child restraint system. The
safety belt is locked.Unlocking the safety belt1.Unbuckle the belt buckle.2.Remove the child restraint system.3.Allow the strap to be pulled in completely.
LATCH child restraint system
Information
LATCH: Lower Anchors and Tether for Children.
Pay attention to the operating and safety infor‐
mation of the child restraint system manufac‐
turer when installing and using LATCH child re‐
straint fixing systems.
Mounts for the lower LATCH anchors The lower anchors may be used to attach the
CRS to the vehicle seat up to a combined child
and CRS weight of 65 lb/30 kg when the child is
restrained by the internal harnesses.
Information WARNING
If the LATCH child restraint fixing systems
are not correctly engaged, the protective effect
of the LATCH child restraint fixing system can
be limited. There is risk of injuries or danger to
life. Make sure that the lower anchors are se‐
curely engaged and that the LATCH child re‐
straint fixing system fits securely against the
backrest. ◀
Position The corresponding symbol shows the
mounts for the lower LATCH anchors.
Seats equipped with lower anchors are
marked with a pair, 2, of LATCH sym‐
bols. It is not recommended to use the
inner lower anchors of standard outer
LATCH positions to fasten a child restraint sys‐tem on the middle seat. Use the vehicle seat
belt instead for the middle seat.
Before installing LATCH child restraint
systems
Pull the belt away from the area of the child re‐
straint system.
Assembly of LATCH child restraint
systems1.Install child restraint system, see manufac‐
turer's information.2.Ensure that both LATCH anchors are prop‐
erly connected.
Child restraint fixing system with a
tether strap
Information CAUTION
The mounting points for the upper retain‐
ing straps of child restraint systems are only
provided for these retaining straps. When other objects are mounted, the anchors can be dam‐
aged. There is risk of property damage. Only
mount child restraint systems to the upper re‐
taining straps. ◀
Mounting points The respective symbol shows the an‐chor for the upper retaining strap. Seats
with an upper Top Tether are marked
Seite 60CONTROLSTransporting children safely60
Online Edition for Part no. 01 40 2 964 625 - X/15
Page 62 of 248

DrivingVehicle features and op‐
tions
This chapter describes all standard, country-
specific and optional features offered with the
series. It also describes features that are not
necessarily available in your car, e. g., due to
the selected options or country versions. This
also applies to safety-related functions and sys‐
tems. The respectively applicable country provi‐
sions must be observed when using the respec‐
tive features and systems.
Start/Stop button The concept Pressing the Start/Stop button
switches the ignition on or off
and starts the engine.
Steptronic transmission: the en‐
gine starts in selector lever posi‐
tion P or N with the brake pedal pressed when
you press the Start/Stop button.
Manual transmission: the engine starts with the
clutch pedal pressed when the Start/Stop but‐
ton is pressed.
Ignition on Manual transmission: press the Start/Stop but‐
ton without stepping on the clutch pedal.
Steptronic transmission: press the Start/Stop
button, and do not press on the brake pedal at
the same time.
All vehicle systems are ready for operation.
Most of the indicator and warning lights in the
instrument cluster light up for a varied length of
time.To save battery power when the engine is off,
switch off the ignition and any unnecessary
electronic systems/power consumers.
Ignition off
Manual transmission: press the Start/Stop but‐
ton again without stepping on the clutch pedal.
Steptronic transmission: shift to selector lever
position P, press the Start/Stop button again
without stepping on the brake.
All indicator lights in the instrument cluster go
out.
To save battery power when the engine is off,
switch off the ignition and any unnecessary electronic systems/power consumers.
The ignition is switched off automatically in the
following situations while the vehicle is station‐
ary and the engine is off:▷During locking, also with the low beams ac‐
tivated.▷Shortly before the battery is discharged
completely, so that the engine can still be
started. This function is only available when
the low beams are turned off.▷When opening and closing the driver door,
if the driver's safety belt is unbuckled and
the low beams are turned off.▷While the driver's safety belt is unbuckled
with driver's door open and low beams off.▷The low beams switch to parking lights af‐
ter approx. 15 minutes of no use.
Radio ready state
Activate radio-ready state: when the engine is
running: press the Start/Stop button.
Some electronic systems/power consumers re‐
main ready for operation.
The radio-ready state is switched off automati‐
cally in the following situations:
Seite 62CONTROLSDriving62
Online Edition for Part no. 01 40 2 964 625 - X/15
Page 63 of 248

▷After approx. 8 minutes.▷When the vehicle is locked using the central
locking system.▷Shortly before the battery is discharged
completely, so that the engine can still be
started.
The radio-ready state remains active if, for ex‐
ample, the ignition is automatically switched off
for the following reasons:
▷Opening or closing the driver's door.▷Unfastening of the driver's safety belt.▷When automatically switching from low
beams to parking lights.
If the engine is switched off and the ignition is
switched on, the system automatically switches
to the radio-ready state if the lights are turned
off or, if correspondingly equipped, the day‐
time running lights are activated.
Starting the engine
Information DANGER
If the exhaust pipe is blocked or ventila‐
tion is insufficient, harmful exhaust gases can
enter into the vehicle. The exhaust gases con‐
tain carbon monoxide, an odorless and color‐
less but highly toxic gas. In enclosed areas, ex‐
haust gases can also accumulate outside of the
vehicle. There is danger to life. Keep the ex‐
haust pipe free and ensure sufficient ventila‐
tion. ◀
WARNING
An unsecured vehicle can put itself into
motion and roll away. There is risk of an acci‐
dent. Before exiting, secure the vehicle against
rolling.
In order to ensure that the vehicle is secured
against rolling away, observe the following:
▷Set the parking brake.▷On uphill grades or on a slope, turn the
front wheels in the direction of the curb.▷On uphill grades or on a slope, also secure
the vehicle, for example with a wheel
chock. ◀
CAUTION
In the case of repeated starting attempts
or repeated starting in quick succession, the
fuel is not burned or is inadequately burned.
The catalytic converter can overheat. There is
risk of property damage. Avoid repeated start‐
ing in quick succession. ◀
Steptronic transmission
Starting the engine
1.Depress the brake pedal.2.Engage selector lever position P or N.3.Press the Start/Stop button.
The ignition is activated automatically for a cer‐
tain time and is stopped as soon as the engine
starts.
Manual transmission
Starting the engine
1.Depress the brake pedal.2.Press on the clutch pedal and shift to neu‐
tral.3.Press the Start/Stop button.
The ignition is activated automatically for a cer‐
tain time and is stopped as soon as the engine
starts.
Engine stop
Information WARNING
Unattended children or animals can move
the vehicle and endanger themselves and traf‐
fic, for example with the following actions:
Seite 63DrivingCONTROLS63
Online Edition for Part no. 01 40 2 964 625 - X/15