fuel MINI COOPER CONVERTIBLE 2009 Owners Manual
[x] Cancel search | Manufacturer: MINI, Model Year: 2009, Model line: COOPER CONVERTIBLE, Model: MINI COOPER CONVERTIBLE 2009Pages: 172, PDF Size: 2.73 MB
Page 5 of 172
REFERENCEAT A GLANCE CONTROLS DRIVING TIPS MOBILITY
3
CONTENTS
The fastest way to find information on a particu-
lar topic or item is by using the index, refer to
page158.
Using this Owner's Manual
4Notes
6Reporting safety defects
AT A GLANCE
10Cockpit
CONTROLS
18Opening and closing
34Adjustments
40Transporting children safely
43Driving
52Everything under control
62Technology for driving comfort and safety
73Lamps
78Climate
83Practical interior accessories
DRIVING TIPS
90Things to remember when driving
MOBILITY
100Refueling
102Wheels and tires
113Under the bonnet
117Maintenance
119Care
123Replacing components
134Giving and receiving assistance
138Indicator and warning lamps
REFERENCE
152Technical data
158From A to Z
Page 14 of 172
Cockpit
12
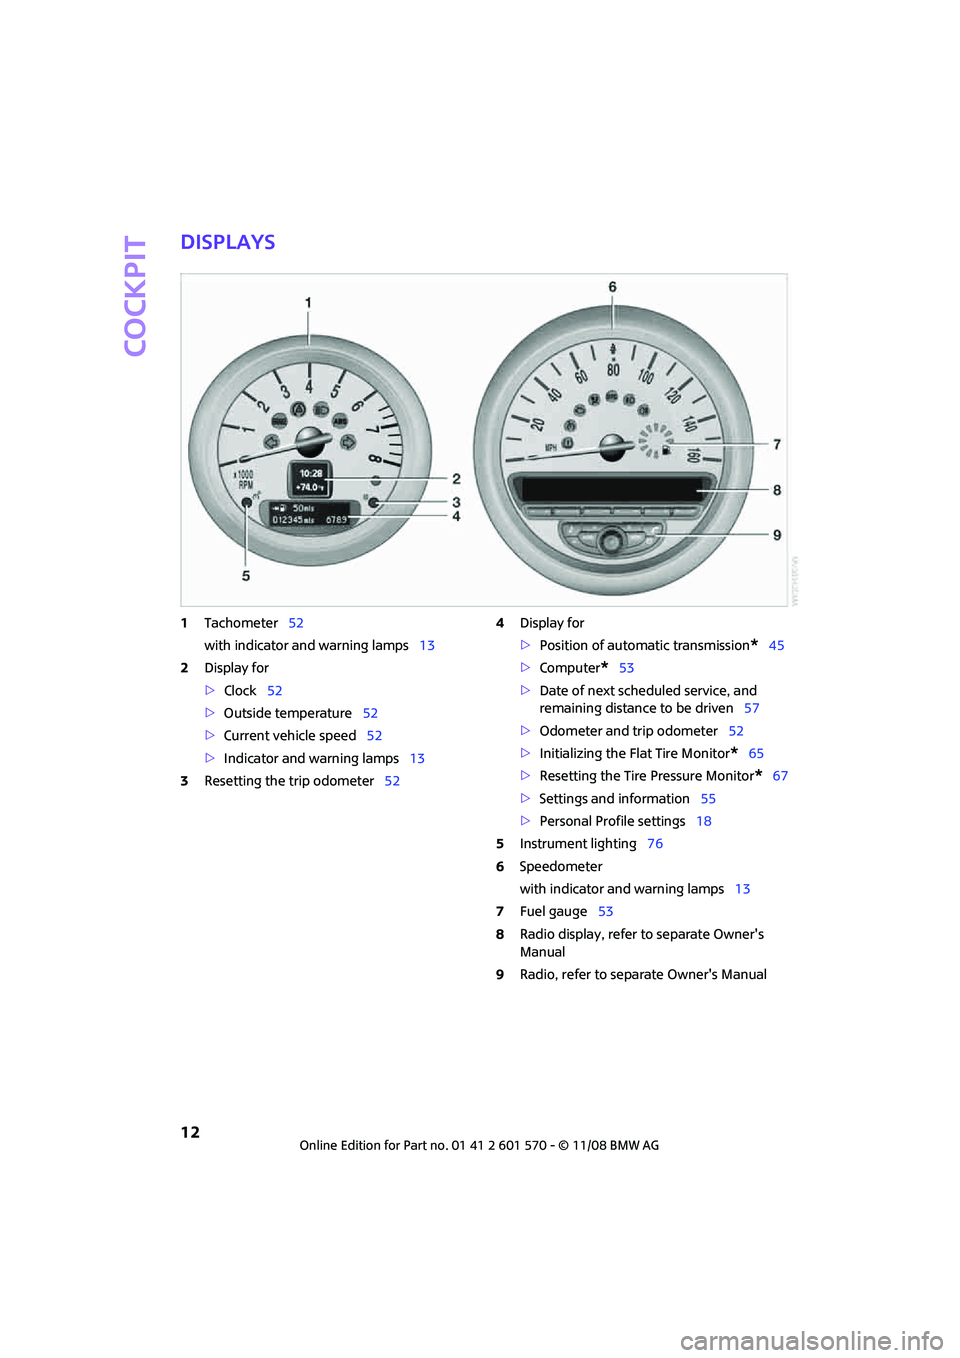
Displays
1Tachometer52
with indicator and warning lamps13
2Display for
>Clock52
>Outside temperature52
>Current vehicle speed52
>Indicator and warning lamps13
3Resetting the trip odometer524Display for
>Position of automatic transmission
*45
>Computer
*53
>Date of next scheduled service, and
remaining distance to be driven57
>Odometer and trip odometer52
>Initializing the Flat Tire Monitor
*65
>Resetting the Tire Pressure Monitor
*67
>Settings and information55
>Personal Profile settings18
5Instrument lighting76
6Speedometer
with indicator and warning lamps13
7Fuel gauge53
8Radio display, refer to separate Owner's
Manual
9Radio, refer to separate Owner's Manual
Page 21 of 172
REFERENCEAT A GLANCE CONTROLS DRIVING TIPS MOBILITY
19
Personal Profile settings
For more information on specific settings, refer
to the specified pages.
>Response of the central locking system
when the car is being unlocked19
>Automatic locking of the vehicle23
>Triple turn signal activation47
>Settings for the displays on the onboard
monitor, in the speedometer and in the
tachometer.
>12h/24h mode of the clock, refer to For-
mats and units of measure56
>Date format, refer to Formats and units
of measure56
>Units of measure for fuel consumption,
distance covered/remaining distances
and temperature, refer to Formats and
units of measure56
>Light settings:
>Pathway lighting73
>Daytime running lamps74
>Automatic climate control
*: AUTO program,
activating/deactivating cooling function and
automatic recirculated-air control, setting
temperature, air flow rate and
distribution80
>Entertainment:
>Audio volume, refer to separate Owner's
Manual
>Speed-dependent volume, refer to sepa-
rate Owner's Manual
Central locking system
The concept
The central locking system is ready for operation
whenever the driver's door is closed.
The system simultaneously engages and
releases the locks on the following:
>Doors
>Tailgate
>Fuel filler door
Operating from outside
>Via the remote control
>Via the door lock
*
>In cars with convenient access*, via the door
handles on the driver's and passenger's
sides.
The anti-theft system is also operated at the
same time. It prevents the doors from being
unlocked using the lock buttons or door han-
dles. The remote control can also be used to
switch on/off the welcome lamps and interior
lamps. The alarm system
* is also activated or
deactivated, page24.
Operating from inside
Button for central locking system, page22.
In the event of a sufficiently severe accident, the
central locking system unlocks automatically. In
addition, the hazard warning flashers and inte-
rior lamps come on.
Opening and closing:
from outside
Persons or animals in a parked vehicle
could lock the doors from the inside. Take
the key with you when you leave the vehicle so
that the vehicle can be opened from the out-
side.<
Using the remote control
Unlocking
Press button .
The welcome lamps and interior lamps come on.
Unlocking mode
You can also set which parts of the car are
unlocked. The setting is stored for the remote
control in use.
Page 22 of 172

Opening and closing
20
1.Switch on the ignition, refer to page43.
2.Briefly press the button in the turn indicator
lever repeatedly until "SET/INFO" is displayed.
3.Press and hold the button until the display
changes.
4.Briefly press the button repeatedly until the
symbol and "SET" are displayed.
5.Press and hold the button until the display
changes.
6.Briefly press the button repeatedly until the
display shows the illustrated symbol, arrow.
7.Press and hold the button until the display
changes.
8.Briefly press the button to select:
>
Press the button once to unlock
only the driver's door and the fuel filler
door. Press the button twice to unlock the entire
vehicle.
>
Press the button once to unlock
the entire vehicle.
9.Press and hold the button until the display
changes. The setting is stored for the remote
control currently in use.
Convenient opening
Hold the button down.
The power windows are opened and the glass
sunroof* is raised. In the MINI Convertible, the
windows and the sliding sunroof are opened.
In order to open the convertible top of your MINI
Convertible: release button and push again until
the convertible top is completely open. The side
window remains open.
Convenient closing is not possible by
means of the remote control.<
Locking
Press the button.
Do not lock the vehicle from the outside if
there is any person inside, because the
vehicle cannot be unlocked from inside without
special knowledge.<
Setting confirmation signals
To have the vehicle confirm when it has been
locked or unlocked.
1.Switch on the ignition, refer to page43.
2.Briefly press the button in the turn indicator
lever repeatedly until "SET/INFO" is dis-
played.
Page 24 of 172

Opening and closing
22
Any unauthorized modifications or
changes to these devices could void the
user's authority to operate this equipment.<
Using the door lock
You can set which parts of the car are unlocked,
page19.
When there is no alarm system
* or conve-
nient access
*, only the driver's door is
locked with the door lock.<
To lock all doors, the fuel filler door and the tail-
gate together:
With the doors closed, press the interior central
locking button, page22 to lock the vehicle.
Unlocking and opening the driver or passenger
door, page22.
Locking the vehicle.
>Lock the driver's door with the integrated
key via the door lock, or
>press the safety lock button on the pas-
senger's door and close the door from
the outside.
Convenient operation
With an alarm system* or convenient access*,
the windows and glass sunroof
* can be oper-
ated via the door lock.
Hold the key in the position for unlocking or
locking.
In the MINI Convertible, the convertible top
closes first, followed by the folding sunroof, and
finally the side windows close.
During the roof closing process (in case of
the convertible top also during the open-
ing process) ensure no one gets pinched.
Releasing the key stops the operation.<
Manual operation
In the event of an electrical malfunction, the
driver's door can be unlocked or locked by turn-
ing the integrated key in the door lock to the end
positions.
Opening and closing:
from inside
The switch locks or unlocks the doors and tail-
gate when the doors are closed, but the anti-
theft system is not activated. The fuel filler door
remains unlocked
*.
To unlock and open the doors
>Either unlock the doors together using the
switch for the central locking system and
then pull the door handle above the armrest
or
>pull on the door handle of either door twice:
the first time unlocks the door, the second
time opens it.
Locking
>Press the switch or
>press down the safety lock button of a door.
To prevent you from being locked out, the
open driver's door cannot be locked using
the lock button.
Persons or animals in a parked vehicle
could lock the doors from the inside. Take
the key with you when you leave the vehicle so
that the vehicle can be opened from the out-
side.<
Page 46 of 172

Driving
44
Starting the engine
Do not allow the engine to run in enclosed
spaces; otherwise inhalation of the nox-
ious exhaust gases can lead to unconsciousness
and death. Exhaust gases contain carbon mon-
oxide, an odorless and colorless, but highly toxic
gas. Never leave an unattended vehicle with the
engine running, otherwise such a vehicle repre-
sents a potential safety hazard.
Before leaving the car while the engine is run-
ning, place the transmission in neutral or move
the selector lever to position P and forcefully
apply the parking brake to prevent the car from
moving.<
Avoid frequent starting in quick succes-
sion or repeated start attempts in which
the engine does not start. Otherwise, the fuel is
not burned or inadequately burned and there is
a danger of overheating and damaging the cat-
alytic converter.<
Do not let the engine warm up with the vehicle
at a standstill. Move off immediately at a moder-
ate engine speed.
When starting the engine, do not depress the
accelerator pedal.
Manual transmission
Key in ignition lock or inside vehicle with conve-
nient access, refer to page26.
1.Depress the brake.
2.Depress the clutch.
3.Press the start/stop button.
Automatic transmission
Key in ignition lock or inside vehicle with conve-
nient access, refer to page26.
1.Depress the brake.
2.Shift the selector lever into position P or N.
3.Press the start/stop button.
The starter operates automatically for a certain
time, and stops automatically as soon as the
engine has started.
Engineswitching off
Always take the key with you when you
leave the vehicle.
When parking, apply the parking brake force-
fully, otherwise the vehicle could begin to roll.<
Manual transmission
1.With the car at a standstill, press the
start/stop button.
2.Shift into first gear or reverse.
3.Forcefully apply the parking brake.
Automatic transmission
1.With the car at a standstill, move the selector
lever to position P.
2.Press the start/stop button.
3.Forcefully apply the parking brake.
Before driving into a car wash
By following these steps, the vehicle is able to
roll:
1.Place the remote control, even with conve-
nient access, in the ignition lock.
2.Depress the brake.
3.Move the selector lever to position N.
4.Switch off the engine.
Page 48 of 172

Driving
46
Changing selector lever positions
>The selector lever can only be moved out of
position P if the ignition i s s w i t c h e d o n o r t h e
engine is running: interlock.
>Before moving the lever away from P or N
with the vehicle stationary, first depress the
brake; otherwise the selector lever will
refuse to move: shiftlock.
To prevent the vehicle from creeping
after you select a driving position,
depress the brake until you are ready to
start.<
A lock prevents accidental shifting into selector
lever positions R and P.
Overriding the selector lever lock
Press the button on the front of the selector
lever, arrow.
P Park
Select this only when the vehicle is stationary.
The transmission locks to prevent the drive
wheels from turning.
R Reverse
Select this only when the vehicle is stationary.
N Neutral
Select this when you are in a car wash, for exam-
ple. The vehicle can roll.
D Drive, automatic position
Position for normal vehicle operation. All for-
ward gears are selected automatically.
Under normal operation conditions, fuel con-
sumption is lowest when you drive in position D.
Kick-down
Kick-down enables you to achieve maximum
performance.
Depress the accelerator pedal beyond the full-
throttle resistance point.
Sport program and manual operation
M/S
Move the selector lever from position D to the
left into the M/S shifting slot:
The Sport program is activated and DS is dis-
played.
Shifting with the selector lever
Push the selector lever forward or pull it back to
activate manual operation. Steptronic shifts the
gear.
>Pull the selector lever in the + direction.
Transmission shifts up.
>Push the selector lever in the – direction.
Transmission shifts down.
The tachometer displays M1 to M6.
To use the automatic mode again, move the
selector lever to the right into position D.
Upshifts and downshifts are executed only when
they will result in a plausible combination of
engine and vehicle speed; thus, for example, a
downshift that would cause the engine to over-
rev will not be executed by the system. The
selected gear is displayed briefly, followed by
the actual gear.
Shifting on the steering wheel
With the selector lever in position D, automatic
drive, you can shift gears using the shift paddles
on the steering wheel. The transmission auto-
matically switches to manual mode.
Page 54 of 172
Everything under control
52
Everything under control
Odometer, outside
temperature display,
clock
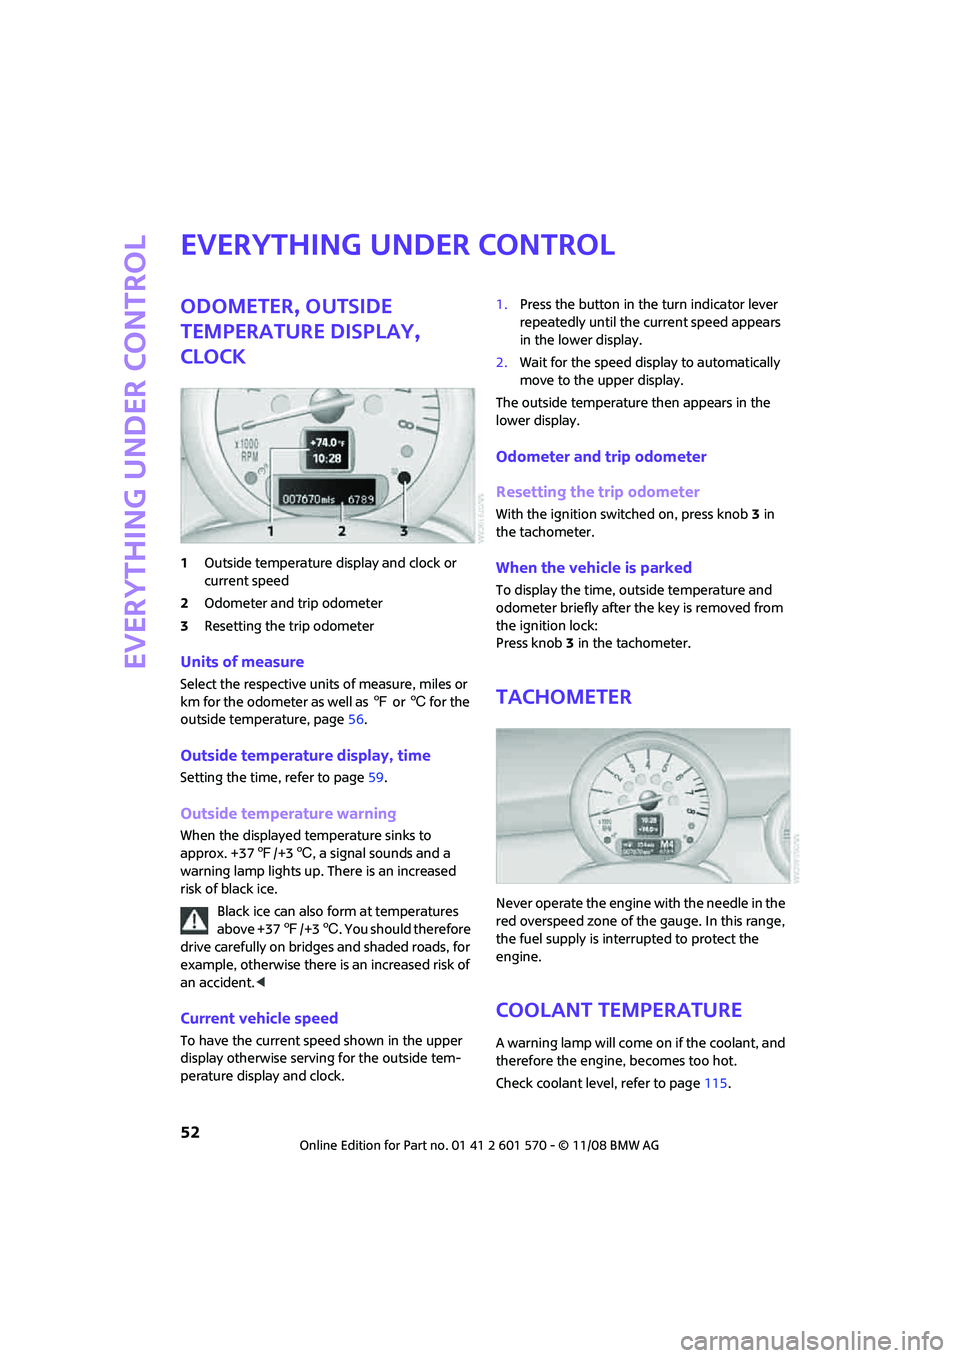
1Outside temperature display and clock or
current speed
2Odometer and trip odometer
3Resetting the trip odometer
Units of measure
Select the respective units of measure, miles or
km for the odometer as well as 7 or 6 for the
outside temperature, page56.
Outside temperature display, time
Setting the time, refer to page59.
Outside temperature warning
When the displayed temperature sinks to
approx. +377/+36, a signal sounds and a
warning lamp lights up. There is an increased
risk of black ice.
Black ice can also form at temperatures
above +377/+36. You should therefore
drive carefully on bridges and shaded roads, for
example, otherwise there is an increased risk of
an accident.<
Current vehicle speed
To have the current speed shown in the upper
display otherwise serving for the outside tem-
perature display and clock.1.Press the button in the turn indicator lever
repeatedly until the current speed appears
in the lower display.
2.Wait for the speed display to automatically
move to the upper display.
The outside temperature then appears in the
lower display.
Odometer and trip odometer
Resetting the trip odometer
With the ignition switched on, press knob 3 in
the tachometer.
When the vehicle is parked
To display the time, outside temperature and
odometer briefly after the key is removed from
the ignition lock:
Press knob 3 in the tachometer.
Tachometer
Never operate the engine with the needle in the
red overspeed zone of the gauge. In this range,
the fuel supply is interrupted to protect the
engine.
Coolant temperature
A warning lamp will come on if the coolant, and
therefore the engine, becomes too hot.
Check coolant level, refer to page115.
Page 55 of 172
REFERENCEAT A GLANCE CONTROLS DRIVING TIPS MOBILITY
53
Fuel gauge
Fuel tank capacity
You can find information on refueling on
page101.
If the tilt of the vehicle varies for a longer period,
when you are driving in mountainous areas, for
example, the indicator may fluctuate slightly.
MINI Cooper, MINI Cooper S
Approx. 13.2 US gallons/50 liters.
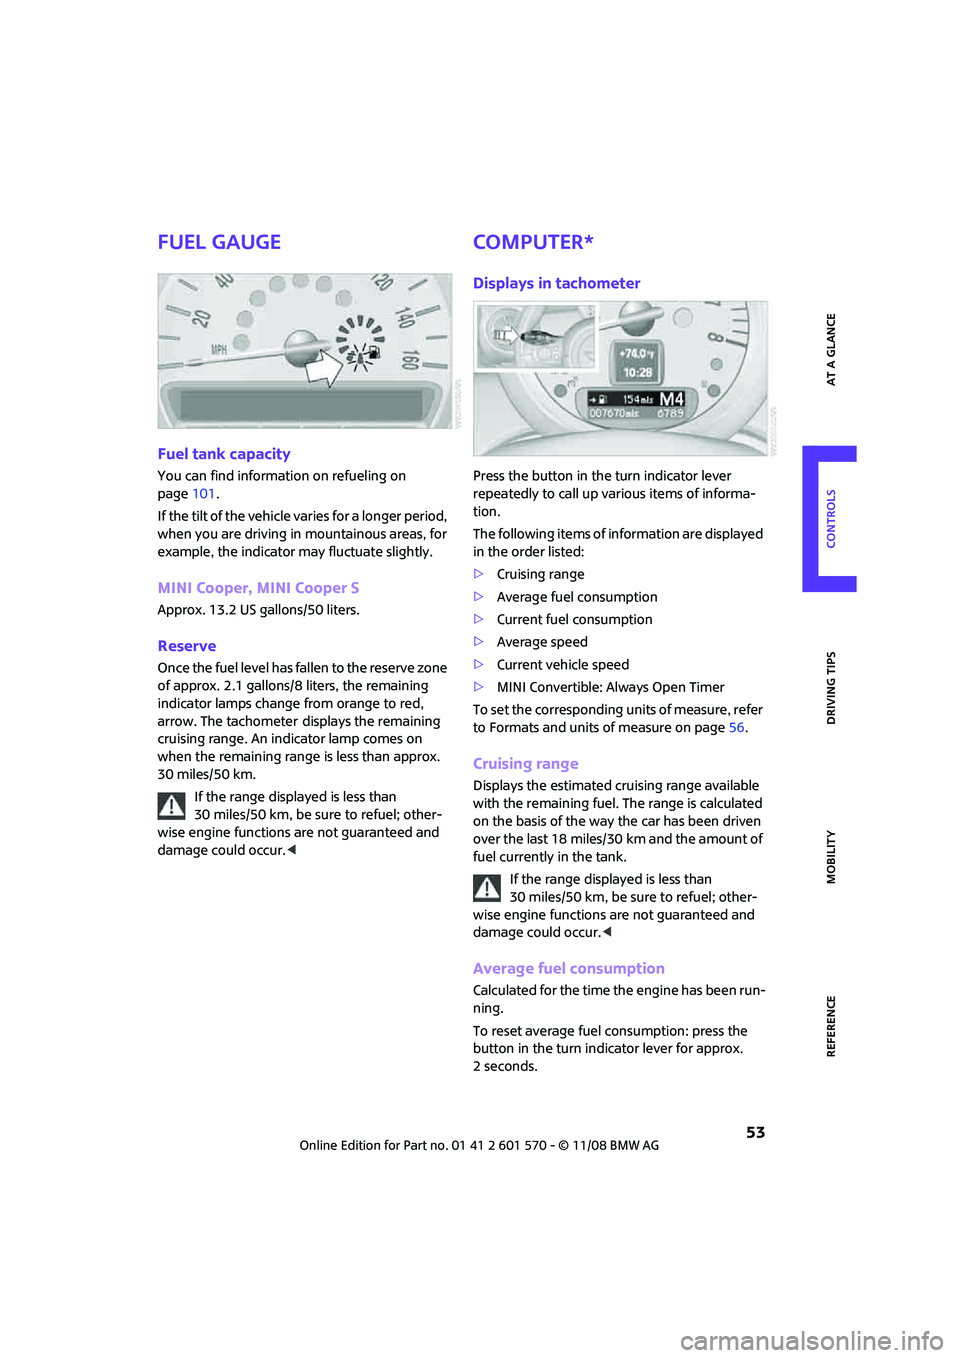
Reserve
Once the fuel level has fallen to the reserve zone
of approx. 2.1 gallons/8 liters, the remaining
indicator lamps change from orange to red,
arrow. The tachometer
displays the remaining
cruising range. An indicator lamp comes on
when the remaining range is less than approx.
30 miles/50 km.
If the range displayed is less than
30 miles/50 km, be sure to refuel; other-
wise engine functions are not guaranteed and
damage could occur.<
Computer*
Displays in tachometer
Press the button in the turn indicator lever
repeatedly to call up various items of informa-
tion.
The following items of information are displayed
in the order listed:
>Cruising range
>Average fuel consumption
>Current fuel consumption
>Average speed
>Current vehicle speed
>MINI Convertible: Always Open Timer
To set the corresponding units of measure, refer
to Formats and units of measure on page56.
Cruising range
Displays the estimated cruising range available
with the remaining fuel. The range is calculated
on the basis of the way the car has been driven
over the last 18 miles/30 km and the amount of
fuel currently in the tank.
If the range displayed is less than
30 miles/50 km, be sure to refuel; other-
wise engine functions are not guaranteed and
damage could occur.<
Average fuel consumption
Calculated for the time the engine has been run-
ning.
To reset average fuel consumption: press the
button in the turn indicator lever for approx.
2seconds.
Page 56 of 172
Everything under control
54
Current fuel consumption
Displays the current fuel consumption to allow
you to see whether your current driving style is
conducive to fuel economy with minimum
exhaust emissions.
Average speed
Periods with the vehicle parked and the engine
switched off are not included in the calculations
of average speed.
To reset average speed: press the button in the
turn indicator lever for approx. 2 seconds.
Current vehicle speed
To have the current speed shown in the upper
display otherwise serving for the outside tem-
perature display and clock.
1.Press the button in the turn indicator lever
repeatedly until the current speed appears
in the lower display.
2.Wait for the speed display to automatically
move to the upper display.
The outside temperature then appears in the
lower display of the computer.
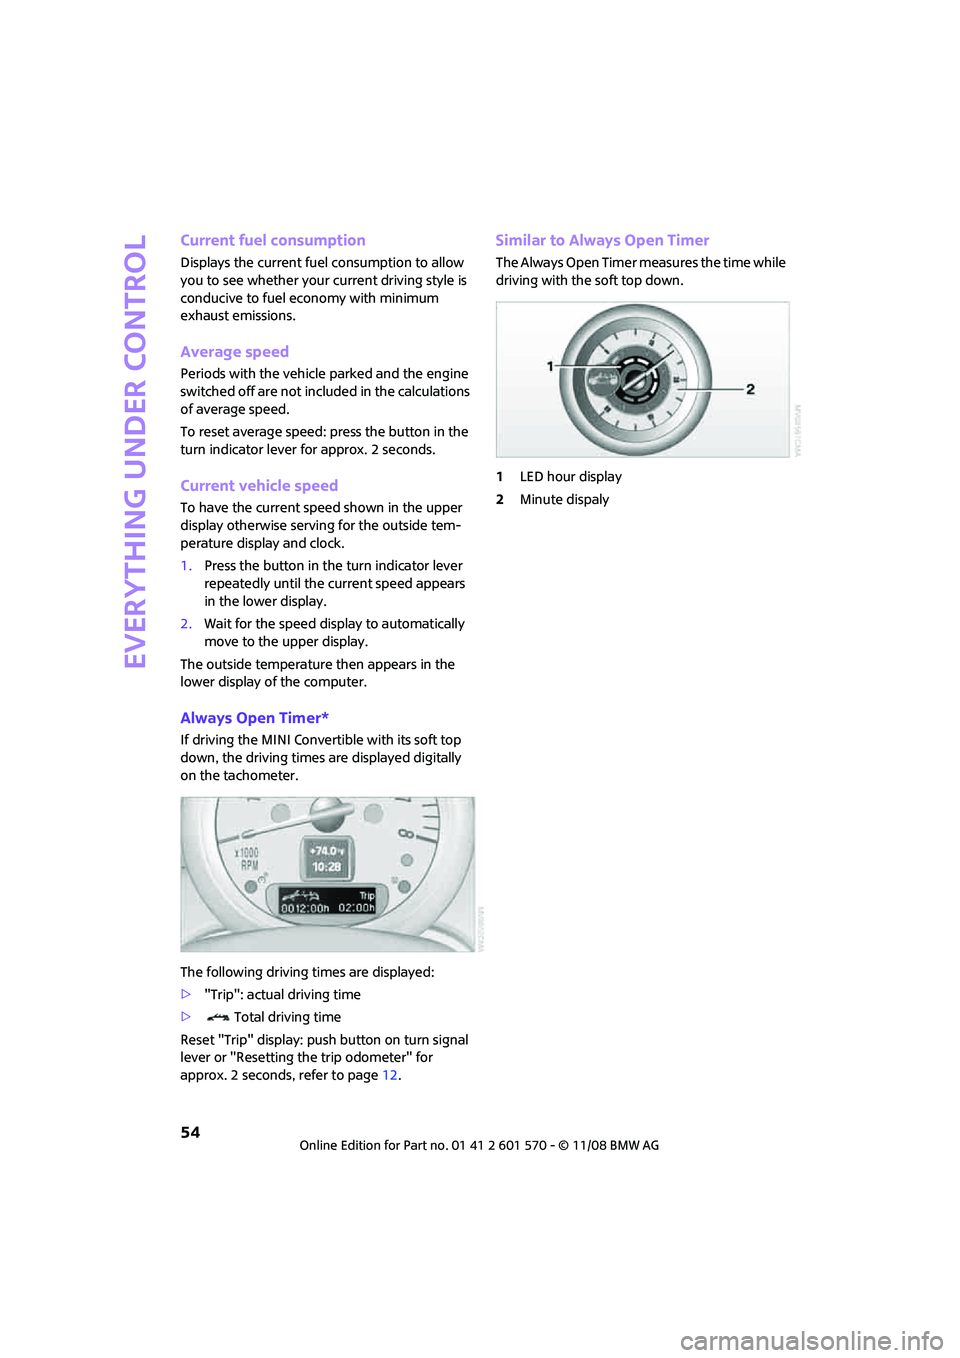
Always Open Timer*
If driving the MINI Convertible with its soft top
down, the driving times are displayed digitally
on the tachometer.
The following driving times are displayed:
>"Trip": actual driving time
>Total driving time
Reset "Trip" display: push button on turn signal
lever or "Resetting the trip odometer" for
approx. 2 seconds, refer to page12.
Similar to Always Open Timer
The Always Open Timer measures the time while
driving with the soft top down.
1LED hour display
2Minute dispaly