check engine MINI COOPER CONVERTIBLE 2016 Owner's Manual
[x] Cancel search | Manufacturer: MINI, Model Year: 2016, Model line: COOPER CONVERTIBLE, Model: MINI COOPER CONVERTIBLE 2016Pages: 252, PDF Size: 5.41 MB
Page 220 of 252
Breakdown assistanceVehicle features and op‐
tions
This chapter describes all standard, country-
specific and optional features offered with the
series. It also describes features that are not
necessarily available in your car, e. g., due to
the selected options or country versions. This
also applies to safety-related functions and sys‐
tems. The respectively applicable country provi‐
sions must be observed when using the respec‐
tive features and systems.
Hazard warning flash‐
ers
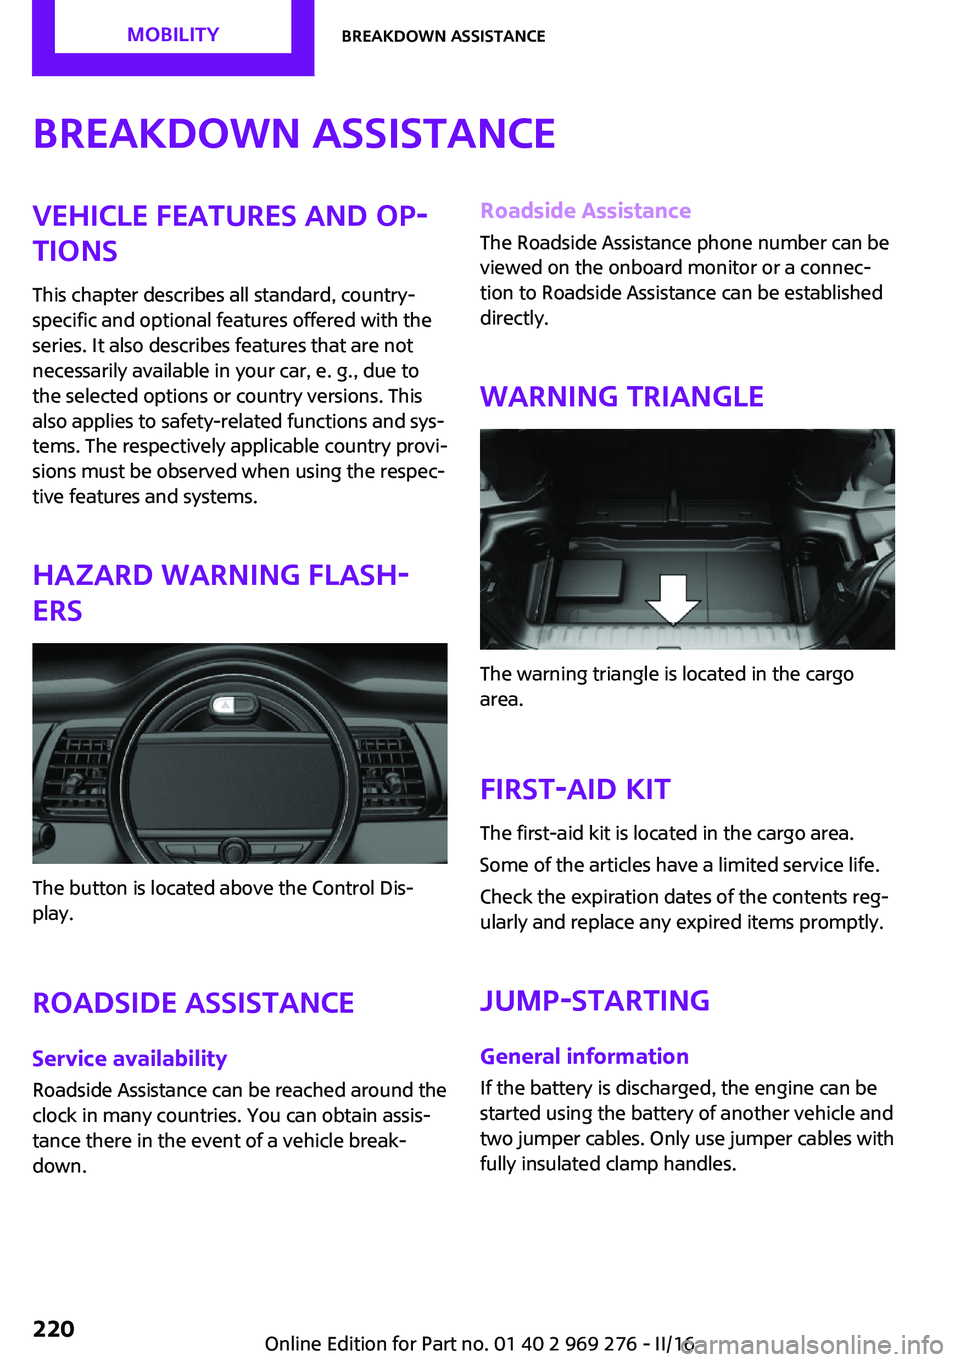
The button is located above the Control Dis‐
play.
Roadside Assistance
Service availability Roadside Assistance can be reached around the
clock in many countries. You can obtain assis‐
tance there in the event of a vehicle break‐
down.
Roadside Assistance
The Roadside Assistance phone number can be
viewed on the onboard monitor or a connec‐
tion to Roadside Assistance can be established
directly.
Warning triangle
The warning triangle is located in the cargo
area.
First-aid kit
The first-aid kit is located in the cargo area.
Some of the articles have a limited service life.
Check the expiration dates of the contents reg‐
ularly and replace any expired items promptly.
Jump-starting
General information If the battery is discharged, the engine can be
started using the battery of another vehicle and
two jumper cables. Only use jumper cables with
fully insulated clamp handles.
Seite 220MOBILITYBreakdown assistance220
Online Edition for Part no. 01 40 2 969 276 - II/16
Page 221 of 252
InformationDANGER
Contact with live components can lead to
an electric shock. There is a risk of injury or
danger to life. Do not touch any components
that are under voltage. ◀
To prevent personal injury or damage to both
vehicles, adhere strictly to the following proce‐
dure.
Preparation ATTENTION
In the case of body contact between the
two vehicles, a short circuit can occur during
jump-starting. There is a risk of damage to
property. Make sure that no body contact oc‐
curs. ◀1.Check whether the battery of the other ve‐
hicle has a voltage of 12 volts. The voltage
information can be found on the battery.2.Switch off the engine of the assisting vehi‐
cle.3.Switch off any electronic systems/power
consumers in both vehicles.
Starting aid terminals
WARNING
If the jumper cables are connected in the
incorrect order, sparks formation can occur.
There is a a risk of injury. Pay attention to the
correct order during connection. ◀
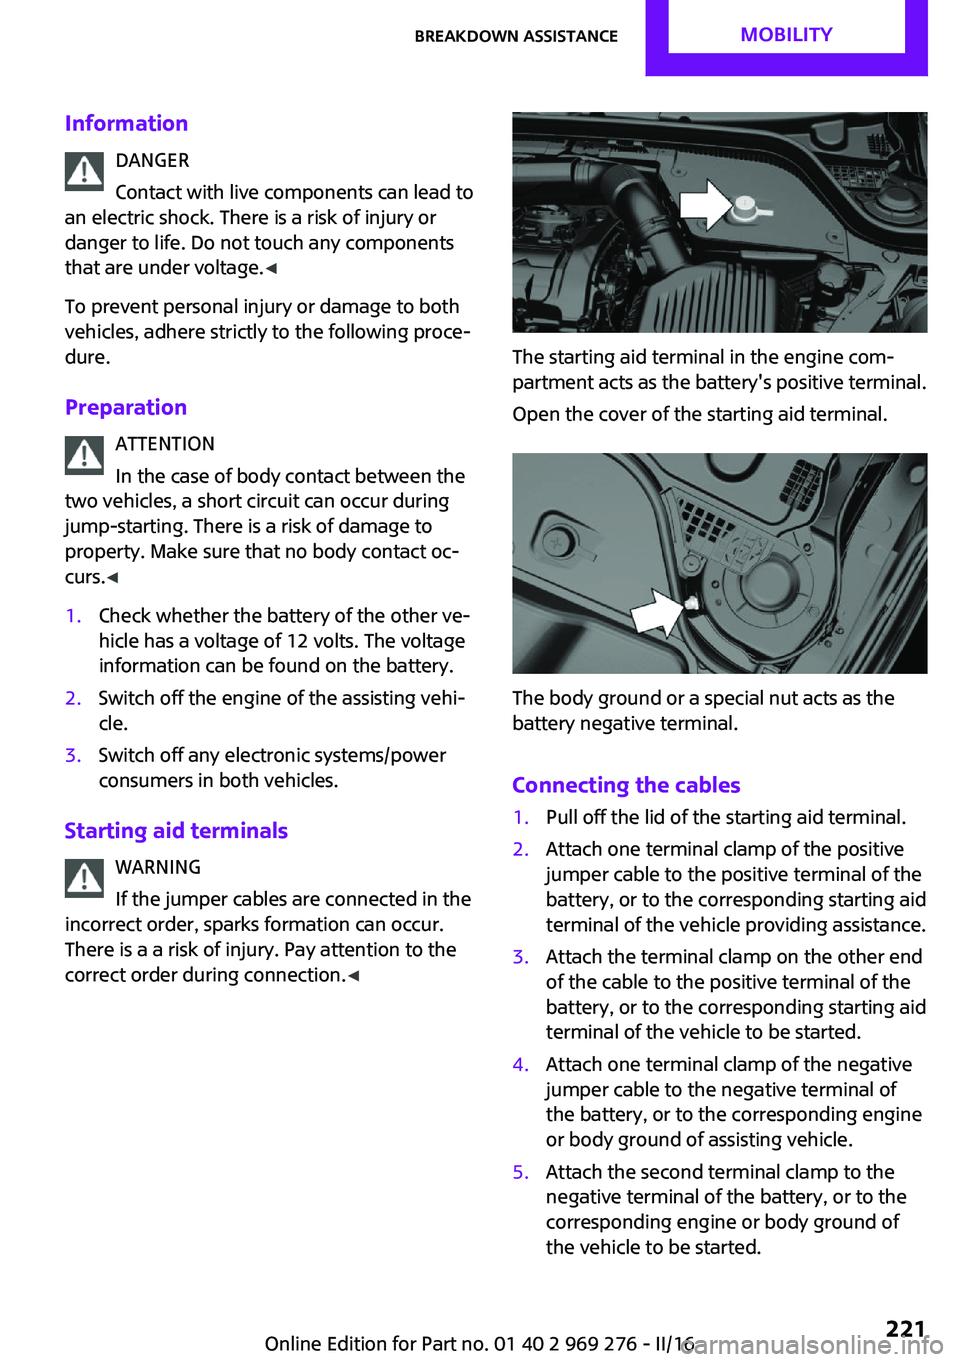
The starting aid terminal in the engine com‐
partment acts as the battery's positive terminal.
Open the cover of the starting aid terminal.
The body ground or a special nut acts as the
battery negative terminal.
Connecting the cables
1.Pull off the lid of the starting aid terminal.2.Attach one terminal clamp of the positive
jumper cable to the positive terminal of the
battery, or to the corresponding starting aid
terminal of the vehicle providing assistance.3.Attach the terminal clamp on the other end
of the cable to the positive terminal of the
battery, or to the corresponding starting aid
terminal of the vehicle to be started.4.Attach one terminal clamp of the negative
jumper cable to the negative terminal of
the battery, or to the corresponding engine
or body ground of assisting vehicle.5.Attach the second terminal clamp to the
negative terminal of the battery, or to the
corresponding engine or body ground of
the vehicle to be started.Seite 221Breakdown assistanceMOBILITY221
Online Edition for Part no. 01 40 2 969 276 - II/16
Page 222 of 252
Starting the engineNever use spray fluids to start the engine.1.Start the engine of the assisting vehicle and
let it run for several minutes at an increased
idle speed.2.Start the engine of the vehicle that is to be
started in the usual way.
If the first starting attempt is not successful,
wait a few minutes before making another
attempt in order to allow the discharged
battery to recharge.3.Let both engines run for several minutes.4.Disconnect the jumper cables in the reverse
order.
Check the battery and recharge if needed.
Tow-starting and towing
Information WARNING
Due to system limits, individual functions
can malfunction during tow-starting/towing
with the Intelligent Safety systems activated,
e.g., approach control warning with light brak‐
ing function. There is risk of an accident. Switch
all Intelligent Safety systems off prior to tow-
starting/towing. ◀
Switching off Intelligent Safety systems, refer to
page 115.
Steptronic transmission with driven
front axle: transporting the vehicle
Information The vehicle must not be towed if the front
wheels are touching the ground.
CAUTION
The vehicle can be damaged when tow‐
ing the vehicle with a lifted rear axle. There is
arisk of property damage. Have vehicle trans‐
ported only with lifted front axle or on a load‐
ing platform. ◀
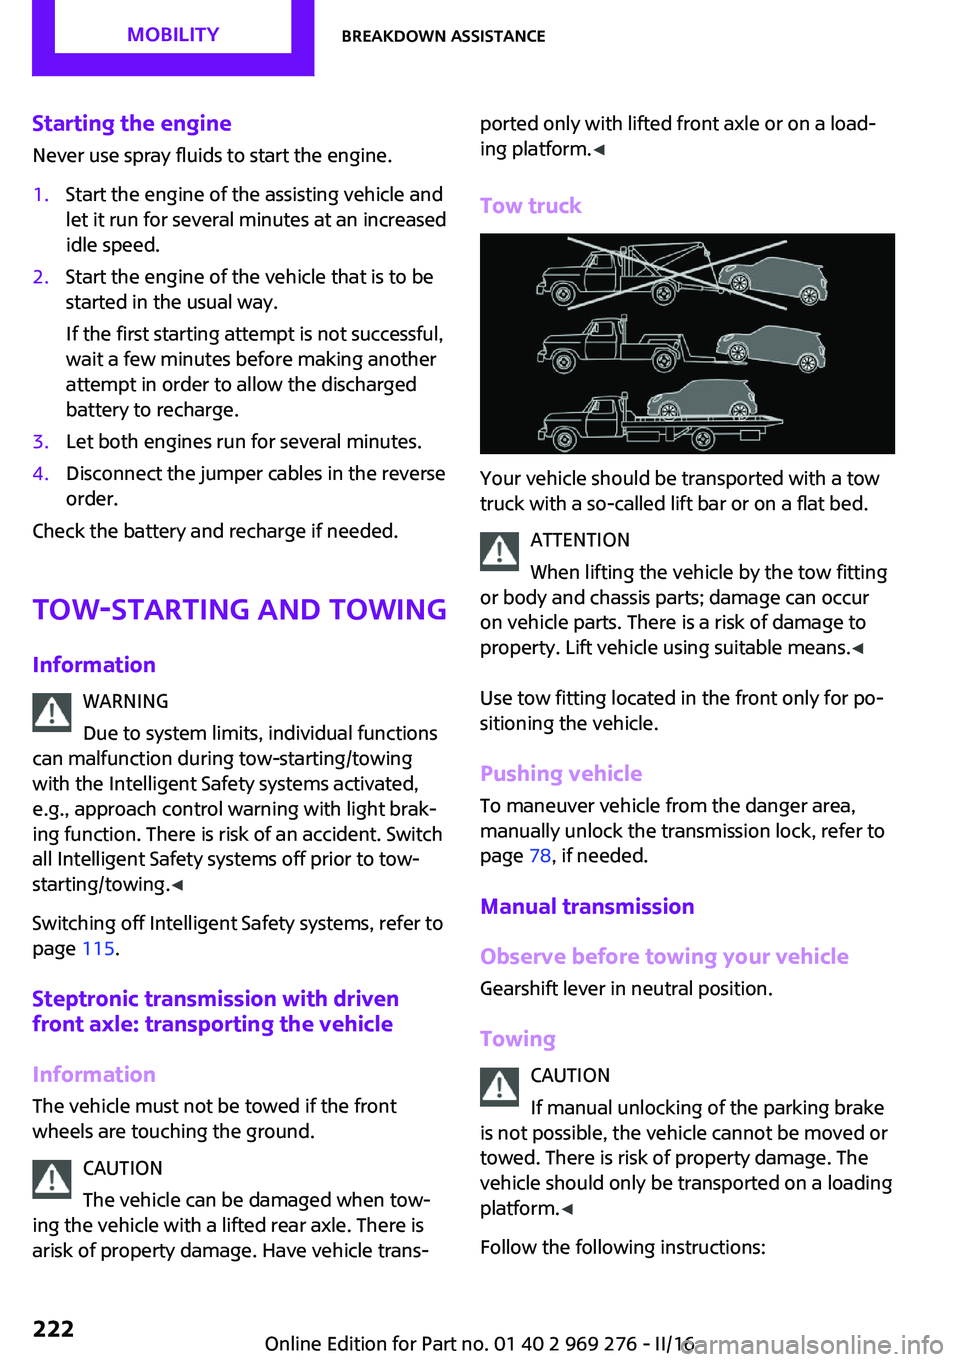
Tow truck
Your vehicle should be transported with a tow
truck with a so-called lift bar or on a flat bed.
ATTENTION
When lifting the vehicle by the tow fitting
or body and chassis parts; damage can occur
on vehicle parts. There is a risk of damage to
property. Lift vehicle using suitable means. ◀
Use tow fitting located in the front only for po‐
sitioning the vehicle.
Pushing vehicle
To maneuver vehicle from the danger area,
manually unlock the transmission lock, refer to
page 78, if needed.
Manual transmission
Observe before towing your vehicle
Gearshift lever in neutral position.
Towing CAUTION
If manual unlocking of the parking brake
is not possible, the vehicle cannot be moved or
towed. There is risk of property damage. The
vehicle should only be transported on a loading
platform. ◀
Follow the following instructions:
Seite 222MOBILITYBreakdown assistance222
Online Edition for Part no. 01 40 2 969 276 - II/16
Page 227 of 252
Before driving into a car washIn order to ensure that the vehicle can roll in a
car wash, take the following steps:
Manual transmission:1.Drive into the car wash.2.Shift to neutral.3.Switch the engine off.4.Switch on the ignition.
Steptronic transmission:
1.Drive into the car wash.2.Engage selector lever position N.3.Make sure that the parking brake is re‐
leased.4.Press the Start/Stop button to switch off the
engine.
In this way, the ignition remains switched
on, and two Check-Control messages are
displayed.
A signal sounds when you leave the vehicle
while in selector lever position N.
The vehicle cannot be locked from the outside
when in selector lever position N. A signal is
sounded when an attempt is made to lock the
vehicle.
To start the engine with manual transmission:
1.Press on the clutch pedal.2.Press the Start/Stop button.
To start the engine with Steptronic transmis‐
sion:
1.Depress the brake pedal.2.Press the Start/Stop button.
Headlights
▷Do not rub dry and do not use abrasive or
acidic cleansers.▷Soak areas that have been dirtied e. g.,
from insects, with shampoo and wash off
with water.▷Thaw ice with de-icing spray; do not use an
ice scraper.
After washing the vehicle
After washing the vehicle, apply the brakes
briefly to dry them; otherwise, braking action
can be reduced and corrosion of the brake
discs can occur.
Completely remove all residues on the win‐
dows, to minimize loss of visibility due to
smearing and to reduce wiper noises and wiper
blade wear.
Vehicle care Vehicle care products
The manufacturer of your vehicle recommends
using care and cleaning products from MINI.
WARNING
Cleansers can contain substances that are
dangerous and harmful to your health. There is
a risk of injury. When cleaning the interior,
open the doors or windows. Only use products
intended for cleaning vehicles. Follow the in‐
structions on the container. ◀
Vehicle paint Regular care contributes to driving safety and
value retention. Environmental influences in
areas with elevated air pollution or natural con‐
taminants, such as tree resin or pollen can af‐
fect the vehicle's paintwork. Tailor the fre‐
quency and extent of your vehicle care to these
influences.
Aggressive substances such as spilled fuel, oil,
grease or bird droppings, must be removed im‐
mediately to prevent the finish from being al‐
tered or discolored.
Caring for the convertible top
The appearance and life of the convertible top
depend on correct care and operation.
Seite 227CareMOBILITY227
Online Edition for Part no. 01 40 2 969 276 - II/16
Page 243 of 252
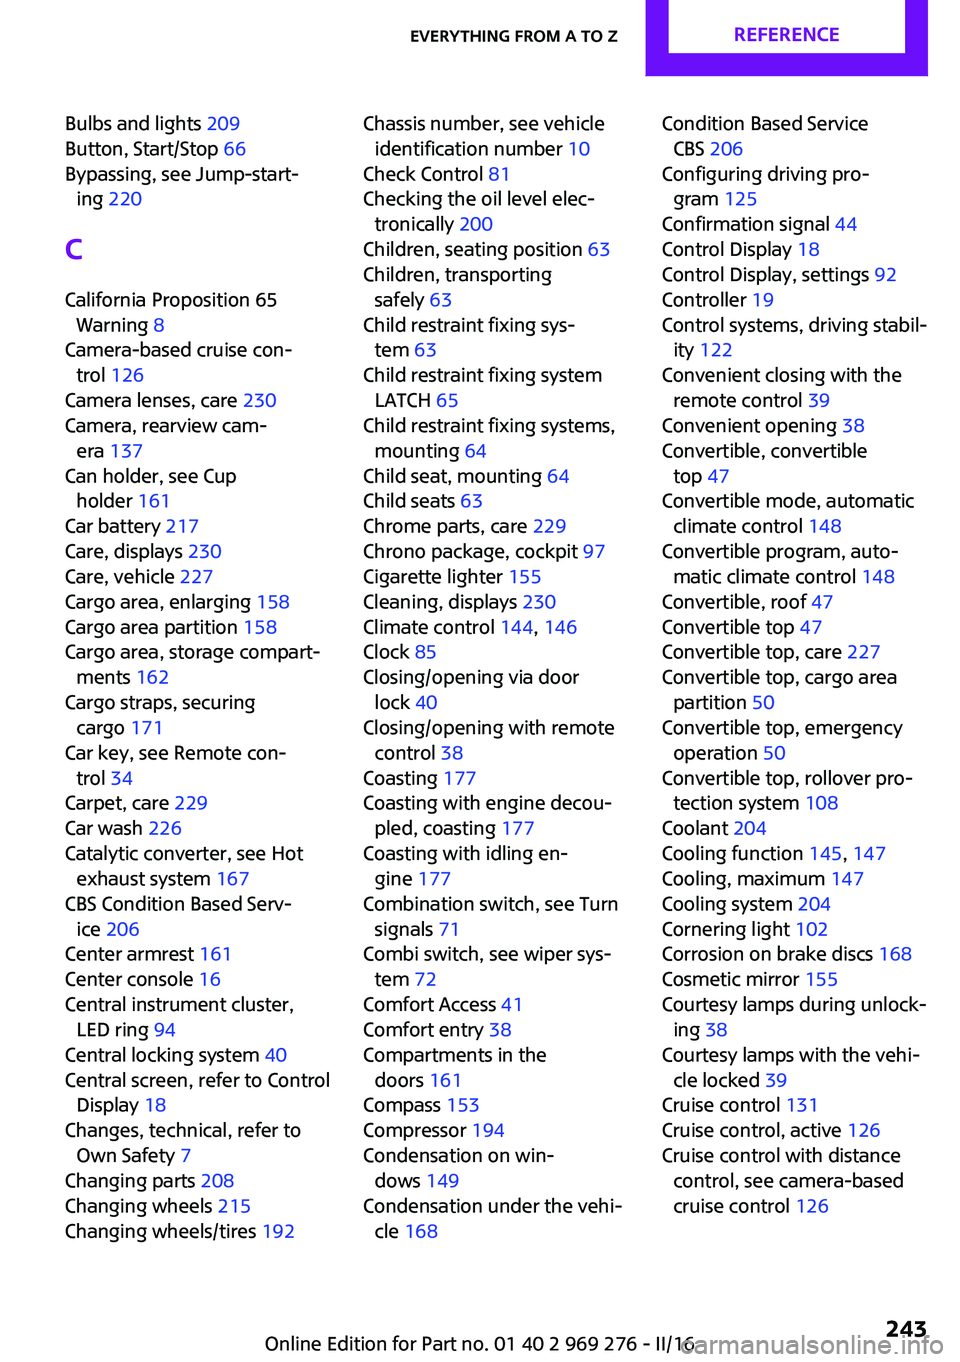
Bulbs and lights 209
Button, Start/Stop 66
Bypassing, see Jump-start‐ ing 220
C California Proposition 65 Warning 8
Camera-based cruise con‐ trol 126
Camera lenses, care 230
Camera, rearview cam‐ era 137
Can holder, see Cup holder 161
Car battery 217
Care, displays 230
Care, vehicle 227
Cargo area, enlarging 158
Cargo area partition 158
Cargo area, storage compart‐ ments 162
Cargo straps, securing cargo 171
Car key, see Remote con‐ trol 34
Carpet, care 229
Car wash 226
Catalytic converter, see Hot exhaust system 167
CBS Condition Based Serv‐ ice 206
Center armrest 161
Center console 16
Central instrument cluster, LED ring 94
Central locking system 40
Central screen, refer to Control Display 18
Changes, technical, refer to Own Safety 7
Changing parts 208
Changing wheels 215
Changing wheels/tires 192 Chassis number, see vehicle
identification number 10
Check Control 81
Checking the oil level elec‐ tronically 200
Children, seating position 63
Children, transporting safely 63
Child restraint fixing sys‐ tem 63
Child restraint fixing system LATCH 65
Child restraint fixing systems, mounting 64
Child seat, mounting 64
Child seats 63
Chrome parts, care 229
Chrono package, cockpit 97
Cigarette lighter 155
Cleaning, displays 230
Climate control 144, 146
Clock 85
Closing/opening via door lock 40
Closing/opening with remote control 38
Coasting 177
Coasting with engine decou‐ pled, coasting 177
Coasting with idling en‐ gine 177
Combination switch, see Turn signals 71
Combi switch, see wiper sys‐ tem 72
Comfort Access 41
Comfort entry 38
Compartments in the doors 161
Compass 153
Compressor 194
Condensation on win‐ dows 149
Condensation under the vehi‐ cle 168 Condition Based Service
CBS 206
Configuring driving pro‐ gram 125
Confirmation signal 44
Control Display 18
Control Display, settings 92
Controller 19
Control systems, driving stabil‐ ity 122
Convenient closing with the remote control 39
Convenient opening 38
Convertible, convertible top 47
Convertible mode, automatic climate control 148
Convertible program, auto‐ matic climate control 148
Convertible, roof 47
Convertible top 47
Convertible top, care 227
Convertible top, cargo area partition 50
Convertible top, emergency operation 50
Convertible top, rollover pro‐ tection system 108
Coolant 204
Cooling function 145, 147
Cooling, maximum 147
Cooling system 204
Cornering light 102
Corrosion on brake discs 168
Cosmetic mirror 155
Courtesy lamps during unlock‐ ing 38
Courtesy lamps with the vehi‐ cle locked 39
Cruise control 131
Cruise control, active 126
Cruise control with distance control, see camera-based
cruise control 126 Seite 243Everything from A to ZREFERENCE243
Online Edition for Part no. 01 40 2 969 276 - II/16
Page 244 of 252
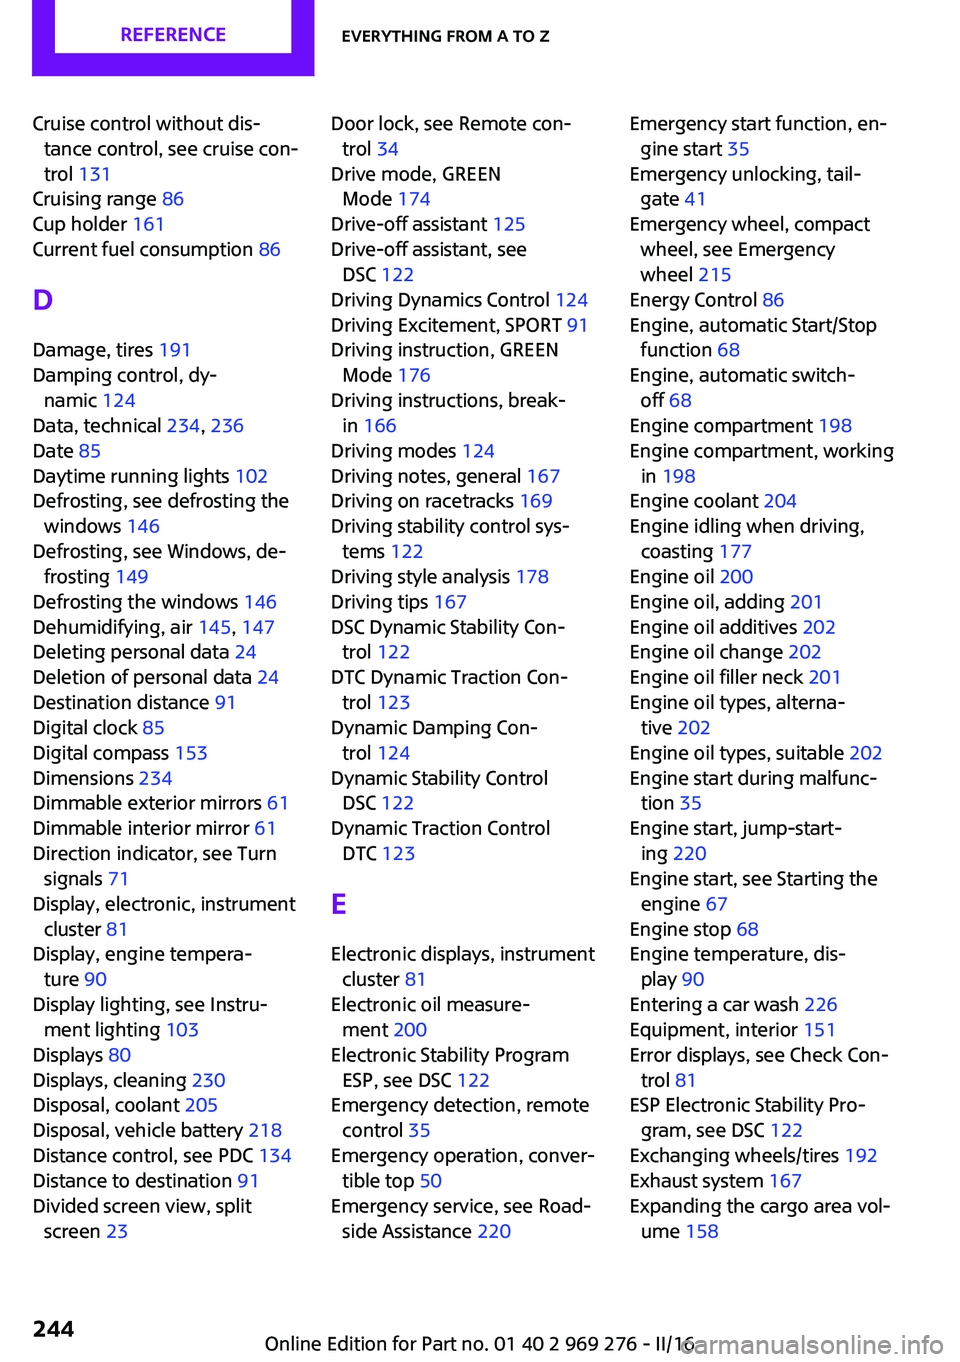
Cruise control without dis‐tance control, see cruise con‐
trol 131
Cruising range 86
Cup holder 161
Current fuel consumption 86
D
Damage, tires 191
Damping control, dy‐ namic 124
Data, technical 234, 236
Date 85
Daytime running lights 102
Defrosting, see defrosting the windows 146
Defrosting, see Windows, de‐ frosting 149
Defrosting the windows 146
Dehumidifying, air 145, 147
Deleting personal data 24
Deletion of personal data 24
Destination distance 91
Digital clock 85
Digital compass 153
Dimensions 234
Dimmable exterior mirrors 61
Dimmable interior mirror 61
Direction indicator, see Turn signals 71
Display, electronic, instrument cluster 81
Display, engine tempera‐ ture 90
Display lighting, see Instru‐ ment lighting 103
Displays 80
Displays, cleaning 230
Disposal, coolant 205
Disposal, vehicle battery 218
Distance control, see PDC 134
Distance to destination 91
Divided screen view, split screen 23 Door lock, see Remote con‐
trol 34
Drive mode, GREEN Mode 174
Drive-off assistant 125
Drive-off assistant, see DSC 122
Driving Dynamics Control 124
Driving Excitement, SPORT 91
Driving instruction, GREEN Mode 176
Driving instructions, break- in 166
Driving modes 124
Driving notes, general 167
Driving on racetracks 169
Driving stability control sys‐ tems 122
Driving style analysis 178
Driving tips 167
DSC Dynamic Stability Con‐ trol 122
DTC Dynamic Traction Con‐ trol 123
Dynamic Damping Con‐ trol 124
Dynamic Stability Control DSC 122
Dynamic Traction Control DTC 123
E Electronic displays, instrument cluster 81
Electronic oil measure‐ ment 200
Electronic Stability Program ESP, see DSC 122
Emergency detection, remote control 35
Emergency operation, conver‐ tible top 50
Emergency service, see Road‐ side Assistance 220 Emergency start function, en‐
gine start 35
Emergency unlocking, tail‐ gate 41
Emergency wheel, compact wheel, see Emergency
wheel 215
Energy Control 86
Engine, automatic Start/Stop function 68
Engine, automatic switch- off 68
Engine compartment 198
Engine compartment, working in 198
Engine coolant 204
Engine idling when driving, coasting 177
Engine oil 200
Engine oil, adding 201
Engine oil additives 202
Engine oil change 202
Engine oil filler neck 201
Engine oil types, alterna‐ tive 202
Engine oil types, suitable 202
Engine start during malfunc‐ tion 35
Engine start, jump-start‐ ing 220
Engine start, see Starting the engine 67
Engine stop 68
Engine temperature, dis‐ play 90
Entering a car wash 226
Equipment, interior 151
Error displays, see Check Con‐ trol 81
ESP Electronic Stability Pro‐ gram, see DSC 122
Exchanging wheels/tires 192
Exhaust system 167
Expanding the cargo area vol‐ ume 158 Seite 244REFERENCEEverything from A to Z244
Online Edition for Part no. 01 40 2 969 276 - II/16
Page 245 of 252
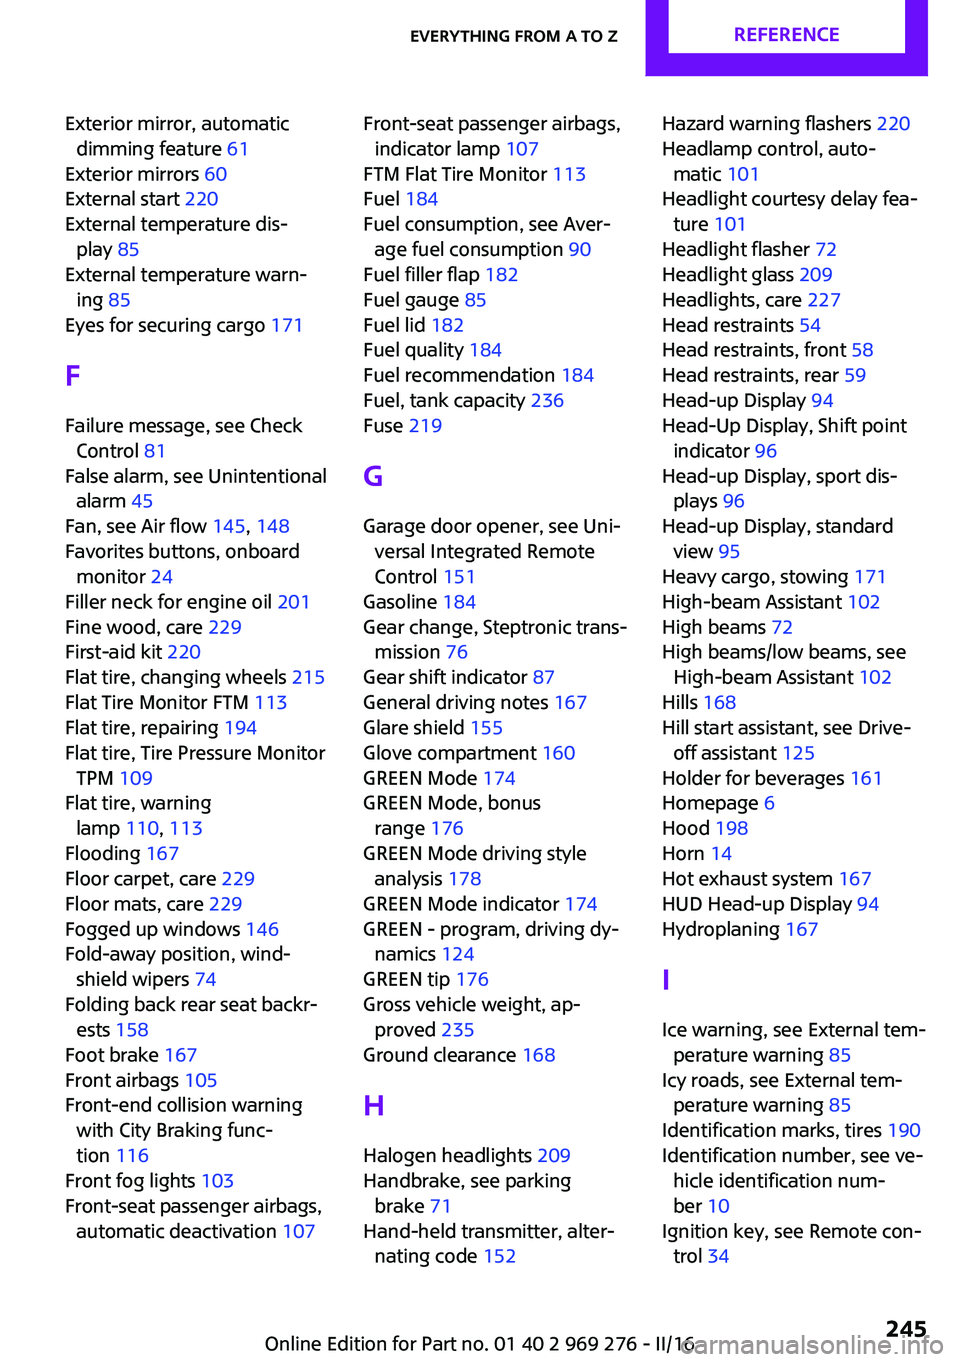
Exterior mirror, automaticdimming feature 61
Exterior mirrors 60
External start 220
External temperature dis‐ play 85
External temperature warn‐ ing 85
Eyes for securing cargo 171
F
Failure message, see Check Control 81
False alarm, see Unintentional alarm 45
Fan, see Air flow 145, 148
Favorites buttons, onboard monitor 24
Filler neck for engine oil 201
Fine wood, care 229
First-aid kit 220
Flat tire, changing wheels 215
Flat Tire Monitor FTM 113
Flat tire, repairing 194
Flat tire, Tire Pressure Monitor TPM 109
Flat tire, warning lamp 110, 113
Flooding 167
Floor carpet, care 229
Floor mats, care 229
Fogged up windows 146
Fold-away position, wind‐ shield wipers 74
Folding back rear seat backr‐ ests 158
Foot brake 167
Front airbags 105
Front-end collision warning with City Braking func‐
tion 116
Front fog lights 103
Front-seat passenger airbags, automatic deactivation 107 Front-seat passenger airbags,
indicator lamp 107
FTM Flat Tire Monitor 113
Fuel 184
Fuel consumption, see Aver‐ age fuel consumption 90
Fuel filler flap 182
Fuel gauge 85
Fuel lid 182
Fuel quality 184
Fuel recommendation 184
Fuel, tank capacity 236
Fuse 219
G Garage door opener, see Uni‐ versal Integrated Remote
Control 151
Gasoline 184
Gear change, Steptronic trans‐ mission 76
Gear shift indicator 87
General driving notes 167
Glare shield 155
Glove compartment 160
GREEN Mode 174
GREEN Mode, bonus range 176
GREEN Mode driving style analysis 178
GREEN Mode indicator 174
GREEN - program, driving dy‐ namics 124
GREEN tip 176
Gross vehicle weight, ap‐ proved 235
Ground clearance 168
H Halogen headlights 209
Handbrake, see parking brake 71
Hand-held transmitter, alter‐ nating code 152 Hazard warning flashers 220
Headlamp control, auto‐ matic 101
Headlight courtesy delay fea‐ ture 101
Headlight flasher 72
Headlight glass 209
Headlights, care 227
Head restraints 54
Head restraints, front 58
Head restraints, rear 59
Head-up Display 94
Head-Up Display, Shift point indicator 96
Head-up Display, sport dis‐ plays 96
Head-up Display, standard view 95
Heavy cargo, stowing 171
High-beam Assistant 102
High beams 72
High beams/low beams, see High-beam Assistant 102
Hills 168
Hill start assistant, see Drive- off assistant 125
Holder for beverages 161
Homepage 6
Hood 198
Horn 14
Hot exhaust system 167
HUD Head-up Display 94
Hydroplaning 167
I
Ice warning, see External tem‐ perature warning 85
Icy roads, see External tem‐ perature warning 85
Identification marks, tires 190
Identification number, see ve‐ hicle identification num‐
ber 10
Ignition key, see Remote con‐ trol 34 Seite 245Everything from A to ZREFERENCE245
Online Edition for Part no. 01 40 2 969 276 - II/16