rear view mirror MINI COOPER CONVERTIBLE 2016 Owners Manual
[x] Cancel search | Manufacturer: MINI, Model Year: 2016, Model line: COOPER CONVERTIBLE, Model: MINI COOPER CONVERTIBLE 2016Pages: 252, PDF Size: 5.41 MB
Page 44 of 252
The vehicle locks automatically after a
short period of time if no door is
opened after unlocking.▷"Lock after start driving"
The vehicle locks automatically after
you drive off.
Confirmation signals from the vehicle
1. "Settings"2."Doors/key"3.Select desired setting.▷With alarm system:
"Acoustic sig. lock/unlock"
Unlocking is signaled by one honk of
the horn.▷"Flash when lock/unlock"
Unlocking is signaled by two flashes,
locking by one.
Alarm system
The concept
When the vehicle is locked, the vehicle alarm
system responds to:
▷Opening a door, the hood or the trunk lid.▷Movements in the vehicle interior.▷Changes in the vehicle tilt, e. g., during at‐
tempts at stealing a wheel or when towing
the car.▷Disconnected battery voltage.
The alarm system briefly signals tampering:
▷Acoustic alarm.▷By switching on the hazard warning system.▷By flashing the daytime running lights.
Switching on and off
When you lock or unlock the vehicle, either
with the remote control or with Comfort Access,
the alarm system is switched on and off at the same time.
Door lock with the alarm system
switched on
The alarm system is triggered when the door is
opened, when the vehicle is unlocked via the
door lock.
Switching off the alarm, refer to page 45.
Tailgate with the alarm system
switched on
The tailgate can be opened even when the
alarm system is switched on.
After the trunk lid is closed, it is locked and
monitored again when the doors are locked.
The hazard warning system flashes once.
Panic mode
You can trigger the alarm system if you find
yourself in a dangerous situation.
Press button on the remote control for
at least 3 seconds.
To switch off the alarm: press any button.
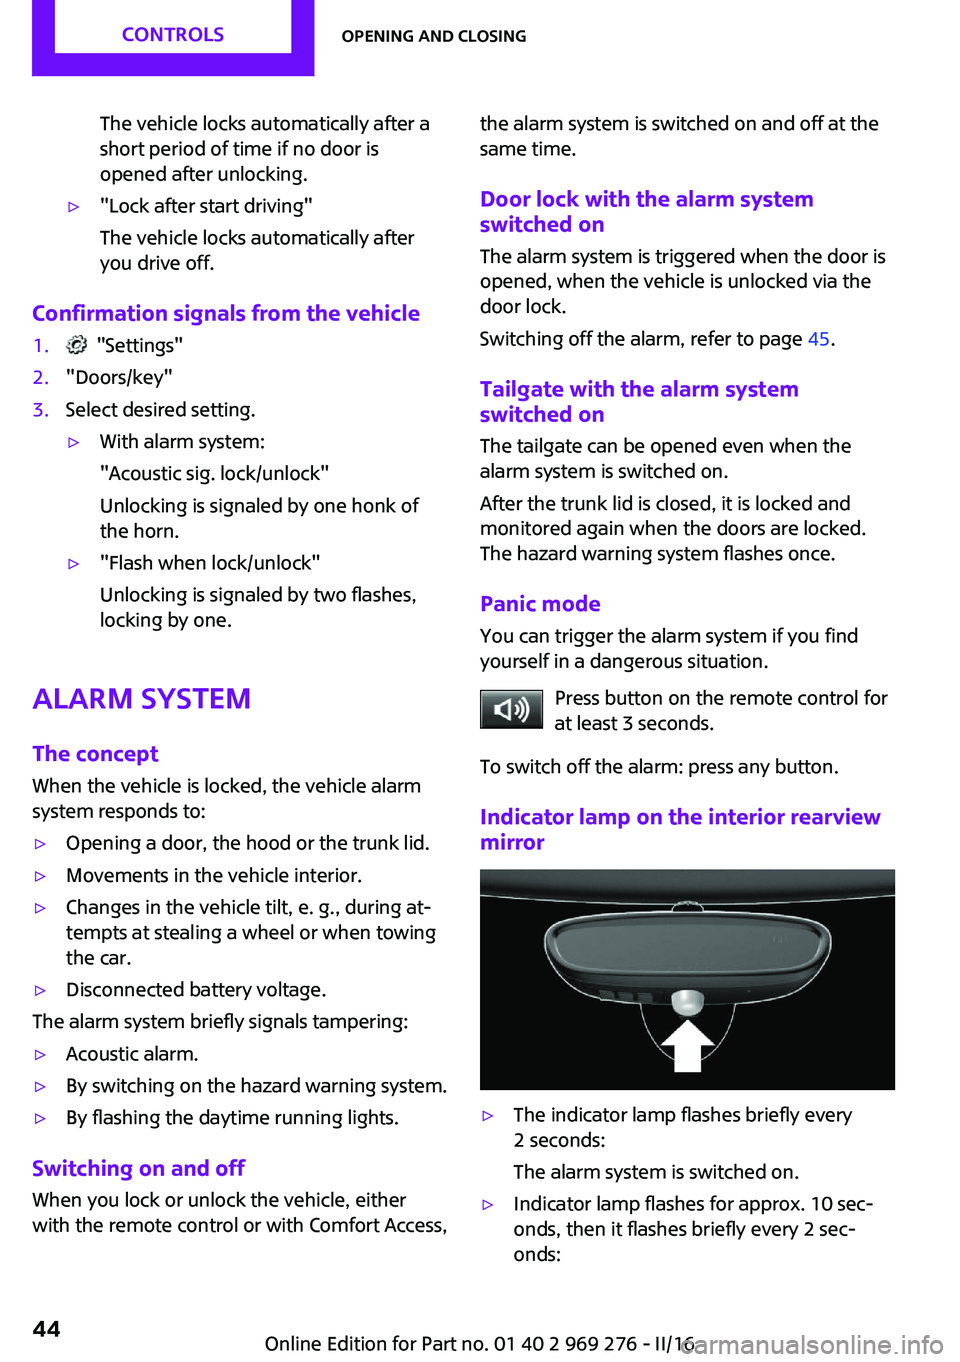
Indicator lamp on the interior rearview
mirror▷The indicator lamp flashes briefly every
2 seconds:
The alarm system is switched on.▷Indicator lamp flashes for approx. 10 sec‐
onds, then it flashes briefly every 2 sec‐
onds:Seite 44CONTROLSOpening and closing44
Online Edition for Part no. 01 40 2 969 276 - II/16
Page 61 of 252

Deactivating
Slide the switch to the passenger side mirror
position.
Fold in and out ATTENTION
Depending on the vehicle width, the ve‐
hicle can be damaged in vehicle washes. There
is a risk of damage to property. Before washing,
fold in the mirrors by hand or with the button. ◀
Press button.
Possible at speeds up to approx.
15 mph/20 km/h.
Folding the mirrors in and out is advantageous
in the following situations:▷In car washes.▷On narrow roads.▷For folding mirrors back out that were
folded away manually.
Mirrors that were folded in are folded out auto‐
matically at a speed of approx.
25 mph/40 km/h.
Automatic heating
Both exterior mirrors are automatically heated
whenever the engine is running.
Automatic dimming featureThe exterior mirror on the driver's side is auto‐
matically dimmed. Photocells are used to con‐
trol the Interior mirror, refer to page 61.
Interior mirror, manually dimmable
Flip lever
To reduce the blinding effect of the interior rear
view mirror, flip the lever forward.
Turn knob
Turn the knob to reduce the blinding effect by
the interior mirror.
Interior mirror, automatic dimming
feature
Overview
Photocells are used for control:
Seite 61AdjustingCONTROLS61
Online Edition for Part no. 01 40 2 969 276 - II/16
Page 62 of 252
▷In the mirror glass.▷On the back of the mirror.
Functional requirements
▷Keep the photocells clean.▷Do not cover the area between the inside
rearview mirror and the windshield.
Steering wheel
Information WARNING
Steering wheel adjustments while driving
can lead to unexpected steering wheel move‐
ments. Vehicle control could be lost. There is
risk of an accident. Adjust the steering wheel
while the vehicle is stationary only. ◀
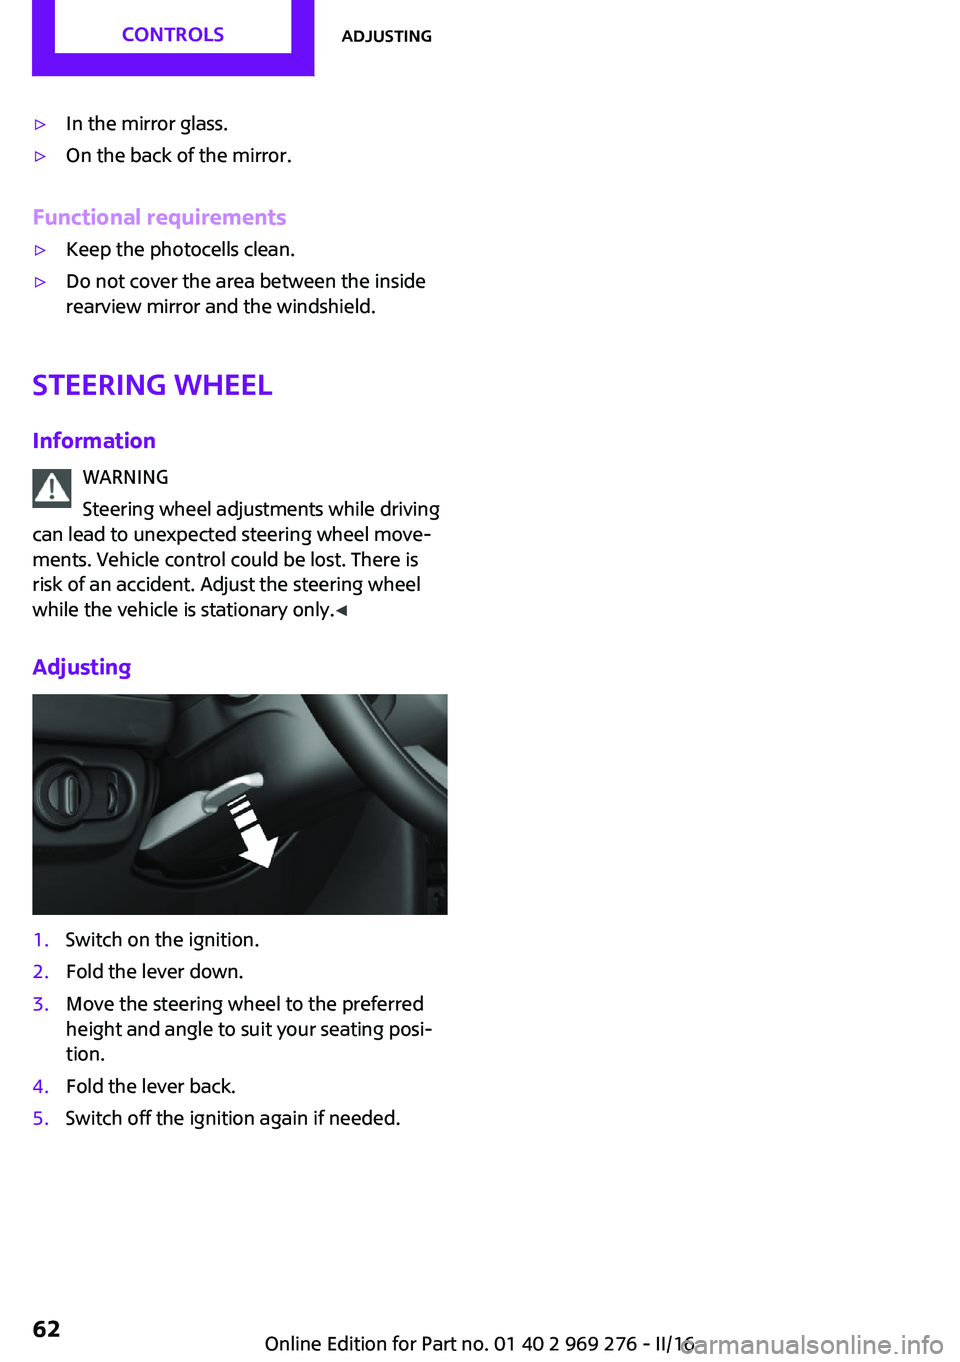
Adjusting
1.Switch on the ignition.2.Fold the lever down.3.Move the steering wheel to the preferred
height and angle to suit your seating posi‐
tion.4.Fold the lever back.5.Switch off the ignition again if needed.Seite 62CONTROLSAdjusting62
Online Edition for Part no. 01 40 2 969 276 - II/16
Page 117 of 252
Overview
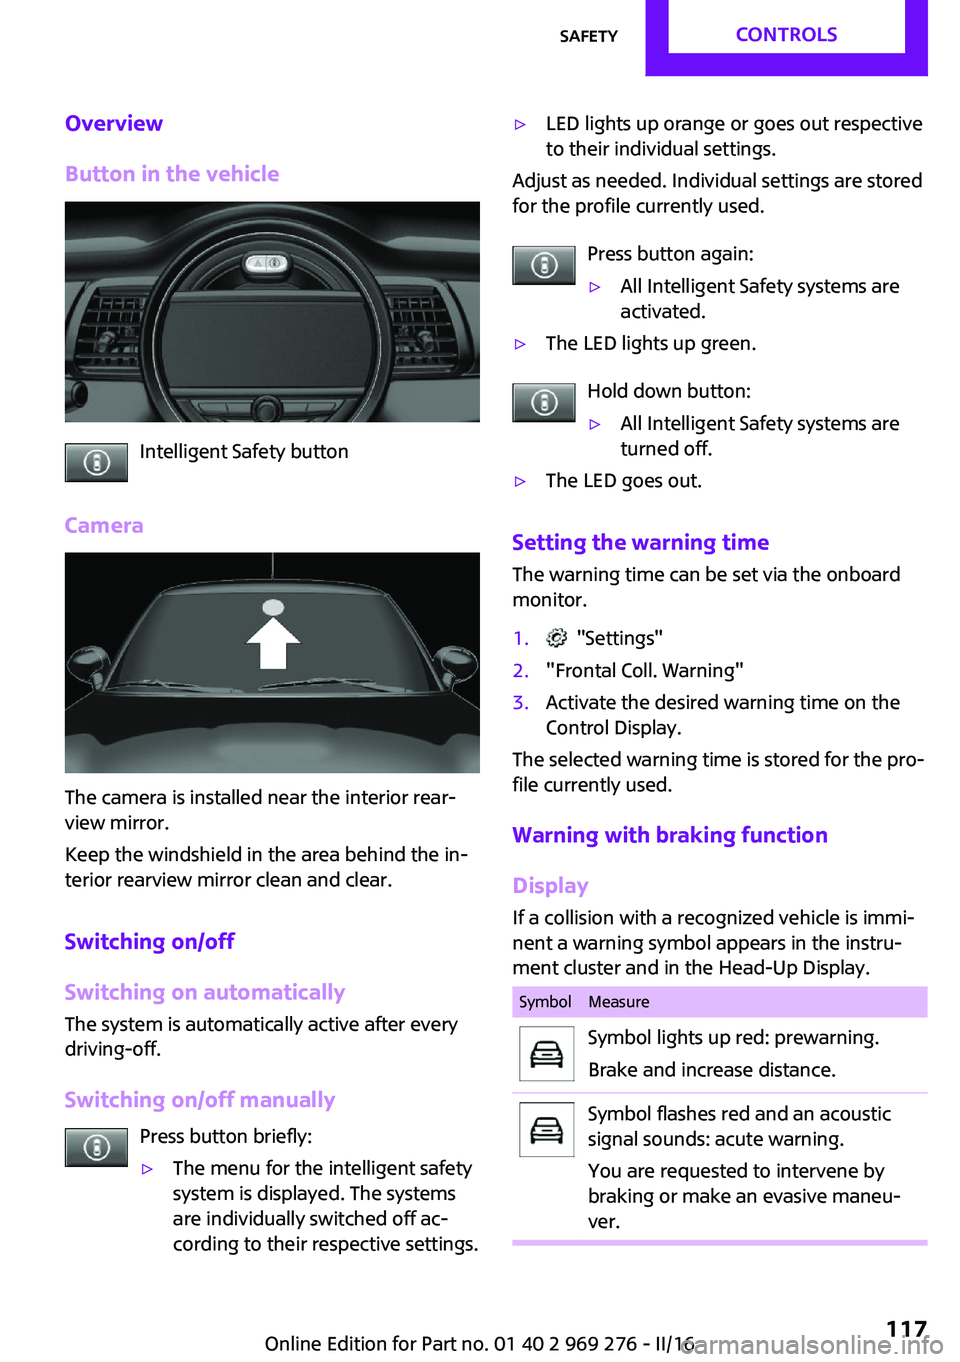
Button in the vehicle
Intelligent Safety button
Camera
The camera is installed near the interior rear‐
view mirror.
Keep the windshield in the area behind the in‐
terior rearview mirror clean and clear.
Switching on/off
Switching on automatically
The system is automatically active after every
driving-off.
Switching on/off manually Press button briefly:
▷The menu for the intelligent safety
system is displayed. The systems
are individually switched off ac‐
cording to their respective settings.▷LED lights up orange or goes out respective
to their individual settings.
Adjust as needed. Individual settings are stored
for the profile currently used.
Press button again:
▷All Intelligent Safety systems are
activated.▷The LED lights up green.
Hold down button:
▷All Intelligent Safety systems are
turned off.▷The LED goes out.
Setting the warning time
The warning time can be set via the onboard
monitor.
1. "Settings"2."Frontal Coll. Warning"3.Activate the desired warning time on the
Control Display.
The selected warning time is stored for the pro‐
file currently used.
Warning with braking function
Display
If a collision with a recognized vehicle is immi‐
nent a warning symbol appears in the instru‐
ment cluster and in the Head-Up Display.
SymbolMeasureSymbol lights up red: prewarning.
Brake and increase distance.Symbol flashes red and an acoustic
signal sounds: acute warning.
You are requested to intervene by
braking or make an evasive maneu‐
ver.Seite 117SafetyCONTROLS117
Online Edition for Part no. 01 40 2 969 276 - II/16
Page 120 of 252
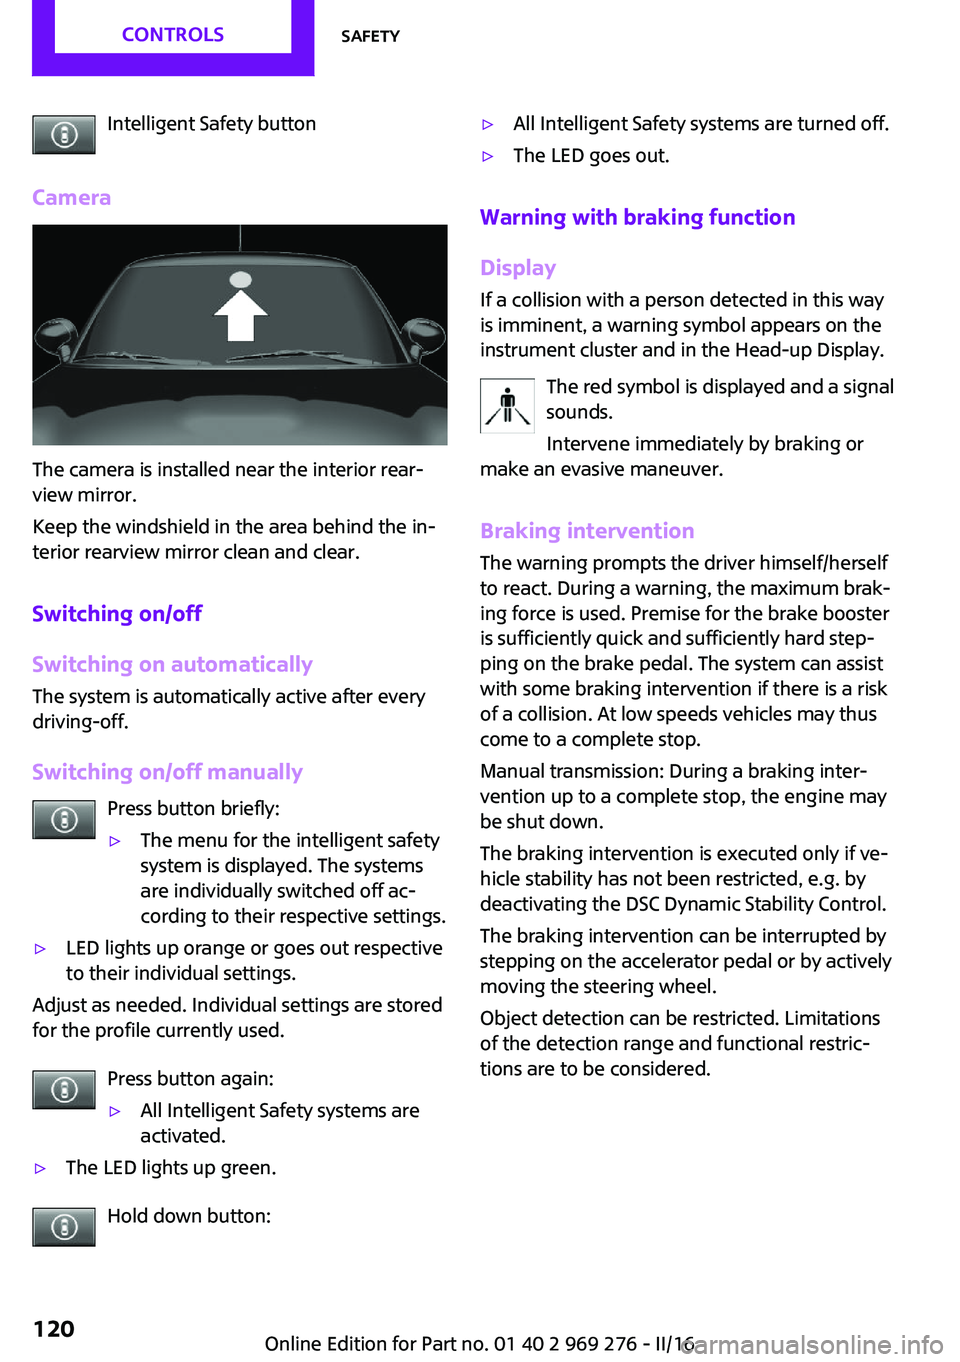
Intelligent Safety button
Camera
The camera is installed near the interior rear‐
view mirror.
Keep the windshield in the area behind the in‐
terior rearview mirror clean and clear.
Switching on/off
Switching on automatically
The system is automatically active after every
driving-off.
Switching on/off manually Press button briefly:
▷The menu for the intelligent safety
system is displayed. The systems
are individually switched off ac‐
cording to their respective settings.▷LED lights up orange or goes out respective
to their individual settings.
Adjust as needed. Individual settings are stored
for the profile currently used.
Press button again:
▷All Intelligent Safety systems are
activated.▷The LED lights up green.
Hold down button:
▷All Intelligent Safety systems are turned off.▷The LED goes out.
Warning with braking function
Display
If a collision with a person detected in this way
is imminent, a warning symbol appears on the
instrument cluster and in the Head-up Display.
The red symbol is displayed and a signal
sounds.
Intervene immediately by braking or
make an evasive maneuver.
Braking intervention
The warning prompts the driver himself/herself
to react. During a warning, the maximum brak‐ ing force is used. Premise for the brake booster
is sufficiently quick and sufficiently hard step‐
ping on the brake pedal. The system can assist
with some braking intervention if there is a risk
of a collision. At low speeds vehicles may thus
come to a complete stop.
Manual transmission: During a braking inter‐
vention up to a complete stop, the engine may
be shut down.
The braking intervention is executed only if ve‐
hicle stability has not been restricted, e.g. by
deactivating the DSC Dynamic Stability Control.
The braking intervention can be interrupted by
stepping on the accelerator pedal or by actively
moving the steering wheel.
Object detection can be restricted. Limitations
of the detection range and functional restric‐
tions are to be considered.
Seite 120CONTROLSSafety120
Online Edition for Part no. 01 40 2 969 276 - II/16
Page 126 of 252
Driving comfortVehicle features and op‐
tions
This chapter describes all standard, country-
specific and optional features offered with the
series. It also describes features that are not
necessarily available in your car, e. g., due to
the selected options or country versions. This
also applies to safety-related functions and sys‐
tems. The respectively applicable country provi‐
sions must be observed when using the respec‐
tive features and systems.
Camera-based cruise con‐
trol
The concept
Using this system, a desired speed and a dis‐
tance to a vehicle ahead can be adjusted using
the buttons on the steering wheel.
The system maintains the desired speed on
clear roads. For this purpose, the vehicles accel‐
erates or brakes automatically.
If a vehicle is driving ahead of you, the system
adjusts the speed of your vehicle within the
given system limits so that the set distance to
the vehicle ahead is maintained.
The distance can be adjusted in several steps.
For safety reasons, it depends on the repective
speed.
General information
A camera on the interior rear view mirror is
used to detect vehicles driving ahead.
The system is functional at speeds beginning at
approx. 20 mph/30 km/h.
Active cruise control is paused below approx.
20 mph/30 km/h.The system does not brake to a stop.
Depending on the driving settings, the features
of the cruise control can change in certain
areas.
Information WARNING
The system does not release from the
personal responsibility to correctly assess the
traffic situation. Based on the limits of the sys‐
tem, it cannot independently react to all traffic situations. There is risk of an accident. Adjust
the driving style to the traffic conditions. Watch
traffic closely and actively intervene in the re‐
spective situations. ◀
WARNING
The desired speed can be incorrectly ad‐
justed or called up by mistake. There is risk of
an accident. Adjust the desired speed to the
traffic conditions. Watch traffic closely and ac‐
tively intervene in the respective situations. ◀
WARNING
Risk of accident due to too high speed
differences to other vehicles, e.g., in the follow‐
ing situations:▷When fast approaching a slowly moving ve‐
hicle.▷Suddenly swerving vehicle onto the own
lane.▷When fast approaching standing vehicles.
There is a risk of injury or danger to life. Watch
traffic closely and actively intervene in the re‐
spective situations. ◀
Seite 126CONTROLSDriving comfort126
Online Edition for Part no. 01 40 2 969 276 - II/16
Page 127 of 252
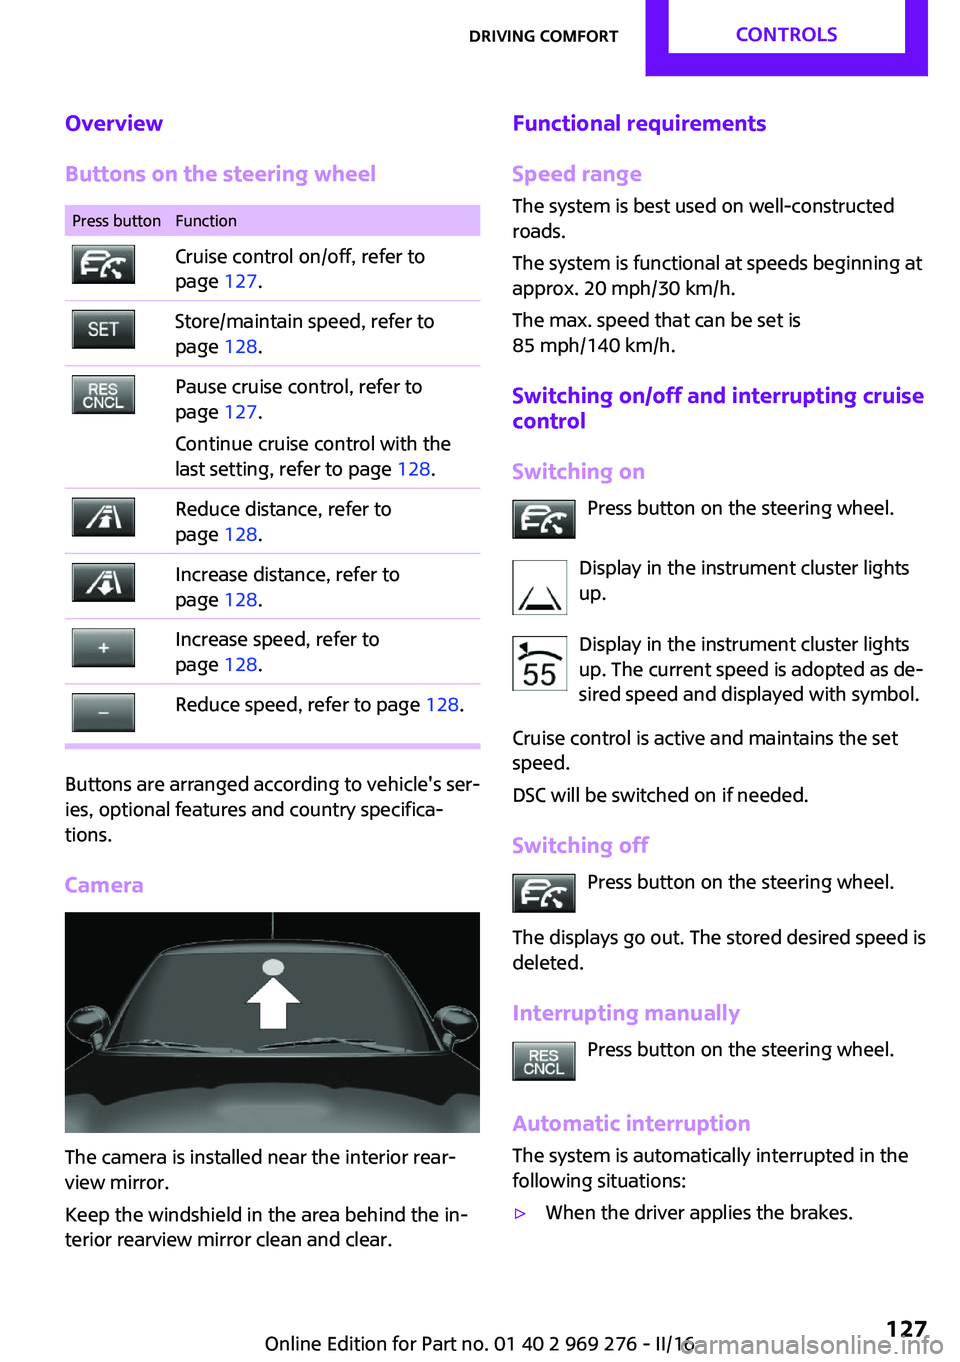
Overview
Buttons on the steering wheelPress buttonFunctionCruise control on/off, refer to
page 127.Store/maintain speed, refer to
page 128.Pause cruise control, refer to
page 127.
Continue cruise control with the
last setting, refer to page 128.Reduce distance, refer to
page 128.Increase distance, refer to
page 128.Increase speed, refer to
page 128.Reduce speed, refer to page 128.
Buttons are arranged according to vehicle's ser‐
ies, optional features and country specifica‐
tions.
Camera
The camera is installed near the interior rear‐
view mirror.
Keep the windshield in the area behind the in‐
terior rearview mirror clean and clear.
Functional requirements
Speed range The system is best used on well-constructed
roads.
The system is functional at speeds beginning at
approx. 20 mph/30 km/h.
The max. speed that can be set is
85 mph/140 km/h.
Switching on/off and interrupting cruise
control
Switching on Press button on the steering wheel.
Display in the instrument cluster lights
up.
Display in the instrument cluster lights
up. The current speed is adopted as de‐
sired speed and displayed with symbol.
Cruise control is active and maintains the set
speed.
DSC will be switched on if needed.
Switching off Press button on the steering wheel.
The displays go out. The stored desired speed is
deleted.
Interrupting manually Press button on the steering wheel.
Automatic interruption
The system is automatically interrupted in the
following situations:▷When the driver applies the brakes.Seite 127Driving comfortCONTROLS127
Online Edition for Part no. 01 40 2 969 276 - II/16
Page 151 of 252
Interior equipmentVehicle features and op‐
tions
This chapter describes all standard, country-
specific and optional features offered with the
series. It also describes features that are not
necessarily available in your car, e. g., due to
the selected options or country versions. This
also applies to safety-related functions and sys‐
tems. The respectively applicable country provi‐
sions must be observed when using the respec‐
tive features and systems.
Universal Integrated Re‐
mote Control
The concept
The Universal Integrated Remote Control can
operate up to 3 functions of remote-controlled
systems such as garage door drives or lighting
systems. The Universal Integrated Remote Con‐
trol replaces up to 3 different hand-held trans‐
mitters. To operate the remote control, the but‐
tons on the interior rearview mirror must be
programmed with the desired functions. The
hand-held transmitter for the particular system
is required in order to program the remote con‐
trol.
Before selling the vehicle, delete the stored
functions for the sake of security.
Information WARNING
Body parts can be jammed when operat‐
ing remote-controlled systems, e.g., the garage
door, using the integrated universal remote
control. There is a risk of injury or risk of prop‐
erty damage. Make sure that the area of move‐
ment of the respective system is clear duringprogramming and operation. Also follow the
safety instructions of the hand-held transmit‐
ter. ◀
Compatibility If this symbol is printed on the packag‐
ing or in the instructions of the system
to be controlled, the system is generally
compatible with the Universal Integrated Re‐
mote Control.
If you have any questions, please contact:▷A dealer’s service center or another quali‐
fied service center or repair shop.▷www.homelink.com on the Internet.
HomeLink is a registered trademark of Gentex
Corporation.
Overview
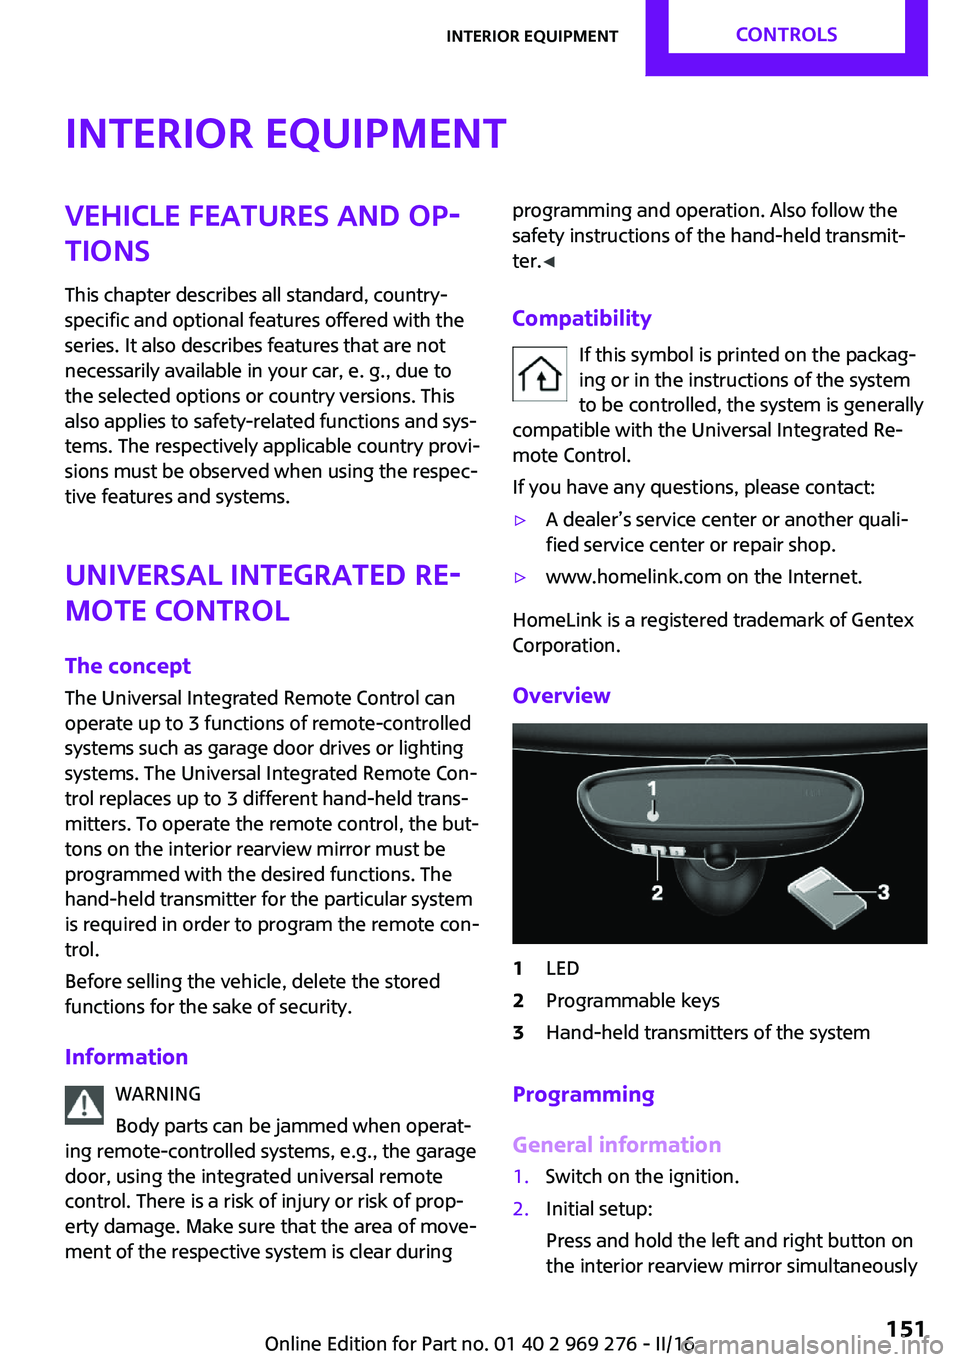
1LED2Programmable keys3Hand-held transmitters of the system
Programming
General information
1.Switch on the ignition.2.Initial setup:
Press and hold the left and right button on
the interior rearview mirror simultaneouslySeite 151Interior equipmentCONTROLS151
Online Edition for Part no. 01 40 2 969 276 - II/16
Page 152 of 252
for approximately 20 seconds until the LED
on the interior rearview mirror flashes. This
erases all programming of the buttons on
the interior rearview mirror.3.Hold the hand-held transmitter for the sys‐
tem to be controlled approx. 1 to 3 in‐
ches/2.5 to 8 cm away from the buttons of
the interior rearview mirror. The required
distance depends on the manual transmit‐
ter.4.Simultaneously press and hold the button
of the desired function on the hand-held
transmitter and the button to be program‐
med on the interior rearview mirror. The
LED on the interior rearview mirror will be‐
gin flashing slowly.5.Release both buttons as soon as the LED
flashes more rapidly. The LED flashing
faster indicates that the button on the inte‐
rior rearview mirror has been programmed.
If the LED does not flash faster after at least
60 seconds, change the distance between
the interior rearview mirror and the hand-
held transmitter and repeat the step. Sev‐
eral more attempts at different distances
may be necessary. Wait at least 15 seconds
between attempts.
Canada: if programming with the hand-
held transmitter was interrupted, hold
down the interior rearview mirror button
and repeatedly press and release the hand-
held transmitter button for 2 seconds.6.To program other functions on other but‐
tons, repeat steps 3 to 5.
The systems can be controlled using the interior
rearview mirror buttons.
Special feature of the alternating-code
wireless system
If you are unable to operate the system after
repeated programming, please check if the sys‐
tem to be controlled features an alternating-
code radio system.
Read the system's operating manual, or press
the programmed button on the interior rear‐
view mirror longer. If the LED on the interior
mirror starts flashing rapidly and then stays lit
constantly for 2 seconds, the system features
an alternating-code radio system. Flashing and
continuous illumination of the LED will repeat
for approximately 20 seconds.
For systems with an alternating-code radio sys‐
tem, the universal remote control and the sys‐
tem also have to be synchronized.
Please read the operating manual to find out
how to synchronize the system.
Synchronizing is easier with the aid of a second
person.
Synchronizing the universal remote control
with the system:1.Park the vehicle within range of the re‐
mote-controlled system.2.Program the relevant button on the interior
rearview mirror as described.3.Locate and press the synchronizing button
on the system being programmed. You
have approx. 30 seconds for the next step.4.Hold down the programmed button on the
interior rearview mirror for approximately
3 seconds and then release it. If necessary,
repeat this step up to three times in order
to finish synchronization. Once synchroni‐
zation is complete, the programmed func‐
tion will be carried out.
Reprogramming individual buttons
1.Switch on the ignition.2.Press and hold the interior rearview mirror
button to be programmed.3.As soon as the interior rearview mirror LED
starts flashing slowly, hold the hand-held
transmitter for the system to be controlled
approx. 1 to 3 inches/2.5 to 8 cm away
from the buttons of the interior rearview
mirror. The required distance depends on
the manual transmitter.Seite 152CONTROLSInterior equipment152
Online Edition for Part no. 01 40 2 969 276 - II/16
Page 153 of 252
4.Likewise, press and hold the button of the
desired function on the hand-held trans‐
mitter.5.Release both buttons as soon as the interior
rearview mirror LED flashes more rapidly.
The LED flashing faster indicates that the
button on the interior rearview mirror has
been programmed. The system can then be
controlled by the button on the interior
rearview mirror.
If the LED does not flash faster after at least
60 seconds, change the distance and re‐
peat the step. Several more attempts at dif‐
ferent distances may be necessary. Wait at
least 15 seconds between attempts.
Canada: if programming with the hand-
held transmitter was interrupted, hold
down the interior rearview mirror button
and repeatedly press and release the hand-
held transmitter button for 2 seconds.
Controls
WARNING
Body parts can be jammed when operat‐
ing remote-controlled systems, e.g., the garage
door, using the integrated universal remote
control. There is a risk of injury or risk of prop‐
erty damage. Make sure that the area of move‐
ment of the respective system is clear during
programming and operation. Also follow the
safety instructions of the hand-held transmit‐
ter. ◀
The system, such as the garage door, can be
operated using the button on the interior rear‐
view mirror while the engine is running or
when the ignition is started. To do this, hold
down the button within receiving range of the
system until the function is activated. The inte‐
rior rearview mirror LED stays lit while the wire‐
less signal is being transmitted.
Deleting stored functions
Press and hold the left and right button on the
interior rearview mirror simultaneously for ap‐
proximately 20 seconds until the LED flashes
rapidly. All stored functions will be deleted. The
functions cannot be deleted individually.
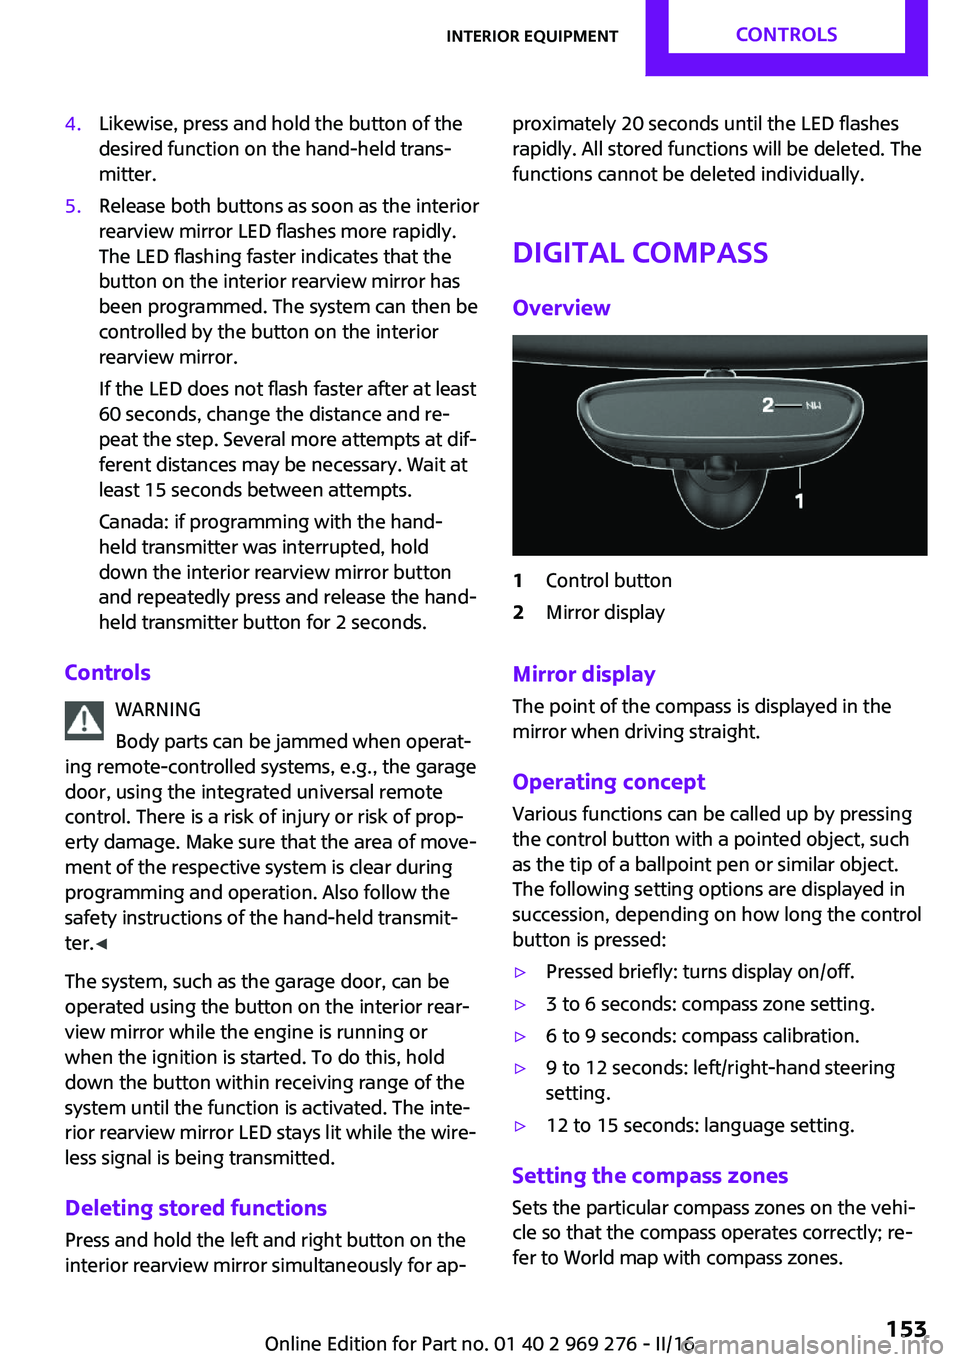
Digital compass
Overview1Control button2Mirror display
Mirror display The point of the compass is displayed in the
mirror when driving straight.
Operating concept Various functions can be called up by pressing
the control button with a pointed object, such
as the tip of a ballpoint pen or similar object.
The following setting options are displayed in
succession, depending on how long the control
button is pressed:
▷Pressed briefly: turns display on/off.▷3 to 6 seconds: compass zone setting.▷6 to 9 seconds: compass calibration.▷9 to 12 seconds: left/right-hand steering
setting.▷12 to 15 seconds: language setting.
Setting the compass zones
Sets the particular compass zones on the vehi‐
cle so that the compass operates correctly; re‐
fer to World map with compass zones.
Seite 153Interior equipmentCONTROLS153
Online Edition for Part no. 01 40 2 969 276 - II/16