Controls overviewCONTROLS
65
Altering settings
Language on the Control Display
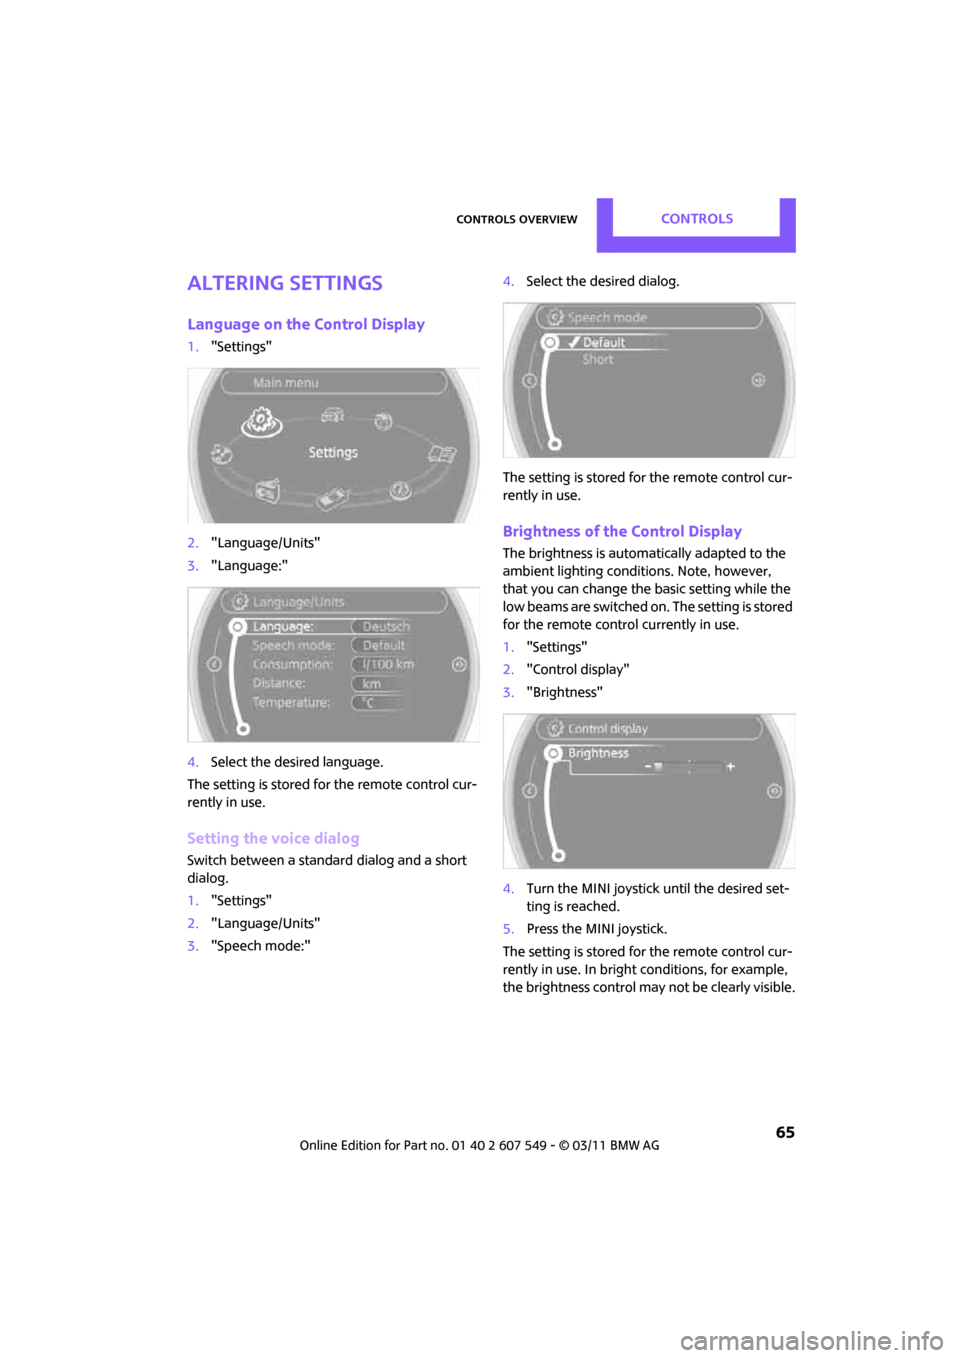
1."Settings"
2. "Language/Units"
3. "Language:"
4. Select the desired language.
The setting is stored for the remote control cur-
rently in use.
Setting the voice dialog
Switch between a standard dialog and a short
dialog.
1. "Settings"
2. "Language/Units"
3. "Speech mode:" 4.
Select the desired dialog.
The setting is stored for the remote control cur-
rently in use.
Brightness of the Control Display
The brightness is automa tically adapted to the
ambient lighting conditions. Note, however,
that you can change the basic setting while the
low beams are switched on . The setting is stored
for the remote control currently in use.
1. "Settings"
2. "Control display"
3. "Brightness"
4. Turn the MINI joystick until the desired set-
ting is reached.
5. Press the MINI joystick.
The setting is stored for the remote control cur-
rently in use. In bright conditions, for example,
the brightness control may not be clearly visible.
CommunicationsMobile phone preparation Bluetooth
174
Adjusting volume
Turn knob during announcement.
>The volume remains the same, even if the
volume of other audi o sources is changed.
> The volume is stored for the remote control
currently in use.
Notes
Do not use the voice activation system to initiate
an emergency call. In st ressful situations, the
voice and vocal pitch can change. This can
unnecessarily delay the establishment of a tele-
phone connection.
Ambient conditions
> Say the commands, numbers and letters
smoothly and with normal volume, empha-
sis and speed.
> Always say commands in the language of
the voice activation system. The language
for voice operation is preset and can not be
changed over the Control Display.
> Keep doors, windows, glass sunroof
*/pan-
oramic sunroof
*, or convertible top* closed
to avoid noise interference.
> Avoid ambient noise in the vehicle while
speaking.
Snap-in adapter*
Installation location
In the center armrest.
Inserting snap-in adapter
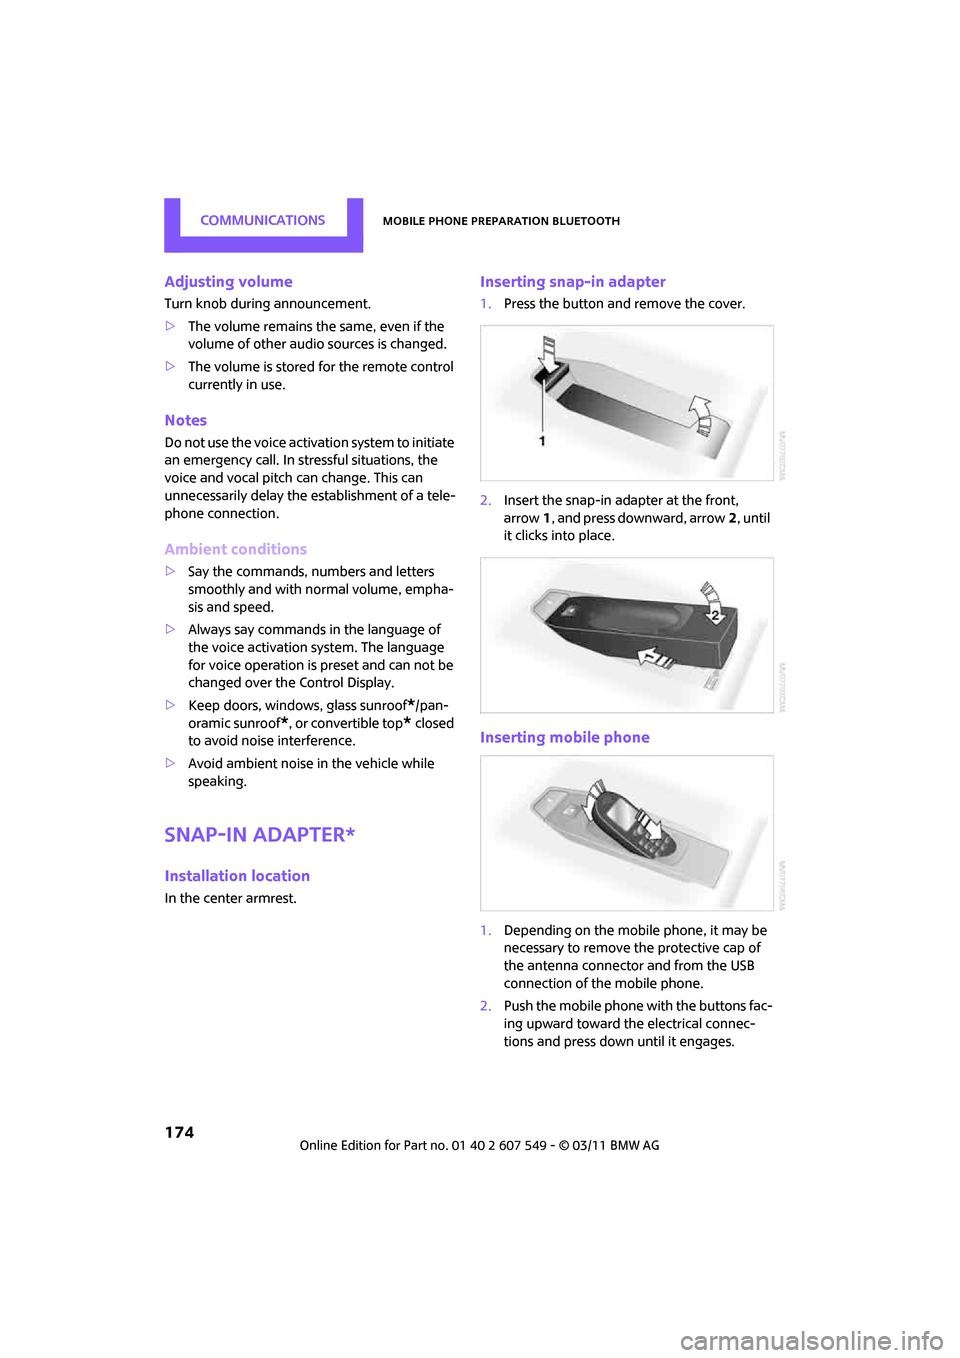
1.Press the button and remove the cover.
2. Insert the snap-in ad apter at the front,
arrow 1, and press downward, arrow 2, until
it clicks into place.
Inserting mobile phone
1. Depending on the mobile phone, it may be
necessary to remove the protective cap of
the antenna connector and from the USB
connection of the mobile phone.
2. Push the mobile phone with the buttons fac-
ing upward toward the electrical connec-
tions and press down until it engages.

