parking brake MINI Countryman 2011 Owner's Manual (Mini Connected)
[x] Cancel search | Manufacturer: MINI, Model Year: 2011, Model line: Countryman, Model: MINI Countryman 2011Pages: 254, PDF Size: 3.84 MB
Page 15 of 254
CockpitAT A GLANCE
13
Indicator and warning
lamps
The concept
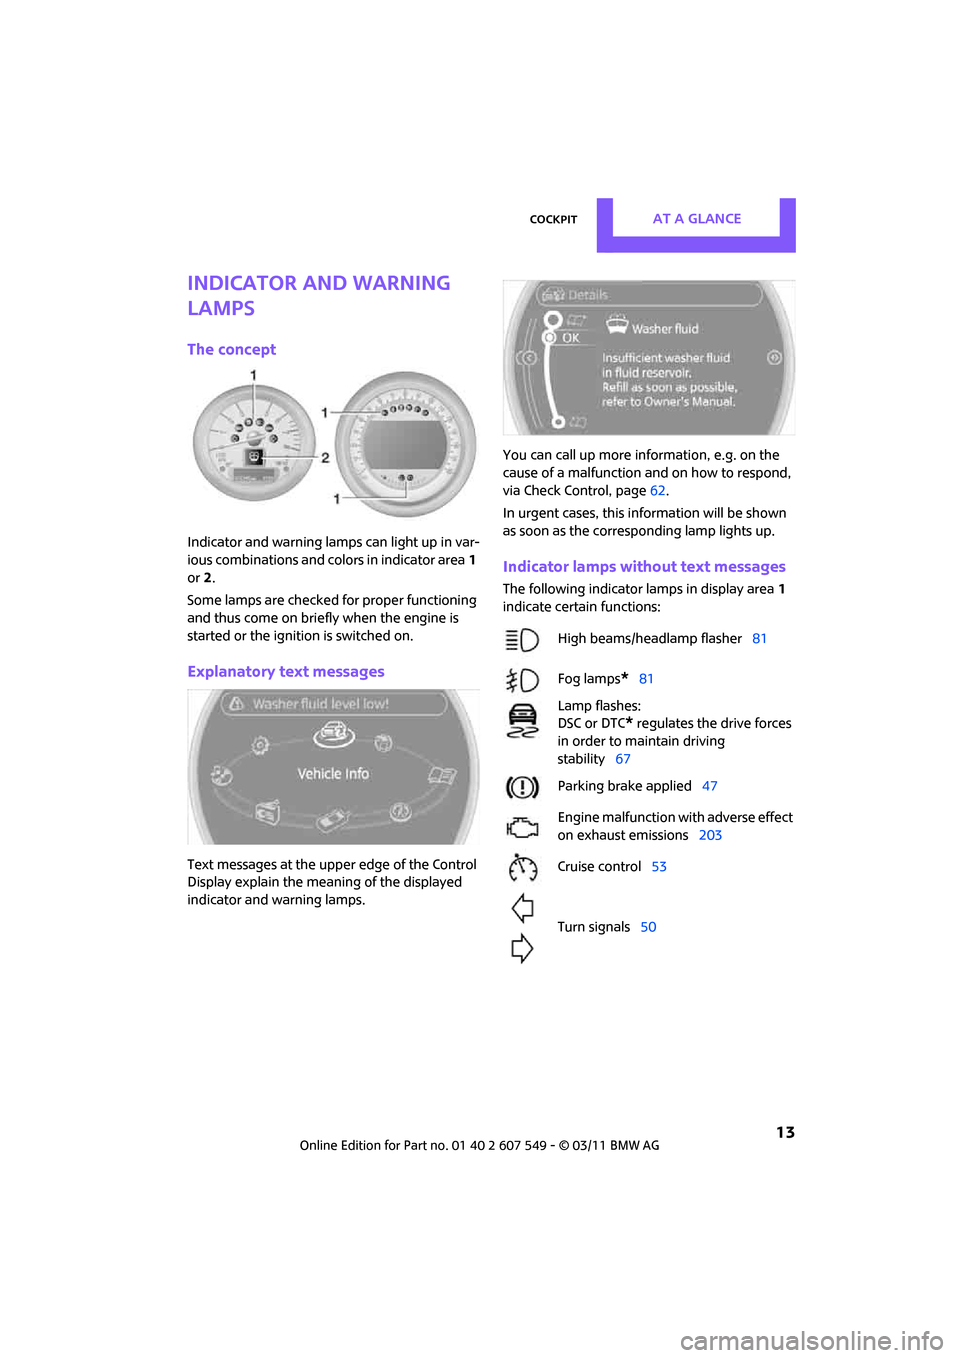
Indicator and warning lamps can light up in var-
ious combinations and colors in indicator area1
or 2.
Some lamps are checked for proper functioning
and thus come on briefly when the engine is
started or the ignition is switched on.
Explanatory text messages
Text messages at the uppe r edge of the Control
Display explain the mean ing of the displayed
indicator and warning lamps. You can call up more information, e.g. on the
cause of a malfunction and on how to respond,
via Check Control, page
62.
In urgent cases, this information will be shown
as soon as the corresponding lamp lights up.
Indicator lamps without text messages
The following indicator lamps in display area 1
indicate certain functions:
High beams/headlamp flasher 81
Fog lamps
*81
Lamp flashes:
DSC or DTC
* regulates the drive forces
in order to maintain driving
stability 67
Parking brake applied 47
Engine malfunction with adverse effect
on exhaust emissions 203
Cruise control 53
Turn signals 50
Page 49 of 254
DrivingCONTROLS
47
gas. Never leave an unattended vehicle with the
engine running; otherwise, such a vehicle repre-
sents a potential safety hazard.
Before leaving the car while the engine is run-
ning, place the transmission in neutral or move
the selector lever to position P and forcefully
apply the parking brake to prevent the car from
moving.<
Avoid frequent starting in quick succes-
sion or repeated start attempts in which
the engine does not start. Otherwise, the fuel is
not burned or inadequately burned and there is
a danger of overheating and damaging the cat-
alytic converter. <
Do not let the engine warm up with the vehicle
at a standstill. Move of f immediately at a moder-
ate engine speed.
When starting the engine, do not depress the
accelerator pedal.
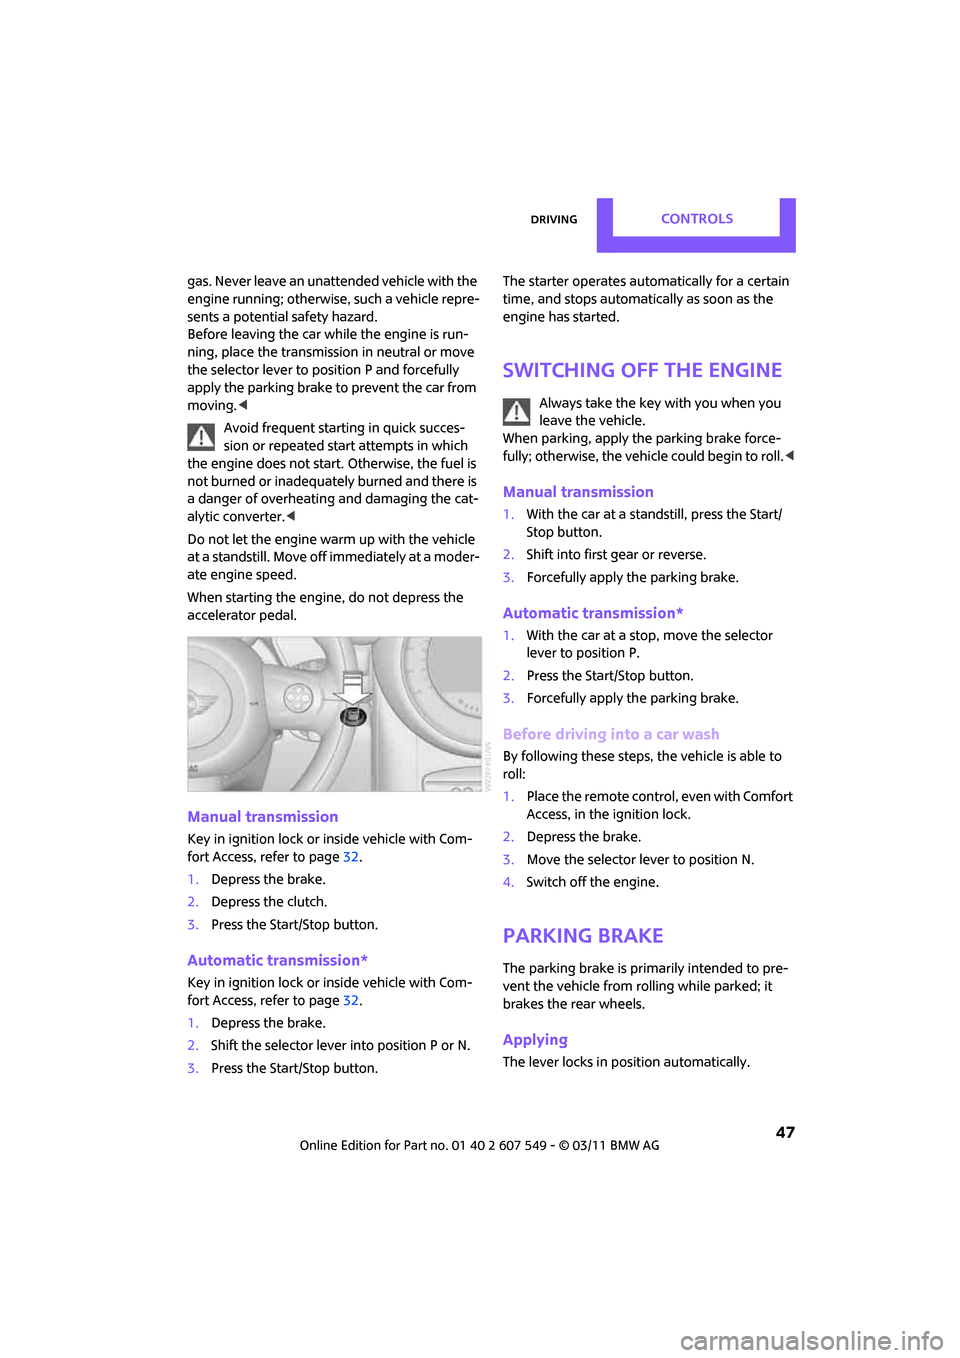
Manual transmission
Key in ignition lock or inside vehicle with Com-
fort Access, refer to page 32.
1. Depress the brake.
2. Depress the clutch.
3. Press the Start/Stop button.
Automatic transmission*
Key in ignition lock or inside vehicle with Com-
fort Access, refer to page 32.
1. Depress the brake.
2. Shift the selector lever into position P or N.
3. Press the Start/Stop button. The starter operates auto
matically for a certain
time, and stops automatically as soon as the
engine has started.
Switching off the engine
Always take the key with you when you
leave the vehicle.
When parking, apply the parking brake force-
fully; otherwise, the vehicle could begin to roll. <
Manual transmission
1.With the car at a standstill, press the Start/
Stop button.
2. Shift into first gear or reverse.
3. Forcefully apply the parking brake.
Automatic transmission*
1.With the car at a stop, move the selector
lever to position P.
2. Press the Start/Stop button.
3. Forcefully apply the parking brake.
Before driving into a car wash
By following these steps, the vehicle is able to
roll:
1.Place the remote control, even with Comfort
Access, in the ig nition lock.
2. Depress the brake.
3. Move the selector lever to position N.
4. Switch off the engine.
Parking brake
The parking brake is primarily intended to pre-
vent the vehicle from rolling while parked; it
brakes the rear wheels.
Applying
The lever locks in position automatically.
Page 50 of 254
CONTROLSDriving
48
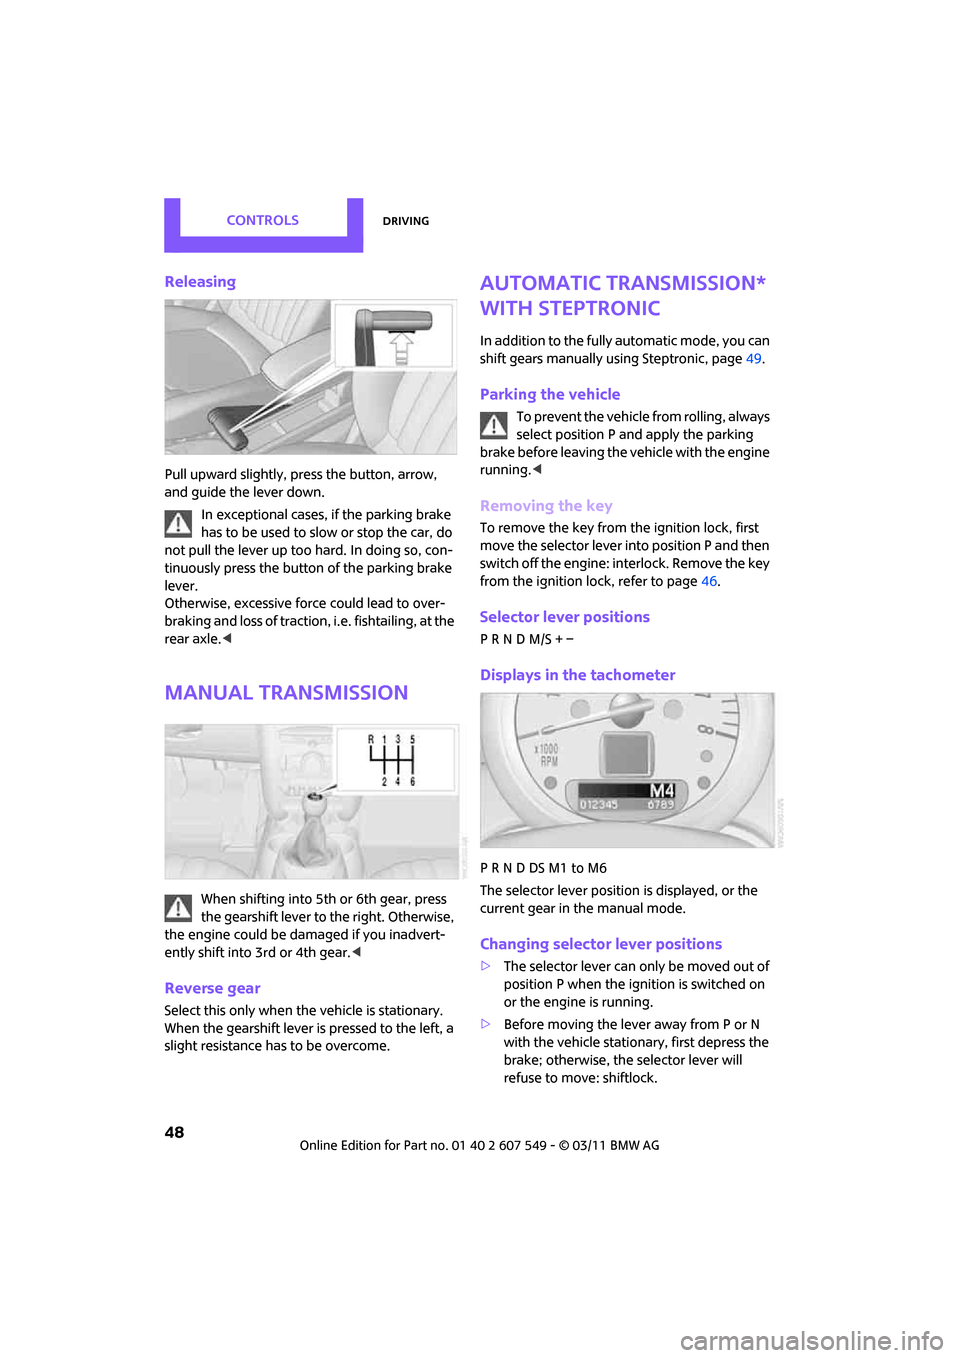
Releasing
Pull upward slightly, press the button, arrow,
and guide the lever down.
In exceptional cases, if the parking brake
has to be used to slow or stop the car, do
not pull the lever up too hard. In doing so, con-
tinuously press the button of the parking brake
lever.
Otherwise, excessive force could lead to over-
braking and loss of traction, i.e. fishtailing, at the
rear axle. <
Manual transmission
When shifting into 5th or 6th gear, press
the gearshift lever to the right. Otherwise,
the engine could be damaged if yo u inadvert-
ently shift into 3rd or 4th gear. <
Reverse gear
Select this only when the vehicle is stationary.
When the gearshift lever is pressed to the left, a
slight resistance has to be overcome.
Automatic transmission*
with Steptronic
In addition to the fully automatic mode, you can
shift gears manually using Steptronic, page 49.
Parking the vehicle
To prevent the vehicle from rolling, always
select position P and apply the parking
brake before leaving the vehicle with the engine
running. <
Removing the key
To remove the key from the ignition lock, first
move the selector lever into position P and then
switch off the engine: in terlock. Remove the key
from the ignition lock, refer to page 46.
Selector lever positions
P R N D M/S + –
Displays in the tachometer
P R N D DS M1 to M6
The selector lever position is displayed, or the
current gear in the manual mode.
Changing selector lever positions
> The selector lever can only be moved out of
position P when the ignition is switched on
or the engine is running.
> Before moving the lever away from P or N
with the vehicle stationary, first depress the
brake; otherwise, the selector lever will
refuse to move: shiftlock.
Page 52 of 254
CONTROLSDriving
50
on the steering wheel. The transmission auto-
matically switches to manual mode.
If you do not shift gears with the shift paddles or
accelerate for a certai n amount of time, the
transmission automatically returns to D, auto-
matic drive.
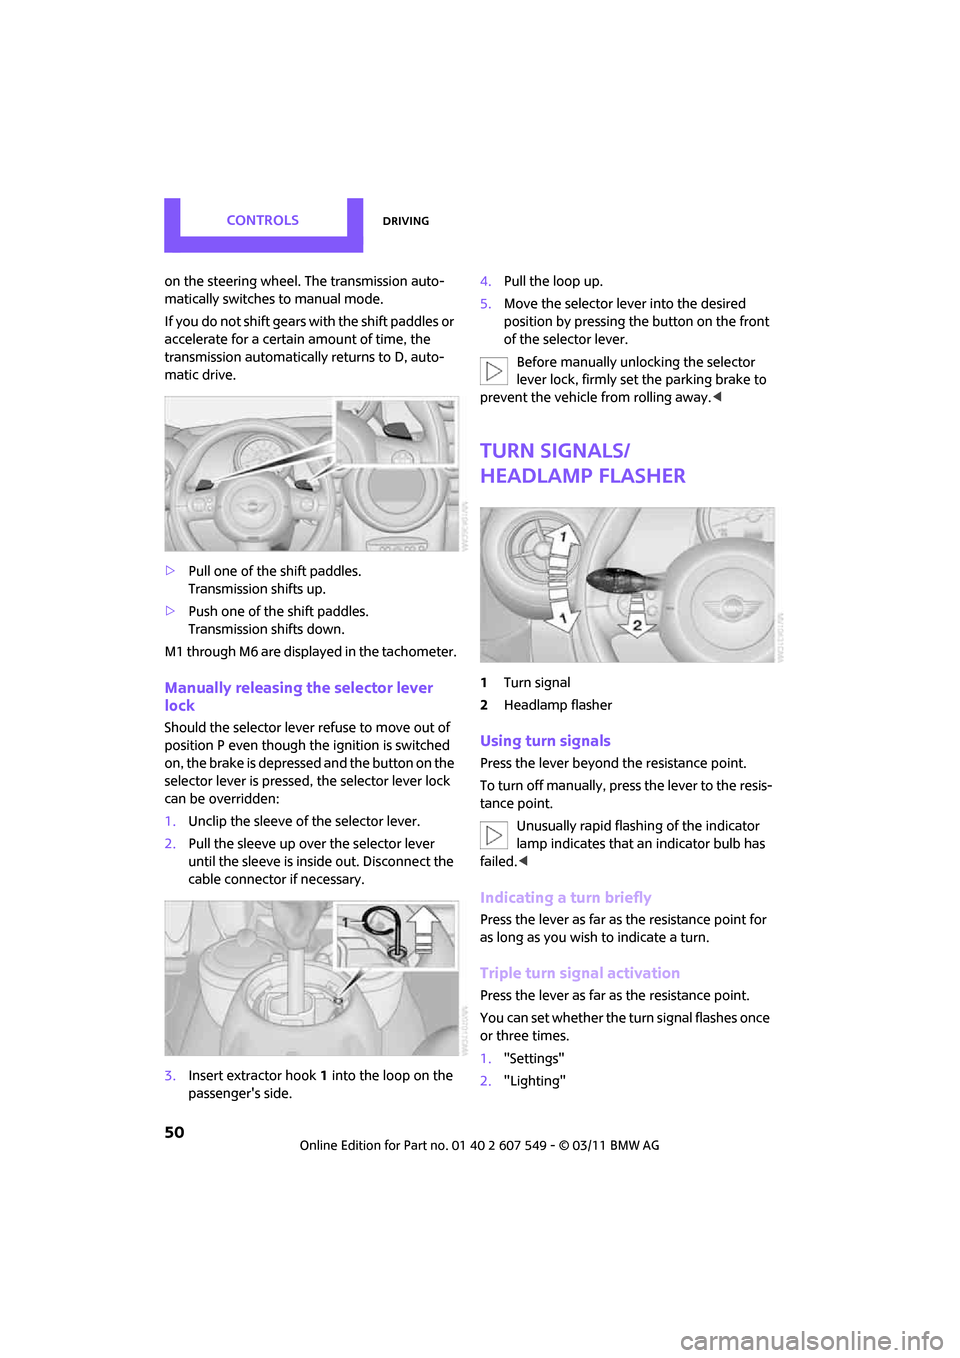
> Pull one of the shift paddles.
Transmission shifts up.
> Push one of the shift paddles.
Transmission shifts down.
M1 through M6 are displayed in the tachometer.
Manually releasing the selector lever
lock
Should the selector lever refuse to move out of
position P even though the ignition is switched
on, the brake is depressed and the button on the
selector lever is pressed, the selector lever lock
can be overridden:
1. Unclip the sleeve of the selector lever.
2. Pull the sleeve up over the selector lever
until the sleeve is inside out. Disconnect the
cable connector if necessary.
3. Insert extractor hook 1 into the loop on the
passenger's side. 4.
Pull the loop up.
5. Move the selector lever into the desired
position by pressing the button on the front
of the selector lever.
Before manually unlocking the selector
lever lock, firmly set the parking brake to
prevent the vehicle from rolling away. <
Turn signals/
headlamp flasher
1Turn signal
2 Headlamp flasher
Using turn signals
Press the lever beyond the resistance point.
To turn off manually, press the lever to the resis-
tance point. Unusually rapid flashi ng of the indicator
lamp indicates that an indicator bulb has
failed. <
Indicating a turn briefly
Press the lever as far as the resistance point for
as long as you wish to indicate a turn.
Triple turn signal activation
Press the lever as far as the resistance point.
You can set whether the turn signal flashes once
or three times.
1."Settings"
2. "Lighting"
Page 71 of 254
Technology for driving comfort and safetyCONTROLS
69
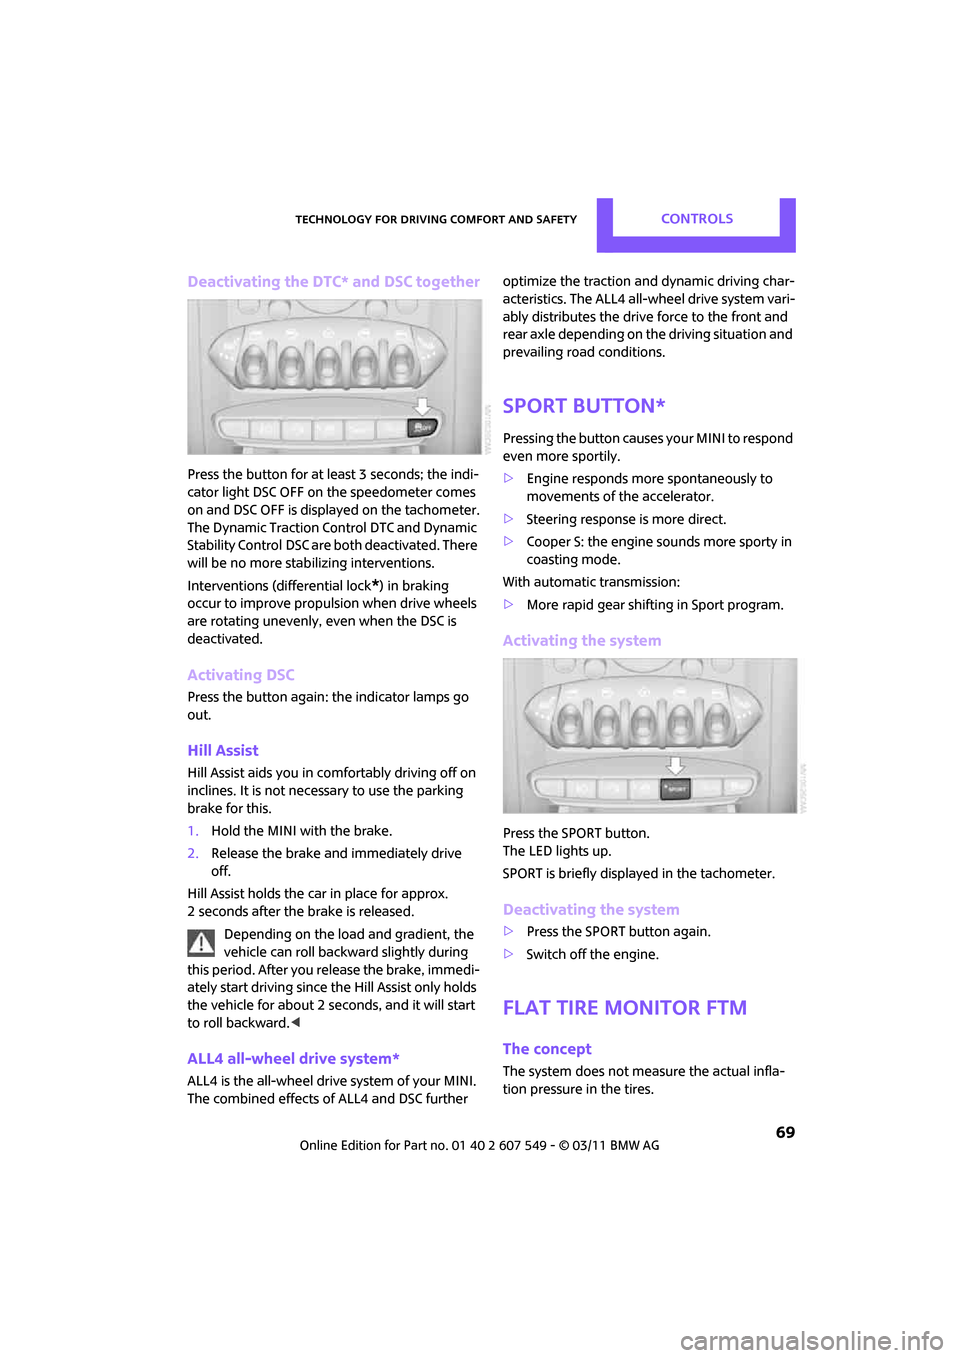
Deactivating the DTC* and DSC together
Press the button for at least 3 seconds; the indi-
cator light DSC OFF on the speedometer comes
on and DSC OFF is displayed on the tachometer.
The Dynamic Traction Control DTC and Dynamic
Stability Control DSC are both deactivated. There
will be no more stab ilizing interventions.
Interventions (differential lock
*) in braking
occur to improve propulsion when drive wheels
are rotating unevenly, even when the DSC is
deactivated.
Activating DSC
Press the button again: the indicator lamps go
out.
Hill Assist
Hill Assist aids you in co mfortably driving off on
inclines. It is not necessary to use the parking
brake for this.
1. Hold the MINI with the brake.
2. Release the brake and immediately drive
off.
Hill Assist holds the car in place for approx.
2 seconds after the brake is released. Depending on the load and gradient, the
vehicle can roll backwa rd slightly during
this period. After you release the brake, immedi-
ately start driving since the Hill Assist only holds
the vehicle for about 2 seconds, and it will start
to roll backward. <
ALL4 all-wheel drive system*
ALL4 is the all-wheel drive system of your MINI.
The combined effects of ALL4 and DSC further optimize the traction and dynamic driving char-
acteristics. The ALL4 all-wheel drive system vari-
ably distributes the drive force to the front and
rear axle depending on
the driving situation and
prevailing road conditions.
Sport button*
Pressing the button causes your MINI to respond
even more sportily.
> Engine responds more spontaneously to
movements of the accelerator.
> Steering response is more direct.
> Cooper S: the engine sounds more sporty in
coasting mode.
With automatic transmission:
> More rapid gear shifting in Sport program.
Activating the system
Press the SPORT button.
The LED lights up.
SPORT is briefly displayed in the tachometer.
Deactivating the system
>Press the SPORT button again.
> Switch off the engine.
Flat Tire Monitor FTM
The concept
The system does not me asure the actual infla-
tion pressure in the tires.
Page 93 of 254

Practical interior accessoriesCONTROLS
91
Center armrest*
Storage compartment
The center armrest between the front seats con-
tains either a compartment or the cover for the
mobile phone base plate
* or the snap-in
adapter
*.
Opening
Press the button, arrow, and lift the cover.
Storage compartments
In the vehicle interior
Depending on your vehicle's equipment, you
will find storage compar tments in the front and
rear doors and in the center console
*.
Pockets
* are provided on the backrest rear pan-
els of the front seats.
Center Rail
On the Center Rail, a va riety of accessories can
be fastened to a specia l base plate and moved
to various positions, e.g. a cupholder
* or a
mobile phone holder
*.
Do not attach accessory parts in the vicin-
ity of the parking brake; otherwise, they
can be damaged when the parking brake lever is
actuated. <
Example: cupholder
Inserting base plate
The lever 3 can be locked in three positions. 0
Locking
1 Sliding along the rail
2 Inserting base plate
For inserting, move th e lever into position2.
Sliding and locking
1. Push lever 3 into position 1.
2. Slide the base plate.
3. Push the lever 3 down, into position 0, and
lock the base plate in place.
Lock the base plate in place before driv-
ing; otherwise, injuries may result in the
event of an accident. <
Installing cupholder
1.Lock base plate in plac e if necessary, refer to
Sliding and locking.
2. Pull the lever 6 up to unlock the mounts.
3. First insert the cupholder into the front
mounts 4 and then snap it into the rear
mounts 5.
Make sure that the lever 6 is situated
opposite the mount 4.<
Page 99 of 254
Things to remember when drivingDRIVING TIPS
97
Hydroplaning
When driving on wet or slushy roads,
reduce road speed. If you do not, a wedge
of water can form betw een tires and road sur-
face. This situation, known as hydroplaning, can
cause partial or complete loss of tire contact
with the road surface, so that the car cannot be
steered or braked properly. <
The risk of hydroplaning increases with declining
tread depth on the tires, refer also to Tread
depth on page 195.
Driving through water
Drive through water on the road only if it is
not deeper than 1 ft/30 cm, and then only
at walking speed at the most. Otherwise, the
vehicle's engine, the electrical systems and the
transmission may be damaged. <
Parking brake on inclines
On inclines, do not hold the vehicle with
the clutch; use the parking brake. Other-
wise, greater clutch wear will result. <
For information on drivin g off using Hill Assist,
refer to page 69.
Braking safely
Your MINI is equipped with ABS. If you are in a
situation which requires full braking, it is best to
brake using maximum brake pressure. Since the
vehicle maintains steeri ng responsiveness, you
can still avoid possible obstacles with a mini-
mum of steering effort.
The pulsation of the brake pedal, together with
the sound of hydraulic regulation, indicates that
ABS is functioning properly.
Objects in the move ment range of the
pedals
Keep floor mats, carpet, and other objects
out of the movement range of the pedals;
otherwise, they may inhibit the function of the
pedals during driving. Do not place additional
floor mats onto an existing one or onto other objects. Only use floor mats that have been
approved for the vehicle and can be appropri-
ately fastened. Make sure that the floor mats are
securely fastened again
after they have been
removed, e.g. for cleaning. <
Driving in wet conditions
When roads are wet or there is heavy rain, briefly
exert gentle pressure on the brake pedal every
few miles. Monitor traffic conditions to ensure
that this maneuver does not endanger other
road users. The heat generated in this process
helps dry the pads and rotors to ensure that.
Then full braking force will be immediately avail-
able when it is needed.
Hills
To prevent overheatin g and the resulting
reduced efficiency of the brake system,
drive long or steep downhill gradients in the
gear in which the least braking is required. Even
light but consistent brake pressure can lead to
high temperatures, brake wear and possibly
even brake failure. <
You can increase the engine's braking effect by
shifting down, all the way to first gear if neces-
sary. This strategy helps you avoid placing
excessive loads on the brake system. Downshift-
ing during manual oper ation of the automatic
transmission, refer to page 49.
Never drive with the clutch held down,
with the transmission in neutral or with
the engine switched off; otherwise, engine brak-
ing action will not be present or there will be no
power assistance to th e brakes or steering.
Never allow floor mats, carpets or any other
objects to protrude into the area around the
pedals; otherwise, pedal function could be
impaired. <
Corrosion on brake rotors
When the vehicle is driven only occasionally,
during extended periods when the vehicle is not
used at all, and in operating conditions where
brake applications are less frequent, there is an
Page 206 of 254
MOBILITYCare
204
Care
Car-care products
Regular cleaning and care helps to maintain the
value of your MINI.
The manufacturer of your MINI recommends
using manufacturer-approved products to clean
and care for your vehicle.
Your MINI dealer would be pleased to advise
you on cleaning and care products and services
for your MINI.The ingredients of original MINI Care Prod-
ucts have been tested, and the products
have been tested in the laboratory and in prac-
tice. They offer optimum care and protection for
your vehicle. <
Do not use any cleansers containing alco-
hol or solvents as these may cause dam-
age. <
Cleaning agents may contain hazardous
or health-damaging substances. Follow
the warning and hazard instructions on the
packaging. For interior cleaning, always open
the doors or windows of the vehicle.
Do not use any products that are not intended
for cleaning the vehicle. <
External care
Washing your vehicle
Especially during the winter months the
vehicle should be frequently washed. Dirt
and road salt can damage the vehicle. <
After washing the vehicle, apply the
brakes briefly to dry them; otherwise,
water can reduce braking efficiency over the
short term and the brake rotors can corrode. <
Car washes
Preference should be given to cloth car washes.
Do not use automatic high-pressure car
washes; otherwise, water may drip into
the vehicle around the windows. <
Before driving in to the car wash, check if the sys-
tem is suitable for your MINI. Observe the fol-
lowing points:
> Vehicle dimensions, page 225
> If necessary: fold in the outside mirrors,
page 41
> Maximum permissible tire width
Avoid car washes with tracks higher than
4 in/10 cm; otherwise, the chassis could
be damaged. <
Preparations for driving into the car wash:
> Unscrew the rod antenna.
> Deactivate the rain sensor
* to prevent unin-
tentional wiping.
> Deactivate rear window wiper and protect it
from damage. Ask the car wash operator
about measures that can be taken to protect
the wipers.
> Remove additional atta chments, e.g. spoil-
ers or telephone antennas, if there is a pos-
sibility that they could be damaged.
> Inserting the remote control into the ignition
lock.
Automatic transmission
Before driving into the car wash, make sure that
the vehicle can roll:
1.Place the remote control, even with Comfort
Access, in the ignition lock.
2. Move the selector le ver to position N.
3. Release the parking brake.
4. Switch off the engine.
Page 214 of 254
MOBILITYReplacing components
212
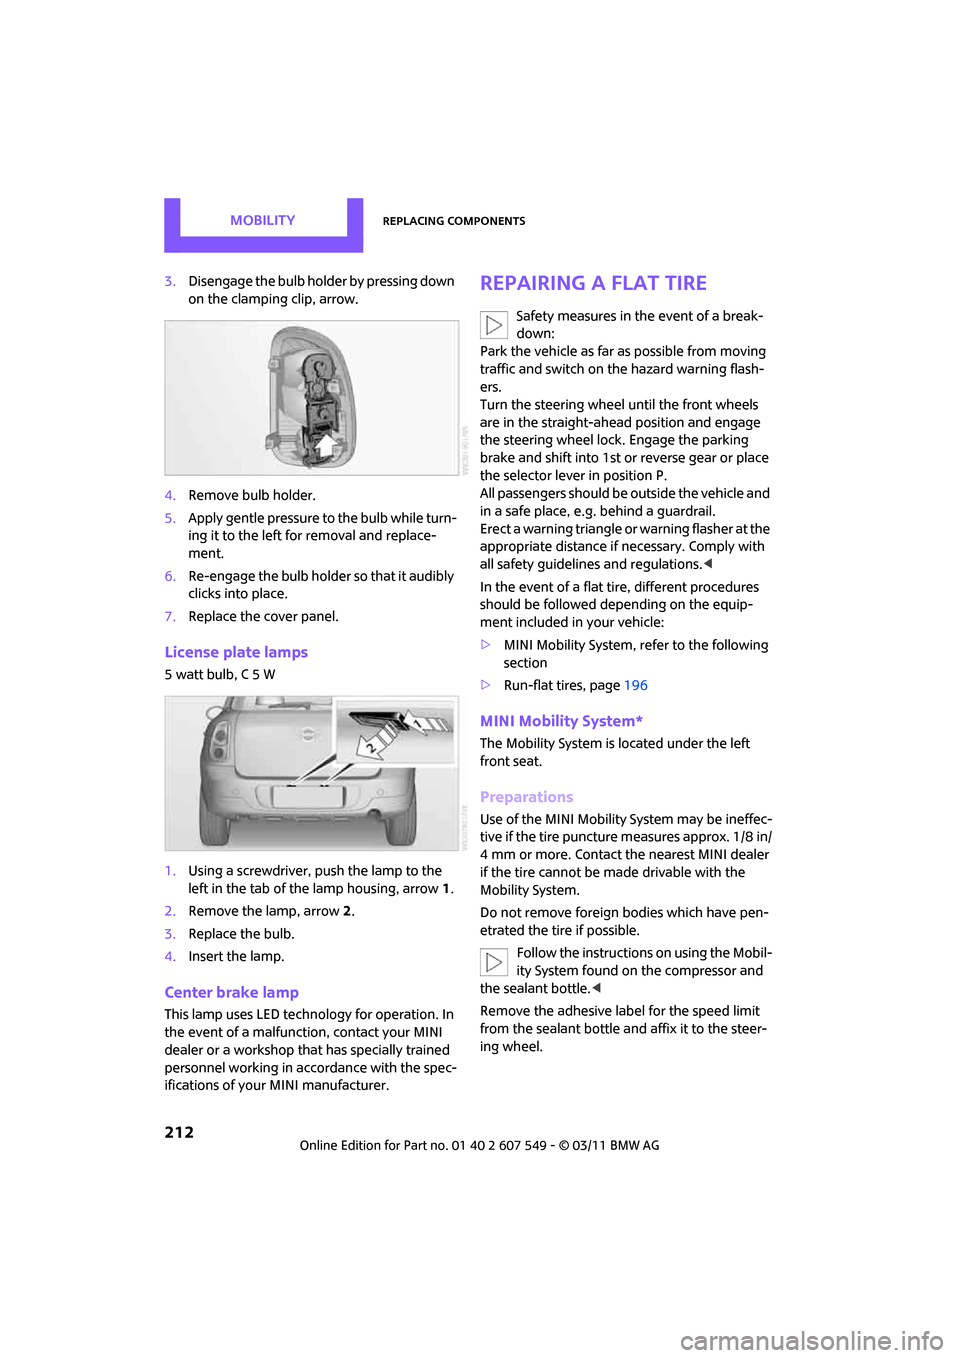
3.Disengage the bulb holder by pressing down
on the clamping clip, arrow.
4. Remove bulb holder.
5. Apply gentle pressure to the bulb while turn-
ing it to the left for removal and replace-
ment.
6. Re-engage the bulb holder so that it audibly
clicks into place.
7. Replace the cover panel.
License plate lamps
5 watt bulb, C 5 W
1.Using a screwdriver, push the lamp to the
left in the tab of the lamp housing, arrow 1.
2. Remove the lamp, arrow 2.
3. Replace the bulb.
4. Insert the lamp.
Center brake lamp
This lamp uses LED techno logy for operation. In
the event of a malfunction, contact your MINI
dealer or a workshop th at has specially trained
personnel working in acco rdance with the spec-
ifications of your MINI manufacturer.
Repairing a flat tire
Safety measures in the event of a break-
down:
Park the vehicle as far as possible from moving
traffic and switch on the hazard warning flash-
ers.
Turn the steering wheel until the front wheels
are in the straight-ahead position and engage
the steering wheel lock. Engage the parking
brake and shift into 1st or reverse gear or place
the selector leve r in position P.
All passengers should be outside the vehicle and
in a safe place, e.g. behind a guardrail.
Erect a warning triangle or warning flasher at the
appropriate distance if necessary. Comply with
all safety guidelines and regulations. <
In the event of a flat ti re, different procedures
should be followed depending on the equip-
ment included in your vehicle:
> MINI Mobility System, refer to the following
section
> Run-flat tires, page 196
MINI Mobility System*
The Mobility System is located under the left
front seat.
Preparations
Use of the MINI Mobility System may be ineffec-
tive if the tire puncture measures approx. 1/8 in/
4 mm or more. Contact the nearest MINI dealer
if the tire cannot be made drivable with the
Mobility System.
Do not remove foreign bodies which have pen-
etrated the tire if possible.
Follow the instructions on using the Mobil-
ity System found on the compressor and
the sealant bottle. <
Remove the adhesive label for the speed limit
from the sealant bottle an d affix it to the steer-
ing wheel.
Page 239 of 254
Everything from A to ZREFERENCE
237
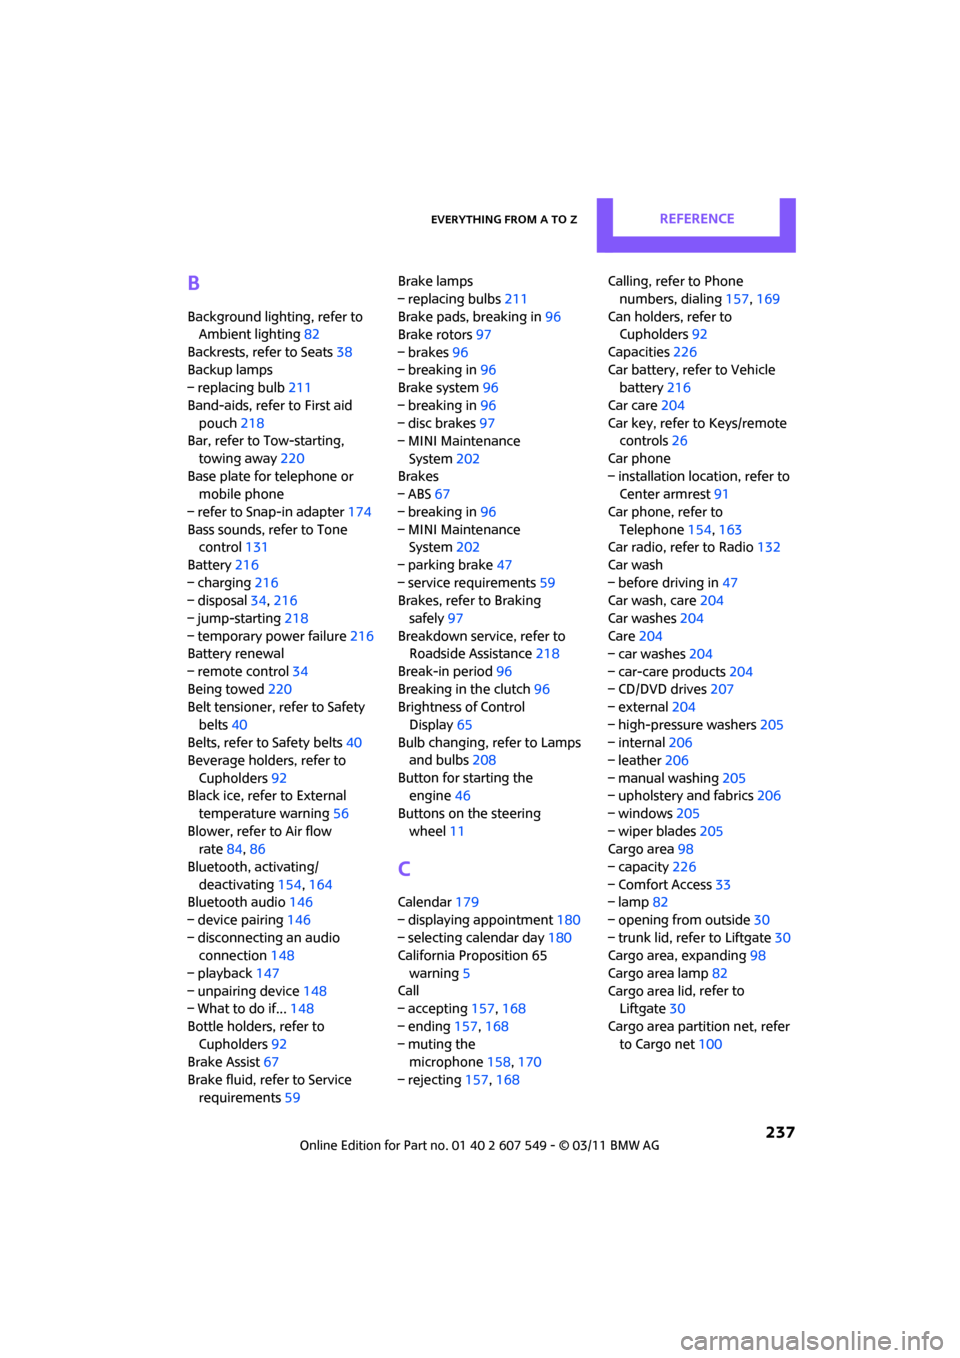
B
Background lighting, refer to
Ambient lighting 82
Backrests, refer to Seats 38
Backup lamps
– replacing bulb 211
Band-aids, refer to First aid pouch 218
Bar, refer to Tow-starting,
towing away 220
Base plate for telephone or mobile phone
– refer to Snap-in adapter 174
Bass sounds, refer to Tone control 131
Battery 216
– charging 216
– disposal 34,216
– jump-starting 218
– temporary power failure 216
Battery renewal
– remote control 34
Being towed 220
Belt tensioner, refer to Safety
belts 40
Belts, refer to Safety belts 40
Beverage holders, refer to
Cupholders 92
Black ice, refer to External
temperature warning 56
Blower, refer to Air flow rate 84,86
Bluetooth, activating/ deactivating 154,164
Bluetooth audio 146
– device pairing 146
– disconnecting an audio connection 148
– playback 147
– unpairing device 148
– What to do if... 148
Bottle holders, refer to Cupholders 92
Brake Assist 67
Brake fluid, refer to Service requirements 59 Brake lamps
– replacing bulbs
211
Brake pads, breaking in 96
Brake rotors 97
– brakes 96
– breaking in 96
Brake system 96
– breaking in 96
– disc brakes 97
– MINI Maintenance
System 202
Brakes
– ABS 67
– b
reaking in 96
– MINI Maintenance System 202
– parking brake 47
– service requirements 59
Brakes, refer to Braking
safely 97
Breakdown service, refer to Roadside Assistance 218
Break-in period 96
Breaking in the clutch 96
Brightness of Control
Display 65
Bulb changing, refer to Lamps and bulbs 208
Button for starting the engine 46
Buttons on the steering wheel 11
C
Calendar 179
– displaying appointment 180
– selecting calendar day 180
California Proposition 65
warning 5
Call
– accepting 157,168
– ending 157,168
– muting the microphone 158,170
– rejecting 157,168 Calling, refer to Phone
numbers, dialing 157,169
Can holders, refer to Cupholders 92
Capacities 226
Car battery, refer to Vehicle battery 216
Car care 204
Car key, refer to Keys/remote controls 26
Car phone
– installation location, refer to Center armrest 91
Car phone, refer to Telephone 154,163
Car radio, refer to Radio 132
Car wash
– before driving in 47
Car wash, care 204
Car washes 204
Care 204
– car washes 204
– car-care products 204
– CD/DVD drives 207
– external 204
– high-pressure washers 205
– internal 206
– leather 206
– manual washing 205
– upholstery and fabrics 206
– windows 205
– wiper blades 205
Cargo area 98
– capacity 226
– Comfort Access 33
– lamp 82
– opening from outside 30
– trunk lid, refer to Liftgate 30
Cargo area, expanding 98
Cargo area lamp 82
Cargo area li
d, refer to
Liftgate 30
Cargo area partition net, refer to Cargo net 100