inflation pressure MINI Countryman 2012 (Mini Connected) User Guide
[x] Cancel search | Manufacturer: MINI, Model Year: 2012, Model line: Countryman, Model: MINI Countryman 2012Pages: 259, PDF Size: 3.07 MB
Page 200 of 259

Wheels and tiresMOBILITY
199
Tire inflation pressures MINI Cooper S Countryman / Cooper S ALL4 Countryman
Tire size Tire pressures in bar/psi
Speeds up to a max. of 100 mph/160 km/h Speeds including those
exceeding
100 mph/160 km/h
All pressure specifications in the
table are indicated in bar/psi for
cold tires. Cold = ambient
temperature
195/60 R 16 89 H M+S
205/55 R 17 91 H M+S
205/55 R 17 91 H M+S RSC
205/55 R 17 91 V RSC
225/45 R 18 91 V RSC
225/40 R 19 89 V RSC 2.2/32 2.2/32 2.6/38 2.6/38
More details on the perm issible load and weights can be found on page 234.
Online Edition for Part no. 01 40 2 914 849 - \251 07/12 BMW AG
Page 201 of 259
MOBILITYWheels and tires
200
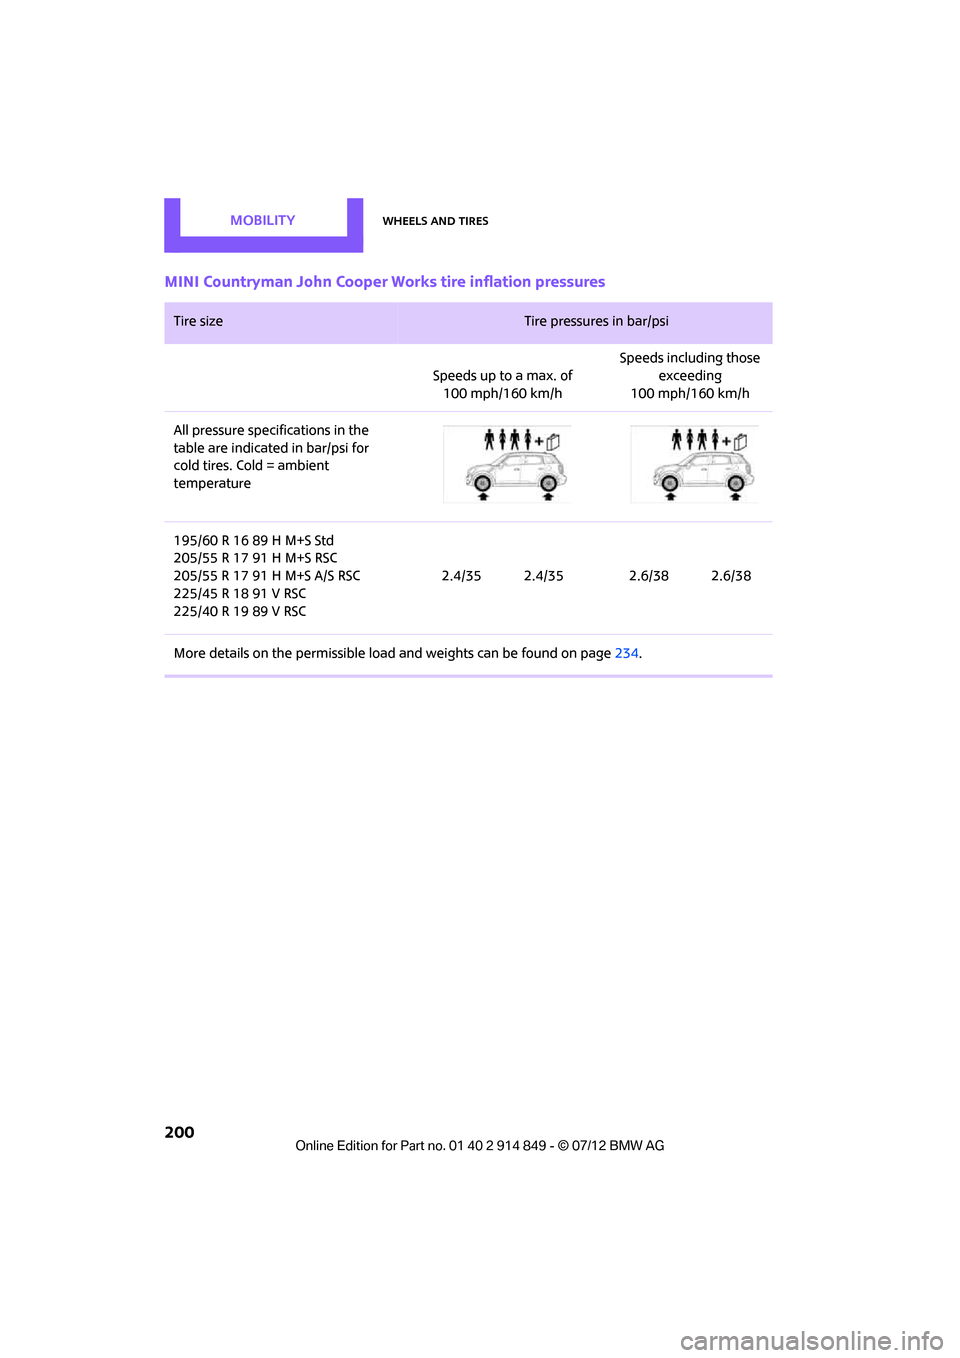
MINI Countryman John Cooper Works tire inflation pressures
Tire size Tire pressures in bar/psi
Speeds up to a max. of 100 mph/160 km/h Speeds including those
exceeding
100 mph/160 km/h
All pressure specifications in the
table are indicated in bar/psi for
cold tires. Cold = ambient
temperature
195/60 R 16 89 H M+S Std
205/55 R 17 91 H M+S RSC
205/55 R 17 91 H M+S A/S RSC
225/45 R 18 91 V RSC
225/40 R 19 89 V RSC 2.4/35 2.4/35 2.6/38 2.6/38
More details on the permissible load and weights can be found on page234.
Online Edition for Part no. 01 40 2 914 849 - \251 07/12 BMW AG
Page 205 of 259
MOBILITYWheels and tires
204
puncture, refer to page76. Your MINI dealer will
be glad to advise you.
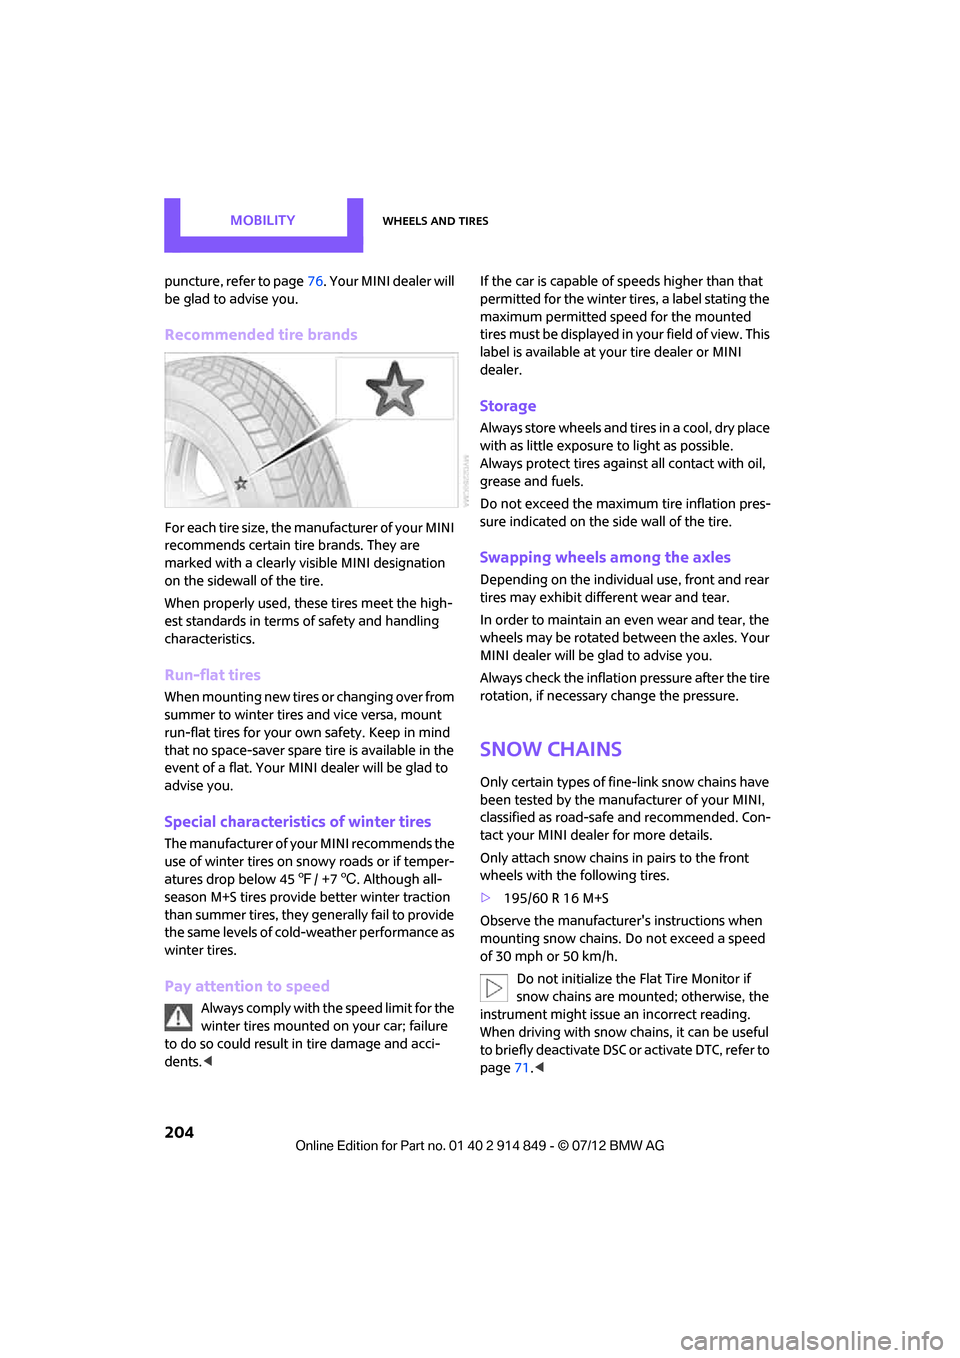
Recommended tire brands
For each tire size, the manufacturer of your MINI
recommends certain tire brands. They are
marked with a clearly vi sible MINI designation
on the sidewall of the tire.
When properly used, these tires meet the high-
est standards in terms of safety and handling
characteristics.
Run-flat tires
When mounting new tires or changing over from
summer to winter tires and vice versa, mount
run-flat tires for your ow n safety. Keep in mind
that no space-saver spare tire is available in the
event of a flat. Your MINI dealer will be glad to
advise you.
Special characteristics of winter tires
The manufacturer of your MINI recommends the
use of winter tires on snowy roads or if temper-
atures drop below 45 7/ +7 6. Although all-
season M+S tires provide better winter traction
than summer tires, they generally fail to provide
the same levels of cold-weather performance as
winter tires.
Pay attention to speed
Always comply with the speed limit for the
winter tires mounted on your car; failure
to do so could result in tire damage and acci-
dents. < If the car is capable of speeds higher than that
permitted for the winter tires, a label stating the
maximum permitted speed for the mounted
tires must be displayed in
your field of view. This
label is available at your tire dealer or MINI
dealer.
Storage
Always store wheels and tires in a cool, dry place
with as little exposure to light as possible.
Always protect tires agains t all contact with oil,
grease and fuels.
Do not exceed the maximum tire inflation pres-
sure indicated on the side wall of the tire.
Swapping wheels among the axles
Depending on the individual use, front and rear
tires may exhibit different wear and tear.
In order to maintain an even wear and tear, the
wheels may be rotated between the axles. Your
MINI dealer will be glad to advise you.
Always check the inflation pressure after the tire
rotation, if necessary change the pressure.
Snow chains
Only certain types of fine-link snow chains have
been tested by the manufacturer of your MINI,
classified as road-safe and recommended. Con-
tact your MINI dealer for more details.
Only attach snow chains in pairs to the front
wheels with the following tires.
>195/60 R 16 M+S
Observe the manufacturer's instructions when
mounting snow chains. Do not exceed a speed
of 30 mph or 50 km/h. Do not initialize the Flat Tire Monitor if
snow chains are mounted; otherwise, the
instrument might issue an incorrect reading.
When driving with snow ch ains, it can be useful
to briefly deactivate DSC or activate DTC, refer to
page 71.<
Online Edition for Part no. 01 40 2 914 849 - \251 07/12 BMW AG
Page 221 of 259

MOBILITYReplacing components
220
In the event of a flat tire, different procedures
should be followed depending on the equip-
ment included in your vehicle:
>MINI Mobility Kit, refer to the following
section
> Run-flat tires, page 203
MINI Mobility Kit
The Mobility Kit is located under the left front
seat.
Preparations
Use of the MINI Mobility Kit may be ineffective if
the tire puncture measures approx. 1/8 in/4 mm
or more. Contact the nearest MINI dealer if the
tire cannot be made drivable with the Mobility
Kit.
Do not remove foreign bodies which have
penetrated the tire if possible.
Follow the instructions on using the
Mobility Kit found on the compressor and
the sealant bottle.<
Remove the adhesive label for the speed limit
from the sealant bottle and affix it to the
steering wheel.
Sealant and compressor
1 Sealant bottle and adhesive label with speed
limit
2 Filling hose
Note the use-by date on the sealant
bottle. < 3
Holder for the sealant bottle
4 Compressor
5 Plug and cable for the socket in the vehicle
interior, page 98
6 Connection hose to connect the compressor
and sealant bottle or the compressor and
wheel
7 On/off switch
8 Pressure gauge for indi cating the tire infla-
tion pressure
9 Release button for reduci ng the tire inflation
pressure
Connector, cable and connection hose are
stored in the co mpressor housing.
Using the Mobility Kit
To repair a tire puncture with the Mobility Kit,
proceed as follows:
>Filling the tire with sealant.
> Distributing the sealant.
> Correct the tire in flation pressure.
Filling the tire with sealant.
Proceed in the specified order; otherwise,
sealant may emerge under high pres-
sure. <
1. Shake the sealant bottle.
2. Pull the connecting hose 6 completely out of
the compressor housing and screw it onto
the connector of the sealant bottle. Make
sure that the hose is not kinked.
3. Insert the sealant bo ttle on the compressor
housing in an upright position.
Online Edition for Part no. 01 40 2 914 849 - \251 07/12 BMW AG
Page 222 of 259
Replacing componentsMOBILITY
221
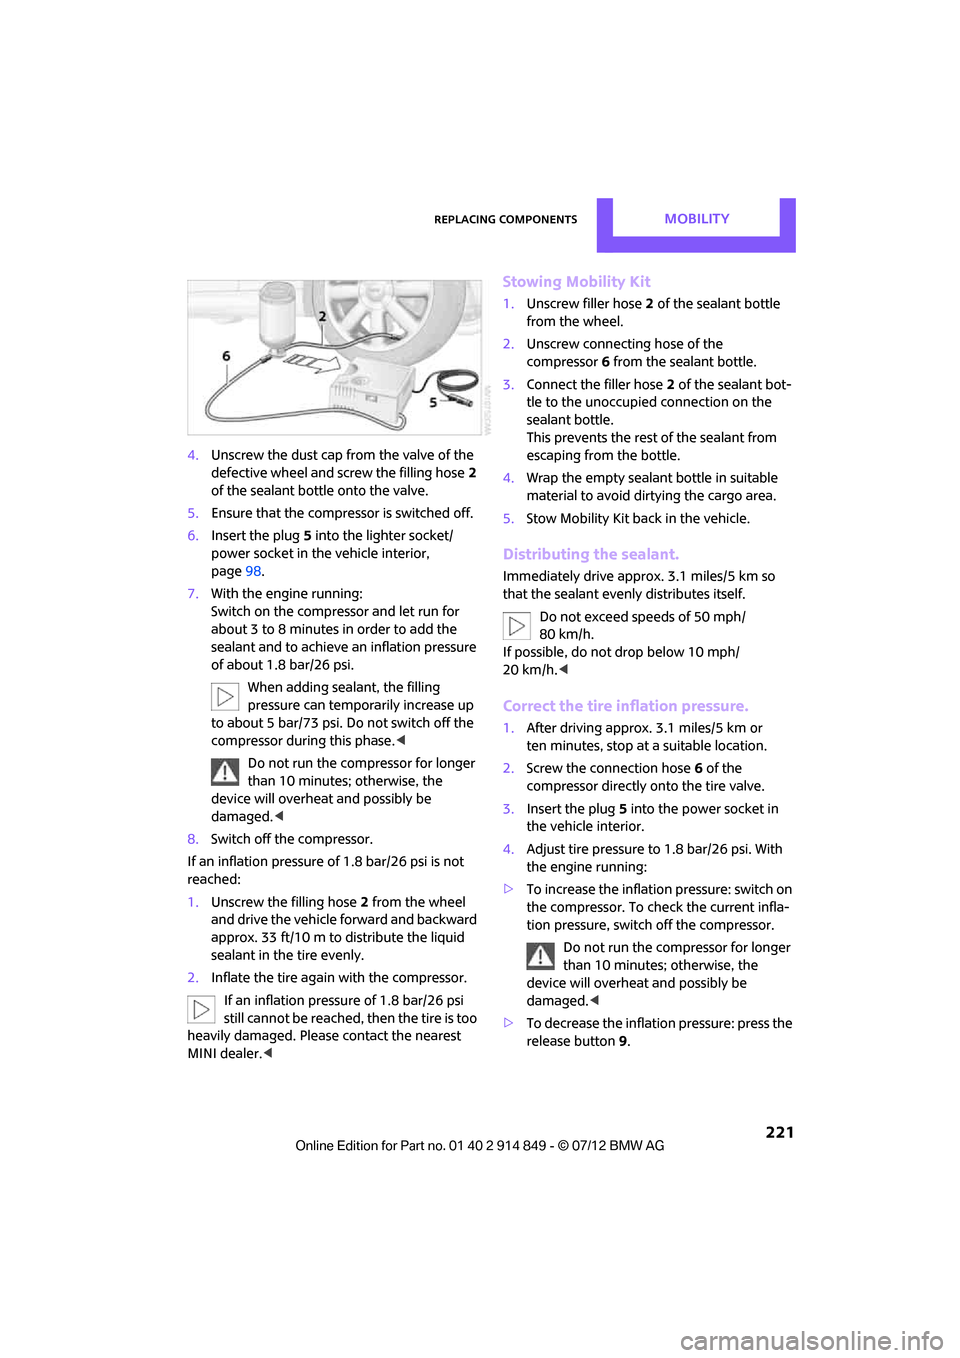
4.Unscrew the dust cap from the valve of the
defective wheel and screw the filling hose 2
of the sealant bottle onto the valve.
5. Ensure that the compre ssor is switched off.
6. Insert the plug 5 into the lighter socket/
power socket in the vehicle interior,
page 98.
7. With the engine running:
Switch on the compre ssor and let run for
about 3 to 8 minutes in order to add the
sealant and to achieve an inflation pressure
of about 1.8 bar/26 psi.
When adding sealant, the filling
pressure can temporarily increase up
to about 5 bar/73 psi. Do not switch off the
compressor during this phase. <
Do not run the compressor for longer
than 10 minutes; otherwise, the
device will overheat and possibly be
damaged. <
8. Switch off the compressor.
If an inflation pressure of 1.8 bar/26 psi is not
reached:
1. Unscrew the filling hose 2 from the wheel
and drive the vehicle forward and backward
approx. 33 ft/10 m to distribute the liquid
sealant in the tire evenly.
2. Inflate the tire again with the compressor.
If an inflation pressure of 1.8 bar/26 psi
still cannot be reached, then the tire is too
heavily damaged. Please contact the nearest
MINI dealer. <
Stowing Mobility Kit
1.Unscrew filler hose 2 of the sealant bottle
from the wheel.
2. Unscrew connecting hose of the
compressor 6 from the sealant bottle.
3. Connect the filler hose 2 of the sealant bot-
tle to the unoccupied connection on the
sealant bottle.
This prevents the rest of the sealant from
escaping from the bottle.
4. Wrap the empty sealant bottle in suitable
material to avoid dirtying the cargo area.
5. Stow Mobility Kit back in the vehicle.
Distributing the sealant.
Immediately drive approx. 3.1 miles/5 km so
that the sealant evenly distributes itself.
Do not exceed speeds of 50 mph/
80 km/h.
If possible, do not drop below 10 mph/
20 km/h.<
Correct the tire inflation pressure.
1. After driving approx. 3.1 miles/5 km or
ten minutes, stop at a suitable location.
2. Screw the connection hose 6 of the
compressor directly onto the tire valve.
3. Insert the plug 5 into the power socket in
the vehicle interior.
4. Adjust tire pressure to 1.8 bar/26 psi. With
the engine running:
> To increase the inflatio n pressure: switch on
the compressor. To check the current infla-
tion pressure, switch off the compressor.
Do not run the compressor for longer
than 10 minutes; otherwise, the
device will overheat and possibly be
damaged. <
> To decrease the inflat ion pressure: press the
release button 9.
Online Edition for Part no. 01 40 2 914 849 - \251 07/12 BMW AG
Page 223 of 259

MOBILITYReplacing components
222
If the tire cannot maintain the inflation
pressure, drive the vehicle again, refer to
Distributing the sealan t. Then repeat steps
1to4.
If an inflation pressure of 1.8 bar/26 psi still
cannot be reached, then the tire is too heavily
damaged. Contact your nearest MINI dealer. <
Driving on
Do not exceed the permitted maximum
speed of 50 mph/80 km/h; doing so may
result in an accident. <
Replace the defective tire as soon as possible
and have the new wheel/tire assembly
balanced.
Have the Mobility Kit refilled.
Changing wheels
The pouch with the wheel changing kit is stored
under the flat load floor.
It includes:
> Vehicle jack
> Reversible ratchet
> Wheel stud wrench
> Extractor hook for wheel center cover
> Chock
Preparing for a wheel change
Observe the safety precautions regarding
flat tires on page 219.<
Additional safety measures when
changing tires:
Only change the tire wh en parked on a surface
that is level, firm and not slippery.
The vehicle or the jack could slip sideways on
soft or slippery support surfaces, such as snow,
ice, flagstones, etc.
Do not use a wooden block or similar object as a
support base for the jack, as this would prevent
it from extending to its full support height and
reduce its load-carrying capacity.
Do not lie under the vehicle or start the engine when the vehicle is supported by the jack; other-
wise, there is a risk of fatal injury.
<
1. Place the foldable chock
behind the front
wheel on the other side of the vehicle or in
front of the wheel if the vehicle is on an
incline. If the wheel is changed on a surface
with a more severe sl ope, take additional
precautions to secure the vehicle from
rolling.
2. Uncover the lug bolts if necessary.
3. Loosen the lug bolts by a half turn.
Jacking up the vehicle
The vehicle jack is designed for changing
wheels only. Do not attempt to raise
another vehicle model with it or to raise any load
of any kind. To do so could cause accidents and
personal injury. <
1. Place the jack at the jacking point closest to
the wheel.
The jack base must be perpendicular to the
surface beneath the jacking point.
2. Slide reversible ratche t onto the fixture on
the jack, arrow 1.
Online Edition for Part no. 01 40 2 914 849 - \251 07/12 BMW AG
Page 245 of 259
244
REFERENCEEverything from A to Z
Everything from A to Z
Index
A
ABS Antilock Brake System70
Accepting a call 163,174
Accessories, see Vehicle equipment 4
Acknowledgment signals for locking/unlocking vehicle 28
Activated-charcoa l filter for
automatic climate control 89
Adaptive Light Control 82
Adding engine oil 207
Additives
– coolant 208
– engine oil 207
Address, entering 122
Address for navigation
– entering 116,122
Adjusting temperature inside the car, refer to Air
conditioner 86
Adjusting temperature inside the car, refer to Automatic
climate control 87
Adjusting the tone during audio operation, refer to
Tone control 137
Airbags 78
– sitting safely 37
– warning lamp 80
Air conditioner 85
Air conditioning mode
– air conditioner 86
– automatic cl imate control87
– ventilation 89
Air distribution
– automatic 88
– individual 87
– manual 87 Air flow rate
86,88
– air conditioning system 86
– automatic climate control 88
– heating, ventilation 86
Airing, refer to Ventilation89
Air outlets, refe r to Air vents85
Air pressure, checking, refer to Tire inflation pressure 196
Air recirculation, refer to
Recirculated-air
mode 86,88
Air supply
– air conditioner 86
– automatic climate control 87
– ventilation 89
Air vents 85
AKI, refer to Fuel grade 195
Alarm system 31
ALL4 all-w h
ee
l drive system 72
All-season tires, refer to Winter
tires 204
All-wheel drive, refer to ALL4 72
AM, waveband 139
Ambient air, refer to Recirculated-air
mode 86,88
Ambient lighting 84
Antenna, care 211
Antifreeze
– coolant 208
– washer fluid 55
Antilock Brake System ABS 70
Anti-theft alarm system, refer to Alarm system 31
Approved axle loads, refer to Weights 234
Approved engine oils 207
Approved gross vehicle weight, refer to Weights 234
Armrest, refer to Center
armrest 94 Arrival time
– computer
60
– route guidance 125
Ashtray 97
Assistant systems, refer to
– Dynamic Stability Control
DSC 70
Audio 136
– controls 136
– switching on/off 136
– tone control 137
– volume 137
Audio device, external 94
Automatic
– air distribution 88
– air flow rate 88
– cruise control 56
– headlamp control 81
Automatic climate control 85
– automatic air distribution 88
Automatic transmission with Steptronic 50
– interlock 51
– overriding selector lever lock 52
– shiftlock 51
– sport program 52
AUTO program for automatic climate control 88
Auxiliary phone 171
AUX-In, refer to External audio device 94
AUX-In connection 149
Average fuel consumption 59
– sett in
g the
units 61
Average speed 60
Avoiding highways for navigation 125
Axle loads, refer to Weights 234
Online Edition for Part no. 01 40 2 914 849 - \251 07/12 BMW AG
Page 250 of 259
Everything from A to ZREFERENCE
249
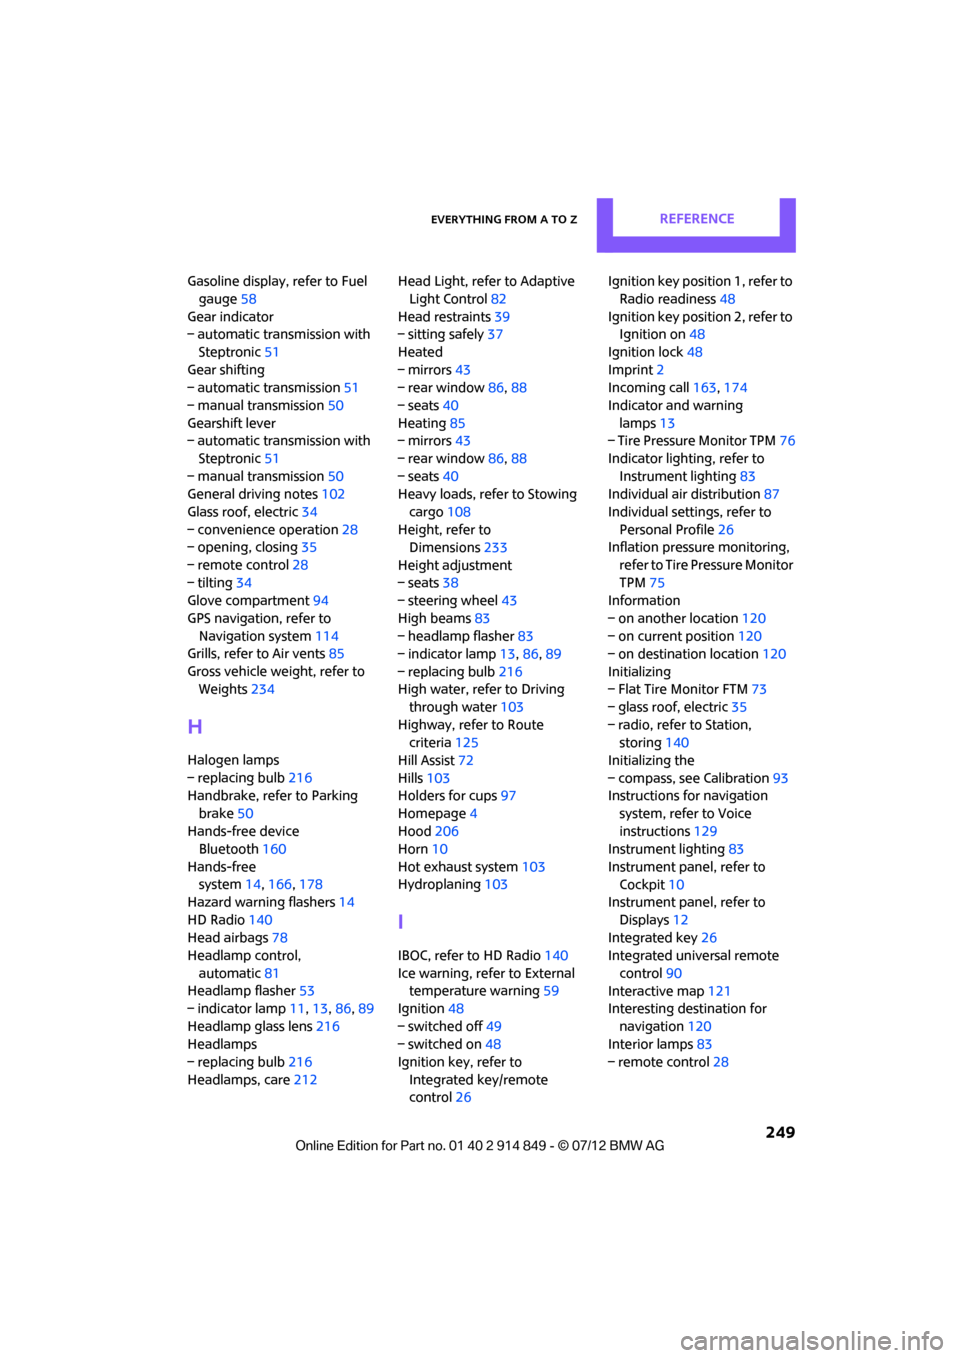
Gasoline display, refer to Fuel gauge 58
Gear indicator
– automatic transmission with
Steptronic 51
Gear shifting
– automatic transmission 51
– manual transmission 50
Gearshift lever
– automatic transmission with
Steptronic 51
– manual transmission 50
General driving notes 102
Glass roof, electric 34
– convenience operation 28
– opening, closing 35
– remote control 28
– tilting 34
Glove compartment 94
GPS navigation, refer to Navigation system 114
Grills, refer to Air vents 85
Gross vehicle weight, refer to Weights 234
H
Halogen lamps
– replacing bulb 216
Handbrake, refer to Parking
brake 50
Hands-free device Bluetooth 160
Hands-free system 14,166 ,178
Hazard warning flashers 14
HD Radio 140
Head airbags 78
Headlamp control,
automatic 81
Headlamp flasher 53
– indicator lamp 11,13,86,89
Headlamp glass lens 216
Headlamps
– replacing bulb 216
Headlamps, care 212Head Light, refer to Adaptive
Light Control 82
Head restraints 39
– sitting safely 37
Heated
– mirrors 43
– rear window 86,88
– seats 40
Heating 85
– mirrors 43
– rear window 86,88
– seats 40
Heavy loads, refer to Stowing
cargo 108
Height, refer to Dimensions 233
Height adjustment
– seats 38
– steering wheel 43
High beams 83
– headlamp flasher 83
– indicator lamp 13,86,89
– replacing bulb 216
High water, refer to Driving through water 103
Highway, refer to Route criteria 125
Hill Assist 72
Hills 103
Holders for cups 97
Hom e
pag
e 4
Hood 206
Horn 10
Hot exhaust system 103
Hydroplaning 103
I
IBOC, refer to HD Radio 140
Ice warning, refer to External temperature warning 59
Ignition 48
– switched off 49
– switched on 48
Ignition key, refer to
Integrated key/remote
control 26 Ignition key position 1, refer to
Radio readiness 48
Ignition key position 2, refer to Ignition on 48
Ignition lock 48
Imprint 2
Incoming call 163,174
Indicator and warning lamps 13
– Tire Pressure Monitor TPM 76
Indicator lighting, refer to Instrument lighting 83
Individual air distribution 87
Individual settings, refer to Personal Profile 26
Inflation pressure monitoring,
refer to Tire Pressure Monitor
TPM 75
Information
– on another location 120
– on current position 120
– on destination location 120
Initializing
– Flat Tire Monitor FTM 73
– glass roof, electric 35
– radio, refer to Station, storing 140
Initializing the
– compass, see Calibration 93
Instructions for navigation
system, refer to Voice
instructions 129
Instrument lighting 83
Instrument pane l, refer to
Cockpit 10
Instrument pane l, refer to
Displays 12
Integrated key 26
Integrated universal remote
control 90
Interactive map 121
Interesting destination for
navigation 120
Interior lamps 83
– remote control 28
Online Edition for Part no. 01 40 2 914 849 - \251 07/12 BMW AG
Page 254 of 259
Everything from A to ZREFERENCE
253
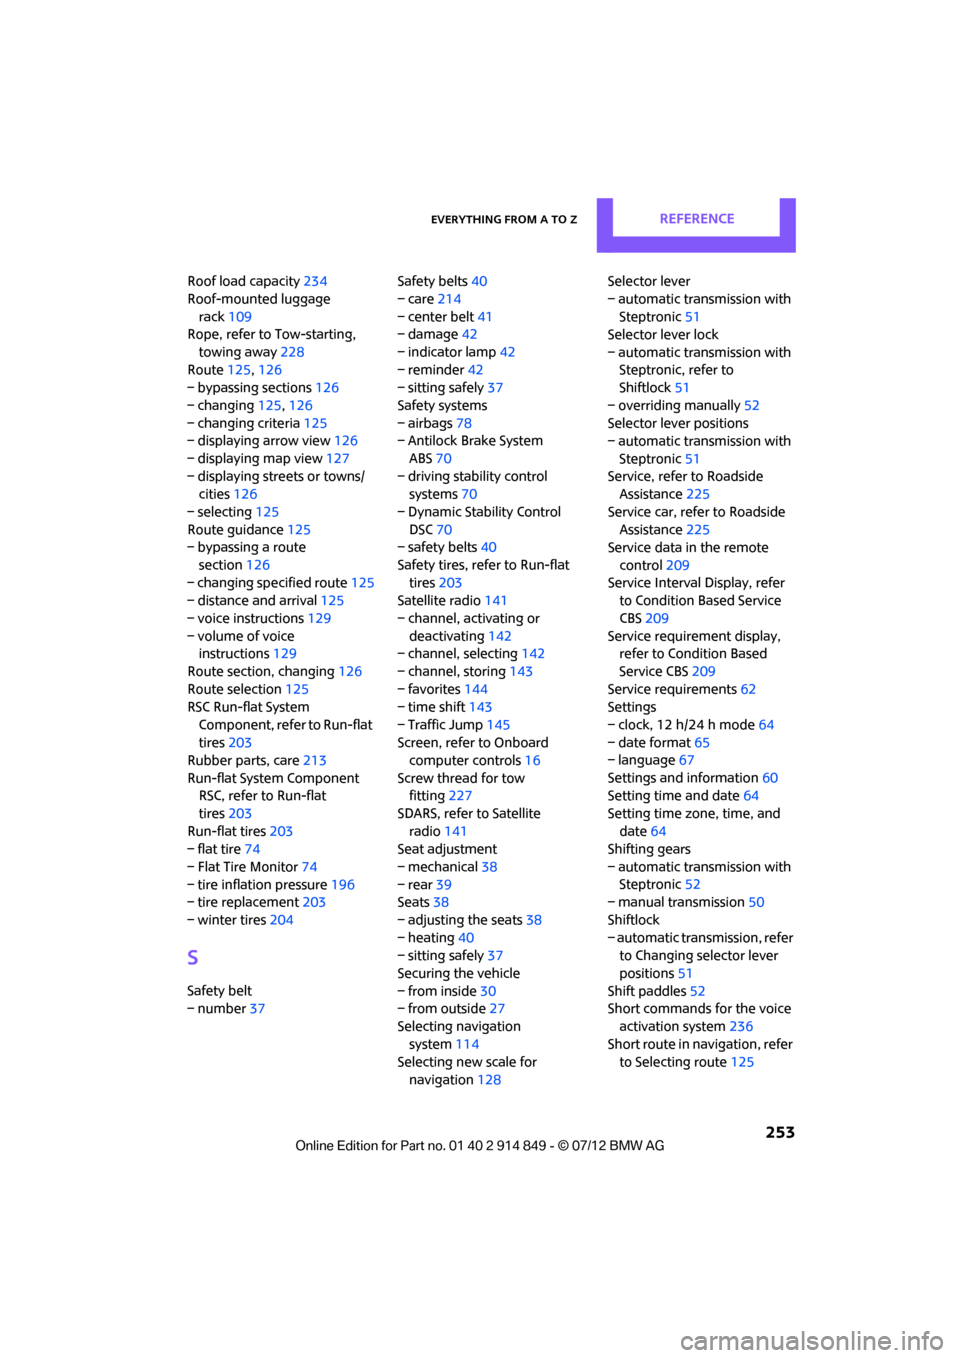
Roof load capacity234
Roof-mounted luggage rack 109
Rope, refer to Tow-starting,
towing away 228
Route 125,126
– bypassing sections 126
– changing 125,126
– changing criteria 125
– displaying arrow view 126
– displaying map view 127
– displaying streets or towns/ cities 126
– selecting 125
Route guidance 125
– bypassing a route
section 126
– changing specified route 125
– distance and arrival 125
– voice instructions 129
– volume of voice instructions 129
Route section, changing 126
Route selection 125
RSC Run-flat System
Component, refer to Run-flat
tires 203
Rubber parts, care 213
Run-flat System Component RSC, refer to Run-flat
tires 203
Run-flat tires 203
– flat tire 74
– Flat Tire Monitor 74
– tire inflation pressure 196
– tire replacement 203
– winter tires 204
S
Safety belt
– number37 Safety belts
40
– care 214
– center belt 41
– damage 42
– indicator lamp 42
– reminder 42
– sitting safely 37
Safety systems
– airbags 78
– Antilock Brake System
ABS 70
– driving stability control systems 70
– Dynamic Stability Control DSC 70
– safety belts 40
Safety tires, refer to Run-flat tires 203
Satellite radio 141
– channel, activating or deactivating 142
– channel, selecting 142
– channel, storing 143
– favorites 144
– time shift 143
– Traffic Jump 145
Screen, refer to Onboard computer controls 16
Screw thread for tow fitting 227
SDARS, refer to Satellite radio 141
Seat adjustment
– mechanical 38
– rear 39
Seats 38
– adjusting the seats 38
– heating 40
– sitting safely 37
Securing the vehicle
– from inside 30
– from outside 27
Selecting navigation system 114
Selecting new scale for
navigation 128 Selector lever
– automatic transmission with
Steptronic 51
Selector lever lock
– automatic transmission with Steptronic, refer to
Shiftlock 51
– overriding manually 52
Selector lever positions
– automatic transmission with
Steptronic 51
Service, refer to Roadside Assistance 225
Service car, refer to Roadside Assistance 225
Service data in the remote
control 209
Servi c
e Interv
al Display, refer
to Condition Based Service
CBS 209
Service requirement display, refer to Condition Based
Service CBS 209
Service requirements 62
Settings
– clock, 12 h/24 h mode 64
– date format 65
– language 67
Settings and information 60
Setting time and date 64
Setting time zone, time, and date 64
Shifting gears
– automatic transmission with Steptronic 52
– manual transmission 50
Shiftlock
– automatic transmission, refer to Changing selector lever
positions 51
Shift paddles 52
Short commands for the voice
activation system 236
Short route in navigation, refer to Selecting route 125
Online Edition for Part no. 01 40 2 914 849 - \251 07/12 BMW AG
Page 256 of 259
Everything from A to ZREFERENCE
255
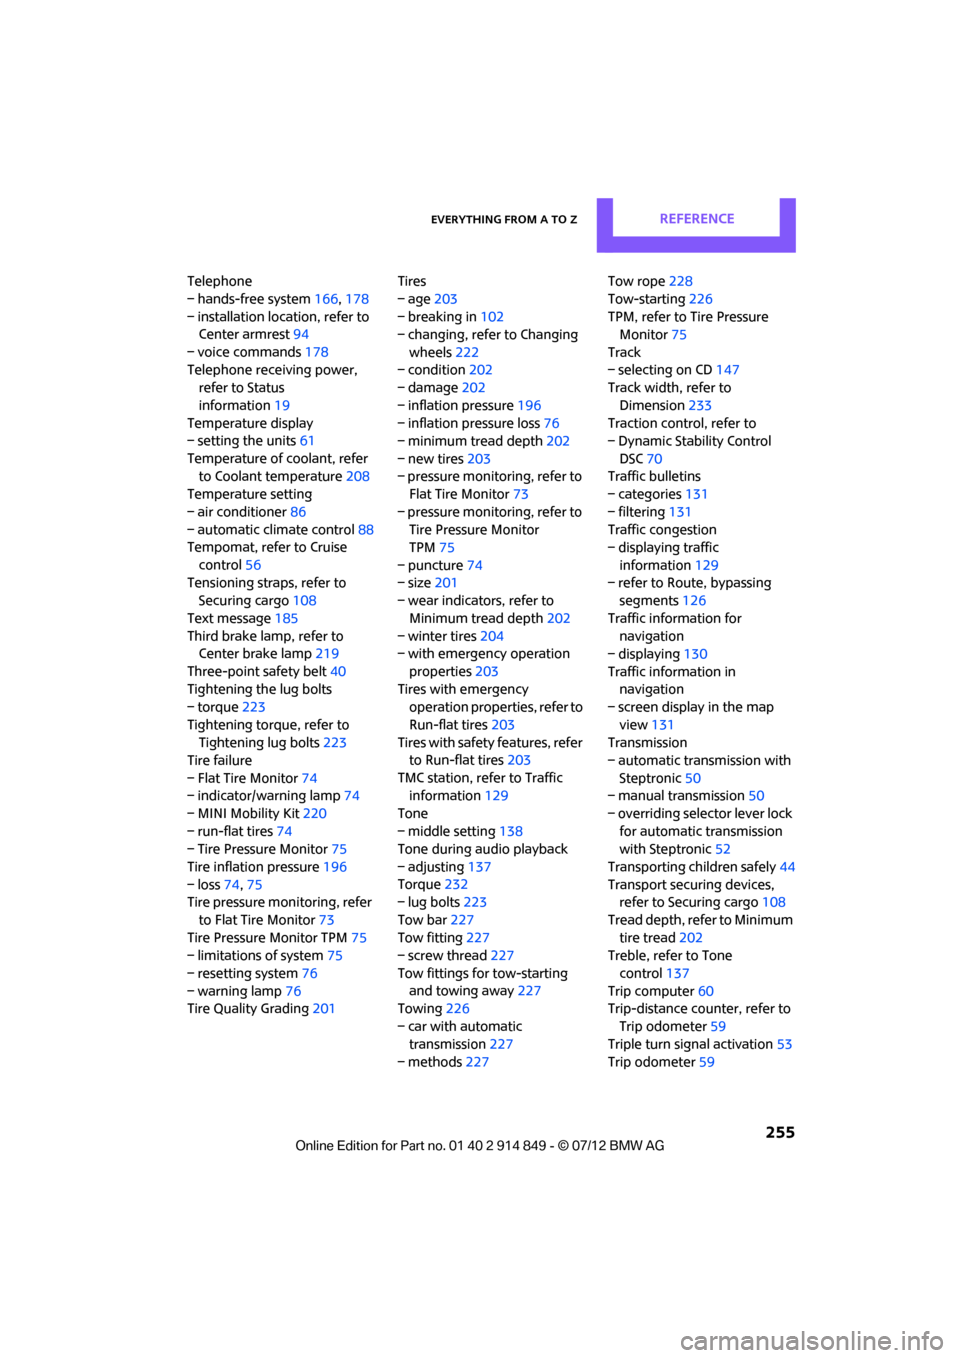
Telephone
– hands-free system166,178
– installation location, refer to Center armrest 94
– voice commands 178
Telephone receiving power, refer to Status
information 19
Temperature display
– setting the units 61
Temperature of coolant, refer to Coolant temperature 208
Temperature setting
– air conditioner 86
– automatic climate control 88
Tempomat, refer to Cruise
control 56
Tensioning straps, refer to Securing cargo 108
Text message 185
Third brake lamp, refer to Center brake lamp 219
Three-point safety belt 40
Tightening the lug bolts
– torque 223
Tightening torque, refer to Tightening lug bolts 223
Tire failure
– Flat Tire Monitor 74
– indicator/warning lamp 74
– MINI Mobility Kit 220
– run-flat tires 74
– Tire Pressure Monitor 75
Tire inflation pressure 196
– loss 74,75
Tire pressure monitoring, refer
to Flat Tire Monitor 73
Tire Pressure Monitor TPM 75
– limitations of system 75
– resetting system 76
– warning lamp 76
Tire Quality Grading 201Tires
– age
203
– breaking in 102
– changing, refe r to Changing
wheels 222
– condition 202
– damage 202
– inflation pressure 196
– inflation pressure loss 76
– minimum tread depth 202
– new tires 203
– pressure monitoring, refer to Flat Tire Monitor 73
– pressure monitoring, refer to Tire Pressure Monitor
TPM 75
– puncture 74
– size 201
– we ar
indicators, refer to
Minimum tread depth 202
– winter tires 204
– with emergency operation
properties 203
Tires with emergency operation properties, refer to
Run-flat tires 203
Tires with safety features, refer
to Run-flat tires 203
TMC station, refer to Traffic information 129
Tone
– middle setting 138
Tone during audio playback
– adjusting 137
Torque 232
– lug bolts 223
Tow bar 227
Tow fitting 227
– screw thread 227
Tow fittings for tow-starting and towing away 227
Towing 226
– car with automatic transmission 227
– methods 227 Tow rope
228
Tow-starting 226
TPM, refer to Tire Pressure Monitor 75
Track
– selecting on CD 147
Track width, refer to
Dimension 233
Traction control, refer to
– Dynamic Stability Control
DSC 70
Traffic bulletins
– categories 131
– filtering 131
Traffic congestion
– displaying traffic
information 129
– refer to Route, bypassing segments 126
Traffic information for navigation
– displaying 130
Traffic information in navigation
– screen display in the map
view 131
Transmission
– automatic transmission with
Steptronic 50
– manual transmission 50
– overriding selector lever lock for automatic transmission
with Steptronic 52
Transporting children safely 44
Transport securing devices, refer to Securing cargo 108
Tread depth, refer to Minimum tire tread 202
Treble, refer to Tone
control 137
Trip computer 60
Trip-dist a
n
ce counter, refer to
Trip odometer 59
Triple turn signal activation 53
Trip odometer 59
Online Edition for Part no. 01 40 2 914 849 - \251 07/12 BMW AG