Check control MINI Countryman 2012 (Mini Connected) Owner's Guide
[x] Cancel search | Manufacturer: MINI, Model Year: 2012, Model line: Countryman, Model: MINI Countryman 2012Pages: 259, PDF Size: 3.07 MB
Page 91 of 259
CONTROLSPractical interior accessories
90
Practical interior accessories
Vehicle equipment
In this chapter, all production, country, and
optional equipment that is offered in the model
range is described. Equipment is also described
that is not available because of, for example,
selected options or coun try version. This also
applies to safety relate d functions and systems.
Integrated universal
remote control
The concept
By using the Integrated universal remote con-
trol, up to 3 functions of remote controlled
devices, e.g., garage door openers or lighting
systems, can be operated . As a result, the uni-
versal remote control can replace up to 3 differ-
ent remote controls. To operate, the buttons on
the rearview mirror must be programmed with
the desired functions. For programming, the
remote control for each device is needed.
To prevent possible damage or injury,
before programming or using the inte-
grated universal remote control, always inspect
the immediate area to make certain that no
people, animals or object s are within the travel
range of the device.
Comply also with the safe ty instructions supplied
with the original hand-held transmitter. <
Before selling the vehicle, delete the stored
functions as a safe ty precaution, page.
Checking compatibility
Depending on your vehicle's equip-
ment, the glove compartment can be
ventilated and, if th e cooling function is
switched on, can also be cooled.
For additional informatio n, please contact your
MINI dealer or call: 1-800-355-3515. A list of compatible remote controls is available
on the Internet at www.homelink.com.
HomeLink is a registered trademark of Johnson
Controls, Inc.
Operating elements on the rearview
mirror
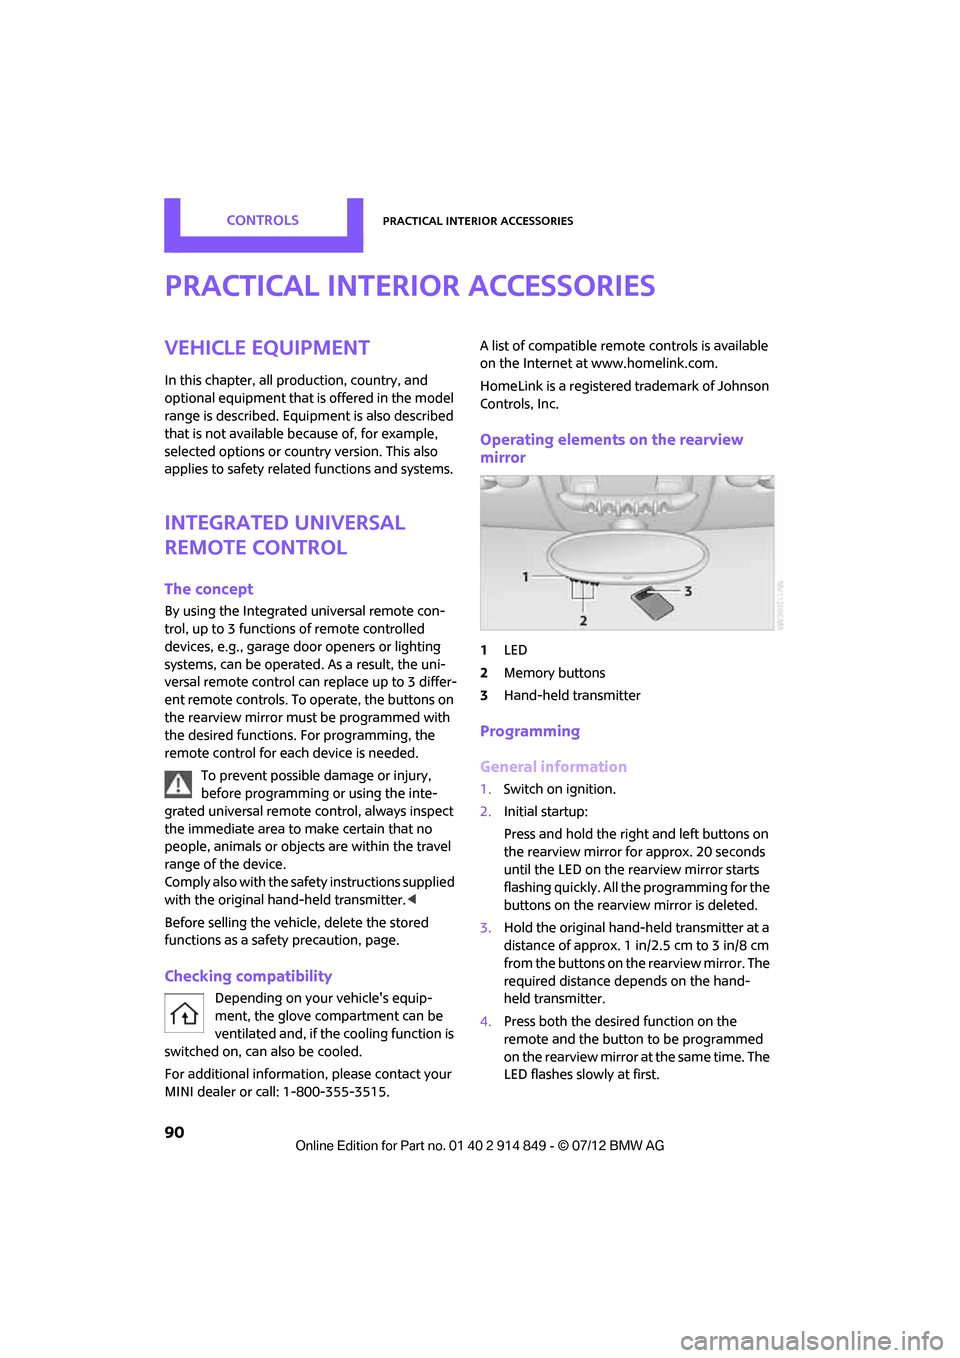
1
LED
2 Memory buttons
3 Hand-held transmitter
Programming
General information
1.Switch on ignition.
2. Initial startup:
Press and hold the righ t and left buttons on
the rearview mirror for approx. 20 seconds
until the LED on the rearview mirror starts
flashing quickly. All the programming for the
buttons on the rearview mirror is deleted.
3. Hold the original hand-held transmitter at a
distance of approx. 1in/2.5cm to 3in/8cm
from the buttons on the rearview mirror. The
required distance depends on the hand-
held transmitter.
4. Press both the desired function on the
remote and the button to be programmed
on the rearview mirror at the same time. The
LED flashes slowly at first.
Online Edition for Part no. 01 40 2 914 849 - \251 07/12 BMW AG
Page 92 of 259
Practical interior accessoriesCONTROLS
91
5.As soon as the LED flashes rapidly, release
both buttons. The quick flashing indicates
that the button on the rearview mirror has
been programmed.
If the LED does not flash rapidly after
approx. 60 seconds, alter the distance
between the rearview mirror and hand-held
transmitter and repeat this step. Several
attempts at different distances may be
necessary. Wait at le ast 15 seconds before
each attempt.
Canada: if the progra mming was interrupted
by the hand-held transmitter, press and hold
the memory button and press the button on
the hand-held transmitter for 2 seconds and
release several times.
6. To program other functions on other
buttons, repeat steps 3 to 5.
You can operate the system with the engine
running or with the ignition switched on.
Special features of hopping-code
transmitter systems
If the device cannot be operated after being
programmed repeatedly, then check if the
device to be operated is equipped with a hop-
ping-code system. In a ddition, check in the
operating instructions for the device or press the
programmed button on the rearview mirror for a
longer period of time. If the LED on the rearview
mirror first flashes quickly and then is on for
2 seconds, then the device is equipped with a
hopping-code system. The flashing and the LED
being on repeats itself for approx. 20 seconds.
In addition, for devices with hopping-code
systems, the integrated universal remote control
and the device must be synchronized.
Information about synchronizing can be found
in the operating instructions for the device to be
set.
Programming will be easier with the aid of a
second person. Synchronizing:
1.
Park your vehicle within the range of the
remote-controlled device.
Do not exceed the 164 ft/50 m range of the
remote-controlled device.
2. Program the particular button on the rear-
view mirrors as described.
3. Find and press the button for synchronizing
the device to be set. There remain approx.
30 seconds for the next step.
4. Press and hold the programmed button on
the rearview mirror for approx. 3seconds
and then release. Repe at this step, possibly
up to three times, to complete the synchro-
nization. After the sy nchronization is com-
pleted, the programmed function is imple-
mented.
To reprogram individual buttons
1. Switch on ignition.
2. Press and hold the button to be pro-
grammed on the rearview mirror.
3. As soon as the LED on the rearview mirror
starts flashing slowly, hold the hand-held
transmitter of the devi ce to be operated
approx. 1in/2.5cm to 3in/8cm from the
buttons on the rearview mirror. The required
distance depends on the hand-held trans-
mitter.
4. Press and also hold the button with the
desired function on the hand-held trans-
mitter.
5. As soon as the LED on the rearview mirror
starts blinking faster, release both buttons.
The quick flashing indicates that the button
on the rearview mirror has been pro-
grammed. The device can now be operated
using the button on the rearview mirror.
Canada: if the LED is not flashing rapidly
after 60 seconds, chan ge the distance and
repeat the step or, if the programming was
interrupted by the hand-held transmitter,
press and hold the memory button and
press the button on the hand-held transmit-
ter for 2 seconds and release several times.
Online Edition for Part no. 01 40 2 914 849 - \251 07/12 BMW AG
Page 112 of 259

Things to remember when drivingDRIVING TIPS
111
Driving on poor roads
Your MINI with ALL4 drive is at home on any
type of street or road. It combines an all-wheel
drive system with the advantages of a normal
passenger car.Do not drive on unpaved terrain, as other-
wise the vehicle may be damaged. <
When you are driving on poor roads, there are a
few points which you shou ld strictly observe for
your own safety, for that of your passengers,
and for the safety of the vehicle:
> Familiarize yourself with the vehicle before
beginning to drive an d do not take risks
under any circumstances.
> Adapt your speed to road conditions. The
steeper and rougher the road surface is, the
lower the speed should be.
> When driving on very steep uphill or down-
hill grades, make sure in advance that the
engine oil and coolant levels are close to the
maximum mark, refer to page 206.
> While driving, watch carefully for obstacles
such as rocks or holes. Try to avoid these
obstacles whenever possible.
> Make sure that the un dercarriage does not
touch the ground, for example on hilltops
and bumpy roads. The ground clearance of
the vehicle is a maximum of approx. 6.0 in/
15 cm. Please note that the ground clear-
ance can vary depending on loading and the
driving conditions of the vehicle.
> Only drive through road surface water up to
a maximum water depth of 1 ft/30 cm and
only at walking speed; do not remain sta-
tionary.
> After driving through water at low speed,
lightly press the brake pedal several times to
dry the brakes and to prevent the braking
effect from being reduced by wetness.
> Depending on the condition of the surface, it
may be practical to briefly activate DTC, refer
to DTC Dynamic Traction Control on
page 71. >
If the drive wheels spin on one side, depress
the accelerator pedal sufficiently so that the
driving stability control systems can distrib-
ute the drive forces to the individual wheels.
After driving on poor roads, please observe the
following points to maintain the driving safety of
the vehicle:
> Clean the coarsest dirt from the body.
> Clean mud, snow, ice, etc. from the wheels
and tires and check the tires for damage.
Online Edition for Part no. 01 40 2 914 849 - \251 07/12 BMW AG
Page 157 of 259
ENTERTAINMENTExternal devices
156
Device could not be paired or connected.
>Do the Bluetooth passkeys on the device
and vehicle match? Enter the same passkey
on the device and via the onboard com-
puter.
> A multi-digit passkey may be required.
> Is the passkey input taking longer than
30 seconds? Repeat th e pairing procedure.
> Are too many Bluetoot h devices connected
to the device or to the vehicle? If necessary,
delete the connections with other devices.
> Is the mobile phone in power economy
mode or does it only have a small amount of
battery charge remaining? Charge the
mobile phone in the snap-in adapter or via a
charging cable.
> Depending on the mobile phone, it may only
be possible to connect one device to the
vehicle. Unpair the connected device from
the vehicle and only pair and connect one
device.
> Is the device no longer responding? Switch
the device off an d back on again.
> Repeat the pairing procedure.
No music can be played.
> Start the program for playing music files on
the device and if necessary, select a track via
the device.
> Activate and deactivate the radio mute on
the radio control panel.
Music files only play quietly.
> Adjust volume settings on the device.
Videos cannot be played or can only be played
with a delayed audio output.
> Check the device compatibility. Information
is available at www.mini.com/connectivity.
Playback is interrupted by the press of a button
or other messages on the device.
> Switch off key tones and other acoustic
signal on the device.
Playback is interrupted by a phone call or traffic
report and does not automatically continue. >
Activate and deactivate the radio mute on
the radio control panel.
Playback is not possible when the mobile phone
is connected via Blueto oth audio and at the
same time via the music interface for smart-
phones at the snap-in adapter.
> Disconnect one of the two connections, e.g.
the audio connection, refer to page 155,
and start playback again.
If you have gone through all items in the list and
still cannot activate the desired function please
contact the Hotline or your MINI dealer.
Software update
The vehicle supports various external devices,
depending on the software it is currently using.
A software update can enable the vehicle to
support, for example, new mobile phones or
new external devices.
Software updates and a ssociated, up-to-date
instructions are availa ble on the web page
www.mini.com/c onnectivity.
Displaying current version
The currently installed software is displayed.
1."Settings"
2. "Software update"
3. "Show current version"
Select the desired versio n to display additional
information.
Updating software
The software update can only be performed
when stopped.
1. Save the file for the software update in the
main directory of a USB data storage device.
2. Connect the USB data storage device to the
USB port in the center console, refer to
page 150. Updating using the USB port in
the glove compartment is not possible.
3. "Settings"
Online Edition for Part no. 01 40 2 914 849 - \251 07/12 BMW AG
Page 161 of 259
COMMUNICATIONSHands-free device Bluetooth
160
Hands-free device Bluetooth
Vehicle equipment
In this chapter, all production, country, and
optional equipment that is offered in the model
range is described. Equipment is also described
that is not available because of, for example,
selected options or coun try version. This also
applies to safety relate d functions and systems.
Overview
The concept
Mobile phones can be connected to the vehicle
through Bluetooth.
Bluetooth® is a registered trademark of
Bluetooth® SIG, Inc.
After being paired once, when the ignition is
switched on, these devices are automatically
detected as soon as they are present in the
vehicle and can be controlled via the onboard
computer, the buttons on the steering wheel,
and by voice.
Up to four mobile phones can be paired.
It may be necessary for some functions to be
activated by the mobile phone provider.
Only make entries when traffic conditions
permit. Do not hold the mobile phone in
your hand while you are driving; use the hands-
free system instead. If you do not observe this
precaution, your being distracted can endanger
vehicle occupants and other road users. <
Suitable mobile phones
Precise information as to which mobile phones
are supported by the hands-free device can be
found at www.mini.com/connectivity.
With a certain software version, these suitable
mobile phones support the vehicle functions
described below. With other mobile phones
or software versions,
malfunctions may occur.
A mobile phone that is connected to the vehicle
should not be operated via the mobile phone
keypad; otherwise, ma lfunctions may occur.
Displaying vehicle identification number
and software part number
To check which mobile phones are supported by
the hands-free device, th e vehicle identification
number and the software part number will be
required. The software version of the mobile
phone may also be required.
1. "Telephone"
2. Open "Options".
3. "Bluetooth® info"
4. "Display system information"
Notes
Do not expose your mobile phone to extreme
ambient conditions, for example, very high tem-
peratures; otherwise, fu nctions on your mobile
phone may not work. Follow the operating
instructions for yo ur mobile phone.
Pairing/unpairing mobile
phone
Requirements
>Suitable mobile phone, refer to page 160.
> Mobile phone operational.
> Bluetooth activated in vehicle, refer to
page 161, and in the mobile phone.
> Bluetooth presets in the mobile phone are
required, e.g. connection not confirmed or
visible, refer to Ow ner's Manual for the
mobile phone.
Online Edition for Part no. 01 40 2 914 849 - \251 07/12 BMW AG
Page 170 of 259
Mobile phone preparation BluetoothCOMMUNICATIONS
169
Mobile phone preparation Bluetooth
Vehicle equipment
In this chapter, all production, country, and
optional equipment that is offered in the model
range is described. Equipment is also described
that is not available because of, for example,
selected options or count ry version. This also
applies to safety related functions and systems.
Overview
The concept
Mobile phones or other external devices, e.g.
audio players, can be connected to the vehicle
via Bluetooth.
Bluetooth® is a registered trademark of
Bluetooth® SIG, Inc.
After being paired once, when the ignition is
switched on, these devices are automatically
detected as soon as they are present in the
vehicle and can be controlled via the onboard
computer, the buttons on the steering wheel,
and by voice.
Depending on whether they are functioning as a
telephone and/or as an audio source, external
devices can be used via the vehicle. The tele-
phone functions will be described below.
Operation of audio functions, refer to page 153.
It may be necessary for some functions to be
activated by the mobile phone provider.
Only make entries when traffic conditions
permit. Do not hold the mobile phone in
your hand while you are driving; use the hands-
free system instead. If you do not observe this
precaution, your being di stracted can endanger
vehicle occupants and other road users. <
Snap-in adapter
The snap-in adapter, refer to page180, makes it
possible to:
> Accommodate the mobile phone.
> Recharge its battery.
> Connect it to an exte rnal antenna of the
vehicle.
This assures a better network connection
and constant sound quality.
A mobile phone that is connected to the vehicle
should not be operated via the mobile phone
keypad; otherwise, ma lfunctions may occur.
Suitable mobile phones
For precise information as to which mobile
phones and external devices with Bluetooth
interfaces are supported by the mobile phone
preparation package, go to www.mini.com/con-
nectivity.
With a certain software version, these suitable
mobile phones support the vehicle functions
described below.
With other mobile phones or software versions,
malfunctions may occur.
It is possible to perform a software update, refer
to page 156.
Displaying vehicle identification number
and software part number
Checking which mobile phones are supported
by the mobile phone preparation requires the
vehicle identification number and software part
number. The software version of the mobile
phone may also be required.
1."Telephone"
2. Open "Options".
3. "Bluetooth® info"
4. "Display system information"
Online Edition for Part no. 01 40 2 914 849 - \251 07/12 BMW AG
Page 197 of 259
MOBILITYWheels and tires
196
Wheels and tires
Vehicle equipment
In this chapter, all production, country, and
optional equipment that is offered in the model
range is described. Equipment is also described
that is not available because of, for example,
selected options or coun try version. This also
applies to safety relate d functions and systems.
Tire inflation pressures
Information for your safety
It is not merely the tire s' service life, but also
driving comfort and, to a great extent, driving
safety that depend on the condition of the tires
and the maintenance of the specified tire
pressure.
Checking pressure
Check the tire inflation pressure regularly
and correct it, if necessary: at least twice a
month and before starting long trips. If you fail
to observe this precauti on you may be driving
on tires with incorrect ti re pressures, a condition
that can not only compromise your vehicle's
driving stability, but also l e a d t o t i r e d a m a g e a n d
the risk of an accident. Do not drive with
deflated, i.e. flat tires, except when using run-
flat tires. A flat tire will seriously impair your
vehicle's handling and braking response.
Att empt s to drive o n a flat t ire can lead to lo ss of
control over the vehicle. <
Check the tire inflation pressures only on cold
tires. This means after a maximum of 1.25 miles/
2 km driving or when the vehicle has been
parked for at least 2 hou rs. When tires are warm,
the tire inflation pressure is higher.
After adjusting the tire inflation pressure,
reinitialize the Flat Tire Monitor, page 73,
or reset the Tire Pressure Monitor, page 76.<
Pressure specifications
The tables below provide all the correct inflation
pressures for the specified tire sizes at ambient
temperature.
The tire inflation pressures apply to the
tire sizes approved and the tire brands
recommended by the manufacturer of your
MINI. Your MINI dealer will be glad to advise
you. <
For correct identificati on of the right tire
inflation pressures, observe the following:
> Tire sizes for your vehicle
> Maximum allowable driving speed
Tire inflation pressures for driving up to
100 mph or 160 km/h
For normal driving up to 100 mph or 160 km/h
and to achieve optimum driving comfort, adjust
pressures to the respective tire inflation
pressures listed on the following pages in the
columns for traveling sp eeds up to a maximum
of 100 mph or 160 km/h.
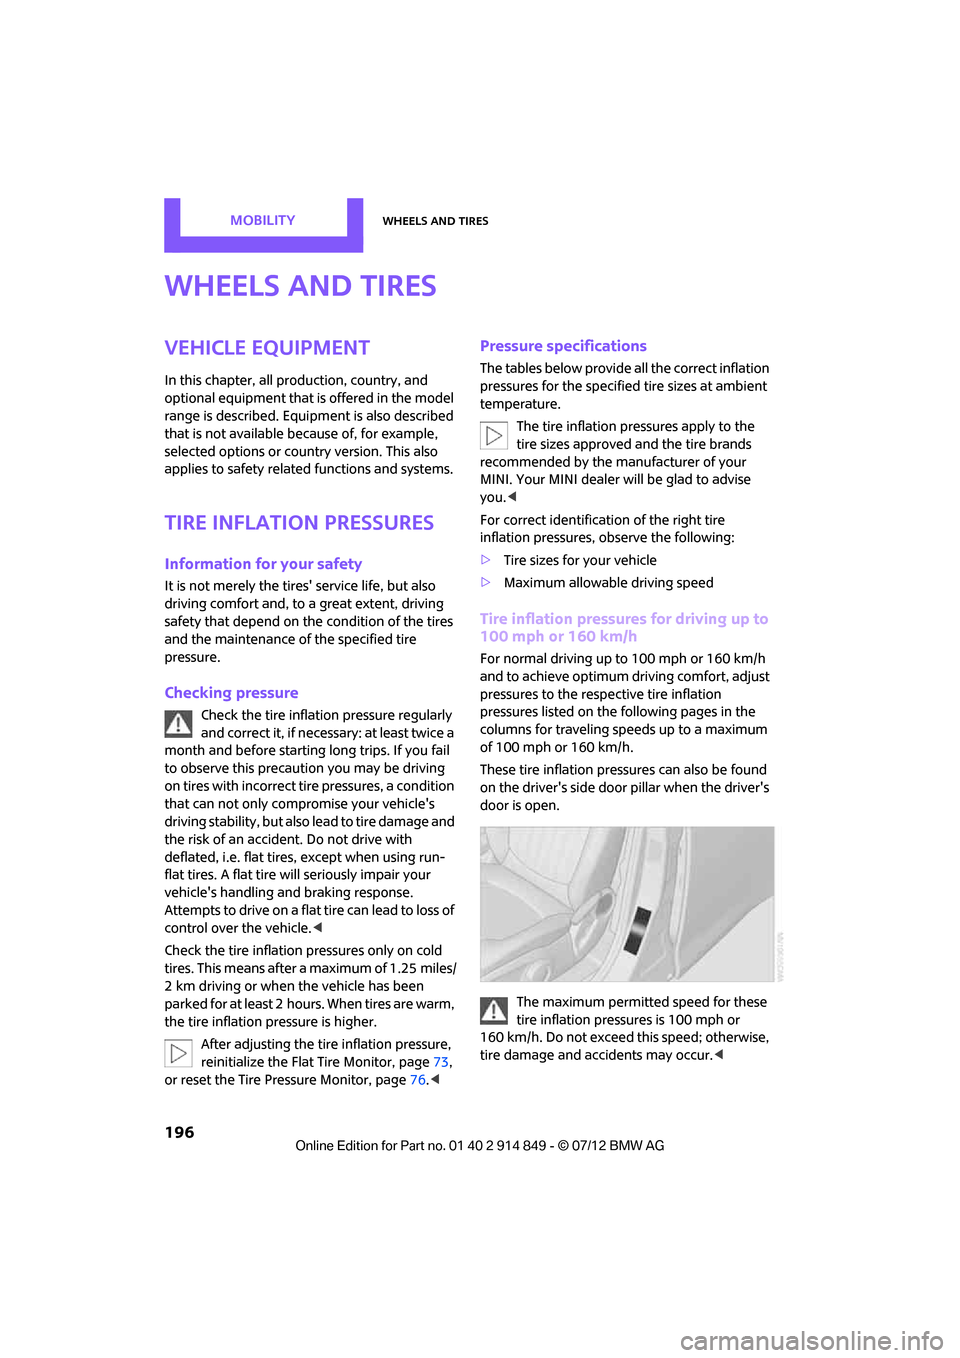
These tire inflation pre ssures can also be found
on the driver's side door pillar when the driver's
door is open.
The maximum permitted speed for these
tire inflation pressures is 100 mph or
160 km/h. Do not exceed this speed; otherwise,
tire damage and accidents may occur. <
Online Edition for Part no. 01 40 2 914 849 - \251 07/12 BMW AG
Page 209 of 259

MOBILITYEngine compartment
208
Coolant
Coolant consists of half water and half additive.
Not all commercially available additives are
suitable for your MINI. Your MINI dealer knows
which additives are suitab le and will be glad to
advise you.
Only use suitable additives; otherwise,
engine damage may result. Because addi-
tives are harmful to your health, it is important
to follow the instructions on the containers. <
Comply with the appropriate environmen-
tal protection regulations when disposing
of coolant additives. <
Coolant temperature
A warning lamp will come on if the coolant, and
therefore the engine, becomes too hot.
A message appears on the Control Display.
Checking coolant level
Do not add coolant to the cooling system
when the engine is hot. Escaping coolant
can cause burns. <
Do not open the hood until the engine has
cooled down.
The coolant level is correct if it is between the
Min and Max markings.
Topping off
1. Turn the cap of the expansion tank a little
counterclockwise to allow any accumulated
pressure to escape, then continue turning to
open.
2. Slowly fill to the correct fluid level; do not
overfill.
3. Close by turning the cap.
Have the reason for the coolant loss eliminated
as soon as possible.
Online Edition for Part no. 01 40 2 914 849 - \251 07/12 BMW AG
Page 211 of 259
MOBILITYMaintenance
210
Socket for On-Board
Diagnosis OBD
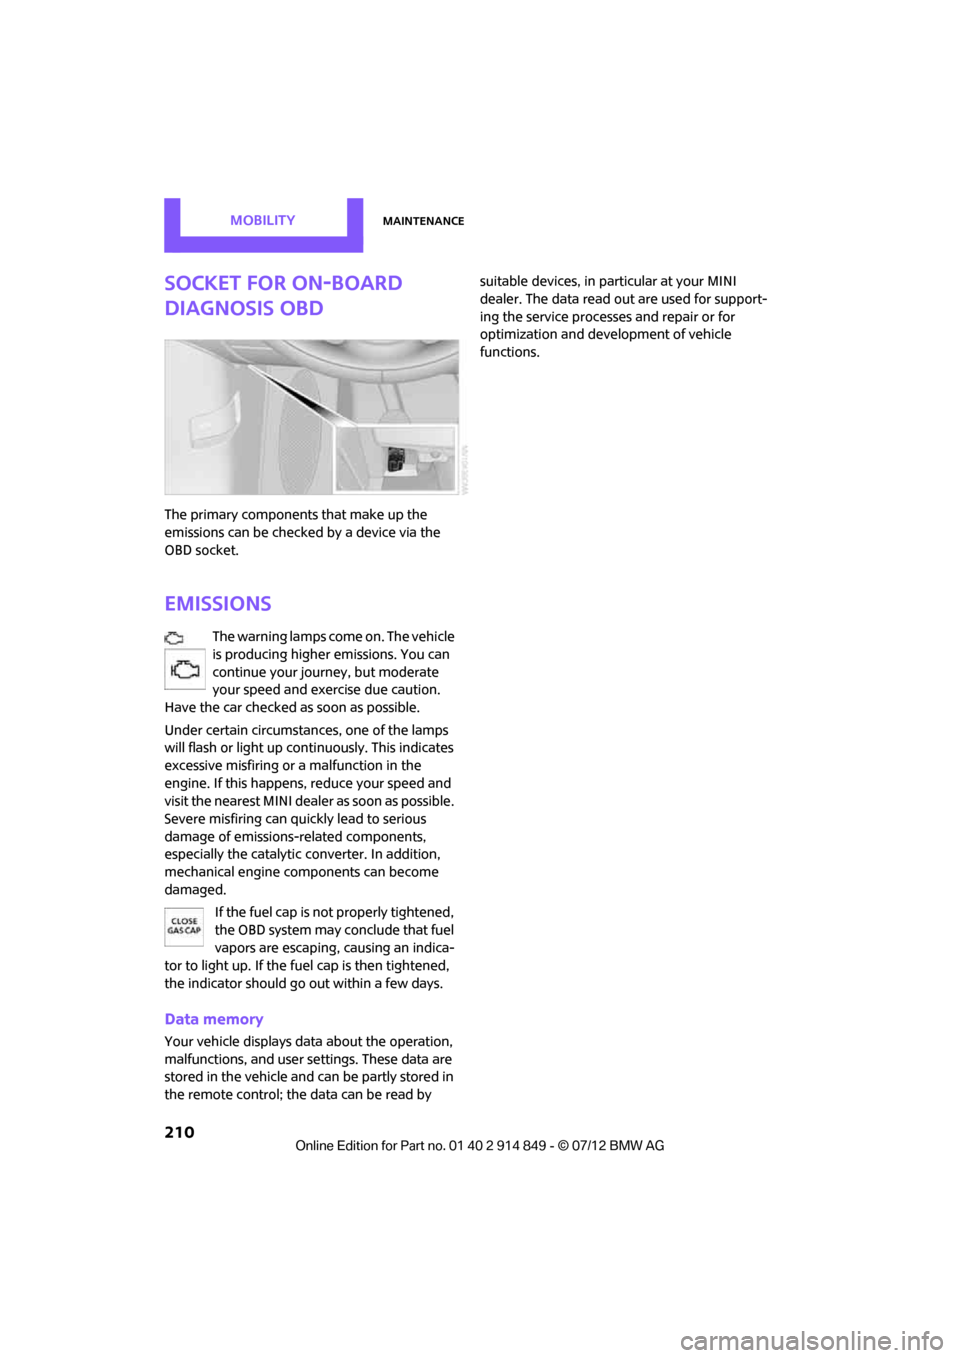
The primary components that make up the
emissions can be checked by a device via the
OBD socket.
Emissions
The warning lamps come on. The vehicle
is producing higher emissions. You can
continue your journey, but moderate
your speed and exercise due caution.
Have the car checked as soon as possible.
Under certain circumstances, one of the lamps
will flash or light up cont inuously. This indicates
excessive misfiring or a malfunction in the
engine. If this happens, reduce your speed and
visit the nearest MINI dealer as soon as possible.
Severe misfiring can quickly lead to serious
damage of emissions-related components,
especially the catalytic converter. In addition,
mechanical engine components can become
damaged.
If the fuel cap is not properly tightened,
the OBD system may conclude that fuel
vapors are escaping, causing an indica-
tor to light up. If the fuel cap is then tightened,
the indicator should go out within a few days.
Data memory
Your vehicle displays da ta about the operation,
malfunctions, and user settings. These data are
stored in the vehicle and can be partly stored in
the remote control; the data can be read by suitable devices, in pa
rticular at your MINI
dealer. The data read out are used for support-
ing the service processe s and repair or for
optimization and development of vehicle
functions.
Online Edition for Part no. 01 40 2 914 849 - \251 07/12 BMW AG
Page 212 of 259
CareMOBILITY
211
Care
Vehicle equipment
In this chapter, all production, country, and
optional equipment that is offered in the model
range is described. Equipment is also described
that is not available because of, for example,
selected options or count ry version. This also
applies to safety related functions and systems.
Car-care products
Regular cleaning and care helps to maintain the
value of your MINI.
The manufacturer of your MINI recommends
using manufacturer-approved products to clean
and care for your vehicle.
Your MINI dealer would be pleased to advise
you on cleaning and care products and services
for your MINI.
The ingredients of original MINI Care
Products have been tested, and the
products have been tested in the laboratory and
in practice. They offer optimum care and protec-
tion for your vehicle.<
Do not use any cleansers containing
alcohol or solvents as these may cause
damage. <
Cleaning agents may contain hazardous
or health-damaging substances. Follow
the warning and hazard instructions on the
packaging. For interior cleaning, always open
the doors or windows of the vehicle.
Do not use any products that are not intended
for cleaning the vehicle. <
External care
Washing your vehicle
Especially during the winter months the
vehicle should be frequently washed. Dirt
and road salt can damage the vehicle.<
After washing the vehicle, apply the
brakes briefly to dry them; otherwise,
water can reduce braking efficiency over the
short term and the brake rotors can corrode. <
Car washes
Preference should be given to cloth car washes.
Do not use automatic high-pressure car
washes; otherwise, water may drip into
the vehicle around the windows. <
Before driving into the car wash, check if the
system is suitable for your MINI. Observe the
following points:
> Vehicle dimensions, page 233
> If necessary: fold in the outside mirrors,
page 42
> Maximum permissible tire width
Avoid car washes with tracks higher than
4 in/10 cm; otherwise, the chassis could
be damaged. <
Preparations for driving into the car wash:
> Unscrew the rod antenna.
> Deactivate the rain sensor to prevent
unintentional wiping.
> Deactivate rear window wiper and protect it
from damage. Ask the car wash operator
about measures that can be taken to protect
the wipers.
> Remove additional attachments, e.g.
spoilers or telephone antennas, if there is a
possibility that they could be damaged.
> Insert the remote control into the ignition
lock.
Online Edition for Part no. 01 40 2 914 849 - \251 07/12 BMW AG