automatic transmission MINI Countryman 2015 Owner's Manual (Mini Connected)
[x] Cancel search | Manufacturer: MINI, Model Year: 2015, Model line: Countryman, Model: MINI Countryman 2015Pages: 283, PDF Size: 6.76 MB
Page 59 of 283
DrivingVehicle equipmentThis chapter describes all series equipment as
well as country-specific and special equipment
offered for this model series. Therefore, it also
describes equipment that may not be found in
your vehicle, for instance due to the selected
special equipment or the country version. This
also applies to safety-related functions and sys‐
tems.
When using the features and systems described
here, adhere to local regulations.
Ignition lock
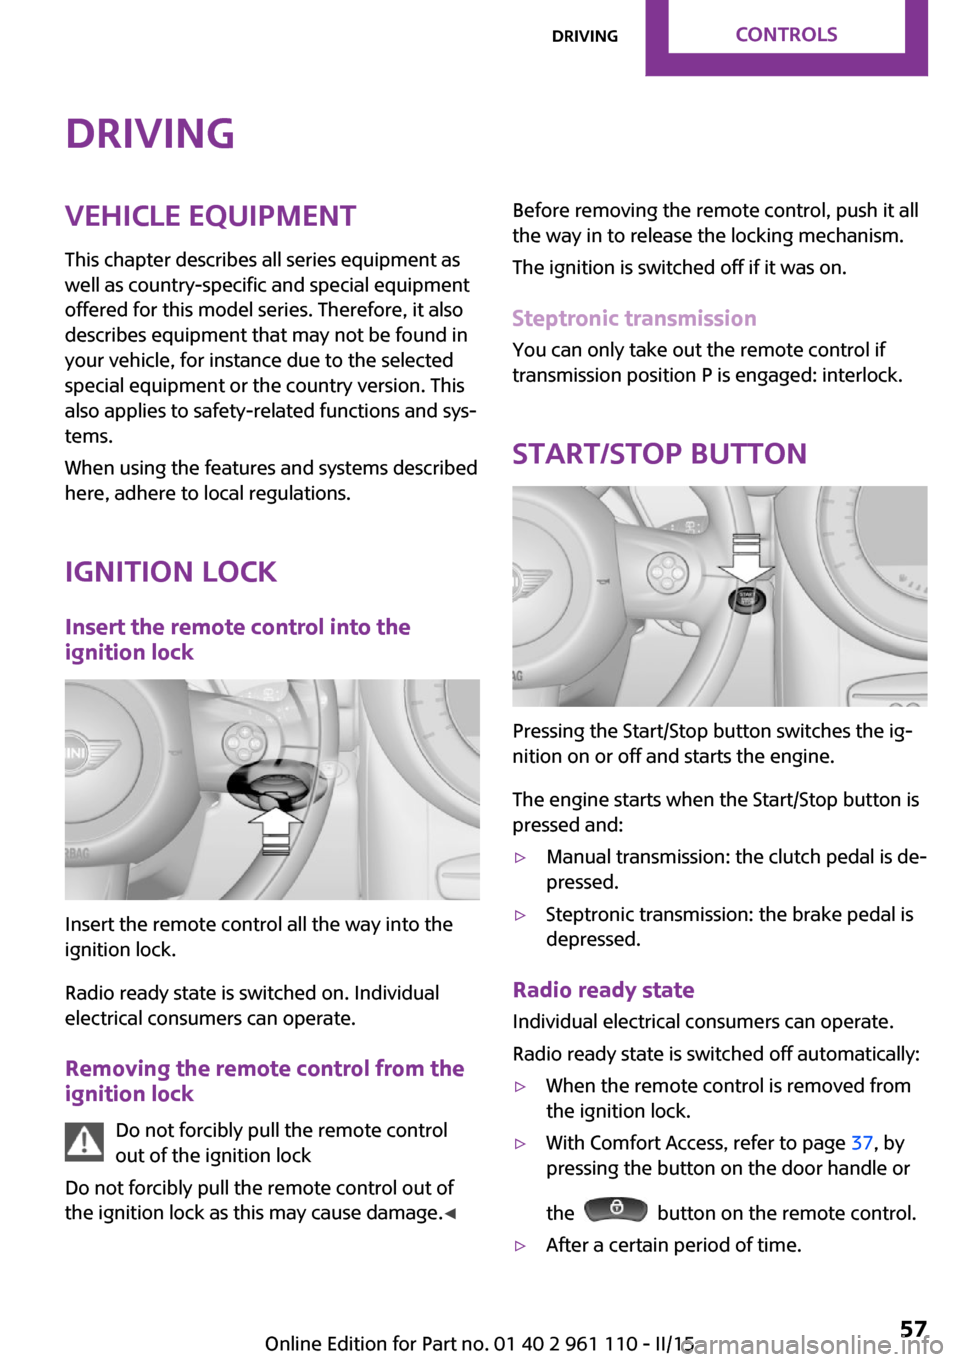
Insert the remote control into the
ignition lock
Insert the remote control all the way into the
ignition lock.
Radio ready state is switched on. Individual
electrical consumers can operate.
Removing the remote control from the
ignition lock
Do not forcibly pull the remote control
out of the ignition lock
Do not forcibly pull the remote control out of
the ignition lock as this may cause damage. ◀
Before removing the remote control, push it all
the way in to release the locking mechanism.
The ignition is switched off if it was on.
Steptronic transmission You can only take out the remote control if
transmission position P is engaged: interlock.
Start/Stop button
Pressing the Start/Stop button switches the ig‐
nition on or off and starts the engine.
The engine starts when the Start/Stop button is
pressed and:
▷Manual transmission: the clutch pedal is de‐
pressed.▷Steptronic transmission: the brake pedal is
depressed.
Radio ready state
Individual electrical consumers can operate.
Radio ready state is switched off automatically:
▷When the remote control is removed from
the ignition lock.▷With Comfort Access, refer to page 37, by
pressing the button on the door handle or
the
button on the remote control.
▷After a certain period of time.Seite 57DrivingCONTROLS57
Online Edition for Part no. 01 40 2 961 110 - II/15
Page 60 of 283
Ignition onAll electrical consumers can operate. Most indi‐
cator and warning lights light up for different
lengths of time.
To save battery power when the engine is off,
switch off the ignition and any unnecessary electronic systems/power consumers.
Radio ready state and ignition off All indicator and warning lights in the displays
go out.
The ignition switches off automatically when
the driver's door is opened. Pressing the Start/
Stop button again switches the ignition back
on.
For example, the ignition is not switched off in
the following situations:▷Depress the clutch or brake pedal.▷The low beams are switched on.
Starting the engine
General information Enclosed areas
Do not let the engine run in enclosed
areas; otherwise, breathing of exhaust fumes
may lead to loss of consciousness and death.
The exhaust gases contain carbon monoxide,
an odorless and colorless but highly toxic gas. ◀
Unattended vehicle
Do not leave the car unattended with the
engine running; otherwise, it presents a poten‐
tial source of danger.
Before leaving the car with the engine running,
shift to neutral or engage transmission posi‐
tion P and set the parking brake firmly; other‐ wise, the vehicle may begin to roll. ◀
Frequent starting in quick succession
Avoid repeated futile attempts at starting
the car and avoid starting the car frequently in
quick succession. Otherwise, the fuel is not
burned or is inadequately burned, and there is
the danger of overheating and damaging the
catalytic converter. ◀
Do not wait for the engine to warm-up while
the vehicle remains stationary; start driving
right away, but at moderate engine speeds.
Do not depress the accelerator when starting
the engine.
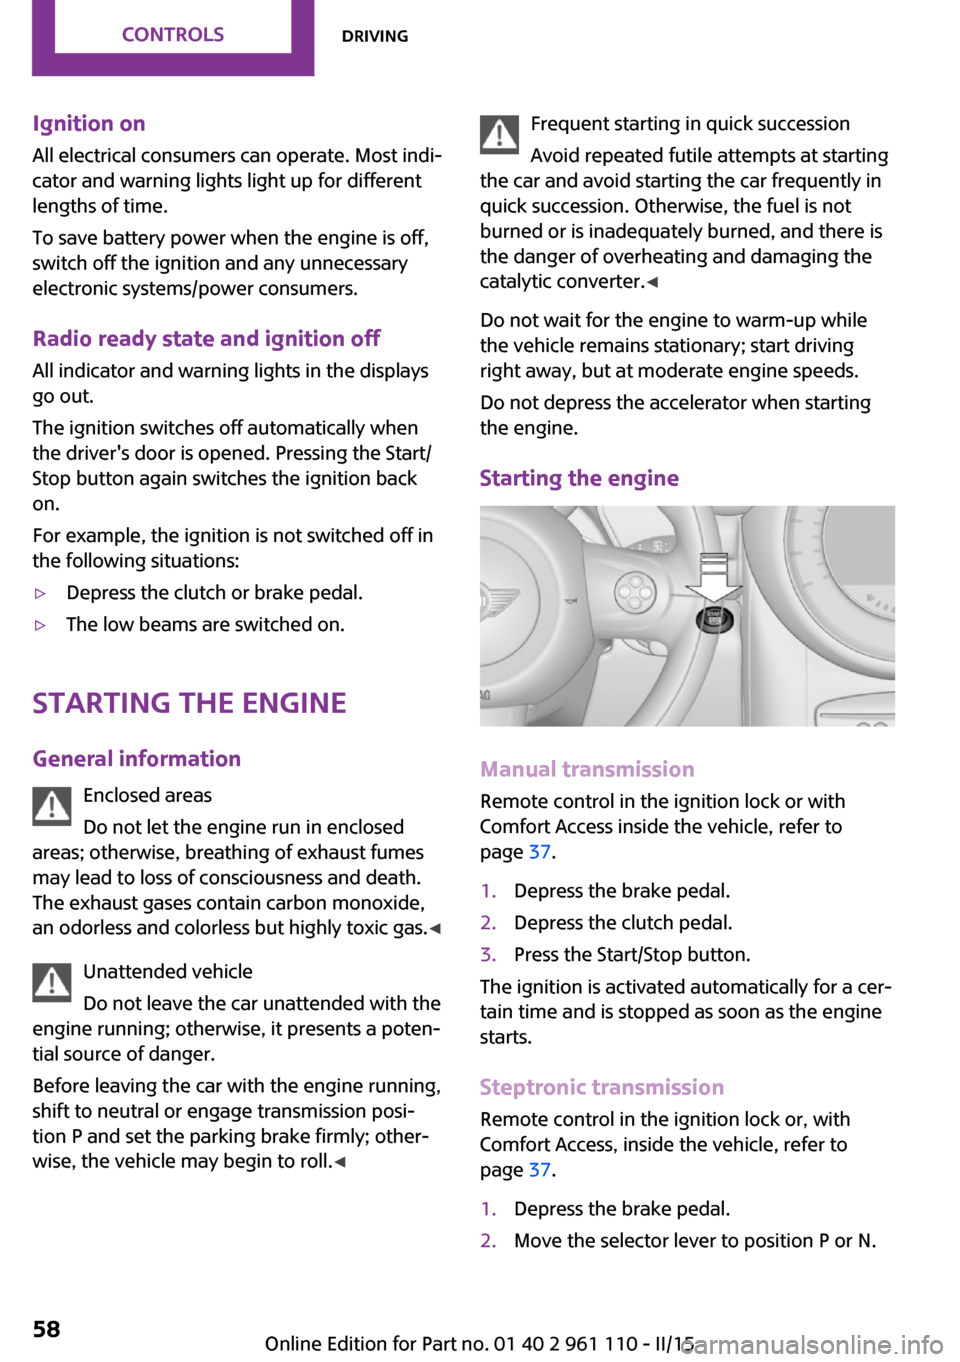
Starting the engine
Manual transmission
Remote control in the ignition lock or with
Comfort Access inside the vehicle, refer to
page 37.
1.Depress the brake pedal.2.Depress the clutch pedal.3.Press the Start/Stop button.
The ignition is activated automatically for a cer‐
tain time and is stopped as soon as the engine
starts.
Steptronic transmission
Remote control in the ignition lock or, with
Comfort Access, inside the vehicle, refer to
page 37.
1.Depress the brake pedal.2.Move the selector lever to position P or N.Seite 58CONTROLSDriving58
Online Edition for Part no. 01 40 2 961 110 - II/15
Page 61 of 283
3.Press the Start/Stop button.
The ignition is activated automatically for a cer‐
tain time and is stopped as soon as the engine
starts.
Engine stop
General information Take the remote control with you
Take the remote control with you when
leaving the vehicle so that children, for exam‐
ple, cannot operate the windows and injure
themselves. ◀
Set the parking brake and further secure
the vehicle as required
Set the parking brake firmly when parking; oth‐
erwise, the vehicle may roll. On steep upward
and downward inclines, further secure the ve‐
hicle, for example, by turning the steering
wheel in the direction of the curb. ◀
Before driving into a car wash To make it possible for the vehicle to roll in an
automatic car wash, follow the information on
Washing in automatic car washes, refer to
page 250.
Switching off the engine
Manual transmission
1.With the vehicle at a standstill, press the
Start/Stop button.2.Shift into first gear or reverse.3.Set the parking brake firmly.4.Remove the remote control from the igni‐
tion lock.Steptronic transmission1.Engage transmission position P with the ve‐
hicle stopped.2.Press the Start/Stop button.3.Set the parking brake firmly.4.Remove the remote control from the igni‐
tion lock.
Parking brake
The concept
The parking brake is primarily intended to pre‐
vent the vehicle from rolling while parked; it
brakes the rear wheels.
Also follow the instructions under Switching off
the engine, refer to page 59.
Setting The lever engages automatically.
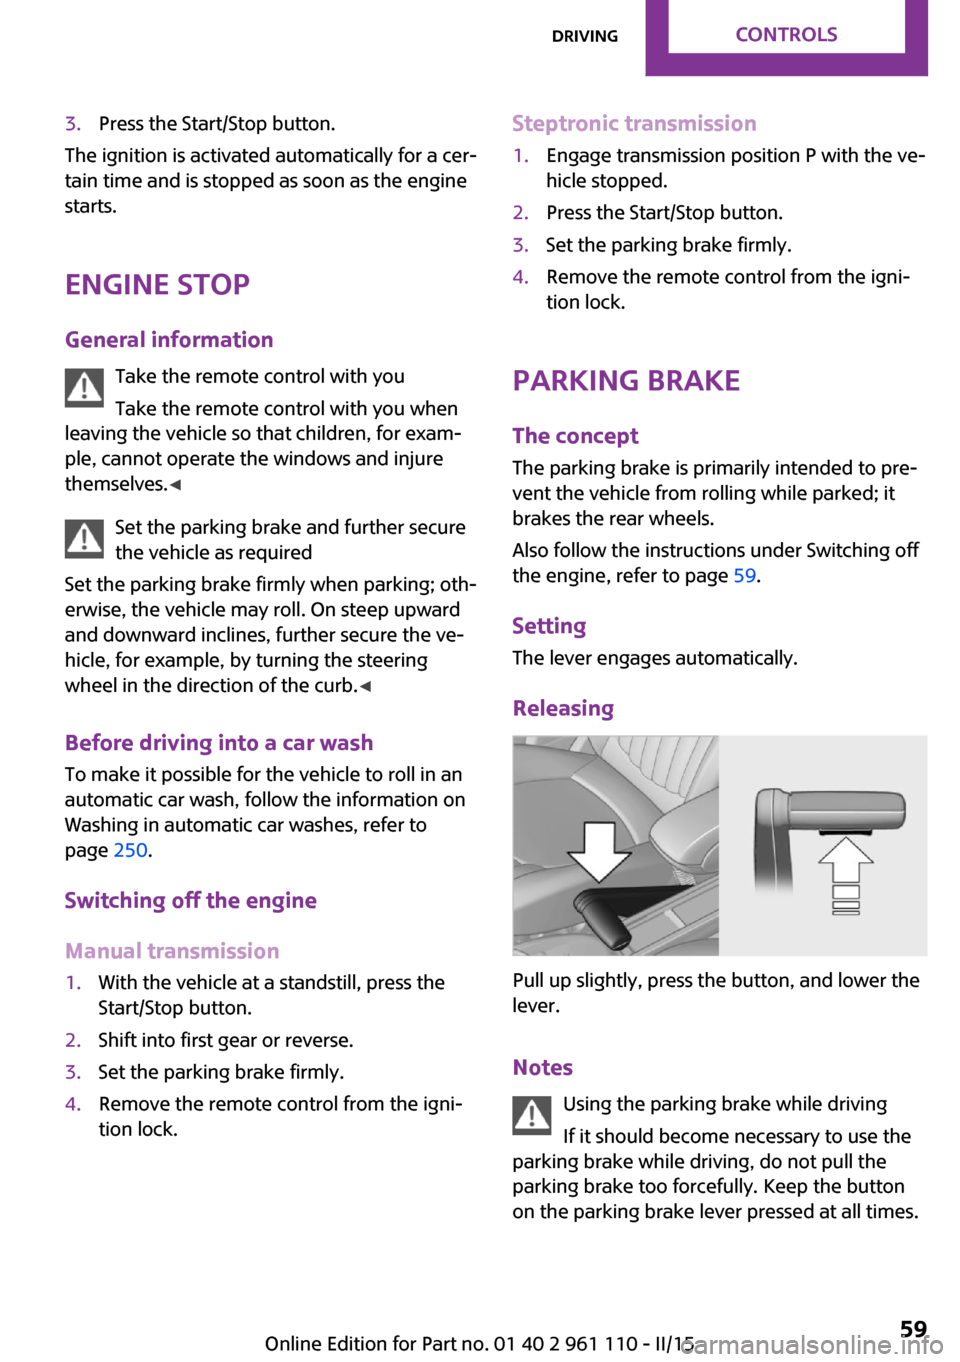
Releasing
Pull up slightly, press the button, and lower the
lever.
Notes Using the parking brake while driving
If it should become necessary to use the
parking brake while driving, do not pull the
parking brake too forcefully. Keep the button
on the parking brake lever pressed at all times.
Seite 59DrivingCONTROLS59
Online Edition for Part no. 01 40 2 961 110 - II/15
Page 66 of 283
Reverse gearSelect only when the vehicle is stationary. When
the gearshift lever is pressed to the left, a slight
resistance needs to be overcome.
Steptronic transmission In addition to the fully automatic mode, gears
can also be shifted manually using Steptronic,
refer to page 65.
Parking the vehicle Secure the vehicle
Before leaving the vehicle with the en‐
gine running, move the selector lever to posi‐
tion P and set the handbrake; otherwise, the
vehicle will begin moving. ◀
Disengaging the remote control
To remove the remote control from the ignition
lock, first move the selector lever to position P
and switch off the engine: interlock. Remove
the remote control from the ignition lock, refer
to page 57.
Selector lever positions
P R N D M/S + –
Displays in the tachometer
The selector lever position is displayed and the
engaged gear, such as M4, is displayed in
manual mode.
Changing selector lever positions▷With the ignition switched on or the engine
running, the selector lever can be moved
out of position P.▷When the vehicle is stationary, step on the
brake before shifting out of P or N; other‐
wise, the selector lever is locked: shiftlock.
Press on the brake pedal until you
start driving
To prevent the vehicle from creeping after
you select a driving position, maintain pres‐
sure on the brake pedal until you are ready
to start. ◀
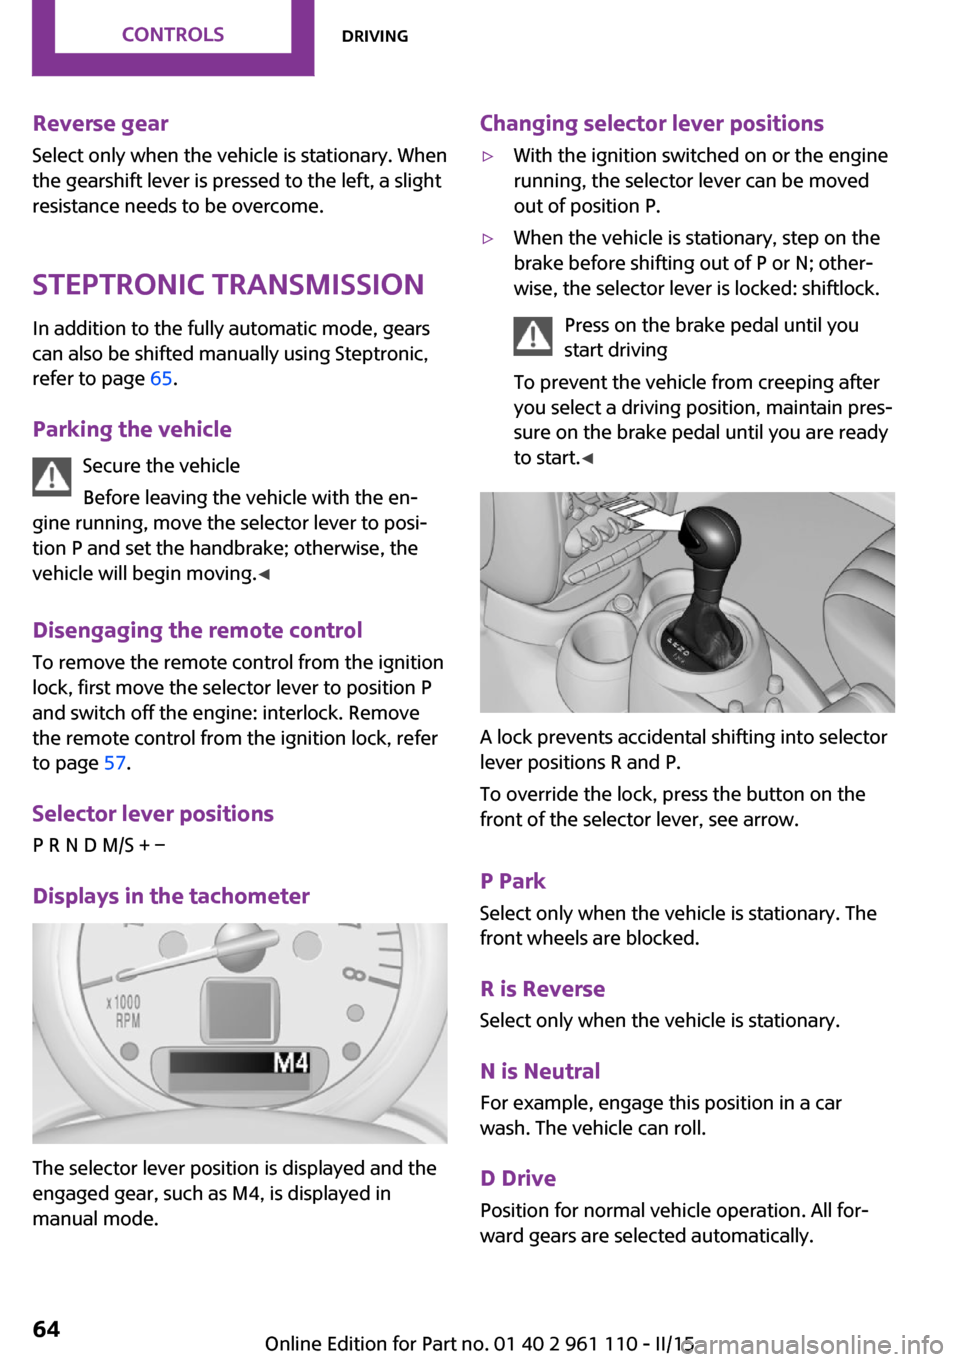
A lock prevents accidental shifting into selector
lever positions R and P.
To override the lock, press the button on the
front of the selector lever, see arrow.
P Park
Select only when the vehicle is stationary. The
front wheels are blocked.
R is Reverse
Select only when the vehicle is stationary.
N is NeutralFor example, engage this position in a car
wash. The vehicle can roll.
D Drive Position for normal vehicle operation. All for‐
ward gears are selected automatically.
Seite 64CONTROLSDriving64
Online Edition for Part no. 01 40 2 961 110 - II/15
Page 124 of 283
Pulsation of the brake pedal and sounds from
the hydraulic circuits indicate that ABS is in its
active mode.
Do not let your foot rest on the brake
pedal
Do not drive with your foot resting on the brake
pedal. Even light but consistent pedal pressure
can lead to high temperatures, brake wear and
possibly even brake failure. ◀
Objects in the area around the pedals No objects in the area around the pedals
Keep floor mats, carpets, and any other
objects out of the area of motion of the pedals;
otherwise, the function of the pedals could be
impeded while driving
Do not place additional floor mats over existing
mats or other objects.
Only use floor mats that have been approved
for the vehicle and can be properly fixed in
place.
Ensure that the floor mats are securely fastened
again when they are returned after being re‐
moved, such as for cleaning. ◀
Driving in wet conditions
When roads are wet or there is heavy rain, briefly exert gentle pressure on the brake pedal
every few miles.
Ensure that this action does not endanger other
road users.
The heat generated in this process helps dry
the brake discs and pads.
In this way braking efficiency will be available
when you need it.
HillsDrive long or steep downhill gradients in the
gear in which the least braking is required. Oth‐
erwise, the brake system may overheat, result‐
ing in a reduction in the brake system effi‐
ciency.You can increase the engine's braking effect by
shifting down, going all the way to first gear, if
necessary.
Downshifting in manual mode of the Steptronic
transmission, refer to page 65.
Avoid load on the brakes
Avoid placing excessive load on the brake
system. Light but consistent brake pressure can
lead to high temperatures, brake wear and
possibly even brake failure. ◀
Do not drive in neutral
Never drive with the transmission in neu‐
tral, with the engine switched off or with the
clutch depressed; otherwise, you will have nei‐
ther the braking action of the engine or nor its
power assistance when braking or steering. ◀
Brake disc corrosion Corrosion on the brake discs and contamina‐
tion on the brake pads are furthered by:▷Low mileage.▷Extended periods when the vehicle is not
used at all.▷Infrequent use of the brakes.
Corrosion occurs when the minimum pressure
that must be exerted by the pads during brake
applications to clean the discs is not reached.
Should corrosion form on the brake discs, the
brakes will tend to respond with a pulsating ef‐
fect that generally cannot be corrected.
When the vehicle is parked
When using the automatic climate control, con‐
densation water develops that exits under‐
neath the vehicle.
Therefore, traces of condensed water under the
vehicle are normal.
After the engine is switched off, the coolant
pump may continue running for some time in
the MINI Cooper S. This causes noises in the en‐
gine compartment.
Seite 122DRIVING TIPSThings to remember when driving122
Online Edition for Part no. 01 40 2 961 110 - II/15
Page 163 of 283
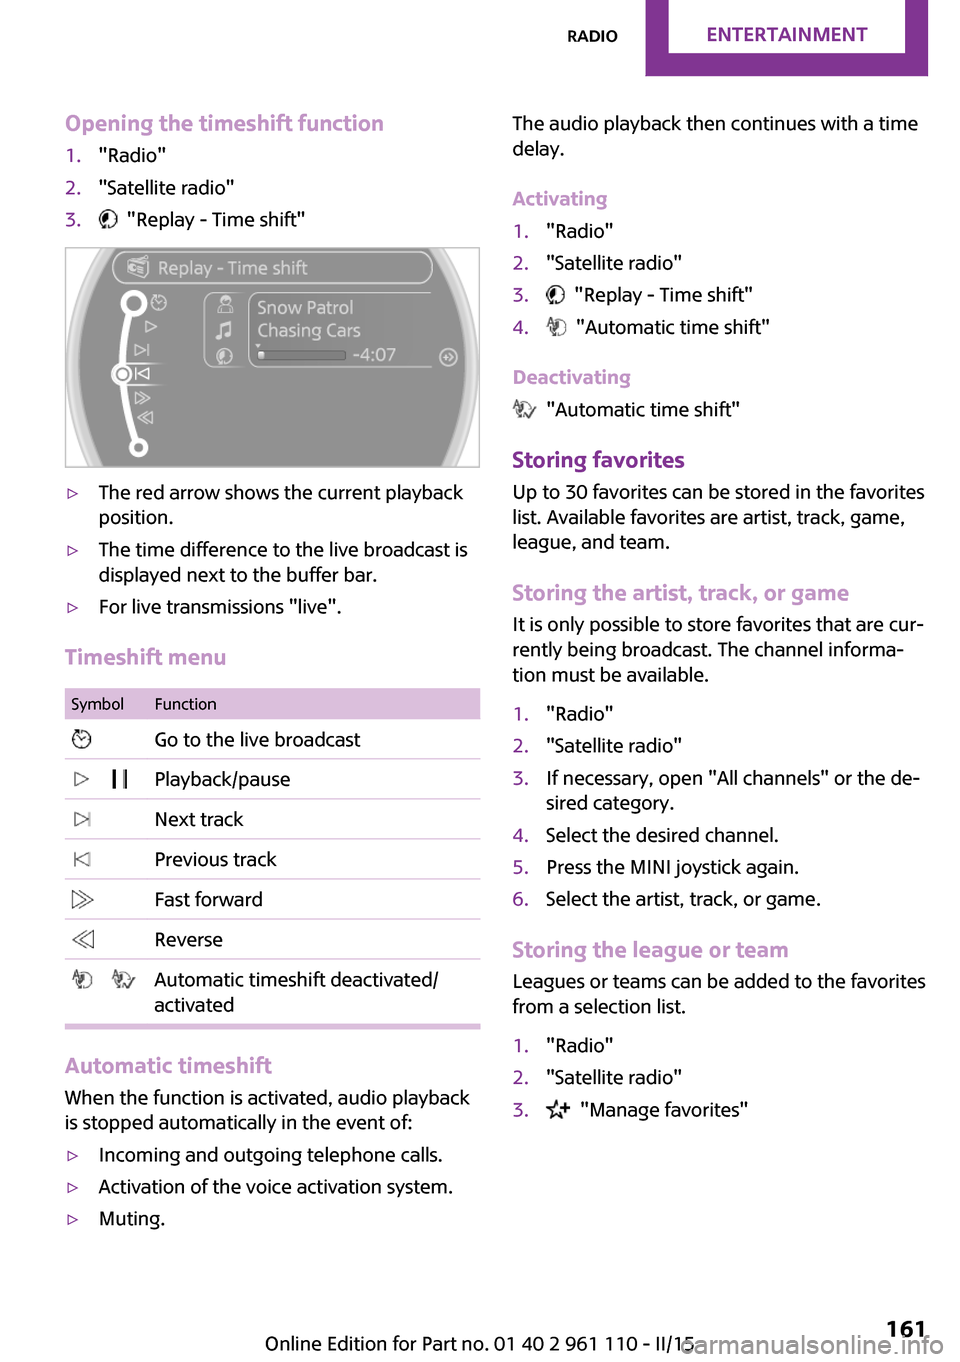
Opening the timeshift function1."Radio"2."Satellite radio"3. "Replay - Time shift"▷The red arrow shows the current playback
position.▷The time difference to the live broadcast is
displayed next to the buffer bar.▷For live transmissions "live".
Timeshift menu
SymbolFunction Go to the live broadcast Playback/pause Next track Previous track Fast forward Reverse Automatic timeshift deactivated/
activated
Automatic timeshift
When the function is activated, audio playback
is stopped automatically in the event of:
▷Incoming and outgoing telephone calls.▷Activation of the voice activation system.▷Muting.The audio playback then continues with a time
delay.
Activating1."Radio"2."Satellite radio"3. "Replay - Time shift"4. "Automatic time shift"
Deactivating
"Automatic time shift"
Storing favorites Up to 30 favorites can be stored in the favorites
list. Available favorites are artist, track, game,
league, and team.
Storing the artist, track, or game
It is only possible to store favorites that are cur‐
rently being broadcast. The channel informa‐
tion must be available.
1."Radio"2."Satellite radio"3.If necessary, open "All channels" or the de‐
sired category.4.Select the desired channel.5.Press the MINI joystick again.6.Select the artist, track, or game.
Storing the league or team
Leagues or teams can be added to the favorites
from a selection list.
1."Radio"2."Satellite radio"3. "Manage favorites"Seite 161RadioENTERTAINMENT161
Online Edition for Part no. 01 40 2 961 110 - II/15
Page 195 of 283
The mobile phone no longer reacts.▷Switch the mobile phone off and on again.▷Is the ambient temperature too high or
low? Do not expose the mobile phone to
extreme environmental conditions.
The telephone functions are not available.
▷Is the mobile phone paired as an additional
telephone and is the additional telephone
function deactivated? Activate the function.▷Is an outgoing call not possible? Connect
the mobile phone as a telephone.
No phone book entries or only some phone
book entries are displayed, or they are incom‐
plete.
▷Transmission of the phone book entries is
not yet complete.▷It is possible that only the phone book en‐
tries of the mobile phone or the SIM card
are transmitted.▷It may not be possible to display phone
book entries with special characters.▷The number of phone book entries to be
stored is too high.▷Is the data volume of the contact too large,
e. g., due to stored information such as
notes? Reduce the data volume of the con‐
tact.▷Is the mobile phone connected as an audio
source or additional telephone? The mobile
phone must be connected as a telephone.
The phone connection quality is poor.
▷The strength of the Bluetooth signal on the
mobile phone can be adjusted, depending
on the mobile phone.▷Insert the mobile phone into the snap-in
adapter or place it in the area of the center
console.▷Adjust the volume of the microphone and
loudspeakers separately.
If all points in this list have been checked and
the required function is still not available, con‐
tact Customer Relations or the service center.
Controls
Adjusting the volume
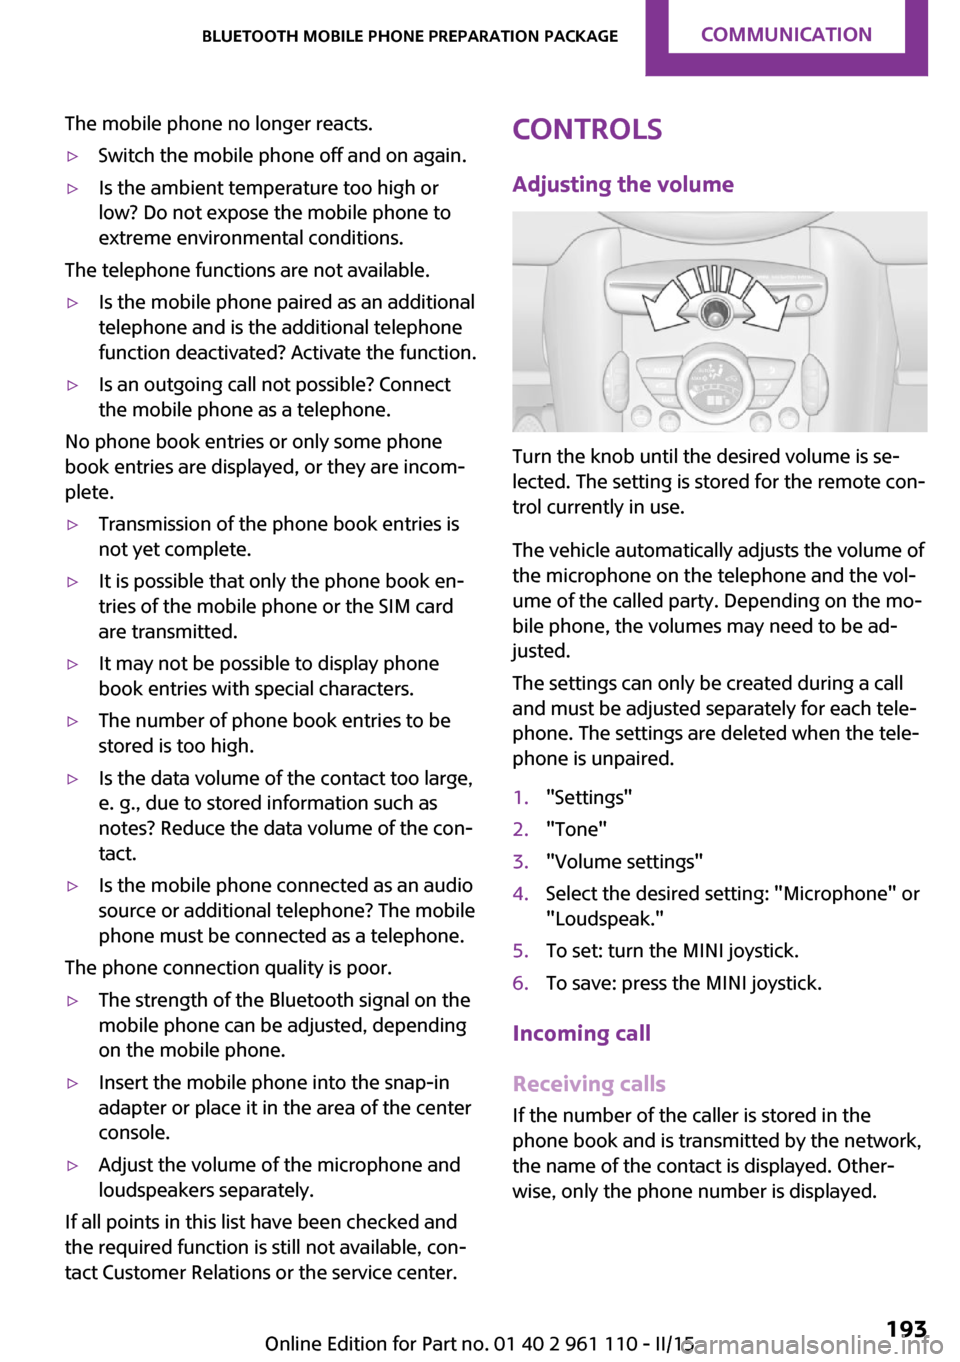
Turn the knob until the desired volume is se‐
lected. The setting is stored for the remote con‐
trol currently in use.
The vehicle automatically adjusts the volume of
the microphone on the telephone and the vol‐
ume of the called party. Depending on the mo‐
bile phone, the volumes may need to be ad‐
justed.
The settings can only be created during a call
and must be adjusted separately for each tele‐
phone. The settings are deleted when the tele‐
phone is unpaired.
1."Settings"2."Tone"3."Volume settings"4.Select the desired setting: "Microphone" or
"Loudspeak."5.To set: turn the MINI joystick.6.To save: press the MINI joystick.
Incoming call
Receiving calls If the number of the caller is stored in the
phone book and is transmitted by the network,
the name of the contact is displayed. Other‐
wise, only the phone number is displayed.
Seite 193Bluetooth mobile phone preparation packageCOMMUNICATION193
Online Edition for Part no. 01 40 2 961 110 - II/15
Page 251 of 283
MINI Countryman:
MINI Paceman:
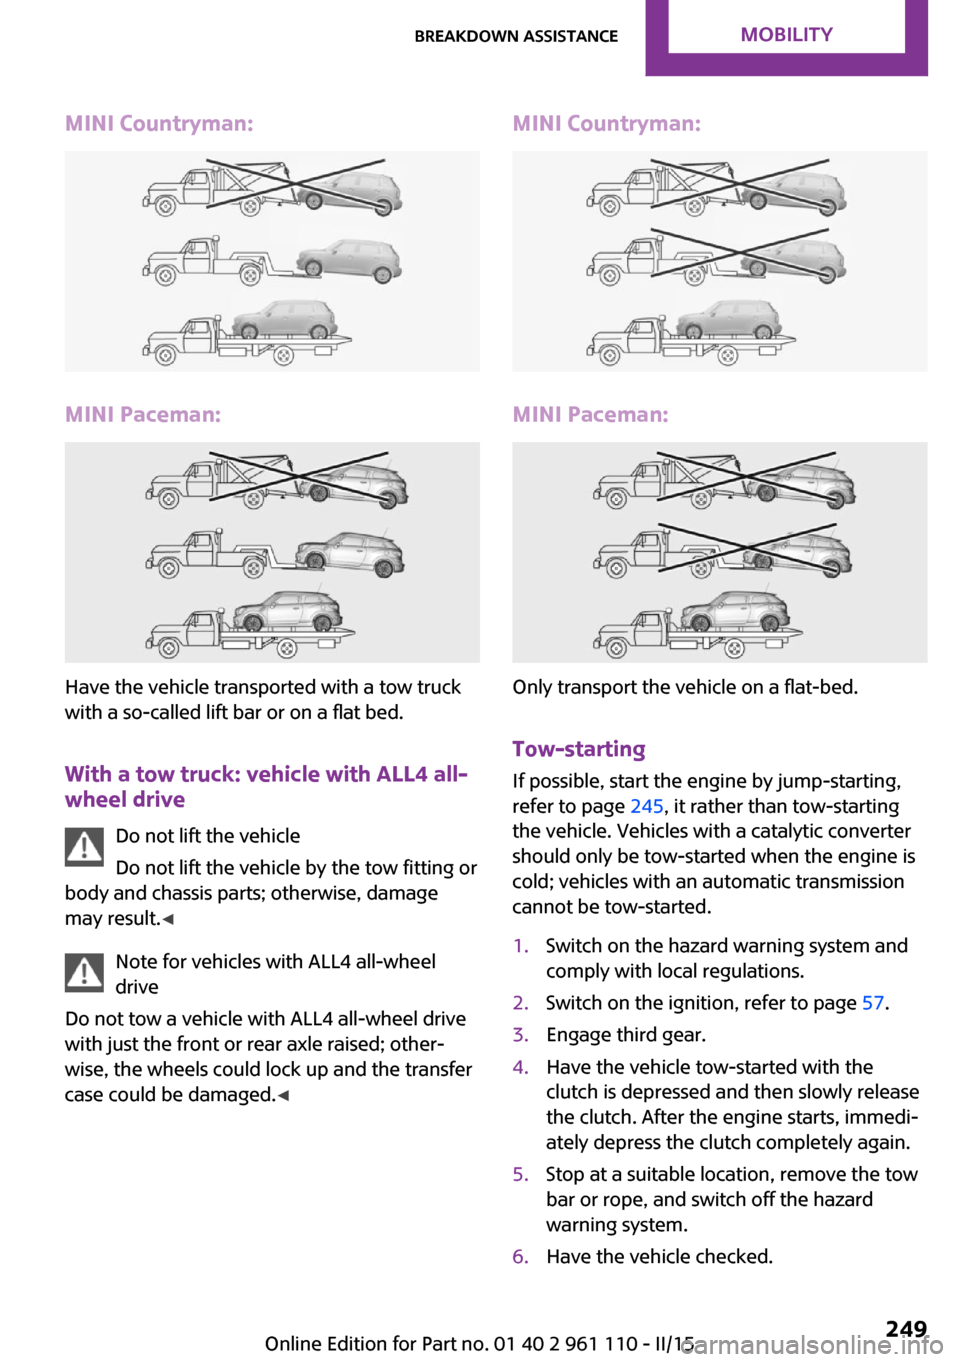
Have the vehicle transported with a tow truck
with a so-called lift bar or on a flat bed.
With a tow truck: vehicle with ALL4 all-wheel drive
Do not lift the vehicle
Do not lift the vehicle by the tow fitting or
body and chassis parts; otherwise, damage
may result. ◀
Note for vehicles with ALL4 all-wheel
drive
Do not tow a vehicle with ALL4 all-wheel drive
with just the front or rear axle raised; other‐
wise, the wheels could lock up and the transfer
case could be damaged. ◀
MINI Countryman:
MINI Paceman:
Only transport the vehicle on a flat-bed.
Tow-starting
If possible, start the engine by jump-starting,
refer to page 245, it rather than tow-starting
the vehicle. Vehicles with a catalytic converter
should only be tow-started when the engine is
cold; vehicles with an automatic transmission
cannot be tow-started.
1.Switch on the hazard warning system and
comply with local regulations.2.Switch on the ignition, refer to page 57.3.Engage third gear.4.Have the vehicle tow-started with the
clutch is depressed and then slowly release
the clutch. After the engine starts, immedi‐
ately depress the clutch completely again.5.Stop at a suitable location, remove the tow
bar or rope, and switch off the hazard
warning system.6.Have the vehicle checked.Seite 249Breakdown assistanceMOBILITY249
Online Edition for Part no. 01 40 2 961 110 - II/15
Page 270 of 283
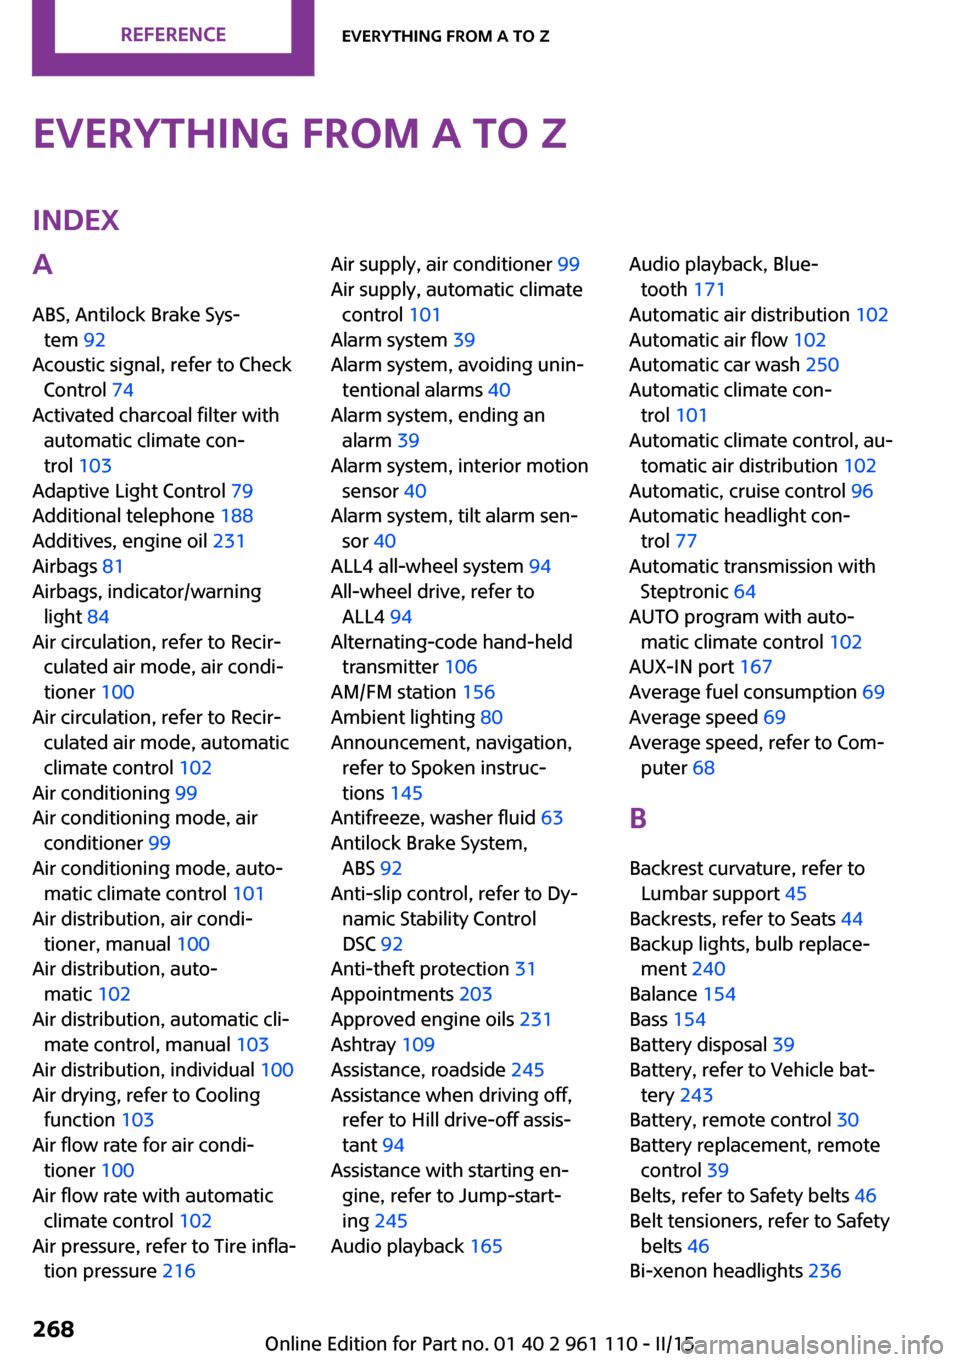
Everything from A to ZIndexA
ABS, Antilock Brake Sys‐ tem 92
Acoustic signal, refer to Check Control 74
Activated charcoal filter with automatic climate con‐
trol 103
Adaptive Light Control 79
Additional telephone 188
Additives, engine oil 231
Airbags 81
Airbags, indicator/warning light 84
Air circulation, refer to Recir‐ culated air mode, air condi‐
tioner 100
Air circulation, refer to Recir‐ culated air mode, automatic
climate control 102
Air conditioning 99
Air conditioning mode, air conditioner 99
Air conditioning mode, auto‐ matic climate control 101
Air distribution, air condi‐ tioner, manual 100
Air distribution, auto‐ matic 102
Air distribution, automatic cli‐ mate control, manual 103
Air distribution, individual 100
Air drying, refer to Cooling function 103
Air flow rate for air condi‐ tioner 100
Air flow rate with automatic climate control 102
Air pressure, refer to Tire infla‐ tion pressure 216 Air supply, air conditioner 99
Air supply, automatic climate control 101
Alarm system 39
Alarm system, avoiding unin‐ tentional alarms 40
Alarm system, ending an alarm 39
Alarm system, interior motion sensor 40
Alarm system, tilt alarm sen‐ sor 40
ALL4 all-wheel system 94
All-wheel drive, refer to ALL4 94
Alternating-code hand-held transmitter 106
AM/FM station 156
Ambient lighting 80
Announcement, navigation, refer to Spoken instruc‐
tions 145
Antifreeze, washer fluid 63
Antilock Brake System, ABS 92
Anti-slip control, refer to Dy‐ namic Stability Control
DSC 92
Anti-theft protection 31
Appointments 203
Approved engine oils 231
Ashtray 109
Assistance, roadside 245
Assistance when driving off, refer to Hill drive-off assis‐
tant 94
Assistance with starting en‐ gine, refer to Jump-start‐
ing 245
Audio playback 165 Audio playback, Blue‐
tooth 171
Automatic air distribution 102
Automatic air flow 102
Automatic car wash 250
Automatic climate con‐ trol 101
Automatic climate control, au‐ tomatic air distribution 102
Automatic, cruise control 96
Automatic headlight con‐ trol 77
Automatic transmission with Steptronic 64
AUTO program with auto‐ matic climate control 102
AUX-IN port 167
Average fuel consumption 69
Average speed 69
Average speed, refer to Com‐ puter 68
B Backrest curvature, refer to Lumbar support 45
Backrests, refer to Seats 44
Backup lights, bulb replace‐ ment 240
Balance 154
Bass 154
Battery disposal 39
Battery, refer to Vehicle bat‐ tery 243
Battery, remote control 30
Battery replacement, remote control 39
Belts, refer to Safety belts 46
Belt tensioners, refer to Safety belts 46
Bi-xenon headlights 236 Seite 268REFERENCEEverything from A to Z268
Online Edition for Part no. 01 40 2 961 110 - II/15
Page 273 of 283
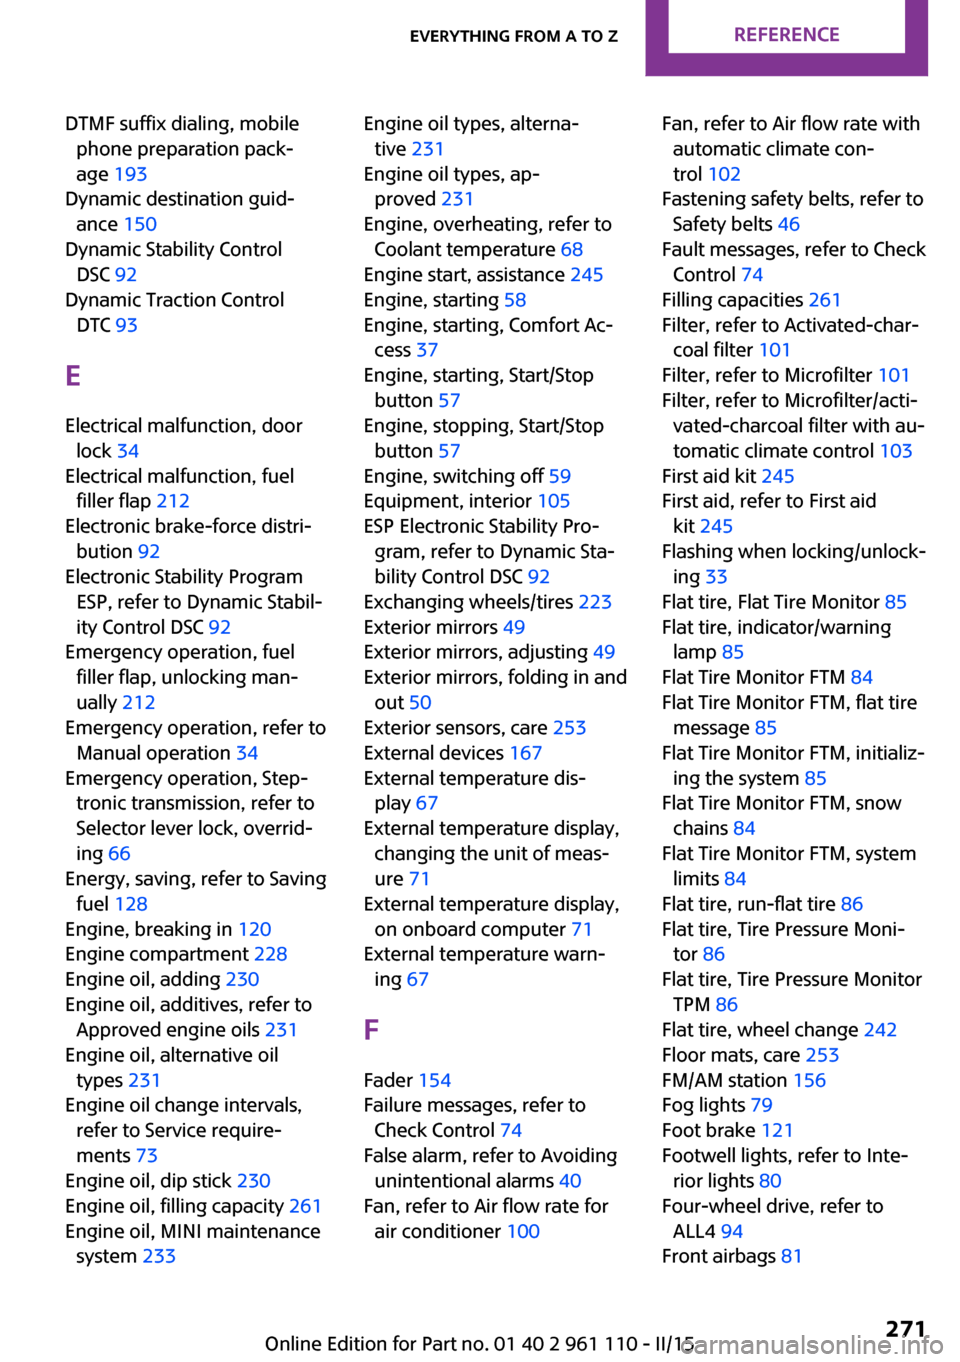
DTMF suffix dialing, mobilephone preparation pack‐
age 193
Dynamic destination guid‐ ance 150
Dynamic Stability Control DSC 92
Dynamic Traction Control DTC 93
E Electrical malfunction, door lock 34
Electrical malfunction, fuel filler flap 212
Electronic brake-force distri‐ bution 92
Electronic Stability Program ESP, refer to Dynamic Stabil‐
ity Control DSC 92
Emergency operation, fuel filler flap, unlocking man‐
ually 212
Emergency operation, refer to Manual operation 34
Emergency operation, Step‐ tronic transmission, refer to
Selector lever lock, overrid‐
ing 66
Energy, saving, refer to Saving fuel 128
Engine, breaking in 120
Engine compartment 228
Engine oil, adding 230
Engine oil, additives, refer to Approved engine oils 231
Engine oil, alternative oil types 231
Engine oil change intervals, refer to Service require‐
ments 73
Engine oil, dip stick 230
Engine oil, filling capacity 261
Engine oil, MINI maintenance system 233 Engine oil types, alterna‐
tive 231
Engine oil types, ap‐ proved 231
Engine, overheating, refer to Coolant temperature 68
Engine start, assistance 245
Engine, starting 58
Engine, starting, Comfort Ac‐ cess 37
Engine, starting, Start/Stop button 57
Engine, stopping, Start/Stop button 57
Engine, switching off 59
Equipment, interior 105
ESP Electronic Stability Pro‐ gram, refer to Dynamic Sta‐
bility Control DSC 92
Exchanging wheels/tires 223
Exterior mirrors 49
Exterior mirrors, adjusting 49
Exterior mirrors, folding in and out 50
Exterior sensors, care 253
External devices 167
External temperature dis‐ play 67
External temperature display, changing the unit of meas‐
ure 71
External temperature display, on onboard computer 71
External temperature warn‐ ing 67
F Fader 154
Failure messages, refer to Check Control 74
False alarm, refer to Avoiding unintentional alarms 40
Fan, refer to Air flow rate for air conditioner 100 Fan, refer to Air flow rate with
automatic climate con‐
trol 102
Fastening safety belts, refer to Safety belts 46
Fault messages, refer to Check Control 74
Filling capacities 261
Filter, refer to Activated-char‐ coal filter 101
Filter, refer to Microfilter 101
Filter, refer to Microfilter/acti‐ vated-charcoal filter with au‐
tomatic climate control 103
First aid kit 245
First aid, refer to First aid kit 245
Flashing when locking/unlock‐ ing 33
Flat tire, Flat Tire Monitor 85
Flat tire, indicator/warning lamp 85
Flat Tire Monitor FTM 84
Flat Tire Monitor FTM, flat tire message 85
Flat Tire Monitor FTM, initializ‐ ing the system 85
Flat Tire Monitor FTM, snow chains 84
Flat Tire Monitor FTM, system limits 84
Flat tire, run-flat tire 86
Flat tire, Tire Pressure Moni‐ tor 86
Flat tire, Tire Pressure Monitor TPM 86
Flat tire, wheel change 242
Floor mats, care 253
FM/AM station 156
Fog lights 79
Foot brake 121
Footwell lights, refer to Inte‐ rior lights 80
Four-wheel drive, refer to ALL4 94
Front airbags 81 Seite 271Everything from A to ZREFERENCE271
Online Edition for Part no. 01 40 2 961 110 - II/15